|
|
Post by Dennis on Jan 22, 2016 2:50:04 GMT -5
I love this build and I'm glad to see it keep coming out. Too bad about all the work it took for the hood, but I have to say I was just a bit downed when you went with the smaller engine too. I like this much better. Some day... this is going to be a heck of a truck. Thanks, man! I plan to get back on it soon. Got another neat change in store that I think everyone will dig on. |
|
|
|
Post by froghawk on Jan 22, 2016 11:50:25 GMT -5
Great work, Dennis. I love how well engineered your projects are.
|
|
|
|
Post by Dennis on Feb 29, 2016 10:52:32 GMT -5
I've been away from the workbench for the last couple of months because I was concentrating on finishing my full size '32 Pickup. Now that its been on the road for about a month and I took some much needed down time from working on anything I found this past weekend that the model juices were starting to flow again. For whatever reason as I looked at all of my started projects this old '37 Pickup started talking to me so I whipped it out. I made a few more revisions to the chassis. One thing was that I cut out the rear "legs" of the center X because when I cut it down to fit this frame I didn't leave the oval holes in the ends for the exhaust pipes to pass through. So I trimmed a new pair where they attach to the center leaving the oval holes at the frame rail ends intact. I had previously modified the '37 truck rear axle to have a live drive shaft and trailing arms but the mounts for the arms went away when I put in the '40 center X. Preferring this time to have a more vintage torque tube with the radius rods I grabbed one out of a Revell '48 Ford. It didn't fit the '37 rear cross member so well (and caused the back to sit too low) so I removed the '37 cross member and put the matching '48 in its place. It's total coincidence but it's pretty neat that the angle of the frame center X and the angle of the radius rods matches exactly! I made exhaust pipes. Since I was using a Revell '40 center X and flathead engine I used the headers and front pipes/mufflers from the same kit. I had to shorten the mufflers a little because the pocket inside the X is a little tighter. I then cobbled together some tailpipes to snake around the axle and radius rods. In the pictures these are just roughed in and will look/fit way better once cleaned up. I also did away with the Lil' Coffin mag wheels and slicks and replaced them with a set of 40's disc wheels and Modelhaus T120/T180 tires that I already had made up complete with inner rims and early Ford brake plates. I think I'm FINALLY happy with the direction of this thing. 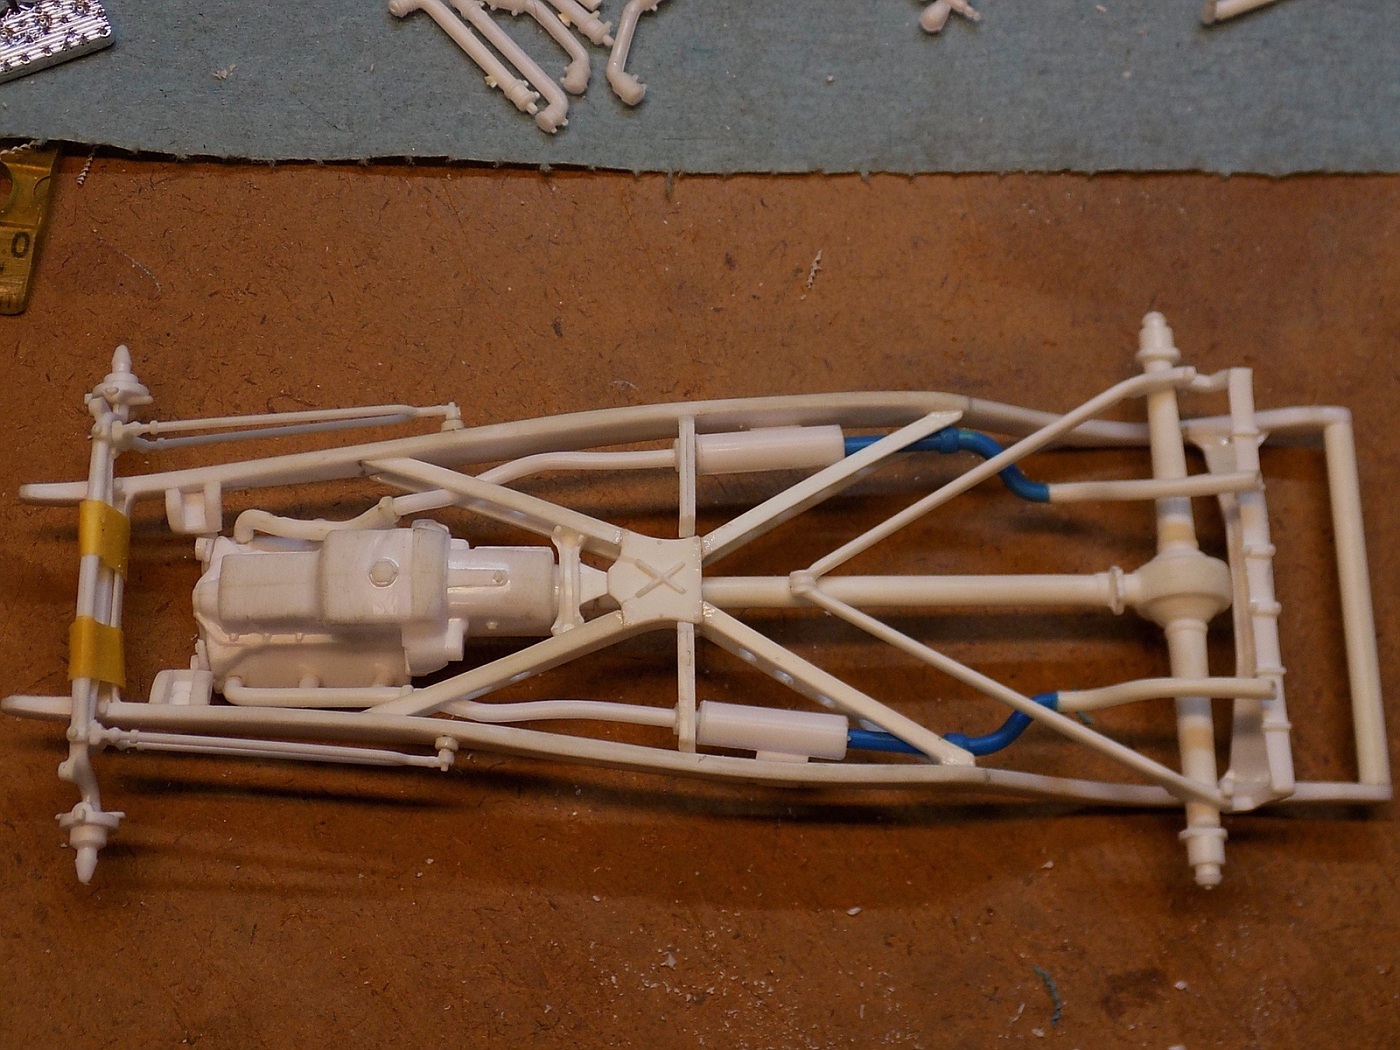 Hosted on Fotki Hosted on Fotki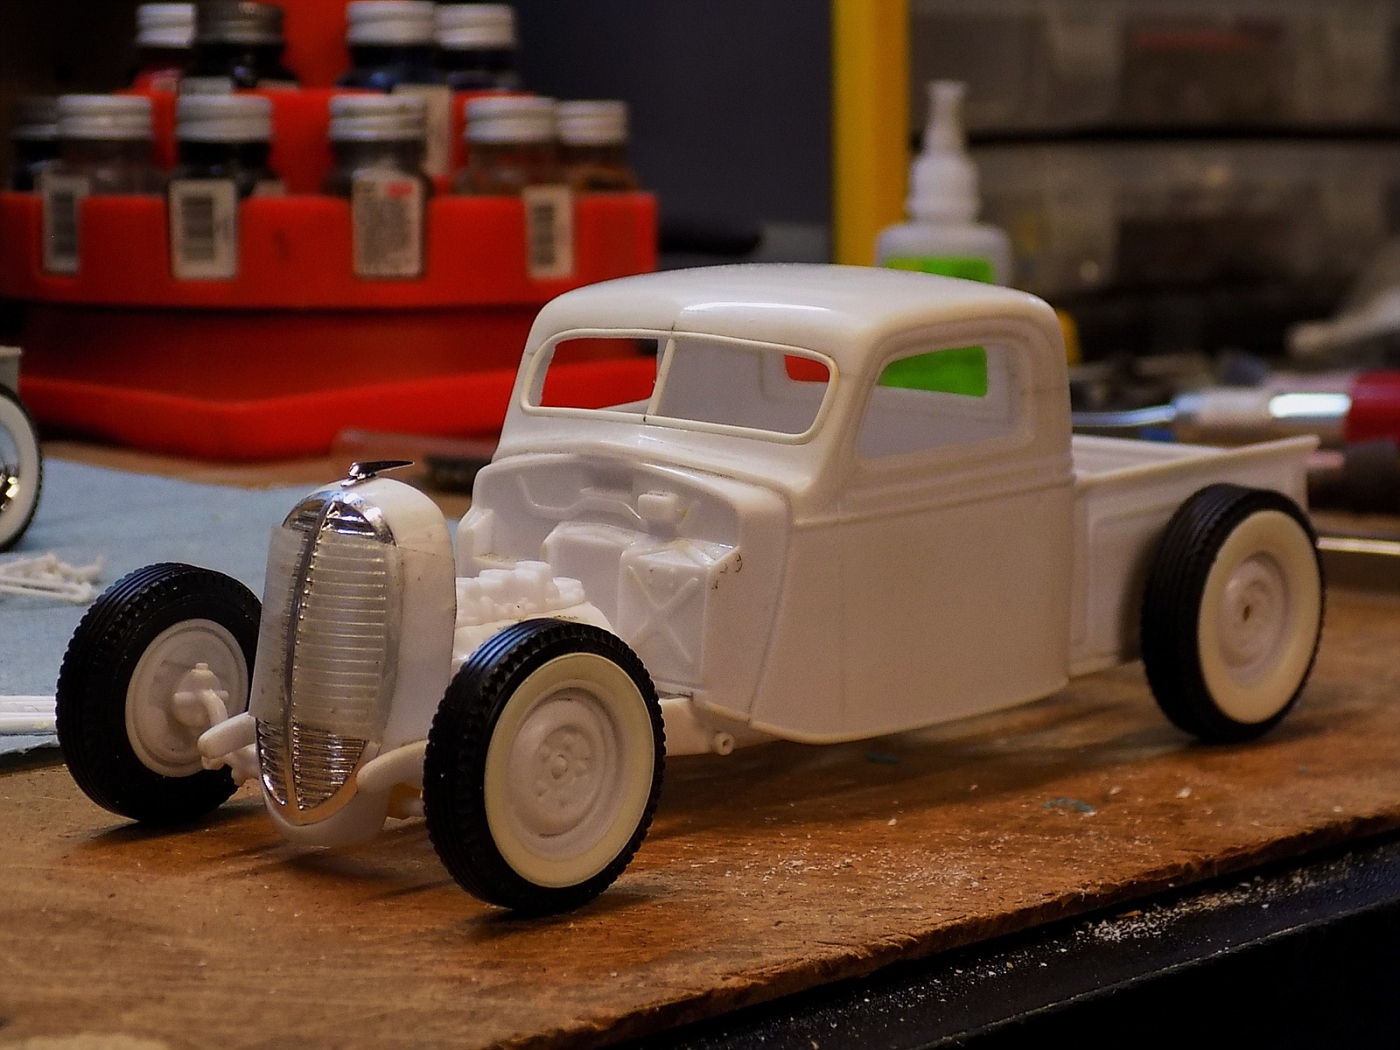 Hosted on Fotki Hosted on Fotki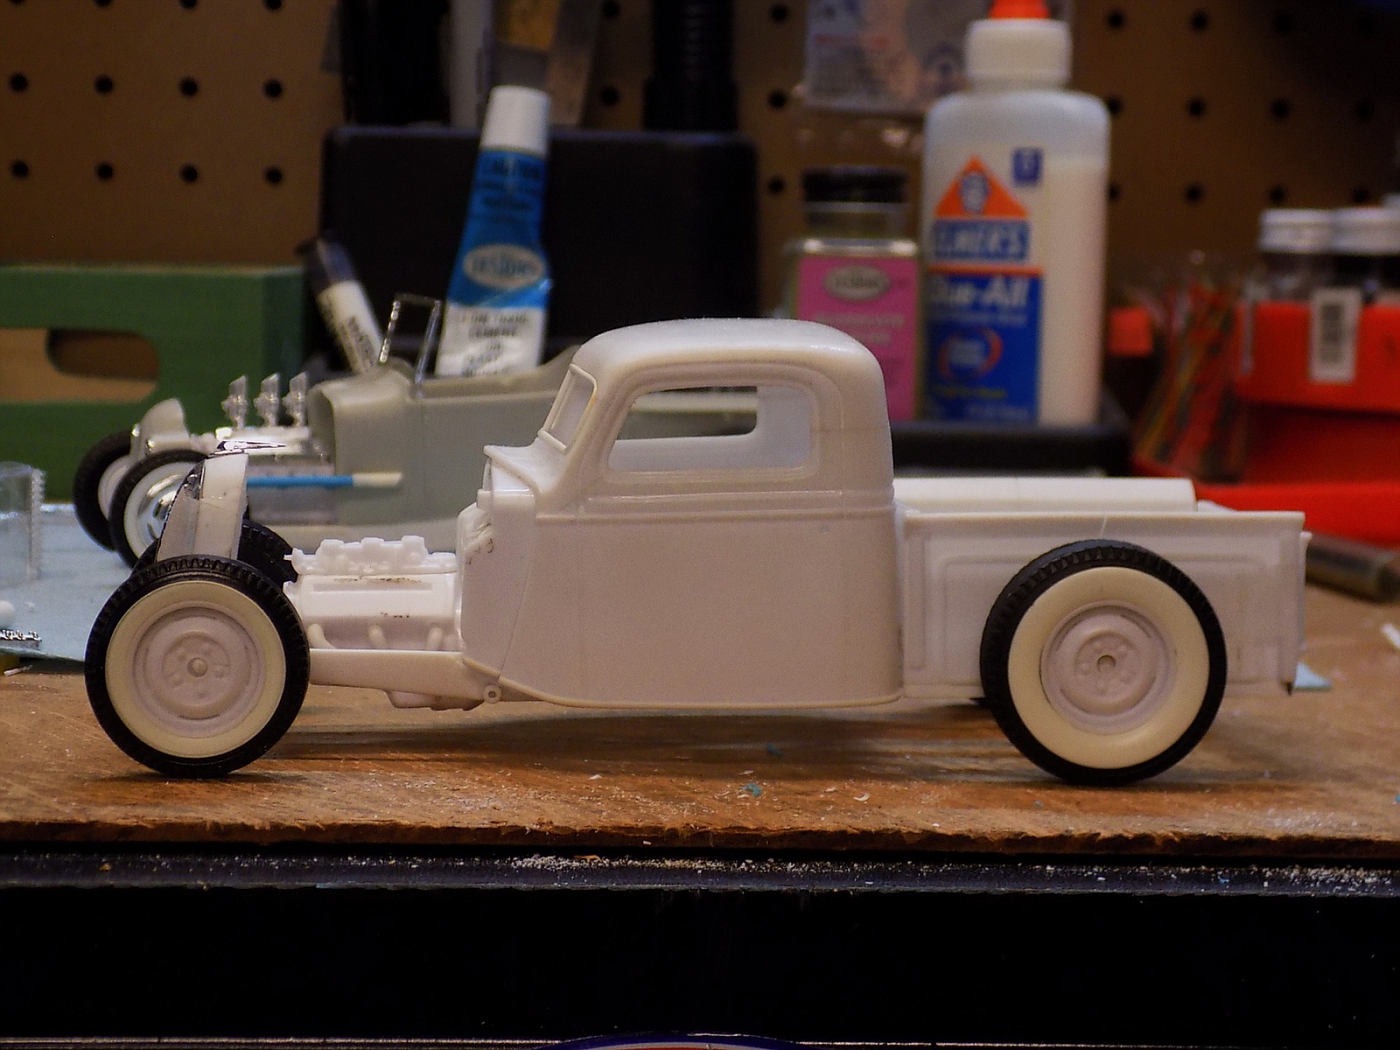 Hosted on Fotki Hosted on Fotki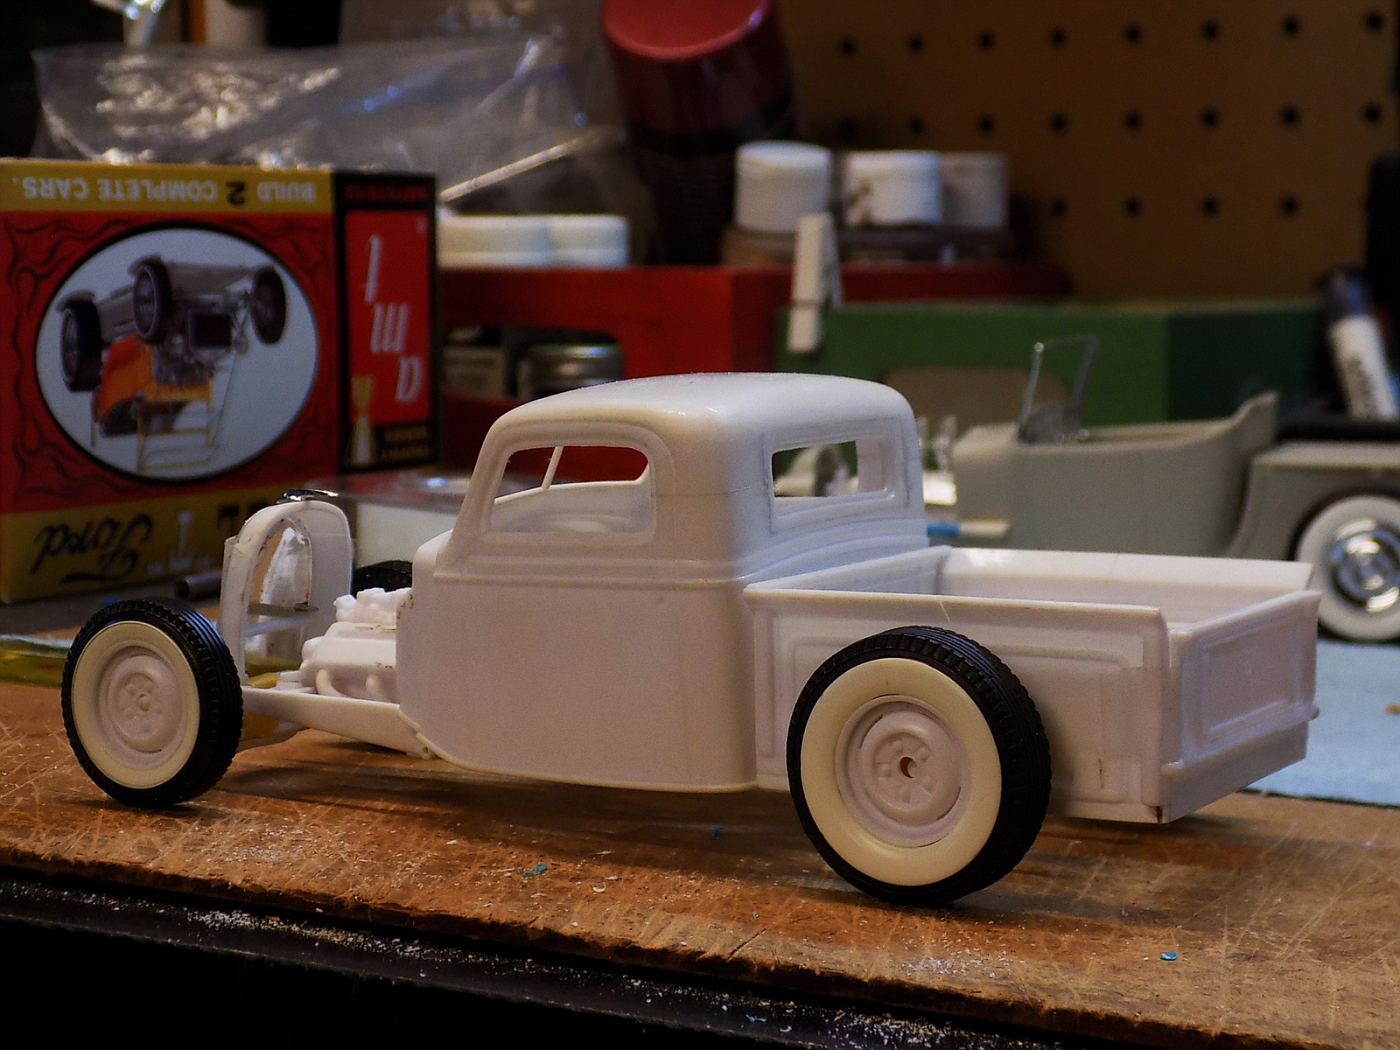 Hosted on Fotki Hosted on Fotki Hosted on Fotki Hosted on Fotki  |
|
|
|
Post by Bernard Kron on Feb 29, 2016 11:10:50 GMT -5
I like how meticulously well proportioned everything is on this truck. The swap of rolling stock only underscores it, and the "just like doing a 1:1" engineering approach is the perfect complement.
|
|
|
|
Post by constructionbob on Feb 29, 2016 12:39:24 GMT -5
I do like your design skills and admire the detail level! ..and "like" is a total understatement..
|
|
|
|
Post by spex84 on Feb 29, 2016 15:24:39 GMT -5
Sweet! I like the changes, it's lookin' good!
|
|
|
|
Post by cturner on Feb 29, 2016 18:39:10 GMT -5
VERY COOL! One of my favorites!
|
|
|
|
Post by Dennis on Feb 29, 2016 23:29:21 GMT -5
I like how meticulously well proportioned everything is on this truck. The swap of rolling stock only underscores it, and the "just like doing a 1:1" engineering approach is the perfect complement. Thanks Bernard! This truck is a clear example of the 1:1 building approach passing down to scale models. You gotta keep mocking things up then standing back and looking at it for a while. Sometimes a real long while. If I'm not feeling a detail or the vehicle as a whole I stop and figure out what needs to be changed. By standing back I mean just that. I get up off my stool and look at the model from 6+ feet away from every angle. Only now do I truly feel like this truck is getting where it needs to be, both proportionately and stylistically. Going back to my original post in this thread, the only thing the original version and the most current version have in common is that they're '37 Pickups.  |
|
|
|
Post by Johnny on Mar 1, 2016 11:44:49 GMT -5
I adore your craftmanship and attention to detail. The chassis freaking awesome and the new direction is truly just great. Keep at it!
|
|
|
|
Post by Bernard Kron on Mar 1, 2016 12:12:39 GMT -5
...You gotta keep mocking things up then standing back and looking at it for a while. Sometimes a real long while. If I'm not feeling a detail or the vehicle as a whole I stop and figure out what needs to be changed. By standing back I mean just that. I get up off my stool and look at the model from 6+ feet away from every angle. ... I do the same thing, except maybe not from 6 feet... We have a credenza in our family room that stands tall enough that I can place my work on top of it and eyeball it as if I was crouching at ground level on a 1:1 to check how it's looking from different angles and whether it's "headed in the right direction". That's what I find I like about the whole rod & kustom thing is that the tradition has a large improvisational element to it. In the modeling side of it it's the difference between kit builders and kit bashers, I guess. |
|
|
|
Post by mredjr on Mar 11, 2016 9:07:41 GMT -5
Great job!
|
|
|
|
Post by Dennis on May 30, 2017 0:00:32 GMT -5
Dug this one out today and spent some quality time with it. I started this project over 4 years ago and last worked on it over a year ago and THIS TIME, damn it, I'm gonna finish it!!! One of the areas I was stuck on was deciding how I wanted to set up the steering. I finally settled on cowl-mounted both for looks and logistics. I added a small bung to the side of the firewall and the pitman arm from Revell's Kurtis midgets. (Also seen is that I added a beehive bypass oil filter to the firewall.) 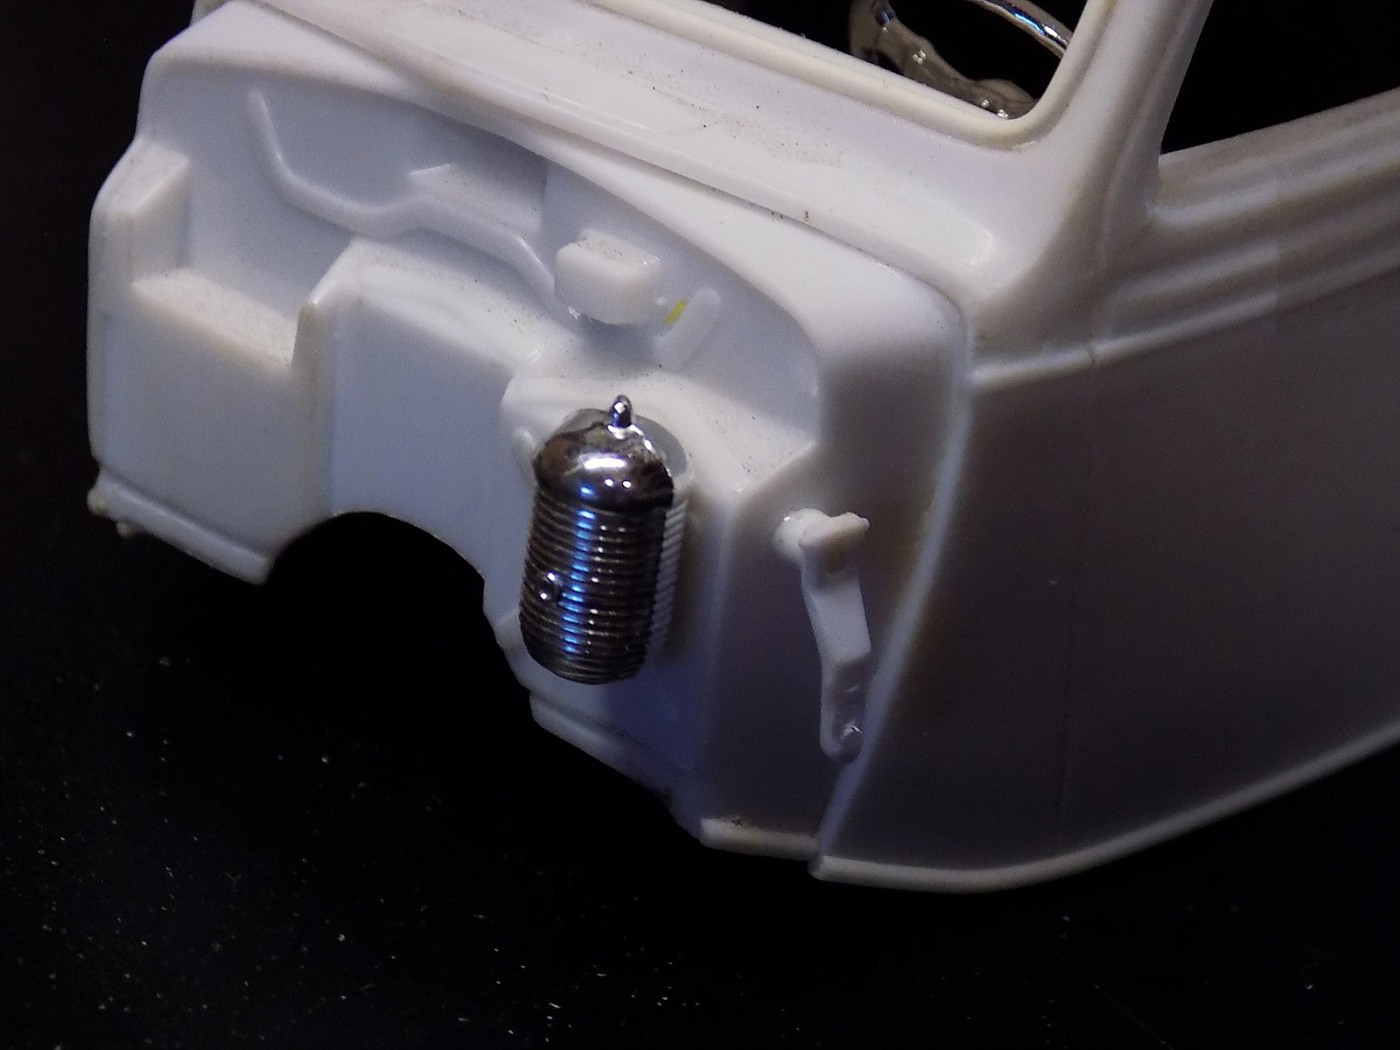 Hosted on Fotki Hosted on FotkiInside the cab I made a column from 3/32" tube (which is pinned to the bottom of the dash and fits into a filed depression), hung a Revell '40 Ford steering gear at the bottom and put the banjo wheel from Revell's newer Model A kits at the other end. I need to extend the side shaft of the gear so that it butts to the side of the firewall. (I'm adding the steering box because I realized it'll be in plain view looking through the back window.) 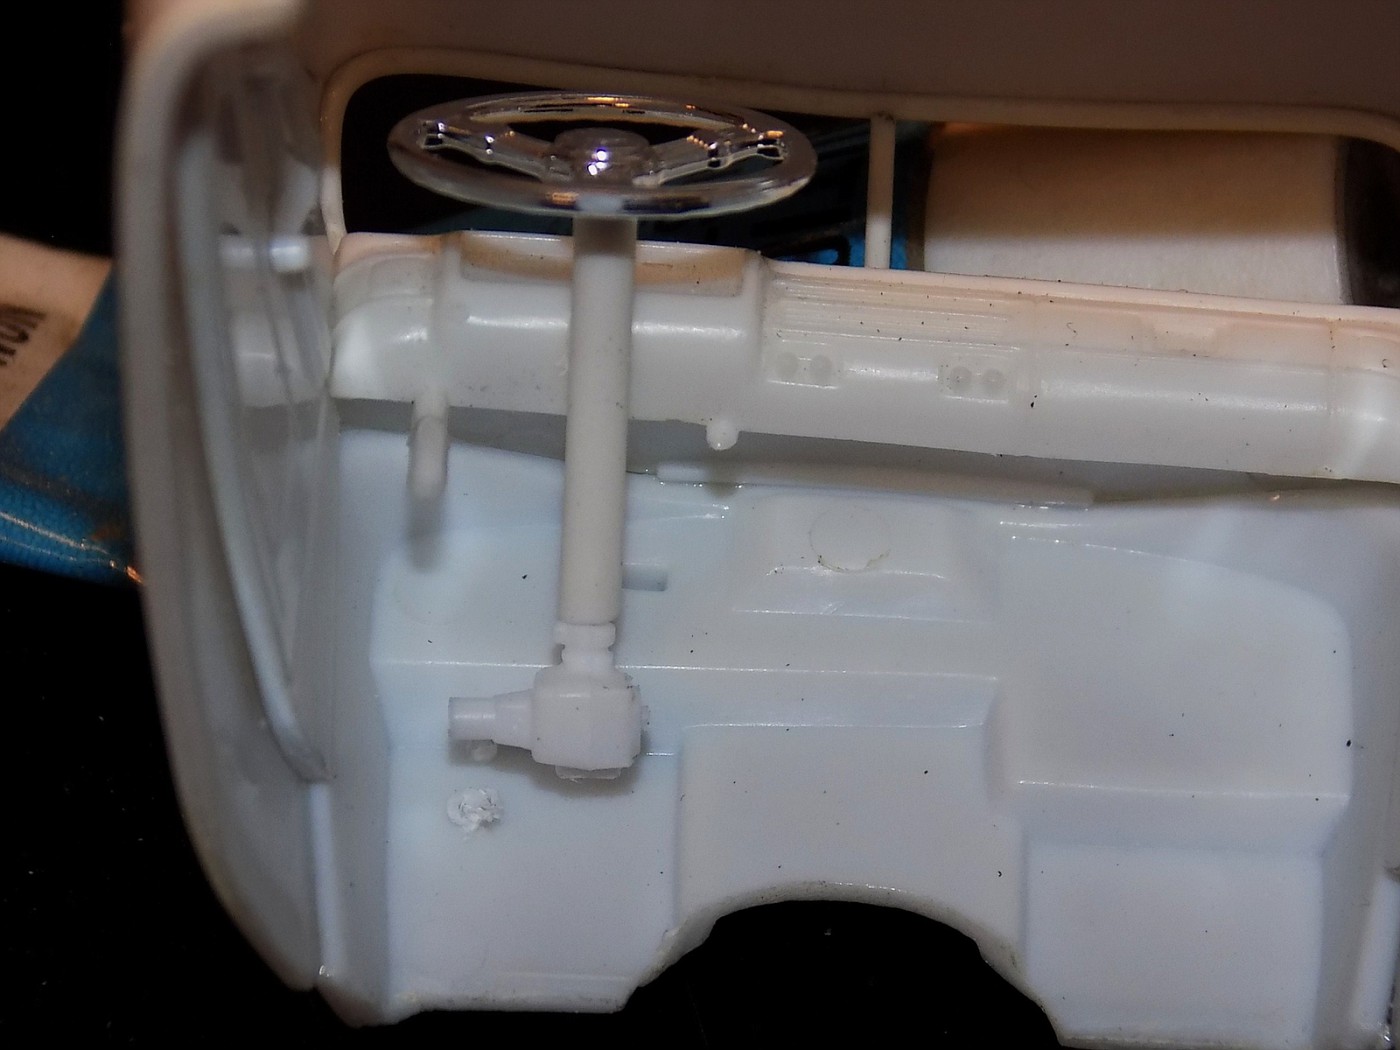 Hosted on Fotki Hosted on FotkiI had previously cut down the door/side panels from Revell's '50 Ford F-1 Pickup but did some further trimming and fit refinement. 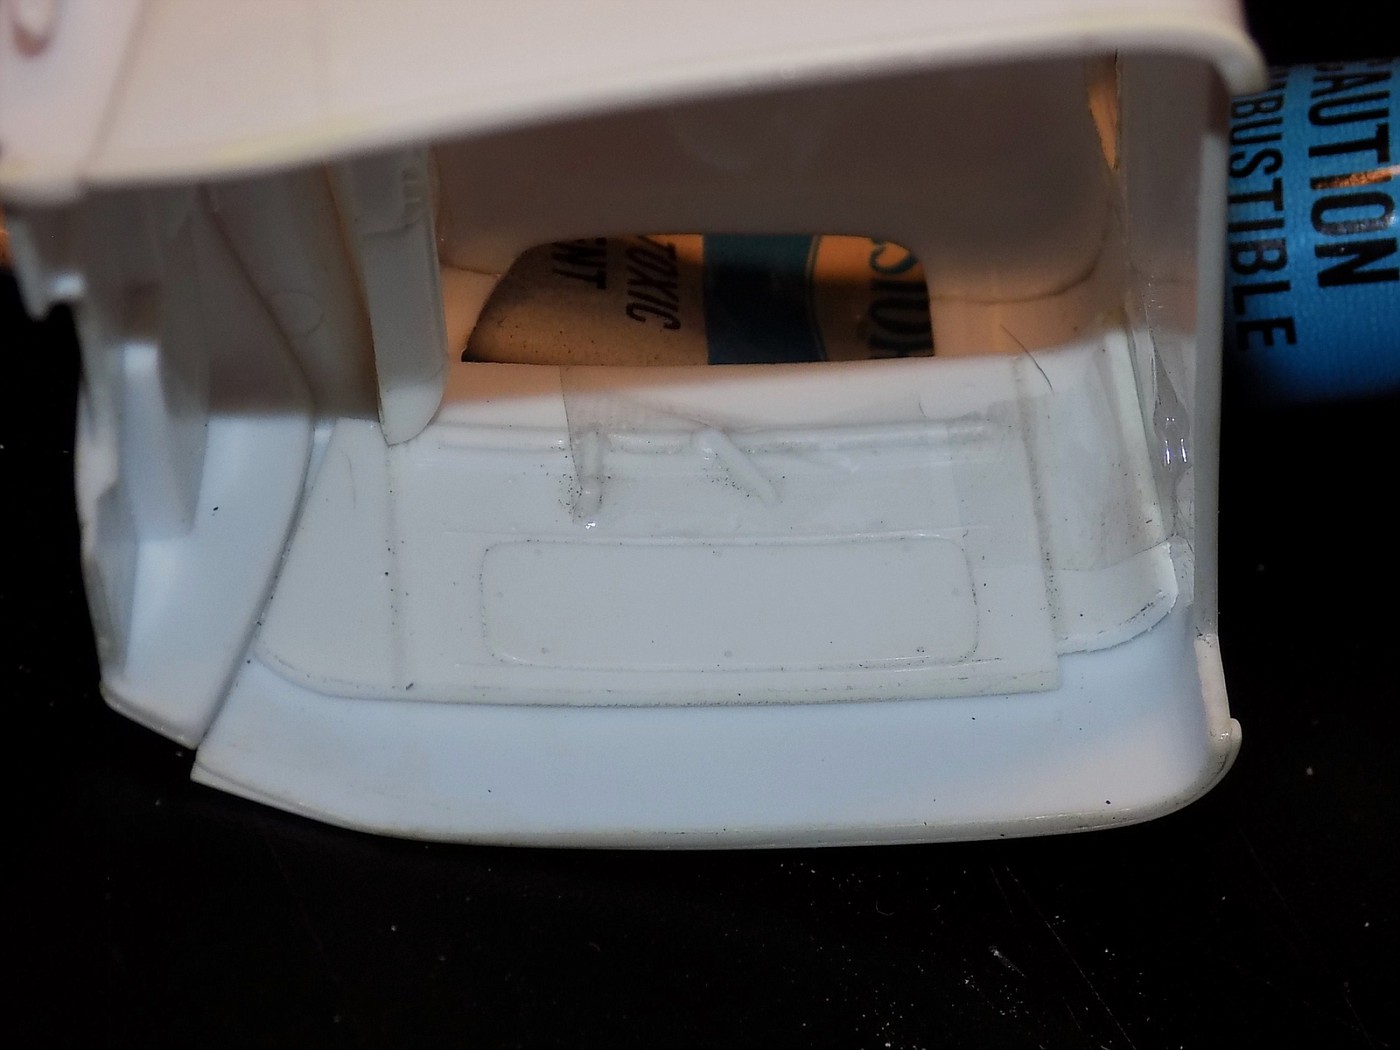 Hosted on Fotki Hosted on FotkiOne of the big things I was drawing a blank on in the past was how I wanted to do the floor / what to make the floor out of. I ultimately decided on cutting down the '50 F-1 floor to fit. I like the realistic look of the reinforcement ribs much more than I would a flat styrene sheet floor.  Hosted on Fotki Hosted on Fotki Hosted on Fotki Hosted on FotkiI also had a tough time finding a seat that was the right width. Most everything I had was too narrow or too wide. The one I did find that was a perfect fit and had a nice pleat pattern is the front seat from Monogram's '30 Touring. It's also short enough that it looks "right" in the channeled cab. It doesn't have any side or back detailing which doesn't matter at all once it's buried in the chopped cab. 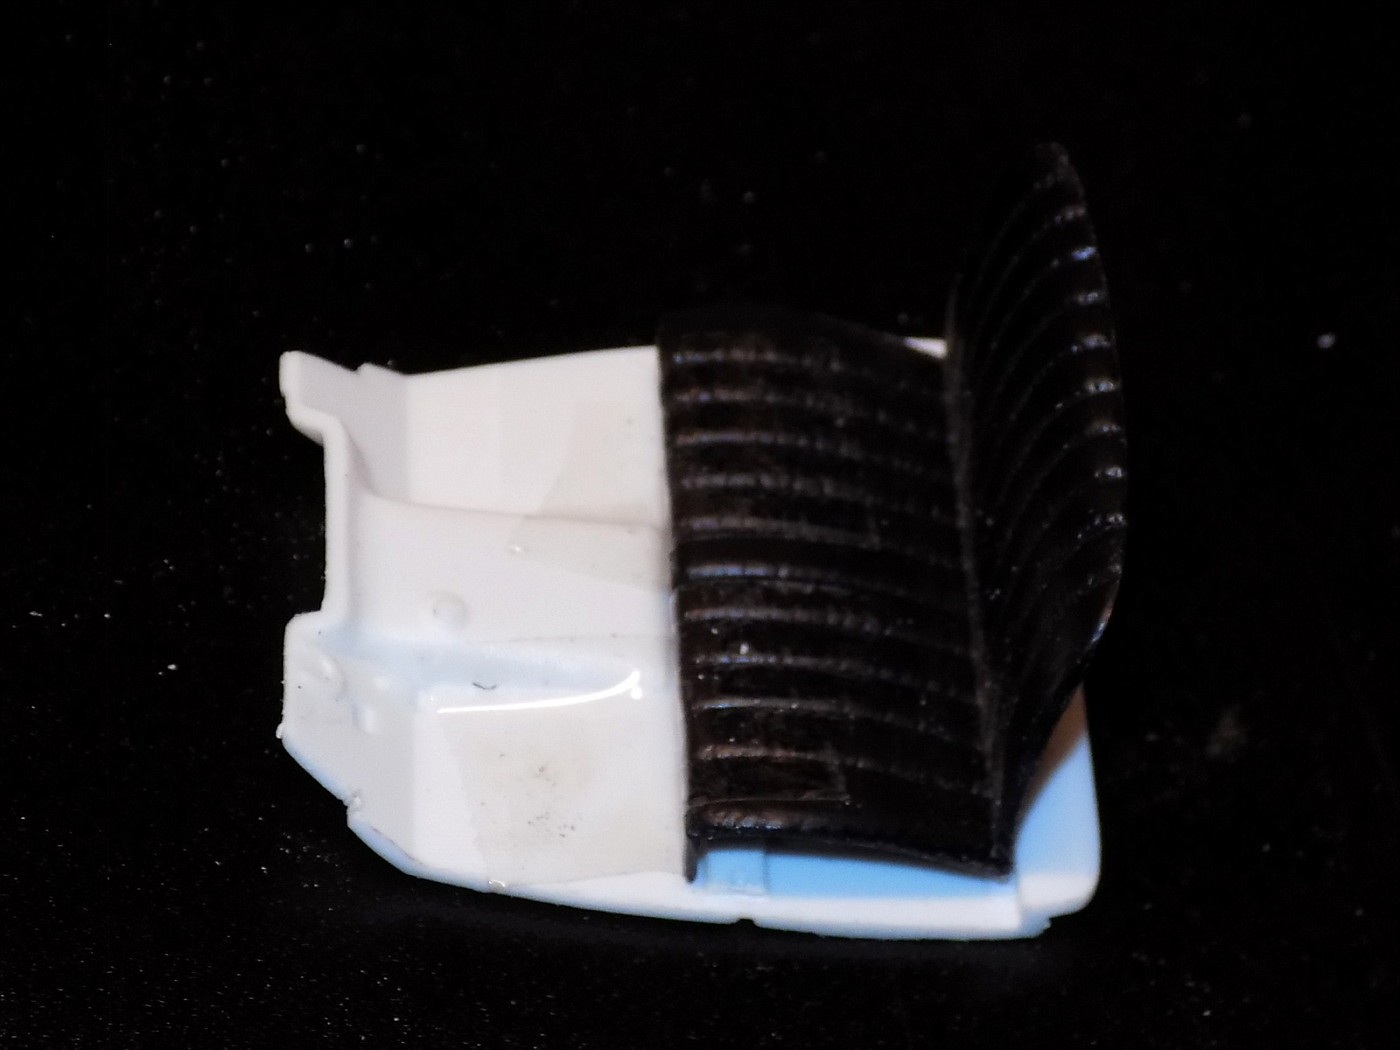 Hosted on Fotki Hosted on FotkiWith the basic interior and steering roughed-in I turned my attention to the bed, another thing I wasn't happy with before. I had originally installed some front-to-back rails inside the bed sides that sat on the top edge of the frame for mounting and that also supported the raised bed floor. However, the floor was raised so high that it was practically at the top of the bed sides which I thought looked dumb and pointless. I decided to ditch the floor and front-to-back supports. Instead I built some brackets on the bed sides as an attachment point to the frame and added some Grandt Line bolt detail. I then built a battery tray and shaped some brackets to hold the cylindrical gas tank from the Ed Roth Tweedy Pie T which I added a filler neck to. 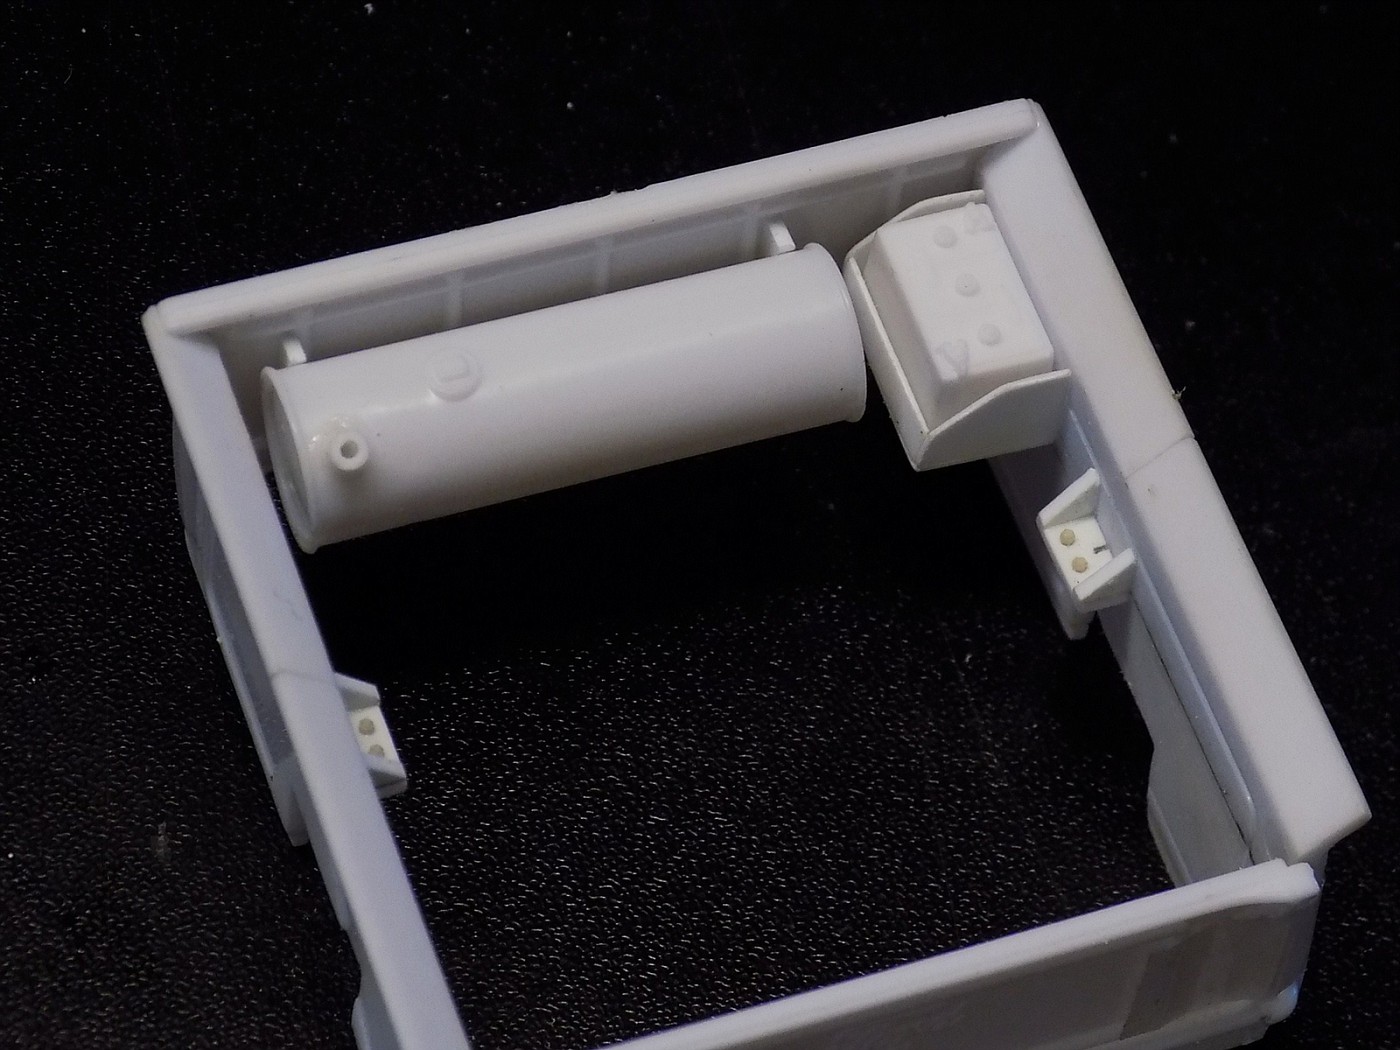 Hosted on Fotki Hosted on FotkiHere is the bed set down over the frame. Speaking of the frame, I finished blending the Revell '48 Ford rear cross member and replaced the really thick rear spreader bar I had previously glued in with a thinner one that looks much more in proportion. 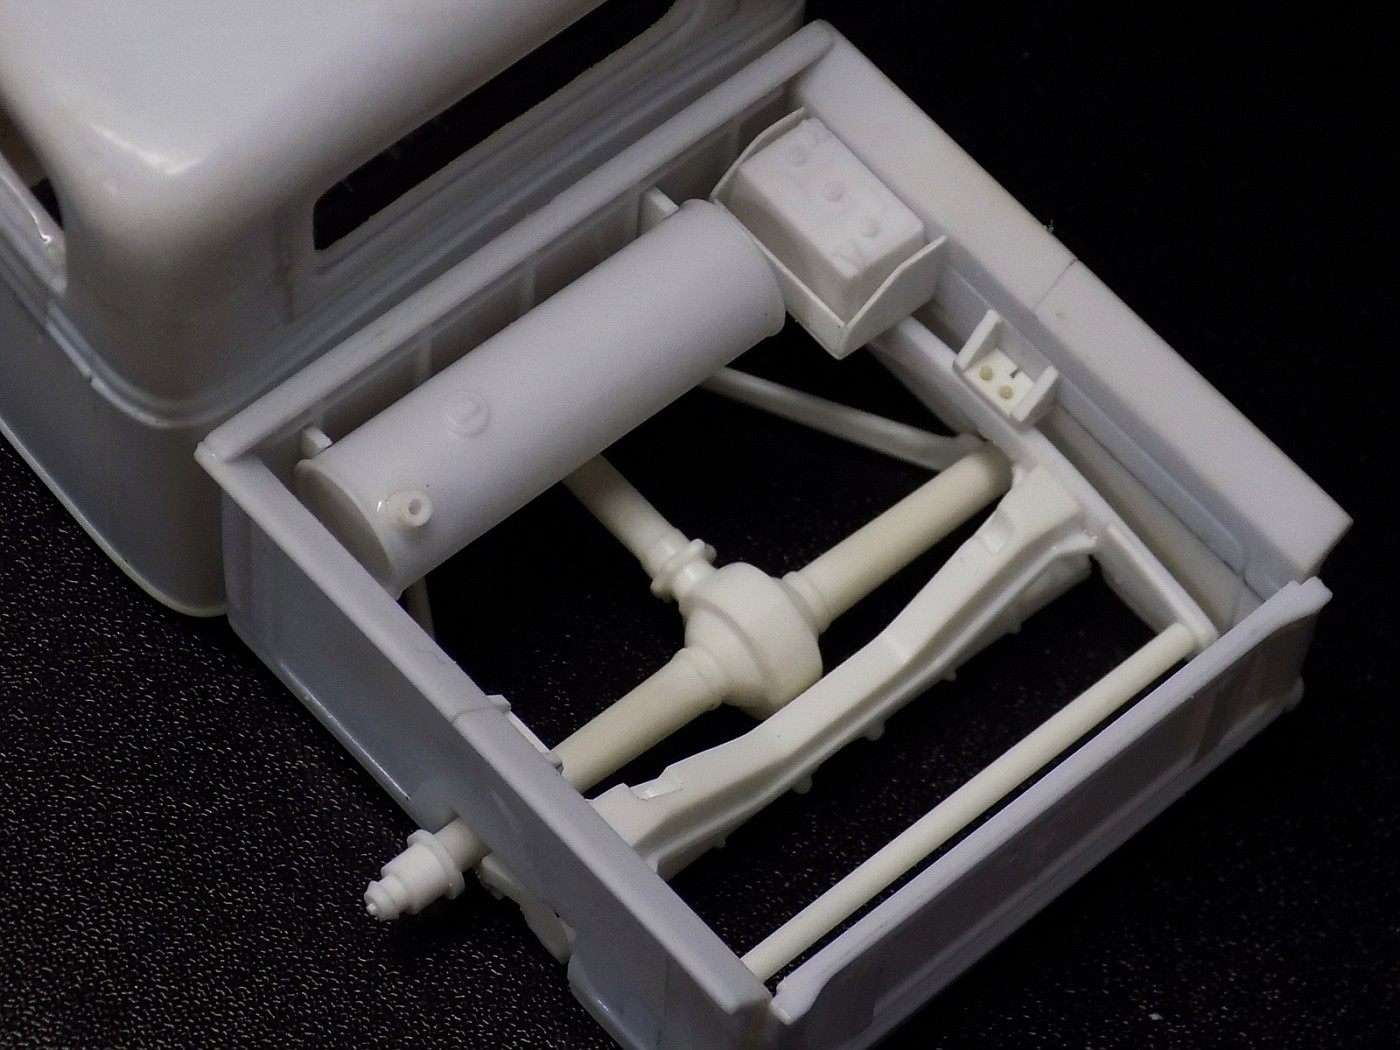 Hosted on Fotki Hosted on FotkiI know usually I get the model all mocked up on its wheels with as many parts hung as possible but I got lazy this time around. 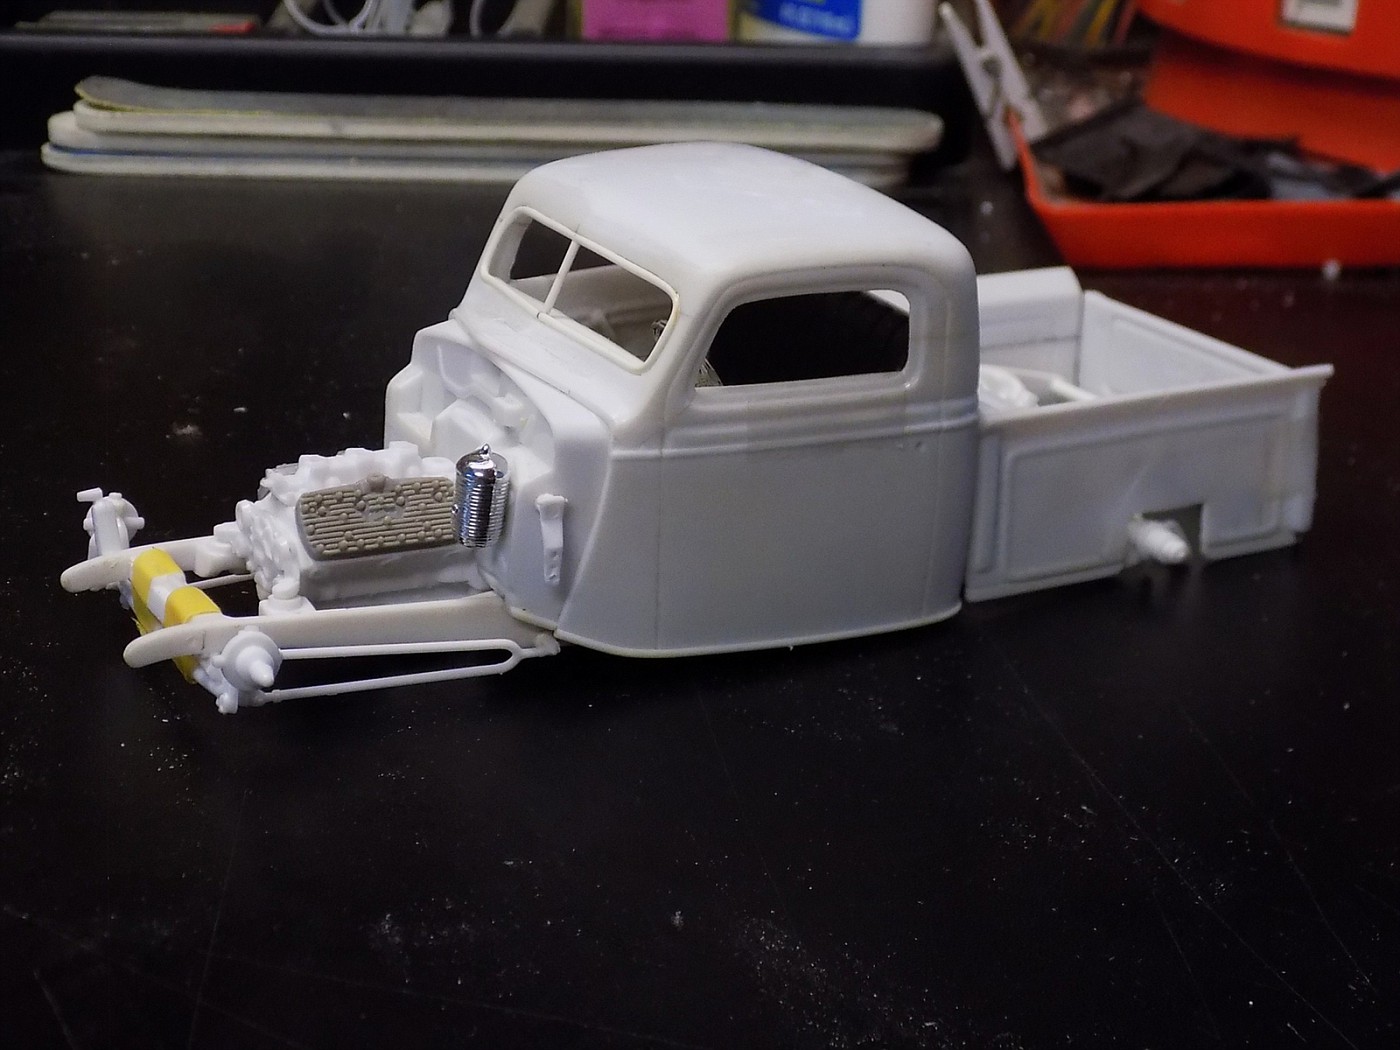 Hosted on Fotki Hosted on Fotki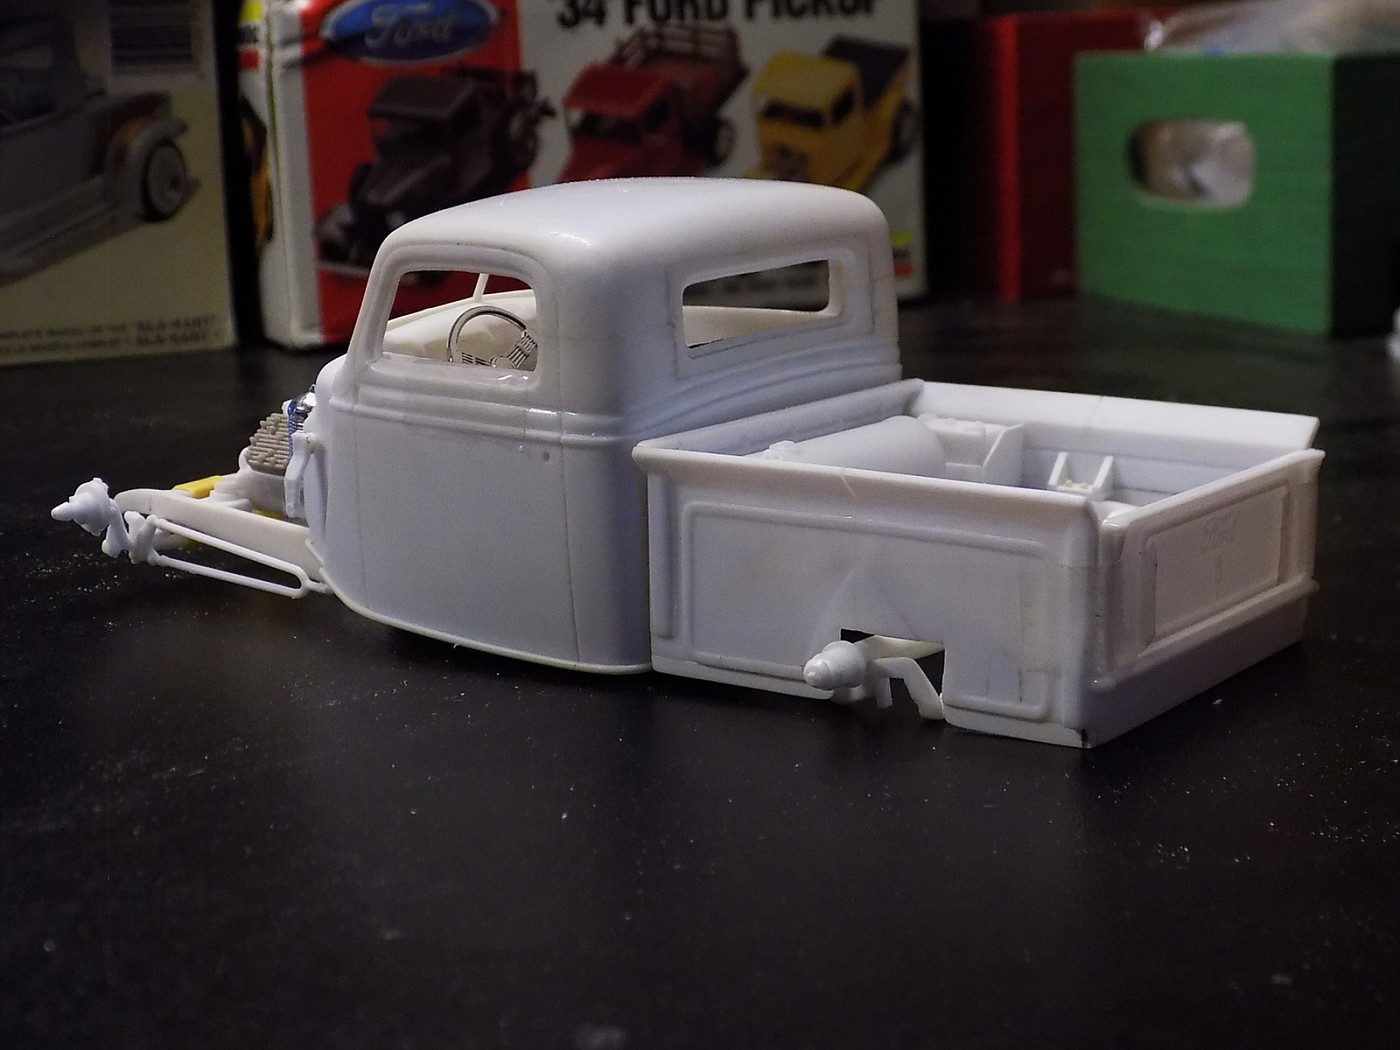 Hosted on Fotki Hosted on FotkiAt this point, this thing is getting pretty close. A few small projects and details left and then I can finally, FINALLY!, get the paint process going and actually finish this poor thing. I'm not touching anything else until this is done. Stay tuned (or not), more to come!  |
|
|
|
Post by dakotajohn on May 30, 2017 8:46:23 GMT -5
Looking Good, I like what you have done with the bed!
|
|
|
|
Post by spex84 on May 30, 2017 12:47:19 GMT -5
I like the skeleton bed too!
|
|
|
|
Post by Dennis on Jun 3, 2017 23:44:06 GMT -5
UPDATE!I have a love / hate relationship with scale exhaust systems. Having a nicely fitted system is very rewarding at the end but can be a tedious, pain in the butt to make. This one went together well, thankfully, after I figured out what I wanted to do. Up front I used two right-hand headers from Revell's '40 Fords. I did this for two reasons. 1) The curved portion is no longer needed to get around a steering gear since the gear is up in the cowl. 2) The non curved header gives the pipe a straighter shot at alignment coming through the center X. 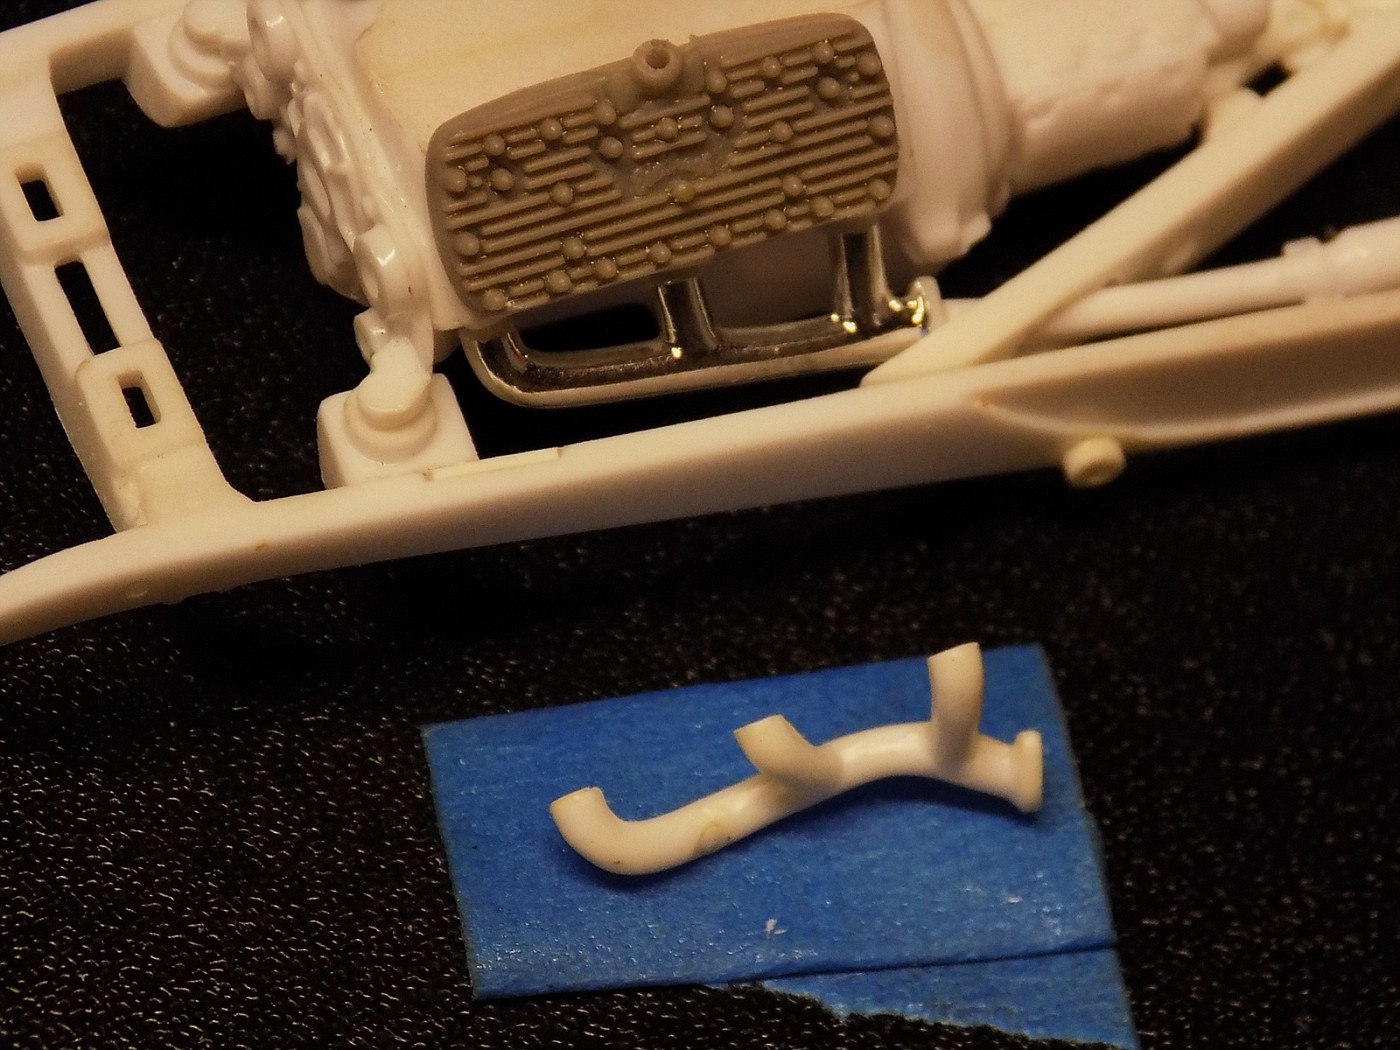 Hosted on Fotki Hosted on FotkiI made the pipes largely from the dual exhaust option in Revell's '48 Ford Convertible, cut down here and there. Right at the rear cross member I grafted on the tips from Revell's '32 Ford's as they have enough offset to drop down and under the back edge of the bed. The pipes consist of two sections per side and pin together at the headers and just behind the hanger brackets (right behind the mufflers.) The pipes further mount by being pinned to the frame rails at the hanger brackets (which I also added some Grandt Line bolts to for detail) and at the rear cross member. 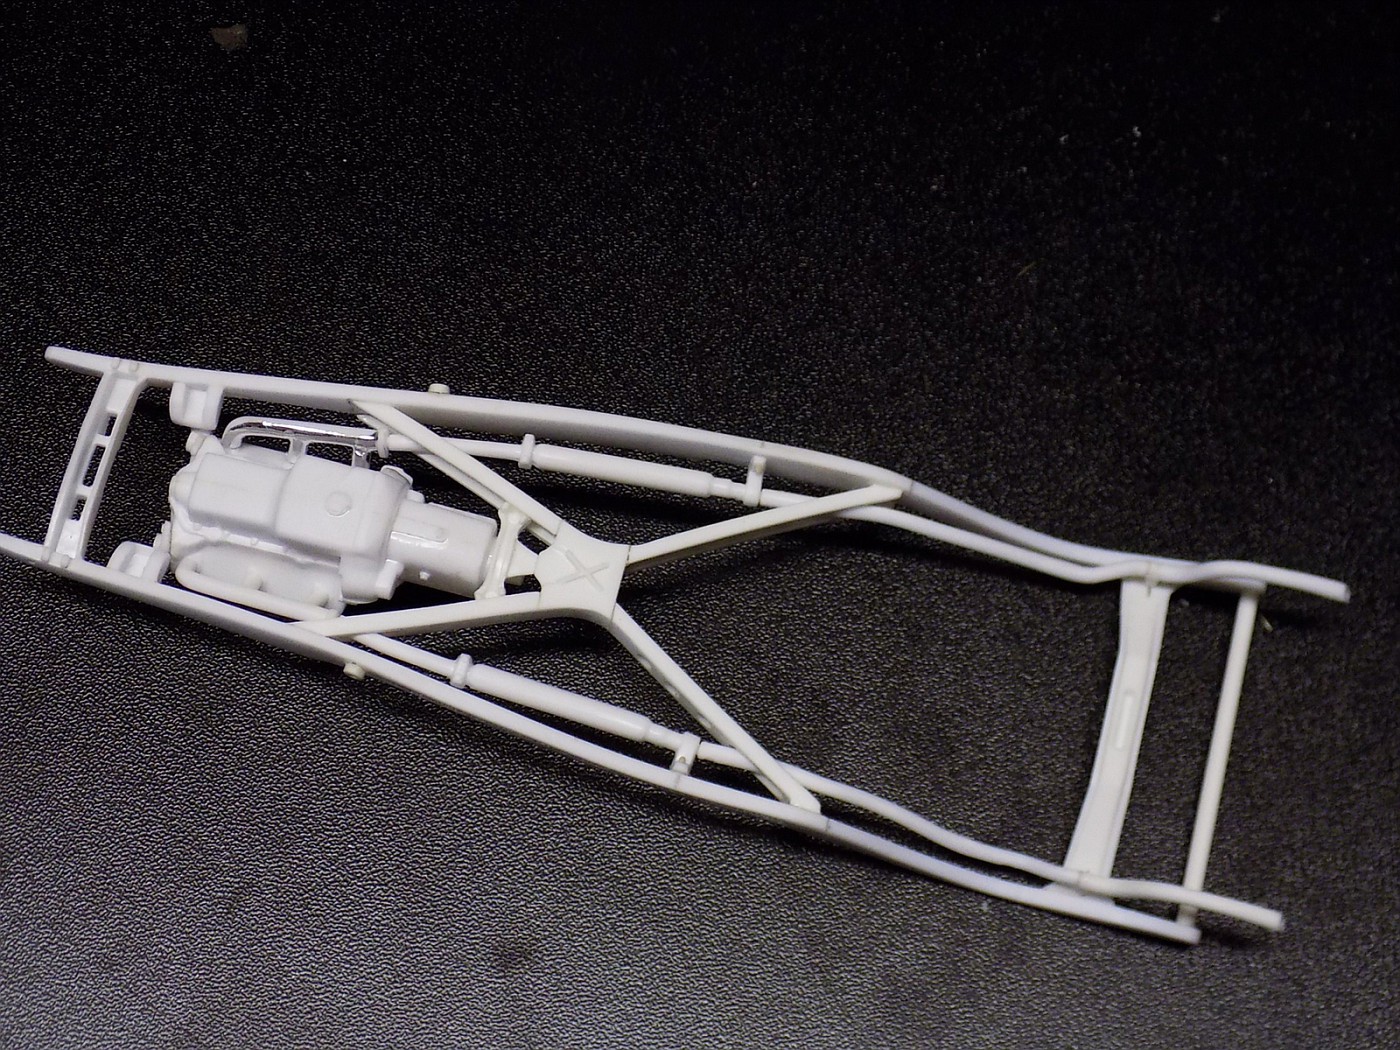 Hosted on Fotki Hosted on Fotki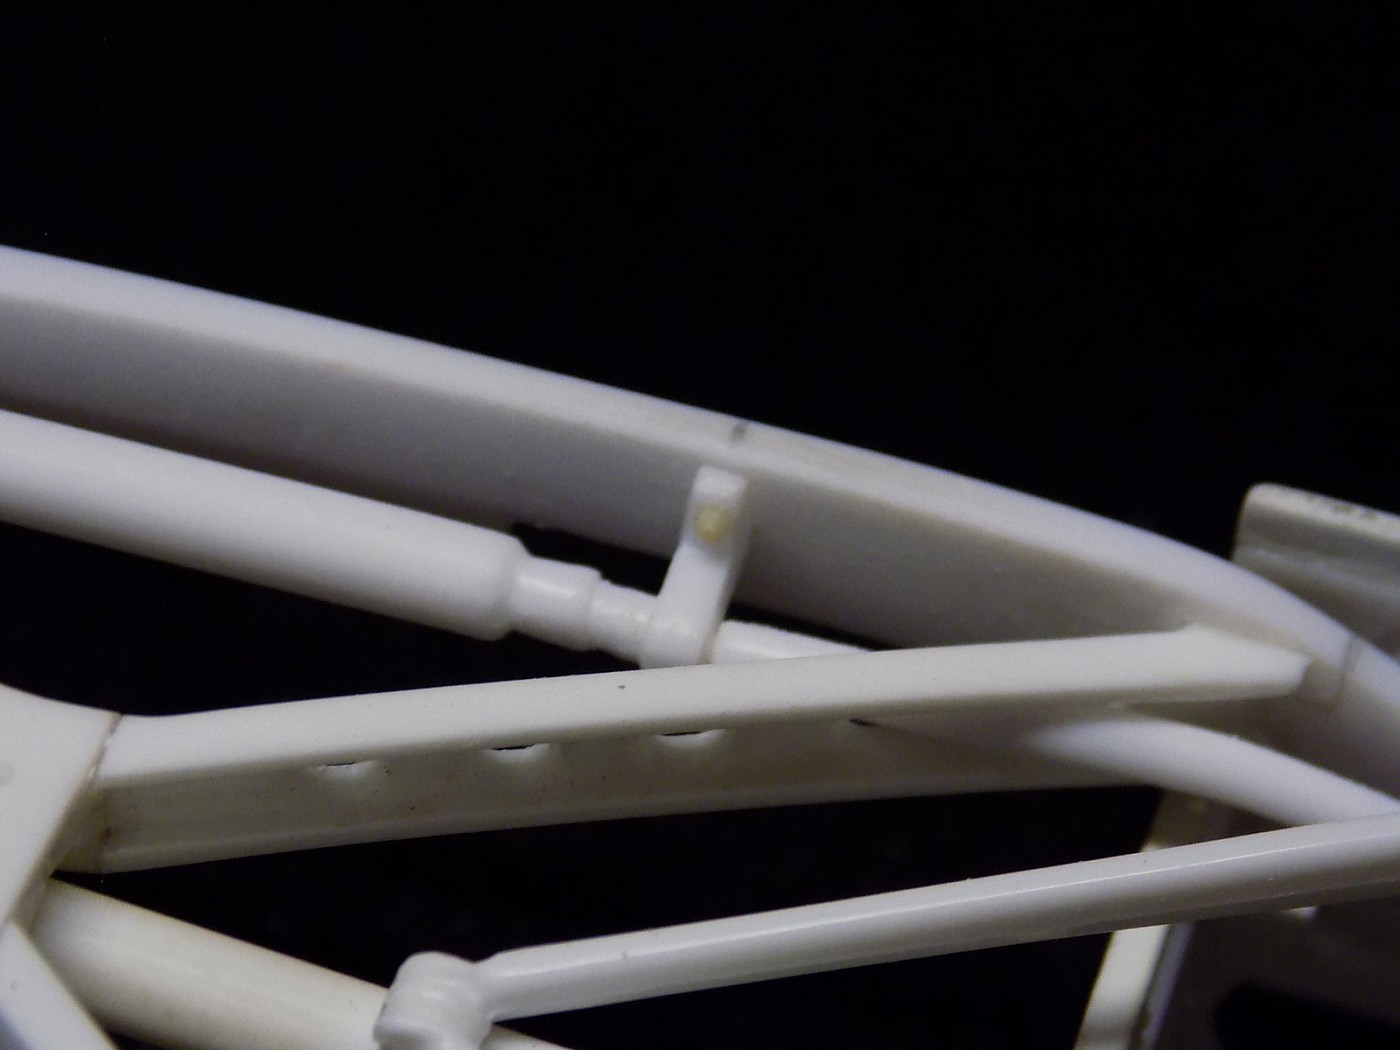 Hosted on Fotki Hosted on Fotki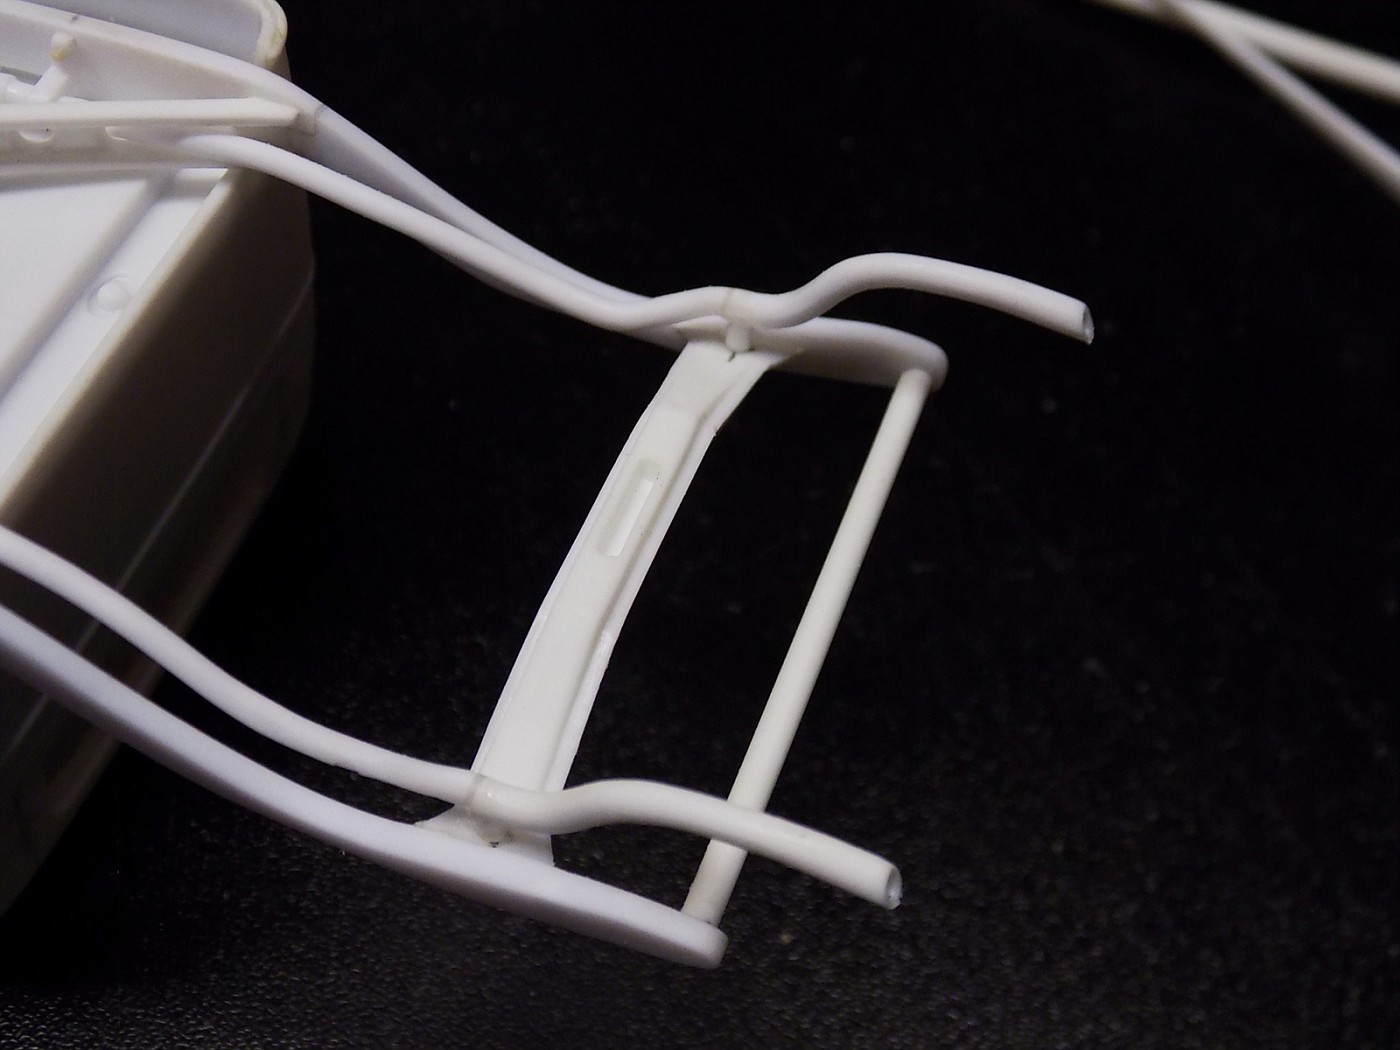 Hosted on Fotki Hosted on FotkiHere's a few views with the rear axle and bed in place. 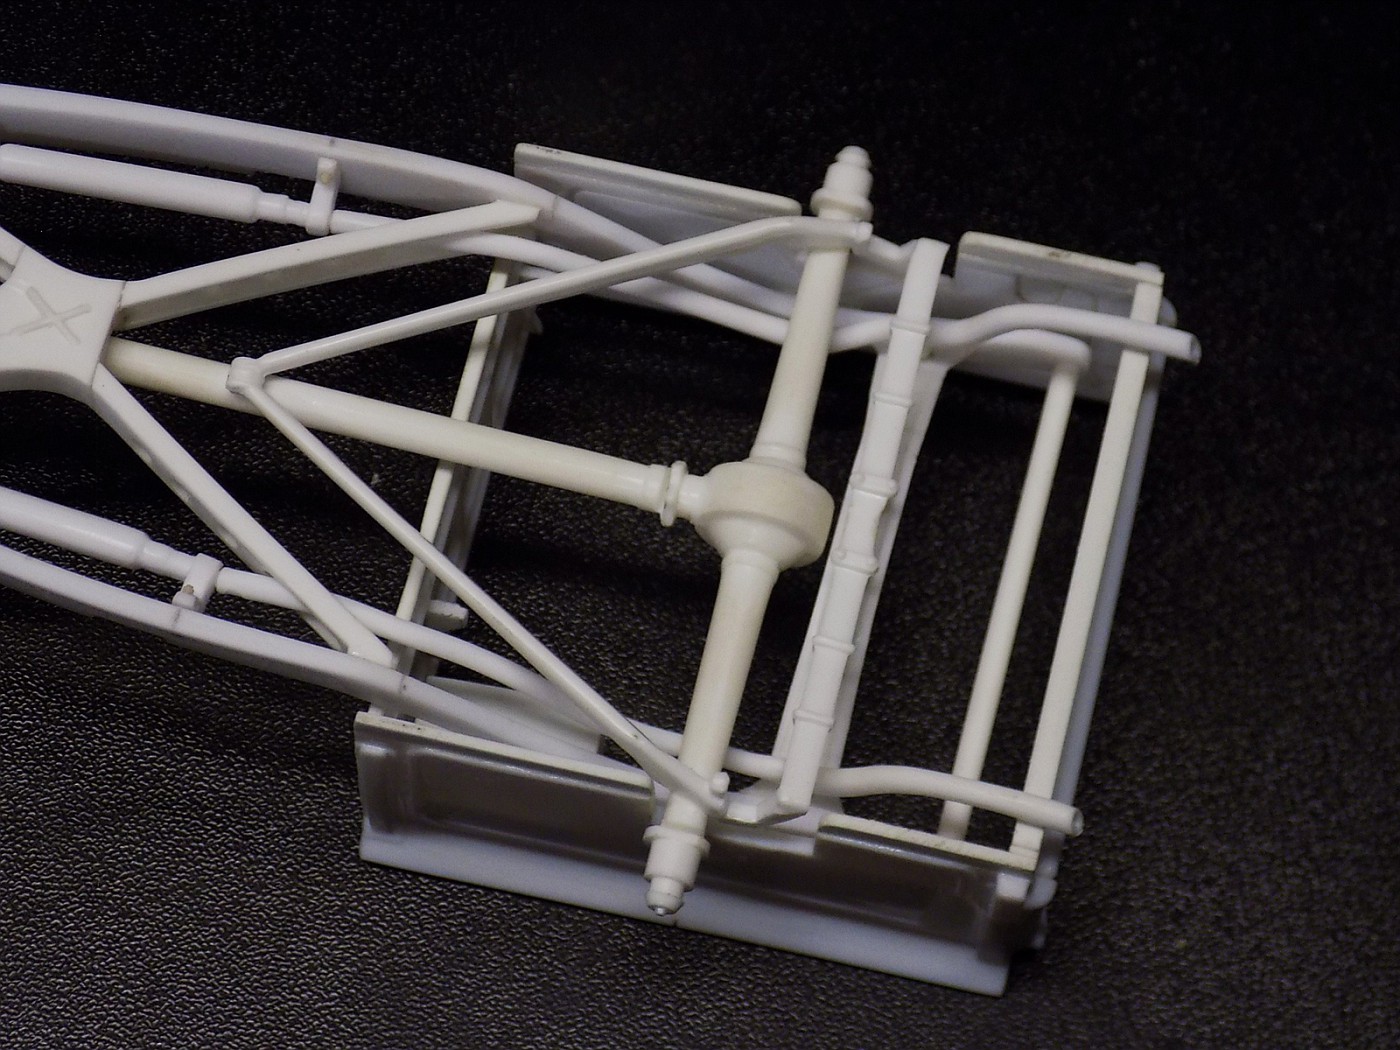 Hosted on Fotki Hosted on Fotki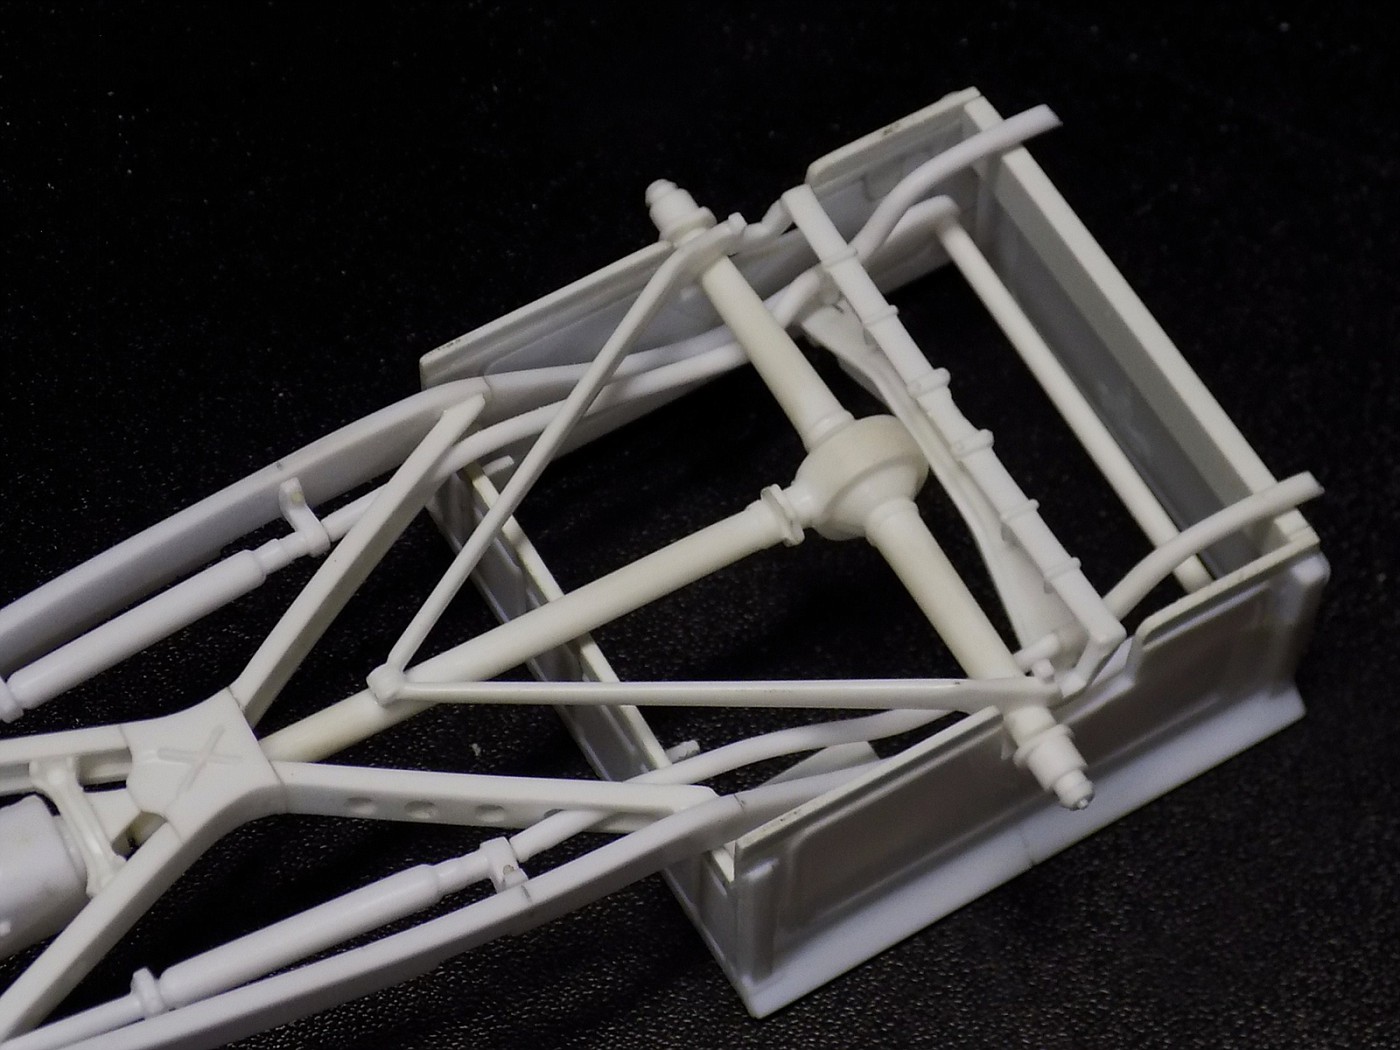 Hosted on Fotki Hosted on FotkiA view against the cab floor. 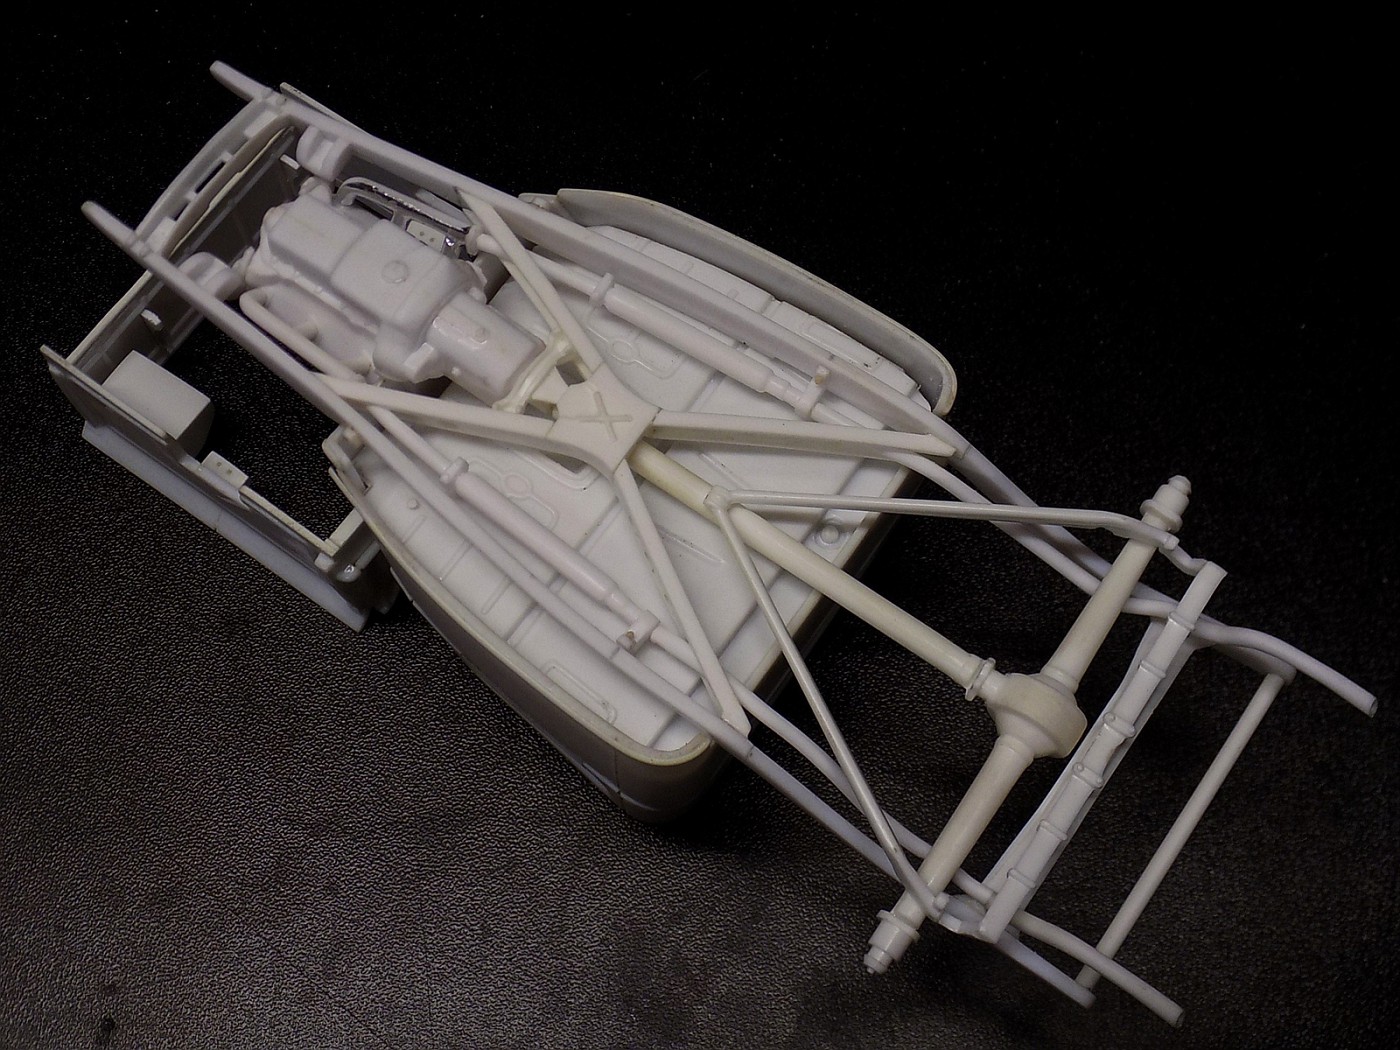 Hosted on Fotki Hosted on FotkiLastly, after I took the initial pictures I had a little more time so I mounted the master cylinder / bracket piece also from Revell's '40 Ford's. 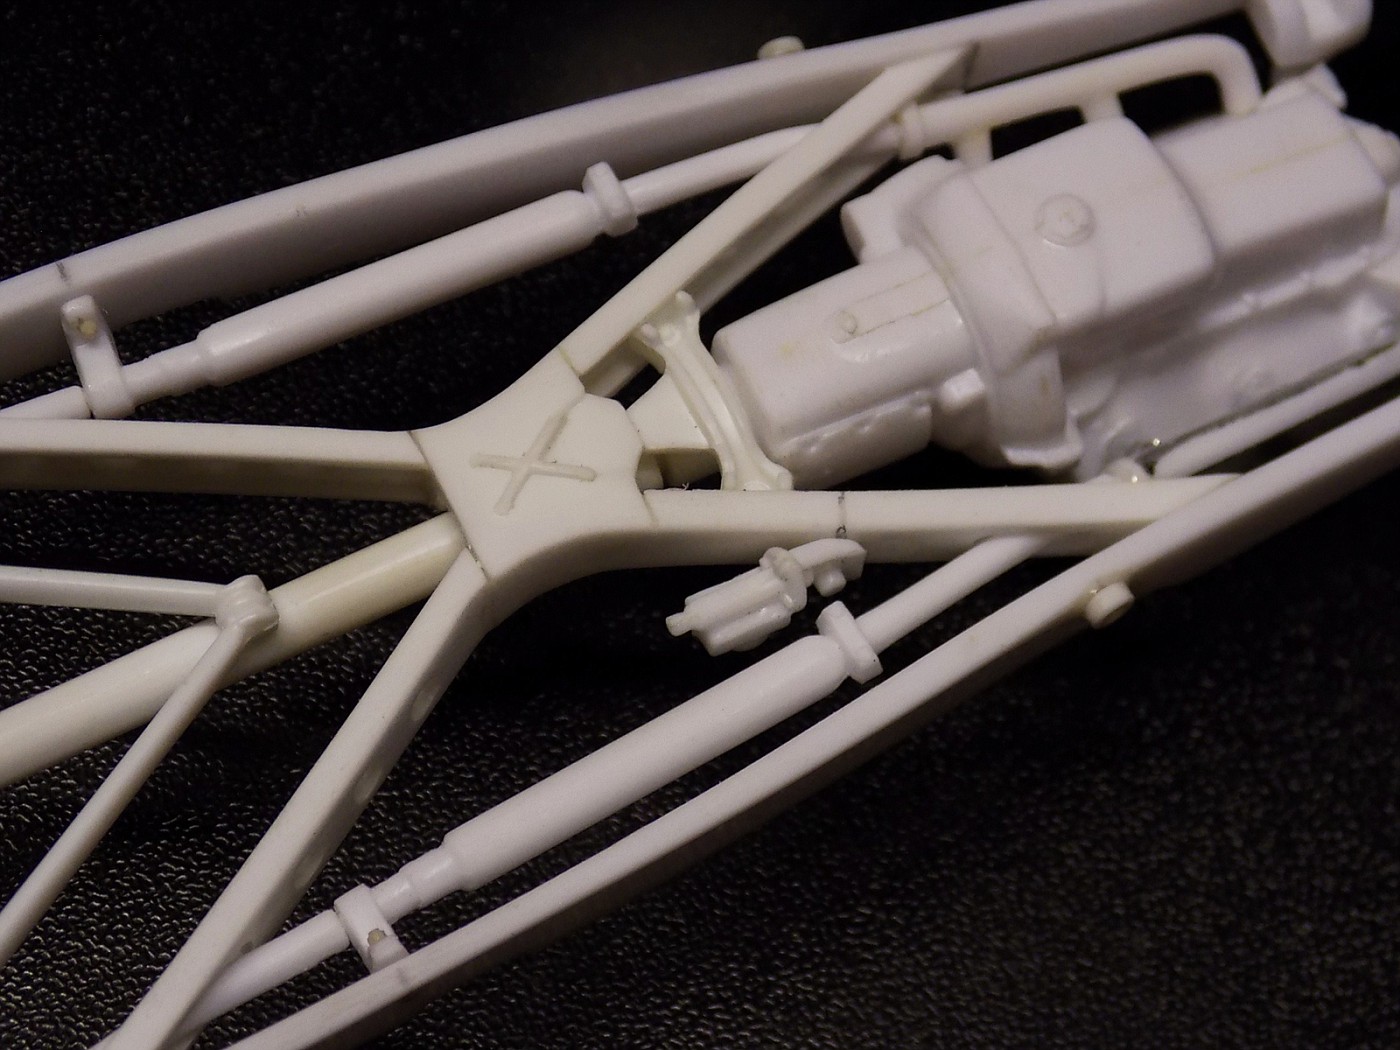 Hosted on Fotki Hosted on Fotki Hosted on Fotki Hosted on FotkiStill more to do but this is a major hurdle cleared. Comments welcome! 
|
|