|
|
Post by Bernard Kron on May 29, 2019 17:38:10 GMT -5
 Bare Metal ’32 Ford Highboy Roadster This is a kit-bashed Deuce Highboy featuring a bare steel finish utilizing a technique I developed consisting of a base color coat of silver lacquer metallic paint (Duplicolor Silver Metallic), Kosutte Gin San metalizing powder and Tamiya Black Panel Line Wash. Everything is plastic except the grill shell support struts (.020 piano wire) and the driveshaft (aluminum tubing stained with black wash). Non-steel surfaces are finished in various combinations of Testors Metalizer paints and Molotow Chrome or are kit chrome. The only color besides metallic tones are black rubber and the blue-gray seat belts. Here are the details of the kits used and the scratch built or modified items: Revell ‘32 Ford Highboy kit – Chassis rails, front cross member, radiator, grill shell, hood, main body, knock off hub spinners, head and tail lights, license plate frame. Chassis z’d 6 scale inches at rear. Model A cross member and buggy spring from Monogram Model A Ford kits grafted in place. Front suspension from Monogram ’32 Ford Roadster kits. Revell Stacey David Rat Roaster: Hairpins, Moon tank sides, miscellaneous small parts and steering gear. Revell/Monogram ’37 Ford Van kit: chassis K-member, exhaust mufflers. AMT ’53 Ford Pickup kit: 8-carb DeSoto Firedome Hemi V8, shift lever. AMT Phantom Vicky kit: Halibrand front mag wheels used as rear wheels, dashboard, steering wheel, front spot brakes. Polar Lights Funny Car kits: front wheels. Aftermarket parts: Modelhaus T120 front tires, Herb Deeks bias-ply rear truck tires, Halibrand quick change rear suspension, ’40 Ford rear brakes and Schroeder cowl mount sprint car steering by the late Ron Royston at Early Years Resins, louvered rear deck and stock style ’32 Ford firewall by Ed Fluck at Drag City Casting, bomber style seats by Big Donkey Resins. Scratch built parts: Interior tin work, steering bell crank and tie rod, exhaust system. Chromed Moon tank made from Revell side pieces and AMT ’49 Ford center barrel to avoid a tank seam and preserve kit chrome. Thanx for lookin’, B.       |
|
|
|
Post by lo51merc on May 29, 2019 22:15:38 GMT -5
Here's a masterpiece from a master.
Nice goin' B.
|
|
|
|
Post by krassandbernie on May 30, 2019 9:52:57 GMT -5
Yes! That body looks REAL! I love it Bernard! Two things if I may.........it would benefit from a 'stainless' grille inside that shell......even polished photo etch would look good; and the louvers on the deck lid would look that much more realistic with a little flat back painted underneath the lower edge of each louver to give the illusion of them being opened up.
|
|
|
|
Post by spex84 on May 30, 2019 16:14:01 GMT -5
What a beast! Love the parts and design choices in the project, B! Re: Ed's louver suggestion, maybe a Pigma Micron fine-line pen would be easier to handle for that kind of fiddly work. 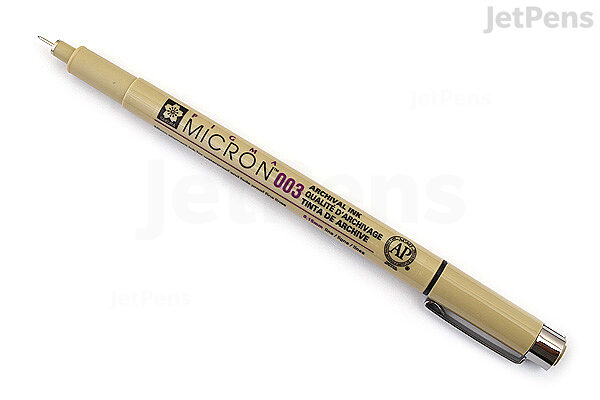 |
|
|
|
Post by ChrisV on May 30, 2019 17:01:49 GMT -5
Great work as usual Bernard!
|
|
|
|
Post by krassandbernie on May 30, 2019 18:10:40 GMT -5
What a beast! Love the parts and design choices in the project, B! Re: Ed's louver suggestion, maybe a Pigma Micron fine-line pen would be easier to handle for that kind of fiddly work. I thought about a fine tip pen as well; but figured the pigment would come out with a purplish hue to it like most drafting pens do. |
|
|
|
Post by Plowboy on May 30, 2019 19:28:29 GMT -5
the louvers on the deck lid would look that much more realistic with a little flat back painted underneath the lower edge of each louver to give the illusion of them being opened up. If you know a successful way to do it, please show us. That would make a great tutorial! It would take a very steady hand to paint what looks like a hundred louvers and do it neatly. Not an easy task IMO. |
|
|
|
Post by krassandbernie on May 31, 2019 1:13:16 GMT -5
the louvers on the deck lid would look that much more realistic with a little flat back painted underneath the lower edge of each louver to give the illusion of them being opened up. If you know a successful way to do it, please show us. That would make a great tutorial! It would take a very steady hand to paint what looks like a hundred louvers and do it neatly. Not an easy task IMO. I agree with you.......and wasn't nit picking Bernard's build. All I was saying was a little bit of time (o.k.....a lot of time........and a steady hand) would make a huge difference! LOL! |
|
|
|
Post by lo51merc on May 31, 2019 8:57:47 GMT -5
A steady hand? That sure leaves me out. But the fine tip pen idea could be the ticket....if the pen held flat black paint that wasn't too thin and runny. Then that would probably lead to the tip clogging up. Ah well, tip saved.
Gary
|
|
|
|
Post by spex84 on May 31, 2019 14:32:46 GMT -5
I just suggested the pen because the ink isn't as likely as paint to wick into the junction between the louver and the decklid, spreading to places it isn't welcome. I know if I tried to brush-paint louvers I'd mess it up, lol. For further edification, here's a photo of Sharpie fine marker ink versus Pigma Micron ink. As you can see, the Sharpie is indeed purple as Ed mentioned, but the Pigma is actually black. 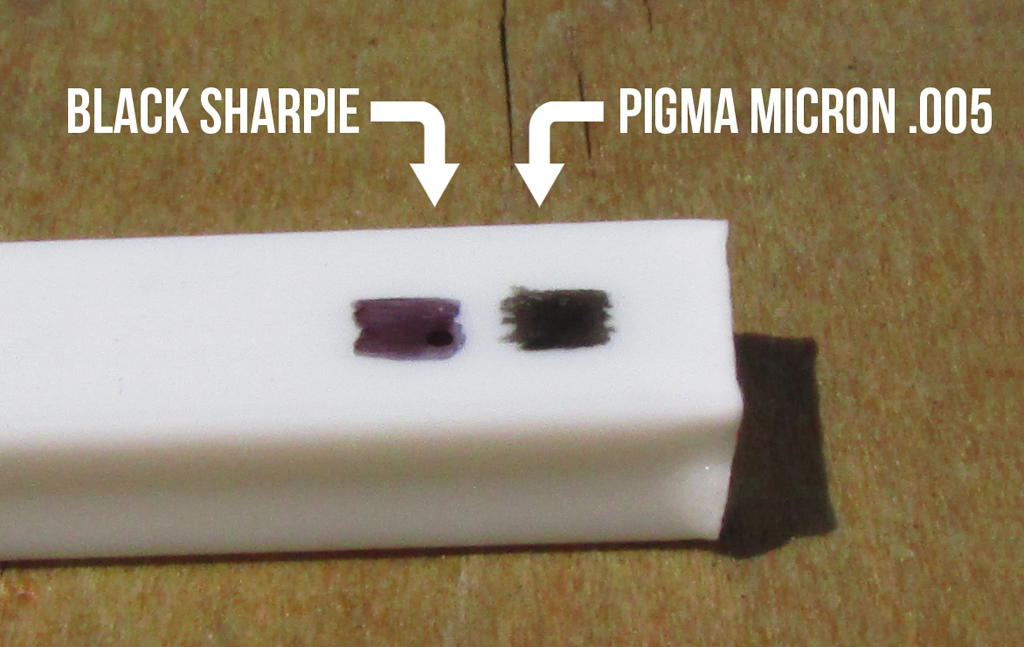 |
|
|
|
Post by krassandbernie on May 31, 2019 16:17:08 GMT -5
I just suggested the pen because the ink isn't as likely as paint to wick into the junction between the louver and the decklid, spreading to places it isn't welcome. I know if I tried to brush-paint louvers I'd mess it up, lol. For further edification, here's a photo of Sharpie fine marker ink versus Pigma Micron ink. As you can see, the Sharpie is indeed purple as Ed mentioned, but the Pigma is actually black. Thanks for the info! I feel like my comments rubbed some the wrong way. It wasn't intended. I know in my younger days hand painting the 'shadow' side of the louvers with some flat black paint would have been a piece of cake; but like many here I doubt I would have as much success now that I am older.......likely less steady with the hands; and eye sight not quite what it was even a decade ago. |
|
|
|
Post by Bernard Kron on Jun 2, 2019 12:53:26 GMT -5
Thanks to all for the comments, suggestions, and kind words.
I thought about using various metal parts alongside the plastic, notably a handsome (although inaccurate) machined aluminum Moon Tank I have, as well as a p/e grill. But in the end I decided to focus on one (although not the only) theme of the project - a believable steel bare metal finish. So I did the darkened bare steel grill you see, and made a kit-chrome Moon tank to add mass and contrast to the front.
Development of a sense of mass and bulk, one of the keynotes of lowered Highboy roadsters, especially with chopped windshields, was the other design goal I was after.* This is a natural outcome of the monochrome bare metal look combined with the lowered z'd frame and deep drop front end. It drove the choice of motor, and the addition of a hood panel and Moon tank. Initially I thought about doing this car entirely in rough raw metal tones, but in the end I chose to include contrasting chrome highlights. The windshield, in particular, would have looked awkward and overdone if stripped to a bare metal look. So the car is in a state where most of the chrome parts are back from being plated.
If I have a spare weekend, sometime, I'll see about hitting the louvers with a Micron pen...
Thanx again for the interest,
B.
*I'm a fan of the 80's/90's "Ohio Look" Deuces, as exemplified by the cars Barry Lobeck's shop turned out. This look has evolved since then with the influence of the more purist Traditional look popularized by TRJ. This build blends the two, with its narrow bias ply tires and flatter stance. The precursor for the Ohio Look, of course, was the Tom McMullen roadster which contributed the idea of the Moon tank.
|
|
|
|
Post by spex84 on Jun 2, 2019 13:34:10 GMT -5
I didn't know there was such a thing as an "Ohio Look", but now I have a bit of a label to hang on cars with that appearance. Thanks!
I always liked the Lobeck cars, although the formula felt stale in the mid 2000s when every issue of Street Rodder seemed to feature another black '32 roadster with polished Halibrands, haha. The more aggressively trad tire and wheel combos of recent years have made the style more palatable to me again.
|
|
|
|
Post by Bernard Kron on Jun 2, 2019 13:55:23 GMT -5
I didn't know there was such a thing as an "Ohio Look", but now I have a bit of a label to hang on cars with that appearance. Thanks The "Ohio Look", of course, is what Revell failed so miserably at capturing when they first issued this kit. They got quite a few of the details right, like the front suspension, wheels and tires and even the air conditioning(!); but OMFG that stance! With the proper massaging, however, much of which is not all the difficult, it can really come alive. I'm always amazed that so many modelers are obtuse or insensitive enough not to notice what's required, and just knock these things off OOB. Especially since so many mistakes of this this kit, and the 3-window, have been perpetuated in subsequent variants. Or is it The Curse of Dan Fink? Now that the Germans are resolutely underachieving so spectacularly with their stewardship of Revell, we must be resigned to having to Do-It-Ourselves... |
|
|
|
Post by spex84 on Jun 2, 2019 14:16:58 GMT -5
Lol, I haven't encountered too many comments about Revell's current management thus far, other than their adoption of the piss-poor crushable Euro-style boxes for US kit offerings.
"Close but not quite" really applies to most kits, so I don't mind having to make some changes...if they're in easily fixable areas that is. Dropping the nose of the '32 series is thankfully one of those easy fixes. The roof on the '30 coupe is the opposite kind, though. Every so often I pull out the WIP of my sole '30 kit and just looking at it exhausts me, haha. In my dreams the tooling fairies pay Revell a visit and just make a few little critical changes in the night...
|
|