|
|
Post by Duane on Mar 31, 2011 19:58:22 GMT -5
thanks Chris !!!!!...
i vaguely remember seeing a
stock Willys P.U. as a tiny kid.
needless to say, that's been a
day or two ago.
|
|
|
|
Post by lo51merc on Apr 2, 2011 19:16:23 GMT -5
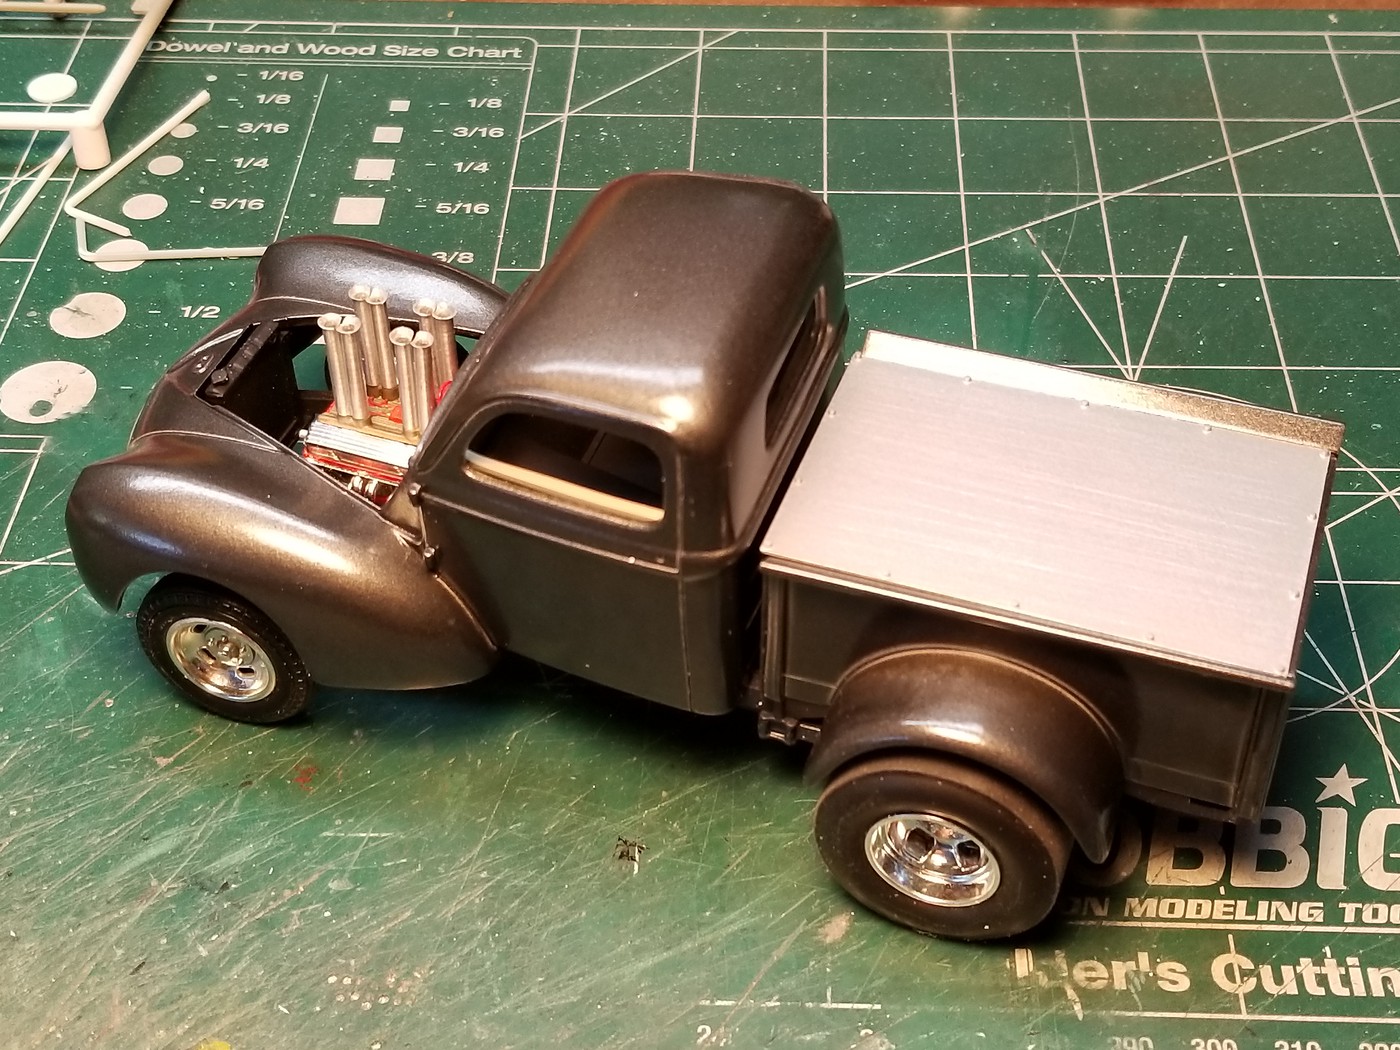
So, with Ed Fluck's prodding me, I've added bed rails, side supports, and a bed cover. The little buttons sticking up on the bed cover are .035 styrene rod, and I'll be sanding most of the tops away to simulate Dzus fasteners holding down a metal bed cover. Each of the side supports is made of four seperate pieces of styrene. The angled part of the bed rail is .020 flat styrene and the round is .062 that I drilled out at the ends. The bed cover won't be attached until final assembly. I still haven't found a good donor for the block for my intended Hilborn injected Chevy small block. I may just end up using the blown Olds from the old Revell SWC kit. Gary 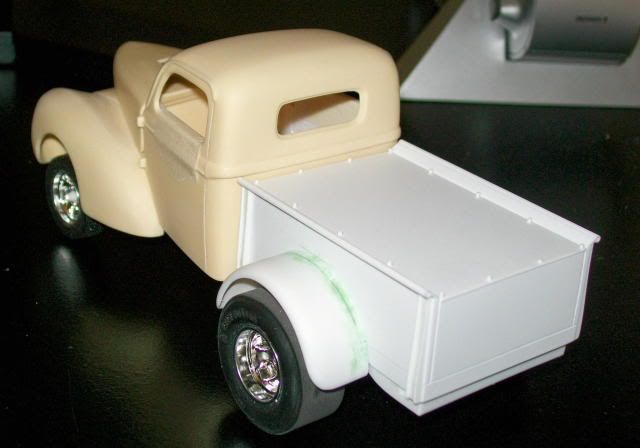 |
|
|
|
Post by rat23 on Apr 3, 2011 0:41:41 GMT -5
|
|
|
|
Post by matttrotta on Apr 3, 2011 19:14:17 GMT -5
Great scale fab work!
|
|
|
|
Post by lo51merc on May 14, 2011 12:55:51 GMT -5
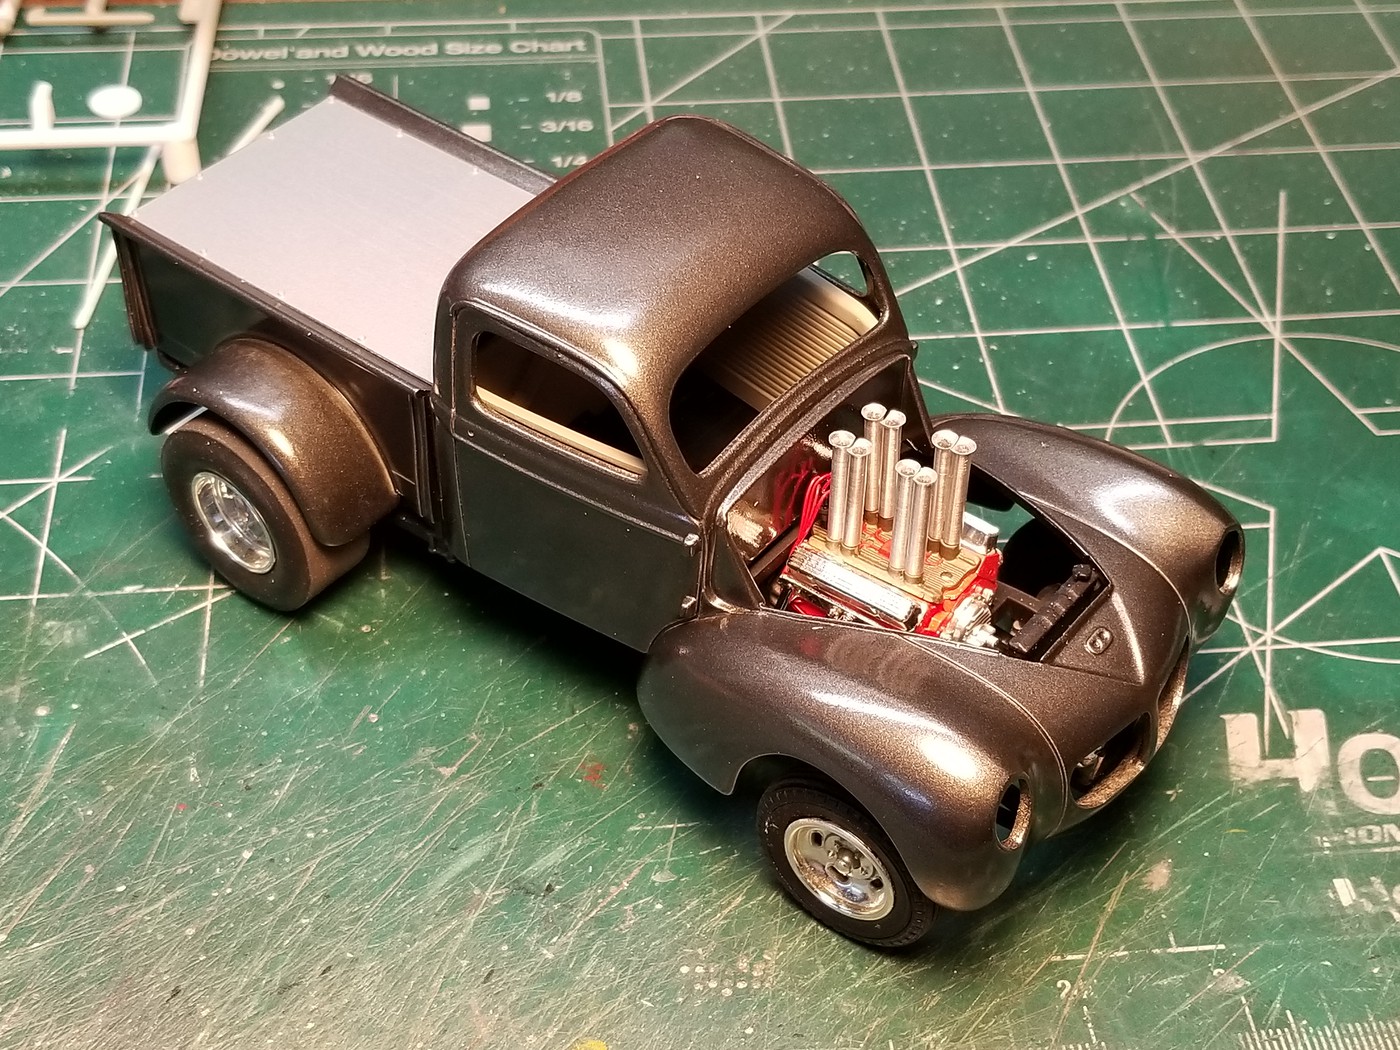
This new update is where I'm at today. Some of the parts are also at The Little Motor Car Co., including a pair of Ed's corrected front Halibrand wheels and a set of headers I found in my parts stash. These should be here in a few weeks. I have the Chevy small block nearly done, and I made the injector stacks for the (AMT 55 Nomad) Hillborn injection out of .093 aluminum tube. The red balls in the tubes are shirt pins, but I think I might take a trip to Michael's and see if I can find some pins with a larger diameter. The hood opening has been modified slightly for the stacks. The box, body and hood are ready for the first coat of primer. I think I'll get this one done this year! (that would be nice wouldn't it!) Ignore the flatty in the foreground. That's for another project. Gary 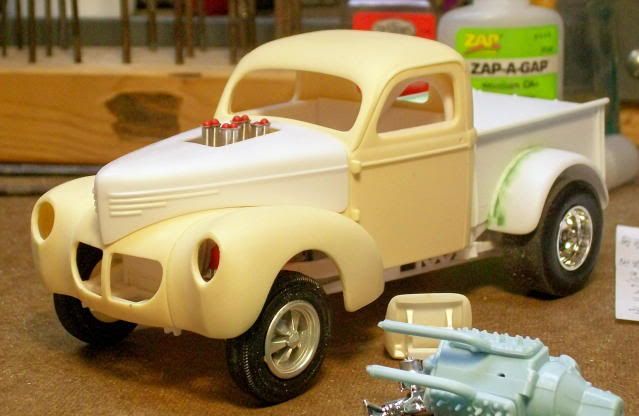 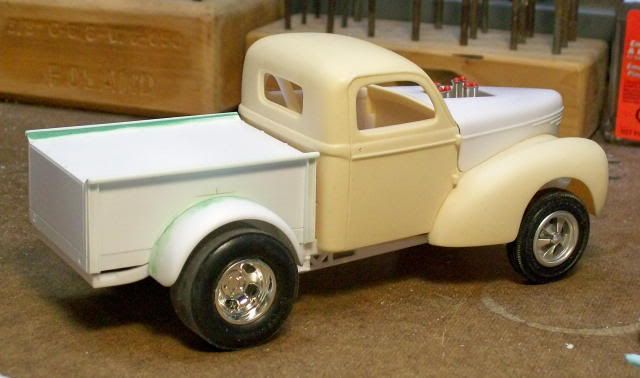 |
|
|
|
Post by dakotajohn on May 14, 2011 15:00:29 GMT -5
I really like this one!!!!
|
|
|
|
Post by krassandbernie on May 14, 2011 16:30:07 GMT -5
Pretty damn cool Gary! I can't wait to see it finished too! I wish everyone was a Willys freak like you and I! I'm still sitting on almost 50 of these '41 Willys pickup cabs that I stocked up in inventory for the NNL East. I probably should not have made more then one mold this time, huh! LOL!
|
|
Deleted
Deleted Member
Posts: 0
|
Post by Deleted on May 18, 2011 17:08:09 GMT -5
just ordered mine, who knows how long it will sit. lol Im liking this build
|
|
|
|
Post by tjfenske on May 20, 2011 16:56:51 GMT -5
Very Nice ! I Love the "rubber" balls just as they are. Look like they would be a snug fit in the tubes. Overall cool stuff  |
|
|
|
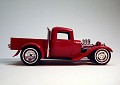
Post by lo51merc on May 13, 2021 18:24:27 GMT -5
Ed asked me a few weeks ago if I had ever finished this truck. Nope, it has been in a showcase since then, almost finished less paint. I painted the cab & bed a week ago and the interior is almost finished now as well. This time it will be finished! Pictures later today.
Gary
|
|
|
|
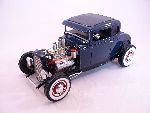
Post by lo51merc on May 13, 2021 19:31:13 GMT -5
|
|
|
|
Post by Duane on May 13, 2021 20:39:50 GMT -5
Gary; your Willys is perfect, and the
color of the paint work tops it off
you slapped it outta the park !
|
|
|
|
Post by chepp on May 13, 2021 22:04:51 GMT -5
That looks sharp!
|
|
|
|
Post by spex84 on May 13, 2021 22:18:30 GMT -5
Wow! Sharp indeed!
The stacks are the perfect punctuation mark on this build.
How did you flare the ends of the tubing?
|
|
|
|
Post by lo51merc on Jun 4, 2021 8:50:03 GMT -5
So it's been 10 plus years and my old brain isn't what it used to be. But, as near as I can recall, I routed out the ends of the tubes with a pretty narrow scalpel blade until it was very thin at the very tip. Then using a solid sharp "tool" like a nail or ?, I just kept rotating the tube to achieve the flare. You just have to watch for a break through as you rotate. The aluminum tubing will only give so much.
Sorry for taking so long to reply but my time has been very limited these days.
Gary
|
|