|
|
Post by Mr409 on Feb 8, 2019 16:14:07 GMT -5
Thanks for the kind words! They sure keep me motivated. I thought about adding only a lip to the hood at first, but the more I thought about it, I decided to do the job the other way. The rear end is going to be a challenge for sure. Otherwise it should be OK, but the tail lights are going to be tricky. As far as I know, no one ever made them in 1/24 or 1/25 scale, so I have to scratchbuild them. During the last couple of days I worked on the rear quarter panels. The wheel openings on the 1:1 car were actually taken from stock '55 Chevy front fenders. Luckily I found a Revell Pro Sportsman '55 Chevy body that I have no use for. It seemed to have stock front wheel openings, so I fitted them to this body. The finished rear wheel openings are combination of the Pro Sportsman front fenders and stock '55 rear fenders. All gaps that my motor tool left while doing the cuts, were filled with pieces of junk styrene.  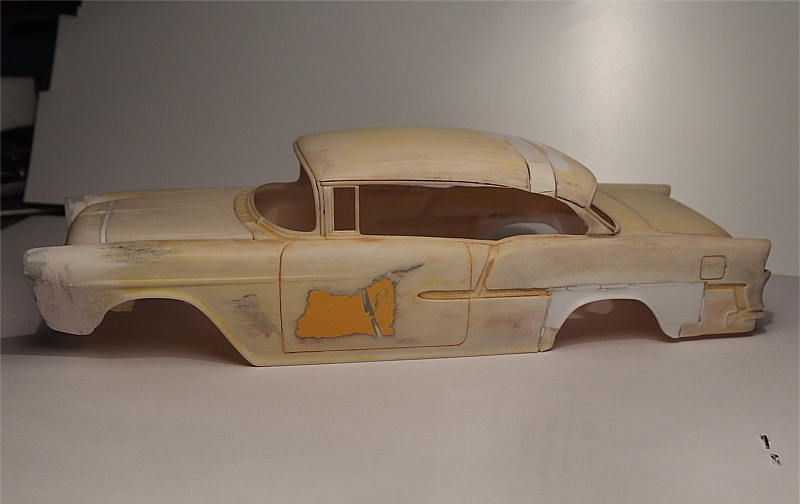  On co-driver's side I also filled the slots for stock side trim. Need to do the same on driver's side as well. 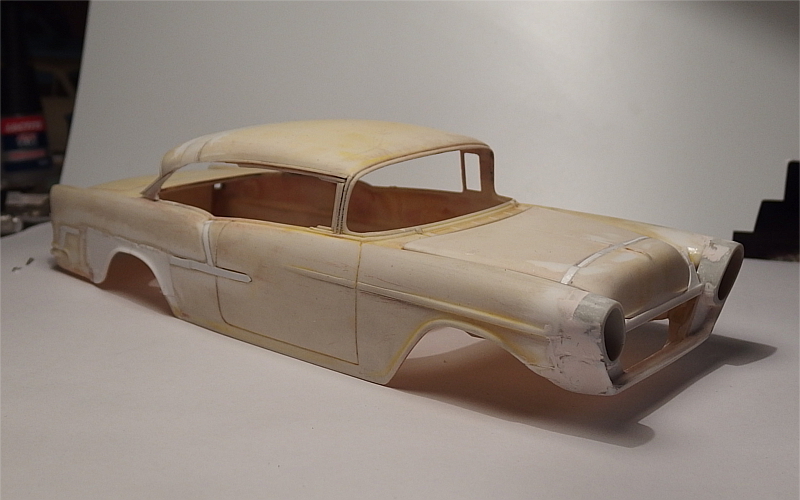 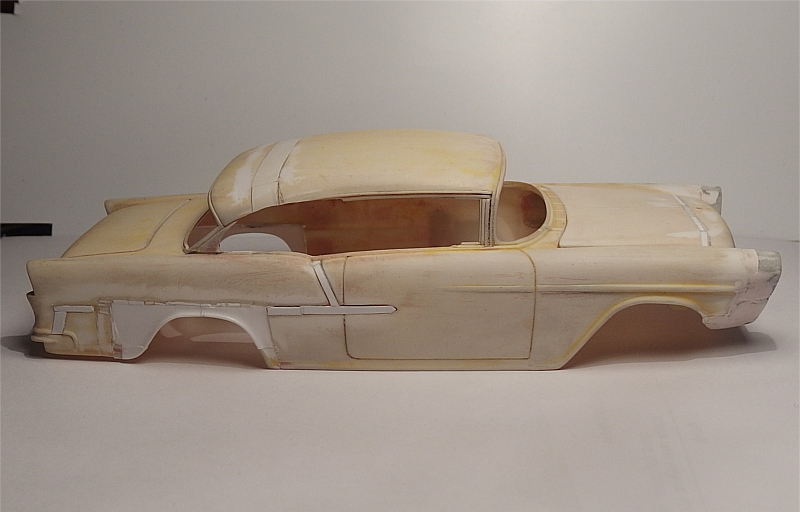 I guess I'm not going to get much done during the weekend. I just came back from old Cable Factory at Helsinki. We put together a "Kustom Kulture In Scale" table for showing the hobby for everyone and building models, and a couple of display cabinets for finished models for The Kustom Kulture Show that's happening on the weekend. |
|
|
|
Post by spex84 on Feb 8, 2019 16:39:14 GMT -5
Awesome, it's coming together...the new rear wheel openings look good! Handy you had the Pro Sportsman body kicking around to give up its arches.
When I finally get around to building a custom '55 I think it will be a mild custom...but I'm sort of itching to do a full kustom version too!
|
|
|
|
Post by Zed on Feb 8, 2019 18:11:49 GMT -5
glad i found that project ! something very cool is coming ;-)
|
|
|
|
Post by Mr409 on Apr 14, 2021 5:51:50 GMT -5
Thanks guys! It has been another long break but now this thing is back on the bench! The top part of doors is different in Hardtop and Sedan bodies. On Hardtop the door slopes down pretty early while on a Sedan version it doesn't. As this body was originally a Hardtop, I had to fix that too. Luckily the same Pro Sportsman body came to the rescue (where I took the rear quarter panels from) as it is a Sedan. After a bit of cutting and slicing I had those parts glued to the Astorian body. Obviously I have to re-scribe the panel lines later on... 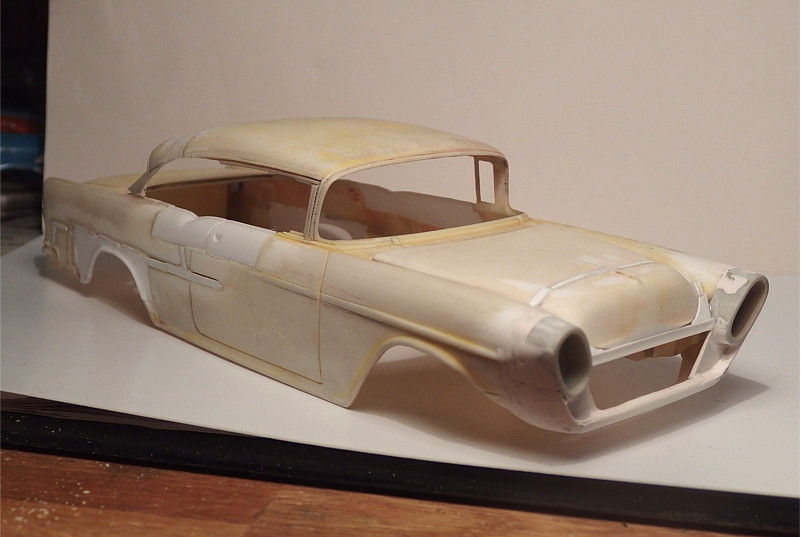 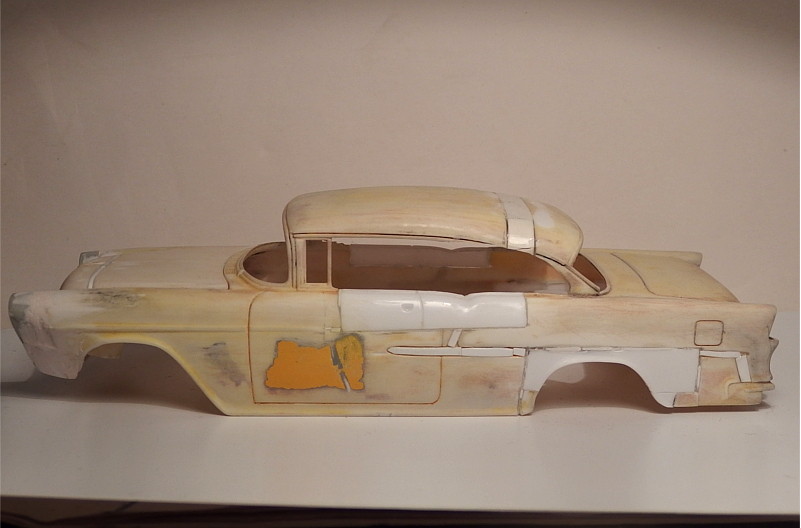 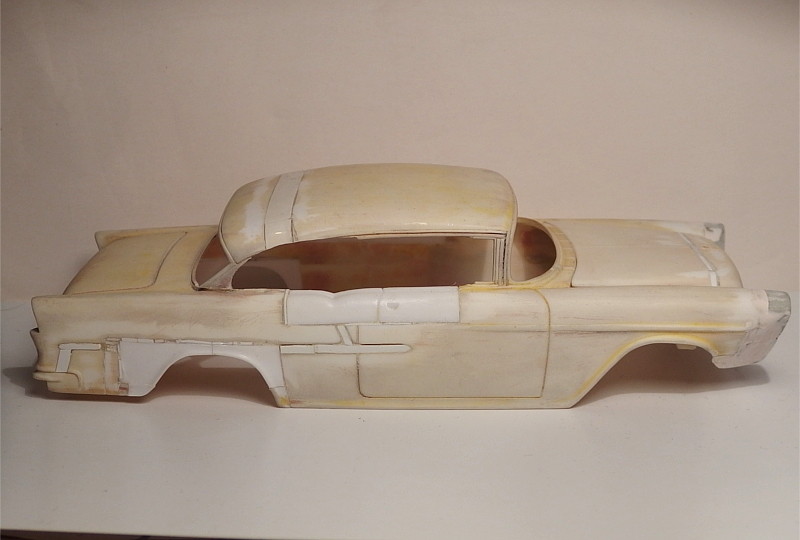 Then the next thing was the roof. I had modified the Hardtop roof earlier to look a bit like a Sedan roof, but now it didn't look good enough. Luckily I had this old Revell '56 Bel Air Sedan body laying around. The body was pretty much junk, one door missing, warped here and there and pretty rough overall. Plus, I had only the body and nothing else. 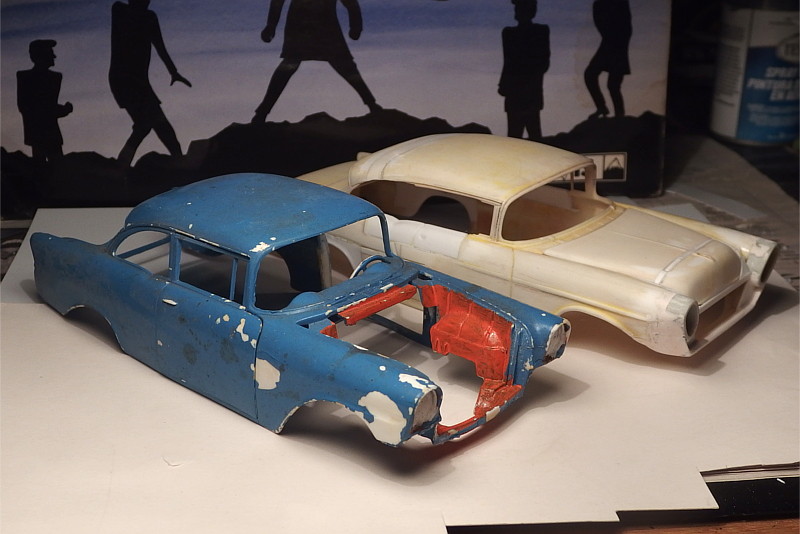 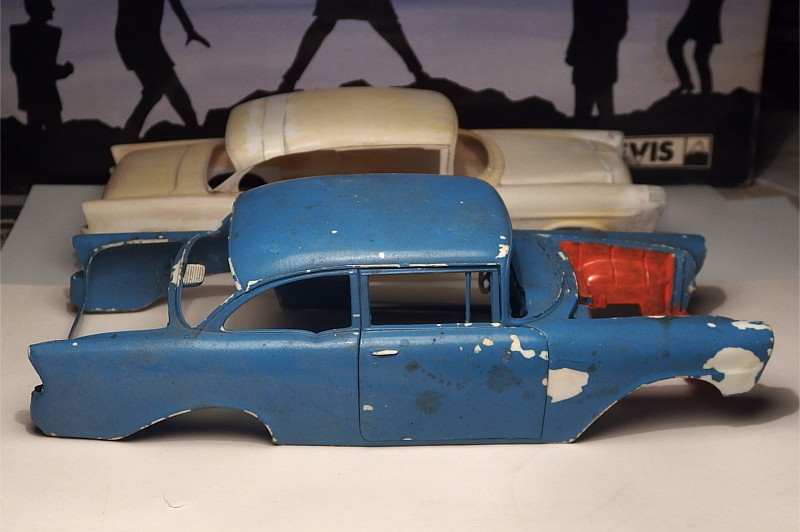 So I cut the rear section of the roof off... 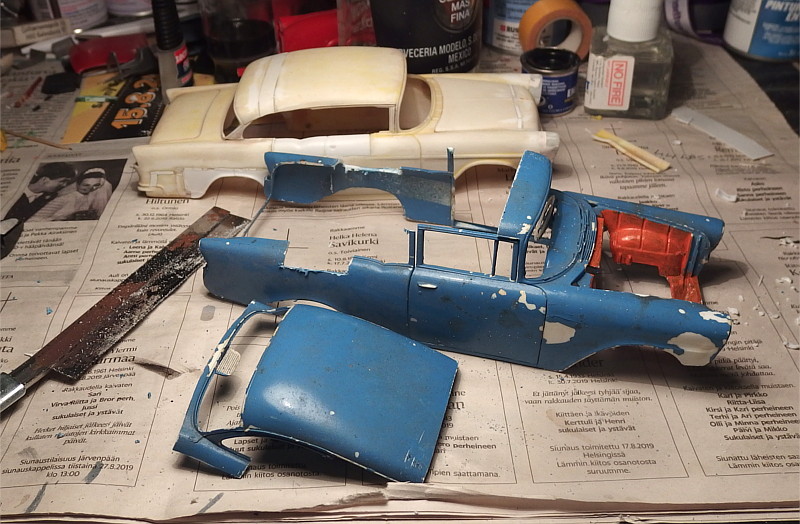 ...And test fitted on the Astorian body... 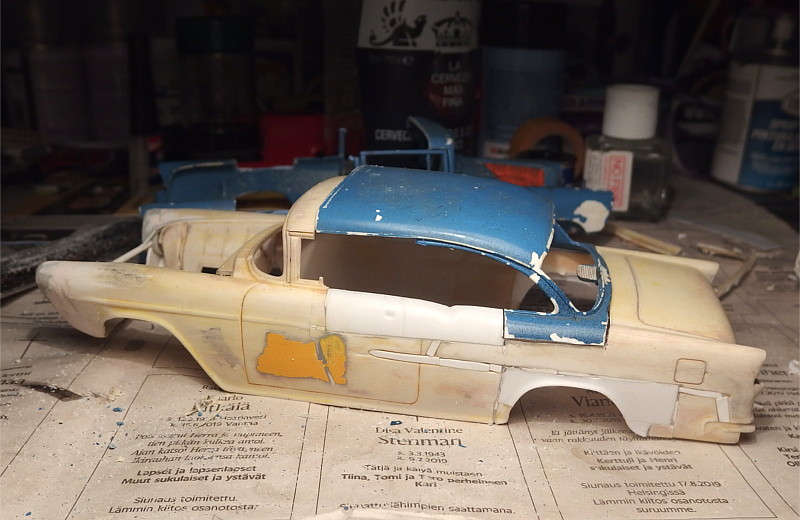 As you can see, some more work was required to make the Sedan roof fit properly. First it had to be chopped, which was done easily. The biggest job was to make the bottom ends of the C-pillars (remember, B-pillars are still missing in these pictures) fit properly on the body. But after some fitting I was able to get them on place properly. Then the roof was glued on and all gaps were filled with sheet styrene. It's still in rough stages, as is the rest of the body, but my plan is to get the basic shapes done before I start prepping the body for primer. 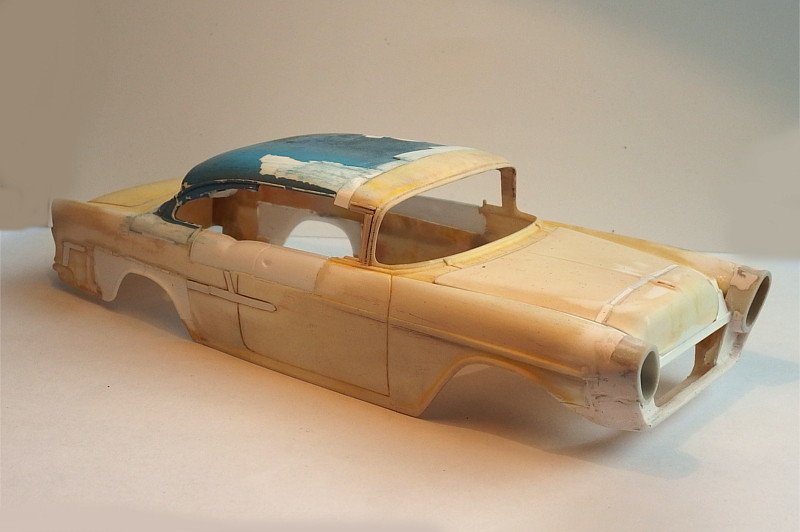 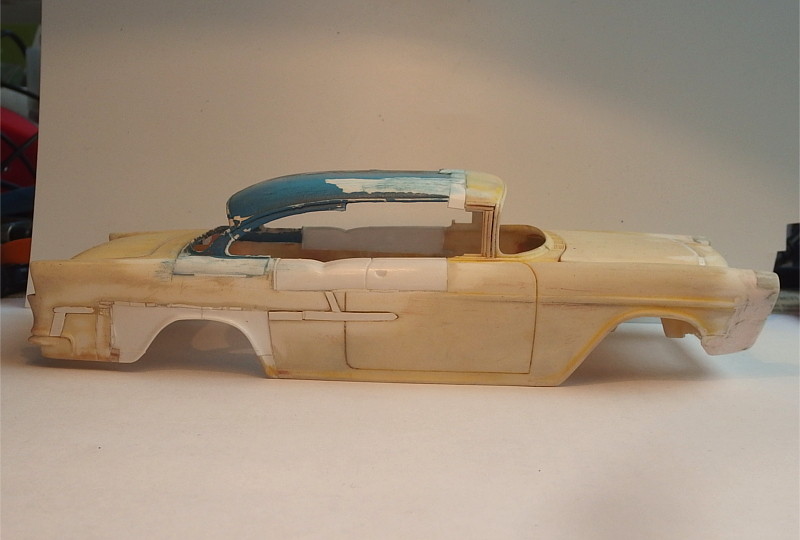 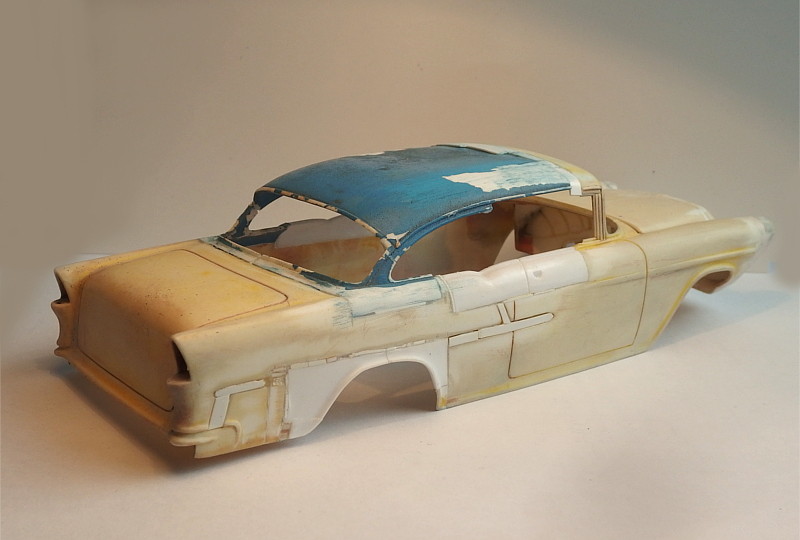  The B-pillars and door window frames were still missing. I already made one to co-drivers's side from sheet styrene. Nothing special, the door gap was done with Trumpeter's Panel Line Scriber tool, otherwise it was just cut to shape and glued on place. Driver's side is up next, but that's a bit trickier as the roof is a bit warped. I will need to fix that first... Stay tuned. 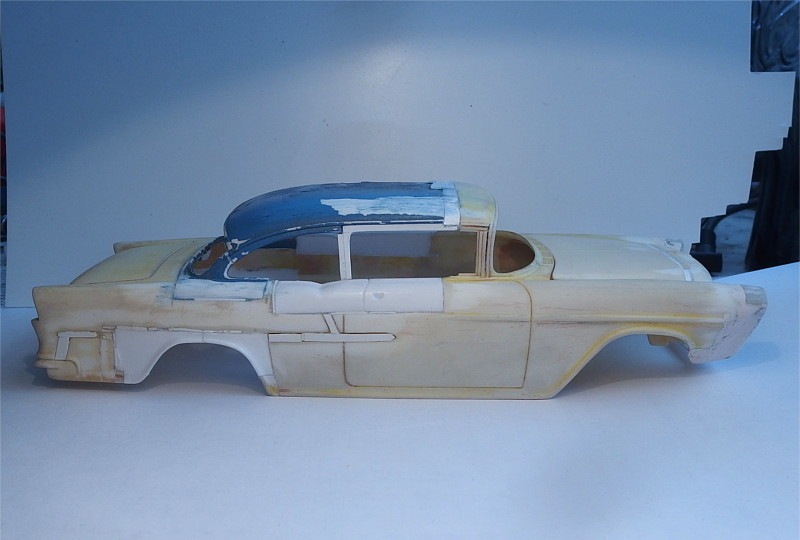 |
|
|
|
Post by Mr. Metallic on Apr 14, 2021 6:49:13 GMT -5
Welcome back Niko
Good to see this one back. I understand your desire to get as much bodywork done as possible before primer, personally I would have trouble judging lines and such with all those different colors going on and would shoot it with a little primer myself. But if you trust your method, run with it
|
|
|
|
Post by spex84 on Apr 14, 2021 10:21:26 GMT -5
Wow, that's some impressive Frankenstein-ing! It's looking good so far. I love the canted quad headlight pods. It looks like the B pillar has more rearward rake than the 1:1 though? 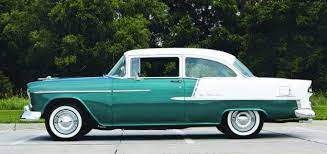 |
|
|
|
Post by Mr409 on Apr 15, 2021 8:03:26 GMT -5
Thanks guys! Craig, you're right on that. Having the body in multiple colors makes things a bit trickier. When I get the rear end roughly shaped like the 1:1 version, I think I'll smooth out the biggest flaws on the body with putty and then shoot primer. Then there is a possibility to fix something if the body has some errors. Chris: Looking at the picture and comparing it to the actual body made me notice that B-pillar issue too. It's not nearly as bad in real life but for some reason it looks a bit goofy on the picture. Well, that should be an easy fix.  |
|
|
|
Post by Mr409 on Apr 19, 2021 15:49:08 GMT -5
The warped roof was fixed pretty easily. I cut the warped area off and glued it back on to a bit different position and sanded to correct shape where needed. Now it's pretty good, and the rest will be smoothed out with body filler. I also made the B-pillar and door window frame for driver's side. It's also just sheet styrene cut and sanded to shape with the door panel line done with Trumpeter's Panel Line Scriber tool. While I was doing this, I also fixed the co-driver's side B-pillar and it is much better now. 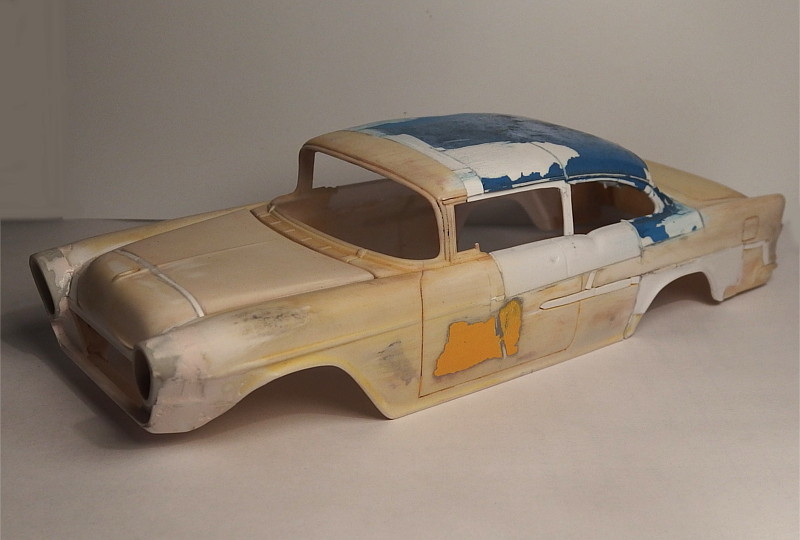   Now that the roof is good enough for now, I think next up is modifying the rear end to match the real car. |
|
|
|
Post by chepp on Apr 19, 2021 16:25:28 GMT -5
It's great to see this back on the bench. The B-pillars look fine now.
|
|
|
|
Post by spex84 on Apr 19, 2021 22:09:52 GMT -5
Yep, I like the new B-pillars! Can't wait to see you tackle the rear end styling...the Astorian gets pretty funky out back.
|
|
|
|
Post by Duane on Apr 19, 2021 23:28:06 GMT -5
Niko; you're doing some beautiful work
i'm going to sit here with some popcorn,
and watch your '55 come together; i've
also bookmarked this page to watch !
|
|
|
|
Post by skip on Apr 20, 2021 7:40:44 GMT -5
Wow, Niko, That's looking Awesome. You are obviously the master of "Slice & Dice" really takes some skills to whack two separate bodies apart and come up with a better looking body afterwards! I've seen others attempt similar kinds of body modification, but ended up looking like a complete afterthought of plastic and mostly putty!
Thanks for sharing your cool skills!
|
|
|
|
Post by Mr409 on Apr 23, 2021 3:23:12 GMT -5
Thanks for the kind words everyone! They sure help me to stay motivated with this one. I have been doing several body modifications in the past, but this is the first time when I'm doing all of this in one body. It's slow progress, but it's fun to do. Anyway, I'm hoping to get the body modifications done soon so I can move on to the engine bay and interior. Especially the interior will need major modifying/scratchbuilding to match the 1:1 car. |
|
|
|
Post by 41chevy on Apr 23, 2021 11:09:41 GMT -5
Beautiful work! You have given me the incentive to take out my 12 year Aztec project again. Thanks for the inspiration with the Astoria build. Paul
|
|
|
|
Post by SteveMilberry on Apr 25, 2021 12:09:09 GMT -5
Looking great so far Nico.
Any ideas on what you're gonna use for the '63 Olds 98 tail lights?
When I think of building this car, I figure the easiest way is to make a set from scratch with sheet plastic and casting copies of them in clear resin.
|
|


