|
|
Post by chepp on Oct 20, 2017 13:57:54 GMT -5
Thanks for the nice comments. Here's the latest on body mods using parts from the AMT Prestige kit. 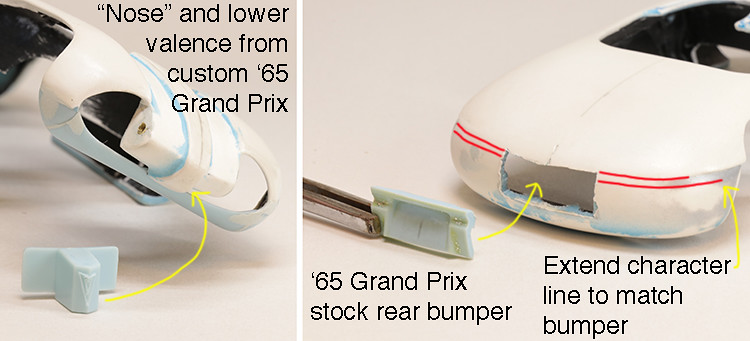 Feel free to point out problems, make suggestions, etc. I have a thick skin. |
|
|
|
Post by chepp on Nov 5, 2017 0:56:39 GMT -5
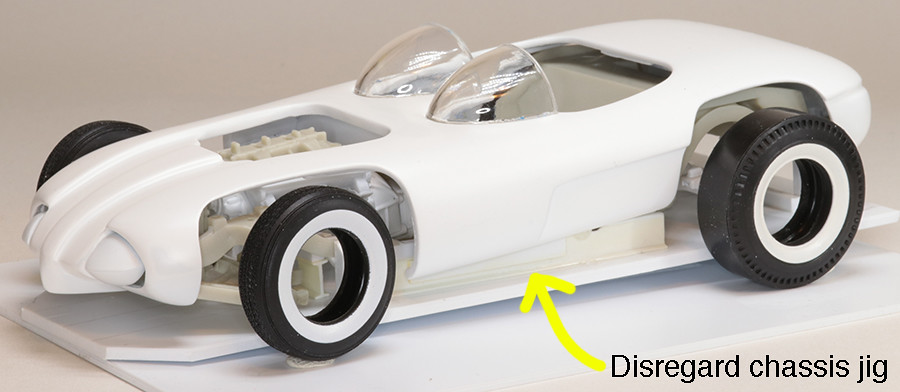
 It's starting to look like a car. I'll show it in this unfinished state at the model show on Sun. Nov. 5 at the NHRA Motorsports Museum in Pomona. Disregard that plate under the car — it's the jig for chassis. To simulate the ride height I raised the jig at the rear about 1/4" but I think that I raised it too high. I don't like this "stink bug" look! |
|
|
|
Post by spex84 on Nov 5, 2017 11:42:40 GMT -5
Looking great Charley!
The frame jig is a good idea; I could really use one of those for my various projects.
|
|
|
|
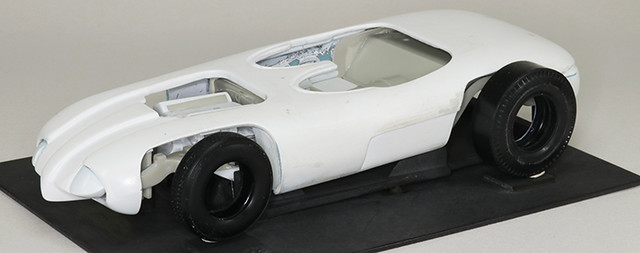
Post by chepp on Nov 5, 2017 11:47:41 GMT -5
 Here's a better shot of how it should look — no more "stink bug" stance. |
|
|
|
Post by randfink on Nov 5, 2017 13:40:11 GMT -5
I love this thing! With the petite body and exposed engine, it's taking on an Ed Roth flavor.
|
|
|
|
Post by lo51merc on Nov 5, 2017 17:14:48 GMT -5
Yeah huh!
|
|
|
|
Post by chepp on Mar 30, 2018 17:00:44 GMT -5
Honest! I'm going to get back to working (and posting) on this. Thanks for all the comments!
|
|
BUCKY
Hoodlum
 I can't find my glue!!!
Posts: 199
|
Post by BUCKY on Mar 30, 2018 17:25:00 GMT -5
Just now saw this! Very interesting! I'll be watching!
|
|
|
|
Post by lo51merc on Mar 30, 2018 18:14:36 GMT -5
I'm still here too and following with great interest.
Gary
|
|
|
|
Post by chepp on Apr 16, 2018 22:36:30 GMT -5
Now I'm on to the dull, boring part of the build. 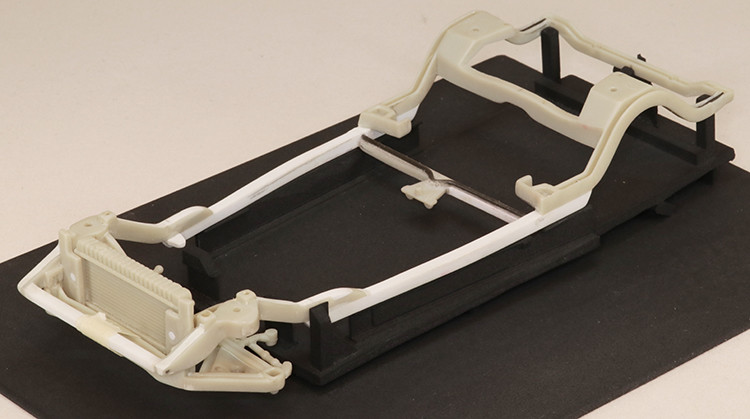 The chassis stand has been minimized and painted dark gray. 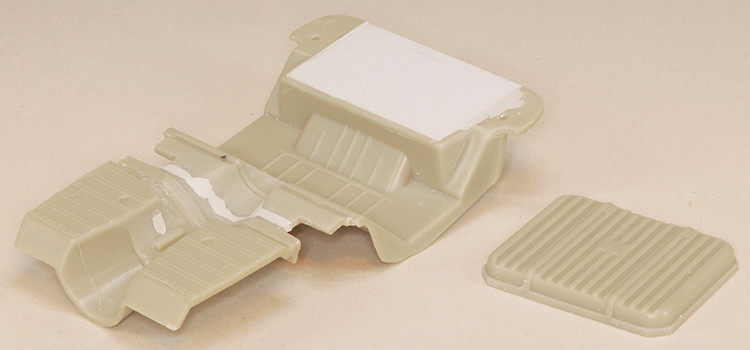 Sheet plastic and putty are being added to the floor pan. There's much more to come. The gas tank was cut out of the '61 Ventura kit. Now it will need to be sectioned to fit into a smaller space. 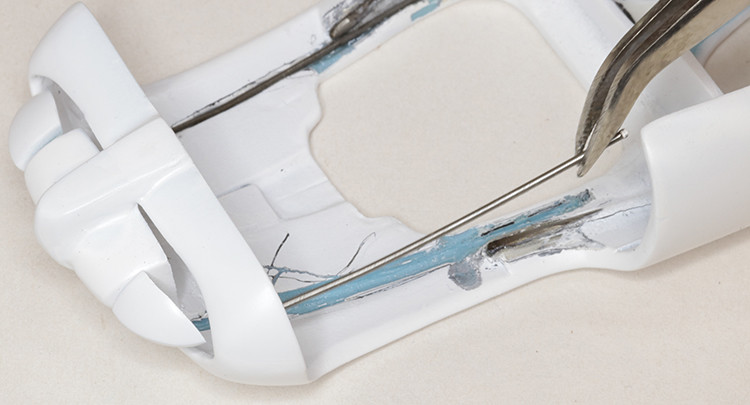 Even though steel wire was added to the underside of the body it's still too flexible so more is being added. |
|
|
|
Post by spex84 on Apr 21, 2018 18:48:07 GMT -5
Glad to see this one again--that chassis jig is killer!
|
|
|
|
Post by chepp on May 13, 2018 16:22:02 GMT -5
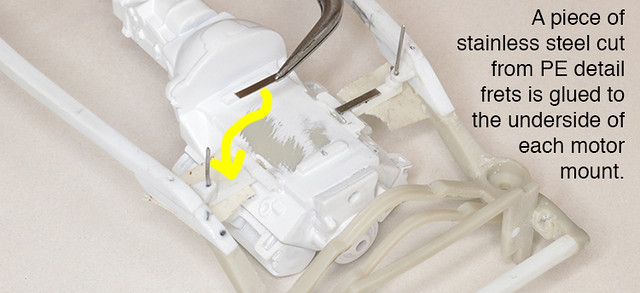
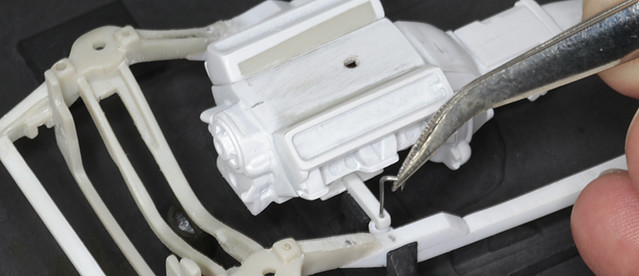
Outwardly it looks like I haven't done anything but I've done a lot on the floorpan and starting to make panels inside the body line up to the pan. This is my umpteenth try at scratchbuilding motor mounts. It's been difficult to get the engine to be in the right x, y and z planes all at once. The "Z" joint attaching the front frame rails was redone, too.
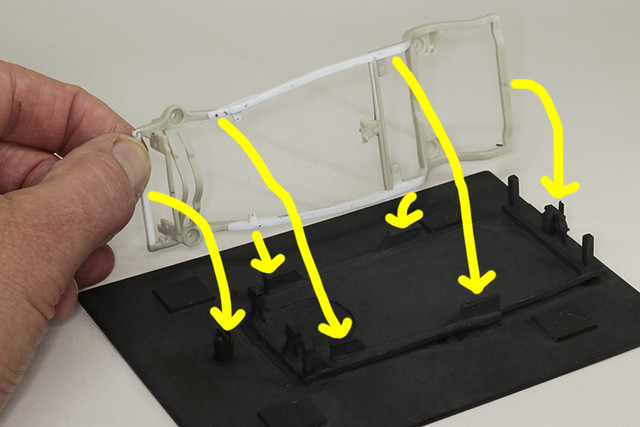
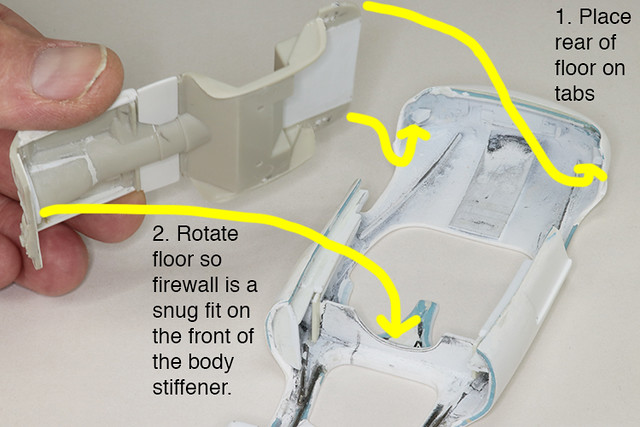
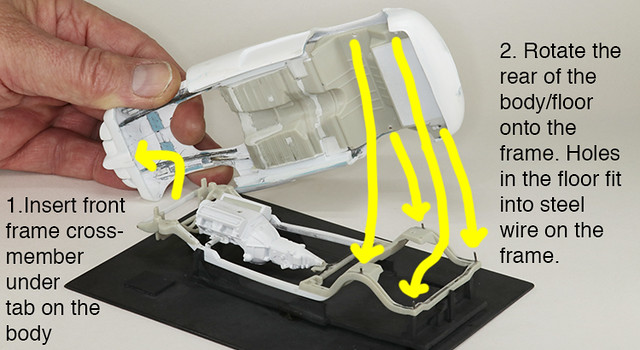
Here's how the major parts go together:
The arrows show the contact points between the frame and the stand.
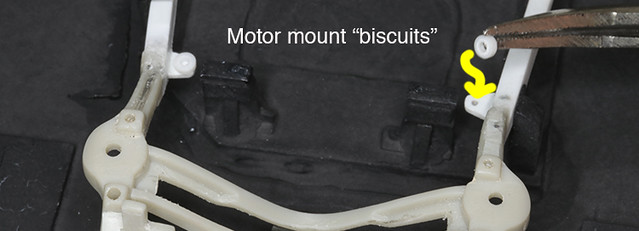
Styrene tubes cut down to simulate rubber "biscuits" are put in place. For final assembly they'll be painted rubber color.
For dry fitting, bent steel wire lines up the parts. Not shown is a piece of tape to hold them in place when the model is turned over.
Inner panels will fill in gaps between the body and the floor pan. There's much more to be done.
It's essential to be able to assemble/disassemble the model repeatedly with the parts always fitting in exactly the same relationship.
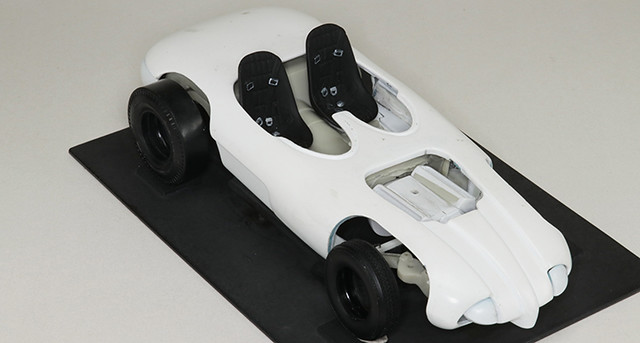
Since this body is kinda small, the seats look kinda big. These are the race ones from the Revell Roth Beatnik Bandit kit. Smaller seats would look better.
The inner body work has been really time consuming with little to show for it. I'm going to take a break from this project for awhile.
Comments (positive and negative) and suggestions are welcome.
|
|
|
|
Post by jbwelda on May 13, 2018 20:12:28 GMT -5
That's really looking great, and looks like its coming along well. I understand the tedium of doing infrastructure, but when you do it right like you are, it makes the later stages that much easier. I would encourage you to only take a short break, if you take a break at all, and I bet things accelerate from this point. Really kool koncept and your execution is pretty outstanding!
Edit to add: for the seats you might think about filing those down a bit heightwise, or maybe check into the AMT Corvair, it has some squarish racing seats that are low profile and might be easier to modify if you need to.
jb
|
|
|
|
Post by chepp on May 13, 2018 22:42:40 GMT -5
That's really looking great, and looks like its coming along well. I understand the tedium of doing infrastructure, but when you do it right like you are, it makes the later stages that much easier. I would encourage you to only take a short break, if you take a break at all, and I bet things accelerate from this point. Really kool koncept and your execution is pretty outstanding! Edit to add: for the seats you might think about filing those down a bit heightwise, or maybe check into the AMT Corvair, it has some squarish racing seats that are low profile and might be easier to modify if you need to. jb Thanks for the encouragement. I'll be back on it soon. I have an AMT '69 Corvair — that sounds like a good seat source. I thought that ones from an AMT '53 Corvette would be usable but they're too large. |
|
|
|
Post by krassandbernie on May 14, 2018 0:24:41 GMT -5
I love the craftsmanship you have put into this project! I also always loved the Monogram Blue Beetle bucket seats. They were modeled after 1:1 racing bucket seats from the day (real early '60's); and Dean Lowe even had a pair in his 1:1 '29 roadster pickup; so they would be period correct for your build! Ironically, the reissued version called the "Blue Bandito" has a re-tooled version of these same seats; but for some reason they are slightly smaller than the original issue bucket seats that carried over for one or two more issues after the first. Perhaps these might be a way to go.
|
|