|
|
Post by spex84 on Oct 19, 2018 2:06:54 GMT -5
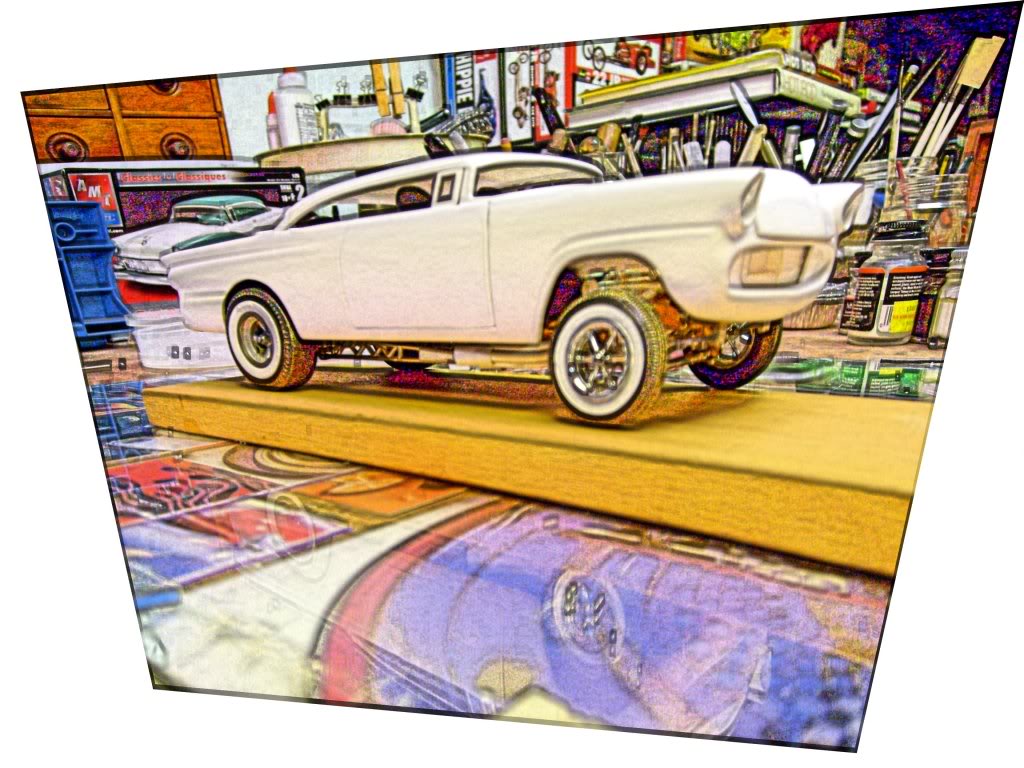
My computer had some issues last week so I blew it apart and cleaned it, put some fresh RAM in. Here's hoping it continues with a fresh bill of health! A little work has been done on the bucket: -new rear crossmember installed with upper shock mounts -filled holes and damage in frame from re-locating mounting points -added engine mounts
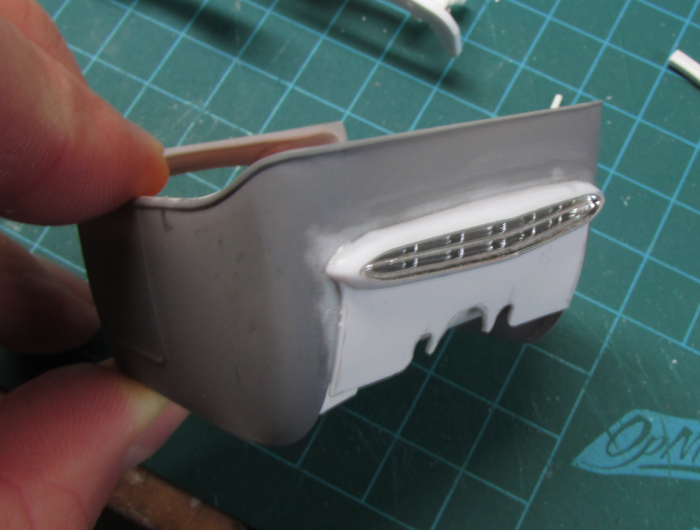
-built a gas tank. Assuming a generous 8 MPG from a blown 427, this car will be able to travel...about 25 miles. Lol!! This is in line with the inspiration for this build, Don Kendall's T bucket, which apparently ran a 4 gallon tank until he added an extra Moon tank. -had a ton of trouble finding a taillight solution. All the usual options seemed boring. Kendall's T had a cool full-width molded sequential turn-signal/brake light bar. I dug out a spare Revell '49 Mercury chrome tree with the '54 Pontiac grille bar. It looked the part, so now it's molded on. The thin panel laminated to the back of the body hides the holes from fitting it to the previous frame. -the step in the frame behind the middle crossmember has been moved back since these photos, so the battery can tuck against the frame, away from the driveshaft by a couple inches. -I didn't want the fuel filler to be in the interior floor, so it will run up the front passenger's side to a port in the dashboard near the corner of the windshield. Less chance of spilling gas inside the car that way!
  |
|
|
|
Post by constructionbob on Oct 19, 2018 4:39:25 GMT -5
Love it! Great work.
|
|
|
|
Post by Murphy on Oct 19, 2018 6:37:52 GMT -5
Wow...the clay trick is genius! I really like your tail light solution-
|
|
|
|
Post by krassandbernie on Oct 19, 2018 10:09:50 GMT -5
Pretty cool! There's a ton of work going into that frame alone! You could probably just finish the frame and running gear.........and have a "Rodder's Journal" photo session! LOL!
|
|
|
|
Post by spex84 on Oct 21, 2018 0:33:29 GMT -5
Thanks guys! I had a mental "to do" list for this build that was about 14 items long. When I transferred it to paper, it ballooned to 35 items. Oh crap! So today I knocked 17 of those off the list. Mostly little things, including:
-built a steering arm, drag link, and pitman arm. I cheated and mounted the steering arm to the bottom of the spindle, unlike most cars which mount it to the top, probably because of clearance issues with the drag link. I can't do that because the headers are in the way. There's a reason most T-bucket headers stick 90 degrees out to the sides... -cleaned up the steering wheel and column, fabbed a column drop/support. -cut the center of the dash out, replaced with a printed piece made in photoshop. I decided not to fiddle around trying to make 3D bezels. Gauge lenses made from Bondic give them some life. The little indent on the passenger's side is where a Revell '32 gas cap will mount, suggesting a filler tube behind the dash that runs down the firewall to the gas tank. -front friction shocks fabricated and located 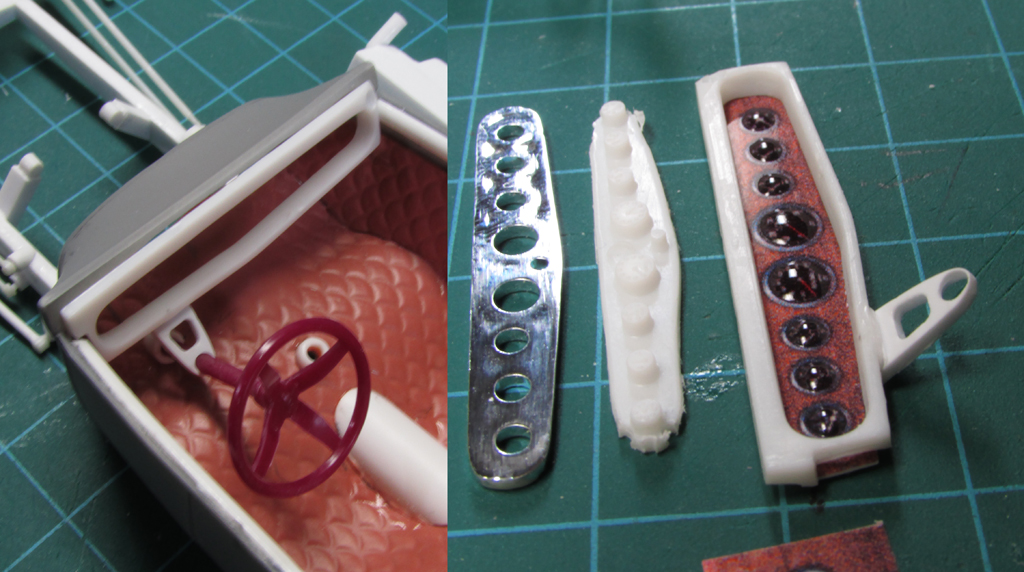 |
|
|
|
Post by krassandbernie on Oct 21, 2018 10:32:54 GMT -5
Very 'tasty' Chris! I love the work you did on the dash! Can you provide us with some better shots of it perhaps? When I've used clear epoxy in the past to make gauge lenses it always yellowed on me over time; and it was never all that clear/transparent; so you couldn't see the gauges underneath as well as hoped for.
|
|
|
|
Post by Dennis on Oct 21, 2018 11:13:16 GMT -5
That dash looks tits!
|
|
|
|
Post by spex84 on Oct 21, 2018 11:16:16 GMT -5
Ed--the Bondic trick would work very well for covering gauge decals. While epoxy yellows, Bondic seems to stay clear. It also doesn't make the ink run. The gauges I printed are not great; muddier than I'd like but the allure of printing them all out in perfect alignment with a woodgrain backing was too much to resist. Way easier than trying to piece together decals, make bezel rings, and arrange them individually by hand. The bondic lenses don't really help with making the gauges visible, but the little hilight the clear dome provides is perhaps more valuable in terms of making them look realistic at a glance. Between Bondic lenses and Molotow chrome, I think you could conceivably approach "the perfect Tachometer" as described in that other thread  *edit* Thanks Dennis! Funny thing is, with the reclining seat position in this car, I doubt the driver could even SEE any of the gauges. I thought about putting a tach on the column or mounted in the floor...I guess that's still an option now that the dashboard is hollowed out. |
|
|
|
Post by krassandbernie on Oct 21, 2018 12:30:06 GMT -5
I think mounting the tach UNDERNEATH the steering column would be cool.......and humorous! LOL! I'll have to look into the Bondic lenses. For some reason I was thinking that Bondic was a trademark name for some type of glue.
|
|
|
|
Post by spex84 on Oct 21, 2018 13:38:10 GMT -5
Bondic IS a type of glue, haha...it's a UV-setting adhesive, comes in a small pen with a UV light on the other end. I don't use it as an adhesive (much)...but it can be used to duplicate very tiny parts (or scripts), or make lenses. Simply apply like a blob of epoxy, shine the light on it for 10-20 seconds, and it's cured. I've had good results applying it to rubber molds of headlight lenses (the older kind with the engraving on the outside) to make spares.
|
|
|
|
Post by lo51merc on Oct 21, 2018 13:56:09 GMT -5
Well that trick with the Bondic is interesting. Something like the dentist does when filling teeth. And that dash is so cool. I showed that picture this morning so she could see the details of the gauges. I love that woodgrain.
Gary
|
|
|
|
Post by krassandbernie on Oct 21, 2018 16:48:28 GMT -5
Bondic IS a type of glue, haha...it's a UV-setting adhesive, comes in a small pen with a UV light on the other end. I don't use it as an adhesive (much)...but it can be used to duplicate very tiny parts (or scripts), or make lenses. Simply apply like a blob of epoxy, shine the light on it for 10-20 seconds, and it's cured. I've had good results applying it to rubber molds of headlight lenses (the older kind with the engraving on the outside) to make spares. My memory was quickly jogged when I looked it up! LOL! |
|
|
|
Post by spex84 on Jan 13, 2019 2:22:30 GMT -5
Funny reading my last update, RE: computer health. If only I'd known it was going to die on me a couple months later! *facepalm*
Well sadly I won't be able to finish this by the deadline...but today I (finally!) got some solid bench time and made some progress. It doesn't look like much, but stuff got done: -tweaked roof so it fits with less of a gap. The corners employ magnets that attach to little wire hoops installed in the body. It...sorta almost worked. Not very secure. Lol. -fixed holes in windshield frame and cowl from my misguided attempt to wire and pin the two together--instead those holes got filled with Bondic and I made a little tab across the length of the windshield's base that will allow it to be glued to the dash/cowl. It's an Outlaw windshield, inverted and trimmed to hide fact that it's upside down! -the parts I scored in August furnished a '67 Bonneville blower snout (extended) and a cool MPC back cover plate. I added a styrene shim to the manifold to raise the blower and make more room for the distributor and wiring. -modified a Revell parts-pack 427 water pump and belts to fit; thinned the belts -Capped the open top of the blower casing,drilled it to accept the carbs. Identified the carbs (I think they're Holley 4150s), added little tubes that the 3D-printed Cal custom 40-40 wedge scoops will fit onto. -skinned the underside of the floor to hide the diamond texture, added body mounts. -used JB weld to blend the interior bolster into the body because the seam between the two was going to cause masking/painting problems. Now I can mask using the underside of the body reveal as a guide... -noticed the Slingster headers fit perfectly (not sure if they clear the steering, will have to check). Might use them instead... -scratchbuilt a coil -and other little fiddly things! 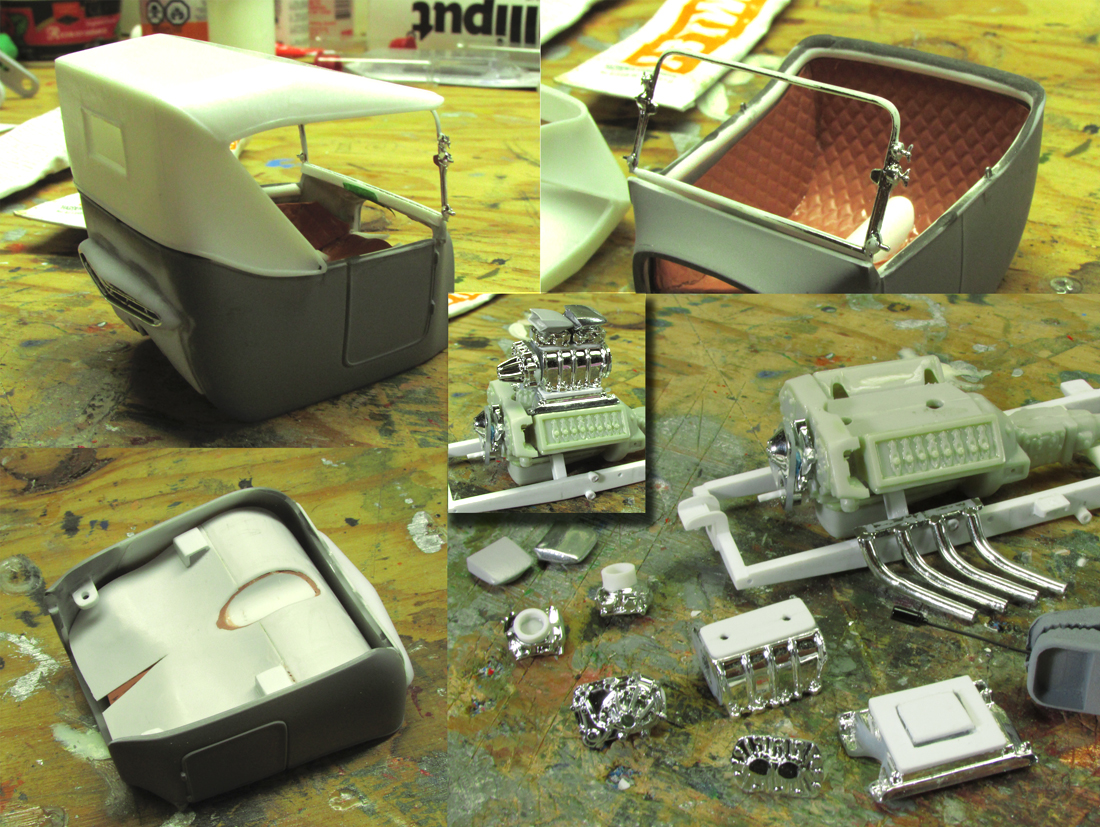 |
|
hardrock
Rebel
 Retired Military
Posts: 58
|
Post by hardrock on Jan 14, 2019 9:42:52 GMT -5
Very nice! It will be worth the wait
|
|
|
|
Post by chrischabre on Jan 22, 2019 22:01:40 GMT -5
Now thats how a T bucket should look!
|
|