|
|
Post by Mr. Metallic on Oct 15, 2019 9:08:08 GMT -5
I haven't had anything new on my bench lately. We were in full packing mode since we were in the final stages of buying a house, so i didn't want to get started on anything I was just going to have to put away, and who knew when I was going to get back to it. Well, a week before closing we found out there were extreme financial issues on the sellers end and we were not going to be allowed to purchase the house. To provide a distraction, I decided to dive headfirst into a new project. So here we have the Y-Block Special. As the name implies, it will be Y-block powered. I've been accumulating parts and notes and ideas for this build for months now. It's going to have flavors of old dirt track and lakes cars. I'm using the 3D printed Y-block dress up parts (including FI) from Maple Leaf Modelworks mounted to the engine out of the Revell 57 Fords. And the 32 Ford rpu body from Drag City Casting To start off I felt like trying my hand at making frame rails from scratch, as opposed to hacking and whacking kit parts like I usually do. If it doesn't work out I will toss them, but I wanted to give it a try. Nothing to lose except a little time and some Evergreen sheet.... 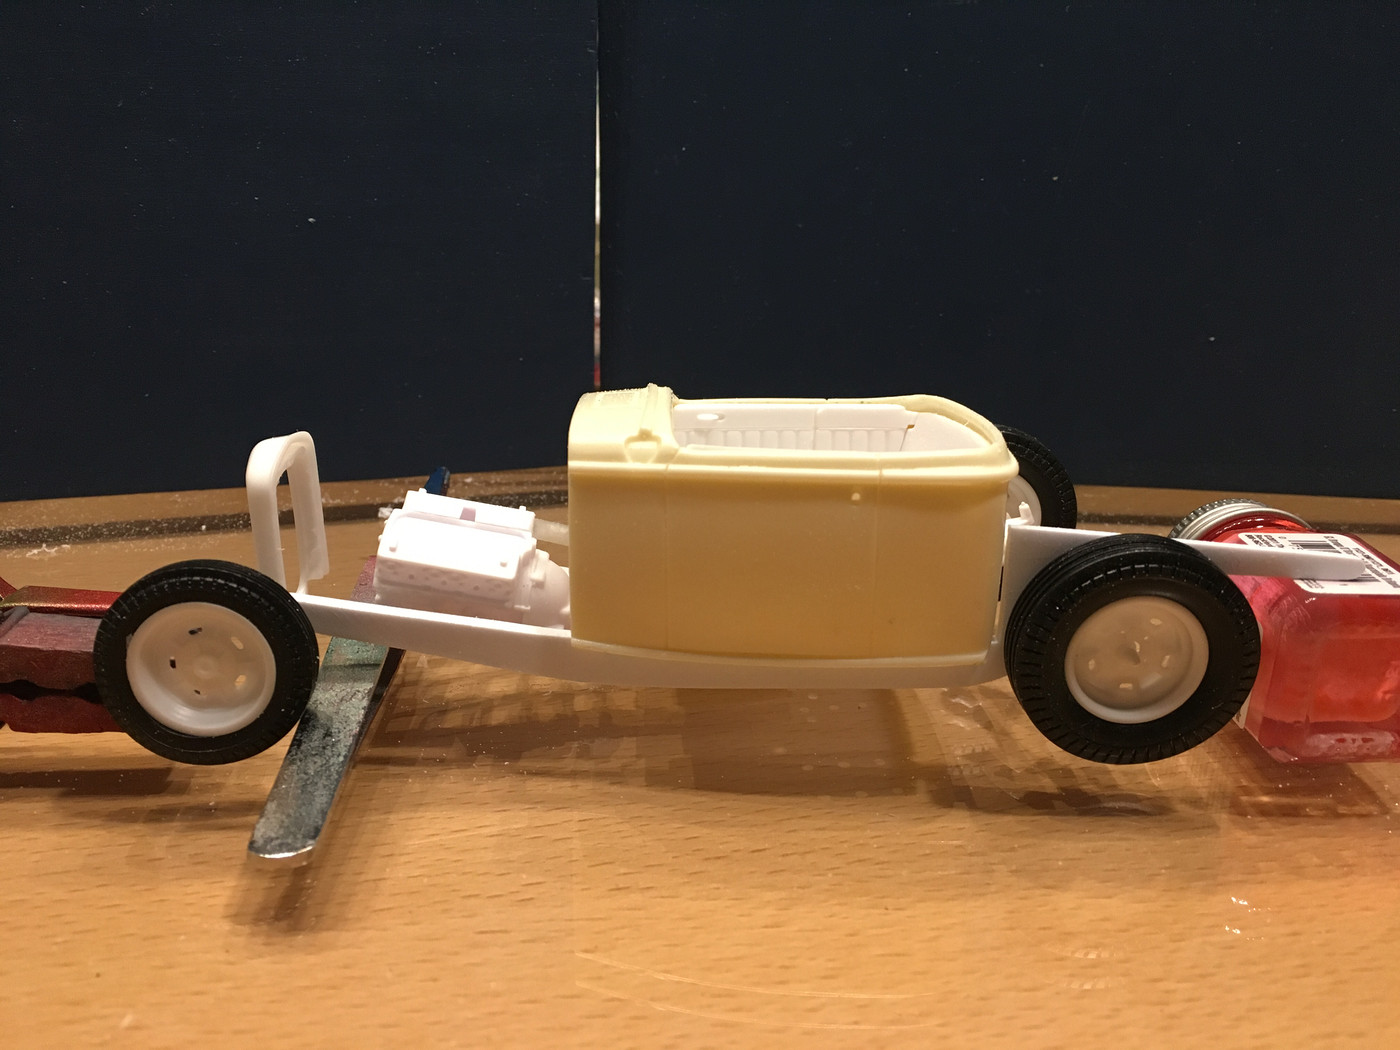 It might be hard to envision with all the clutter in the pic. But right now it's being held together with hopes and dreams, just to prove out the concept to myself. I'm pretty happy with the stance, so I think I will cut out a matching rail for the other side. The current rail needs some refinement, especially in the rear length, so please be kind to my first attempt at doing this. |
|
|
|
Post by Dennis on Oct 15, 2019 9:44:29 GMT -5
Great start! Get cutting on that right hand frame rail. So will this be like a modified, with no bed or body work behind the cab?
|
|
|
|
Post by Mr. Metallic on Oct 15, 2019 10:44:32 GMT -5
Great start! Get cutting on that right hand frame rail. So will this be like a modified, with no bed or body work behind the cab? I'm undecided yet, but leaning towards no bed, and possibly a gas tank nestled behind the cab(made from Bic lighter?) |
|
|
|
Post by Mr. Metallic on Oct 17, 2019 8:12:34 GMT -5
After carving the first frame rail I decided to make a new one to make it even better. Since I'm not sure what I'm doing behind the cab yet I left the area with extra material. Right now it mimics a small pickup bed. I have a couple ideas I'm going to mull over. But here is the new matching set of rails... 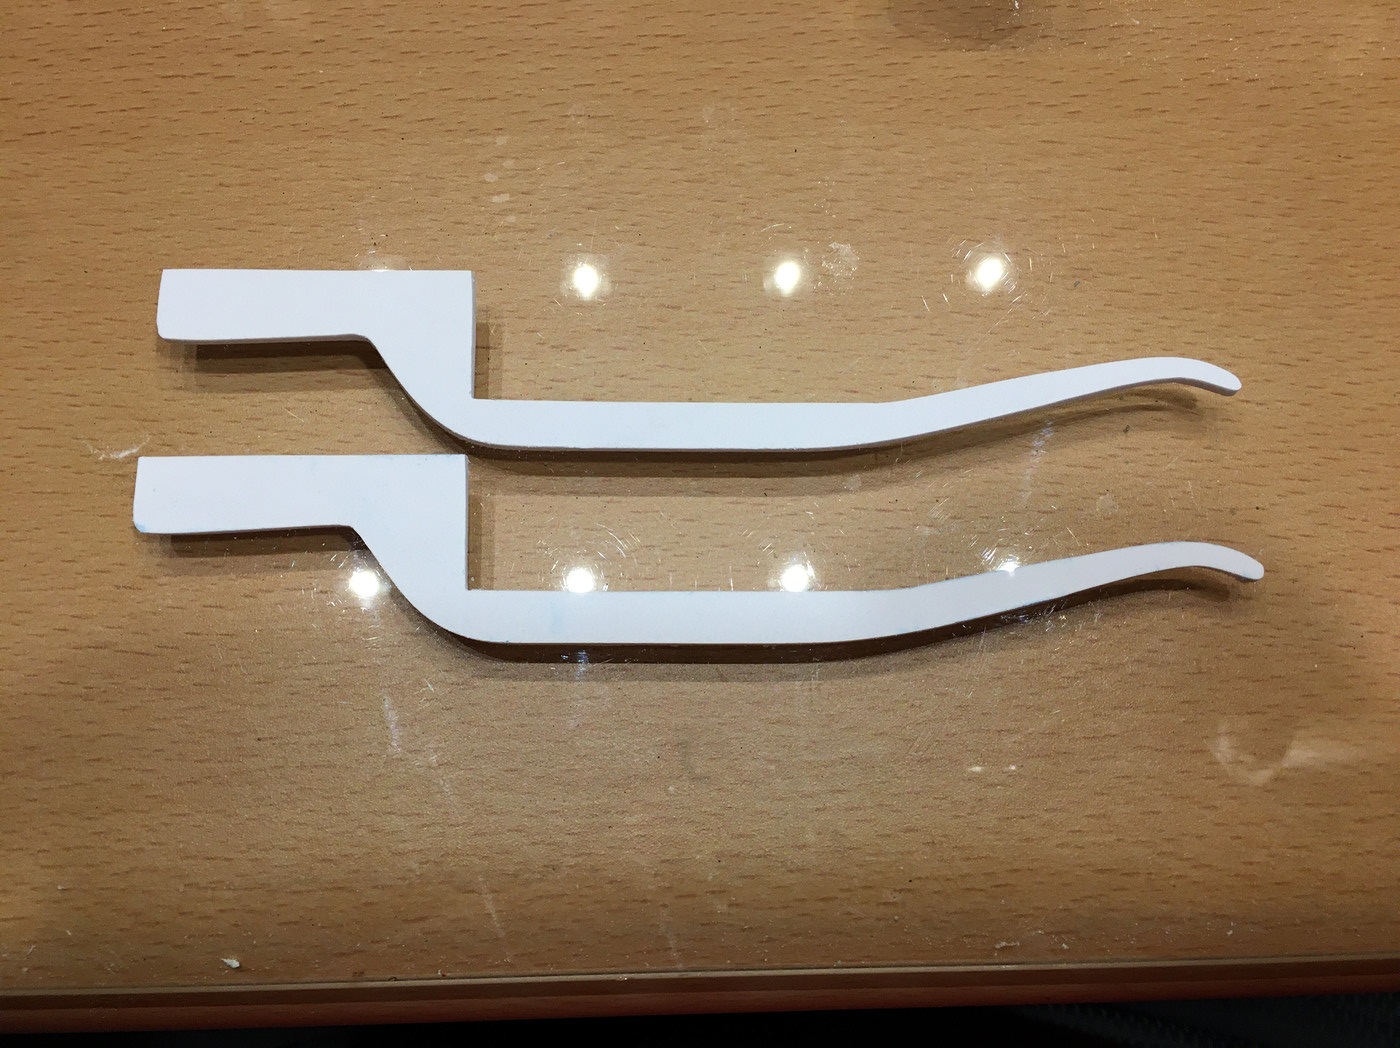 And here it is after I sectioned the interior to channel the body down over the frame. i also pulled out a 3D printed dropped I beam axle with steerable ends I got from Shapeways and modified the wheels to fit. 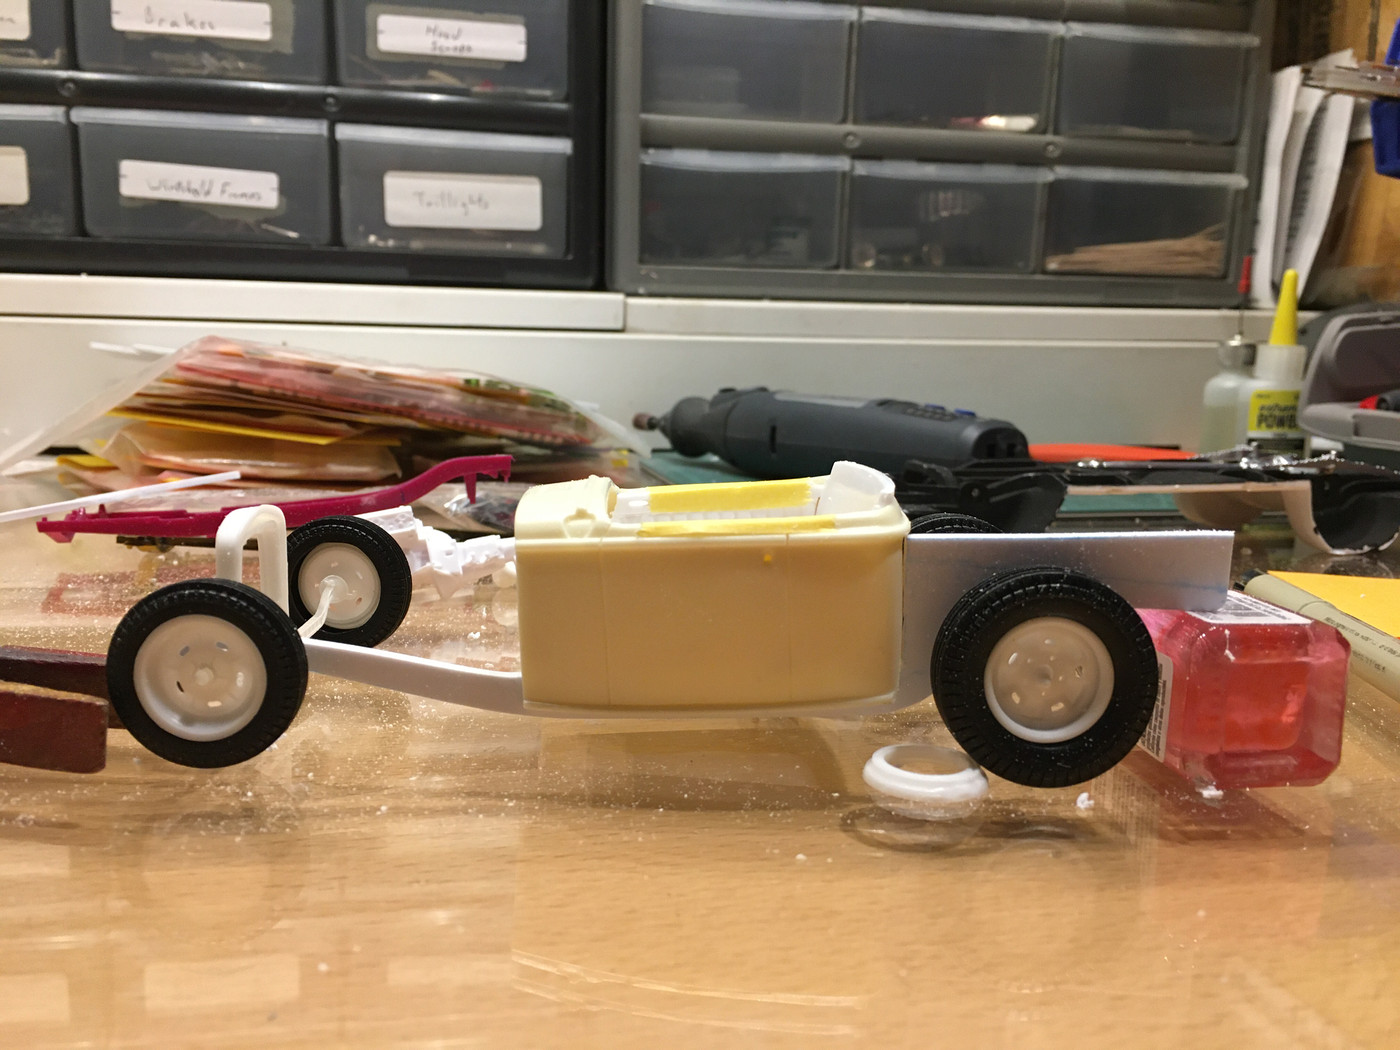  Next up is making crossmembers and sorting ut the suspension. It's been fun so far |
|
|
|
Post by spex84 on Oct 17, 2019 10:56:10 GMT -5
Looking good. Is the 3D-printed axle strong enough to support the weight of the model by itself? I guess we'll find out!
|
|
|
|
Post by krassandbernie on Oct 17, 2019 12:02:38 GMT -5
I can't wait to see more! I'm a bit jealous........you have time to build stuff that we created! LOL!
|
|
|
|
Post by Mr. Metallic on Oct 17, 2019 12:30:04 GMT -5
Looking good. Is the 3D-printed axle strong enough to support the weight of the model by itself? I guess we'll find out! I have some reservations, but I think it will be ok. It took a fair amount of delicate persuasion to get the ends onto the axle, so I'm feeling better that it will be ok. But over time, I guess we'll see. |
|
|
|
Post by Duane on Oct 17, 2019 20:44:19 GMT -5
lookin good so far Craig; stay on it; i'll be watchin !
|
|
|
|
Post by BigPappaJ on Oct 19, 2019 7:54:48 GMT -5
Craig,
Looking forward to see the progress on this very cool build.
What Evergreen stock did you use for the frame?
Thanks
|
|
|
|
Post by Mr. Metallic on Oct 19, 2019 9:04:23 GMT -5
Craig, Looking forward to see the progress on this very cool build. What Evergreen stock did you use for the frame? Thanks .080 sheet stock. Matches the width of the “boxed” frame rails in the Revell kit. Thanks for the interest everyone. More work on the frame today! |
|
|
|
Post by Mr. Metallic on Oct 21, 2019 7:32:52 GMT -5
More scratchbuilding Before I could install crossmembers, I had to finalize the suspensions. I drilled holes through the new frame rails and inserted brass rod to lock in the width of the frame. Then is was onto spring fabrication First up, the front. I took the 3D printed axle and a few kit springs I had lying around. None of them fit the bill, but I used them as a template for the look I was after. I have been concerned with making my own springs in the past due to concerns of sagging. But then I saw a technique illustrated by Daniel Himmel (Straightliner59) on a build he's doing over on MCM. It involved setting the shape and strength of the spring with one leaf of brass, and then using Evergreen for the rest. I made eyes from aluminum and pinned it to the axle with straight pins. 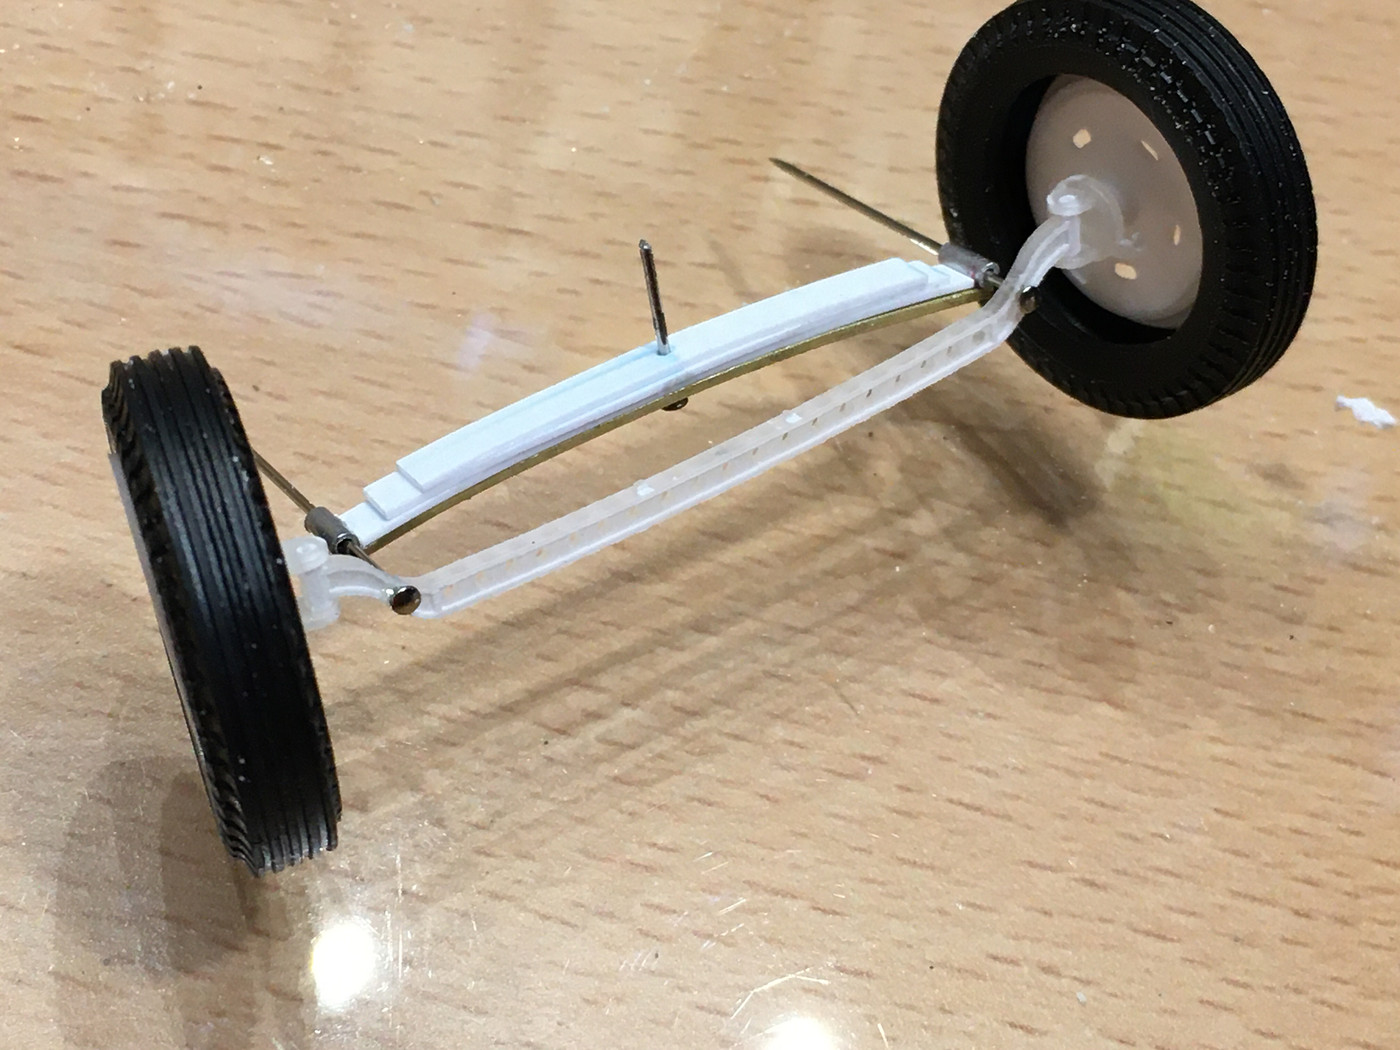 That then allowed me to fab up the front crossmember from K+S brass channel. This method I borrowed from our own John White. Tabs that over-ride the frame make the assembly very strong. 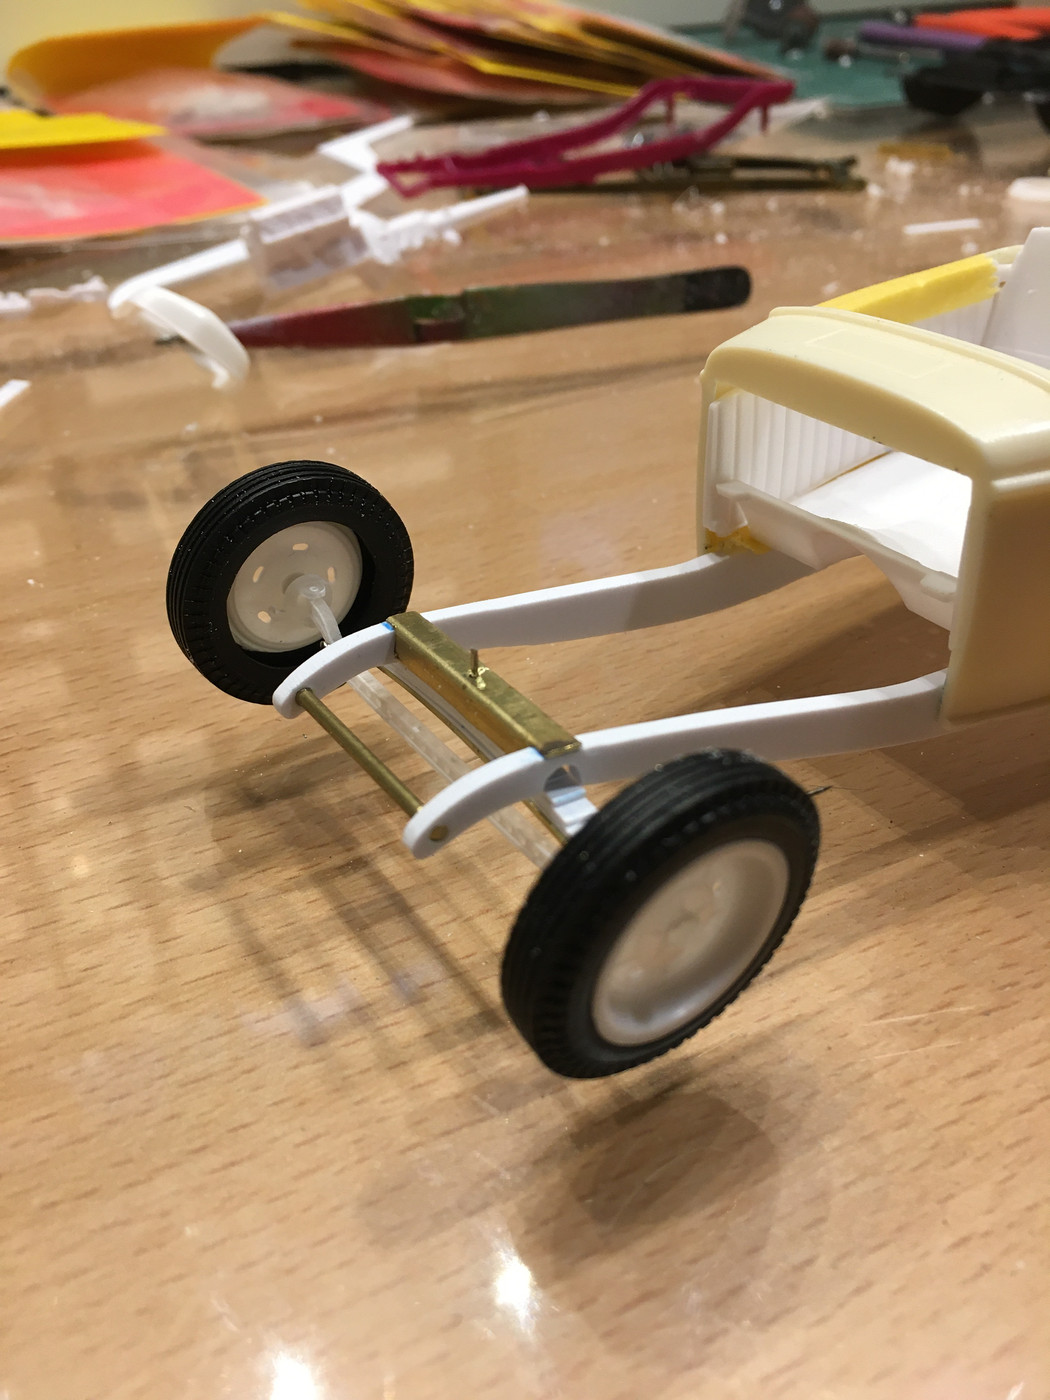 On to the rear. After my successful trial with the front I was ready to try the rear which has more aggressive curves. Drilled the center for a pin that doubles as an alignment point and aids in installation into the frame. The aggressive curves necessitated some clamping while the glue dried 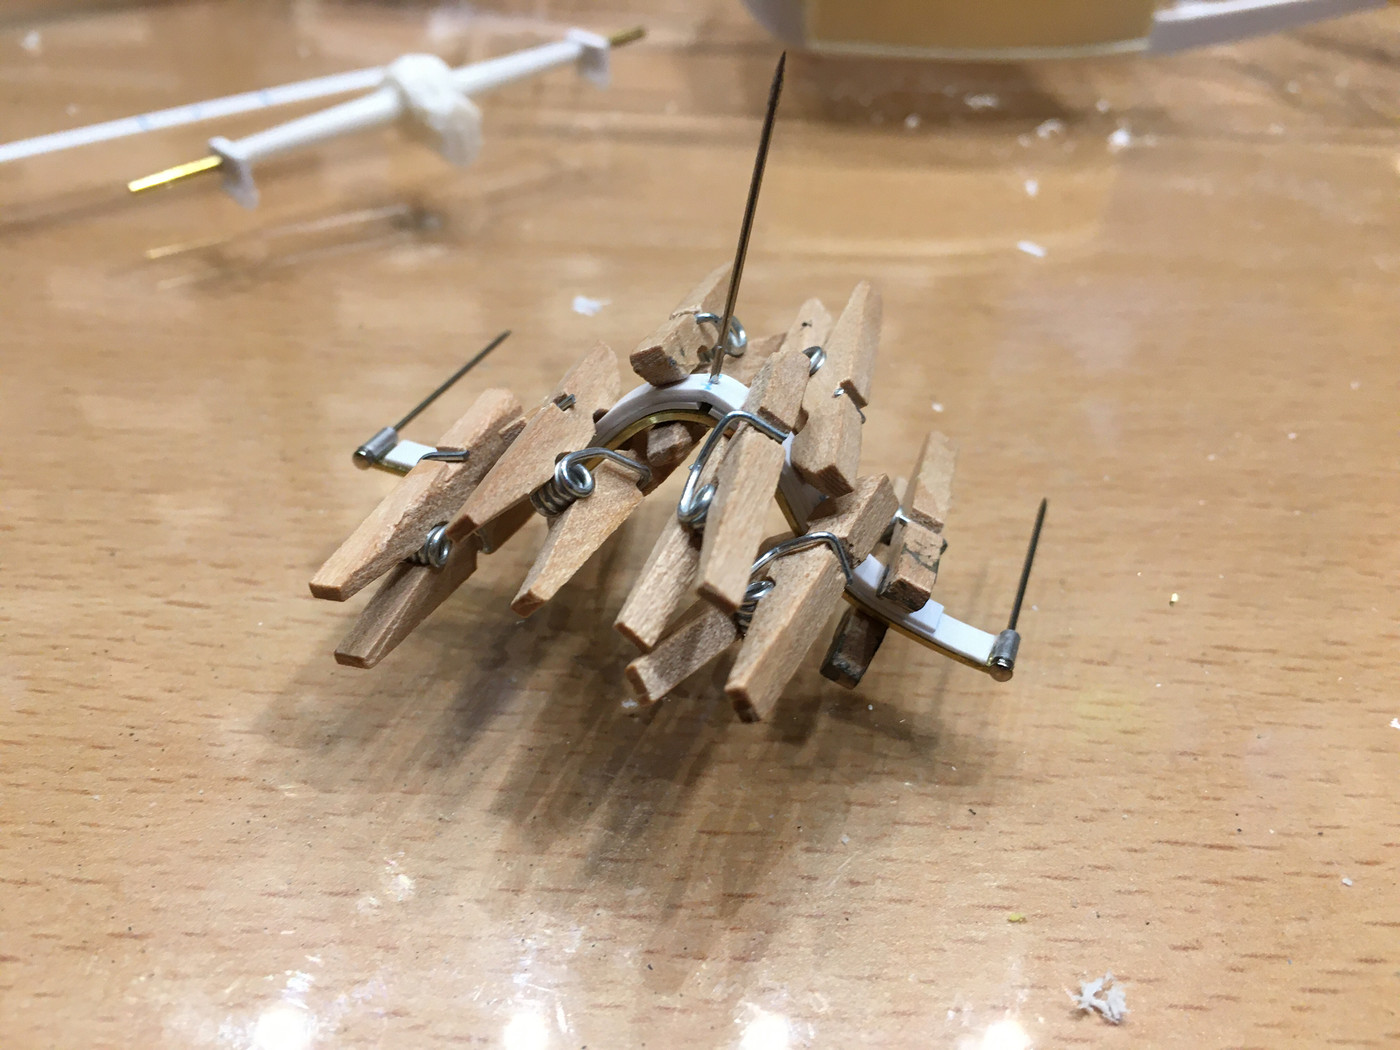 Bent up the brass leaf to clear the quickchange rear from Rep+Min, and also line up with the spring hangers I made from Evergreen. Then I bent up and installed the plastic leaves, and installed the assembly into another brass channel crossmember. You may notice the gap in the first plastic leaf, that was due to having to take a sliver out of the apex to allow it to lay flat due to my cutting it about 1/4 millimeter too long. Lesson learned. But you'll also note it is hidden, so it was easier to do that rather than risk damaging the part by trying to replace that leaf. 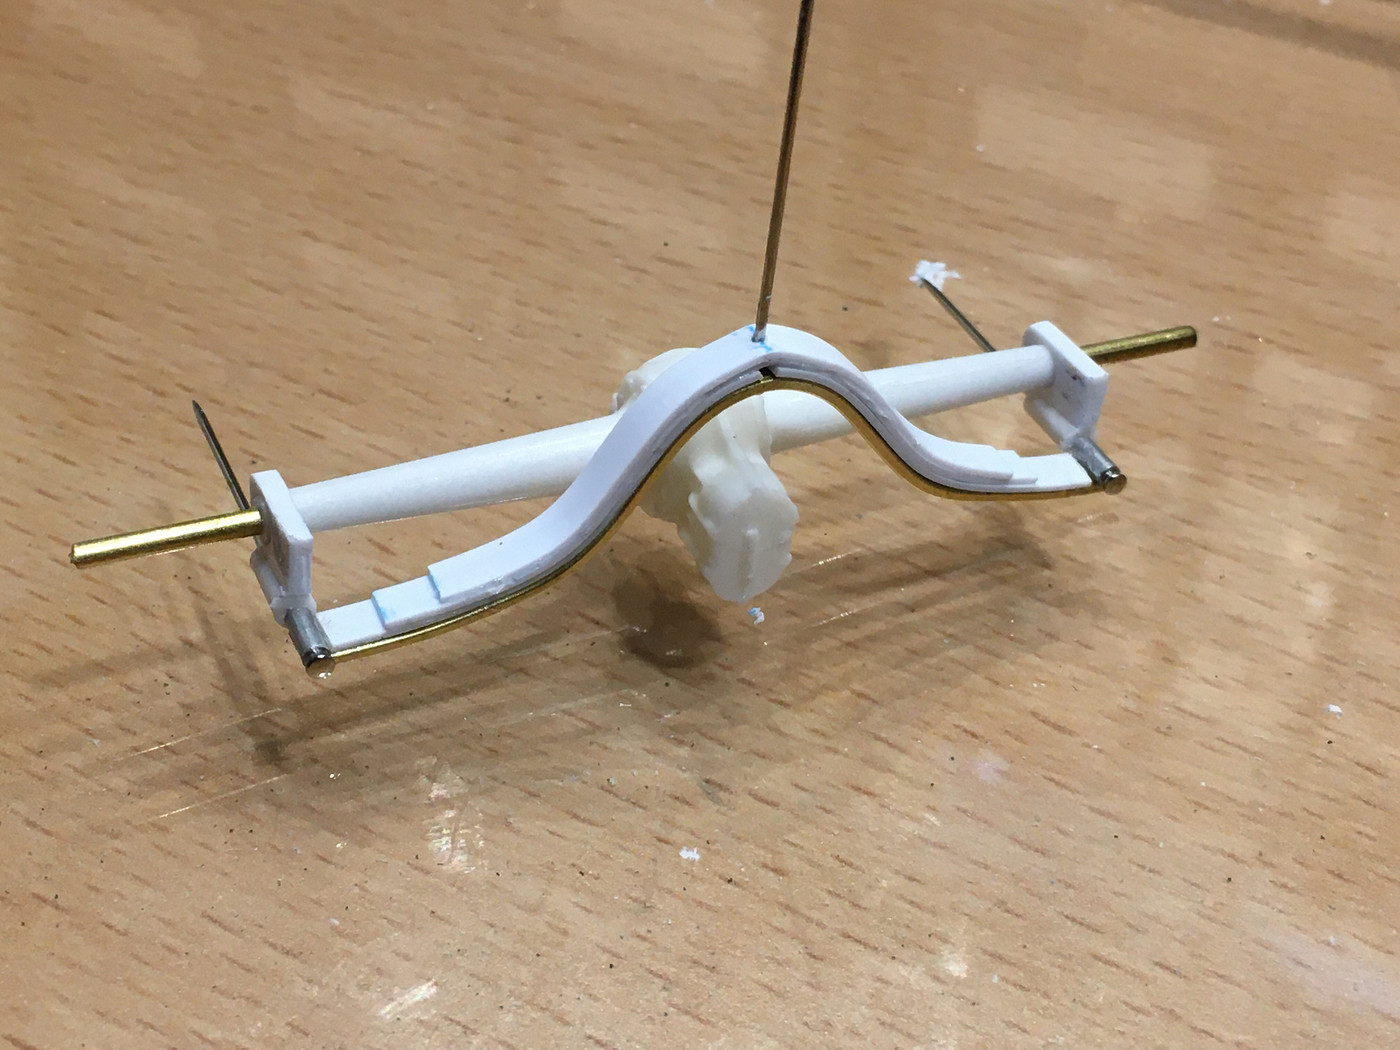 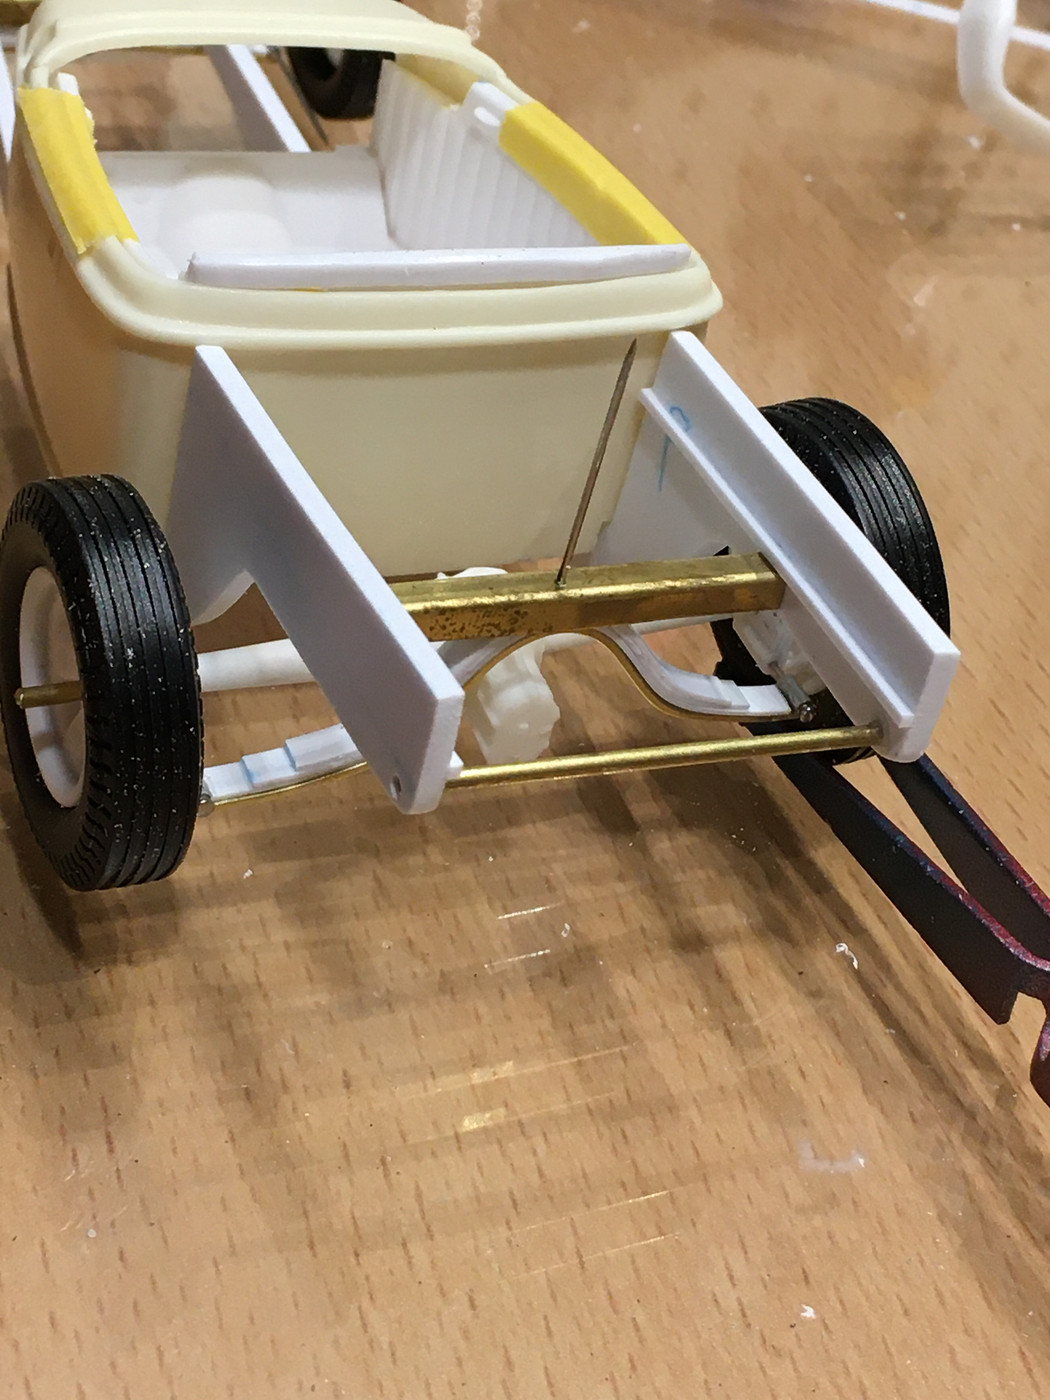 And here is the first mockup on all fours. Very happy with the stance, wheelbase and strength of the whole thing. next up is engine placement/mounting, and more crossmembers. 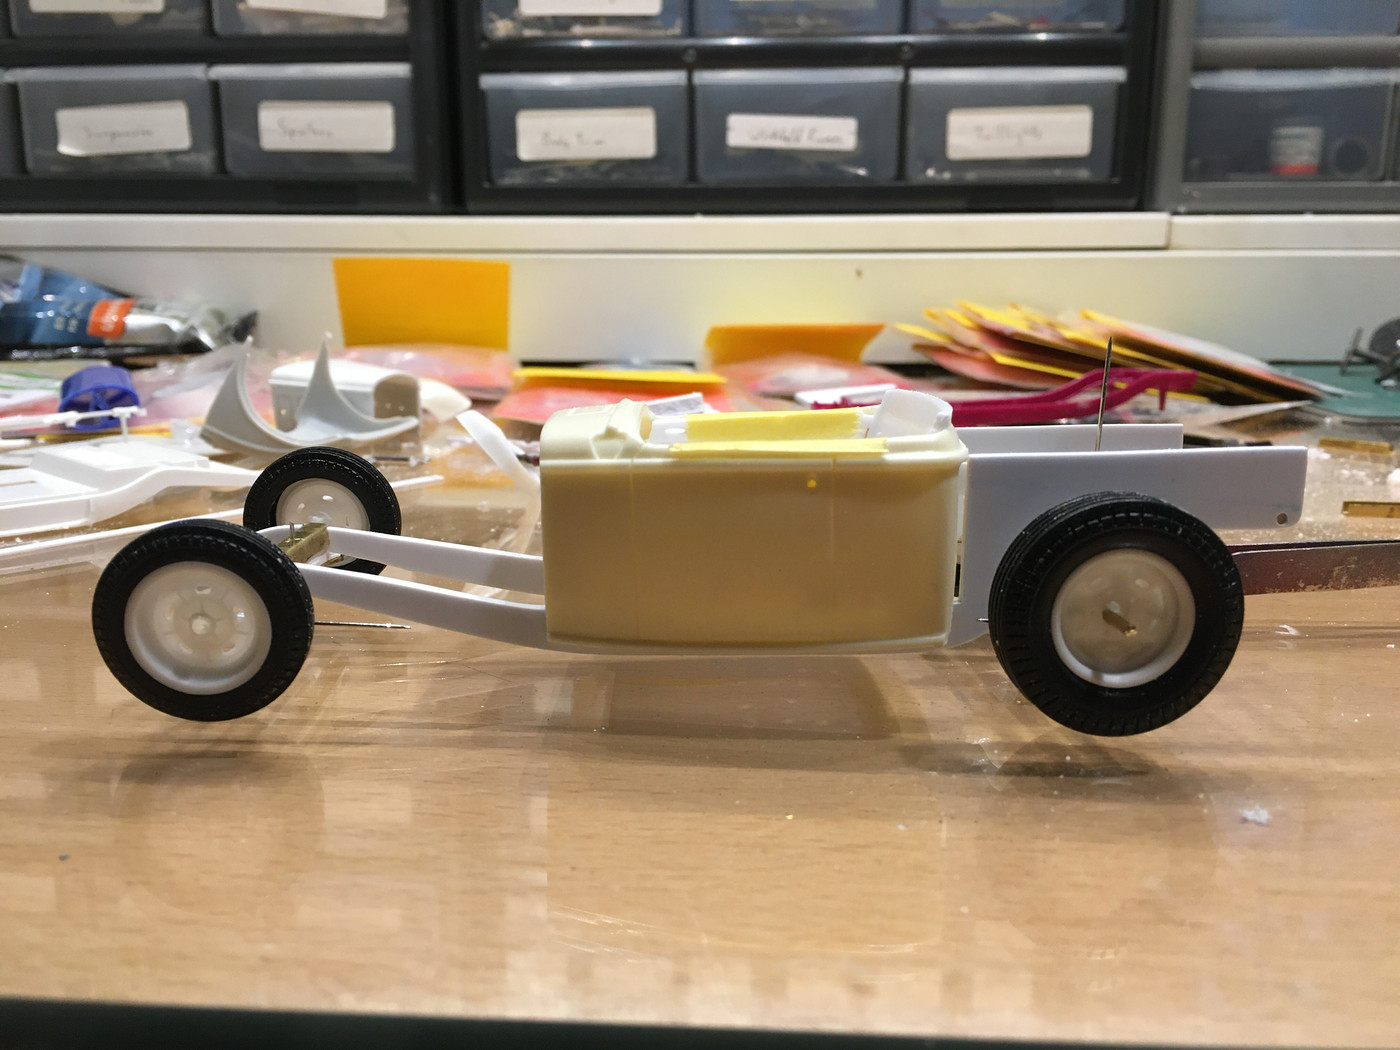 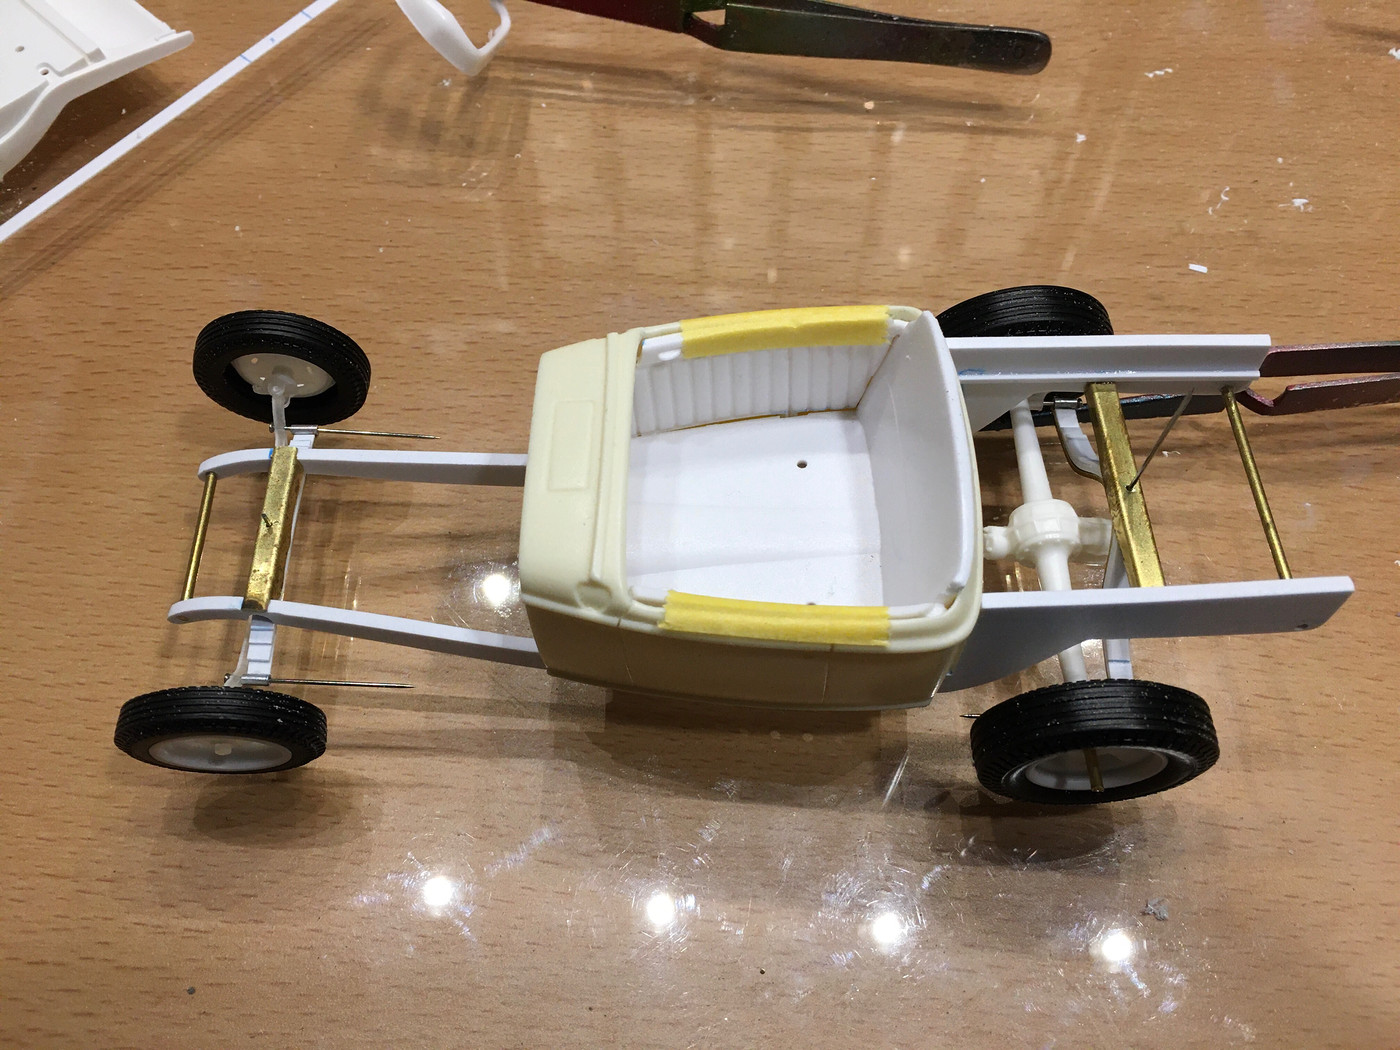 |
|
|
|
Post by lo51merc on Oct 21, 2019 9:59:37 GMT -5
Lookin' good!
|
|
|
|
Post by Duane on Oct 21, 2019 14:57:42 GMT -5
beautiful work Craig; i'm enjoying it big time !
|
|
|
|
Post by spex84 on Oct 21, 2019 19:10:03 GMT -5
Love the scratchbuilding!
Are you going to notch the corners off the spring leaves?
|
|
|
|
Post by CrazySwede on Oct 22, 2019 5:27:29 GMT -5
I like this thing so far!  |
|


 God bless you all! // Marcus Lönnström - The Crazy Swede