|
|
Post by Dennis on Dec 31, 2019 11:57:50 GMT -5
You’re a brave man to tackle all that linkage!
The Hilborn units ran off their own hi pressure fuel pump that was either belt driven or directly driven from the cam or crank on a racing only timing cover. The factory pump would never work.
|
|
|
|
Post by Mr. Metallic on Dec 31, 2019 12:58:16 GMT -5
You’re a brave man to tackle all that linkage! The Hilborn units ran off their own hi pressure fuel pump that was either belt driven or directly driven from the cam or crank on a racing only timing cover. The factory pump would never work. Thanks Dennis, I figured you would have the answer. Now I have to figure this out |
|
|
|
Post by Bernard Kron on Dec 31, 2019 13:00:56 GMT -5
I really like the stance and the channel on this RPU. Very graceful and svelt.* The fuel injection is definitely Over The Top. Super-impressive. For a proper Hilborn fuel pump look in any the long wheelbase AMT dragster kits (i.e. Ivo, Digger 'Cuda, Two Much, Garlits Wynns Charger, etc. etc.). The "elephant motor" in these has a nice one. Or Altered Sates will sell you a little bag of 6 for $5.00. In general all the fabrication work you're doing is a real treat to the eyes.
*Just a note that the glass work surface, while a brilliant idea for actual construction and modeling, makes it hard to see that nice stance since the car appears to be floating in mid air, LOL. A sheet of paper under the car would show it off so much better!
|
|
|
|
Post by spex84 on Dec 31, 2019 19:20:03 GMT -5
Maybe a distributor-drive hilborn pump could work? Here's a forum thread where a guy's looking to do exactly what you're doing but in 1:1 scale: forums.y-blocksforever.com/Topic108772.aspxAnd wow, that linkage system looks fiddly. Well done! |
|
|
|
Post by Mr409 on Jan 1, 2020 6:25:54 GMT -5
Great job on the linkage! It looks really good already and makes the engine look a lot better in my opinion. Belt driven fuel pump might be the easiest way to go. I scratchbuilt mine according to an Enderle fuel pump that was meant for mechanical Fuel Injection setup. Then just add one extra belt to rotate the fuel pump and you're good to go. 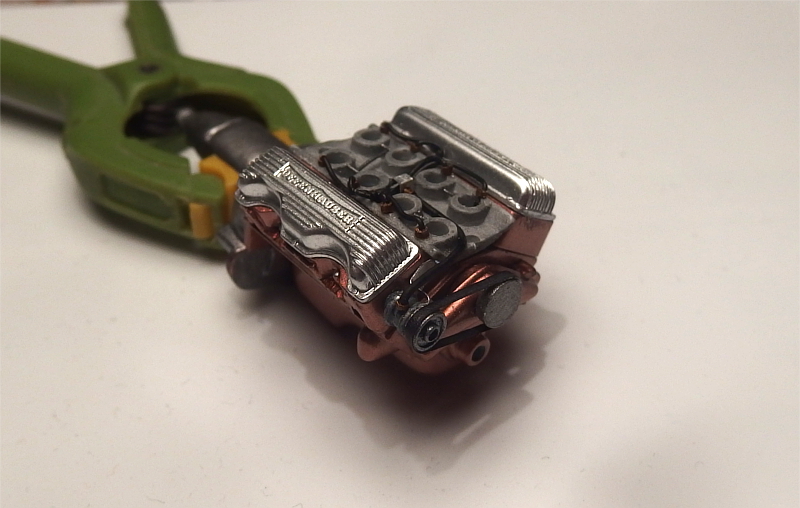 |
|
|
|
Post by Mr. Metallic on Jan 1, 2020 12:06:02 GMT -5
Maybe a distributor-drive hilborn pump could work? Here's a forum thread where a guy's looking to do exactly what you're doing but in 1:1 scale: forums.y-blocksforever.com/Topic108772.aspxAnd wow, that linkage system looks fiddly. Well done! Thanks for the ideas everyone. I think I’m going to try this distributor driven pump. More scratchbuilding ahead |
|
|
|
Post by Mr. Metallic on Jan 6, 2020 6:37:28 GMT -5
Injected! Scratched up a distributor driven fuel pump for the FI and refined some of the linkage. I still need to make a fuel distribution block, and then hopefully the fab is done for this one. 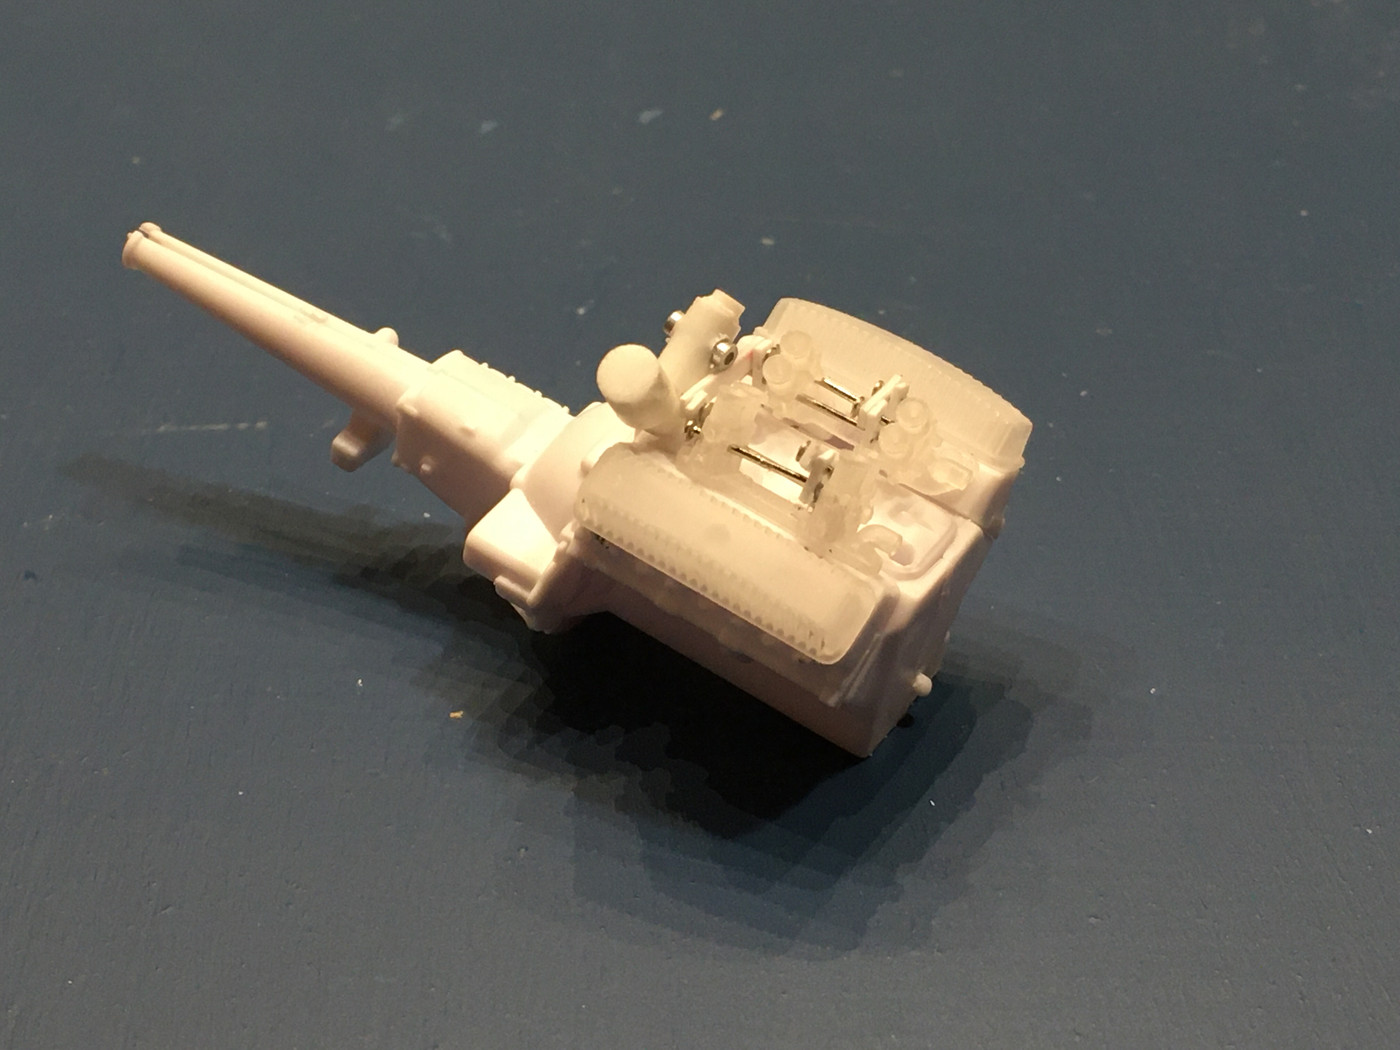 And made new cushions for the seats from real foam. 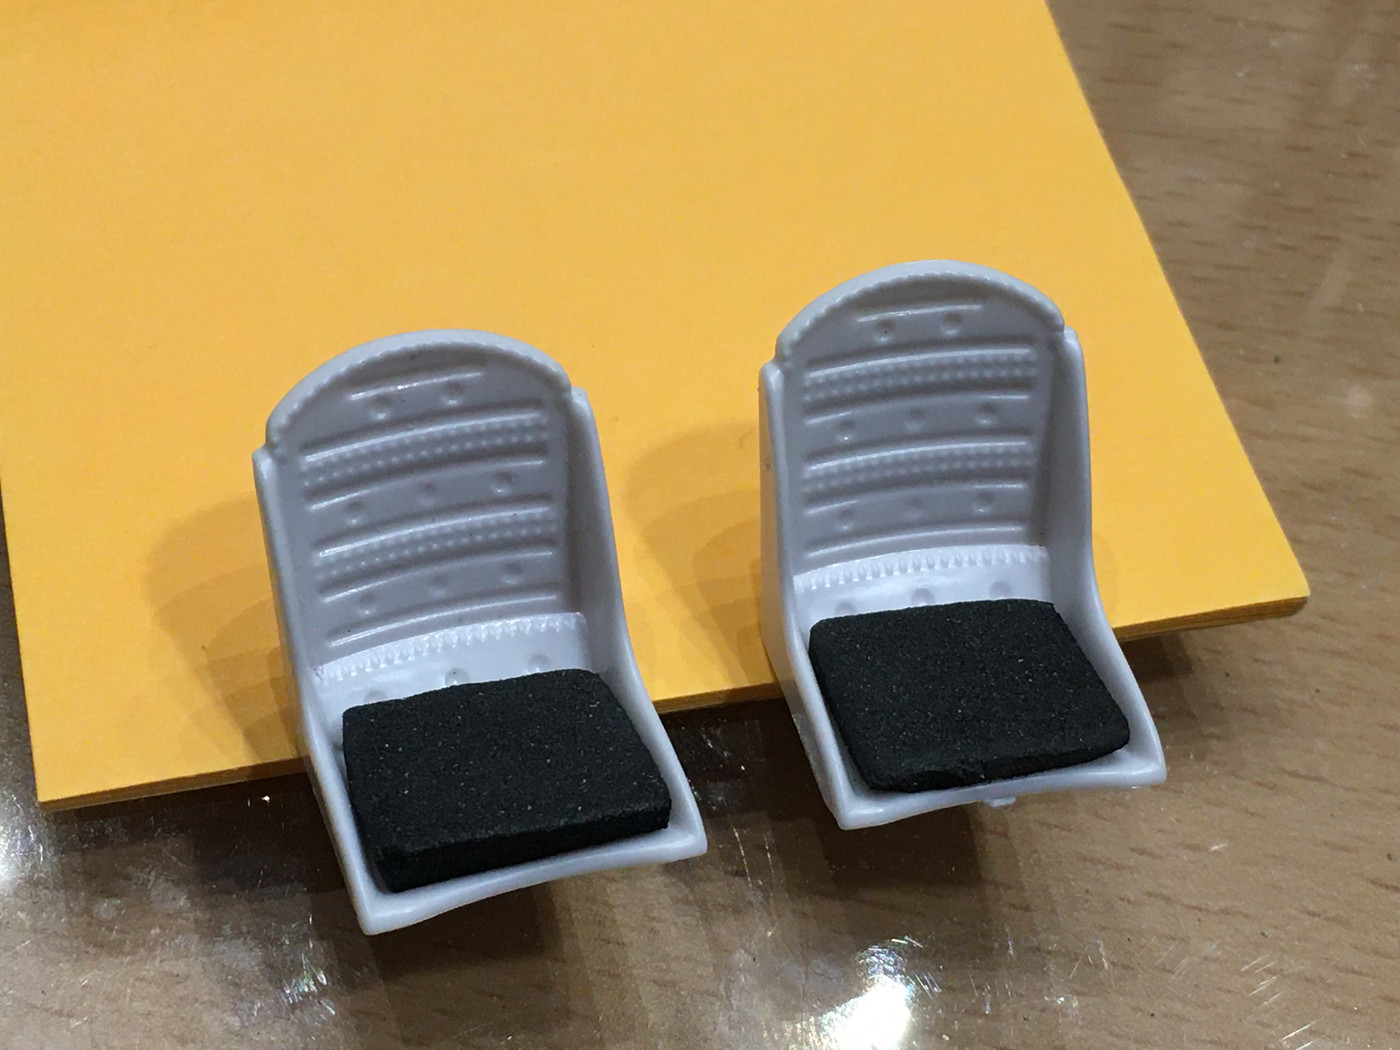 |
|
|
|
Post by spex84 on Jan 6, 2020 16:17:23 GMT -5
Looking good!
With the 3D-printed Ford Y-block ribbed valve covers, I found it helpful to give them a scraping with the tip/edge of a blade in order to level out some of the layer lines, especially on the sides of the valve covers. It will probably be clearer when a coat of primer has been added.
|
|
|
|
Post by Mr. Metallic on Jan 21, 2020 10:31:22 GMT -5
Struggling to keep this one on the bench, but I know if I pull it, i will never get back to it. i very rarely go back to a project once it leaves my bench incomplete.It's one of my shortcomings as a builder.
There's really only one thing left to finalize, the fuel log, and then everything is ready for paint. But I have to paint outside, and Iowa isn't always the most accommodating place to paint this time of year.
I'm not giving up on it yet
|
|
|
|
Post by spex84 on Jan 22, 2020 14:48:13 GMT -5
Ack! This build is way too slick to give up on. Maybe you could set it aside and wait for better painting weather?
I can't really paint in winter here in Canada either...everything takes ages to dry and I don't have a dehydrator (might have to fix that sometime).
|
|
|
|
Post by Mr. Metallic on Jan 23, 2020 9:00:50 GMT -5
Ack! This build is way too slick to give up on. Maybe you could set it aside and wait for better painting weather? I can't really paint in winter here in Canada either...everything takes ages to dry and I don't have a dehydrator (might have to fix that sometime). Thanks for the encouragement. In the property we're renting right now I only have a small space to work in (although I am thankful I have a space at all in our tight house), so I don't really have room to push stuff aside. I just speak from my own experience, when a project leaves my bench it's hard to get it going again. I'm sure many of you can relate, but building these traditional hot rods is not a shake-n-bake endeavor. Lots of scratchbuilding, parts swapping, engineering. My problem is, when i try to return to project, I can never remember exactly how it went together. Often, stuff was mocked up in a certain sequence, and if you're no longer familiar with that sequence you can never get it back together the same and make it work. Like I said, not giving up. But my brain is wanting to work on something new. The voices are getting louder  |
|
|
|
Post by lo51merc on Jan 23, 2020 10:02:27 GMT -5
For whatever the reason (my sometimes long lapses before finishing, my age perhaps?) I've been writing notes about what goes where and in what order. It may help me if and when I open the box again. Thing is though, I have to remember to write the note.
Gary
|
|
|
|
Post by cturner on Jan 23, 2020 18:36:50 GMT -5
Just send it here and I'll make room for it on my shelves! Or...workbench....hehe Then you can move on to that one that's in your head!
|
|
|
|
Post by spex84 on Jan 23, 2020 23:35:12 GMT -5
Oh man, that sounds familiar. Most of my projects have been back-burnered so long, I have no idea how to put them together again...but I do leave myself notes in the box for when I open it up to pull out the project again! And I group and bag/tag the parts so they don't get lost.
Photos help too, and gluing together sub-assemblies so it's not just a disaster of tiny little loose scratchbuilt parts everywhere...
|
|
|
|
Post by Mr. Metallic on Jan 31, 2020 12:09:56 GMT -5
Well, as fate would have it, the reason this project was started in the first place (losing a house) could be what ends it (buying a house). We signed a contract yesterday to purchase a house, which is a wonderful thing. But, closing time is less than a month away (and could be sooner if we get our way) So, we are entering packing mode.
I will keep this on the bench as long as possible, and if there's a break in the weather I may be able to get it painted. The good thing is fabrication and parts sourcing is complete, so I just need to get it painted and assembled.
|
|


