|
|
Post by modelcrazed on May 8, 2020 12:33:49 GMT -5
don't soak it in the mineral spirits it will make the plastic soft. just to loosen the joints. SUPER CLEAN in the purple jug is what you need to strip the paint.
|
|
|
|
Post by acres on May 8, 2020 16:27:44 GMT -5
In the beginning of my model career i used brake fluid for paint stripper, messy and nasty, last 15 years i´ve used owen cleaner or som kitchen power spray", simple easy and much more nice dealing with, just spray the part and put it in a ziplock bag wait over night and simply flush the paint of under the tap, But try some trash parts before so you don´t ruin some nice stuff.
Not sure if it works on old glue.
|
|
|
|
Post by skip on May 8, 2020 20:23:38 GMT -5
Not sure what the chemical make up of your pee is, and I don't want to either! I know Mineral Spirits are regular old non-turpentine paint thinner. My "Pro Art - Odorless Thinner" says on the back of the container; "CONTAINS: 100% Odorless Mineral Spirits". If you're using it just for debonding ancient model cement, then the cheaper no name brands will probably work just as good. I think that Walmart carries the Pro Art brand in their expansive Arts and Crafts section. They're open while everything is closed down local to me. I know Hobby Lobby carries it, but they are closed. Also works with nearly every enamel based paint I've ever used, including Testers, Humbrol and any of the other common hobby enamel paint brands. I've used the Pro Art brand for years doing Sign Painting and Pinstriping work for years using it with One Shot and other enamels. It's super clean, never had it not allow the enamel to set like some other brands have. So you have used it for de bonding glue and stripping old paint? That would be awesome if I could bang out both operations in one dunk of the body! I was going to go pick up some super clean and hope that it helped the glue and also not ruin the glass. Actually, no I have not used mineral spirits to debond model cement, or use it to strip paint. My comment was that: 1. Mineral Spirits are Non-Turpentine Paint Thinner. 2. I have used mineral spirits as a thinner for nearly every enamel based paint I've ever come across. I use it all the time doing sign work and pinstriping to thin the enamel paint. Third comment, not sure how Mineral Spirits will attack styrene. Being in the same family of solvents used in enamel paints that have been directly applied to plastic styrene models since I became involved in modeling in the early 60's. It's the tamest solvent or thinner I use on models, has nothing to do with any hot thinners like lacquer thinner.
In fact, I normally wipe down the bare plastic model with a mineral spirit soaked rag prior to using a tack cloth before painting with any type of paint. I've done that for as long as I can remember, never experienced any harm to styrene plastic. Now if you're talking lacquer thinner, nope never wipe that on bare plastic, it'll probably stick whatever rag to the surface you were trying to clean! It's that hot. I've also Pinstriped and Lettered on some pretty priceless, irreplaceable celluloid, early plastics and styrene plastics and never experienced any sort of detrimental effects to the plastics. About 30+ years back the go to paint removers were things like Cox Nitromethane Airplane Fuels, White Gas, Brake Fluid, Oven Cleaner, Solvent (mineral spirit based like is used in most garages). The Cox Model Airplane fuel goes back to very early 60's I've seen it in print in some of the early Model Car & Science, Car Models and Don Emmons used to recommend its use in Rod & Custom when they had a big model car section. Bottom line, if you're the least bit concerned with any solvent used on styrene plastics, test it out on either a scrap piece or on a piece of sprue. If it doesn't attack the plastic then you're good to go! Sorry this, post got really long but the B.$. needed addressed on mineral spirits harming plastic. I prefer to use personal experience rather than what I've heard someone else say. |
|
|
|
Post by Jared on May 9, 2020 20:24:32 GMT -5
Small update. lots got done, but doesn't show as this point. Picked up some "super clean" and was able to get the body stripped and parts stripped nicely. At this point I was able to see the areas that need to fixing or attention a lot better. I always forget how bad the molding is on these old AMT kits. you can see it badly in the seat as I cleaned up one half and left the other side for the photo. 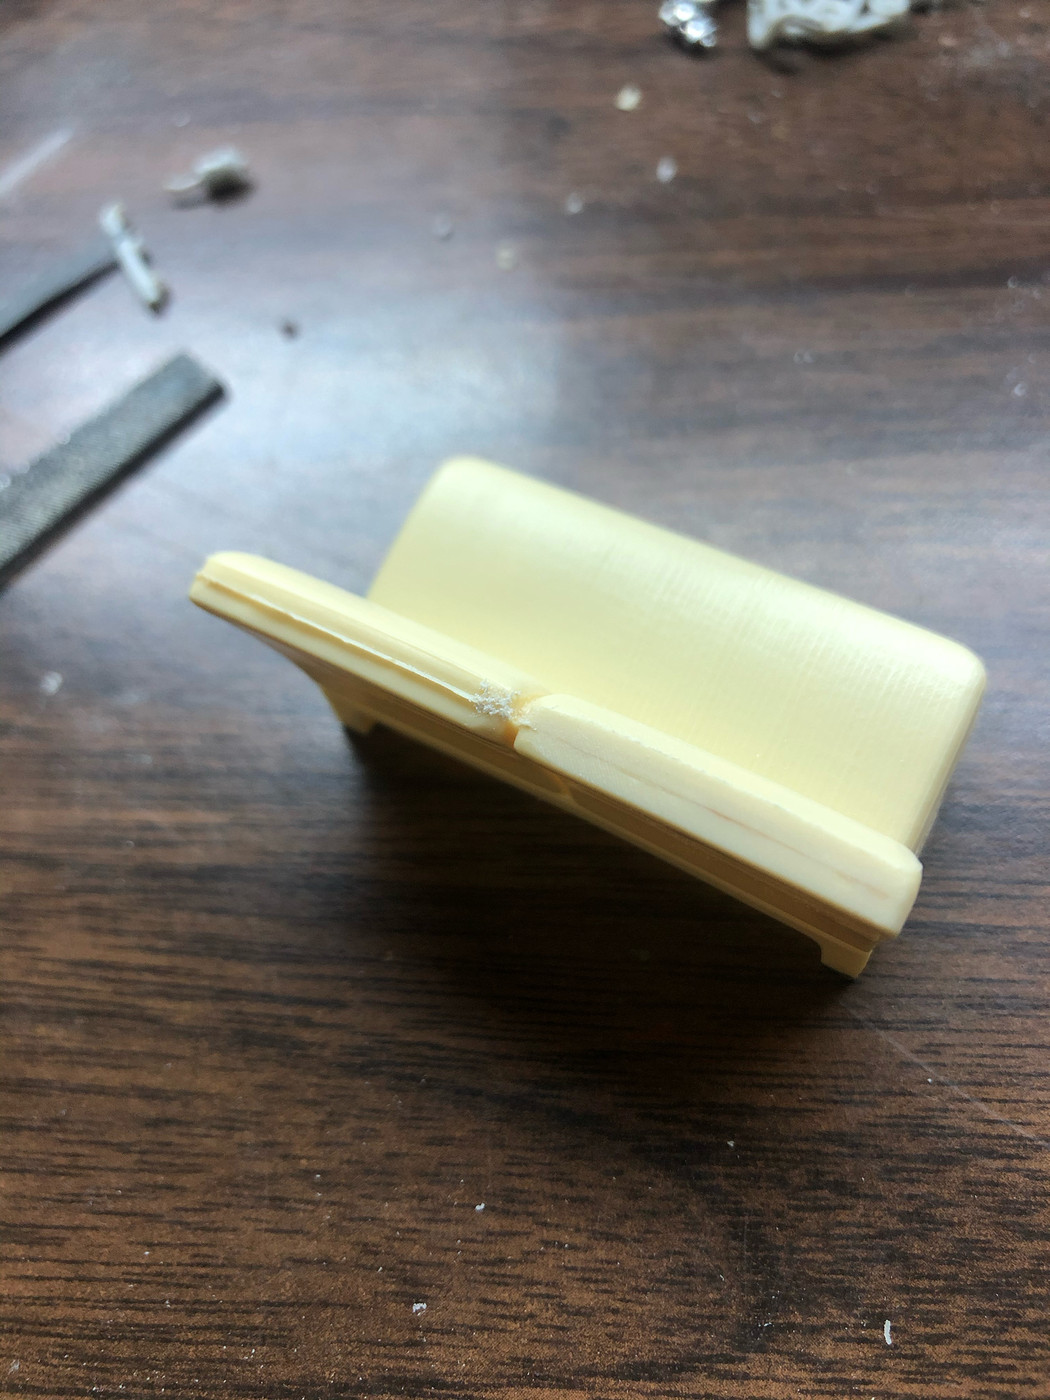 While the interior tub was still soaking in the super clean, I started working on getting the hood to actually close all the way. After that I started getting the gaps a little better. You can see where its tight at the "roll over" point towards the front. They still need some final sanding, but its close for now. I'm waiting on wheels/tires to come in, so I'm off chassis for now for the most part. I may start looking at getting mounts made up for fitting the flathead. 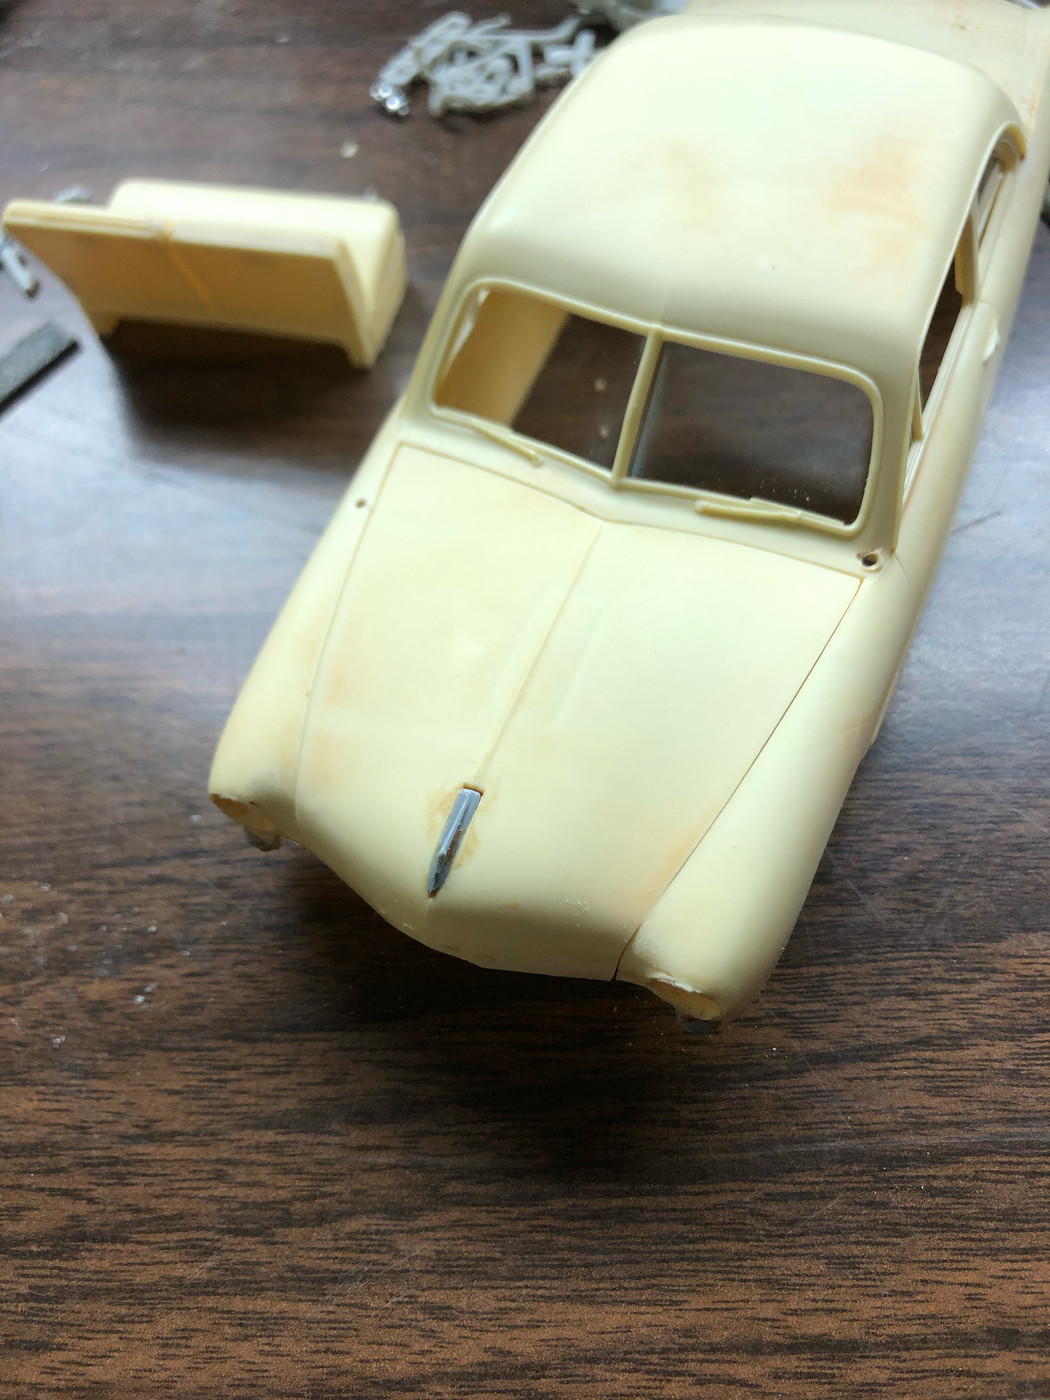 Since the suspension side of things is on hold, I wanted to get so more done on the body. So it was time to fill holes, smooth mold lines and start Frenching the headlights. Don't really want to get too crazy on the front end yet either as the core support/radiator have some major glue issues I'm not sure how to solve yet. Side note, I was able to get the glass out...….eerrr sort of. It came in two halves. Front and back. Front will get a polish and be ready to go back in. The rear didn't survive and has a crack in it. I may get some clear sheets and just make some new glass all around anyway. 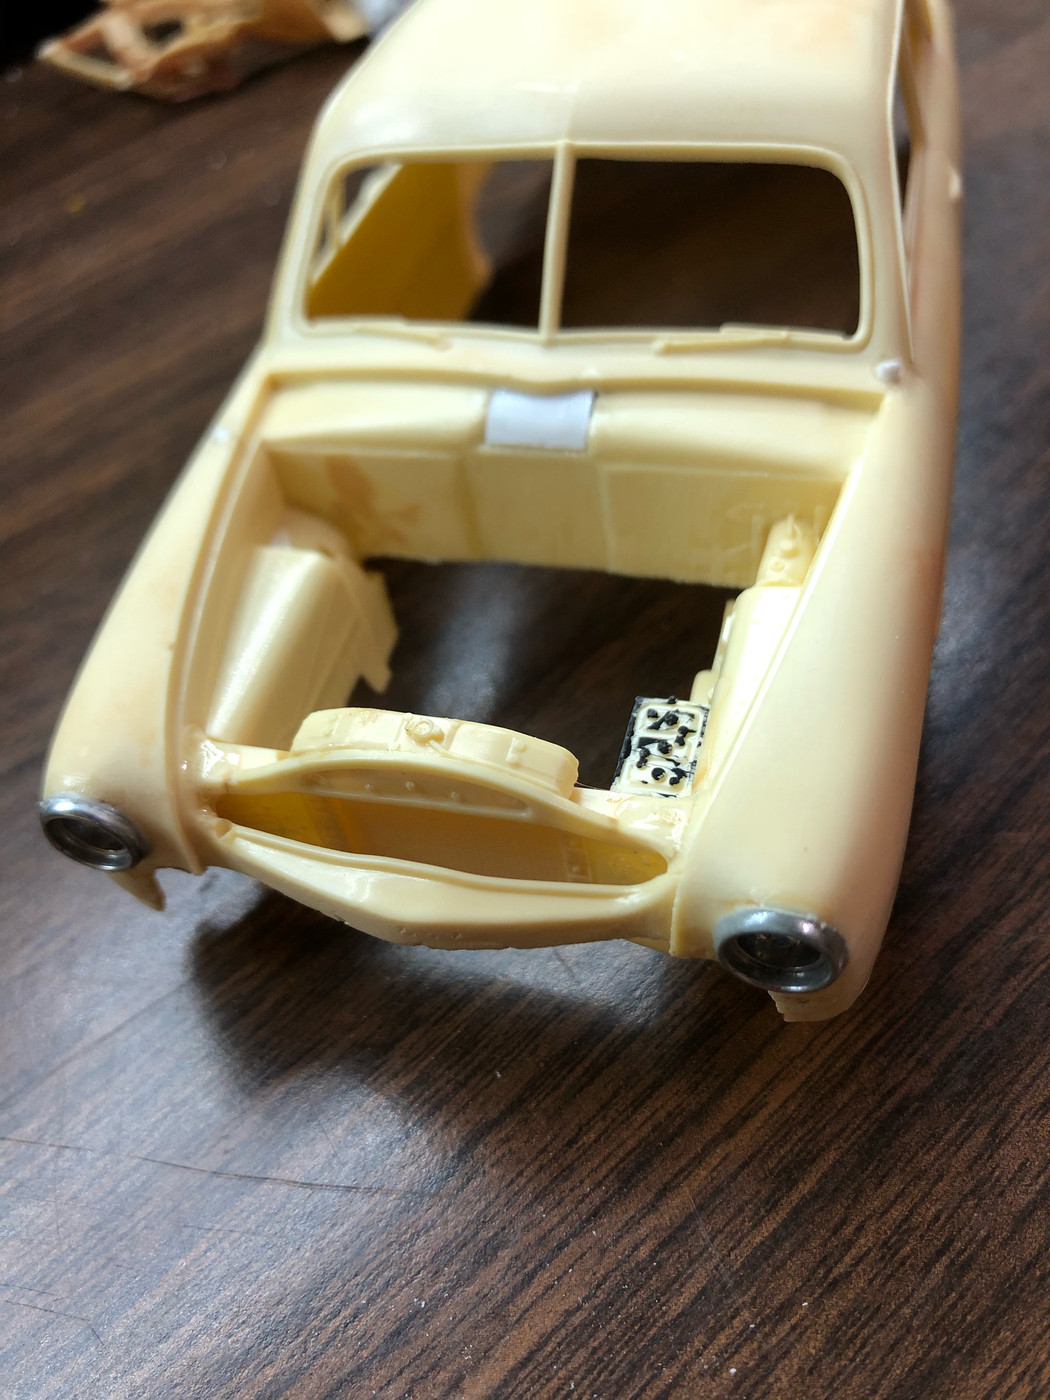 Enjoy everyone!! |
|
|
|
Post by skip on May 9, 2020 20:44:27 GMT -5
That glass is all pretty flat anyway. So why not get some clear plastic sheet and use that, it’s probably clearer than the kit plastic anyway.
|
|
|
|
Post by Jared on May 14, 2020 18:15:18 GMT -5
Not an massive progress. just lots of cleaning up and getting things to fit/work like this should. Got my wheels in today and needed to get them on so I could double check the stance and ride height. Not totally sure if I'm in love with it or not. whats everyones thoughts on it. 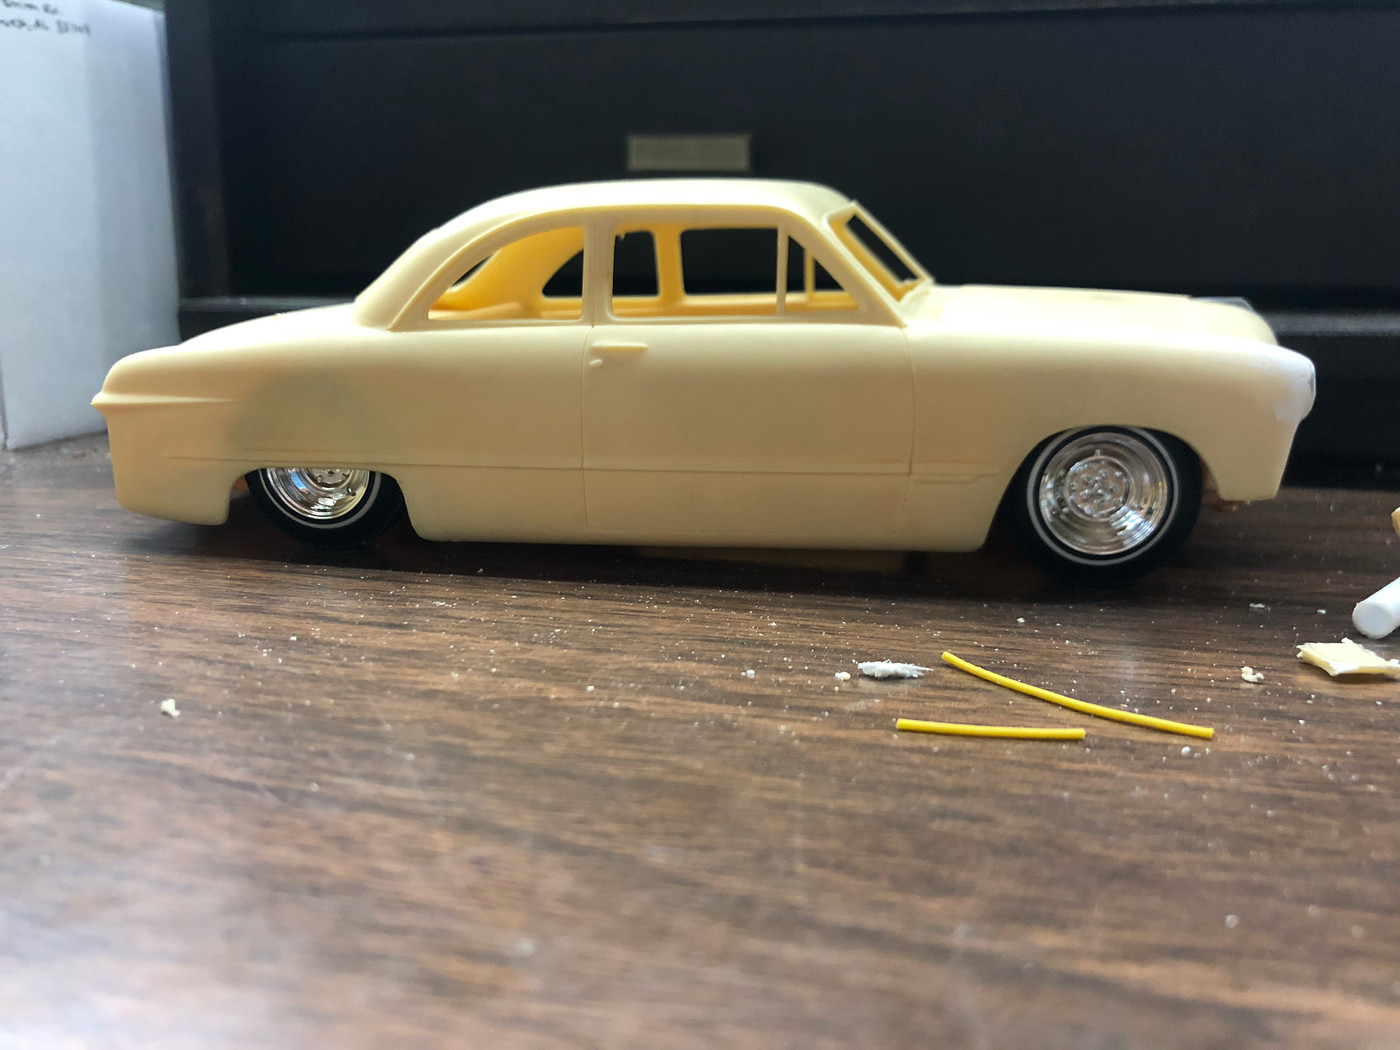 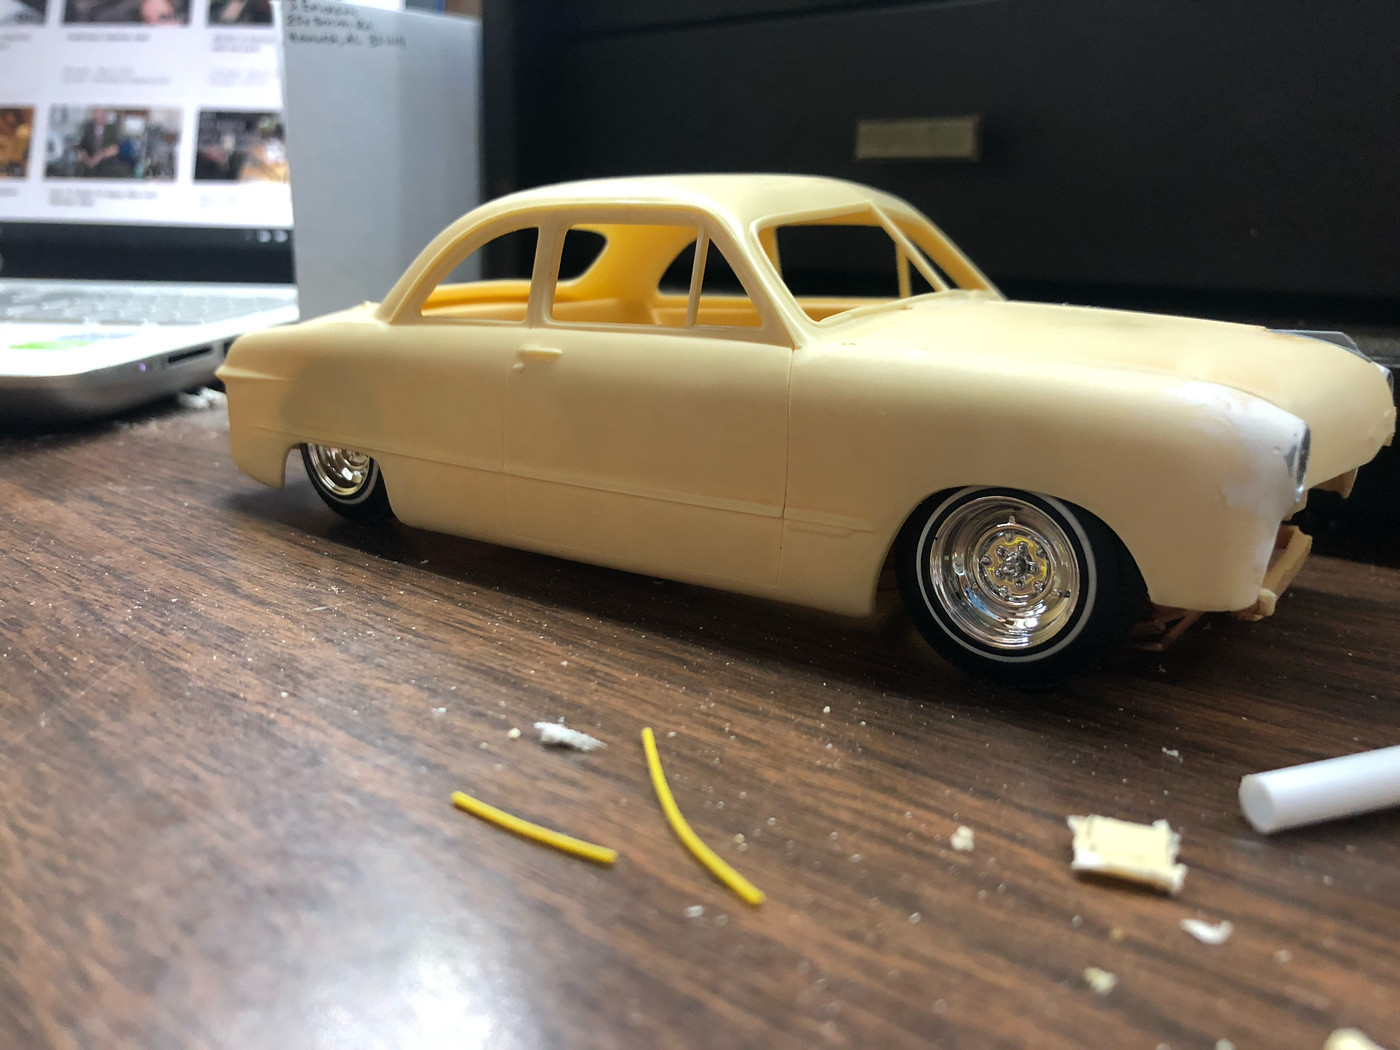 |
|
|
|
Post by Bernard Kron on May 14, 2020 19:08:43 GMT -5
Nice job on the frenched headlights. I think if you raise the rear just a bit you'll like it better. The wheels and tires look good.
|
|
|
|
Post by Duane on May 14, 2020 20:29:47 GMT -5
Jared; i agree with B. just raise it a bit, it won't take much to do so !
|
|
|
|
Post by FordRodnKustom on May 18, 2020 14:08:44 GMT -5
Looks good so far. I like the frenched lights and I agree with others on raising it just a bit.
|
|
|
|
1949 Ford
Jul 16, 2020 22:01:22 GMT -5
via mobile
Post by Jared on Jul 16, 2020 22:01:22 GMT -5
Hey guys. Been a bit on this one. Finally back to putting some time into it. Got a bit of an issue and not sure which way to go about it.
The stock ford rear end has the normal offset pinion. I made new axle tubes for this kit and never looked at the lengths. Should I center the pumpkin or the pinion? What has everyone done before?
Back in the day, I guess the trucks and vans had the pinion offset to go with the offset engines they used. While cars had a centered pinion with a centered engine. That makes the pumpkin offset which looks really odd. Not sure how I have never noticed this or even thought about it.
Any suggestions would be great!
|
|
|
|
Post by chepp on Jul 16, 2020 22:49:55 GMT -5
|
|
|
|
Post by EchoBravoSierra on Jul 17, 2020 8:33:00 GMT -5
|
|
|
|
Post by Jared on Jan 18, 2024 22:00:46 GMT -5
Boy O Boy......
4 Years!!!
ok, well I'm trying to get back onto some of these projects. 1:1 stuff and house things tend to always get in the way. Anyway, I pulled this project back out this afternoon. Have to rub the eyeballs and crack the knuckles. Then I can figure out where I was 4 years ago. I did start fixing some bad gaps with the grill fitment to the fenders and hood. Need to start figuring out the final parts for the flathead as well.
Anyone have ideas on colors? I have a metallic lighter brown I was thinking about.
|
|
|
|
Post by Jared on Jan 19, 2024 11:59:14 GMT -5
Small picture update. Still just trying to get back into the swing of building again. Ive gotten into 3D printing in the last two years and am able to make parts easier, faster now. This was a test print but might be fun for this build? Its different for sure. Might need to play with the height of it because it ALMOST fits under the hood. 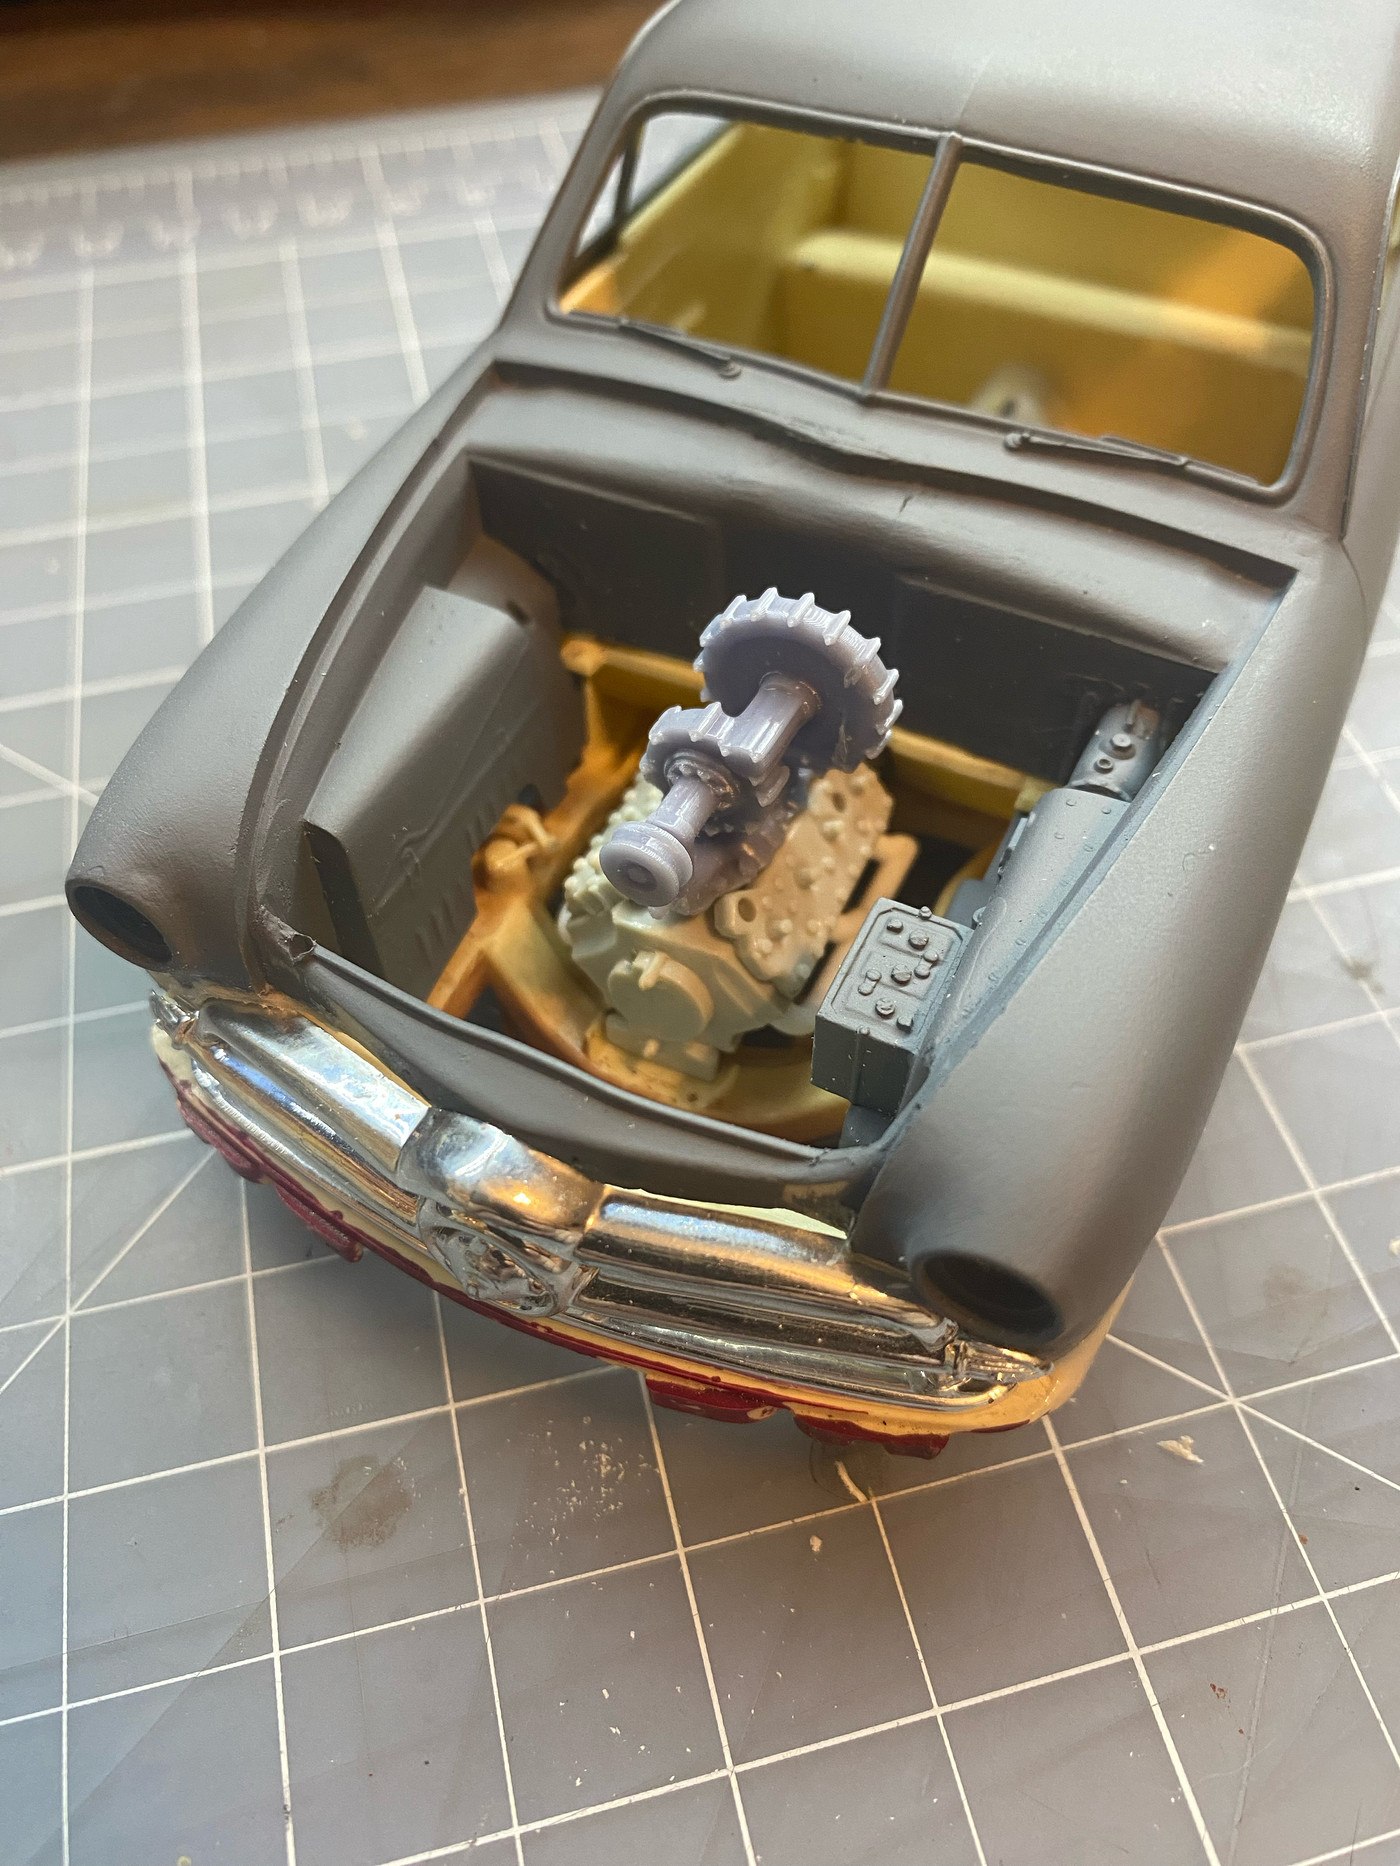 |
|
|
|
Post by RodBurNeR on Jan 19, 2024 22:50:30 GMT -5
man bringing back the old projects love it! that looks cool I bet you can get it to fit!
|
|