|
|
Post by tomqvaxy on Jan 17, 2021 5:21:53 GMT -5
|
|
|
|
Post by Dennis on Jan 17, 2021 13:27:09 GMT -5
Interior mods are looking good. You're really leaving no stone unturned with this project! Thanks! I keep going down rabbit holes but it's interesting. Not yet shown are the chrome exhaust headers that I very lightly airbrushed with clear brown and clear blue to simulate heat discoloration. Now I'm working on how the '40-up Ford juice brake master cylinder, bracket and pedal lever would look adapted to the '32 frame. That doesn't seem to be well covered in online photos but I've found enough to go on. It must have been covered in the "little books" of the '50s and early '60s but I don't have them. As it happens my Dad and I are in the business of manufacturing and selling master cylinder bracket kits for 1932-1938 Ford's for hydraulic conversions on stock frames with stock, unmodified pedals. Below are a few pictures of the kit we make installed on my own '32 Pickup. The transmission cross member you transplanted from the Monogram '32 represents the stock cross member, minus the forward diagonal braces.     |
|
|
|
Post by chepp on Oct 7, 2021 13:39:39 GMT -5
Dennis, thanks for the brake cylinder and frame crossmember photos. I've got to get back to finishing this project.
|
|
|
|
Post by chepp on Dec 16, 2021 22:18:57 GMT -5
Ah-ha! The builder moved the front axle (and radiator/shell, I presume) forward 2 inches. I think by now I've repressed my bad feelings about the troubles I've had with this build and it's back on the bench. I just stirred the body/frame paint* and it still looks good.
*dark red made by pouring the leftovers of three Testors enamels into one bottle to make enough.
|
|
|
|
Post by Mr. Metallic on Dec 17, 2021 8:12:54 GMT -5
Just went though the whole thread to jog my memory. Cool stuff going on here, glad to see you getting back to it.
|
|
|
|
Post by chepp on Dec 28, 2021 17:51:27 GMT -5
I've done what I could to disguise the street roddy floor pan with some faux stampings to vaguely suggest an old floor pan from some other car welded in to replace a rusted-out stock '32. The relocated and trimmed-down Monogram '32 crossmember (yellow plastic) was dolled-up with styrene to suggest something of a stock appearance. The headers on the Revell parts pack Caddy engine splayed out too much to fit between the rails so I made a horizontal cut where the pipes come together then bent and CA'ed the lower part to angle inward. A thin piece of brass was bent into an angle bracket and "attached" with Meng bolts to serve as a mount for an old style master cylinder. Chances are that it and the brake pedal linkage won't even be noticed when a tailpipe/muffler is added.
|
|
|
|
Post by Dave from Pleasanton on Dec 28, 2021 18:53:21 GMT -5
Great work Charley. Too bad so much of it will disappear once finished. What's important is how you feel about it.
|
|
|
|
Post by constructionbob on Dec 29, 2021 3:12:42 GMT -5
Great skills and pedagogically described. Clean and a lot of effort for sizes and detail. Love to watch!
|
|
|
|
Post by Mr. Metallic on Jan 4, 2022 8:46:04 GMT -5
It may "disappear, but having multiple layers of detail are what tends to trick the eye into making it more realistic, as long as it doesn't get too cluttered. Just like the guys that do weathering, layers, but don't overdo it. I think you're nailing it with just the right amount.
|
|
|
|
Post by chepp on Jan 6, 2022 14:37:18 GMT -5
The body color things have a coat of Metallizer Aluminum Plate. About eight years ago I was given Donn Yost's The Art of Airbrushing Show Quality Model Cars DVD dated 2008. I've long intended to follow it but haven't until now. However, some of the instructions didn't make sense to me so I'm not following them exactly. Anyway, one of the instructions is to give a coat of Metallizer as primer so here it is. The next is to airbrush the final color as enamel thinned with lacquer thinner (cheap, not too "hot").
|
|
|
|
Post by Dave from Pleasanton on Jan 20, 2022 13:08:20 GMT -5
I like the sort of matte finish silver. That tip from Donn Yost won't be useful too much longer now that Metallizer is no longer made. Can't wait to see the final paint.
|
|
|
|
Post by chepp on Jan 27, 2022 22:09:52 GMT -5
I've been following (sort of) the Donn Yost instructions and are my hands tired! One of the steps was spraying the Model Master Metallizer as a thin primer/sealer (seen in my post above). Thinking about painting over it gave me the willies, though. The paint is intended to be buffed to give it the polished aluminum finish that is promised but the Yost instructions don't mention that part. I looked closely at his video and saw that he was using the "buffing" Metallizer just like mine but still.... That unbuffed velvety coating didn't seem like a very good surface to be painting final color on.
So, except for the body and dash, I followed the washing instructions using dish detergent and an old soft toothbrush. That buffed the parts enough to make me feel better.
The body and dash needed a little more work, such as wet sanding up to 4000 grit (he instructed going on to 6000, 8000 and 12000 but I stopped at 4000) so I did that and washed/rinsed them, too. When dry I sprayed on a medium coat of Metallizer from the spray can. It looked good but there was still a boo-boo so I sanded that smooth and sprayed on more Metallizer in that area.
Then I threw caution to the winds and decided to just paint everything (some "buffed" and some not) with the thinned enamel as Yost instructed. Man, both the "buffed" parts and the unbuffed body and dash came out with a really nice gloss. Unfortunately, as I was airbrushing a last heavy coat on each side a bunch of little bubbles appeared in the paint. I've never seen that before. I think that I caused it by shaking the airbrush/bottom feed bottle just as the paint level was getting low causing me to spray some air.
I stopped and put it with the other parts in my dehydrator and baked it for a couple of hours at 120 degrees F before looking at it just now. Luckily, the bubbles are less noticeable so I'm hoping that I can wet sand them out when the paint gets hard. I've reduced the temperature to about 100 for an hour or two then I'll let it run overnight with just the fan on to slowly cool down. I'll probably let it sit for a week at room temperature before touching it.
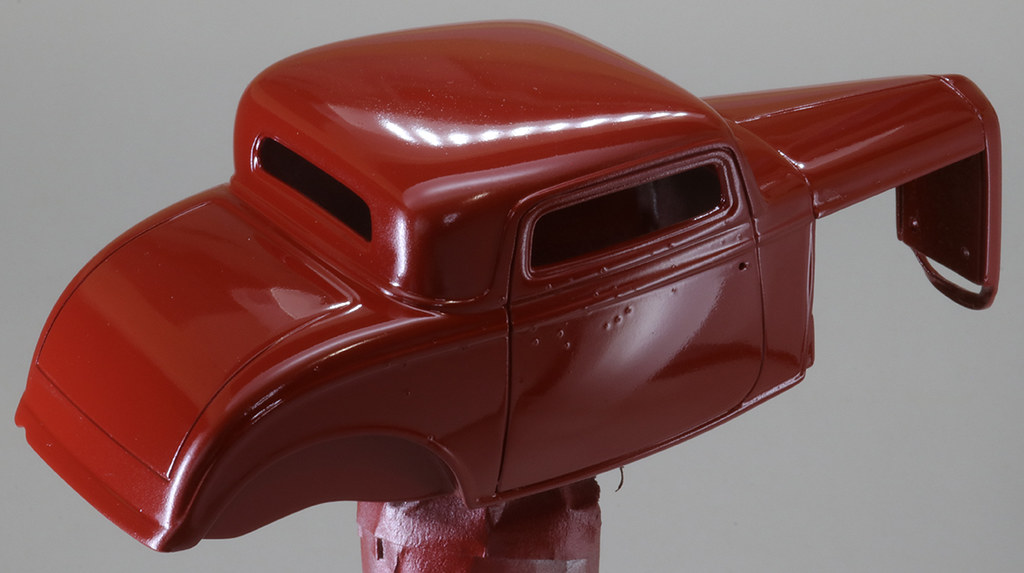
Updated — here's how the body looks about 22 hours after painting. In addition to the bubbles on the sides near the beltline I see some rough areas on the top of the roof and other places. I think that I can correct it all with gentle wet sanding and polishing. I will not be clear coating it.
|
|
|
|
Post by chepp on Mar 10, 2022 19:43:54 GMT -5
Bubble, bubble, toil and trouble. I thought that I could save the special red colored paint job by carefully sanding down the bubbles with 600 grit then smoothing things out with 2400. I burned through too many places and kept finding more boo-boos. So, I regressed a bit and went over it all with 1000. I have a fraction of an ounce of the paint remaining so I'll see if I can make it cover the burned-through areas. If I succeed it won't be thick enough to polish so I'll probably have to put on some clear enamel, too.
|
|
|
|
Post by Dave from Pleasanton on Mar 10, 2022 20:21:09 GMT -5
Bummer Charley about the bubbles and burn through. The color look great.
|
|
|
|
Post by skip on Mar 11, 2022 1:41:41 GMT -5
Well that sux! Why not just shoot the localized area that is thinned out first, with heavy enough coats to color sand out the topcoat then worry about any blending after that.
As long as you don't use a hard masking line at the end of the blended area you should be OK there, use something like a torn edged file card held 1/2 - 1" away from the paint surface it should achieve a decent blend. The blended ends of the blend areas will be almost like a light overspray that way. I've actually watched a few good, well great, (compared to me) automotive painters do pretty much the same thing, they spray the cardboard "mask" first to seal in any dust particles then paint on!
|
|