|
|
Post by 41chevy on Sept 14, 2023 22:09:48 GMT -5
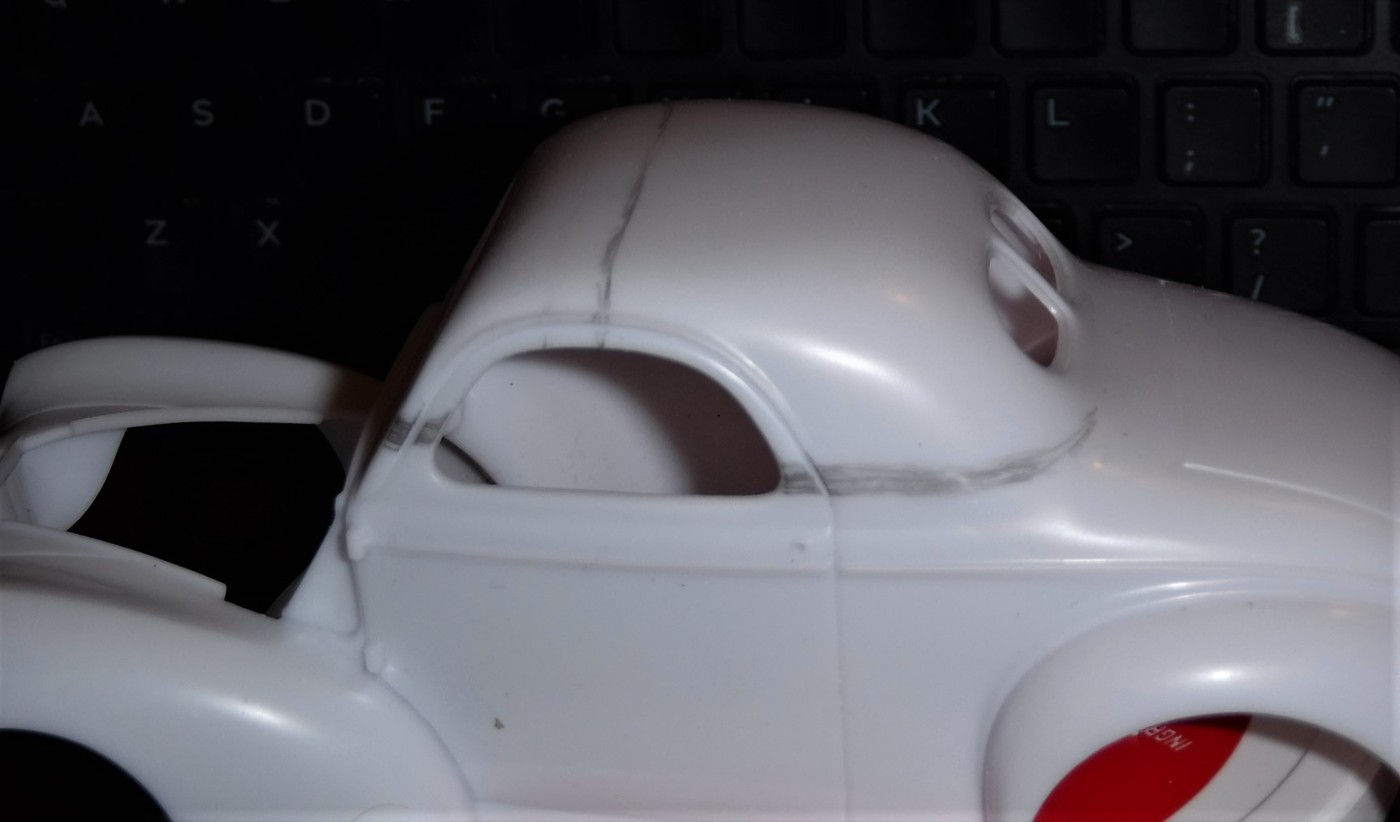
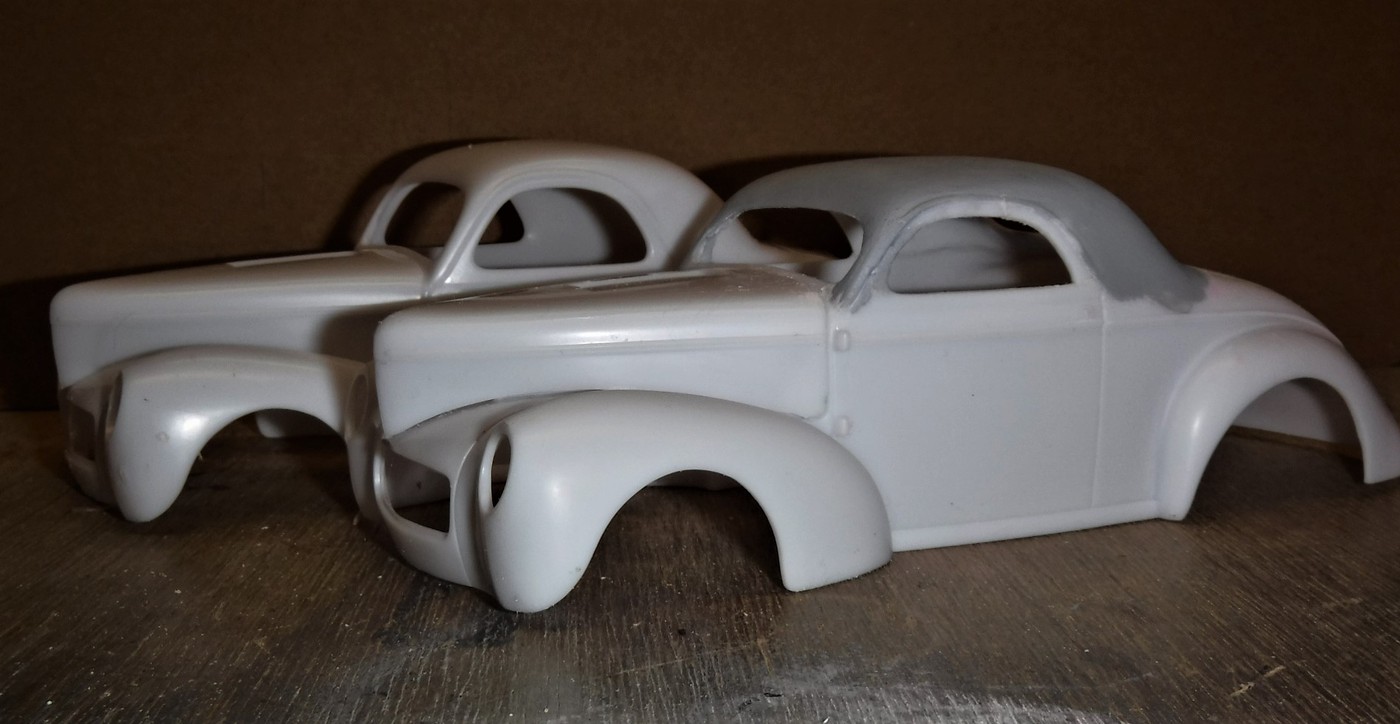
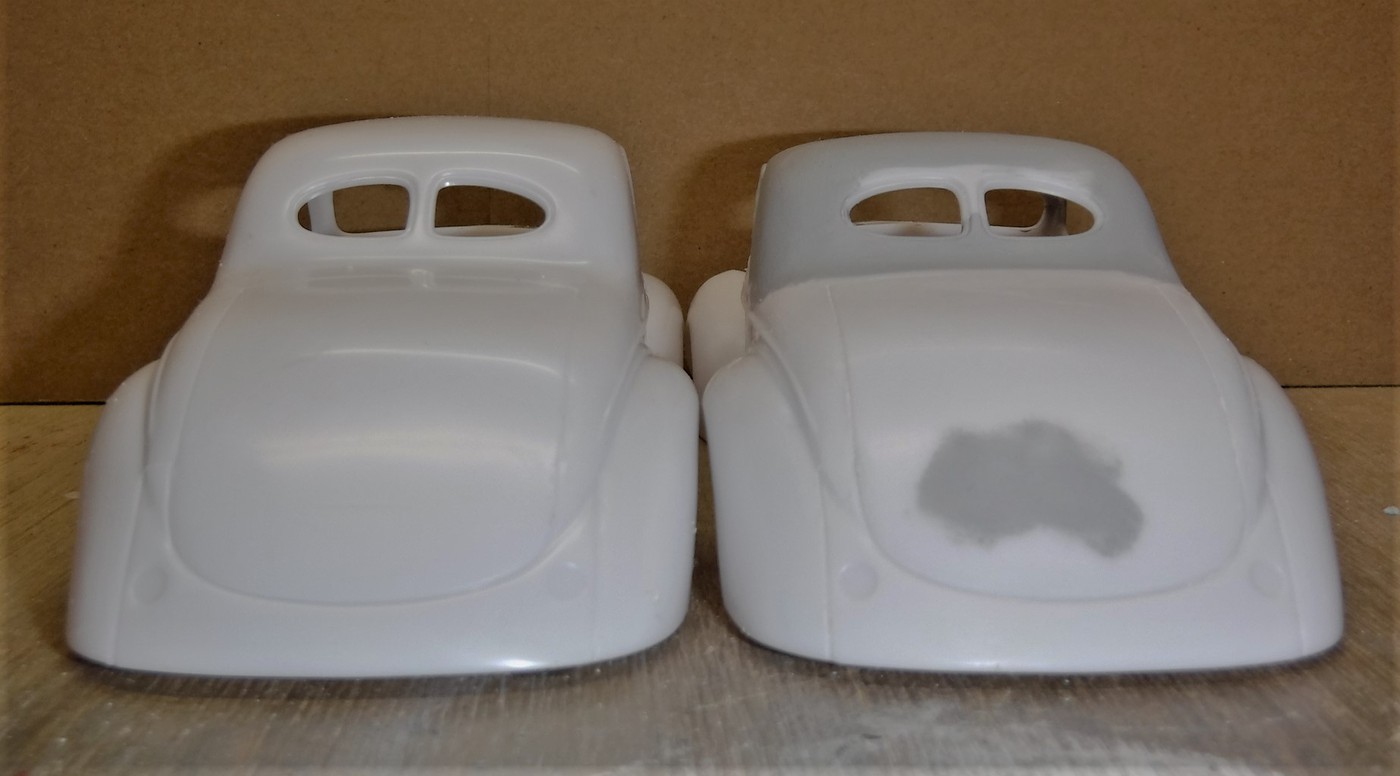
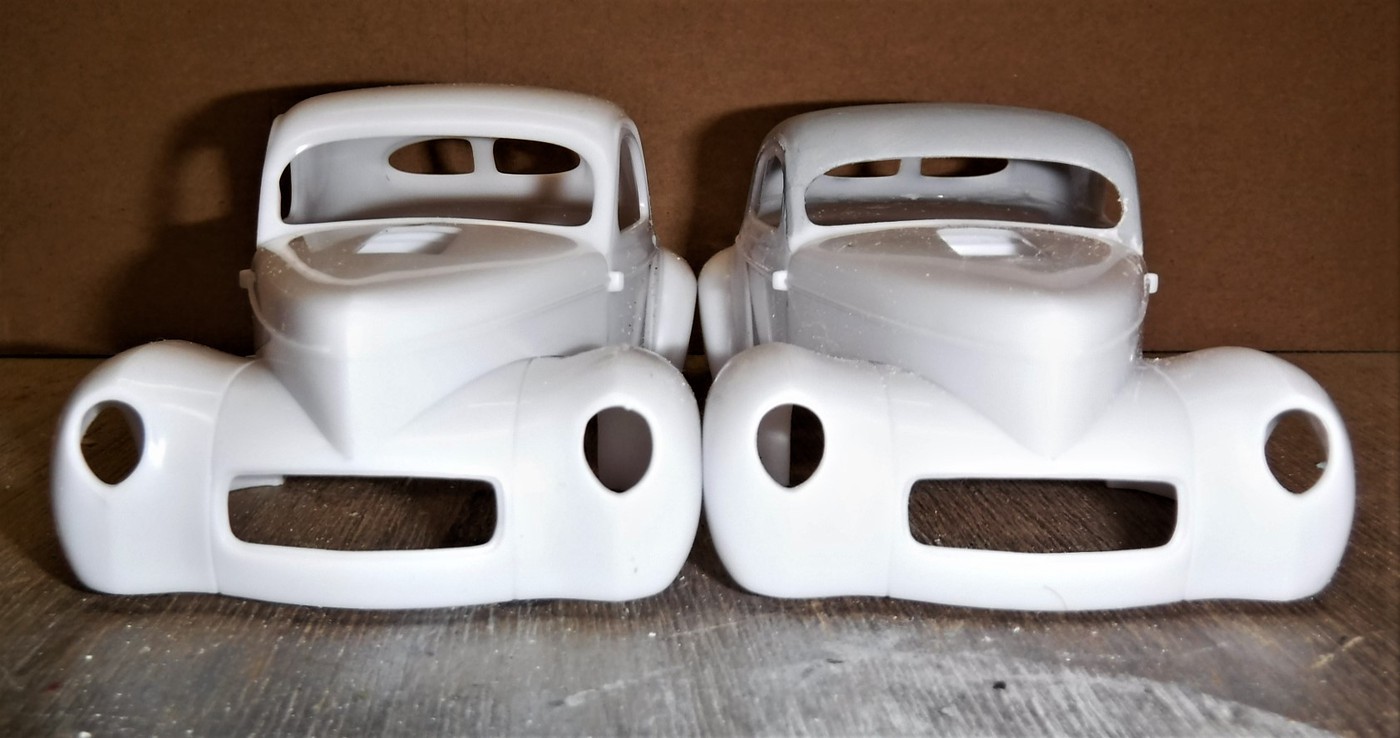
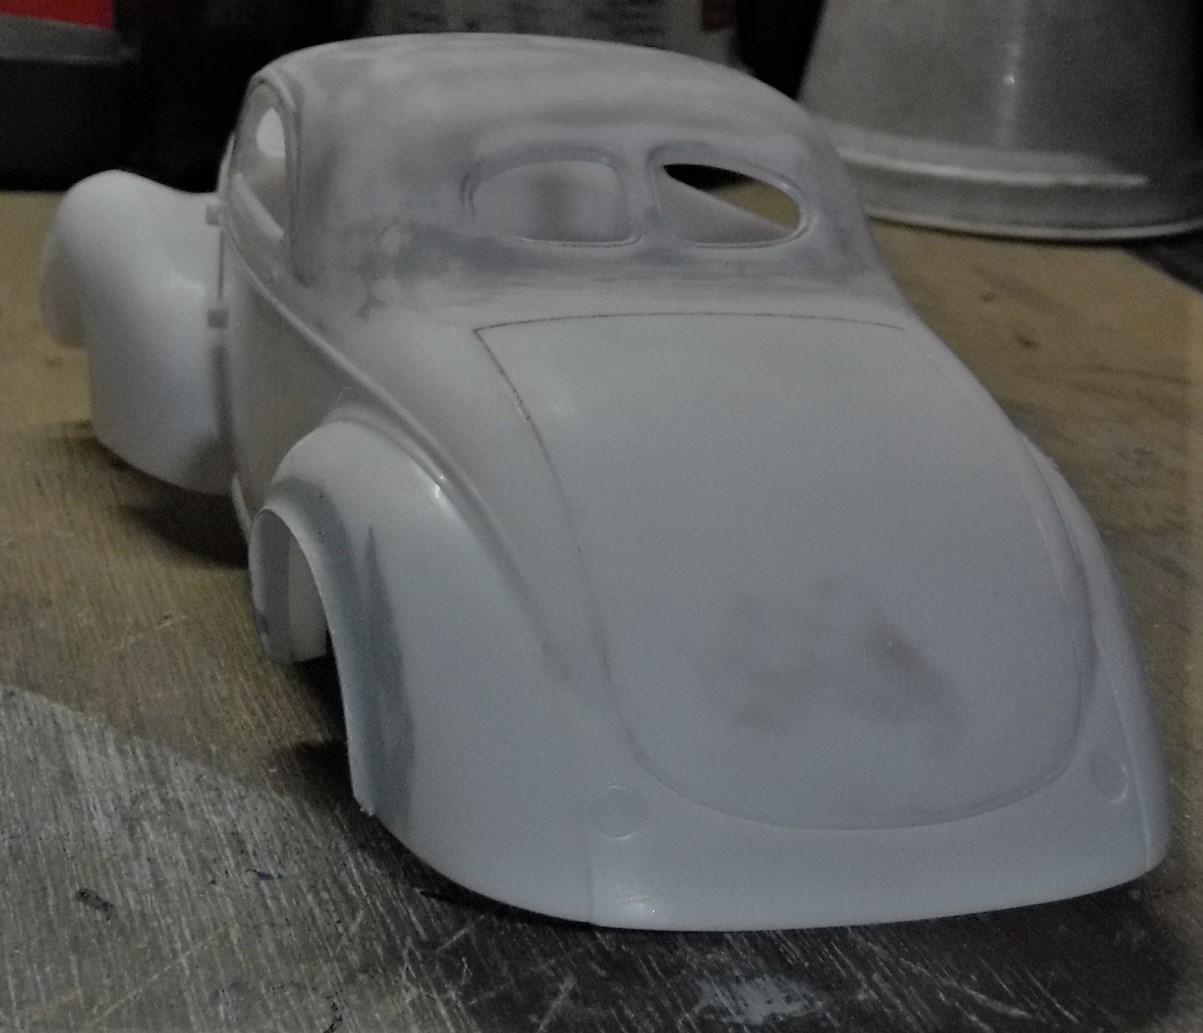
Chopped the top and added flares to the rear fenders. Now since power is a Mouse instead of an Elephant I needed to move the blower hole forward a bit.
|
|
|
|
Post by Mr. Metallic on Sept 15, 2023 6:52:53 GMT -5
Very nice chop!
|
|
|
|
Post by skip on Sept 15, 2023 11:05:31 GMT -5
Paul - Great Bodywork! That Chop and the other tweaks on the body look amazing, can't wait to see it in color.
|
|
|
|
Post by RodBurNeR on Sept 15, 2023 19:47:21 GMT -5
looks like a clean haircut!
|
|
|
|
Post by 41chevy on Sept 15, 2023 20:41:36 GMT -5
Thanks! Color will be a blue metallic when ready. The chop wa much easier than I expected. The first Willys chop was much harder for some reason.
|
|
|
|
Post by lo51merc on Sept 15, 2023 23:01:56 GMT -5
I sure would like to see, what, where you added, extra body piece in the top to stretch it  Tutorial requested! Gary |
|
|
|
Post by ChrisV on Sept 17, 2023 3:56:18 GMT -5
I sure would like to see, what, where you added, extra body piece in the top to stretch it Tutorial requested! Gary I second that - The chop looks very clean and well proportioned! |
|
|
|
Post by krassandbernie on Sept 17, 2023 11:15:04 GMT -5
It's looking great! Please tell me you are going to restore the inside rear corner of the door window openings so that it is rounded again and doesn't come to a point?! I've seen so many guys call it "good enough" or cut corners instead of retaining the original window shape in instances such as this.
|
|
|
|
Post by sharp on Sept 18, 2023 16:41:57 GMT -5
Great lookin' chop!
|
|
|
|
Post by 41chevy on Sept 20, 2023 20:13:39 GMT -5
It's looking great! Please tell me you are going to restore the inside rear corner of the door window openings so that it is rounded again and doesn't come to a point?! I've seen so many guys call it "good enough" or cut corners instead of retaining the original window shape in instances such as this. I added a triangle of .040 plastic and shaped it with a rat tail file, a light coat of MR Liquid filler and done. Having done a few dozen 1 to 1 chops over the past 50 years and apprenticing at my uncles shop (Gary's Auto Bodyhttps://kustomrama.com/wiki/Gary%27s_Auto_Body ) I sweat the small details. I plan my cuts and on window and door openings plan on small fillers for the window openings. |
|
|
|
Post by 41chevy on Sept 20, 2023 20:28:59 GMT -5
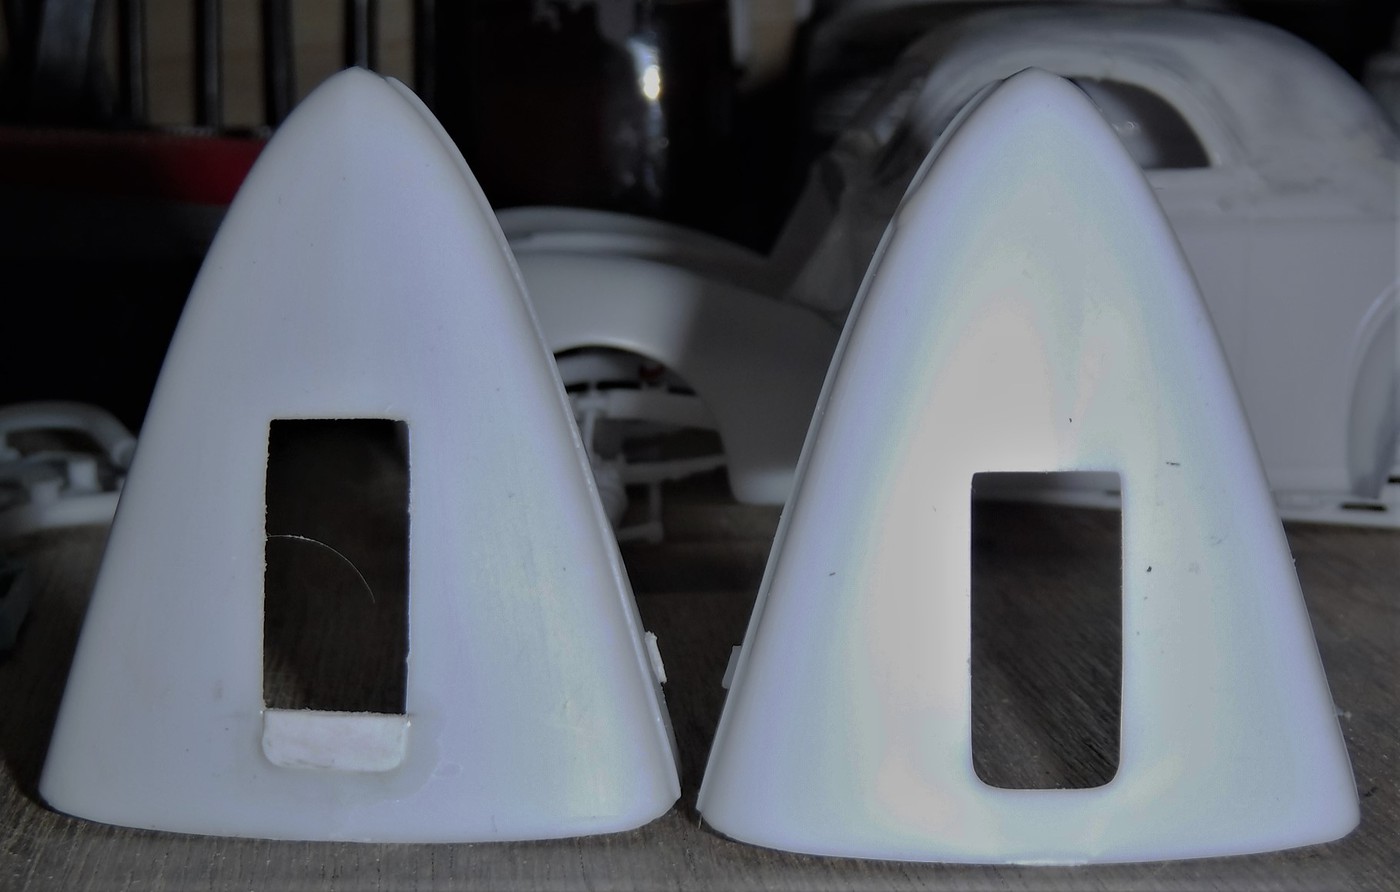
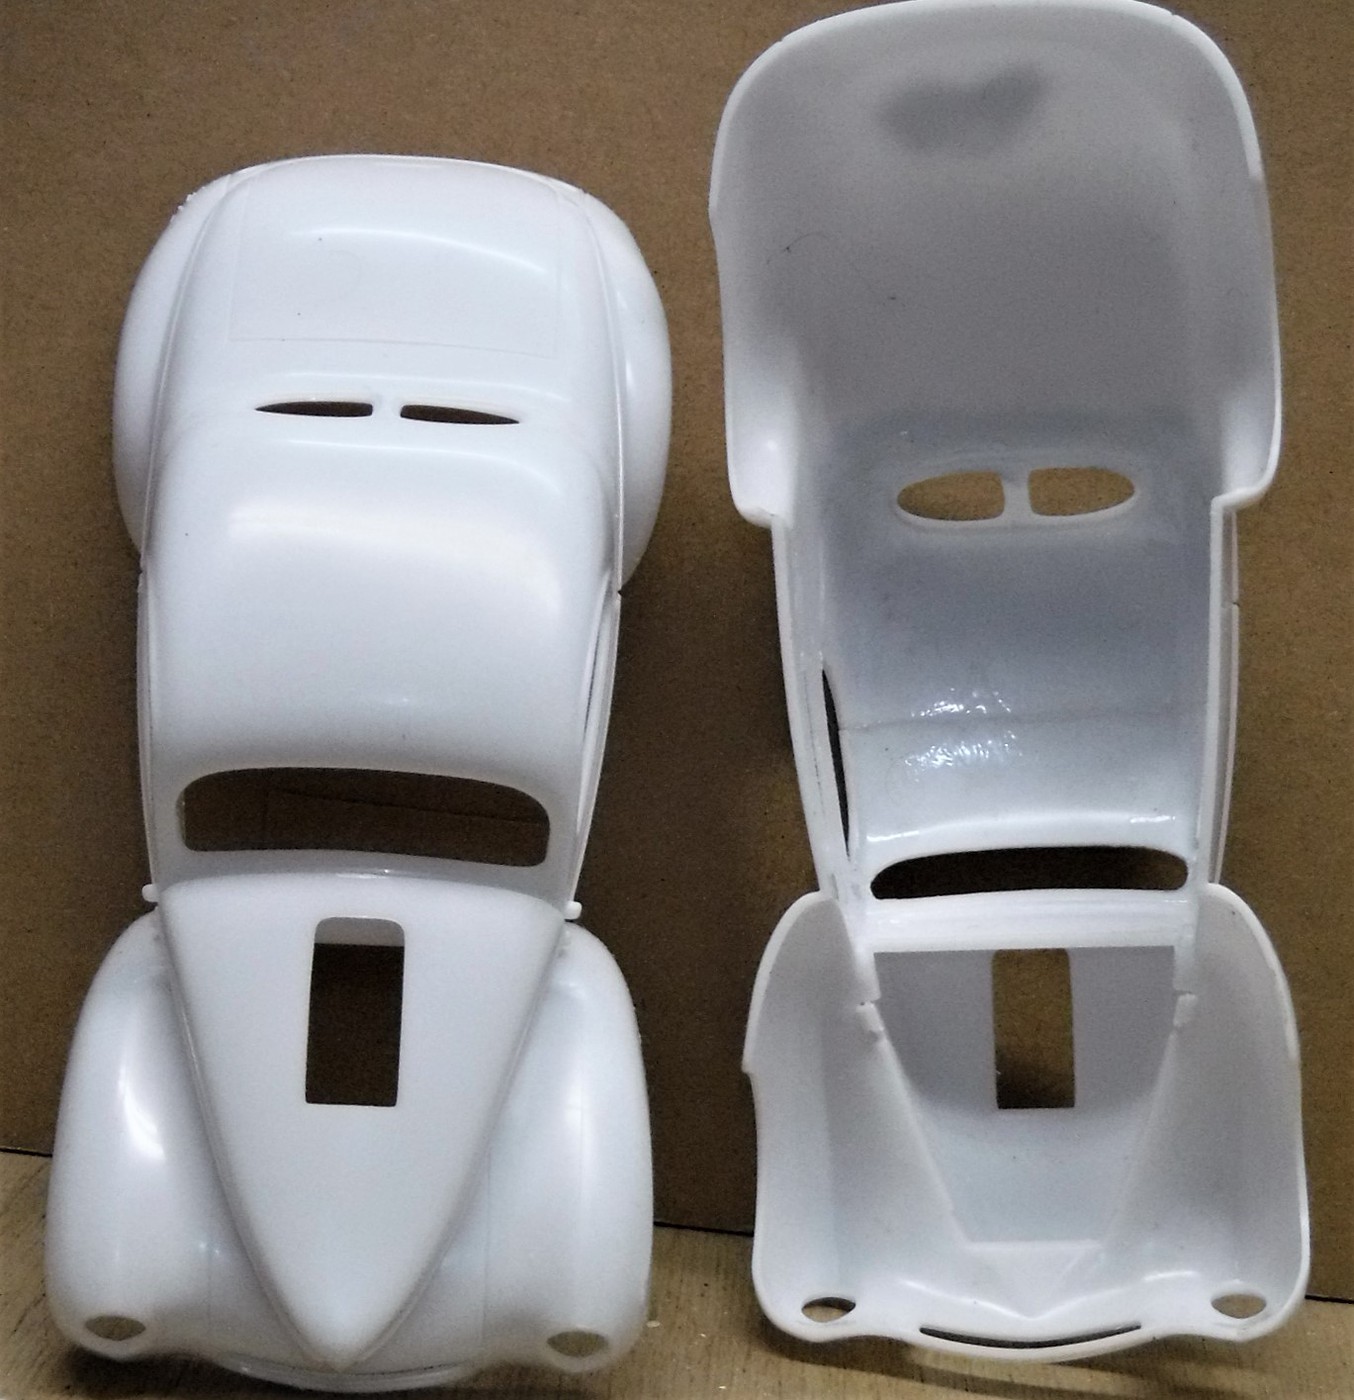
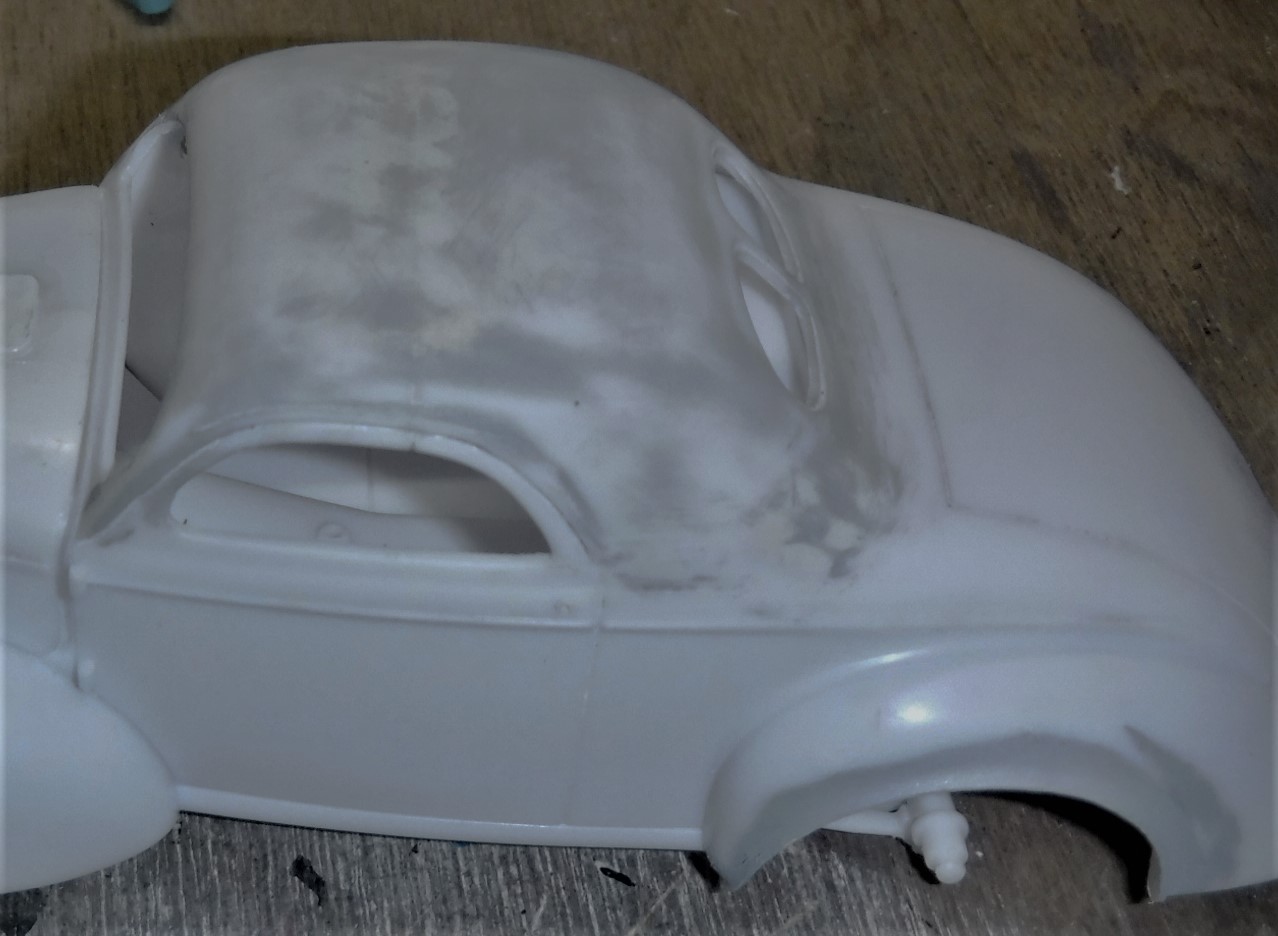
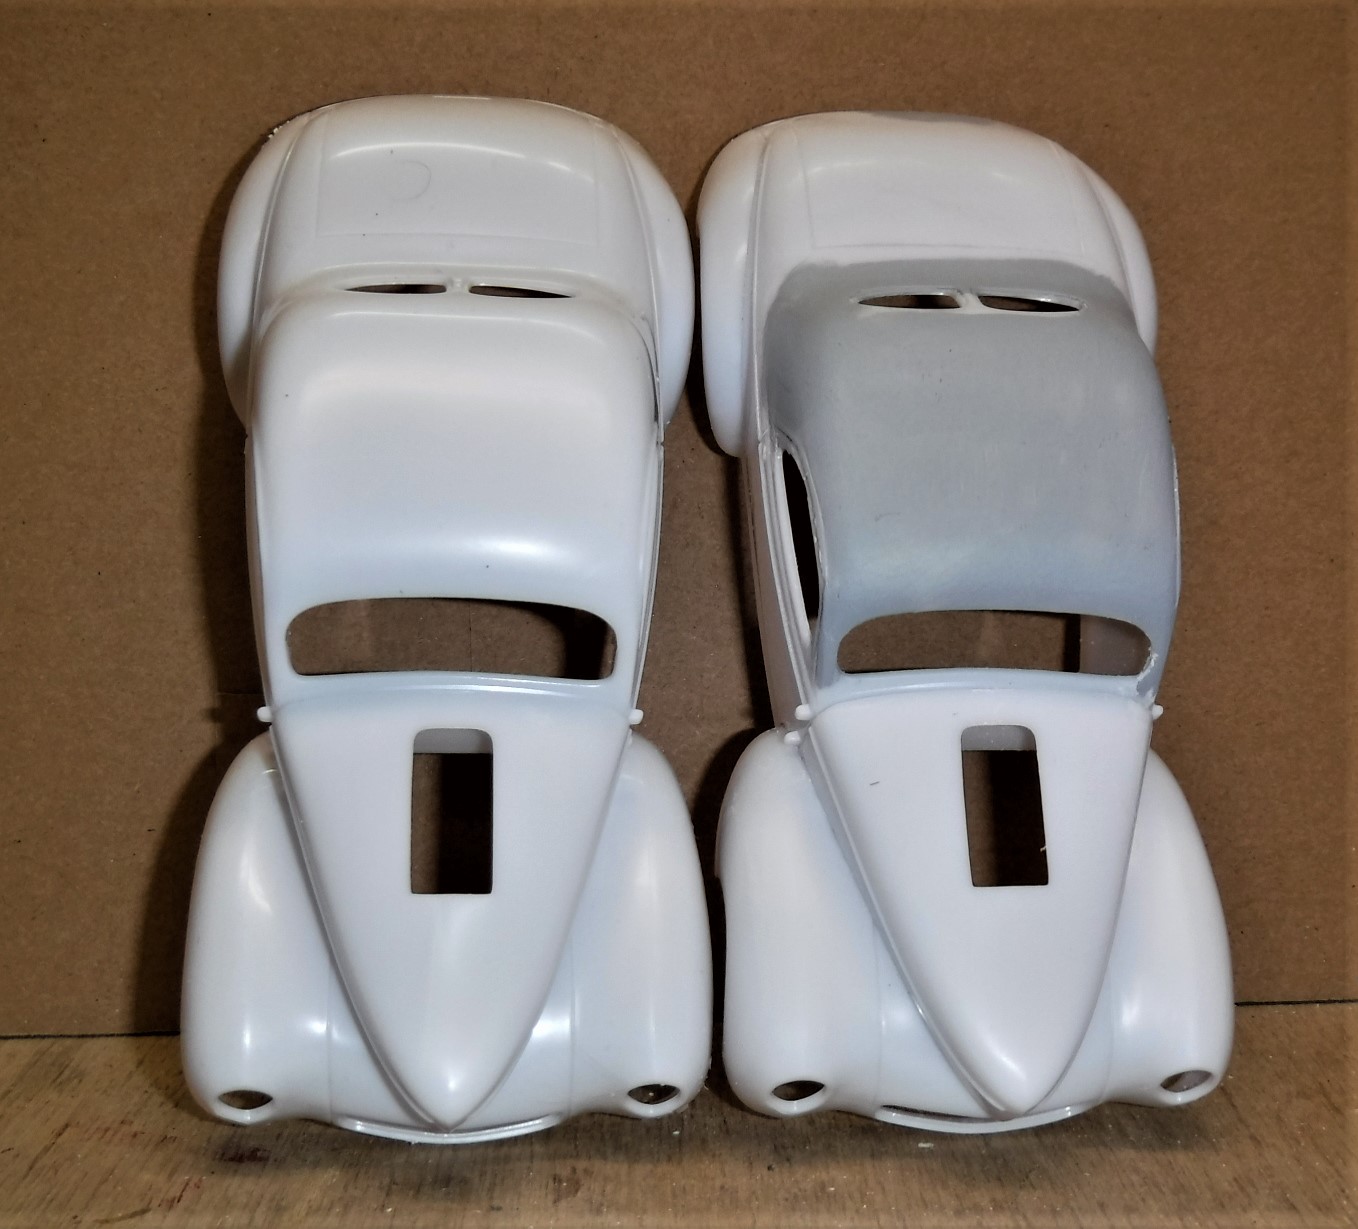
I sure would like to see, what, where you added, extra body piece in the top to stretch it Tutorial requested! Gary Gary there is no filler pieces added. I copied the way the chop was originally done. A single cut to separate the A pillars. a cut across the roof and a 2.5mm to 0 pie cut from the back of the door to just around the rear corner of the top. I ran the saw across the lowest area of the roof flare to relieve stress when I pushed the roof section down to close the pie cut. I laid the rear section forward to close the pie cut and the sanded the roof cut to be 90 degee's to the body. I than sanded the A pillars to lay the windshield back and meet the center roof cut. Zero plastic filler pieces and less than 1/16 of putty to flare in the rear of the roof. See photos.
Initial cut layout I used a .005 Gyro cut off saw blade in a Dremmel.
the cuts and CA is viable in the pic below.
|
|
|
|
Post by dodgefever on Sept 21, 2023 14:23:11 GMT -5
Very clean.  |
|
|
|
Post by HotRodTom on Sept 23, 2023 14:21:03 GMT -5
looks like a clean haircut! I would agree, but.....  Haaaa! Kidding! Looks stellar buddy! Keep bringin' it! Tom |
|
|
|
Post by HotRodTom on Sept 23, 2023 14:25:00 GMT -5
The first Willys chop was much harder for some reason. Just like the first step to change a habit, the first chop is always the hardest.  Great job man! Tom |
|
|
|
Post by lo51merc on Sept 23, 2023 15:12:39 GMT -5
Thanks Paul! Easy peasy etc..
Gary
|
|


 Tutorial requested!


 Great job man!