|
|
Post by 41chevy on Feb 3, 2021 23:14:11 GMT -5
Thanks! I have thought about doing the tonneau cover like the interior, with a diamond tuft insert. My concern is that it will look too thick and "plastic-y", But I'll probably take a swing at it. Bernard, what is the measurements of the diamond "square"? I have a lot of .020 and .015 thick , Plastruct and Evergreen square pattern "roof" tile the look like the same exact patterns on your seats. If I have the size you need you can had some. The sheets are for model railroading and architectural models from N scale to O scale trains. Paul |
|
|
|
Post by Bernard Kron on Feb 4, 2021 1:04:54 GMT -5
Thanks! I have thought about doing the tonneau cover like the interior, with a diamond tuft insert. My concern is that it will look too thick and "plastic-y", But I'll probably take a swing at it. Bernard, what is the measurements of the diamond "square"? I have a lot of .020 and .015 thick , Plastruct and Evergreen square pattern "roof" tile the look like the same exact patterns on your seats. If I have the size you need you can had some. The sheets are for model railroading and architectural models from N scale to O scale trains. Paul That's what I use, too. The Evergreen stuff is engraved, not embossed and .020 isn't all that thick. I just have to figure out how to avoid too many layers of shhet - maybe a .010 base sheet and then the patterned stuff on top. The piece I'm using right now is .010 with some masking tape ober the top to simulate cloth tecture. It's just for ockup purposes. We'll see how it all goes. Thanks for the offer!
|
|
|
|
Post by Mr. Metallic on Feb 4, 2021 7:16:20 GMT -5
Are you thinking of layering the insert on TOP of your existing tonneau? That could get thick. If it was me (and you may have already thought of this) i would cut out the shape if the insert you want and put the insert in flush with the tonneau from underneath.
|
|
|
|
Post by Bernard Kron on Feb 4, 2021 11:41:50 GMT -5
Are you thinking of layering the insert on TOP of your existing tonneau? That could get thick. If it was me (and you may have already thought of this) i would cut out the shape if the insert you want and put the insert in flush with the tonneau from underneath. The tonneau you see is a rough mockup used for positioning and to establish the overall shape. I'll make a new piece for the final version.. That's a good suggestion regarding the insert. It will minimize the height of it and ensure it's roughly flush with the rest of the tonneau. It's the overall thickness, out to the edges, that's my main concern. The alternate approach, a fabric tonneau, could be done by making a top surface from wide masking tape and then trimming, masking, and painting as appropriate. We'll see... |
|
|
|
Post by 41chevy on Feb 4, 2021 12:07:35 GMT -5
The Plastruct is vacuum formed .015 plastic to look like " ceramic roof tile" so the edges are rounded not sharp. Paul
|
|
|
|
Post by Bernard Kron on Feb 7, 2021 21:52:01 GMT -5
Things are moving along at a nice clip now. I decided to tackle a show-style tonneau cover. It’s made from Evergreen (main tuck and roll surface) and Plastruct (diamond tuft insert) styrene sheet. The chassis is built with the exception of the front hairpin radius rods. And all the main surfaces are painted in Duplicolor Universal white over white primer and three coats of Tamiya TS-65 Pearl Clear. Now for the decals and final assembly. Thanks for lookin’, B.  |
|
|
|
Post by spex84 on Feb 8, 2021 12:00:04 GMT -5
Wicked. The tonneau really helps the proportions! I dig the drawer-handle grille and 5-spoke mags...definitely nailing that 60s show-car look.
|
|
|
|
Post by Mr. Metallic on Feb 9, 2021 8:55:41 GMT -5
Tonneau really looks good, and adds a bit of detail to the back of the car. Glad you were able to make it work
|
|
|
|
Post by Bernard Kron on Feb 13, 2021 15:44:34 GMT -5
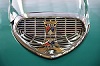
Thanks guys! This looks a lot like the preliminary decal mockup a couple of posts back, but this is actually the final decal application with 5 coats of Tamiya TS-13 clear over them. That’s 2 coats more than I normally do so that’s there’s plenty of thickness to rub the paint out. This was actually a pretty big deal. The decal art was edited to provide a more exact fit, and a fogged strip was made for the grill shell, which was missing from the first set. As you might imagine, these are quite big decals. There are 12 individual pieces (including 3 for the grill) and a lot can go wrong between printing, sealing them, applying them and clear coating them. In fact it took the equivalent of 3 decal sets to get them all right. One of the advantages of self-made decals is you can always print more! It looks very much how I imagined it would and the application is pretty clean will no major gaps or flaws, so I’m quite relieved. Once the paint is hardened I’ll polish it out and then do the final assembly Thanx for lookin’, B.  |
|
|
|
Post by chepp on Feb 13, 2021 16:06:53 GMT -5
Man, you nailed it...again! The panel "painting" is very effective.
|
|
|
|
Post by FordRodnKustom on Feb 13, 2021 18:55:46 GMT -5
Looks good. Interesting approach to graphic design going on there for sure. Bring it home!
|
|
|
|
Post by spex84 on Feb 14, 2021 11:36:08 GMT -5
Holy crap, I somehow missed the fact that you were going to decal the whole thing!! Very impressive prototyping and planning; I wouldn't dare to attempt such large decals, especially when they have to follow the body lines so exactly. Well done.
I do see a slight gap at the doors, which suggests a strategy for future panel-jobs: leave a deliberate gap at body seams, cut lines and character lines, with the art designed to fit around them (ie maybe with filleted corners), so even if the decal chunks don't line up absolutely 100%, they will look absolutely perfectly aligned anyway. If I ever try something like this, I'll definitely take your projects as inspiration and instruction.
*edit*
I was going to fog my '30 coupe build (it's been on hold for years now) but do it by hand. Now I'm wondering if that's the right approach. We shall see!
|
|
|
|
Post by Bernard Kron on Feb 14, 2021 12:21:22 GMT -5
Thanks guys! ...I do see a slight gap at the doors, which suggests a strategy for future panel-jobs: leave a deliberate gap at body seams, cut lines and character lines, with the art designed to fit around them (ie maybe with filleted corners), so even if the decal chunks don't line up absolutely 100%, they will look absolutely perfectly aligned anyway. If I ever try something like this, I'll definitely take your projects as inspiration and instruction. *edit* I was going to fog my '30 coupe build (it's been on hold for years now) but do it by hand. Now I'm wondering if that's the right approach. We shall see! The first time I prototyped the decals there were gaps between most of the panels, including the rear panel where it joined the rear quarter panels. I liked the effect of leaving the door lines showing but wanted the three rear panels to appear continuous. So I made the appropriate changes. That's the advantage of decals - they are cheap and accurately repeatable. Having said that, the only reason I used decals was because I have neither the skills nor the conditions to do airbrushing. I actually own an airbrush and a compressor but haven't been able to find a way to establish proper ventalation in our home to use it. If I had the choice I would airbrush. The skill required is non-trivial, but presumably can be learned with practice. The result would be far superior. These large decals, because the center must remain intact, create large areas that will never be totally smooth. So even after rubbing out, the paint won't be as nice. So, if you can, airbrush! Some of you may recall a very fine modeler name Gary Seeds. Gar is a master painter when it comes to airbrushing in miniature and has produced some exquisite fogged panel paint jobs. He disappeared for a while but he's recently resumed being active and frequents the Model Masters forum. Look him up to see what can be done in this style. |
|
|
|
Post by Bernard Kron on Feb 19, 2021 0:32:08 GMT -5
The back half and interior of the car are now done. The to-do list is still fairly lengthy, with details like the exhaust headers, front radius rods, steering gear, windshield glass and headlights left to install but really this project is about done. Below are pics of the interior (minus shiftlever), and rear end of the car. The taillights and license plate frame are from the inevitable Revell Deuce kits. This should be the last post as a w.i.p. Next time it’ll be a completed model! Thanx for lookin’, B.  |
|