|
|
Post by nobillet on Nov 11, 2011 15:33:41 GMT -5
Just love the symmetry you put into the front and rear of this car. Each end of the vehicle flows and is spaced side to side perfectly. Your modifications are so perfectly matched to each other (font and back) as well as to the car itself. Very well done and so cleanly executed.
John
|
|
|
|
Post by harron68 on Nov 11, 2011 22:14:03 GMT -5
THE WIP SHOWS CLEARLY HOW MUCH TIME AND EFFORT GOES INTO A PERFECT CHOP FOR IT. I STRONGLY ADMIRE YOUR SKILLS AND DETERMINATION TO DO GREAT WORK. THANX FOR SHARING IT WITH ALL US!
|
|
|
|
Post by miwi on Nov 12, 2011 4:26:58 GMT -5
I love how change the rear end of the Fleetline. Those bumper are looking great
|
|
|
|
Post by acres on Nov 12, 2011 7:53:45 GMT -5
Nice work so far  |
|
|
|
Post by Greg Pugh on Nov 12, 2011 16:14:28 GMT -5
I just got done telling Bryce that he had the nicest chop on one of these cars that I've seen but this one is awfully damn nice too! The quality around here is amazing!
|
|
|
|
Post by lo51merc on Nov 17, 2011 21:40:32 GMT -5
So it was time! I've seen a lot of models with hood louvers that were cut out of one model and installed into another. I figured this chebby was a prime candidate for my first attempt on doing it myself. My donor was the Revell 49 Merc custom hood. While the Merc hood has three rows of louvers on each side, I used only two. In the first picture I have sawed almost all the way through to remove these louvers from the donor hood. Once all the cuts were made (and this crappy dark picture was taken) I finished cutting them through, and then I removed the marked sections. Also in the picture I have started the layout for the louvers on the Chevy hood. 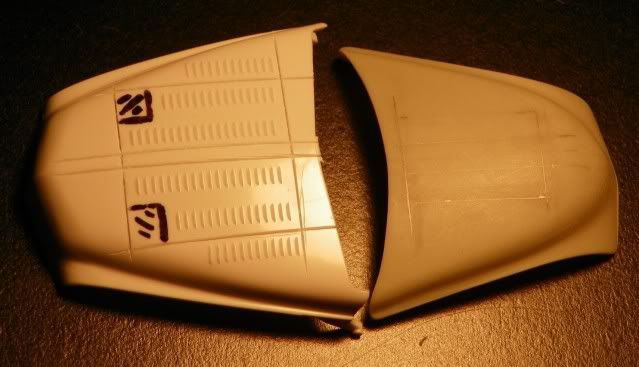 In the following picture I have seperated both rows of louvers, giving me four rows. After that I filed and sanded each row to 1/4" wide, and squared the ends leaving about 1/16" at the front end. It was easier to fit them to the Chevy hood this way because I could tweak the individual rows as needed when installing them. I opened the hood for one row at a time, which I felt would help keep the hood more solid. I worked, left to right, left to right, for that same reason. I'm going to have to fab a narrow sanding stick to even up between the rows, but other than that they're done. Most of the bodywork is done as well, I just have to finish around the grille shell. Then I'll put back the drip rails and the front and rear windshield moldings. HAPPY THANKSGIVING to all who celebrate it! Gary 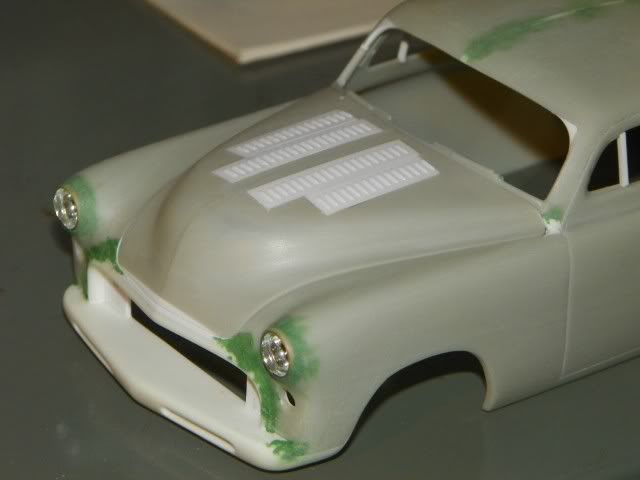 |
|
Deleted
Deleted Member
Posts: 0
|
Post by Deleted on Nov 17, 2011 22:13:38 GMT -5
This is awesome!
;D
|
|
|
|
Post by rusa on Nov 17, 2011 22:50:50 GMT -5
Truly some inspiring work!! The louver work is a stroke of genius, and the rest is lookin great!!
;D ;D
|
|
|
|
Post by draggon on Nov 17, 2011 23:57:10 GMT -5
Holy crap. Some of us have skills beyond belief.......have I said enough? Damn, Gary, ya wanna move to the Bay Area and teach me?
|
|
|
|
Post by RodBurNeR on Nov 18, 2011 0:35:37 GMT -5
very nice, love these touches!
|
|
|
|
Post by Bryce on Nov 18, 2011 6:14:49 GMT -5
Painstaking work Gary - you are doing a great job!
|
|
|
|
Post by dakotajohn on Nov 18, 2011 6:41:19 GMT -5
WOW!! Great work!!
|
|
|
|
Post by froghawk on Nov 18, 2011 8:58:17 GMT -5
Really outstanding work on this one. Love all the meticulously executed modifications, but by far my favorite one is how you thinned out the absurdly thick edges of the windshield and rear window openings on this kit!
|
|
|
|
Post by Greg Pugh on Nov 18, 2011 10:10:00 GMT -5
Holy crap!!! This is amazing work!
|
|
|
|
Post by constructionbob on Nov 18, 2011 11:33:18 GMT -5
I really like your sense with lines & details.. this is going to be very nice.
|
|