|
|
Post by froghawk on Apr 30, 2014 9:03:01 GMT -5
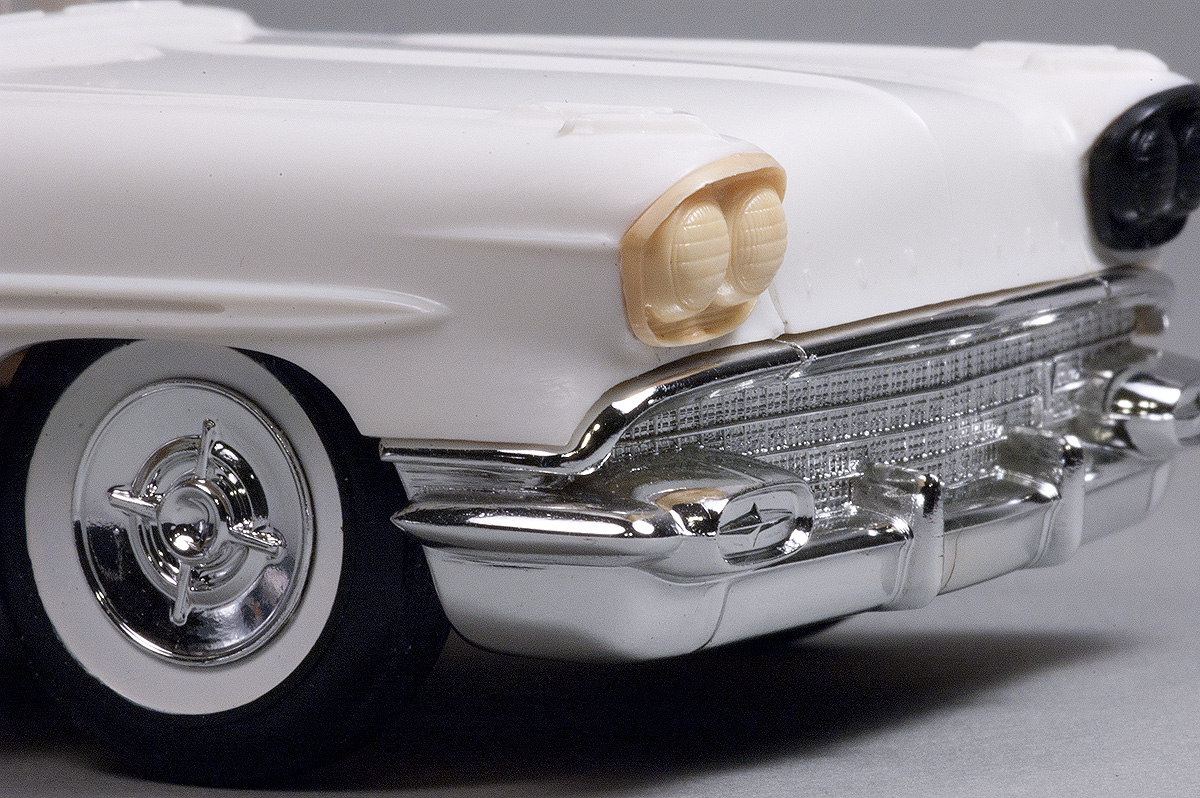
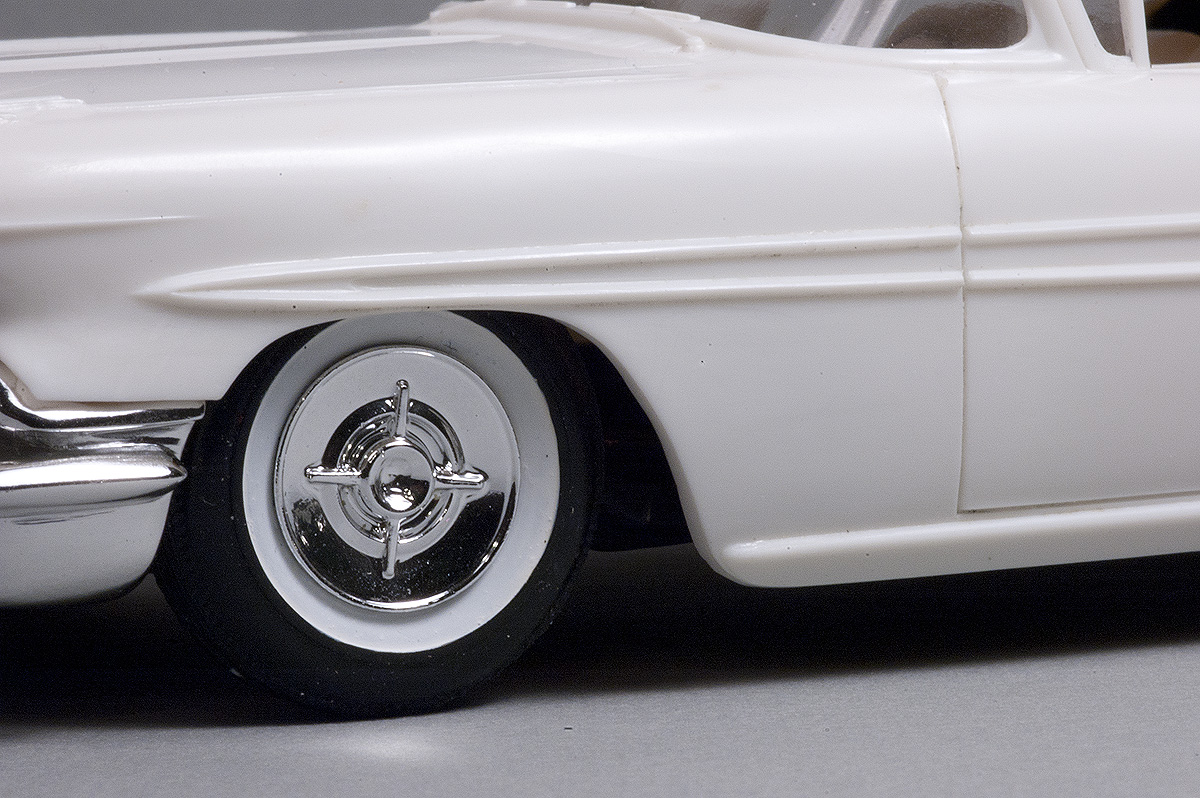
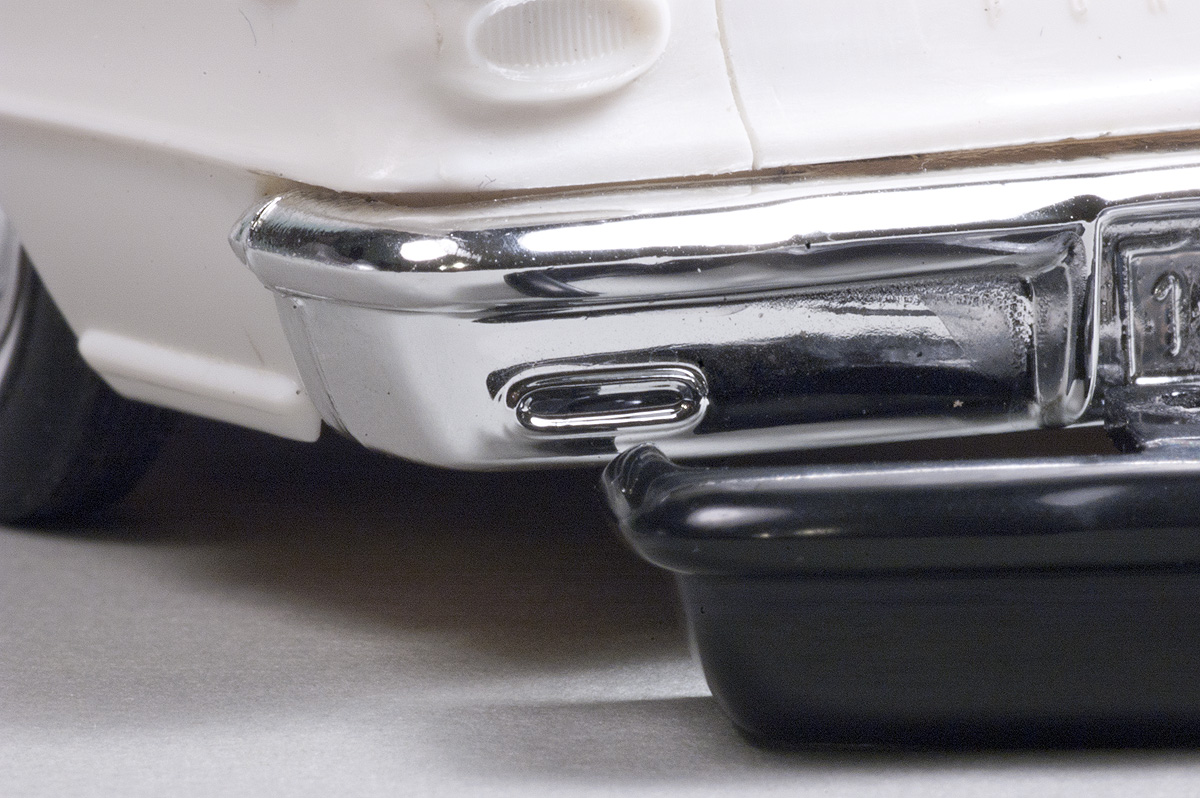
It feels strange to say this about what's basically just a simple old kit mocked up prior to paint and assembly, but... This thing rocks!!! I'm wondering, if a set of '59 Lancer caps would suit the look of the trim even better than the 57's. I can give that a try, Chris! Though the car I want to build had the '57-'58 caps and for my build I'll be shaving some trim off, mainly those hashmarks on the front fenders to clean it up a bit. |
|
|
|
Post by froghawk on Apr 30, 2014 9:05:01 GMT -5
I tend to prefer hardtops, but that's a beauty. Me, too, Stu! Currently working on resolving that issue... |
|
|
|
Post by froghawk on May 22, 2014 20:23:38 GMT -5
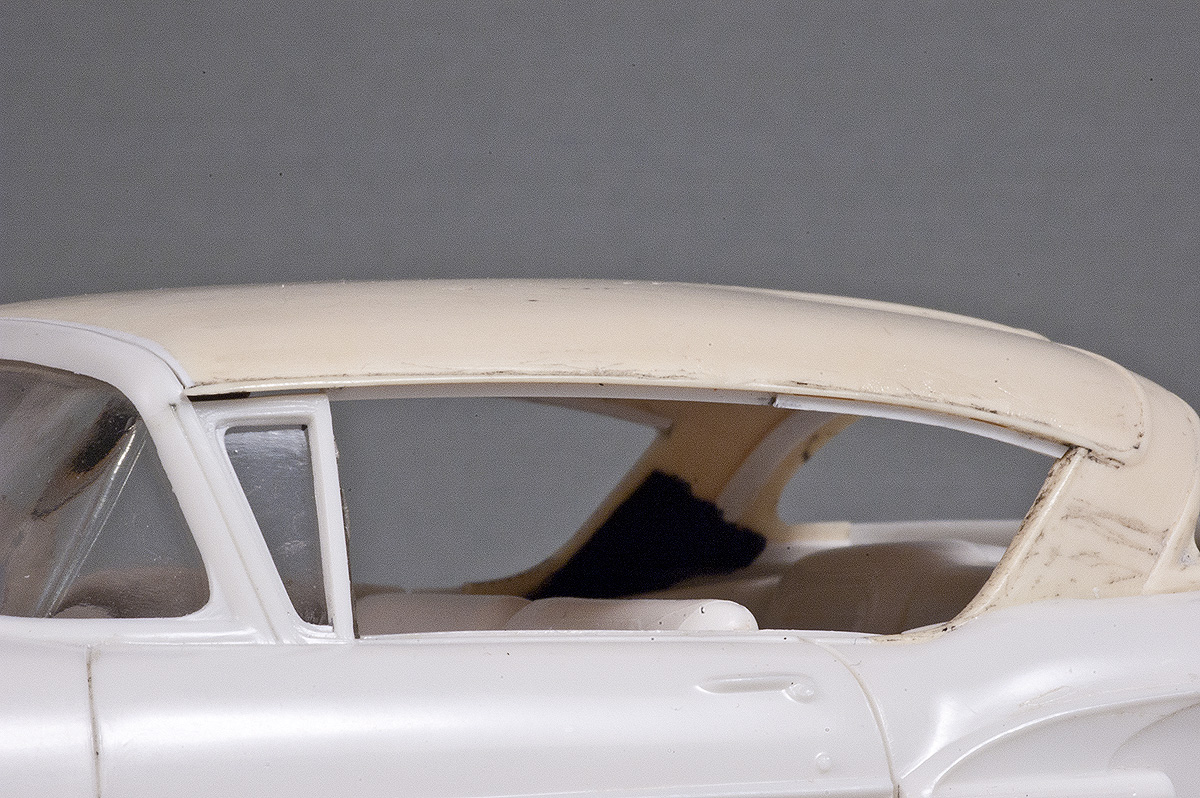
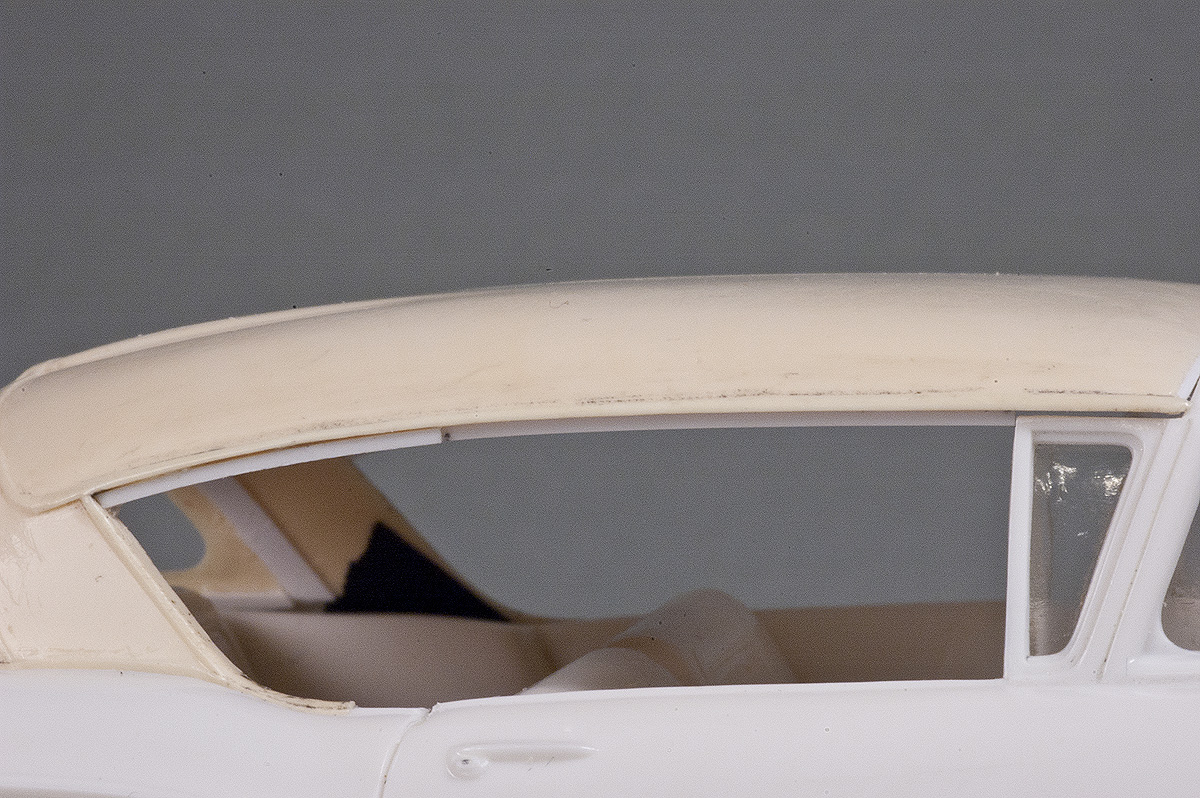
Now she's a hardtop! In addition to the fact that the '58 Bonneville I've wanted to build was a hardtop, being able to make this convertible into a hardtop would also help to camouflage the shallow and under-detailed interior of this kit, was reason enough to go for it when a really sorry-looking hardtop body presented itself on ebay. However I did make sure the AMT Trophy series '58 Impala wouldn't fit with out considerable work before making the purchase!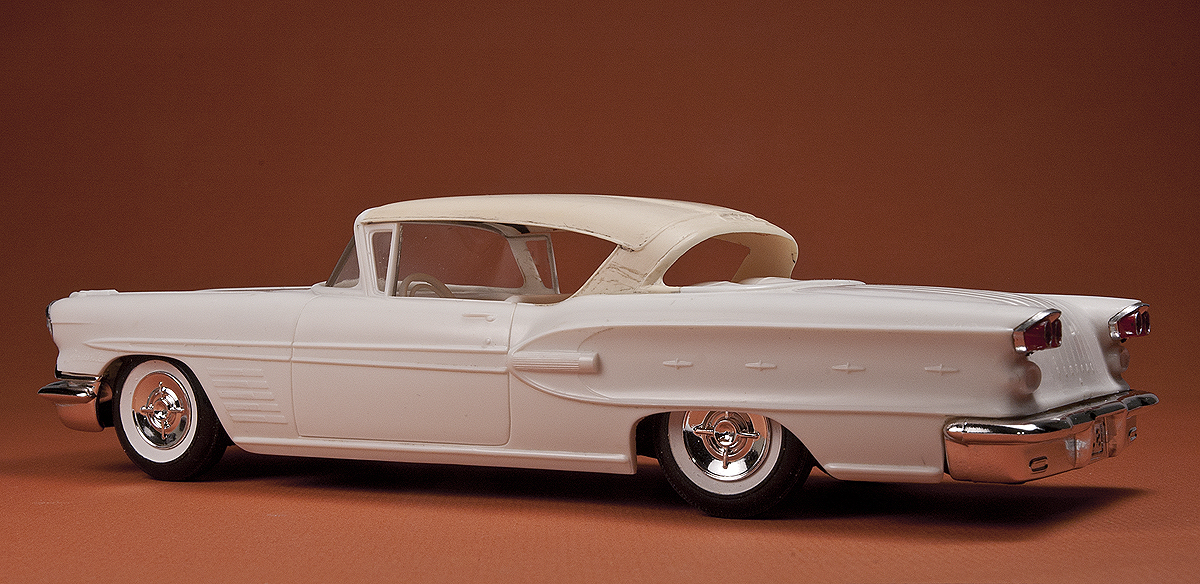 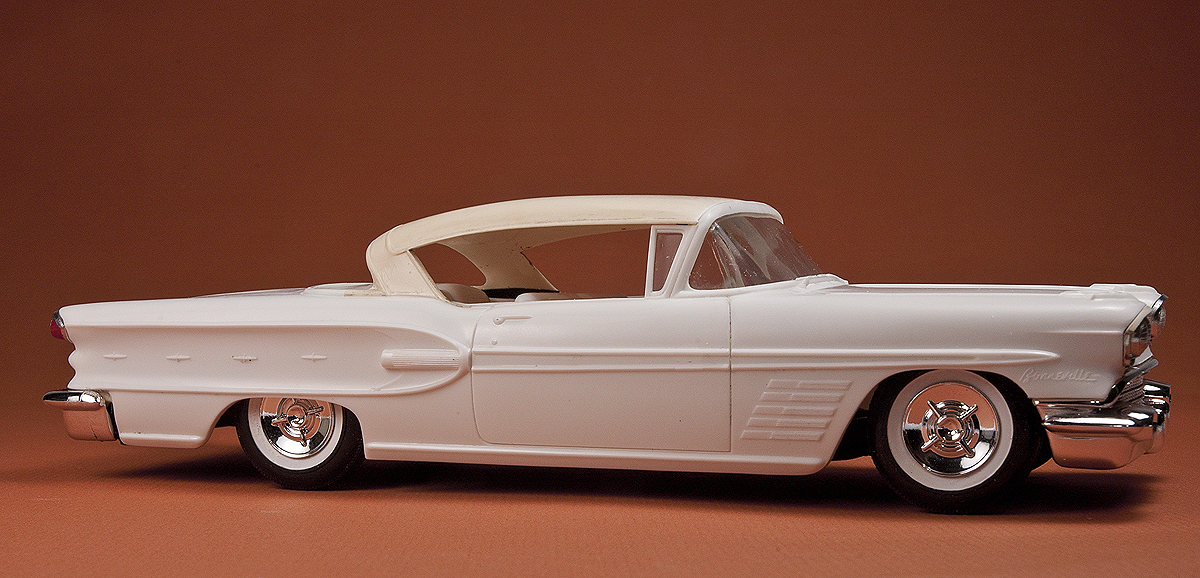 While the roof wasn't perfect the rest of the hardtop body was pretty trashed, looking like someone had attempted to strip the paint with a wire brush and a sharp implement! I wetsanded some scratches out of the forward section of the roof and did some other cleanup to make sure it was salvageable before marking the beltline and lower rear windows moldings for cutting with a razor saw. After those cuts were made I repeatedly scribed a cut with a #11 blade high on the quarter panel about a 16th inch from the base of the C pillar from saw cut to saw cut, freeing the back of the roof. The vent window and windshield posts were already cracked through so no cutting was needed there. While the roof wasn't perfect the rest of the hardtop body was pretty trashed, looking like someone had attempted to strip the paint with a wire brush and a sharp implement! I wetsanded some scratches out of the forward section of the roof and did some other cleanup to make sure it was salvageable before marking the beltline and lower rear windows moldings for cutting with a razor saw. After those cuts were made I repeatedly scribed a cut with a #11 blade high on the quarter panel about a 16th inch from the base of the C pillar from saw cut to saw cut, freeing the back of the roof. The vent window and windshield posts were already cracked through so no cutting was needed there.
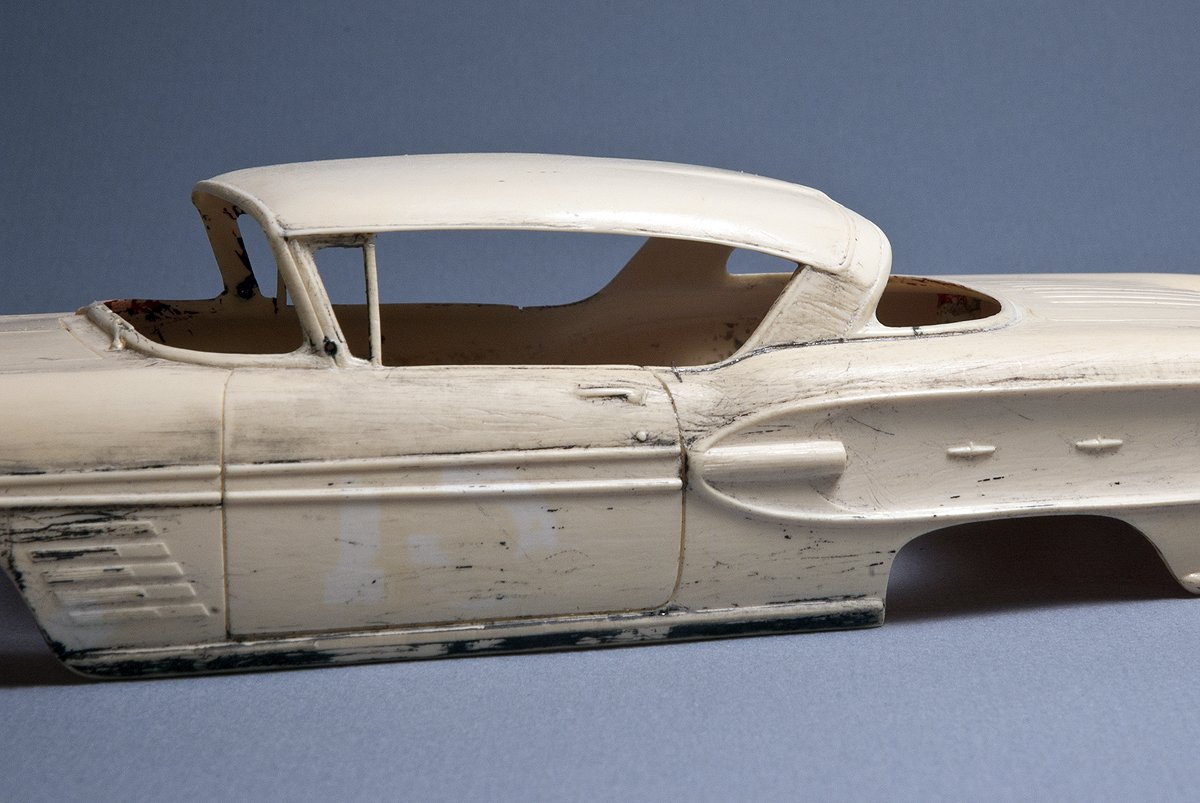 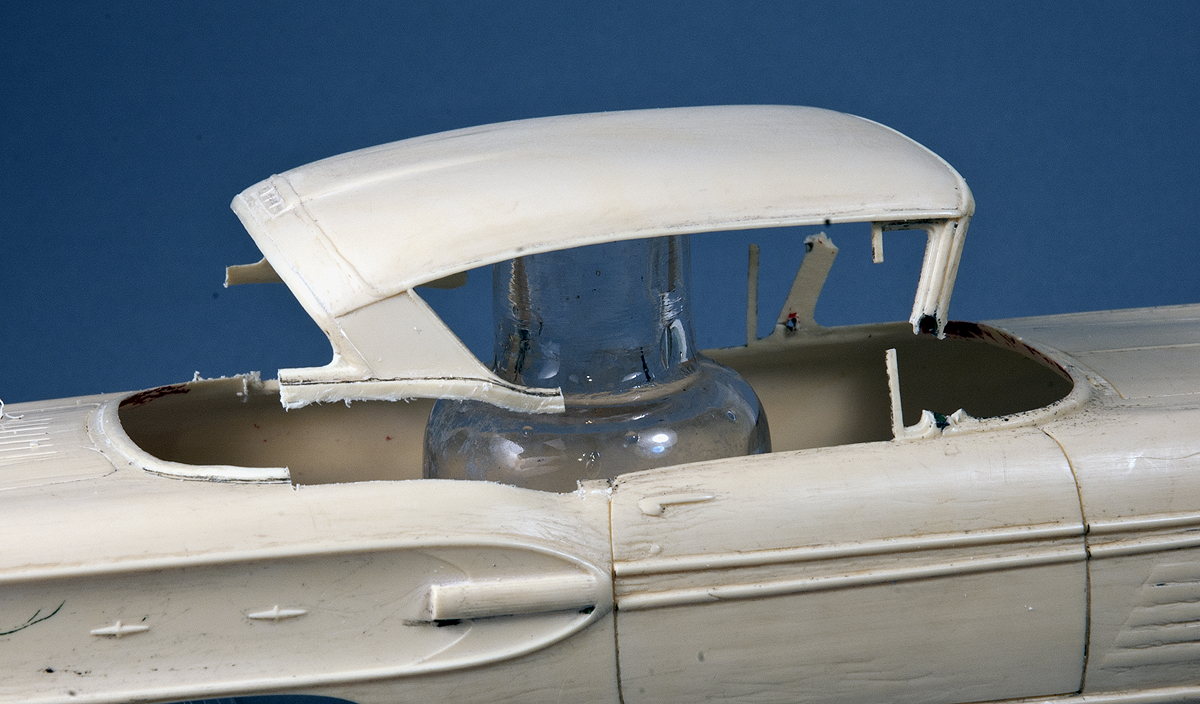  After the roof was cut free I made a light knife cut at the back edge of the vent window, then carefully shaved the remnants of the vent and windshield posts off. Then I highlighted the knife cut by rubbing a little pencil lead into it. This gave me a reference point for locating the roof on the convertible. I also carefully shaved the extra bit of plastic from the hardtop quarter panel off the base of the roof, right up to the beltline molding and the base of the C pillar and no more. Moving to the convertible body, I gingerly cut away the sun visors from the windshield frame. Then I held roof to body, and noting the reference marks at the vent windows, marked the location of the cuts on the beltline and rear window molding, and using the #11 blade, bit by bit, cut out the notches in the body for the base of the roof. Test fitting at frequent intervals prevented cutting away too much plastic. I also trimmed off the upper windshield molding from the hardtop roof since the convertible frame would take its place. At one point during the testfitting it appeared that some additional needed to be removed from the front edge of the roof and I did go too far, having to add a bit styrene strip along that edge to fix it. 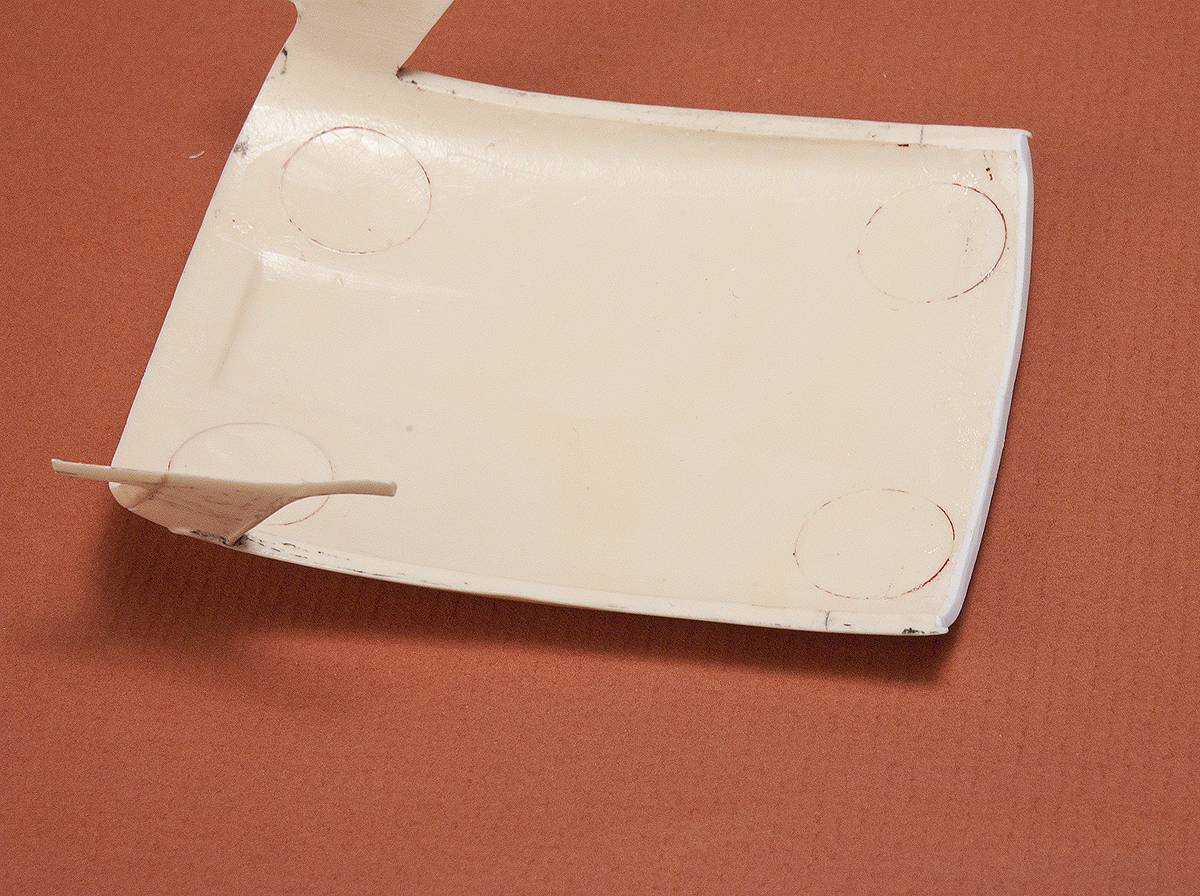 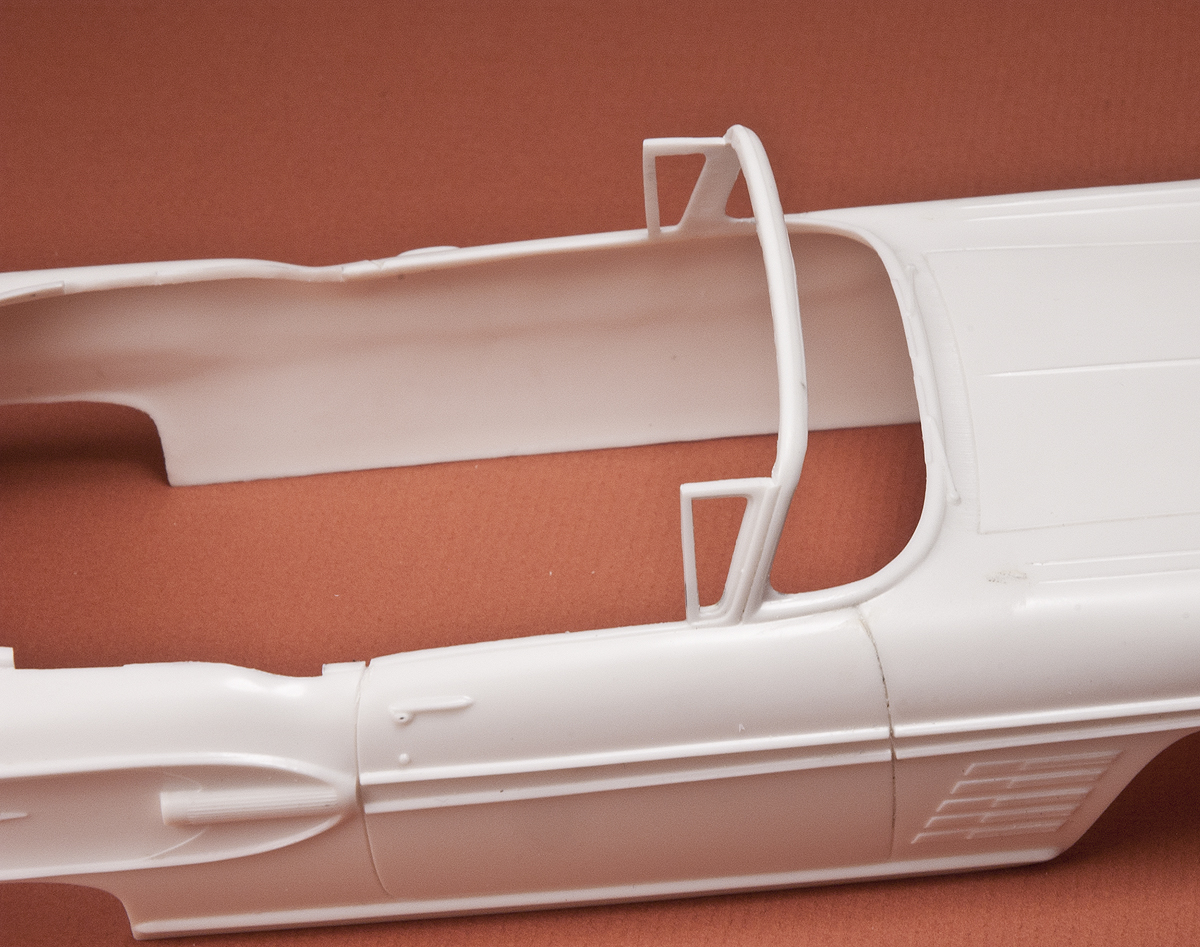 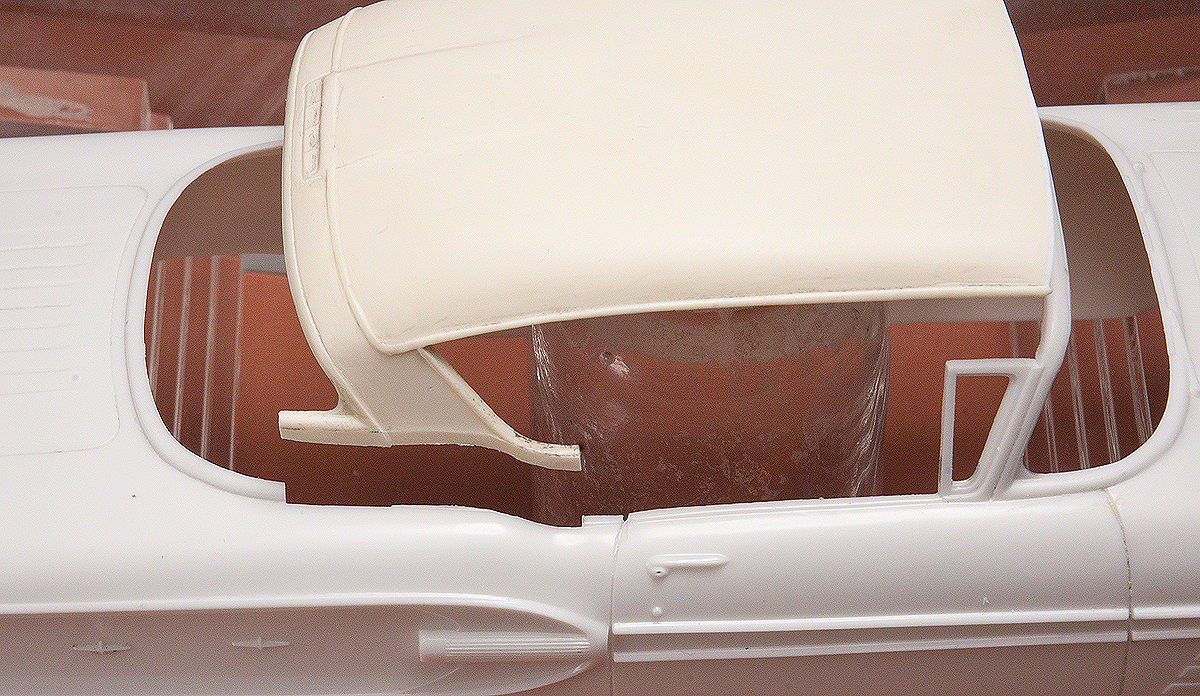 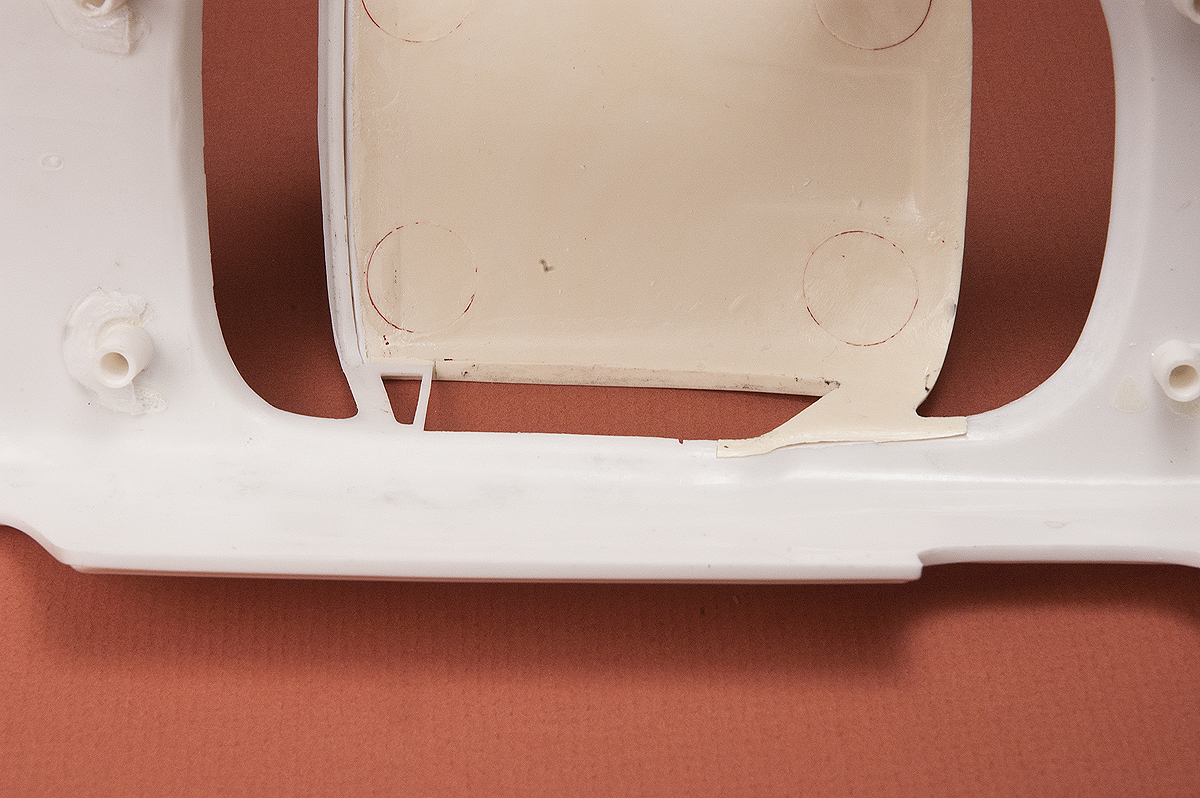 The convertible interior is the same as that used for the hardtop kit except that it has holes at the back for locating the boot cover. I used telescoping plastic tubing and rod cemented in with liquid cement and a little cyano for good measure to fill the holes. These were then cut almost flush, then shaved down with a #11 a bit more before being wet sanded smooth on the top side. 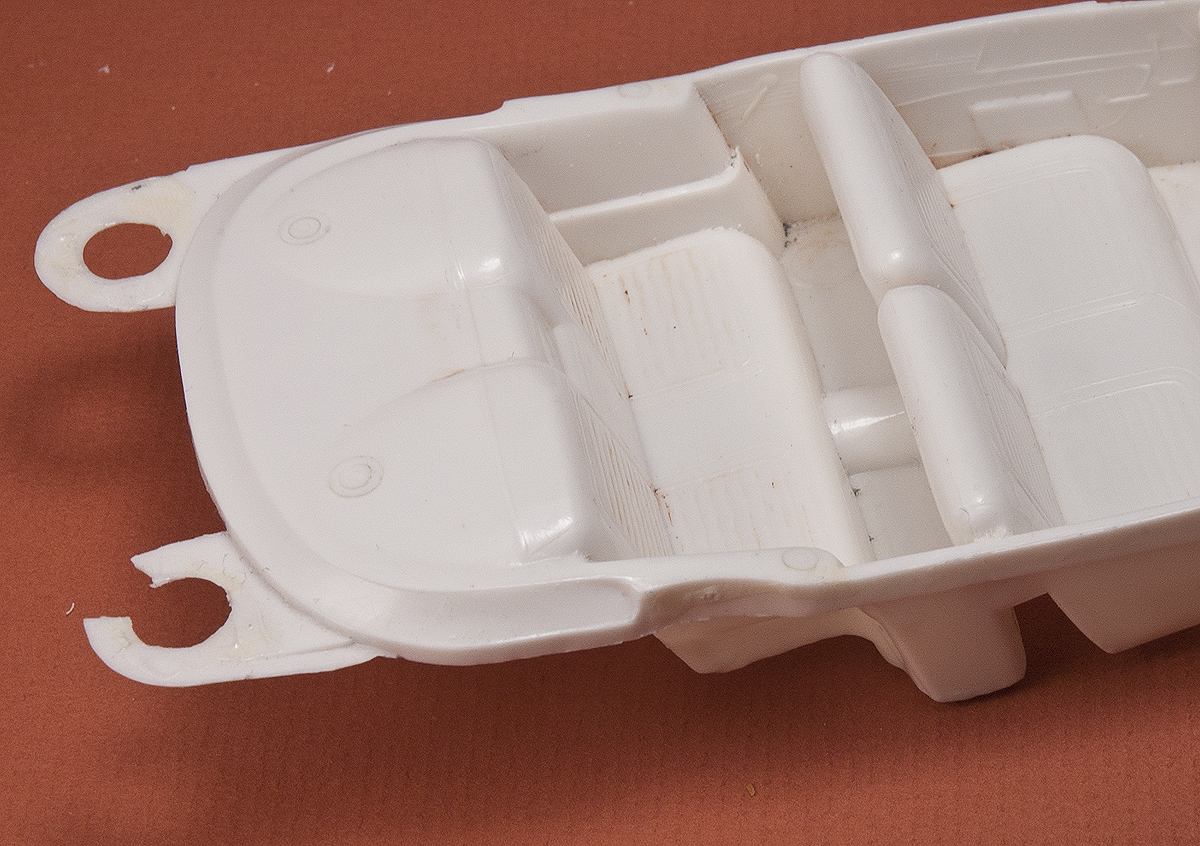 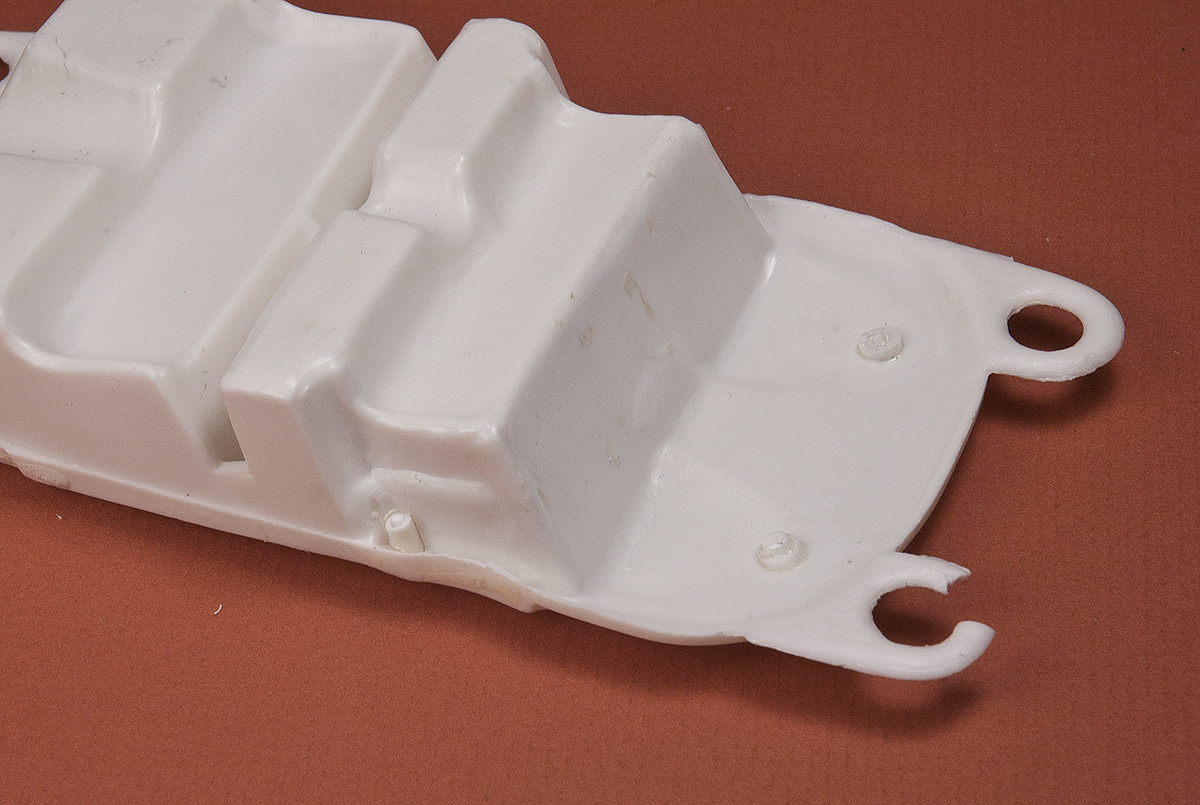 I also used styrene tube to replace the heavy splined axles that came with the kit. The tubing was cut flush with the outside edge of the lowering blocks and tacked in place with a drop of cyano. The wheel backs I was using came from a '65 Grand Prix and the collar on the back was a bit too short, so I needed a couple styrene tube spacers to get the desired track width. The axles are brass rod of the same diameter as typical AMT wire axles. In the first shot you can see the shim added underneath the block to get the front a little lower. 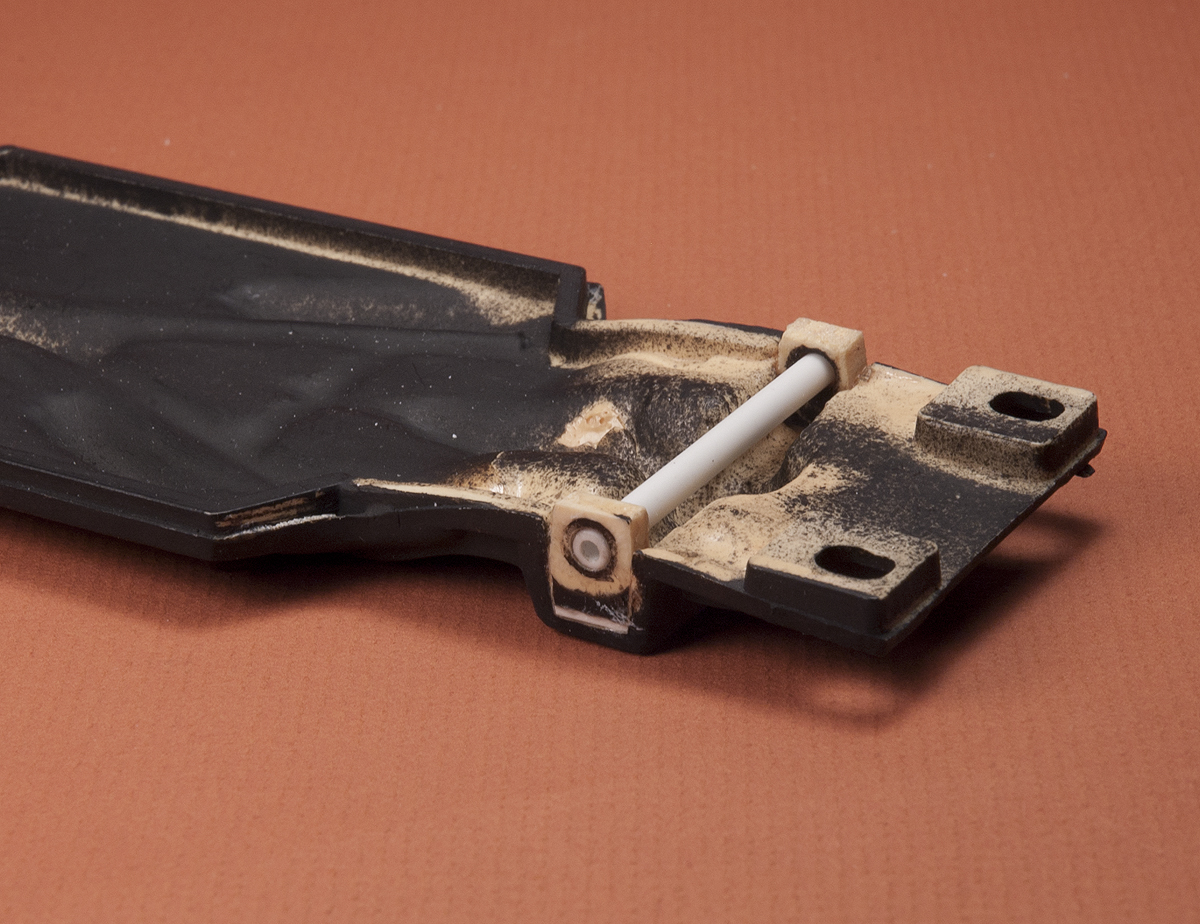 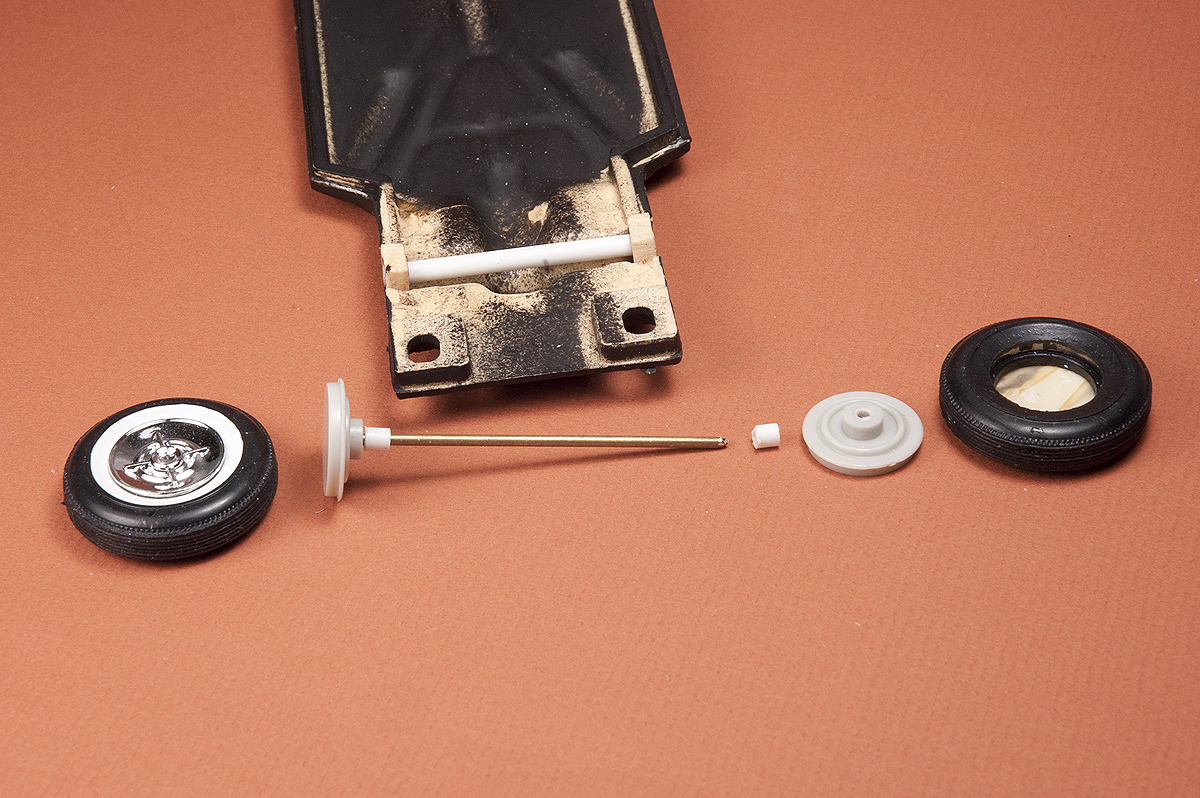 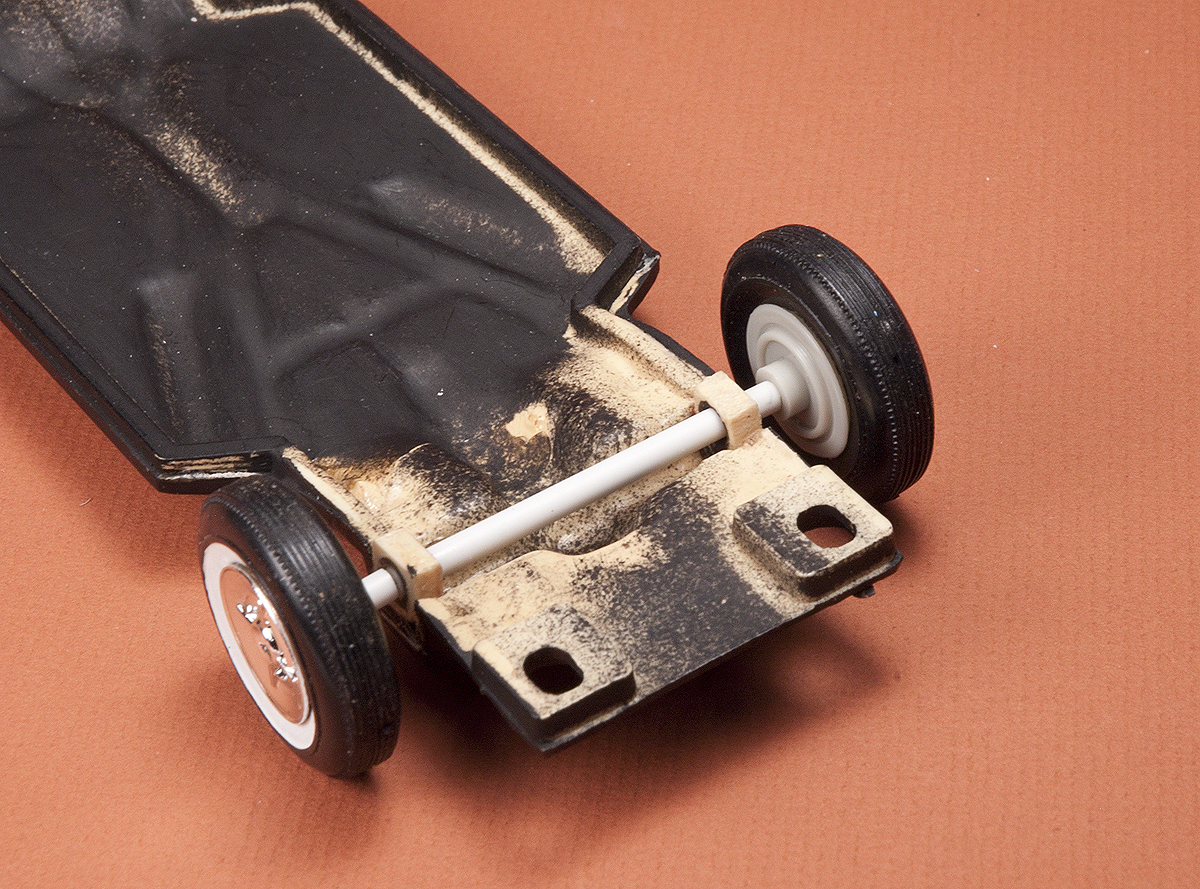 There's plenty left to do, including making a new rear window and adding weather seal and window channel detail to the side window openings. The windshield header will need to be reshaped once the top is glued on, then yadda, yadda, yadda... but I'm pretty happy with the result so far! 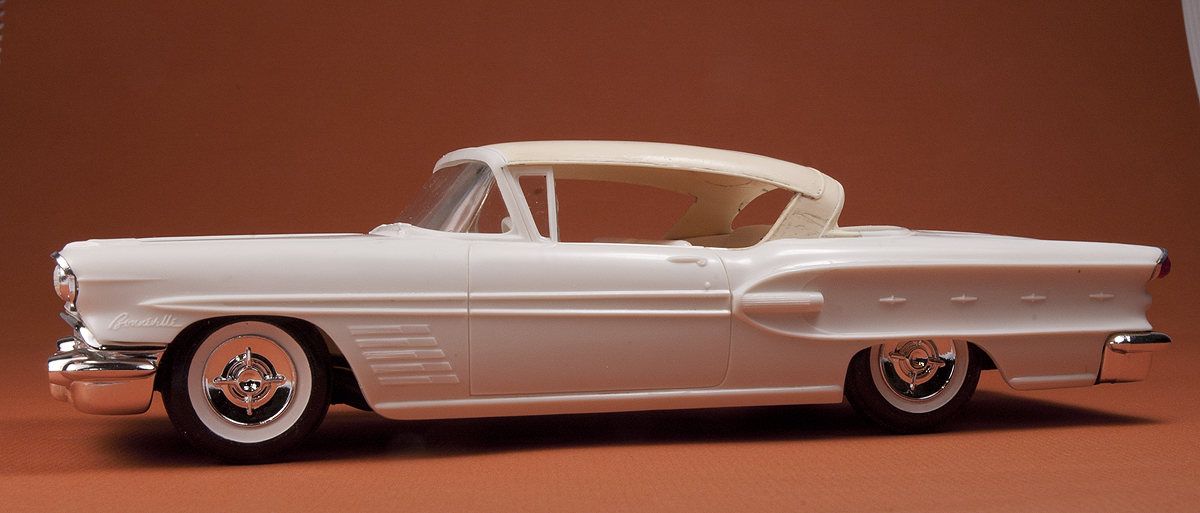 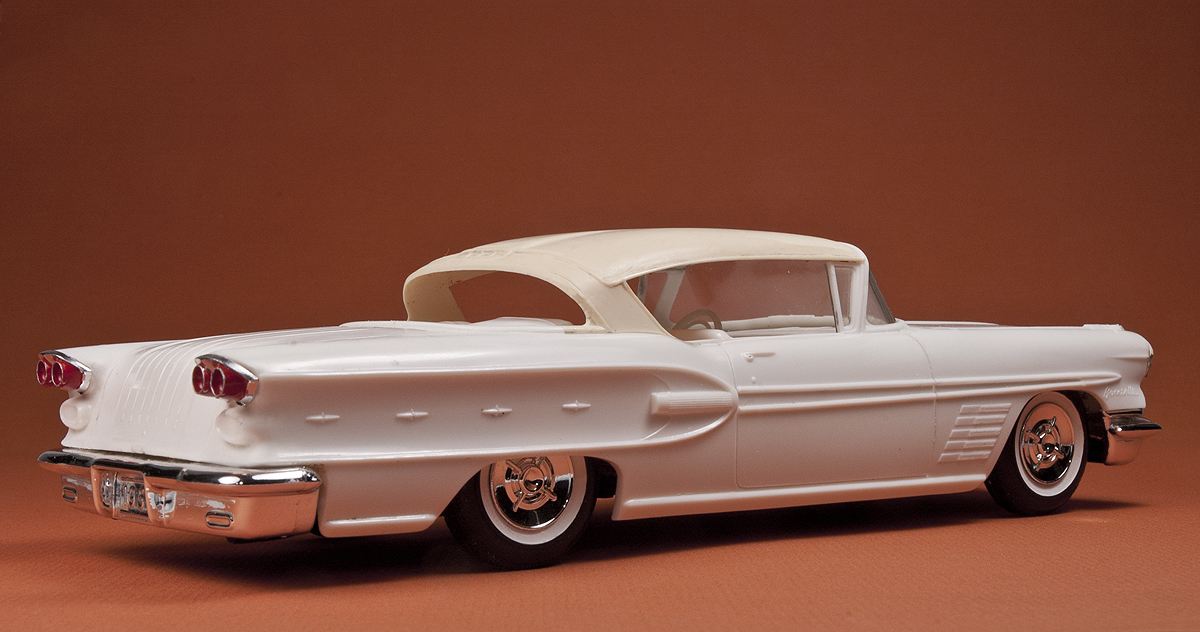
|
|
|
|
Post by stingray on May 22, 2014 23:14:44 GMT -5
We can rebuild her! We have the technology. Lol. All kidding aside that is one friggin' sweet poncho! I can't wait to see what else you got up that sleeve of yours!
|
|
Deleted
Deleted Member
Posts: 0
|
Post by Deleted on May 23, 2014 11:37:24 GMT -5
The surgery was a complete success Dr.! I'm thinking of doing the same to an old built up 59 Buick I have. Thanks for the inspiration.  |
|
|
|
Post by nobillet on May 24, 2014 7:24:44 GMT -5
John, your surgery is always a thrill and a pleasure to watch.
Thanks for sharing,
John
|
|
|
|
Post by dodgefever on May 25, 2014 14:39:31 GMT -5
Now you're talking!  Out of interest, how far of was the Impala roof? Using that would've been my first thought too. |
|
|
|
Post by Ranchwagon on May 26, 2014 19:01:55 GMT -5
Great work!
|
|
|
|
Post by cycolacfan on May 27, 2014 14:40:43 GMT -5
Very clean work as always. I prefer tin tops too. From what I understand kids preferred convertibles so quite a few coupes were sliced back in the day.
I did this to a '59 Buick Ron using the roof from a Monogram '60 Impala - works a treat.
|
|
|
|
Post by ChrisV on May 29, 2014 6:06:02 GMT -5
but I'm pretty happy with the result so far! You should be - It looks amazing! |
|
|
|
Post by froghawk on Jun 14, 2014 10:51:57 GMT -5
|
|
|
|
Post by Gluhead on Jun 14, 2014 16:09:03 GMT -5
Bummer about the drop, but nothing you can't handle. Looks fantastic! Your old one is parked on my car hauler...waiting for me to get schooled by your build.  |
|
|
|
Post by Dennis on Jun 20, 2014 9:23:42 GMT -5
You are a true craftsman, John.
|
|
|
|
Post by Bryce on Jul 3, 2014 5:23:31 GMT -5
Man I love '58 Ponchos. Your mock-ups are almost as good as my finished models John...
|
|
|
|
Post by ChrisV on Jul 3, 2014 5:56:46 GMT -5
OUCH - What a shame!
Luckily the break looks very clean - fixing it shouldn't be much of an issue (just flow a drop of Tamiya's Extra Thin liquid cement along the inside of the seam while applying just enough pressure to the sides to keep the halves together and precisely aligned - Capillary action will draw the water-like cement along and into the seam).
Impact damage is one of the most devastating things that can happen to old kits (particularly to bare plastic that has been subjected to sunlight) - The brittle old styrene can sometimes splinter, making repair an absolute nightmare.
|
|


 Out of interest, how far of was the Impala roof? Using that would've been my first thought too.