|
|
Post by lo51merc on Apr 25, 2022 19:36:01 GMT -5
|
|
Deleted
Deleted Member
Posts: 0
|
Post by Deleted on Apr 25, 2022 20:01:17 GMT -5
I dig the original & like where you're going here. The original reminds me a lot of Bill Cushenberry's El Matador, minus the scoops on the El Matador, & being honest, I've always found them superfluous to the otherwise clean custom he did. So, I'm definitely gonna follow this!
|
|
|
|
Post by lo51merc on Apr 26, 2022 8:17:48 GMT -5
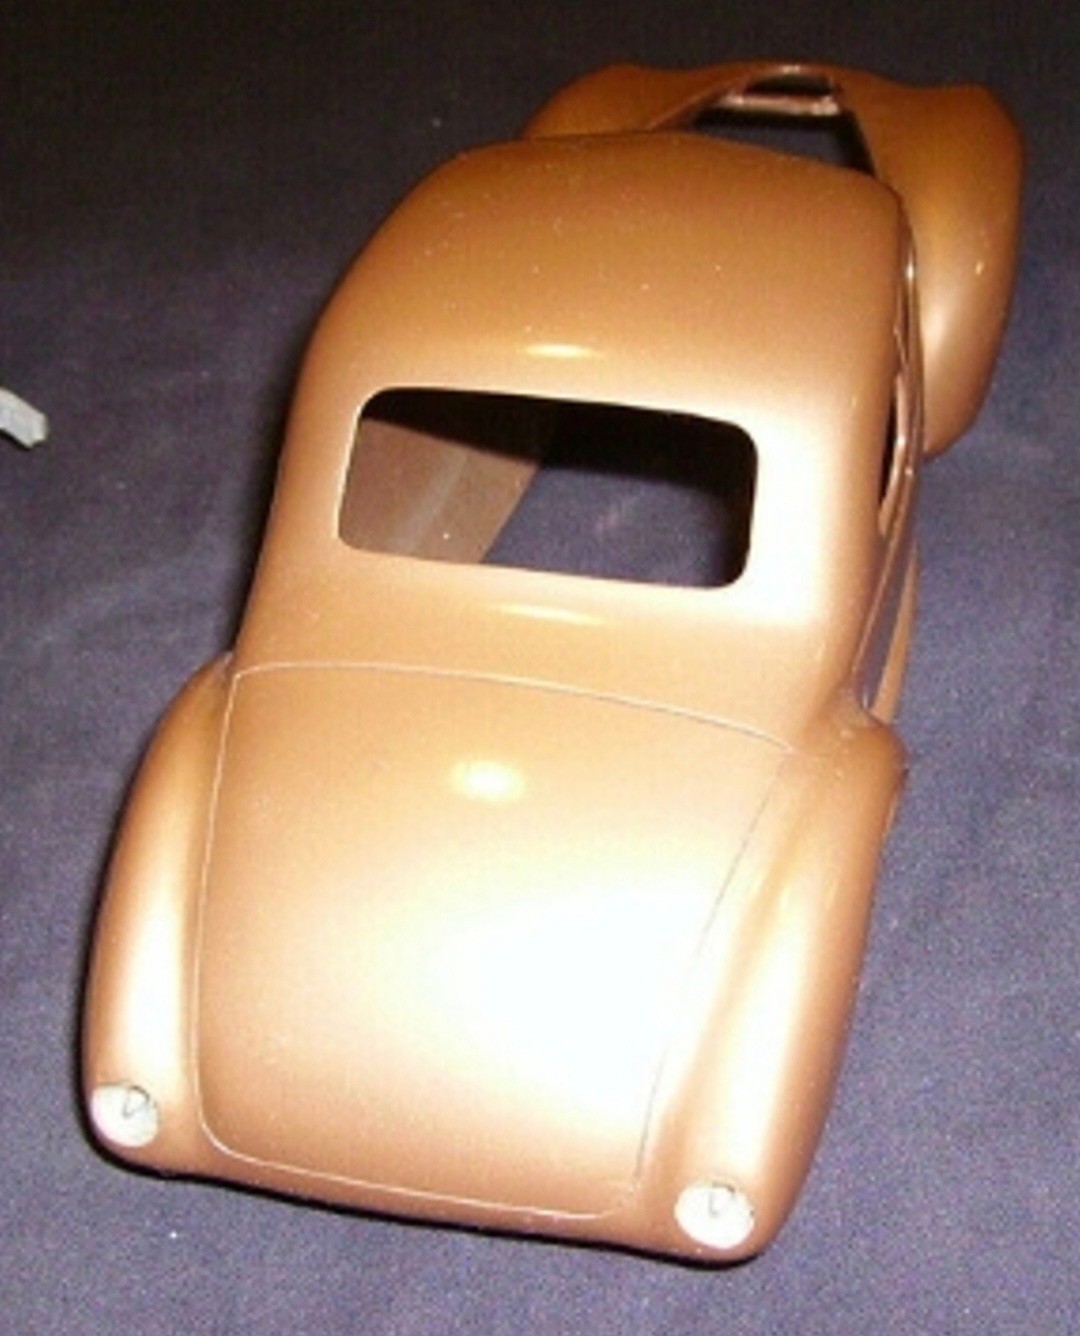
Yeah, the boy copied the ElMatador taillights for sure.
I love seeing what looks like balsa in the rear fender turnunders, and possibly inside the body at the wheel tubs.
Unfortunately for me I didn't take any pictures of my 40 Deco Roadster project. Gotta start from scratch, again. Maybe it'll come back to me.
|
|
|
|
Post by Dave from Pleasanton on Apr 26, 2022 10:33:27 GMT -5
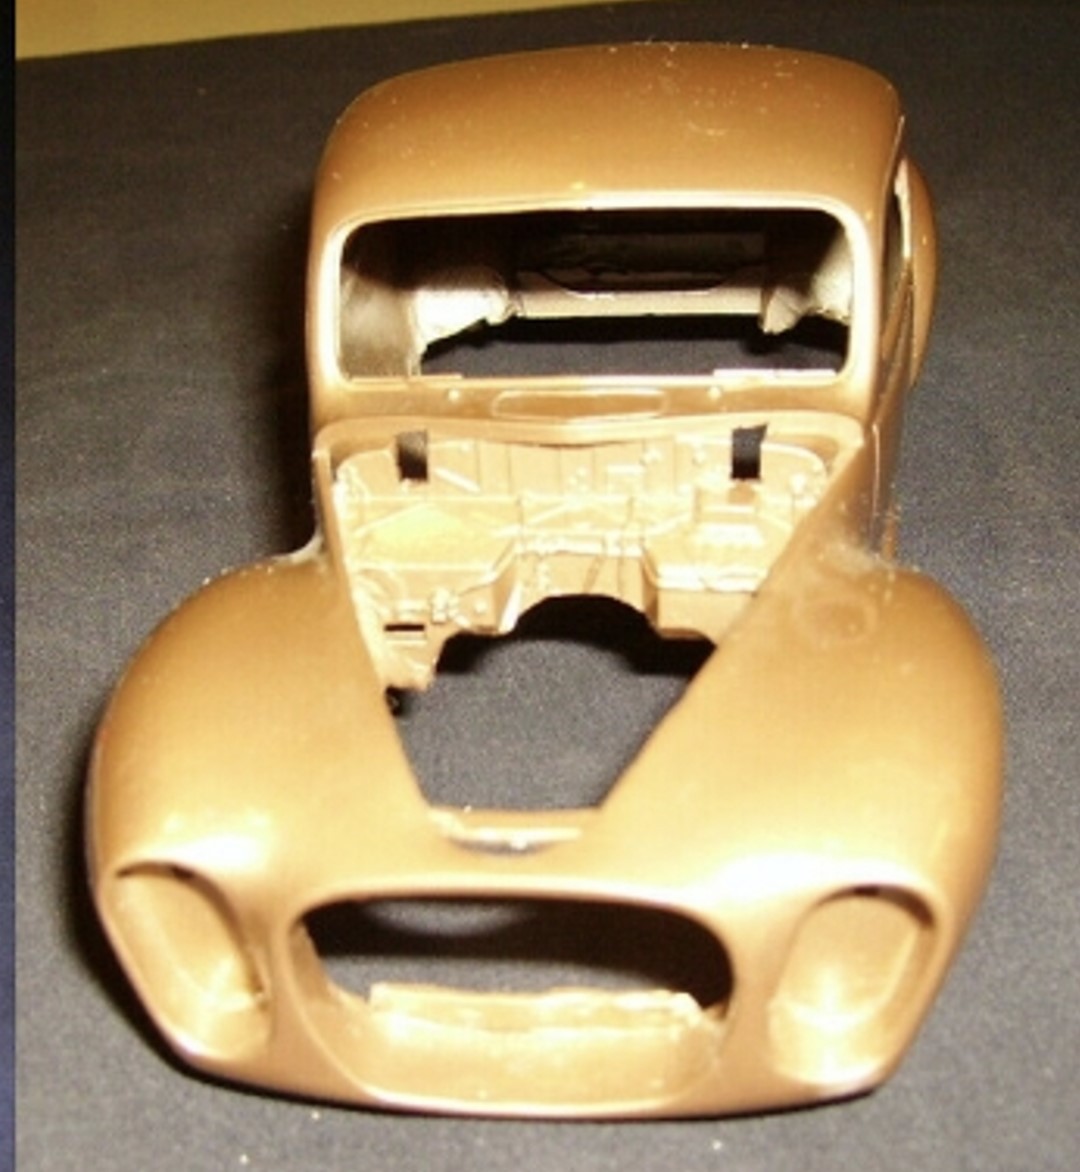
What a great looking car to try to recreate. Looking at the firewall it doesn't look like the body was sectioned so much as the fenders brought up on the body sides. Did the builder bring in the rear fenders so that it is narrower or is it just that when molded in they appear narrower? I ask because the smoothed running boards appear much narrower but they meet at the rear fender close to where they did on the stock body. Regardless this will be one to follow.
|
|
|
|
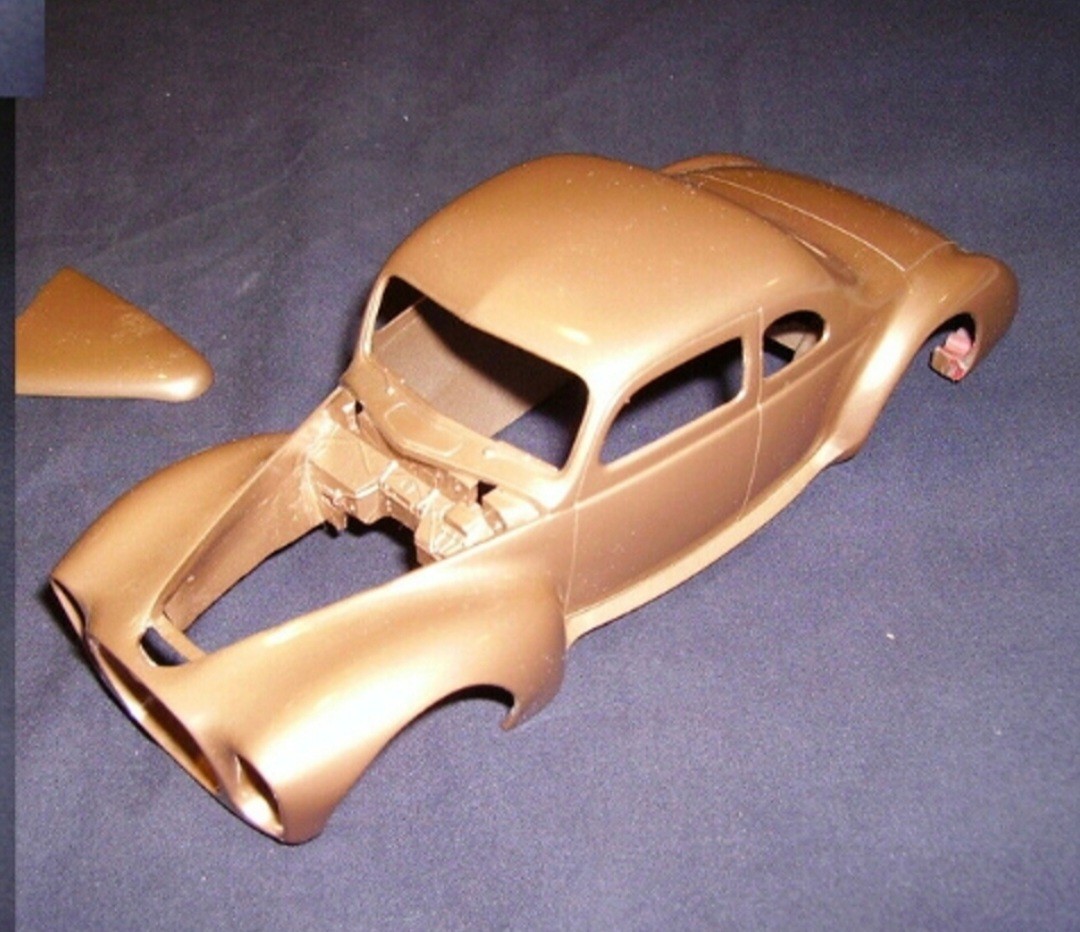
Post by lo51merc on Apr 26, 2022 14:16:19 GMT -5
I did the poor man's section job, it's all off the bottom. His runningboards have been modified, and I think the locations of the rear fenders are in the stock location, just molded in. That's how I'm doing my changes. Thanks for your reply.
Gary
|
|
|
|
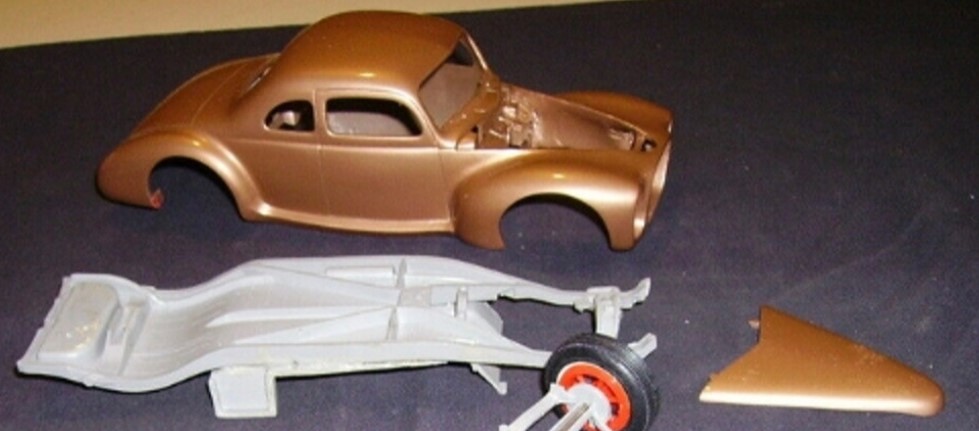
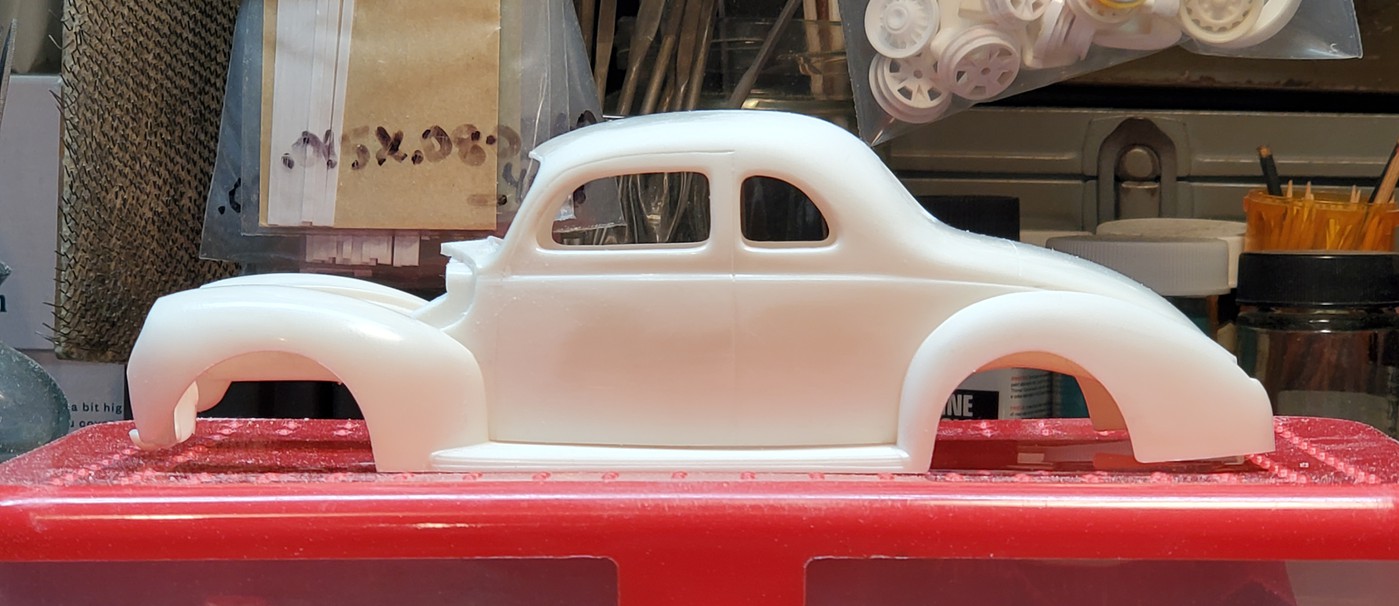
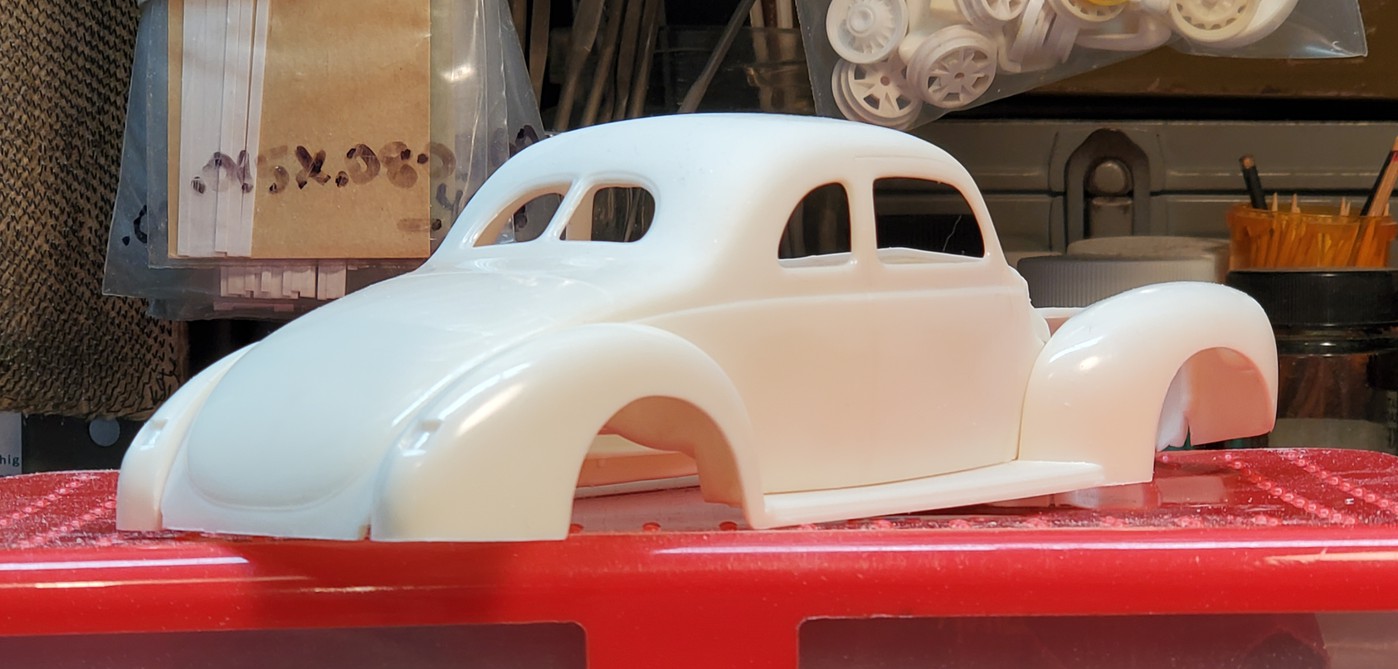
Post by lo51merc on Apr 27, 2022 19:40:39 GMT -5
OK, everybody that thought this model would be easy to replicate, raise your hand. I thought so, nobody. (Not even me!)
The body sectioning, been there, done that. Sectioning the hood, Ditto, done.
OK, now to the hard parts. Might have been a wee bit easier if there were more pictures of the original model. I have the Lucas headlight housings and getting them in place as taillight housings like his. I thought I had the rear fender to body location figured out but now, not positive enough on how he did it.
I have the hood sectioned and the bottom piece length is stretched on each side. This unit gets glued on top of the fenders. My hood top carries the bodyside line forward nicely, but is about 1/8" high at the front. His looks like it sits at the front, much lower, maybe not. I wonder what that body line looks like on his. I'll most likely be leaving mine as I have it now.
I'm still not sure if he channeled his, but I do see part of the interior glued on top of the (unfinished) frame. At some point I'll have to glue the fenders and body together. But before I do that I have to figure out how to get the interior in first. I think I've done this before but don't recall how.
I still haven't figured how I'm gonna do the front bodywork yet either. The biggie!
My hat's off to the builder of the survivor. He did a great job building this customized 40 Ford. I wonder if he actually finished it......
Gary
|
|
|
|
Post by Dave from Pleasanton on Apr 27, 2022 23:45:53 GMT -5
Gary, first I'm not sure I would tackle this project as I don't think I have the skills to make it happen. Second all of my kits are packed with my move so I can't look at my 40 Fords to see if I can help with ideas. That said here's some thoughts and questions. The fender line on the driver side rear seems to be lower relative to the trunk than on the passenger side. It's probably the photo angle but the passenger looks right. I think it would be good to commit and glue the fenders to the body so that all the molding can begin. The front headlight buckets look similar to the AMT 56 Ford pickup custom front end so perhaps you can make use of those parts. How you do the oval grille opening I haven't a clue. It's a great shape. Similar to a 57 Chrysler but not quite. I would plan on attaching the interior to the body at the AMT mounting points and cut the bottom of the interior off to make the channel work if you go that way. Just some thoughts.
|
|
|
|
Post by spex84 on Apr 28, 2022 23:00:29 GMT -5
Ha! I'm delighted you're tackling this project! And I'm not surprised it's turning out to be tricky.
Honestly, that survivor model is one of the nicest "extreme custom" '40s I've ever seen, and I'm a big fan of Cushenberry's El Matador...the model is clean and just SO smooth.
I bet you can get close to it.
There are some extreme mods that end up seeming subtle because they just blend in: the tucked-under and molded fenders, the fine sweep of the molded running-board/rocker molding,the re-cut wheel arches.
Once you blend the front fenders into the hood sides, they'll come out looking much like the inspiration, which is possibly sectioned a smidgen more than yours, enough to bring the front fender tops nearly to the height of the beltline.
|
|
|
|
Post by RodBurNeR on Apr 29, 2022 23:23:48 GMT -5
gonna be sweet!
|
|
|
|
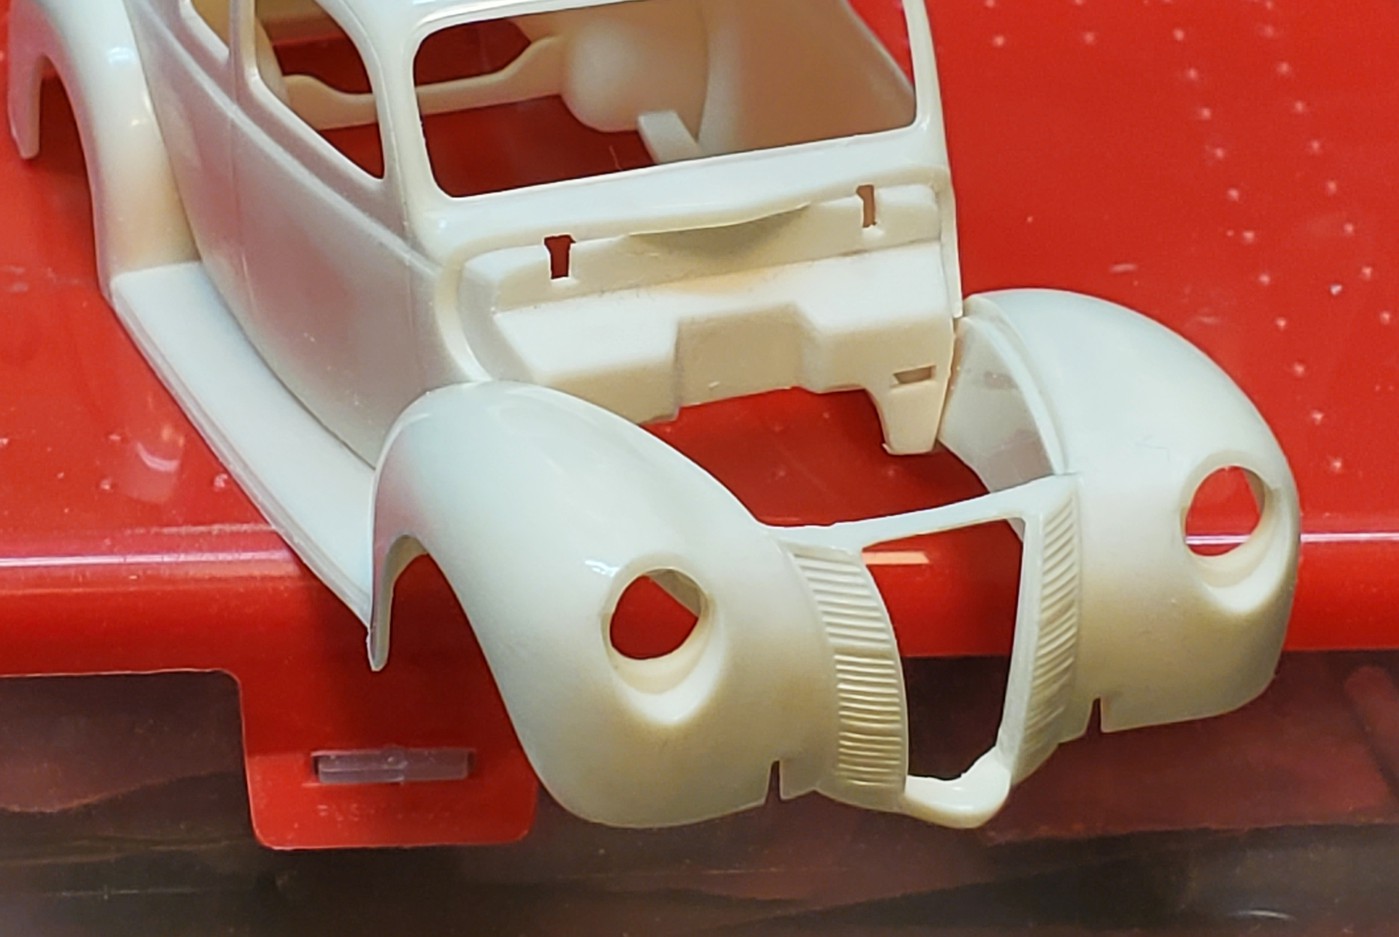
Post by lo51merc on May 3, 2022 10:06:48 GMT -5
Chris, I guess the section of each model is pretty close. Compare the length of the firewall below where the interior tab slots are. I sectioned it 3/16" to the point where the rear of the body below the trunk comes in contact with the inner fenders, and I still had to do a lot of sanding to both the lower body and inner fender tops so the body would sit down easily on the rocker panel. 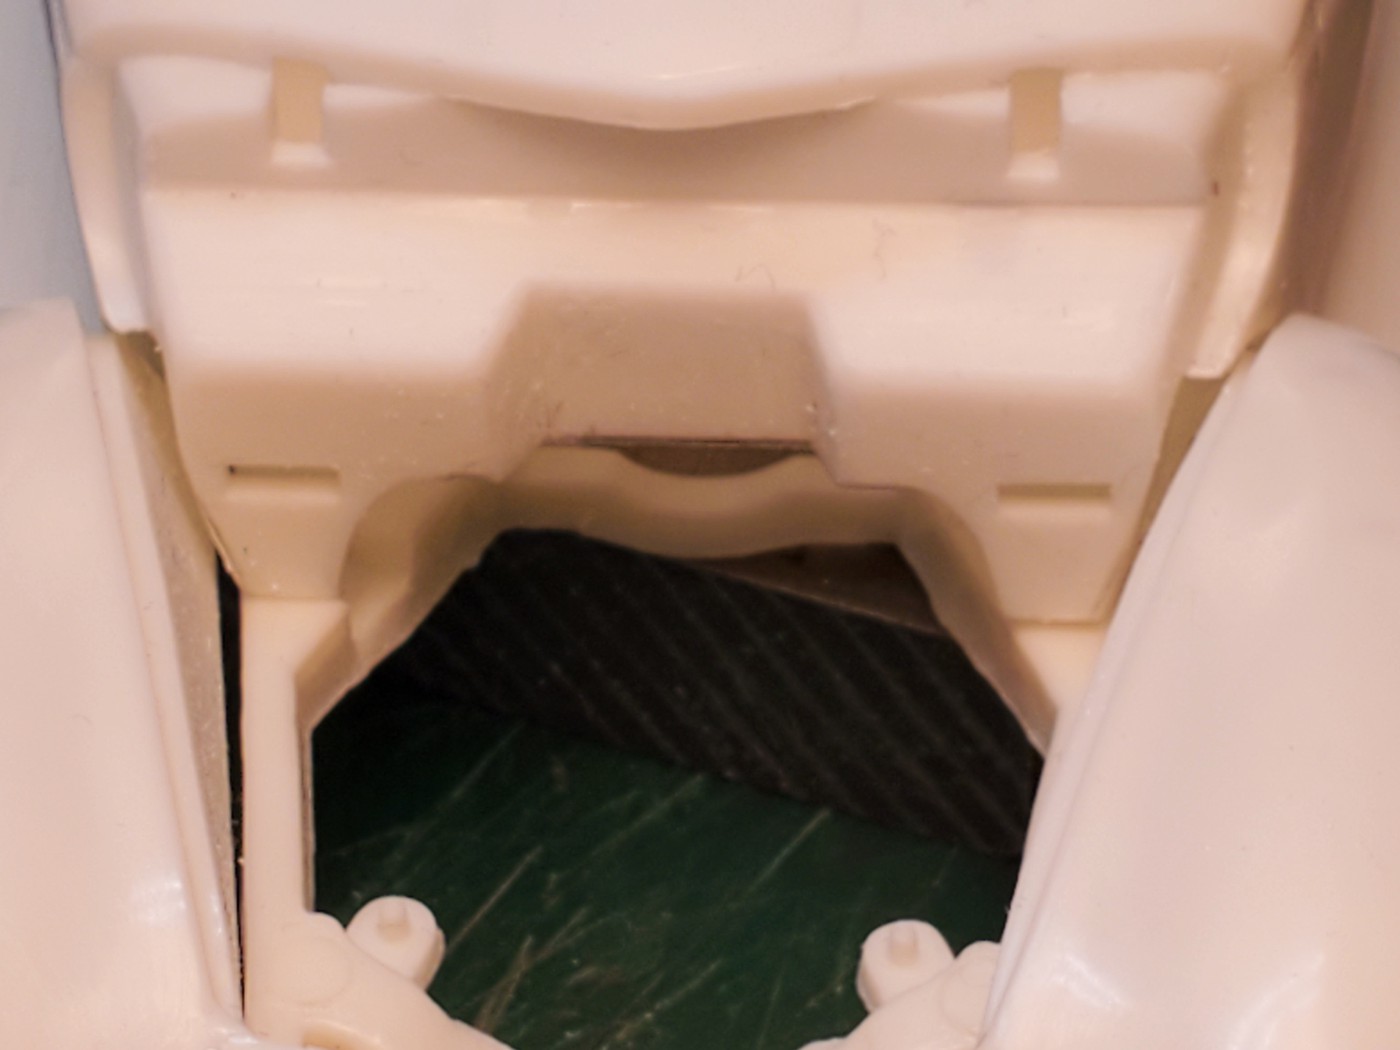 Hosted on Fotki Hosted on FotkiI cut out the rear inner fenders and attached them to the chassis. The hood is sectioned, but the original seems to be shortened/blunted at the front so I've been working on that too. You can see where the hood bottom had to be extended. 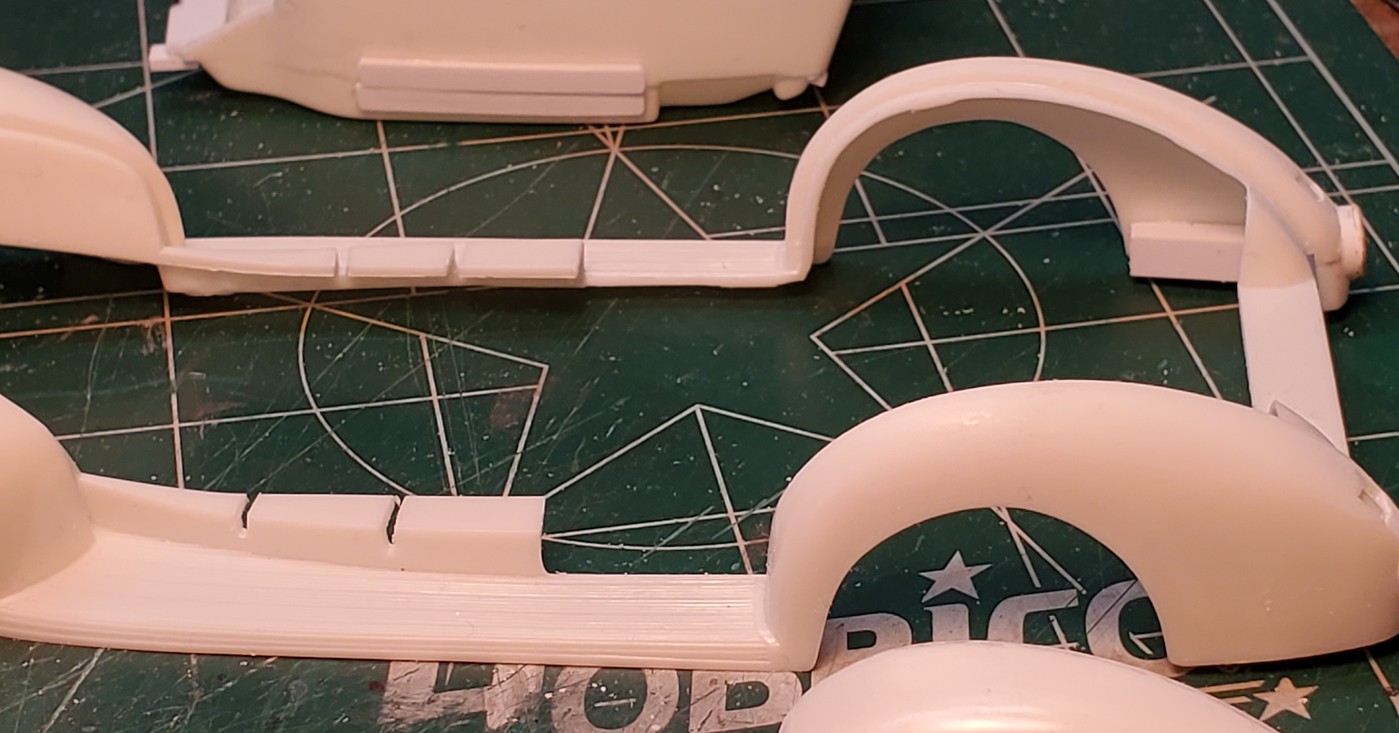 Hosted on Fotki Hosted on FotkiThe inner rockers have been removed as far forward as the fender/frame locating tabs go. I think I'll be able to get the interior in after the fenders are glued to the body. I slotted the inner rockers in a couple of places to ease getting glue between the inner lower body and the running boards. 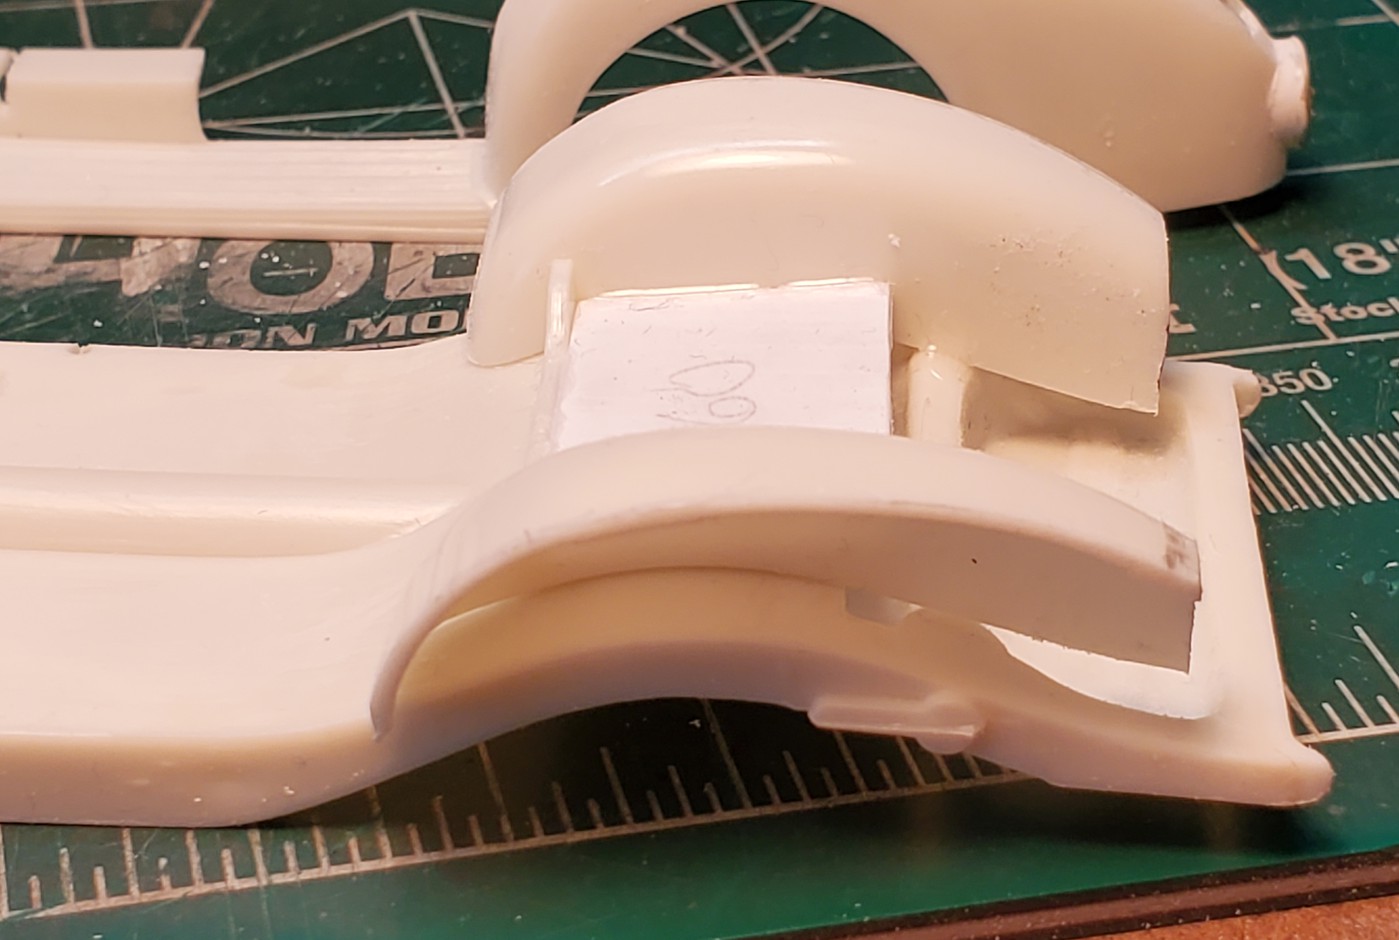 Hosted on Fotki Hosted on FotkiComments? Gary |
|
|
|
Post by Dave from Pleasanton on May 3, 2022 13:18:04 GMT -5
Gary, a lot to take in. I think your rear inner fenders are brought in from stock? Will they now slide into the body as it drops down? Your picture of the interior tub looks like you have sectioned it. Was that sectioned by 3/16 as well? In your first post you mentioned that you had moved the fenders 6" up on the body which would be roughly 1/4. Is the 3/16 an additional reduction so you are about 10 1/2 inches up? Love what you're doing. Keep going.
|
|
|
|
Post by lo51merc on May 3, 2022 16:34:32 GMT -5
I think I made a math oops. 6 inches is wrong. The real drop is closer to 4 1/2". That's it, totally! LOL
Gary
|
|
|
|
Post by 41chevy on May 3, 2022 22:33:15 GMT -5
The rear trunk and surrounding tin look like they are from the AMT 1937 Chevy. Or maybe just the trunk lid? Paul
|
|
|
|
Post by lo51merc on May 4, 2022 8:05:02 GMT -5
Good, no, great eye Paul. You nailed it, and just in time too. I haven't glued the body to the fenders yet. And, if I had it would be a lot harder to make the change to the 37 Chevy deck lid and surround. I WILL look into that swap possibility.
Gary
|
|
|
|
Post by lo51merc on May 11, 2022 10:09:07 GMT -5
Little by little I've been moving along on this model. I made the headlight housings as I have in the past, 4 layers of .060 sheet glued together and then shaped to what I have here. I had a pair of 59 Chevy headlights in my stash. The housings may look way oversize but once they're molded in place all will be OK. 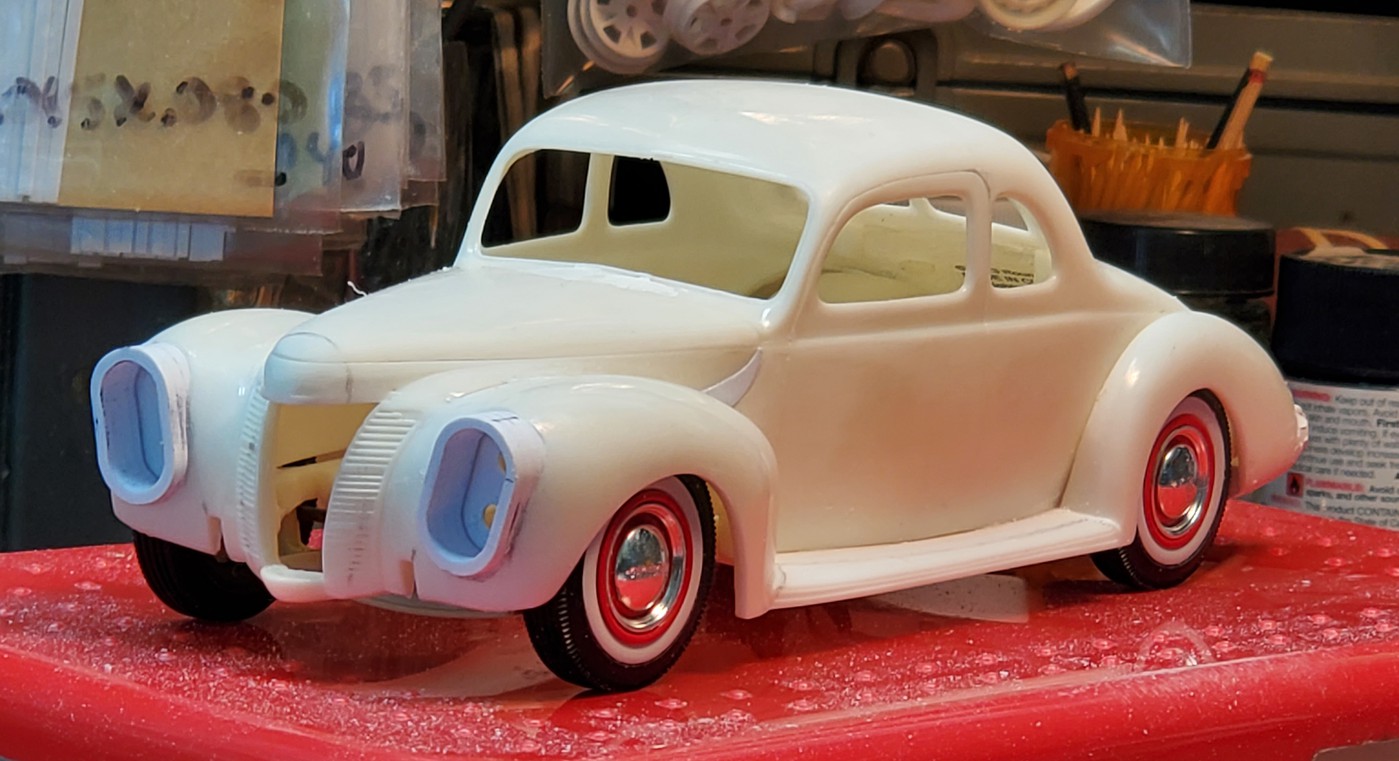 Hosted on Fotki Hosted on FotkiThese were basically the same size before molding in. This is my contest build for reference. 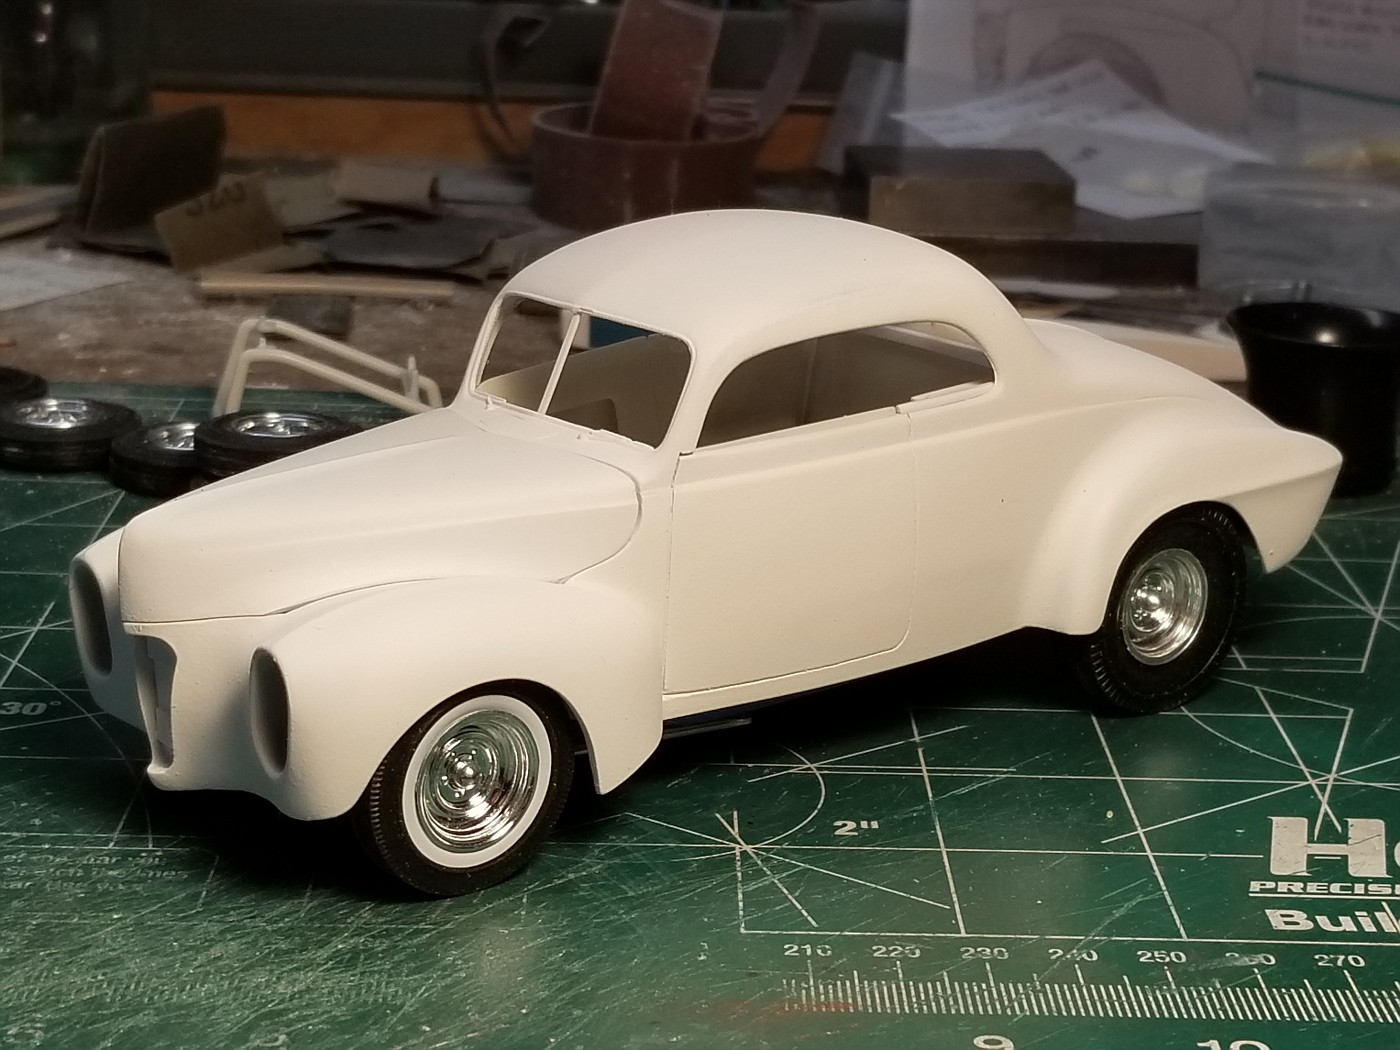 Hosted on Fotki Hosted on FotkiI don't know at this point if I have to channel it, but the way it looks here that is a strong possibility. Thoughts??? 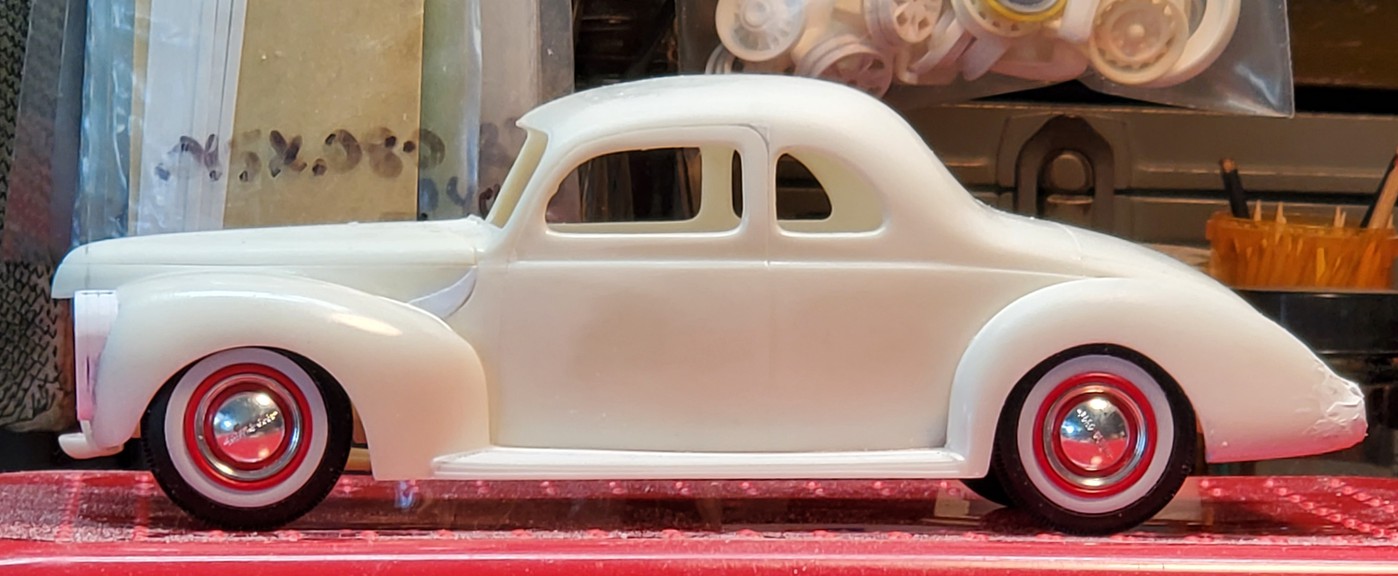 Hosted on Fotki Hosted on Fotki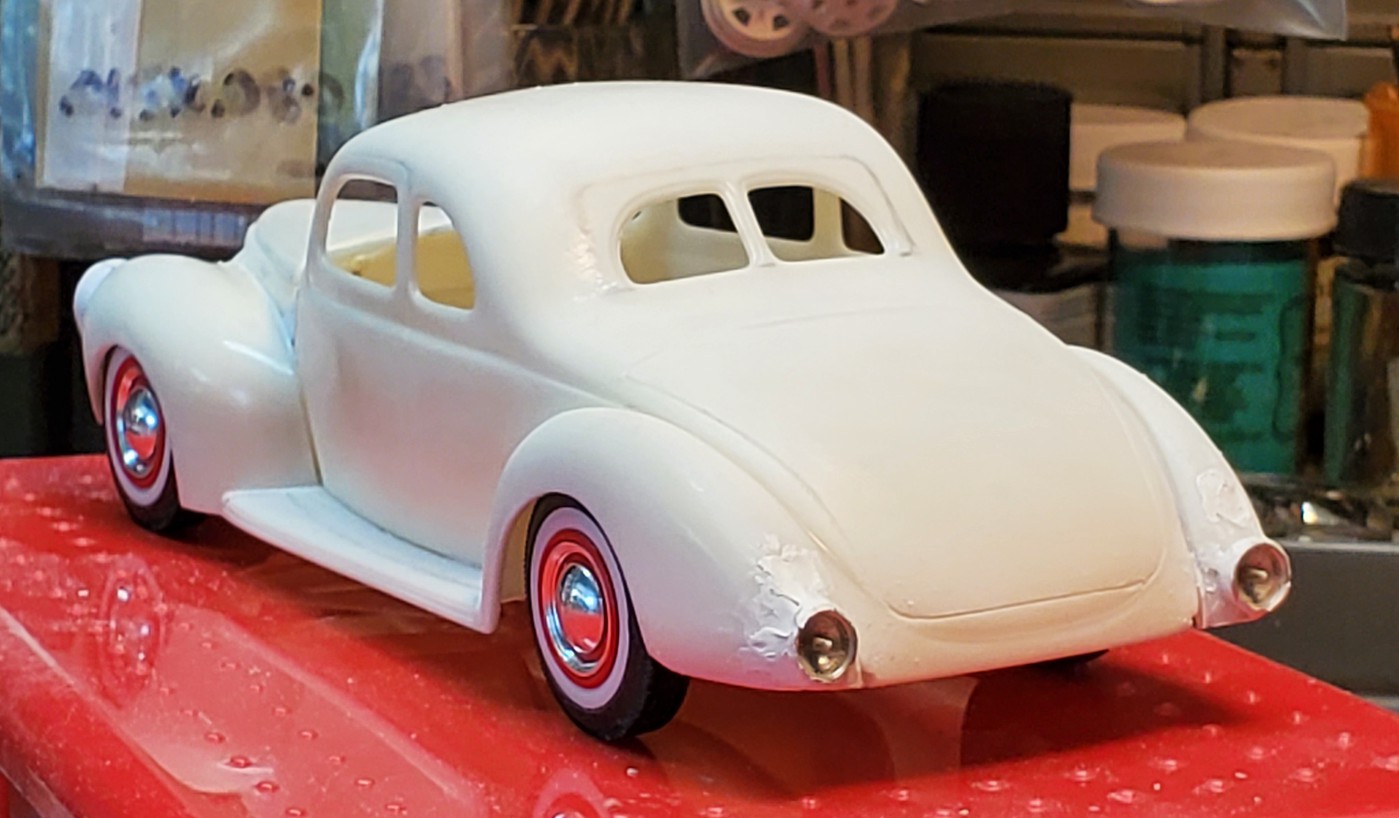 Hosted on Fotki Hosted on FotkiI'm really having second thoughts, no third thoughts about opening the rear window on this model after all I went through with that contest rear window. The prototype looks pretty good though doesn't it! The body, fender unit and the hood bottom are glued together now, I have a long way to go but I'm having fun! Gary |
|