|
|
Post by ChrisV on Jan 29, 2019 14:21:08 GMT -5
Thanks, spex84, for the vote of confidence on my idea to use stock '61 taillights -- unfortunately, they're much larger than I had expected. Look no further than Revell's "Beatnik Bandit" Show Rod: It includes two pairs of smaller (Pontiac Tempest?) taillights - That should do the trick! |
|
|
|
Post by chepp on Jan 29, 2019 23:43:34 GMT -5
It's looking great Charley! And I like the idea of the long horizontal tail light(s) on that car. It seems to fit the styling quite nicely!! IMHO anyway! I have one of those little spring loaded sanding sticks myself, and I was wondering if, and where I might find new belts for it these days? Build on sir, David S.
It does fit the styling...but I'm kinda liking the idea in the next post, too.
|
|
|
|
Post by chepp on Jan 29, 2019 23:47:44 GMT -5
Look no further than Revell's "Beatnik Bandit" Show Rod: It includes two pairs of smaller (Pontiac Tempest?) taillights - That should do the trick!
Doh! Thanks for the reminder. I've got two of those kits and didn't even think of it! I stuck two lenses on the back and did some retouching to the photo. These are protruding but if I were to use them they'd be inset into that recessed groove sort of like the '61 Ventura.
|
|
|
|
Post by chepp on Feb 4, 2019 17:20:11 GMT -5
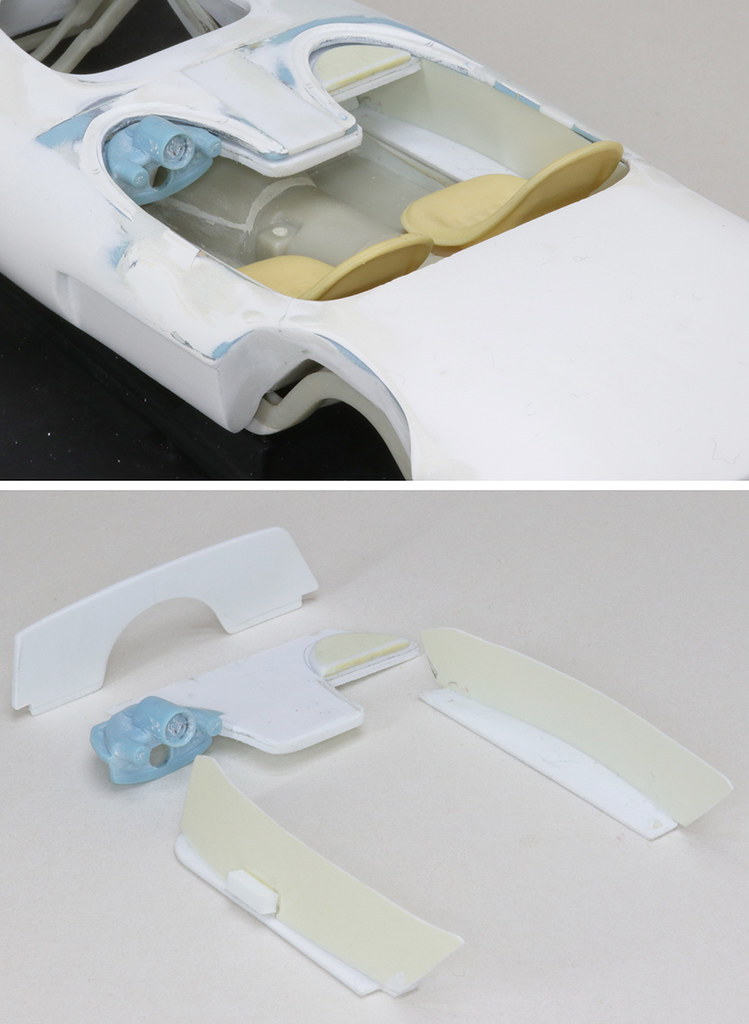
Here are the interior panels made from sheet styrene and incorporating the dash pod from the Revell Pontiac Club De Mer that was stripped of its prior coat of enamel.
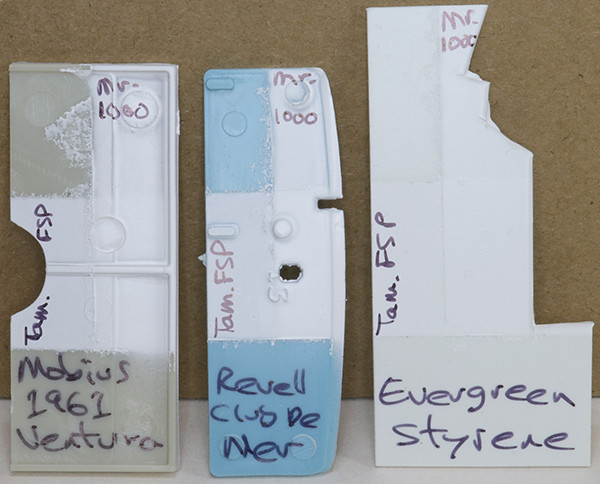
Just to be sure that there wouldn't be any problems with paint and plastics, here are some test panels using three kinds of styrene. First, a couple of coats of Tamiya Fine Surface Primer was sprayed onto a masked-off horizontal band. After drying overnight, a vertical band was masked off and a couple of coats of Mr. White Surfacer 1000 was sprayed on. This shows how it will go over both the raw plastic and the Tamiya paint. Apart from bleeding under my poor masking, both paints are fine.
|
|
|
|
Post by spex84 on Feb 5, 2019 0:31:33 GMT -5
Love how that dash pod looks, and the swoop of the bucket seats...they're perfect for that cockpit.
|
|
|
|
Post by chepp on Feb 11, 2019 23:02:55 GMT -5
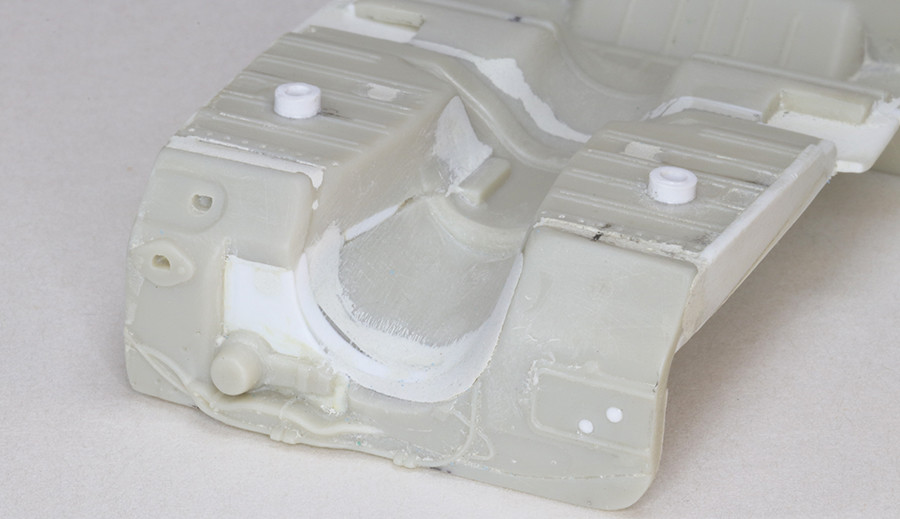
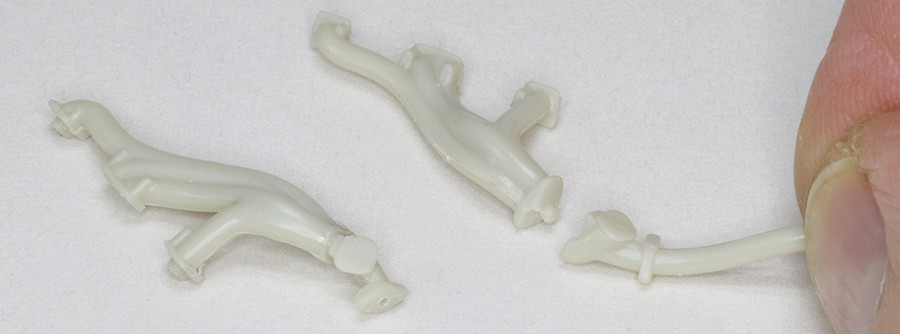
Work continues on filling and sanding the floorpan. The heater holes were filled with .040" styrene rod. I shouldn't have left the wiper motor on but I'll leave it. The hood won't be opening so very little of the firewall will be visible. Those two short tubes on the bottom of the floor will locate the mounting pins on the mufflers.
A cool surprise in the Moebius '61 Ventura kit is the exhaust cut-out molded to the front of the head pipe. At the left is the cut-out removed from the exhaust pipe and cemented to the manifold. I drilled a hole in it to accept a steel wire on the muffler inlet (see photo below) to align and strengthen them after painting and gluing. At the right are the two parts as they come in the kit.
At the top you can see how the muffler fits into the exhaust manifold and the floor. A twin exhaust was made by cutting down the side exhaust from an AMT Cushenbery Silhouette and some bends from the stock Ventura pipes (both shown before modifications nearest the camera). I still have to make the twin exhaust for the other side of the car.
|
|
|
|
Post by chepp on Feb 19, 2019 0:39:56 GMT -5
I cut off the turn-down ends to make straight pipes and made a mirror-image system for the other side of the car. I'm not so sure that I like it. A coat of paint shows defects that need to be fixed. The final colors will probably be flat aluminum for the muffler and Molotow chrome for the the tips. This Light Gunmetal from Tamiya might be good for the exhaust manifolds when sprayed with flat clear.
Something that should be simple like gluing the dash board to the front interior panel was a little difficult. I finally just located each piece in the proper place then used bent tweezers to push in styrene blocks dripping with liquid cement without being able to see what I was doing. It worked out OK but I was "flying blind" as aircraft pilots say.
|
|
|
|
Post by chepp on Feb 25, 2019 23:38:30 GMT -5
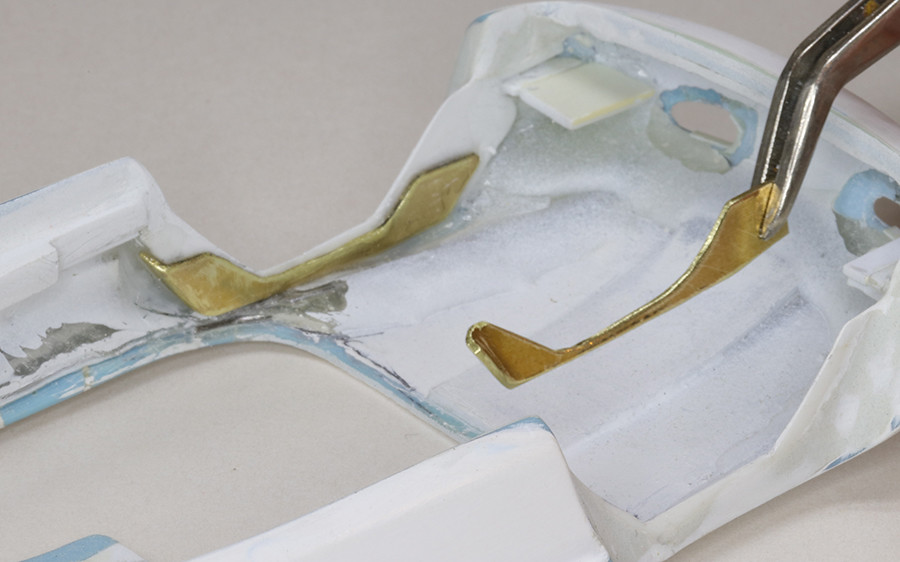
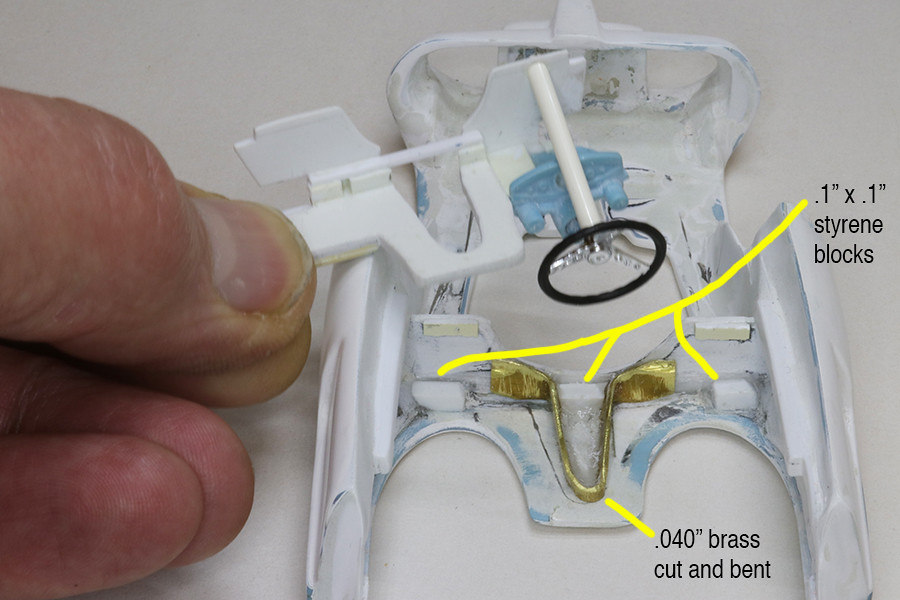
Steel wires and inner fenders weren't enough to keep the body from flexing and cracking at the narrow point between the interior opening and the rear wheel cutouts. A pair of stiffeners were made from .020" x 1/4" brass strips that were cut and bent to fit then glued in with CA. The plastic floorpan (not shown here) was modified to accomodate them.
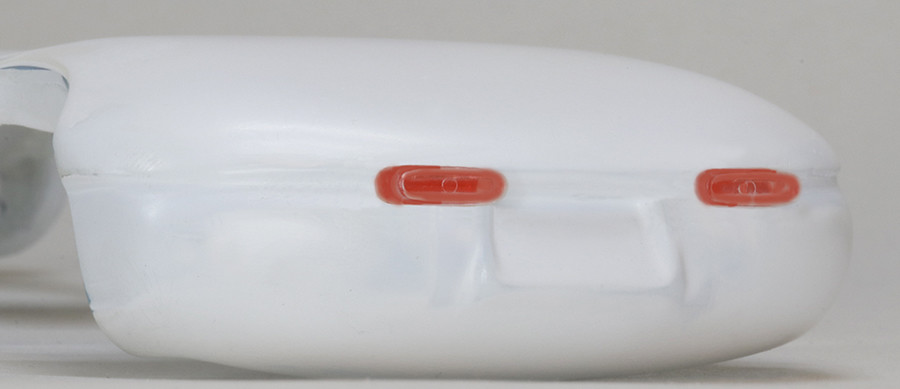
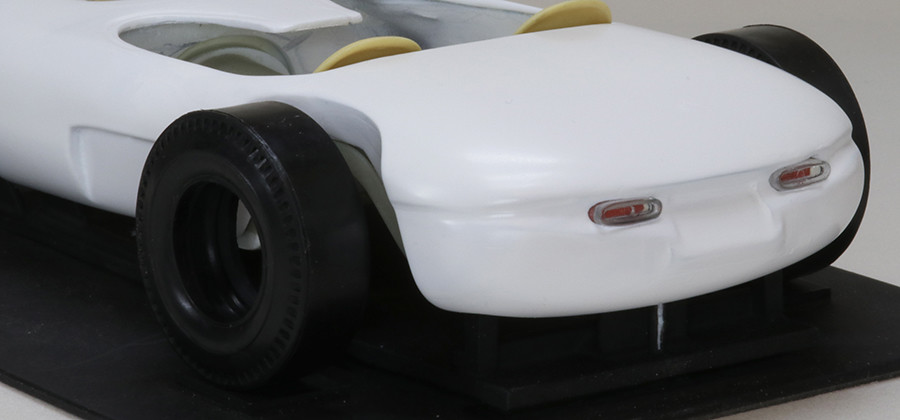
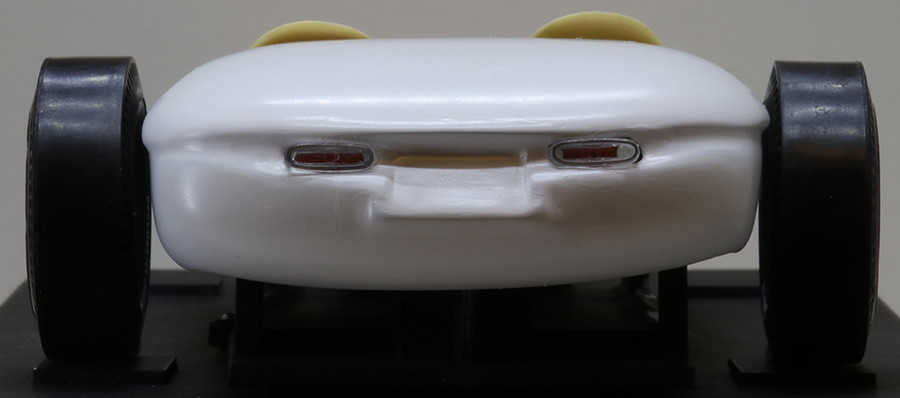
It still needs some fixup but here's the rear panel with taillights from the Roth Beatnik Bandit (thanks to ChrisV for suggesting them). The lights are molded in clear so I jammed in some transparent red plastic to give them some color. The radius of the concave area at the rear was made larger to fit them.
I wasn't too keen on how the taillights and rear panel looked at an angle but seeing it straight on looks better.
Comments are welcome -- how would you improve things?
|
|
|
|
Post by spex84 on Feb 26, 2019 1:06:37 GMT -5
Looks good! Glad you got the reinforcement issue sorted out; it would be a shame if it cracked during polishing the apin, for instance.
Design ideas, hmm....Because the taillights are fairly close together, maybe some nerf bars on the rear corners to fill that space a little more? Perhaps they could be canted slightly.
Or a second set of taillights outboard of these ones? They'd be recessed a little further, giving a stepped appearance when compared to the inboard pair.
|
|
|
|
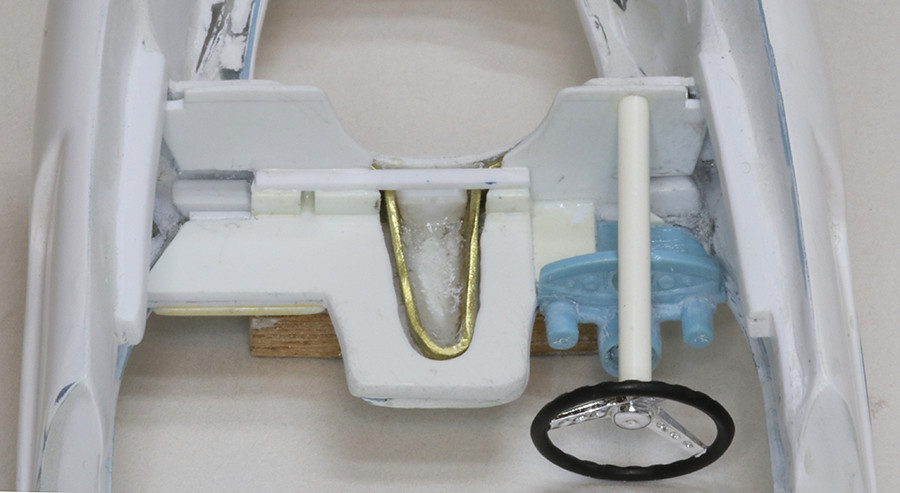
Post by chepp on Mar 10, 2019 22:12:01 GMT -5
Looks good! Glad you got the reinforcement issue sorted out; it would be a shame if it cracked during polishing the apin, for instance. Design ideas, hmm....Because the taillights are fairly close together, maybe some nerf bars on the rear corners to fill that space a little more? Perhaps they could be canted slightly. Or a second set of taillights outboard of these ones? They'd be recessed a little further, giving a stepped appearance when compared to the inboard pair. Thanks, spex84. The reinforcement above the rear wheel area is still holding strong. My sanding on the cowl area showed another area of weakness -- see below.
Nerf bars -- good idea. I'll look into that. They would break up that empty rounded area. I won't add another set of taillights, though. One pair is enough.
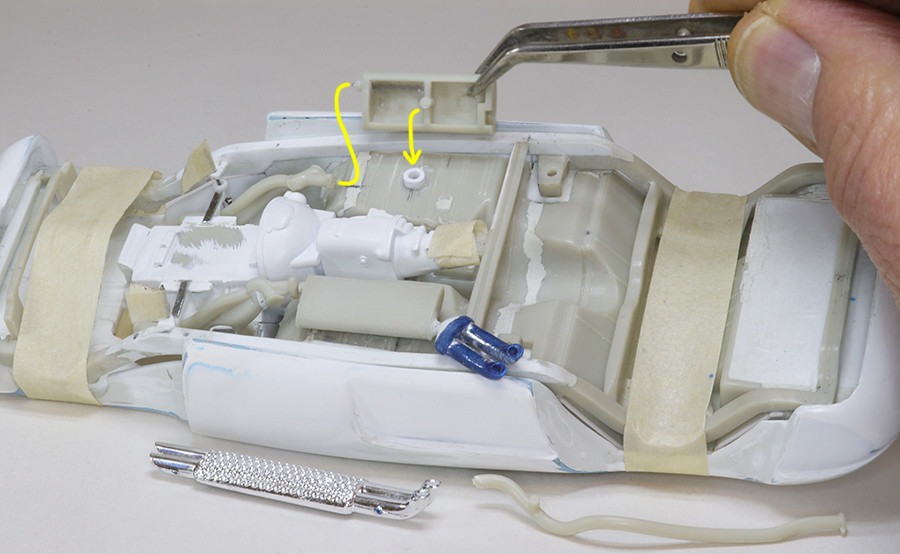
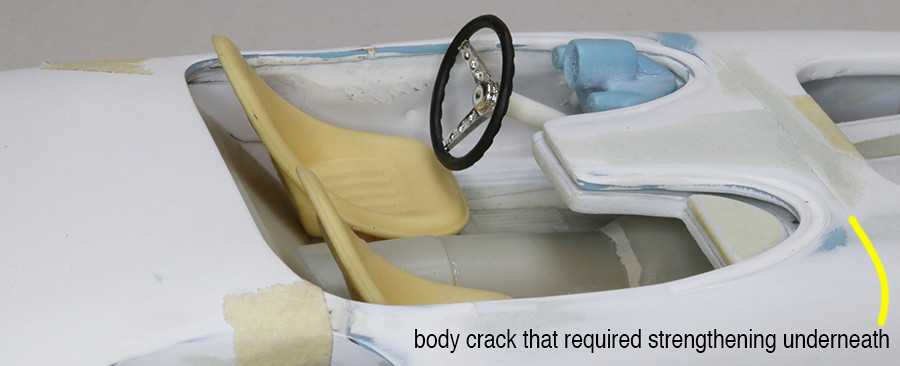
The cowl cracked during wetsanding. The super-strong cowl brace in that area acted like a fulcrum while the unsupported area around the windscreens acted like a lever.
So, underneath I added some styrene blocks and big ol' brass thingie. Then I modified the panel holding the dashboard pods to fit around it. Yes, this was time consuming.
Here's how it looks with the pod panel in place. It still needs some trimming to match up with the body opening. The steering wheel and column have some problems. The column isn't parallel with the centerline of the car and the lower part of the wheel doesn't give the driver enough legroom (see first photo in this post).
The steering wheel location looks OK from the side but it has to be corrected. I'm really NOT liking the "air" that I left between the body and the frame in the inner fender areas.
|
|
|
|
Post by mod3llover on Mar 11, 2019 14:27:07 GMT -5
Still looks great though!!
|
|
|
|
Post by chepp on Mar 27, 2019 22:25:15 GMT -5
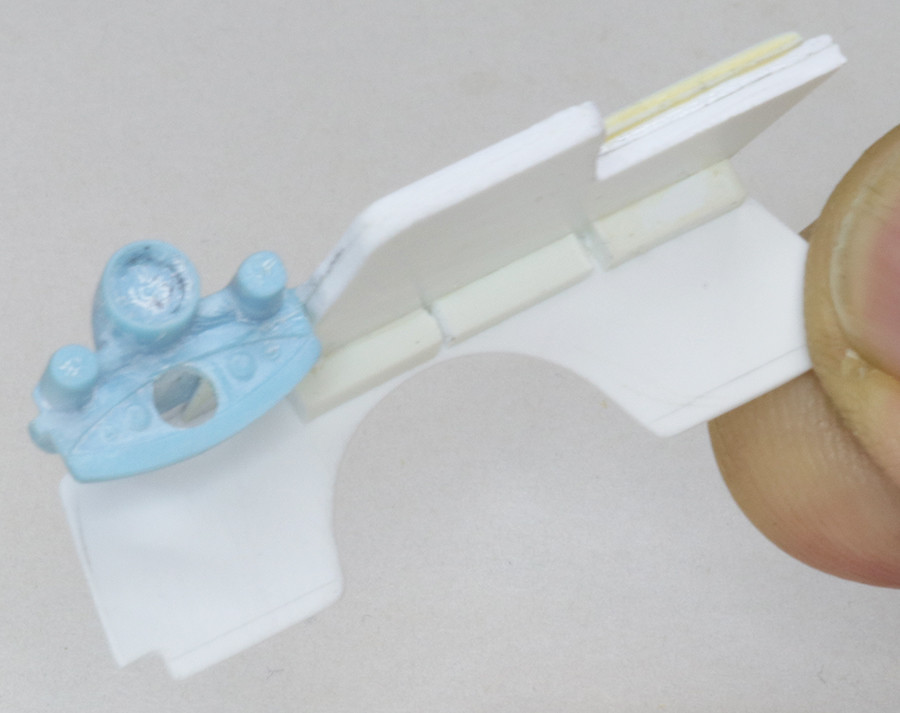
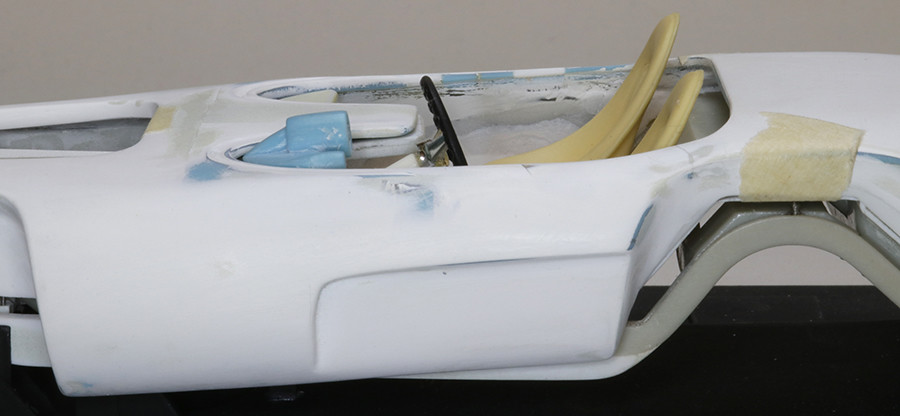
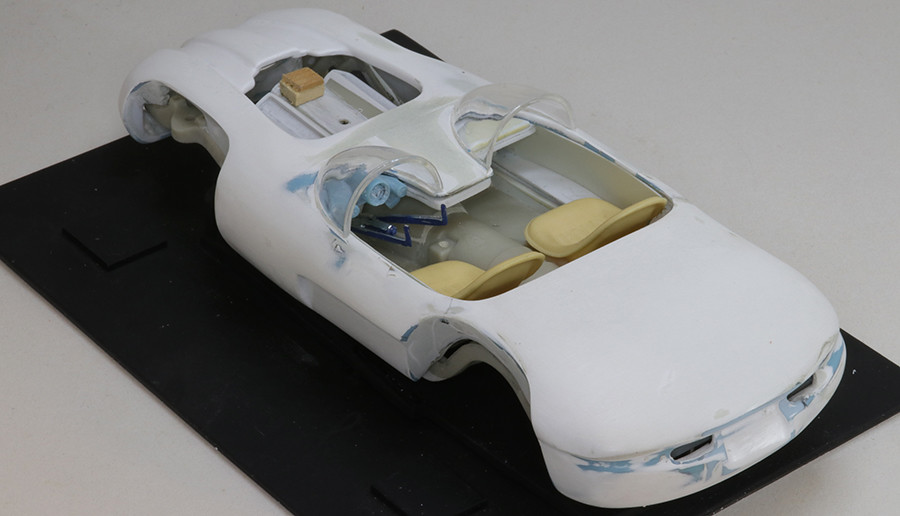
The hot rod style steering wheel didn't work out so well but one from the AMT Cushenbery Silhouette will add some flash. Because the whole assembly would rotate I hogged out a half circle under the gauges to accomodate it. The finished item will have Molotow chrome on it with the little vertical handholds painted to simulate teak wood. This will add some surfer vibe to go with the car's Hermosa (as in Hermosa Beach, California) name.
More time-consuming work progressed this week. Those big brass stiffeners that I put in to strengthen the body near the rear wheel wells interfered with the interior side panels so I had to modify them. I've also filled in the large gaps between the body and the frame at all four wheel wells. Some monkeying around with rear nerf bars hasn't resulted in anything usable yet.
Disregard the little block of wood on top of the engine. That's a spacer to keep the engine in the right place when the car is turned upside down for exhaust system work.
|
|
|
|
Post by spex84 on Mar 28, 2019 0:27:05 GMT -5
"Disregard the little block of wood on top of the engine."
You mean the log manifold?
Hee hee.
Looks good! The new radical yoke steering setup suits the style of the car.
|
|
|
|
Post by chepp on Apr 2, 2019 22:40:39 GMT -5
What the ?
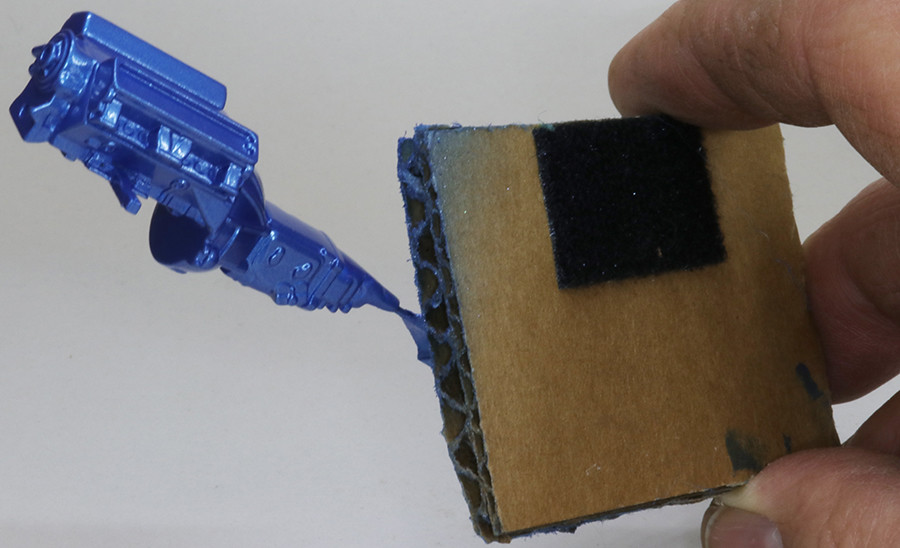
Enough with the mockups, already. I've got to start painting and stuff. This is a drying rack — it is NOT a painting rack. On the ground is an old aluminum pie pan turned upside down. A cut-down length of mop handle is attached to the pan with a screw and a washer so it doesn't pull out. It's hard to see, but there are a bunch of quarter-inch holes near the center of the pie pan to let air through. Stuck to the pan and the handle are squares of the "hook" kind of Velcro. Each of those cardboard or wood things holding model parts have a piece of the "loop" Velcro on them.
On the paint table, I remove one of the holders and paint the part. When it needs more than one coat I set it aside and remove another holder and paint its parts. When the parts are all painted I stick them with their holders onto the drying rack using the Velcro. Then, I put the drying rack into my home-brew dehydrator. I bake it between 90 and 120 degrees F for about six hours then let it sit overnight at room temperature.
Here's one of the holders with the engine on it after painting. I'm holding it so you can see the bottom of the cardboard with the Velcro on it. You'll notice that the "log manifold" spex84 mentioned isn't there. Also not there are the spark plug holes that I should have drilled before painting.
The blue is Model Masters Metallic Blue 2768 enamel thinned about 2:1 with KleenStrip lacquer thinner. The black is Tamiya X-1 water-cleanup acrylic thinned about 2:1 with their X-20A thinner.
|
|
|
|
Post by spex84 on Apr 2, 2019 23:46:40 GMT -5
That blue is gorgeous!
And the paint drying rack is genius. Dang. I've been using the "precariously balance crap all over the place and let air-dry" method...but I do have some velcro. Hmm. Even if I don't have a dehydrator, I appreciate the storage density and relative security of the velcro solution. Thanks for sharing your secrets!
|
|