|
|
Post by Dennis on Jul 22, 2020 23:52:43 GMT -5
|
|
|
|
Post by skip on Jul 23, 2020 9:12:08 GMT -5
Seeing that firewall in paint reminded me of the old (now) '70's method of making a Model A firewall deeper by using the back end of a wheelbarrow body cut to the appropriate depth. I've seen a lot of older Model A builds over the years with that same modification, a lot of people (now) skip over how the original builder did the "Tru-Temper Firewall". Fits that really big Pontiac engine to a Tee!
On to your build, looks great! Model A's were made for "Primary" colors! In my opinion they don't look as good with some of the flashier colors that the '32 can wear. Guess it goes back to the "utilitarian nature of the Model A itself being nothing fancy in the first place.
You didn't mention the final choice of headers, is that something you've built or did they come form a kit? They look great, I'm not a big fan of over the frame exhaust on highboys, block hugging headers that flow between the engine and framerails look classic. Again fitting the utilitarian Model A, soo well!
|
|
|
|
Post by krassandbernie on Jul 23, 2020 19:09:56 GMT -5
I like it! I was half expecting a much darker blue......almost a midnight blue minus the metallic until I scrolled down. Now you need to put a tach on top of the cowl where the stock gas filler cap would go! Is the roof insert painted already; or just masked off?
|
|
|
|
Post by mack2856 on Jul 23, 2020 20:33:42 GMT -5
Shut the front door, vroom vroom!
|
|
|
|
Post by Dennis on Jul 23, 2020 23:55:52 GMT -5
Seeing that firewall in paint reminded me of the old (now) '70's method of making a Model A firewall deeper by using the back end of a wheelbarrow body cut to the appropriate depth. I've seen a lot of older Model A builds over the years with that same modification, a lot of people (now) skip over how the original builder did the "Tru-Temper Firewall". Fits that really big Pontiac engine to a Tee! On to your build, looks great! Model A's were made for "Primary" colors! In my opinion they don't look as good with some of the flashier colors that the '32 can wear. Guess it goes back to the "utilitarian nature of the Model A itself being nothing fancy in the first place. You didn't mention the final choice of headers, is that something you've built or did they come form a kit? They look great, I'm not a big fan of over the frame exhaust on highboys, block hugging headers that flow between the engine and framerails look classic. Again fitting the utilitarian Model A, soo well! Thanks! And if I had some 1/25 scale wheel barrows I’d definitely use them for Model A firewalls. I’ve seen several cars done that way. A huge proponent of that was the late, great Pete Chapouris of Pete & Jakes and SoCal Speed Shop fame. The headers are modified from Monograms ‘30 Woody kit. That kit has a small block Chevy but the port spacing was good and they’re the only thing I had that had any hope of fitting. The over-the-frame headers are neat but over done. I like the challenge of creating a fitted, full exhaust system. |
|
|
|
Post by Dennis on Jul 23, 2020 23:58:11 GMT -5
I like it! I was half expecting a much darker blue......almost a midnight blue minus the metallic until I scrolled down. Now you need to put a tach on top of the cowl where the stock gas filler cap would go! Is the roof insert painted already; or just masked off? The tack is a great idea. I should have something on hand that will work. The roof insert is still in primer. After giving the paint a few days to dry I’ll be masking the body and spraying the insert black. |
|
|
|
Post by krassandbernie on Jul 24, 2020 21:27:47 GMT -5
I like it! I was half expecting a much darker blue......almost a midnight blue minus the metallic until I scrolled down. Now you need to put a tach on top of the cowl where the stock gas filler cap would go! Is the roof insert painted already; or just masked off? The tack is a great idea. I should have something on hand that will work. The roof insert is still in primer. After giving the paint a few days to dry I’ll be masking the body and spraying the insert black. Gotcha! I think black is a good choice for the roof insert. I was afraid you painted it flat white......not that you aren't allowed to paint it whatever color you feel like. The nicest tach I've ever seen from a kit was found in the Revell '64 Ford Thunderbolt kits. Have you thought about using colored (tinted) lexan for the windows? Orange, yellow, or even blue might not look bad. It was a very popular thing to do (and safer) to use Plexiglass back in the '60's. It became that much more apparent to me after helping an old friend build and race a couple of 100% period correct late sixties blown '33 Willys gassers around 20 years ago.  |
|
|
|
Post by Dennis on Jul 28, 2020 22:53:07 GMT -5
The tack is a great idea. I should have something on hand that will work. The roof insert is still in primer. After giving the paint a few days to dry I’ll be masking the body and spraying the insert black. Gotcha! I think black is a good choice for the roof insert. I was afraid you painted it flat white......not that you aren't allowed to paint it whatever color you feel like. The nicest tach I've ever seen from a kit was found in the Revell '64 Ford Thunderbolt kits. Have you thought about using colored (tinted) lexan for the windows? Orange, yellow, or even blue might not look bad. It was a very popular thing to do (and safer) to use Plexiglass back in the '60's. It became that much more apparent to me after helping an old friend build and race a couple of 100% period correct late sixties blown '33 Willys gassers around 20 years ago. The colored “plexiglass” would work but the beauty of using your top half with the restyled insert is that the kit “glass” still fits saving a bunch of work and frustration. I hate making and fitting windows from clear sheet! I’ll save the colored windows for an actual race car. |
|
|
|
Post by krassandbernie on Jul 29, 2020 0:11:36 GMT -5
Gotcha! I think black is a good choice for the roof insert. I was afraid you painted it flat white......not that you aren't allowed to paint it whatever color you feel like. The nicest tach I've ever seen from a kit was found in the Revell '64 Ford Thunderbolt kits. Have you thought about using colored (tinted) lexan for the windows? Orange, yellow, or even blue might not look bad. It was a very popular thing to do (and safer) to use Plexiglass back in the '60's. It became that much more apparent to me after helping an old friend build and race a couple of 100% period correct late sixties blown '33 Willys gassers around 20 years ago. The colored “plexiglass” would work but the beauty of using your top half with the restyled insert is that the kit “glass” still fits saving a bunch of work and frustration. I hate making and fitting windows from clear sheet! I’ll save the colored windows for an actual race car. Don't blame you one bit for rolling that way! No need to make building a model that much more frustrating! LOL! |
|
|
|
Post by Dennis on Aug 1, 2020 21:55:42 GMT -5
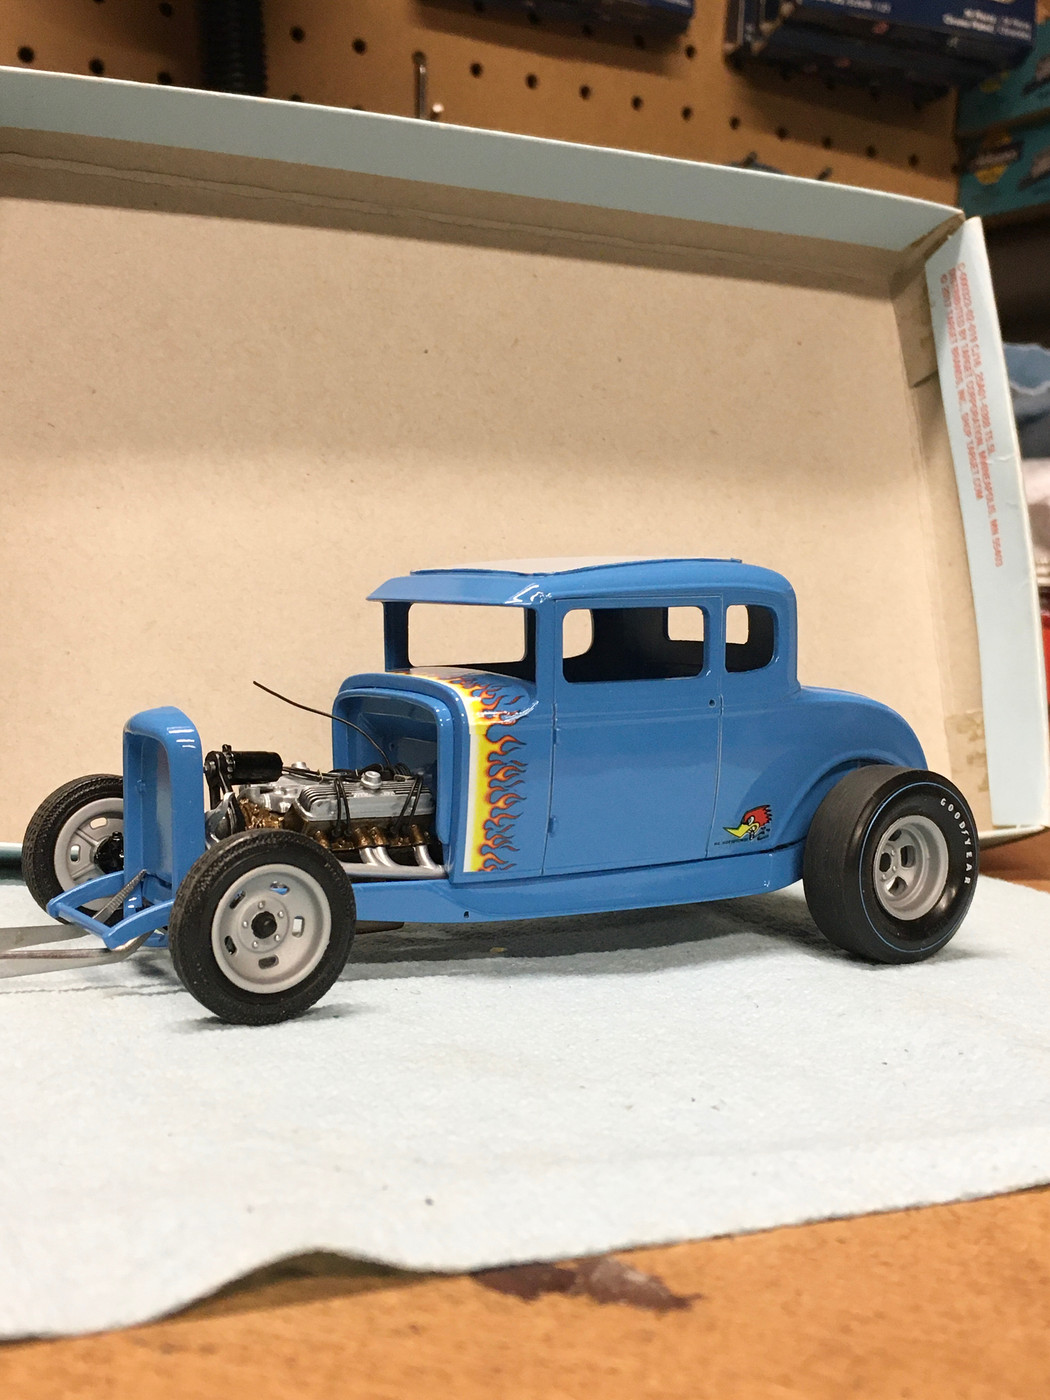
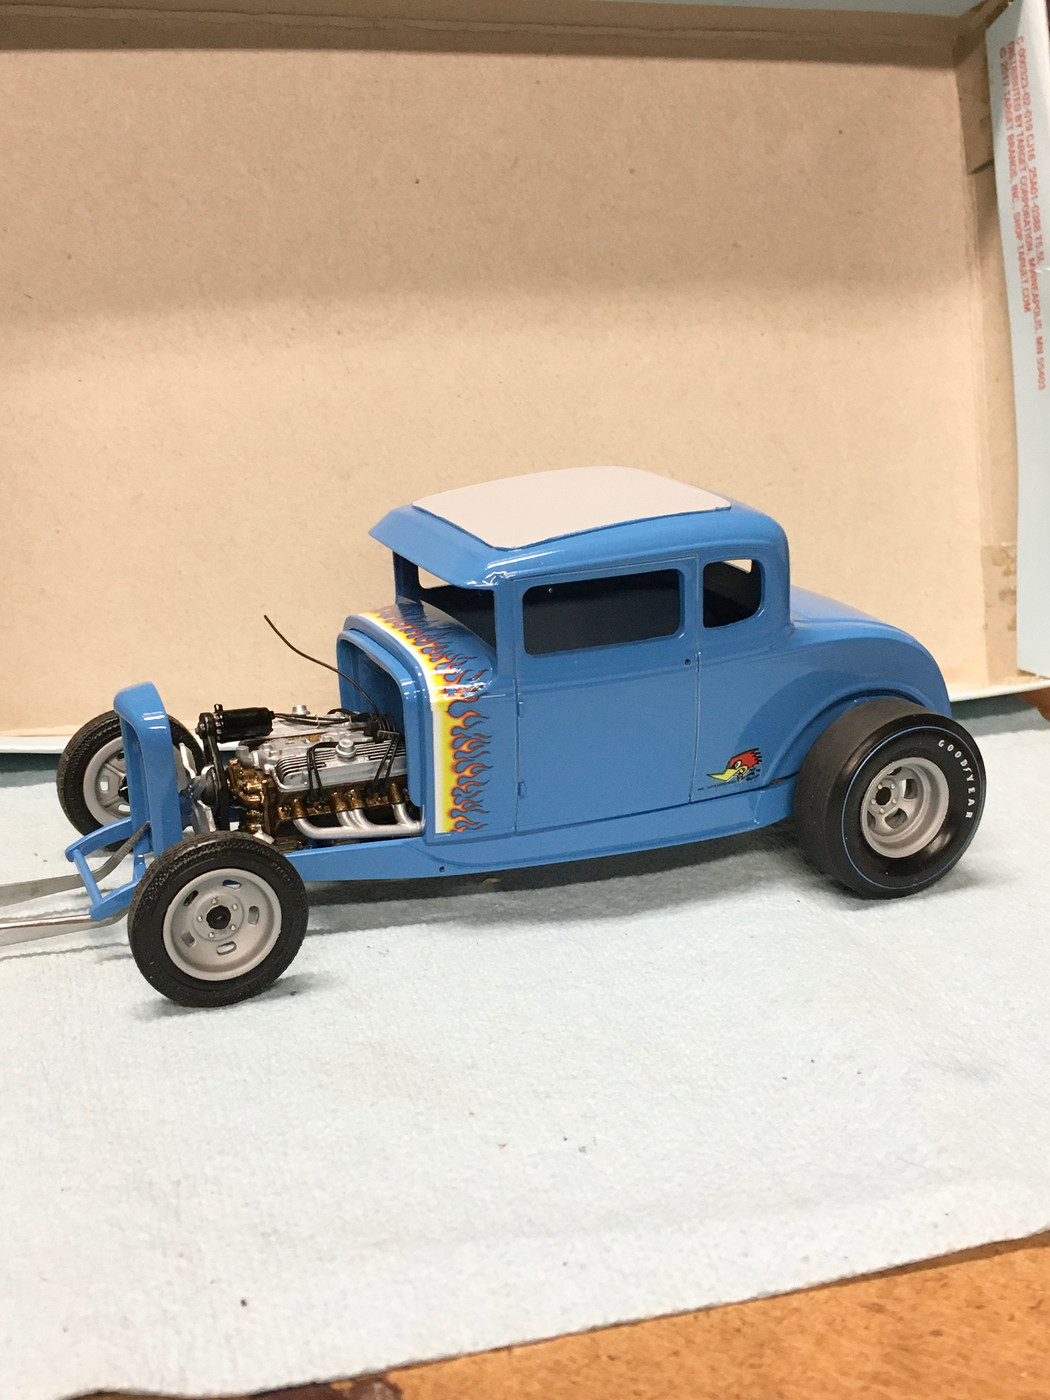
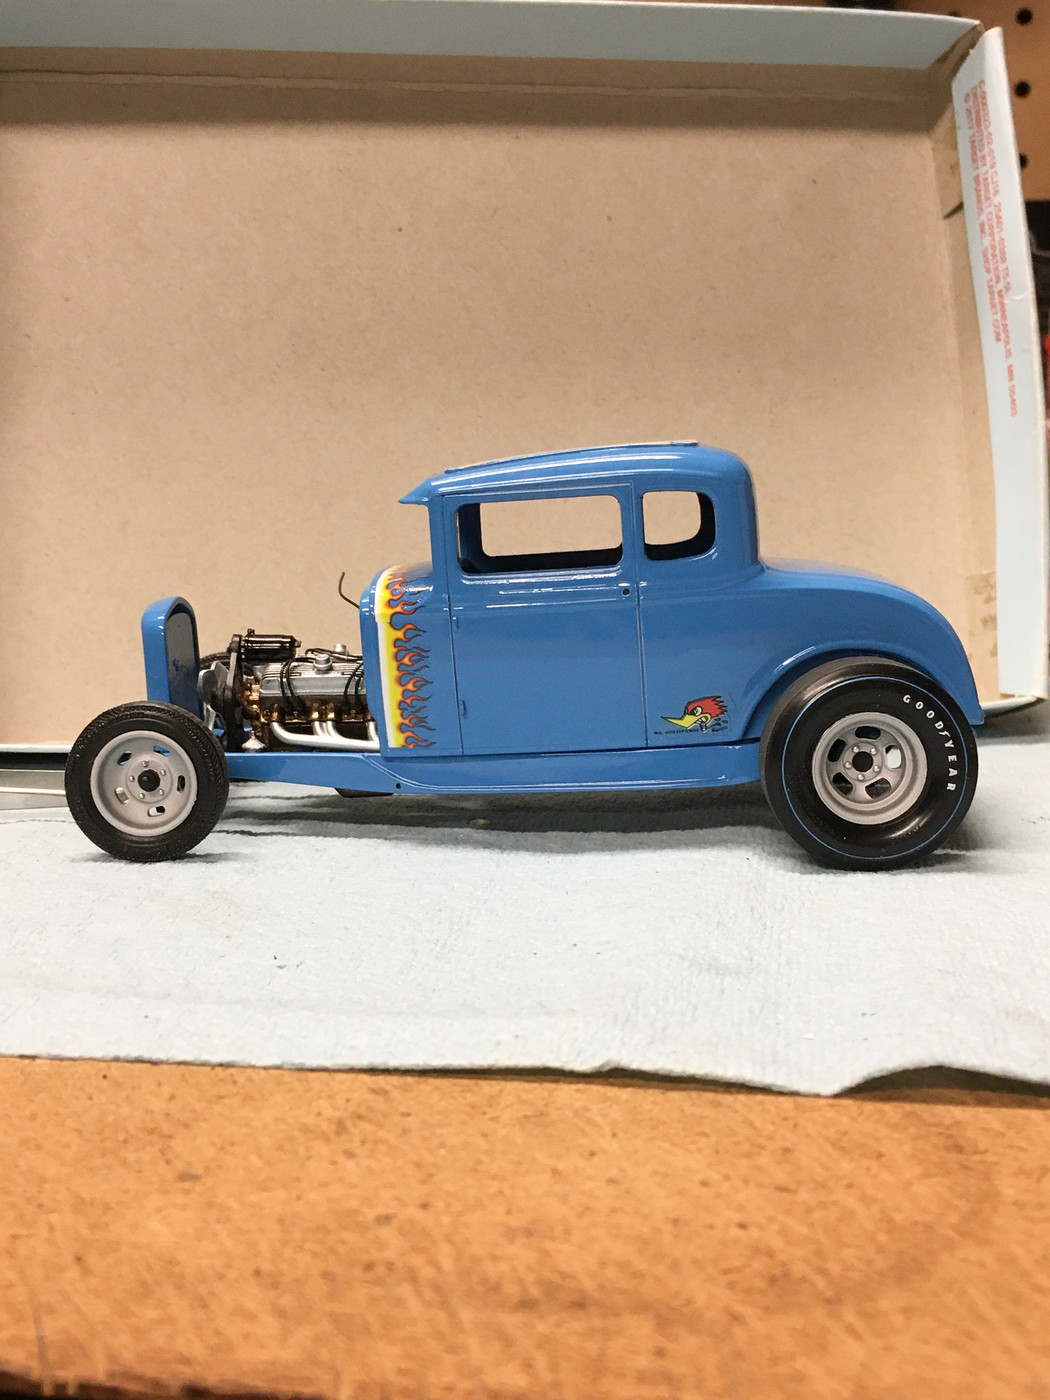
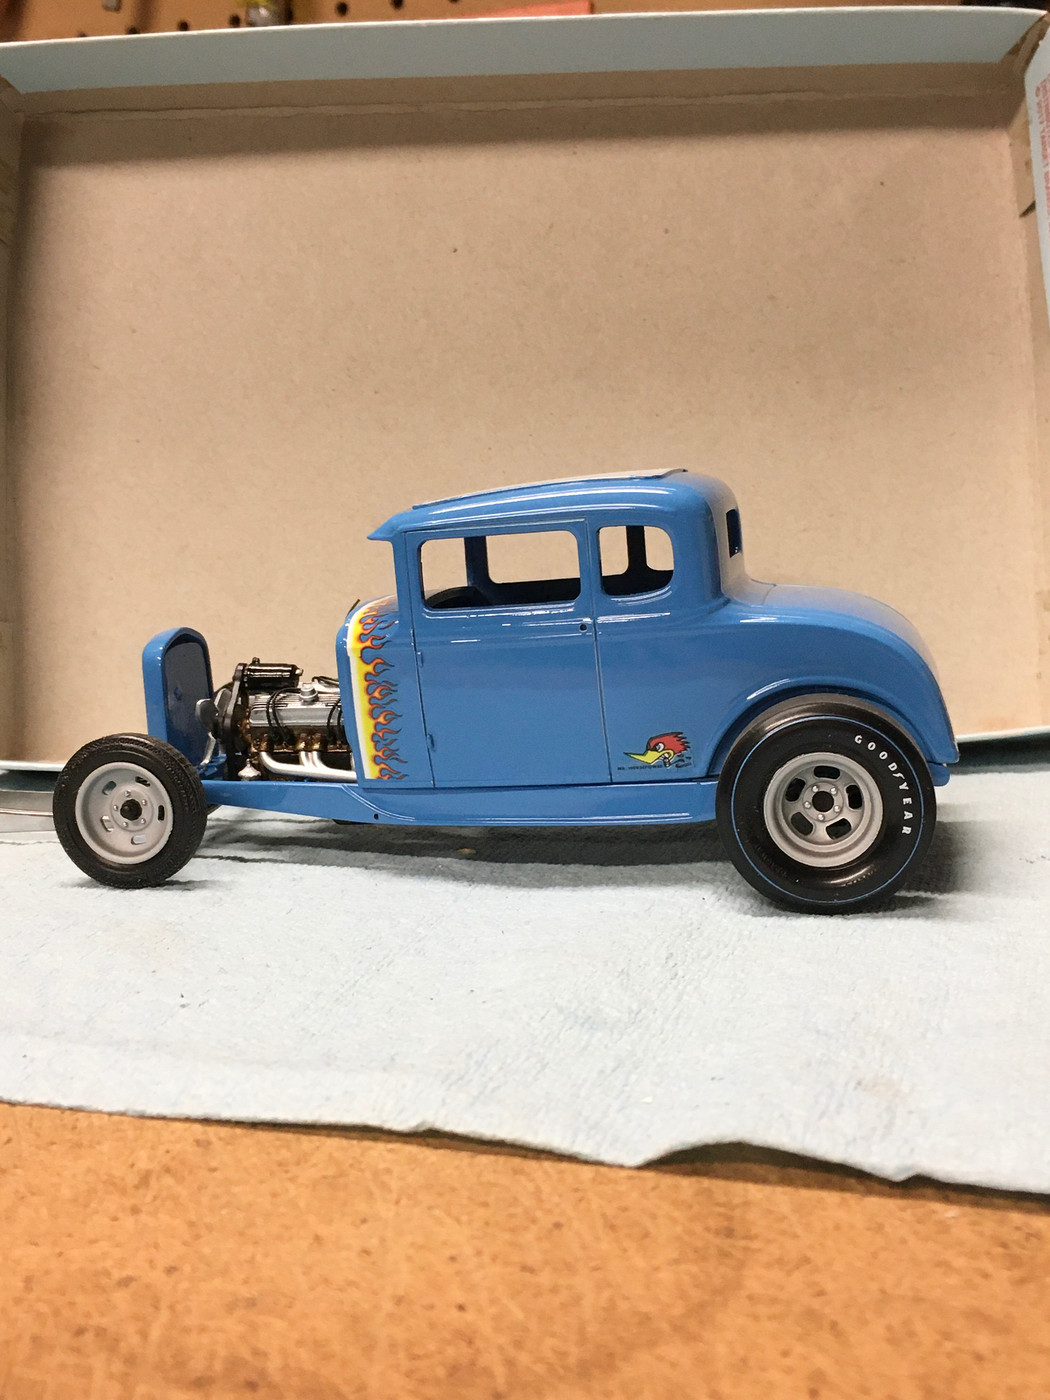
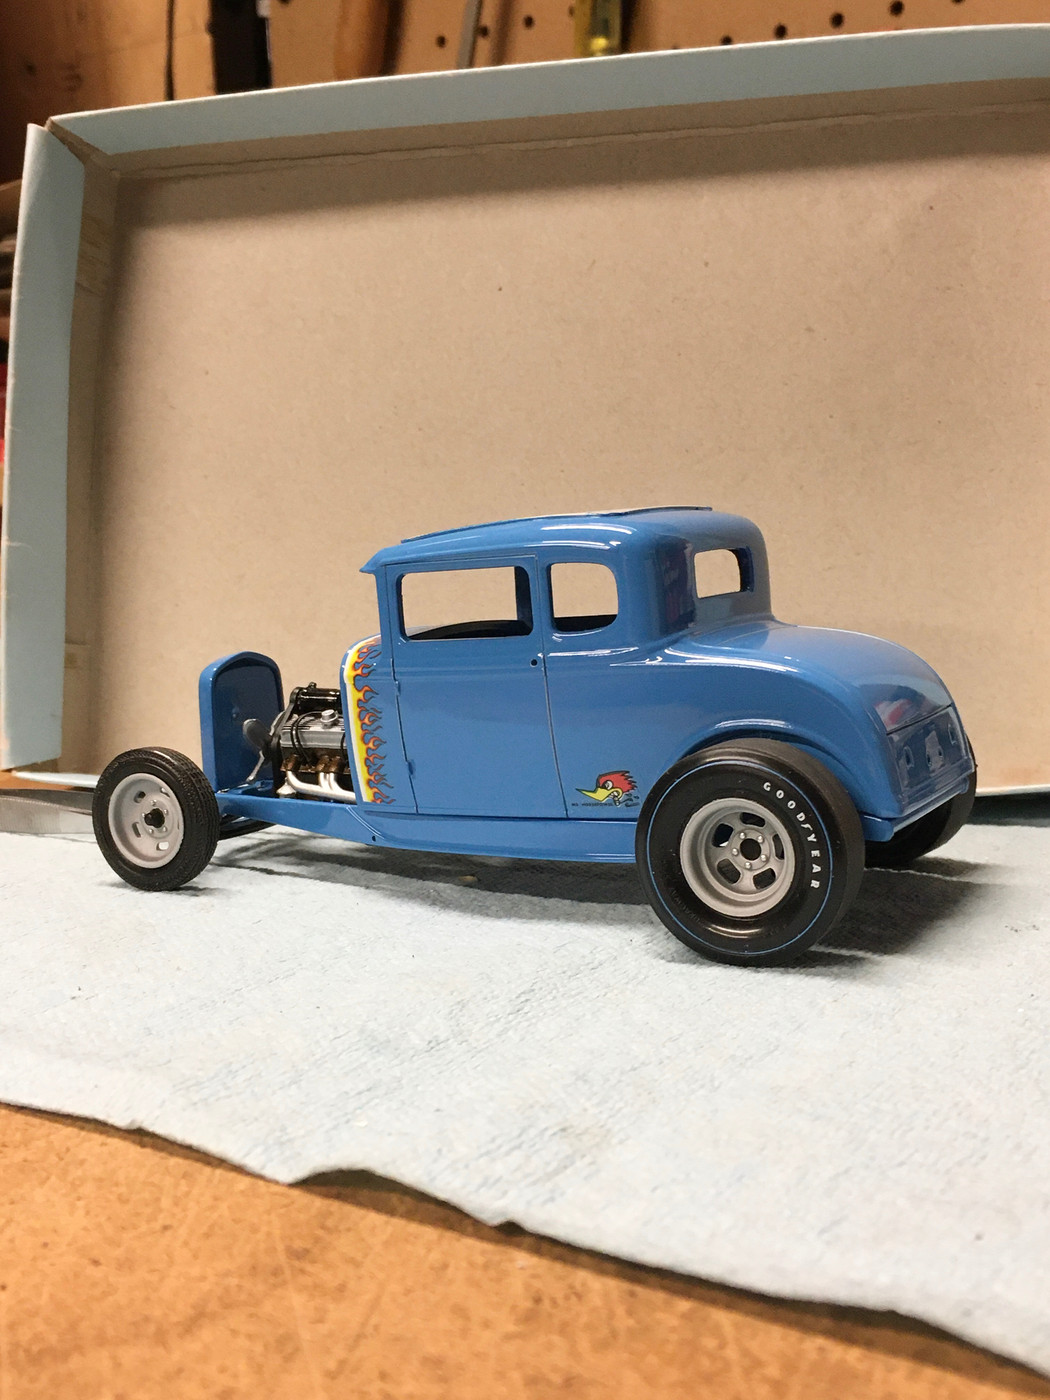
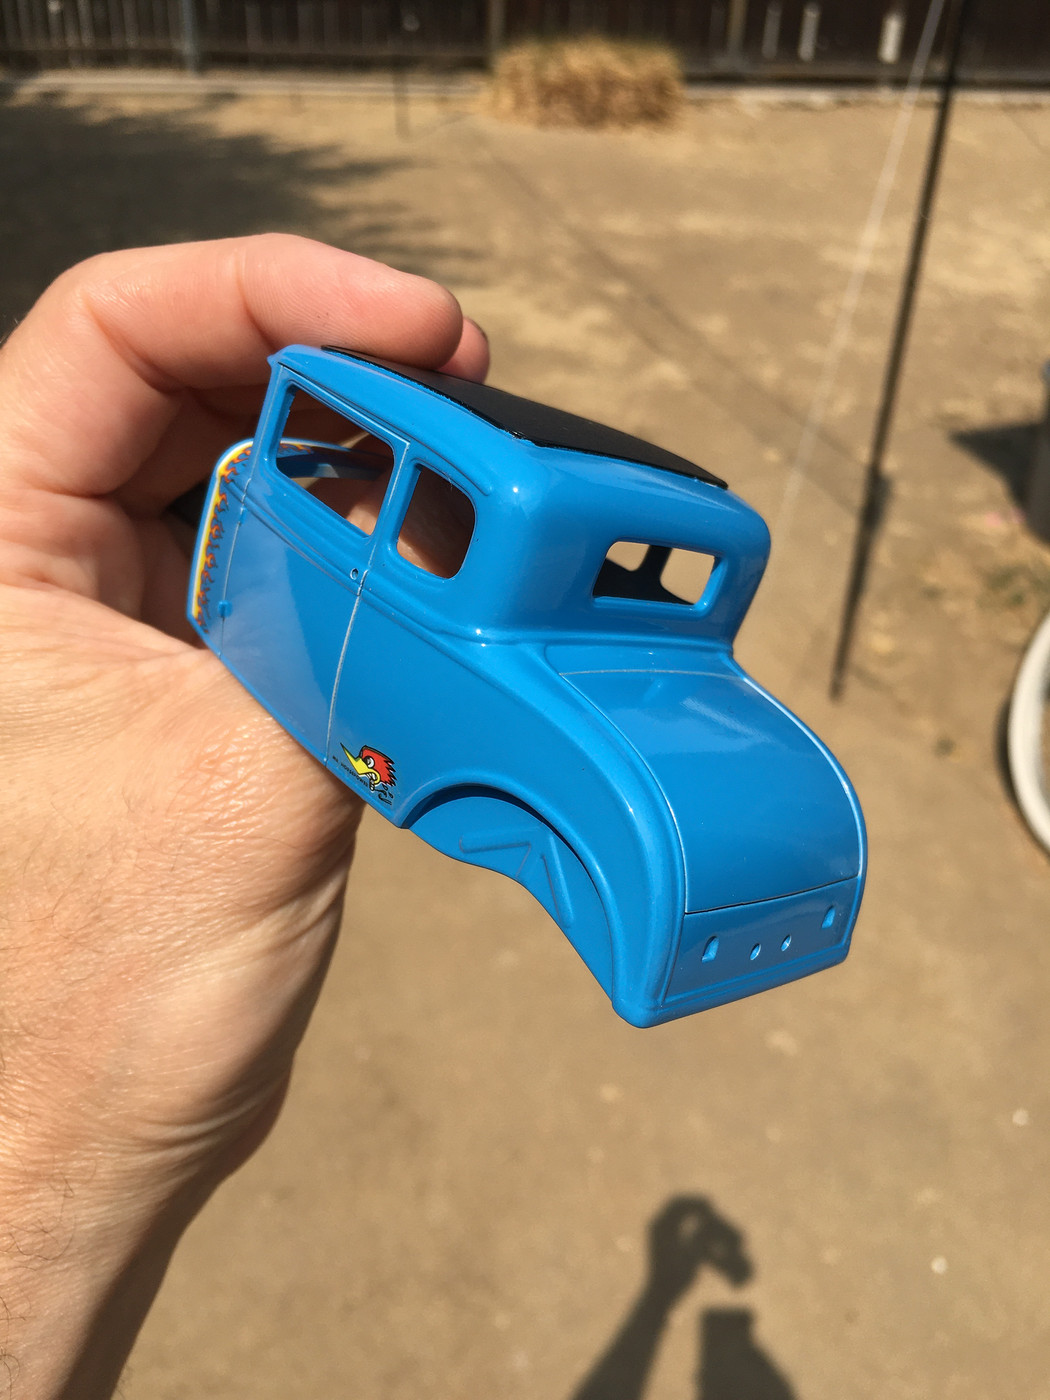
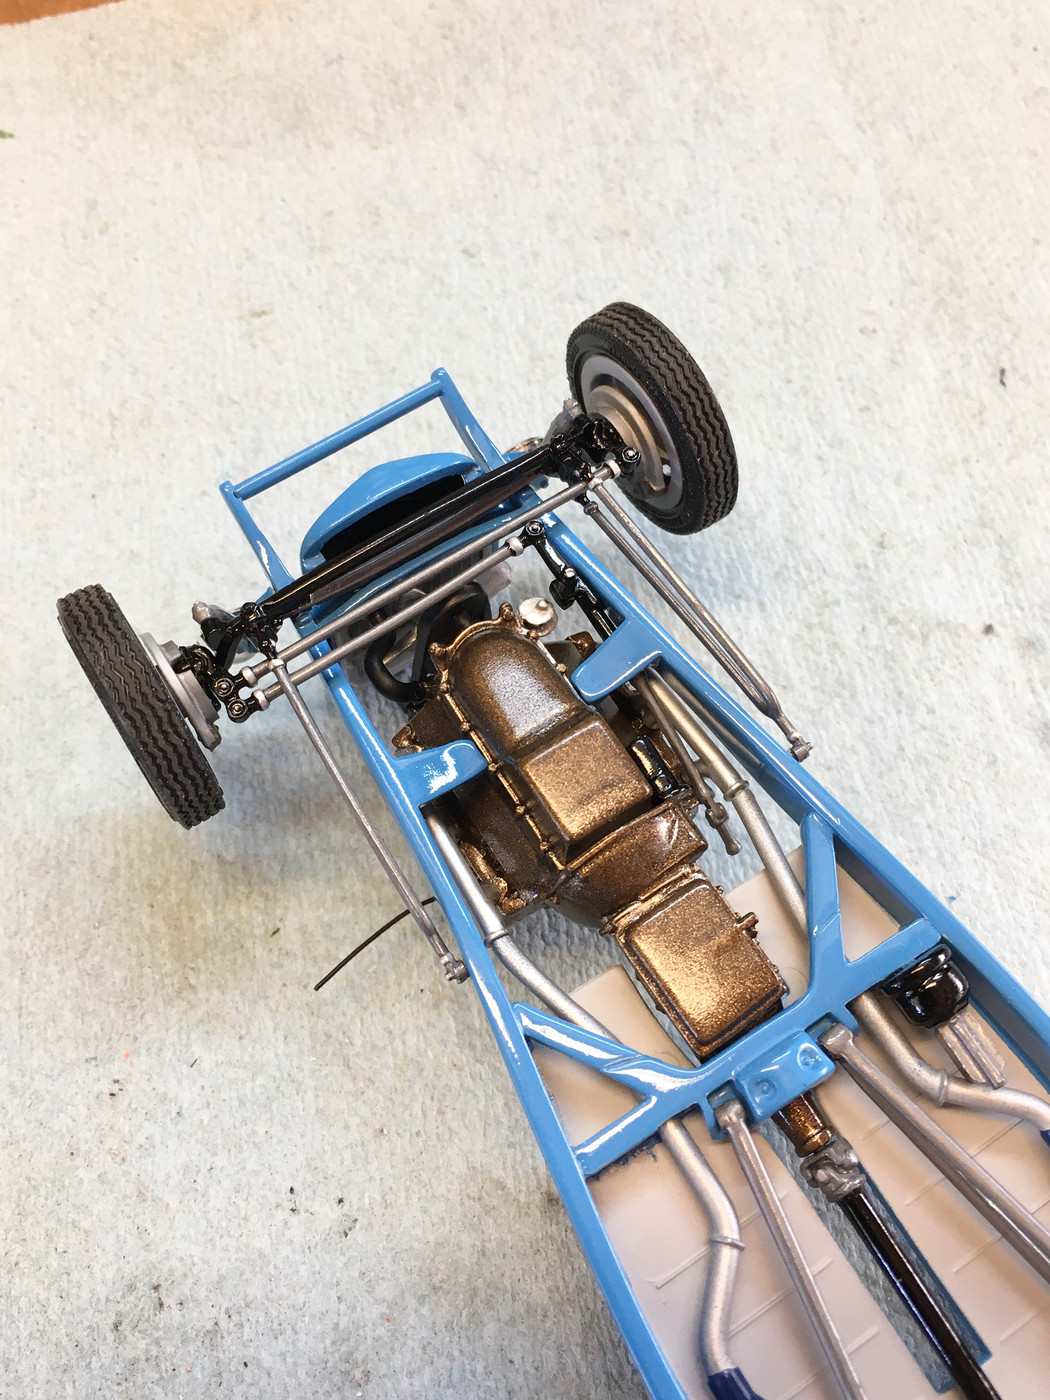
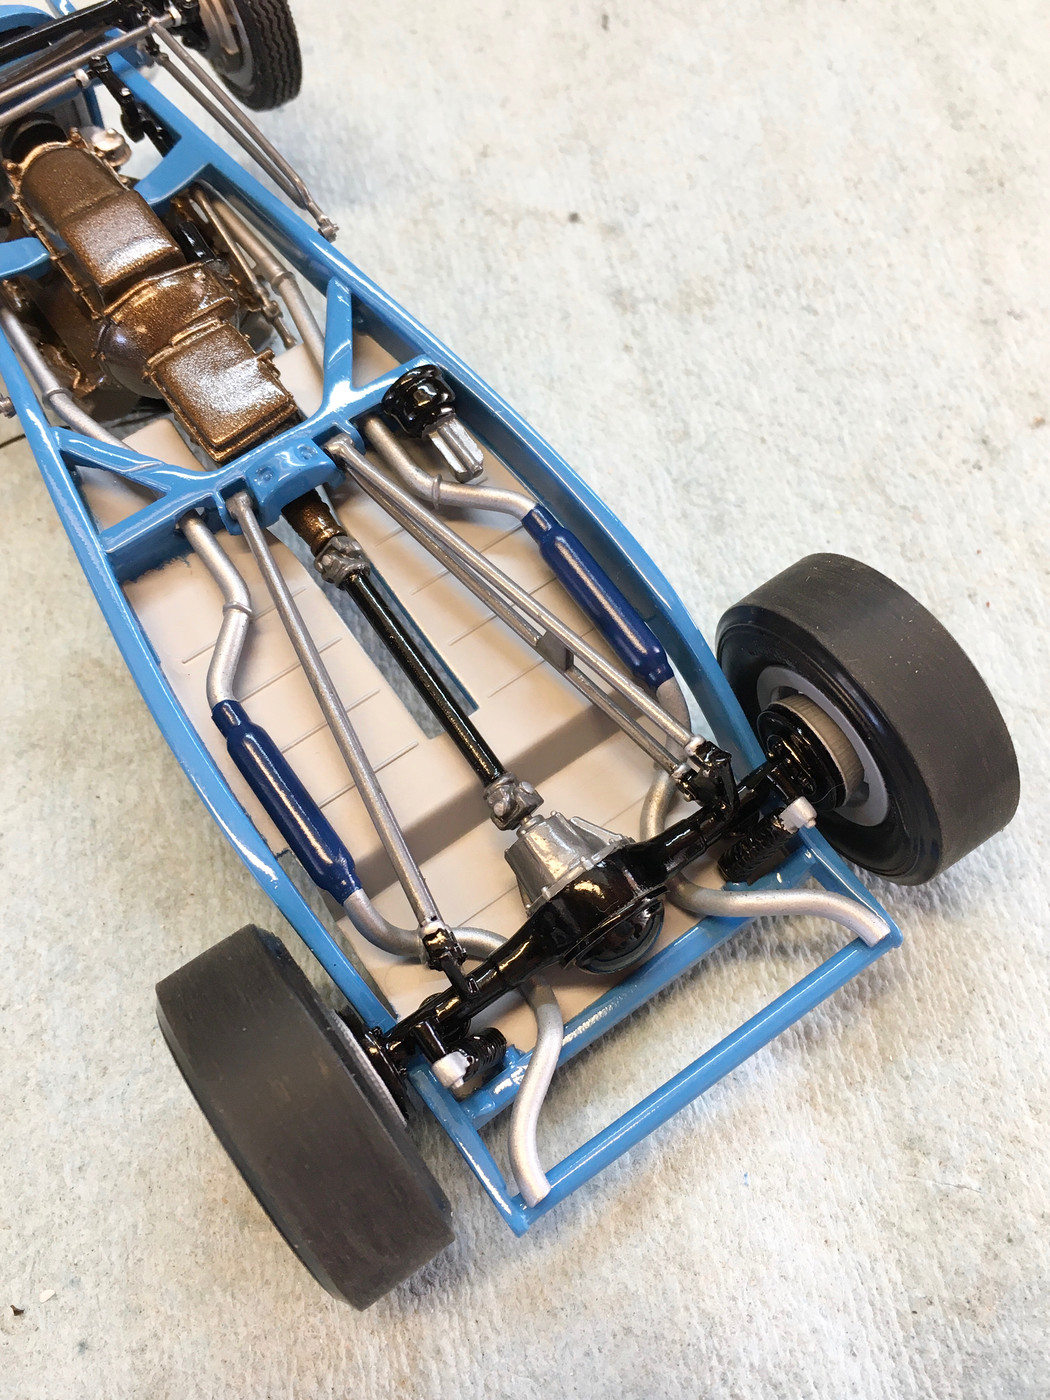
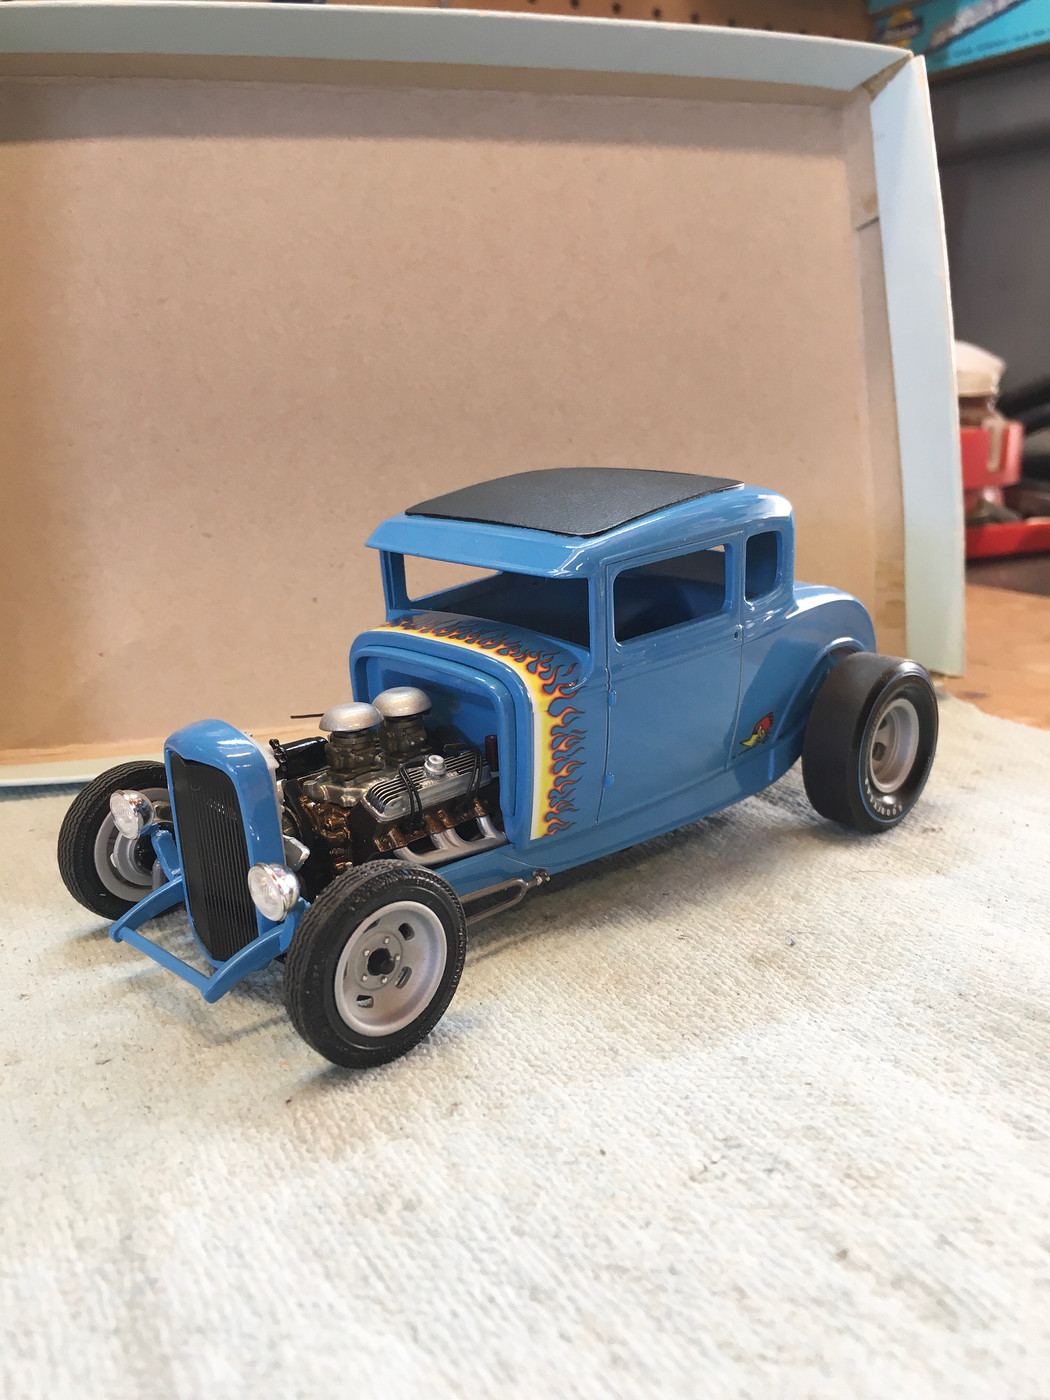
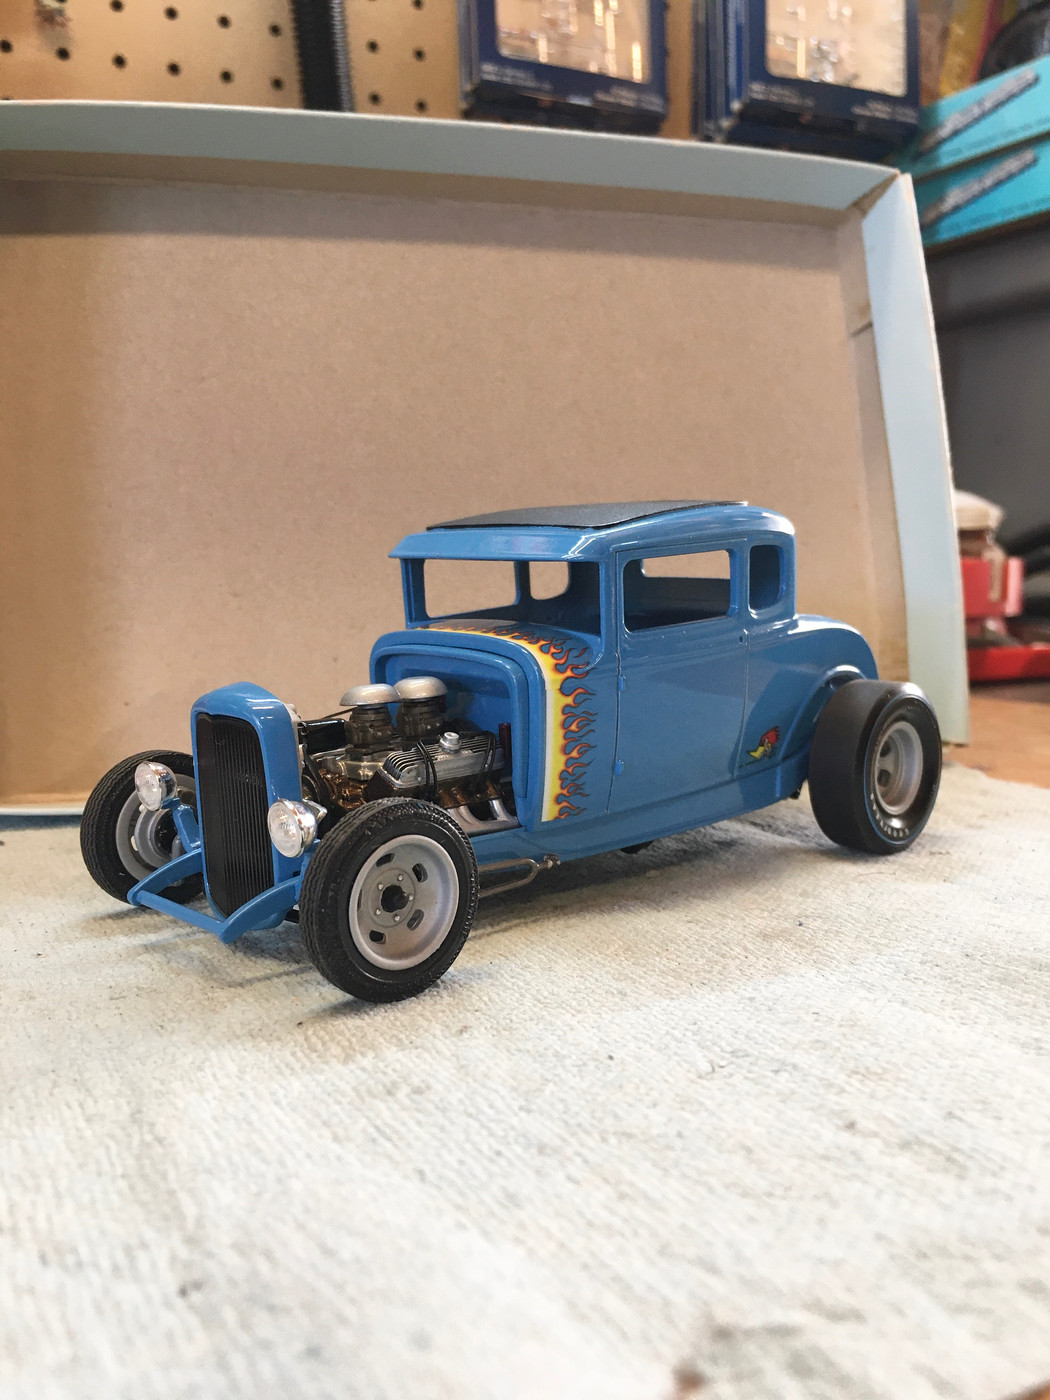
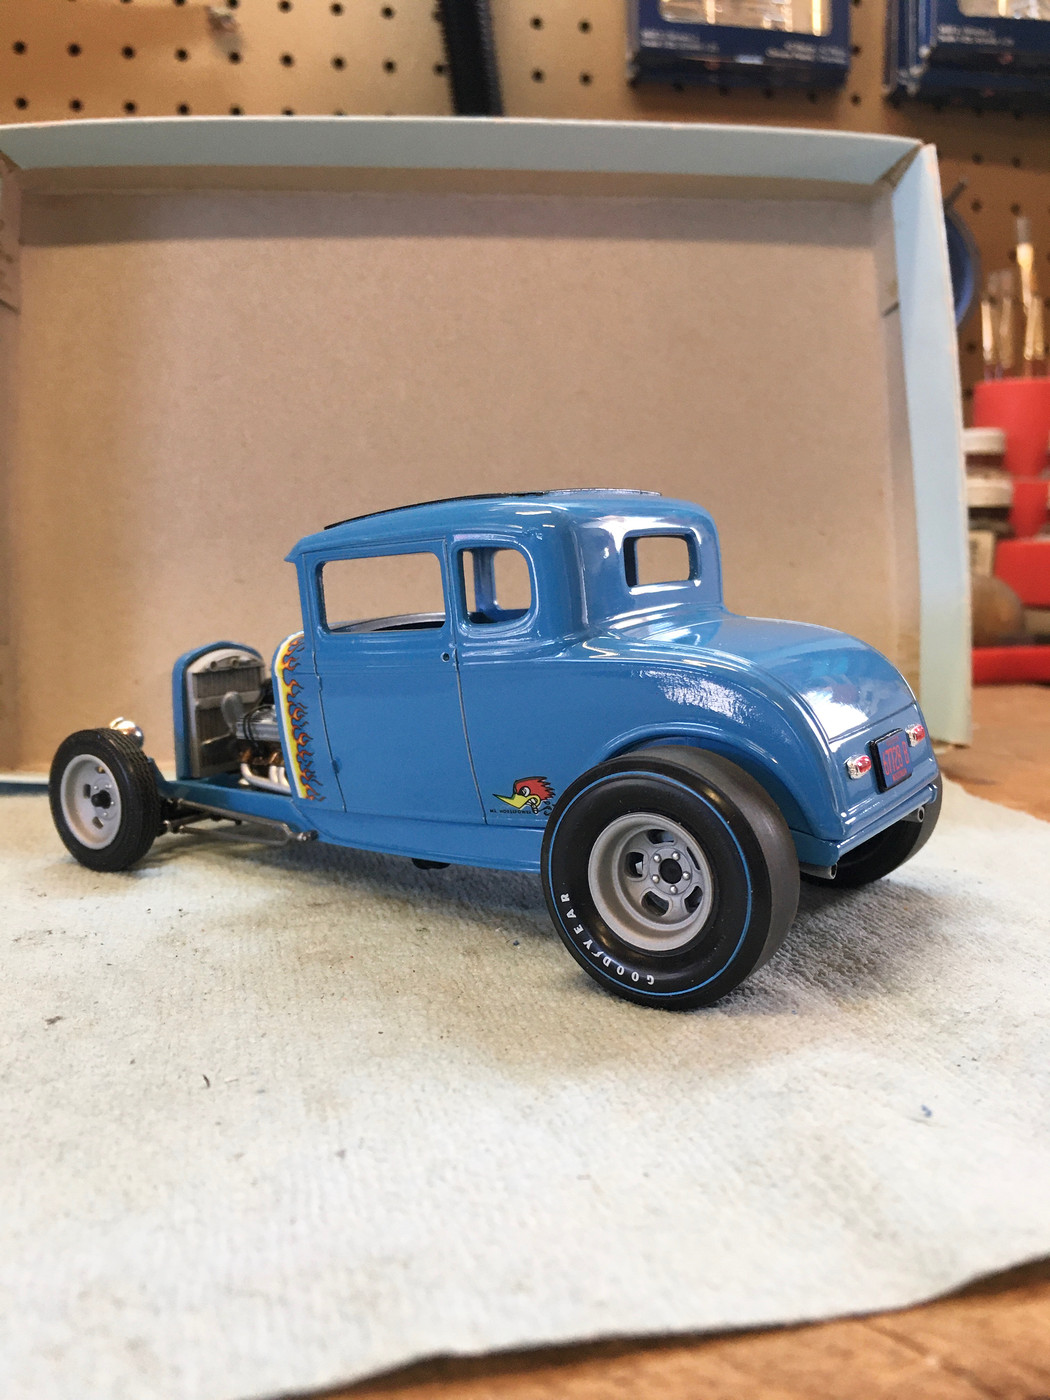
SMALL UPDATE:A small update but one none the less. I masked the body and sprayed the roof insert flat black. Now seeing the paint finished it's amazing how much better Drag City's revised insert design is. Love it!  It'll still be a couple of weeks yet before it's time to polish and wax the body and other blue parts, which will then allow assembly to happen. In the meantime I need to order more hard line and fittings so that I can make the fuel lines to complete the engine.
|
|
|
|
Post by krassandbernie on Aug 2, 2020 12:34:35 GMT -5
Very cool! You can see the textured detail in the roof insert I made more clearly now. The contrast with the shiny blue paint looks great too!
|
|
|
|
Post by dodgefever on Aug 2, 2020 14:14:51 GMT -5
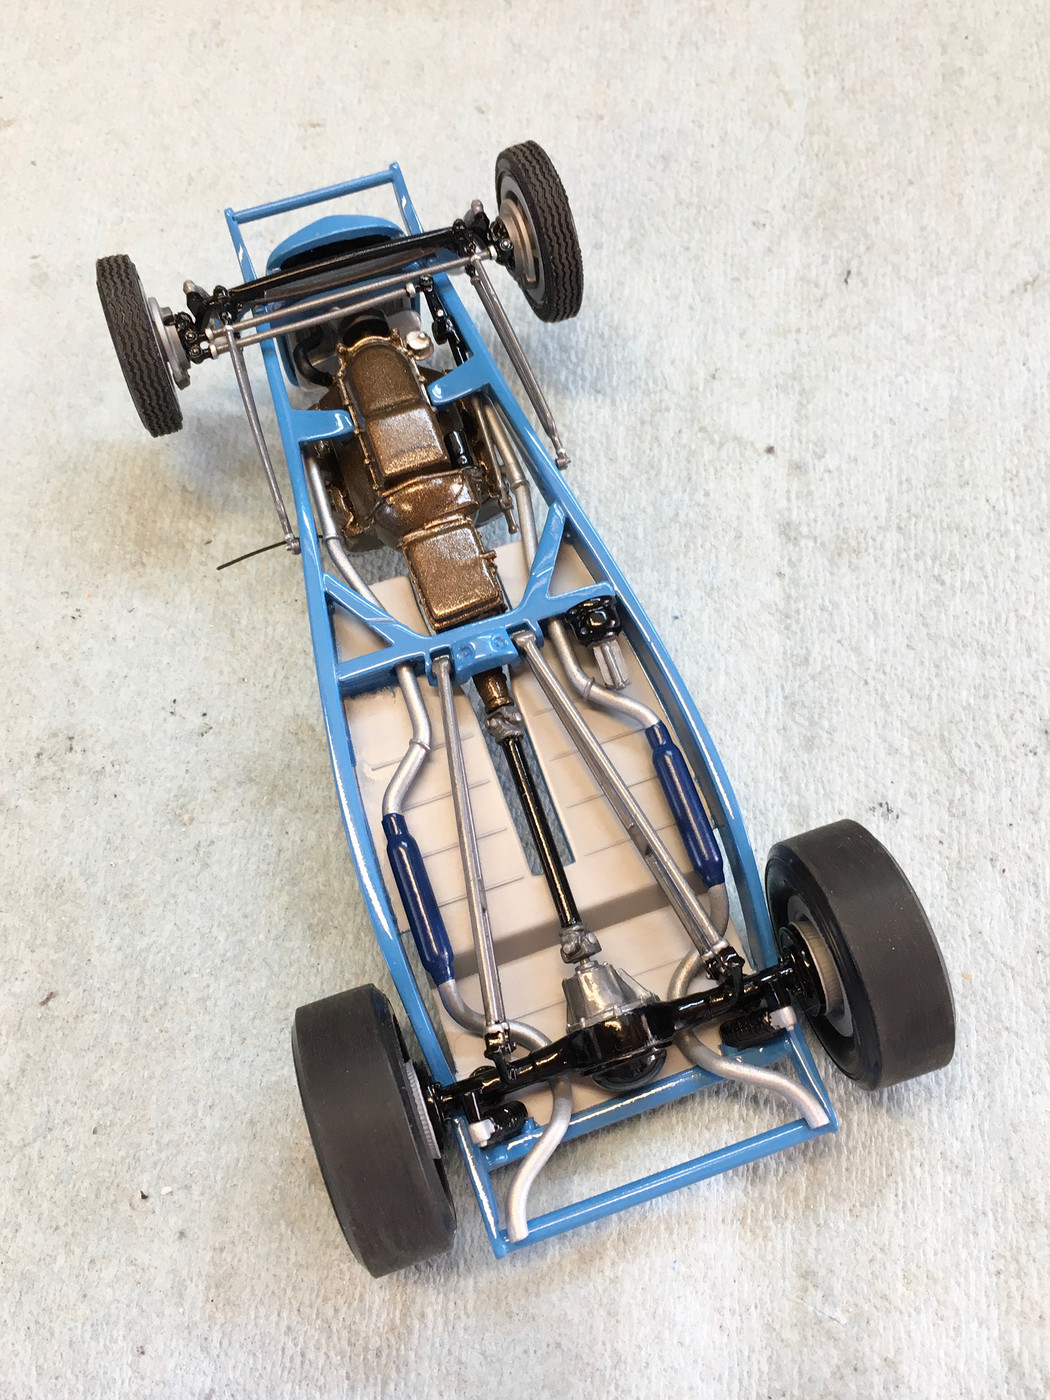
Cool build, the engine and mags look really good.
|
|
|
|
Post by Dennis on Aug 23, 2020 23:07:58 GMT -5
|
|
|
|
Post by krassandbernie on Aug 24, 2020 13:08:09 GMT -5
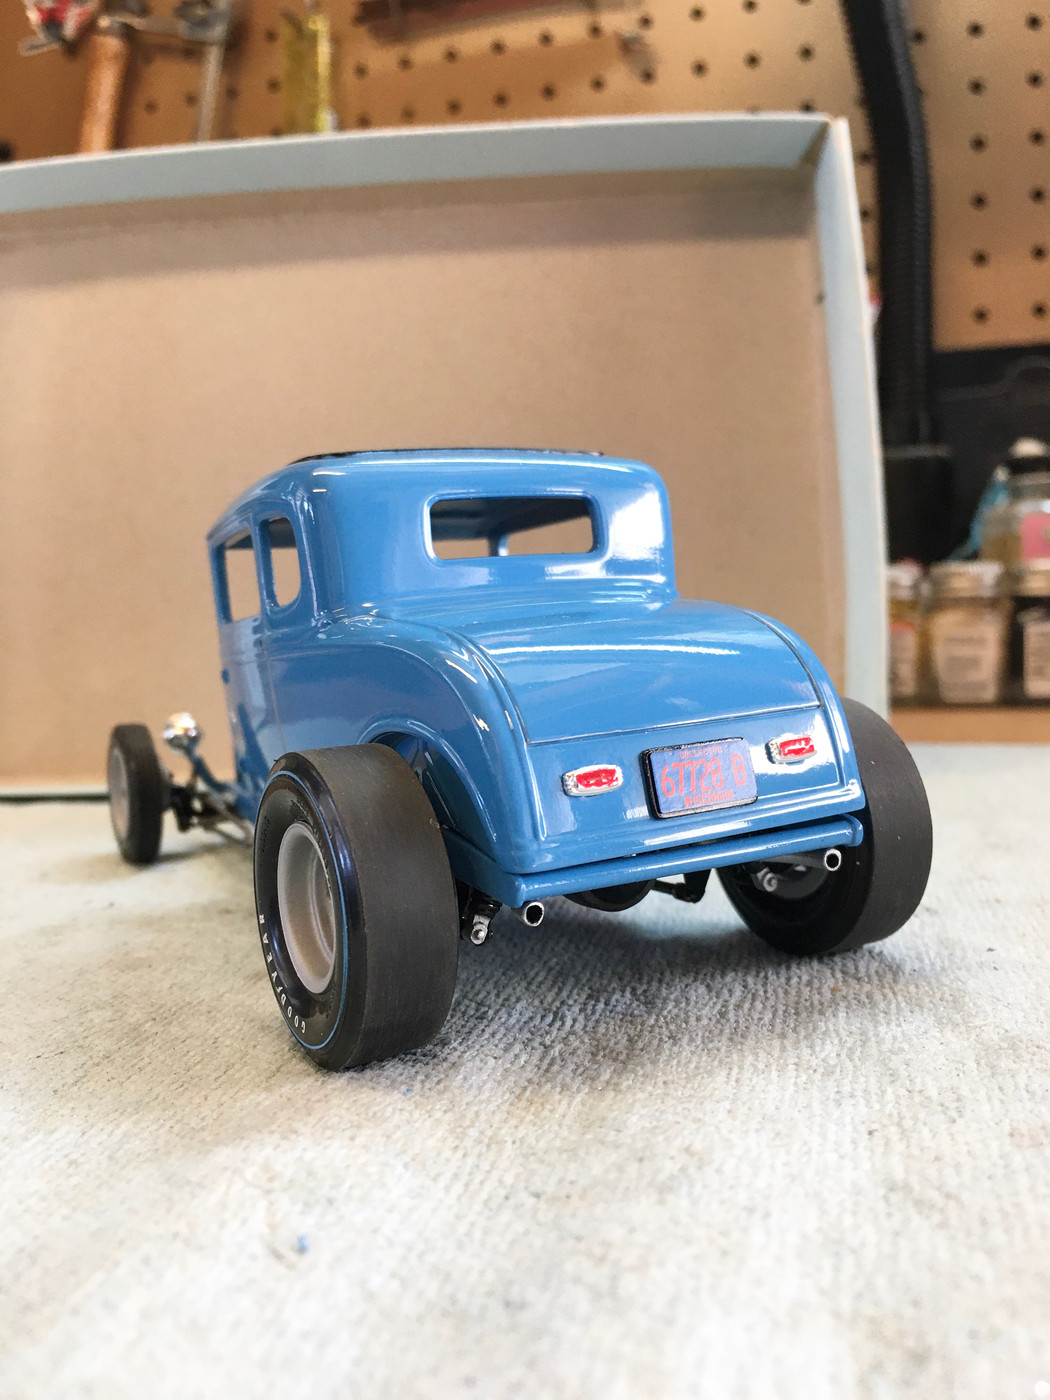
Very cool! Don't forget to thoroughly clean out the door lines now that you have polish residue stuck in there! LOL! An old toothbrush should be soft enough; yet still do the trick without damaging the paint finish. Man, that last photo is killer.....from the back!!!!
|
|
|
|
Post by Dennis on Aug 30, 2020 0:03:53 GMT -5
UPDATE!A small update but an important one. Got the fuel lines made up. Used Detail Master #1 line and fittings. The T-fitting is made from .040" square rod. Now the engine looks more complete except that I still need to cut an upper "hose" to fit. 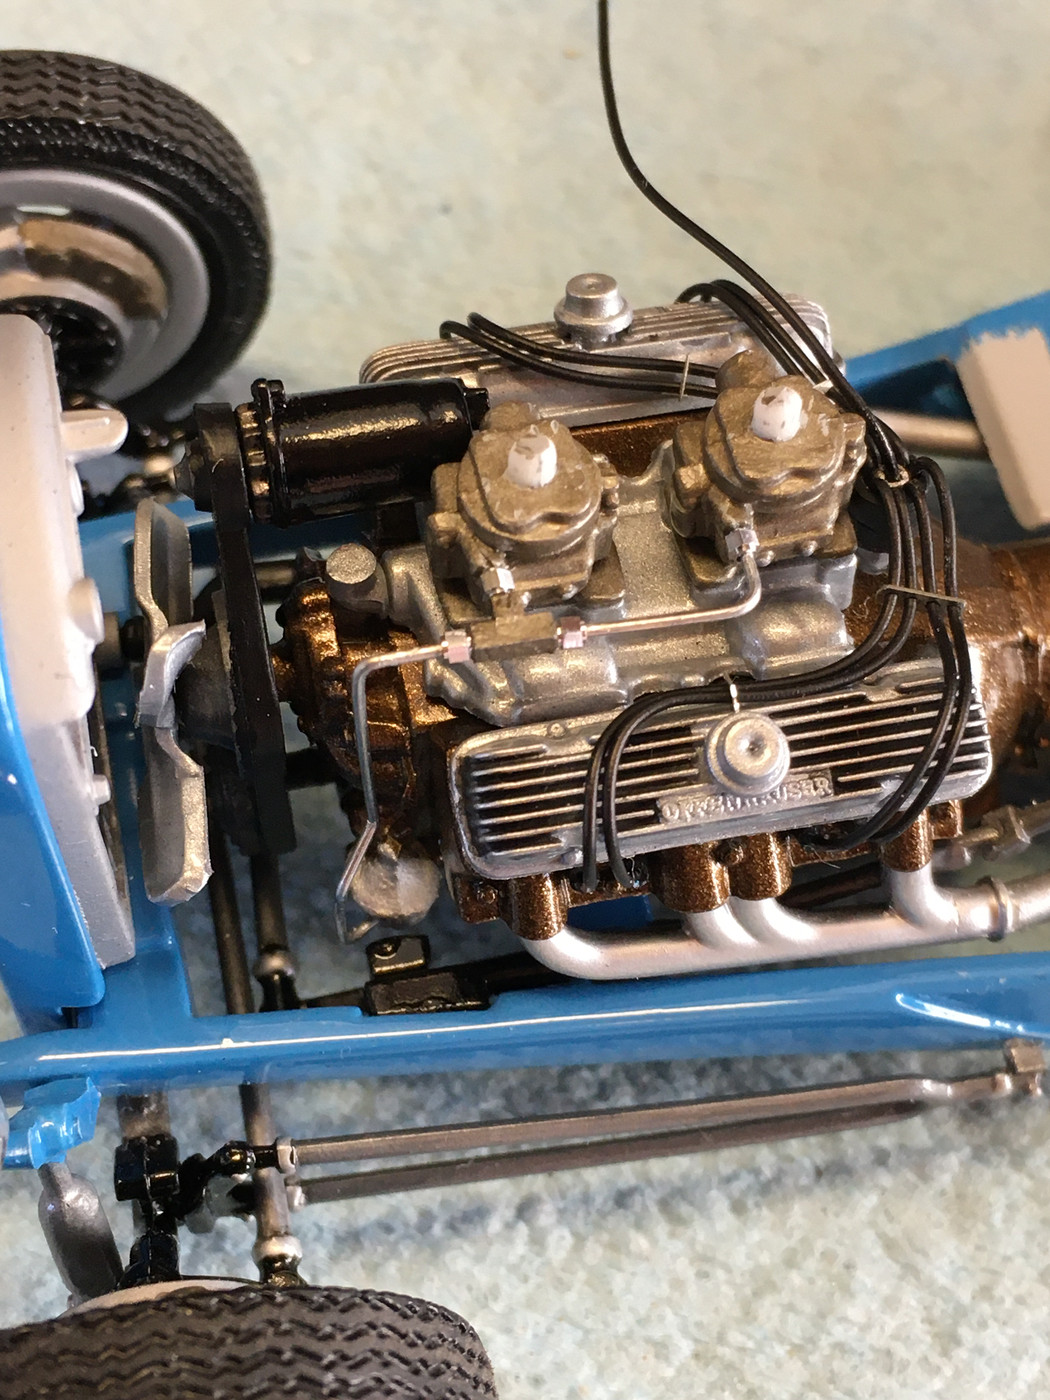 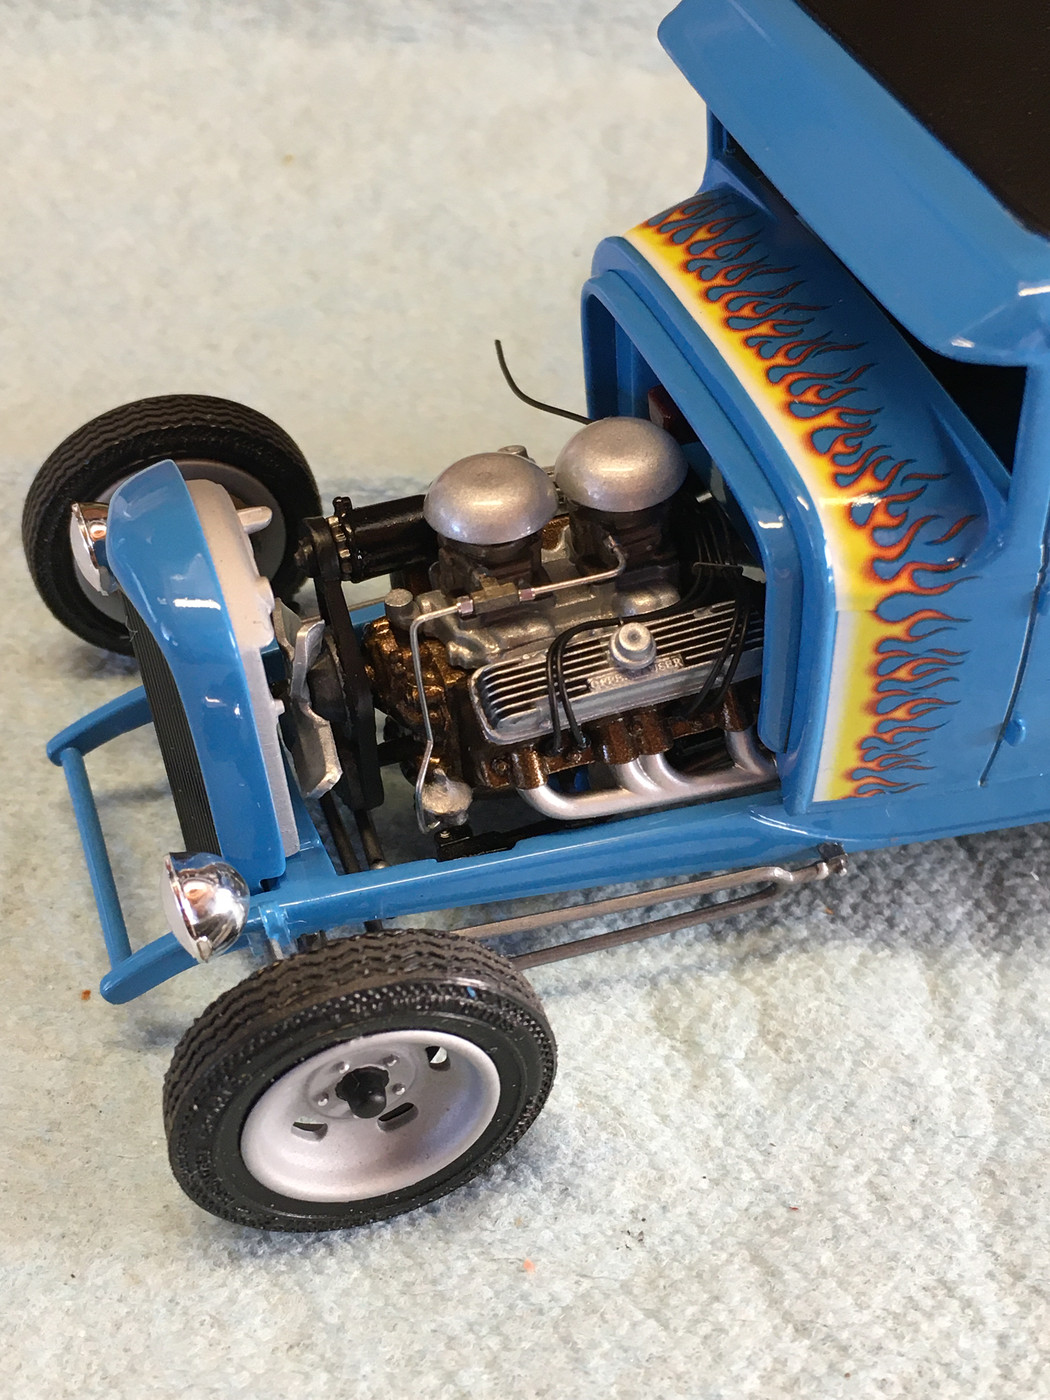 I also painted the inside of the body flat black today. All that's left now is to install the glass and assemble the interior then the body can be glued down. No more updates. Next post will be in the finished section.
|
|