|
|
Post by SteveMilberry on Aug 15, 2020 11:10:15 GMT -5
Like the header says, this is gonna be a version of the custom Impala shown on the AMT '65 annual box art. Another "long term" project. I will also be taking a few libertys with the design along the way such as a chopped top and a few other little changes. I'm using an old forlorn Revell Impala given to me many years ago. The custom parts were generously donated by Snake from the MCM forums. 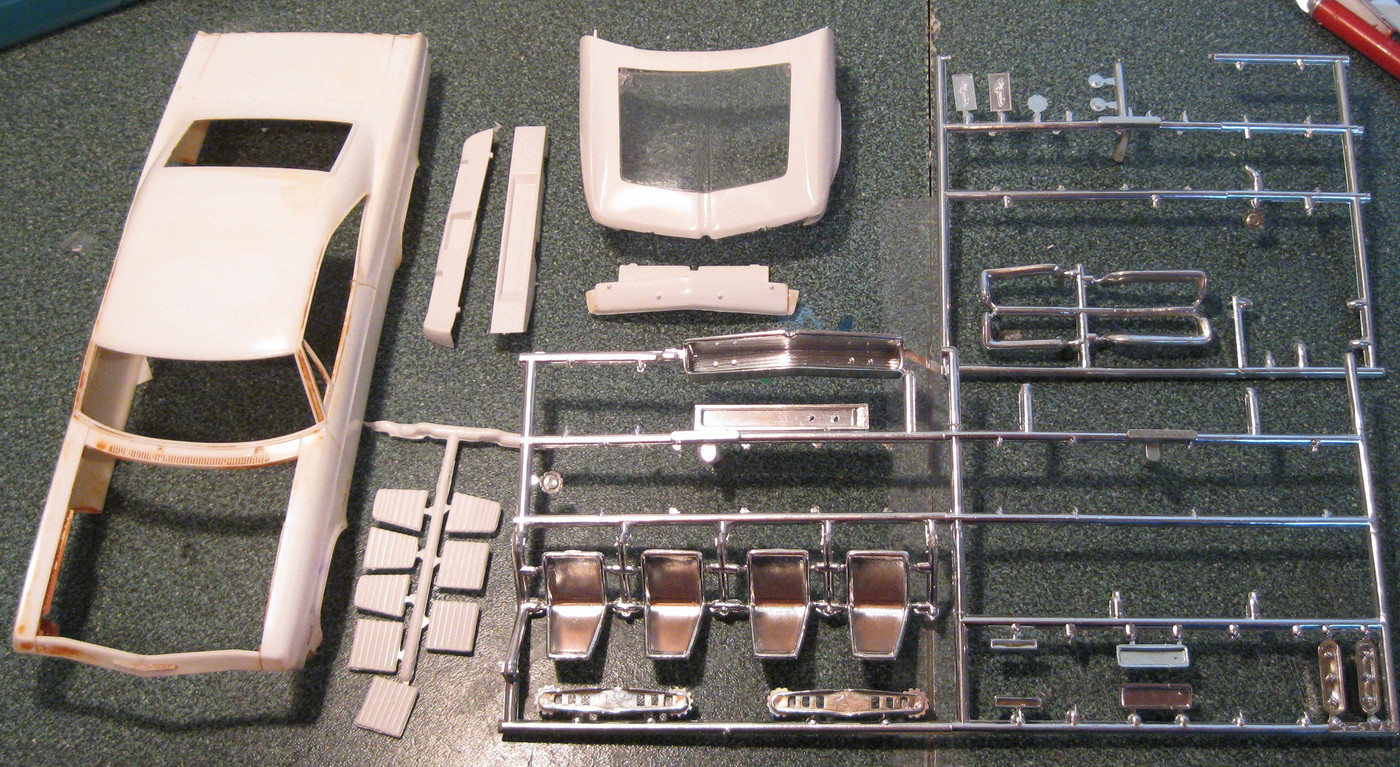 Not a lot of progress yet besides cutting off the front clip and glueing on the bottom 1/2 of the custom clip. The top 1/2 had to be narrowed slightly by making a couple relief cuts and glueing the gaps closed. Love the clear custom hood. Great for showing off the engine and I have another one coming to paint along with the body so I could swap then around. 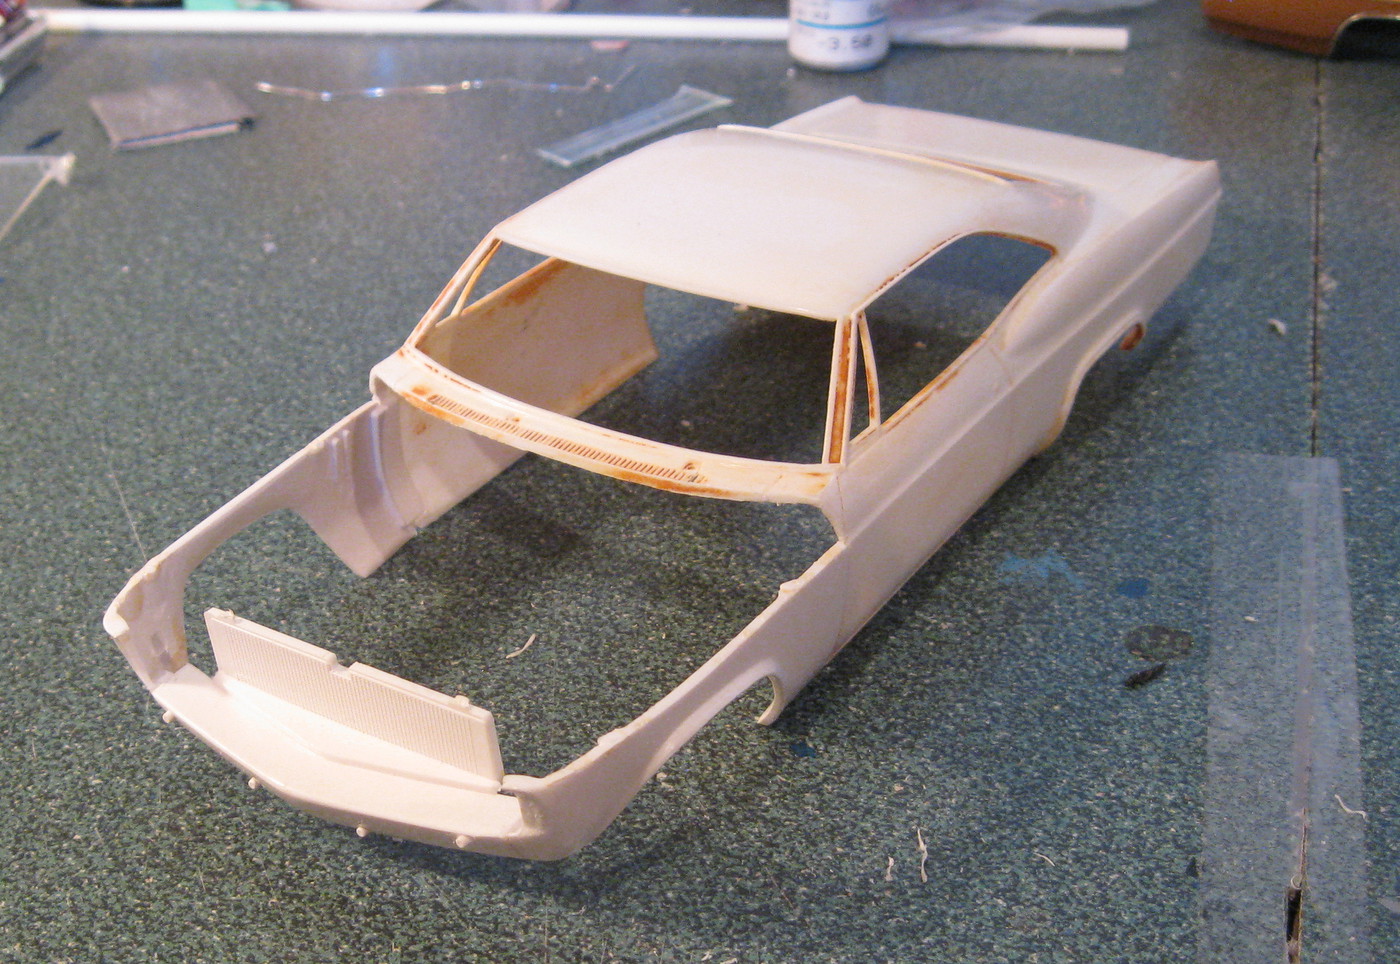 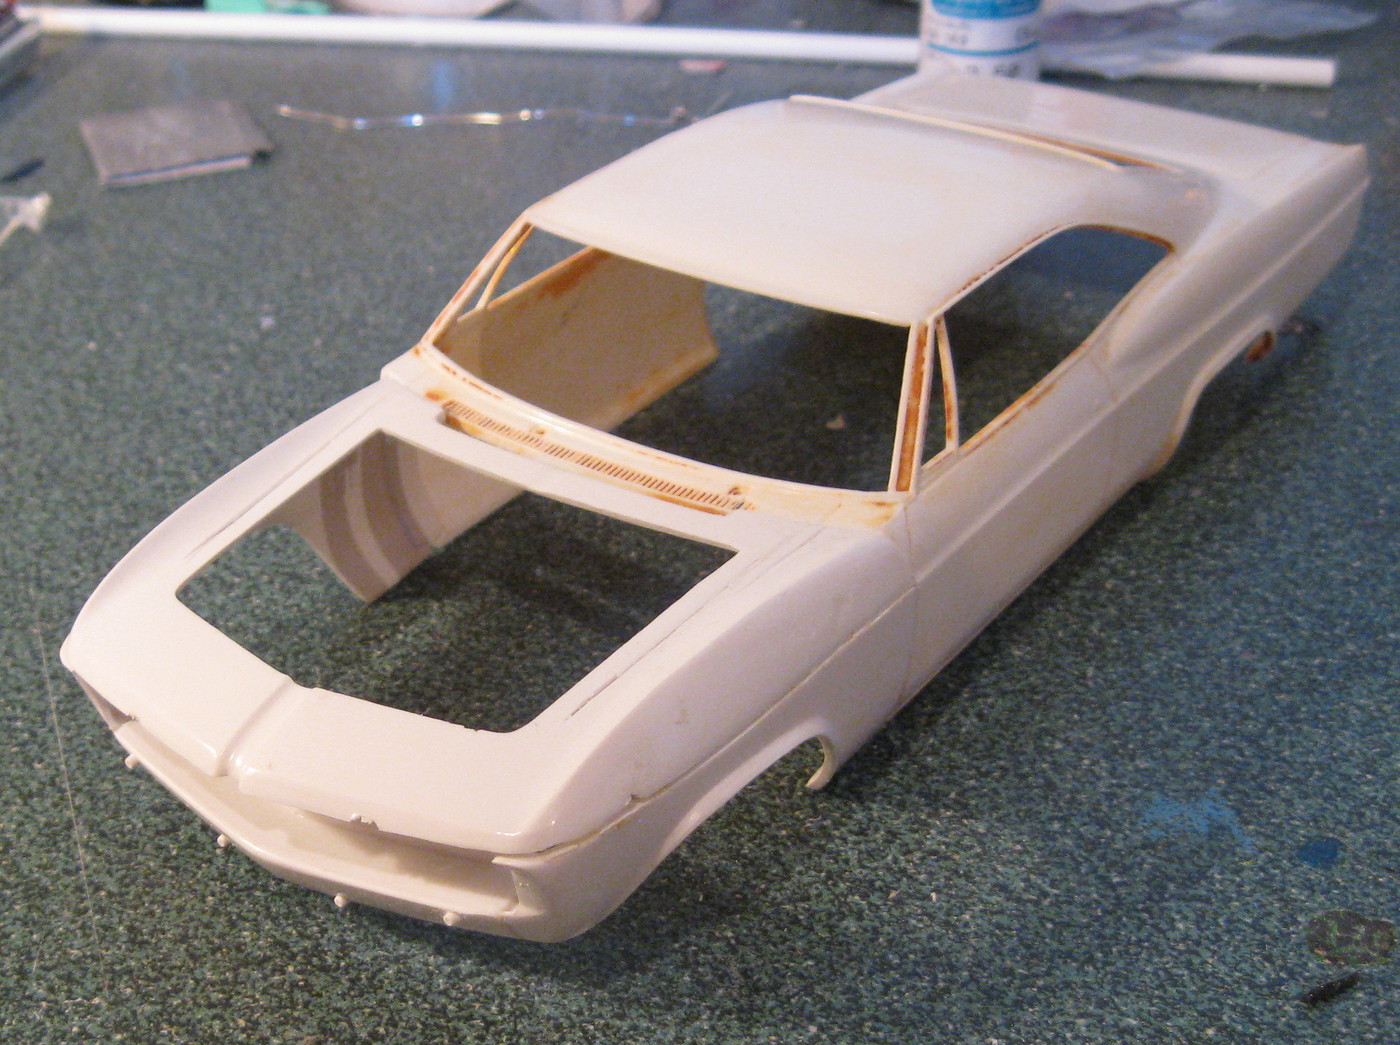 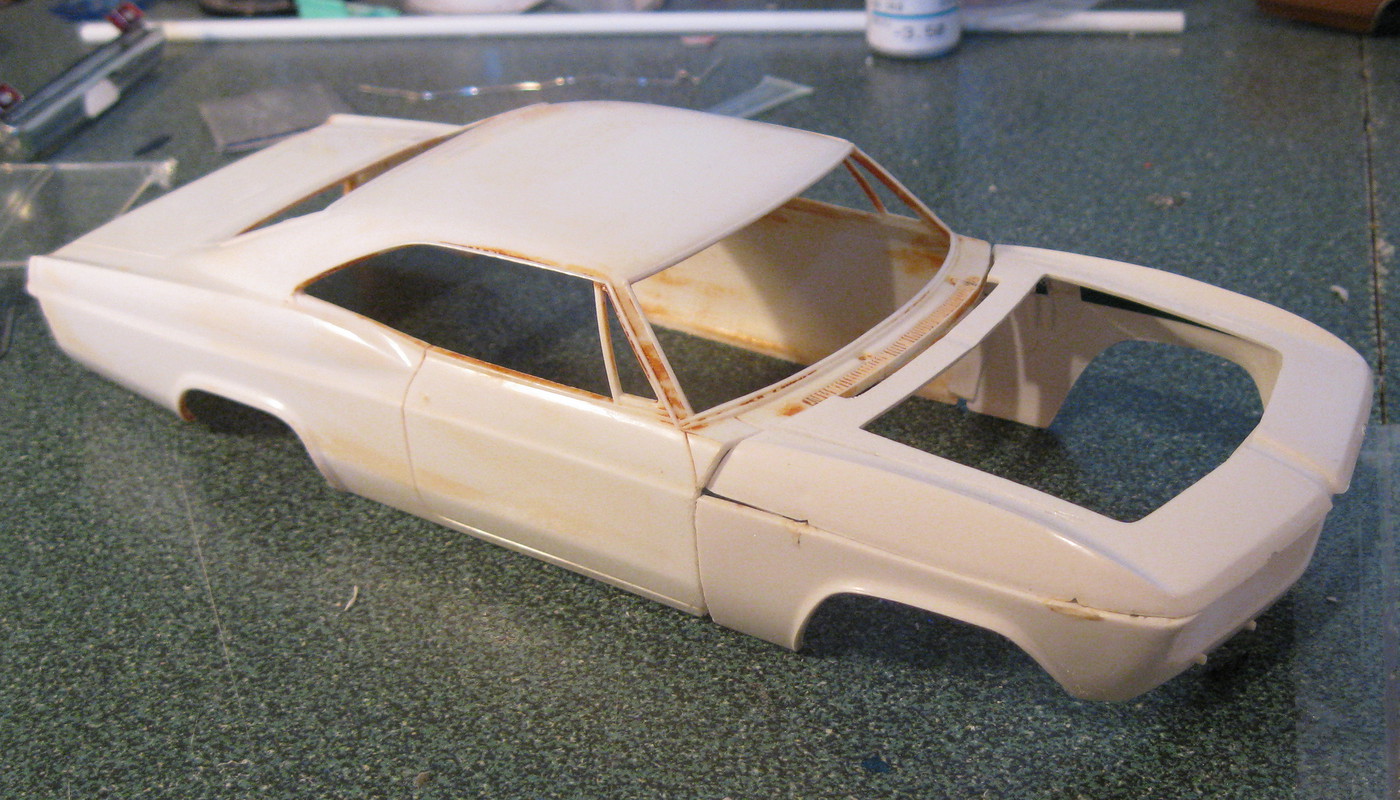 |
|
|
|
Post by chepp on Aug 15, 2020 12:34:30 GMT -5
It looks like you are well on your way to adapt the AMT parts to the Revell body.
|
|
|
|
Post by spex84 on Aug 15, 2020 18:44:55 GMT -5
That custom front end is bananas, but also very reasonable somehow! Must be the Corvair/Euro influence. Looking forward to seeing this built, can't say I've seen many like it!
|
|
|
|
Post by Duane on Aug 15, 2020 20:43:05 GMT -5
Steve the new front end looks like a cross between
'66, (or there abouts) Corvair, and a '69 Camaro !
i'll be watchin your '65,it looks like a fun build !
|
|
|
|
Post by lo51merc on Aug 16, 2020 9:34:46 GMT -5
And once again an old memory comes back. I recall buying the AMT kit of this subject way back when. I also recall removing the stock front clip but that's it. I know for sure though, that it didn't get much beyond this point. This really is a rare subject here and one I'll be watching for sure.
Gary
|
|
|
|
Post by Mr. Metallic on Aug 17, 2020 7:08:25 GMT -5
Dang, that is gonna be cool, especially in your hands. I've seen a few sets of these parts floating around eBay and thought of doing the same thing, adapting them to the modern Revell tooling. I'll be following along because your projects are always fun to watch come together and executed so well.
|
|
|
|
Post by SteveMilberry on Aug 27, 2020 18:37:43 GMT -5
Made a little progress on this one. The front clip just needs a little more filler. I also received a spare hood so I'll be able to swap between clear and body color hoods. 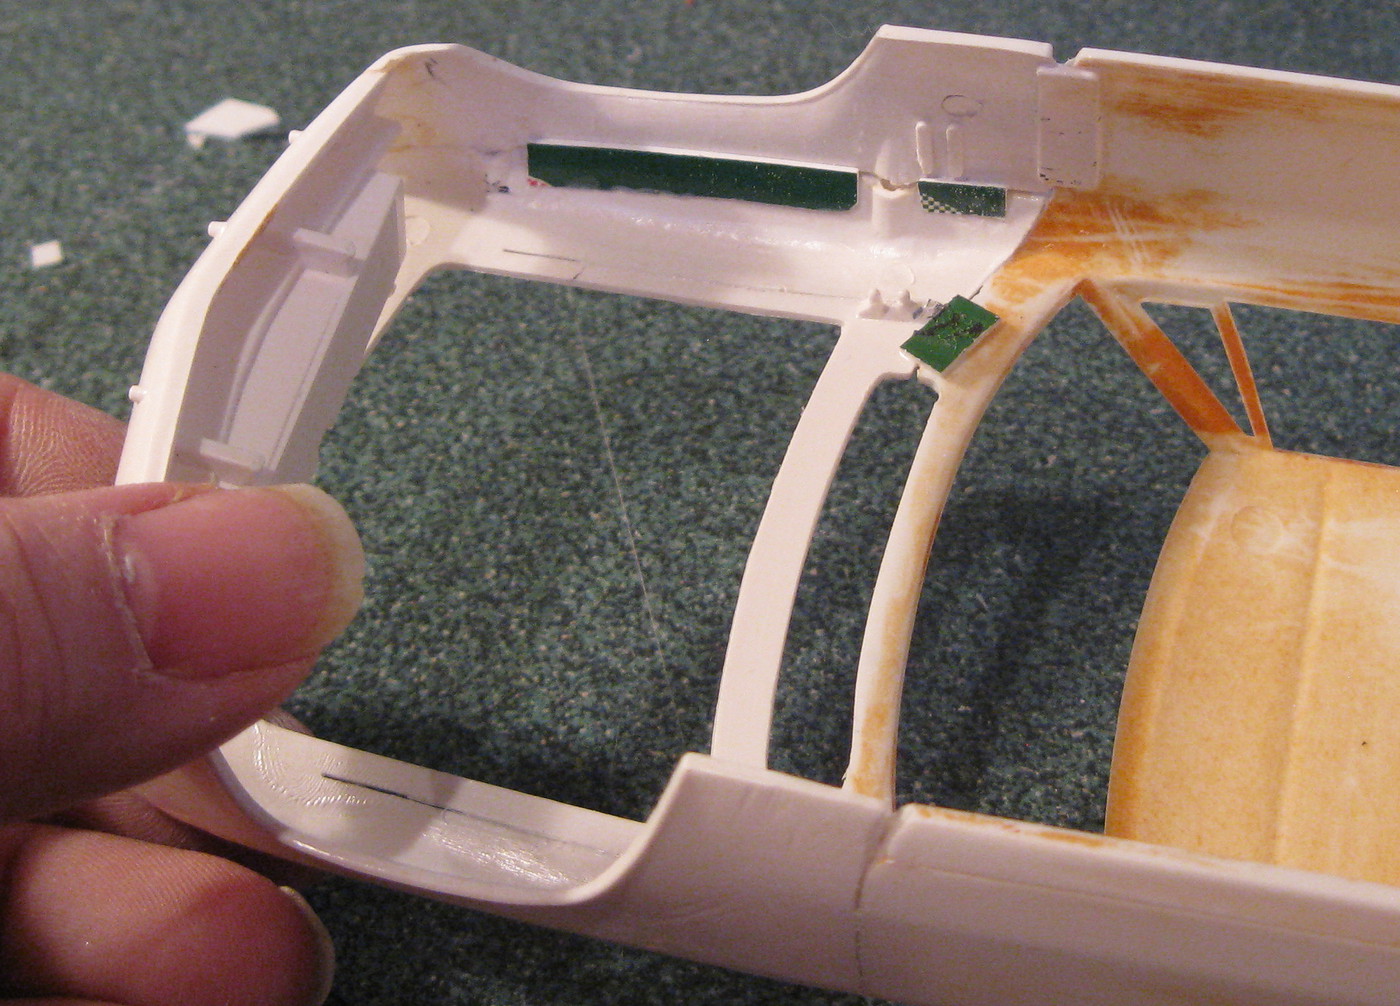 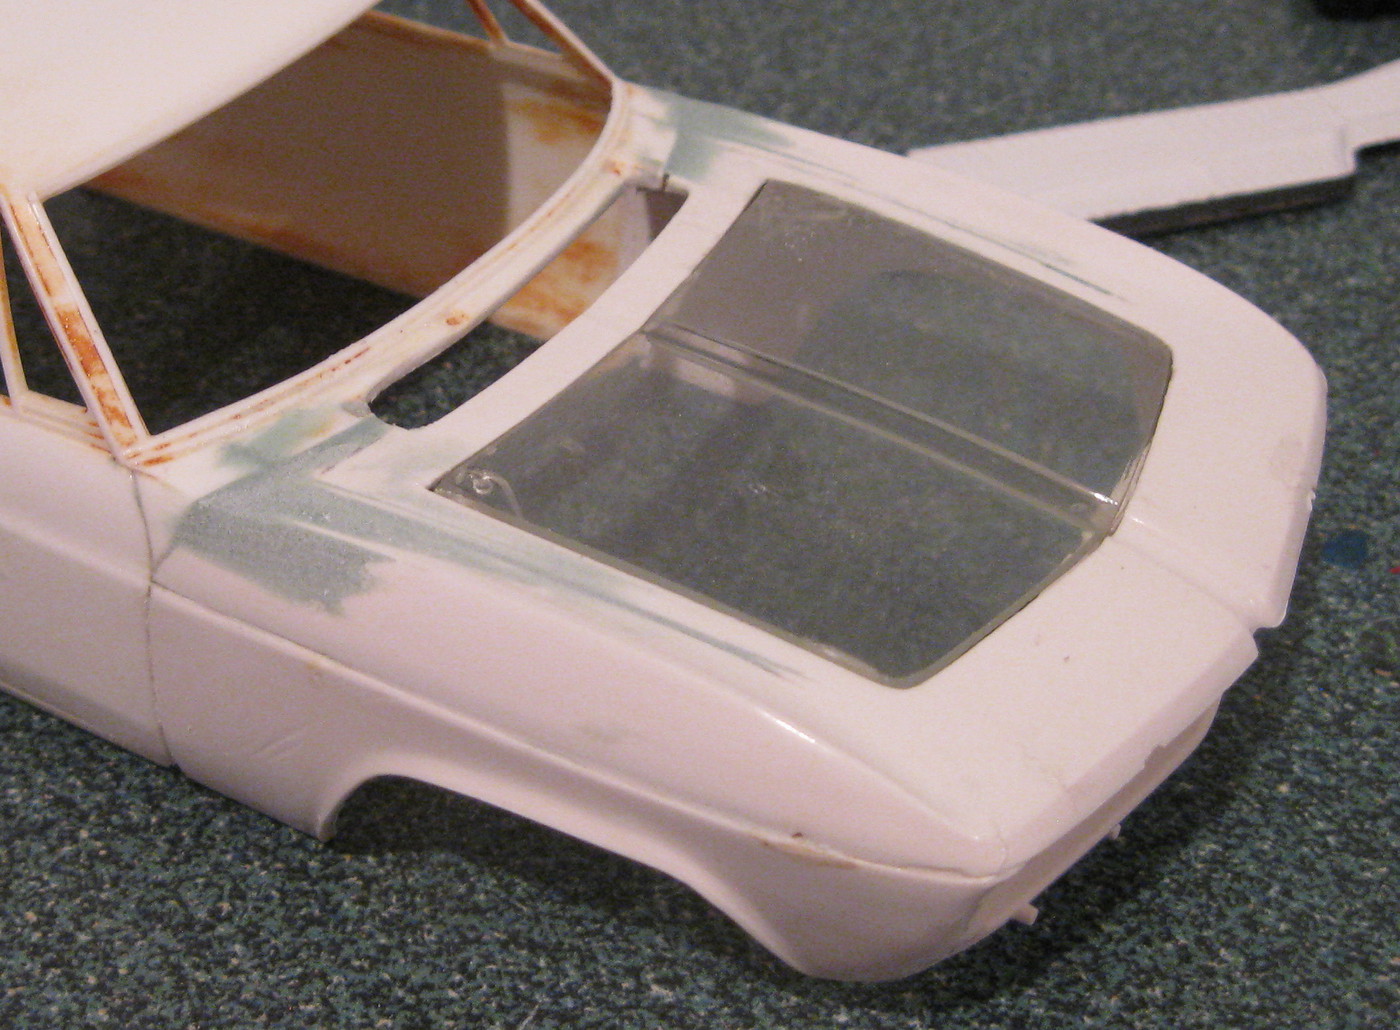 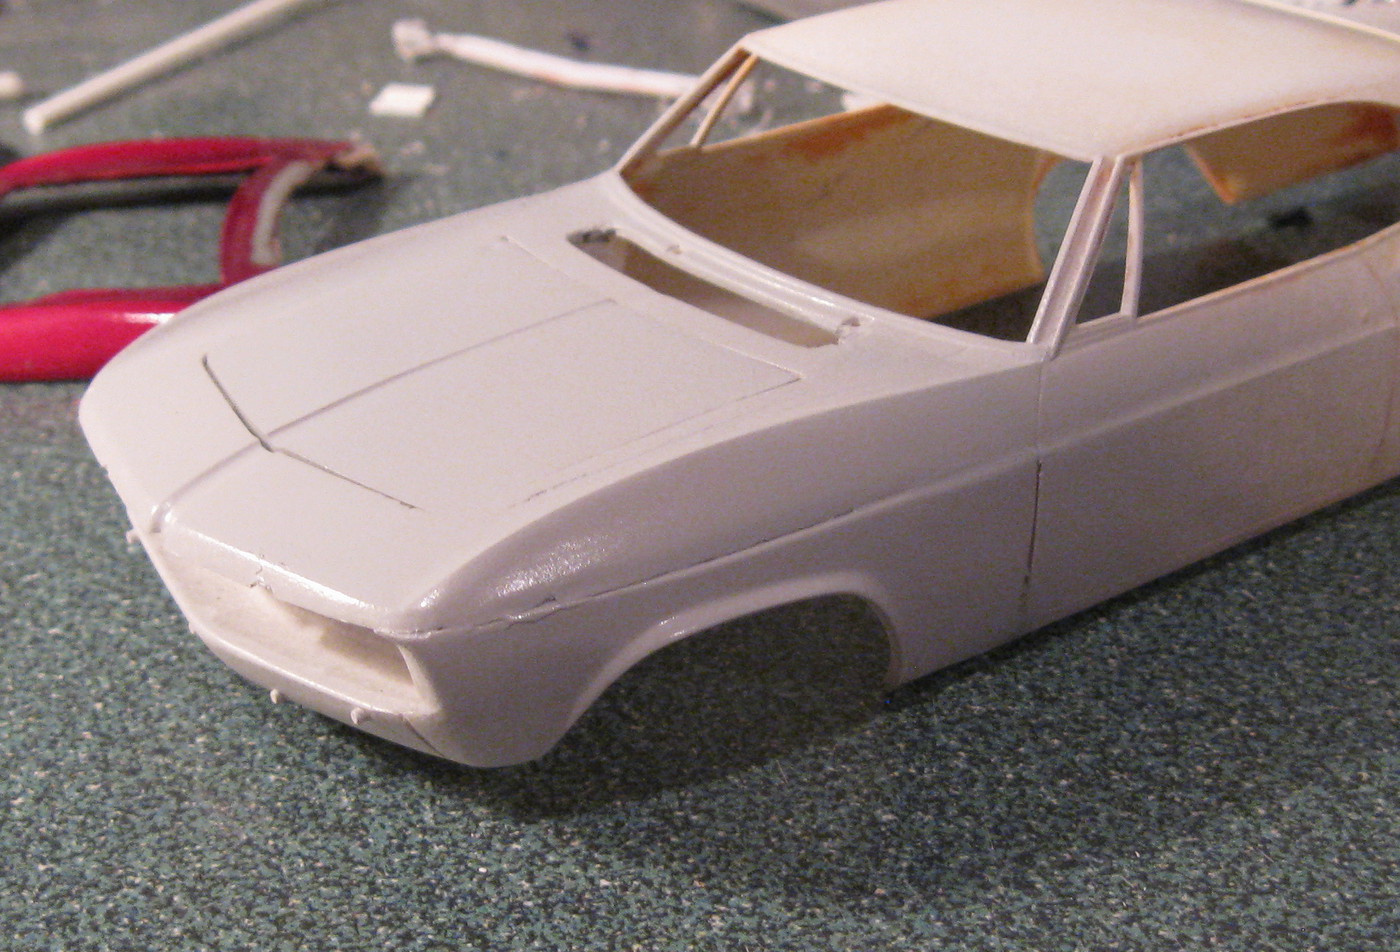 |
|
|
|
Post by Duane on Aug 27, 2020 23:43:20 GMT -5
Steve; i'm lovin watchin this build; i book marked it.
build on young man !
|
|
|
|
Post by ChrisV on Aug 29, 2020 11:32:53 GMT -5
Awesome project Steve!
I really have to dig out my stranded '65 'Vert Bubble top and finish it...
|
|
|
|
Post by SteveMilberry on Sept 27, 2020 18:15:05 GMT -5
got this far this afternoon. Cut the top off with an X-acto saw and added a small tab of sheet plastic to the underside of the back of the opening. 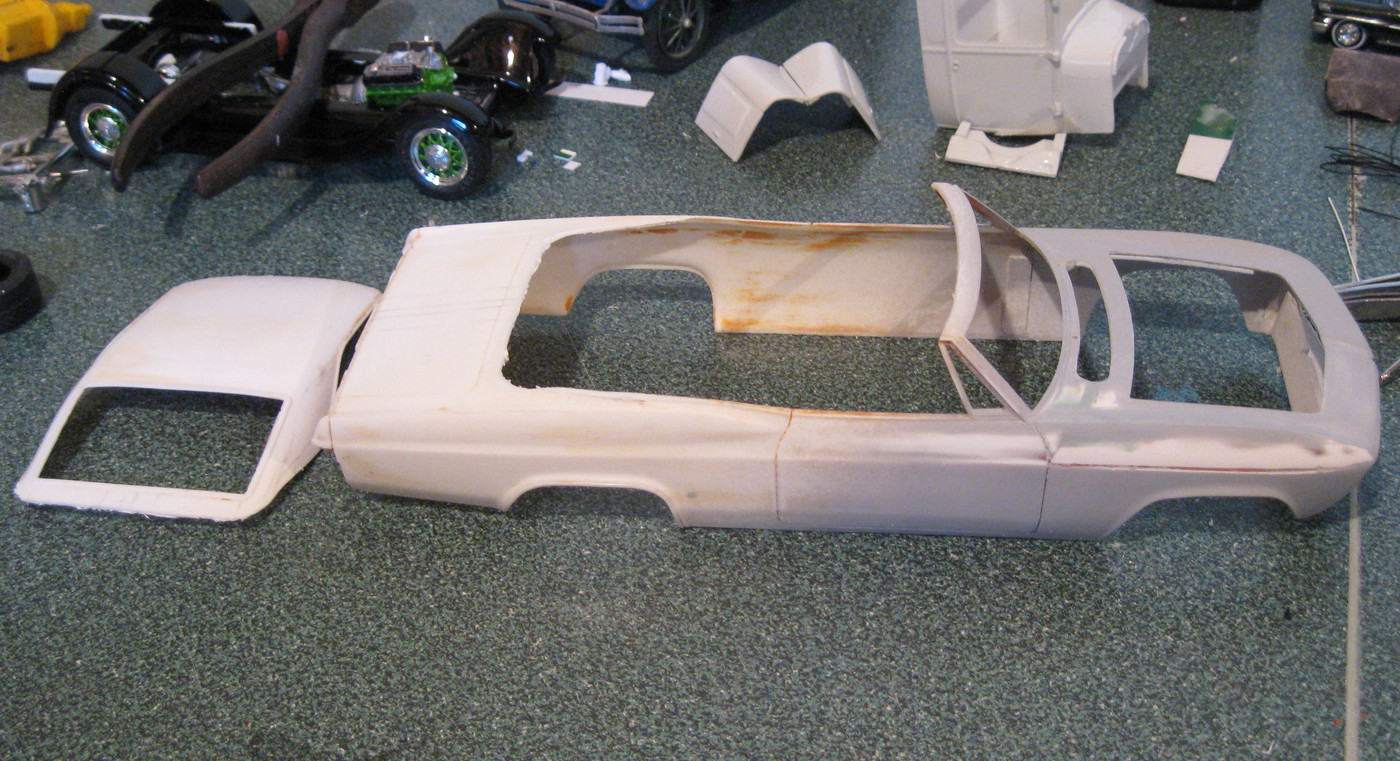 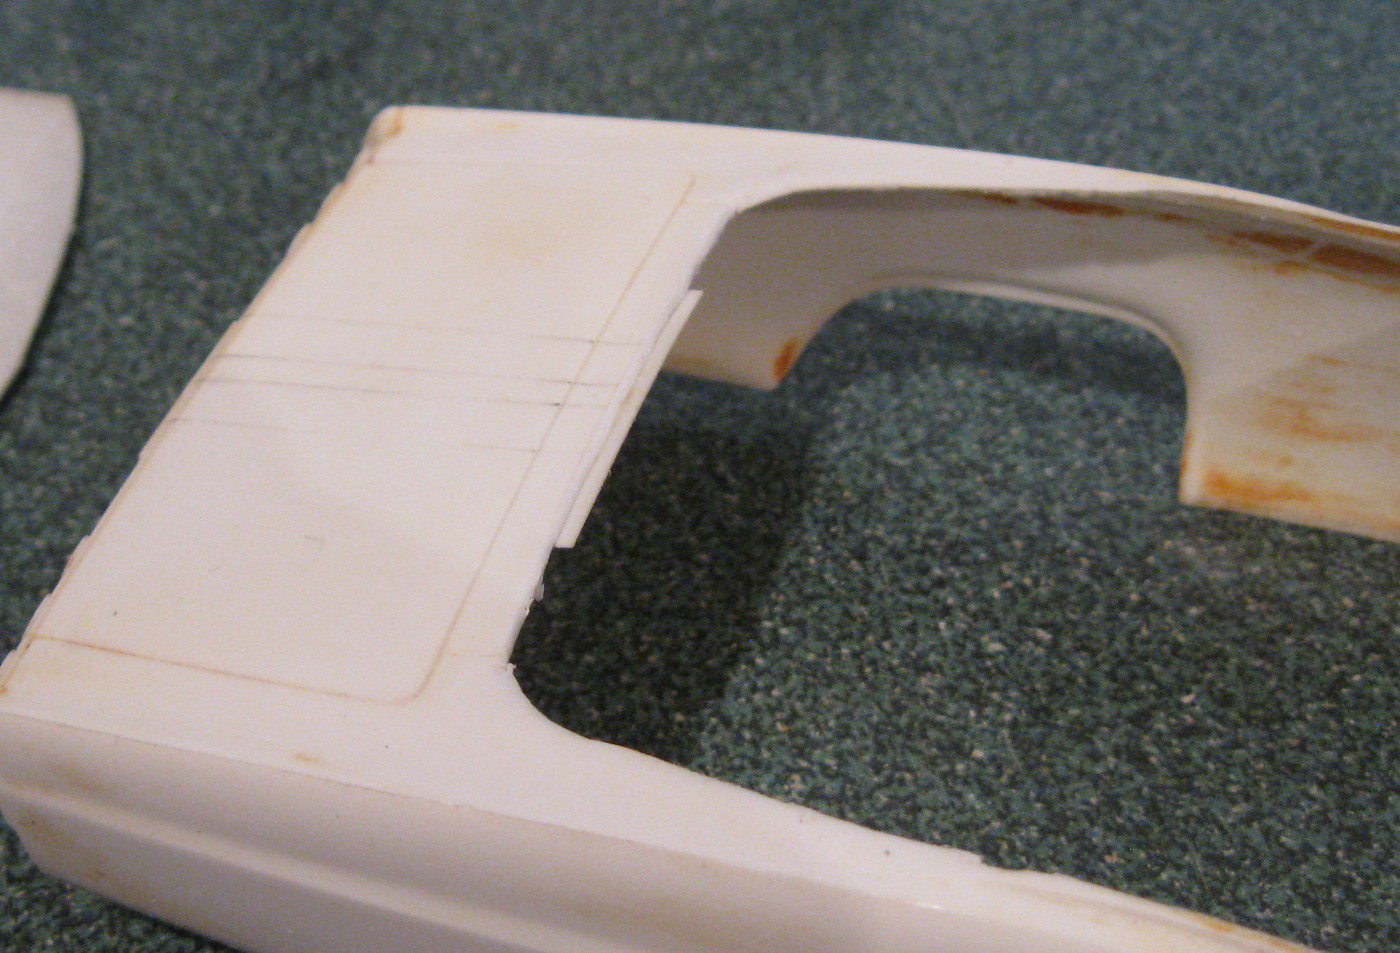 I was originally going to cut the sail panels from the back of the roof also but as it turned out, I didn't have to. I just made a relief cut up each side so it would spread apart. I just sank the sail panels down at their forward ends and pulled the main part of the roof up. In the end I'll have about a 2 to 2 1/2 inch chop. When the sail panels are solid , I'll cut the base of the A-pillars and vent posts away, make notches where the cuts are. When I glue the top of the windshield frame back to the roof, the bottom of the pillars will slot into the notches. 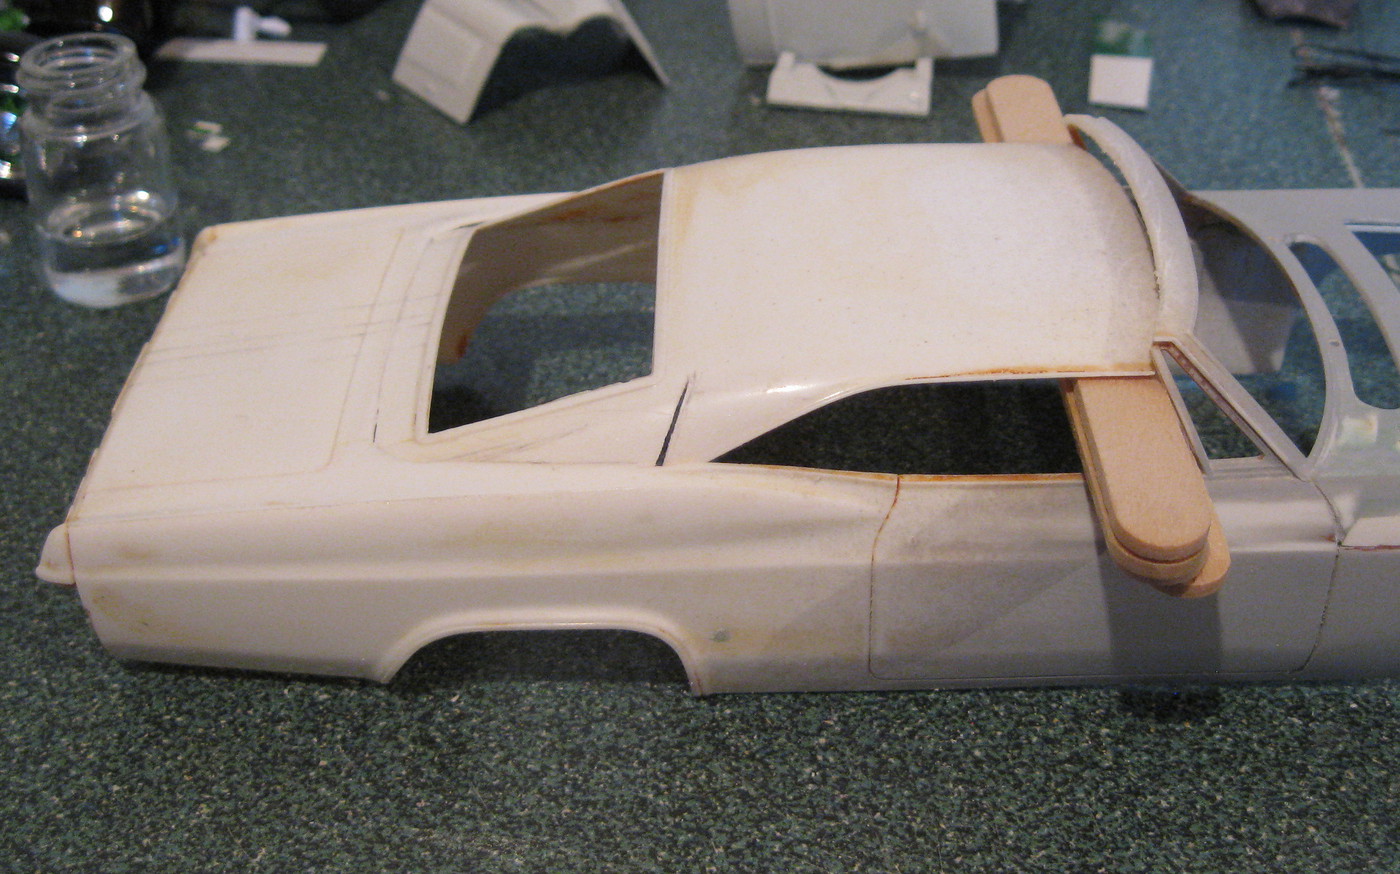 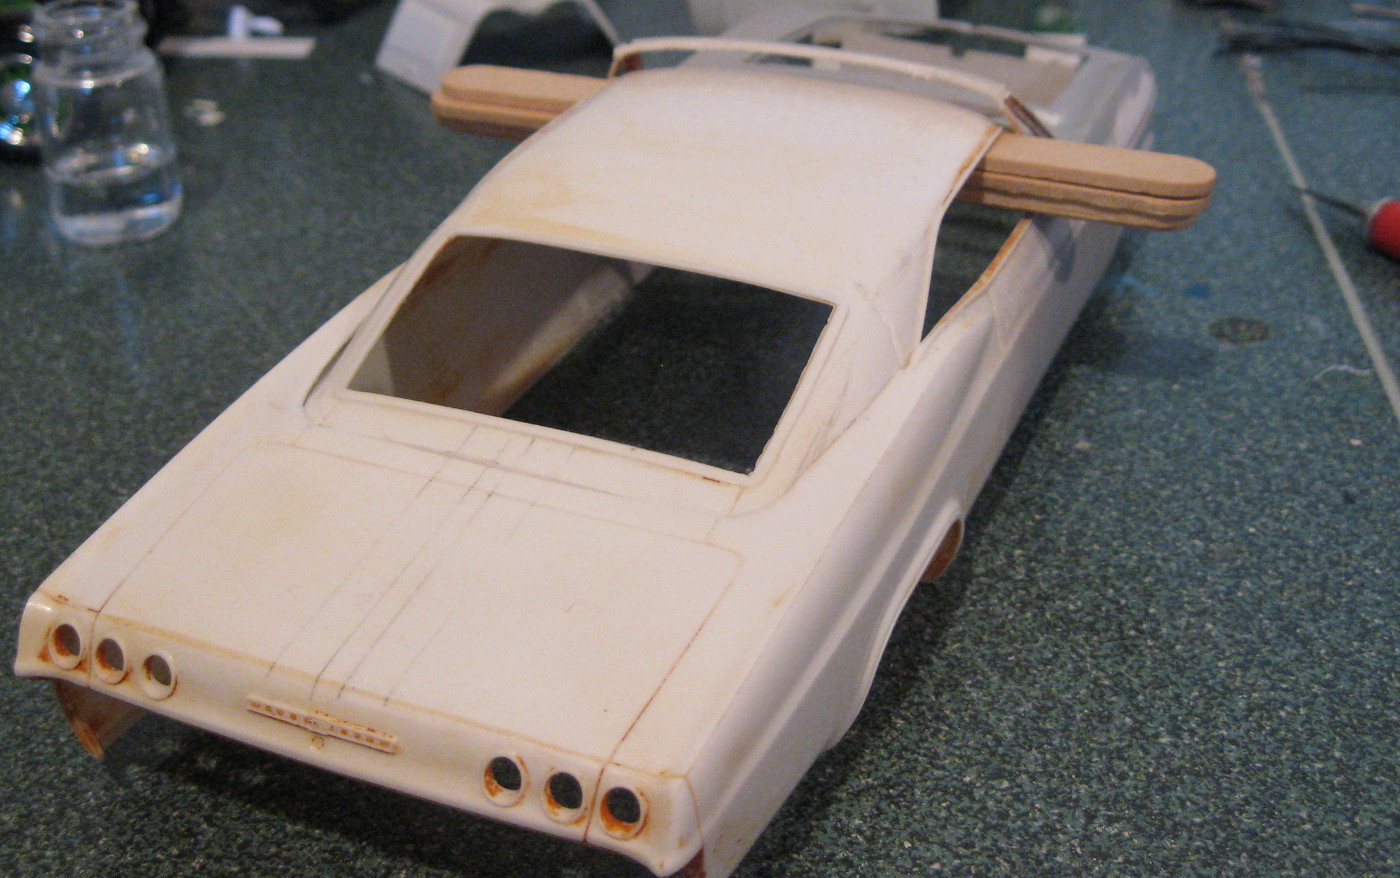  |
|
|
|
Post by Mr. Metallic on Sept 28, 2020 7:36:49 GMT -5
so far that chop looks right on the money. keep it rolling!
|
|
|
|
Post by skip on Sept 28, 2020 7:39:04 GMT -5
Steve, Nice work on everything so far! So clean, what's not to like! Have to agree the "New" front end takes major design elements from the late Corvair, early Camaro and the later Impala all wrapped into one good looking package.
Didn't miss your clever use of foam double back tape to match up the front clip with the main body panels at the cowl and door lines before using the liquid cement to "weld 'er up". (Almost like using those sheet metal butt joint panel clips.) Then the use of popsicle sticks as parallels to keep the front of the chopped top's roof line and window opening parallel with the body. That's just classic tooling type Engineering right out of the Mechanical Engineer's handbook! Very smart temporary controls for both, most people would have still been wrestling to get things together straight.
|
|
|
|
Post by spex84 on Sept 28, 2020 9:57:35 GMT -5
Looking good! I like the popsicle-stick spacer trick too...I've had a heck of a time in the past trying to get chopped roofs square; too lazy to make temporary plastic spacers I guess!
|
|
|
|
Post by SteveMilberry on Sept 28, 2020 14:37:28 GMT -5
Actually Skip, I didn't use any tape , foam or otherwise to attach the front end. What people seen and thought was tape was actually some sheet plastic from a sign. It was painted on one side and I didn't bother removing the paint as it wouldn't be seen after I'm finished. I just used the plastic as tabs to glue too and did one side at a time allowing several days to dry before continuing with the next step. My best tools are time and patients.  |
|
|
|
Post by skip on Sept 29, 2020 0:45:14 GMT -5
Actually Skip, I didn't use any tape , foam or otherwise to attach the front end. What people seen and thought was tape was actually some sheet plastic from a sign. It was painted on one side and I didn't bother removing the paint as it wouldn't be seen after I'm finished. I just used the plastic as tabs to glue too and did one side at a time allowing several days to dry before continuing with the next step. My best tools are time and patients.  I see it after your explanation, the painted back and thickness made me think I was looking at the plaid green Scotch brand foam double back tape. Still the use of small tabs are just as good of a tip, when closing an entire front clip onto the body. |
|