|
|
Post by Mr. Metallic on Sept 9, 2021 6:30:08 GMT -5
Nice work so far! The "Little Deuce" and spinoff kits are indeed solid offerings out of the box. I get the impression you intend to polish the bare plastic instead of painting? I built one of the black versions of this kit a number of years ago and really enjoyed it; I added piping to the interior, some wiring and paint detail, teardrop taillights and an intake swap. Basically just embellishments on the kit's already acceptable platform. The engine needed the most help, it was the lackluster single 4bbl version. Yes, I do plan on polishing the plastic. The last few years, painting at the house we rented, I had lots of paint issues. Mostly caused by fluctuations in humidity and such since I was forced to paint outside. We bought a house last year and i have a great new hobby room, with space carved out for a paint booth. That is on the to-do list this winter. Anyway, I've really enjoyed the last few projects that I've done where I've simply polished out the kit plastic. I'm glad you mentioned the upgrades you made to your project. I was struggling with a way to make the interior really pop without having to do a bunch of delicate painting. The interior in this one is right out in the open, making it very difficult to hide any mistakes if I made them. However, adding red piping to the seats and such could be the perfect, subtle upgrade I'm looking for. |
|
|
|
Post by Mr. Metallic on Sept 9, 2021 6:38:33 GMT -5
Just making my way through detail painting and adding Molotow details. Here's a smattering of the parts I've touched so far. 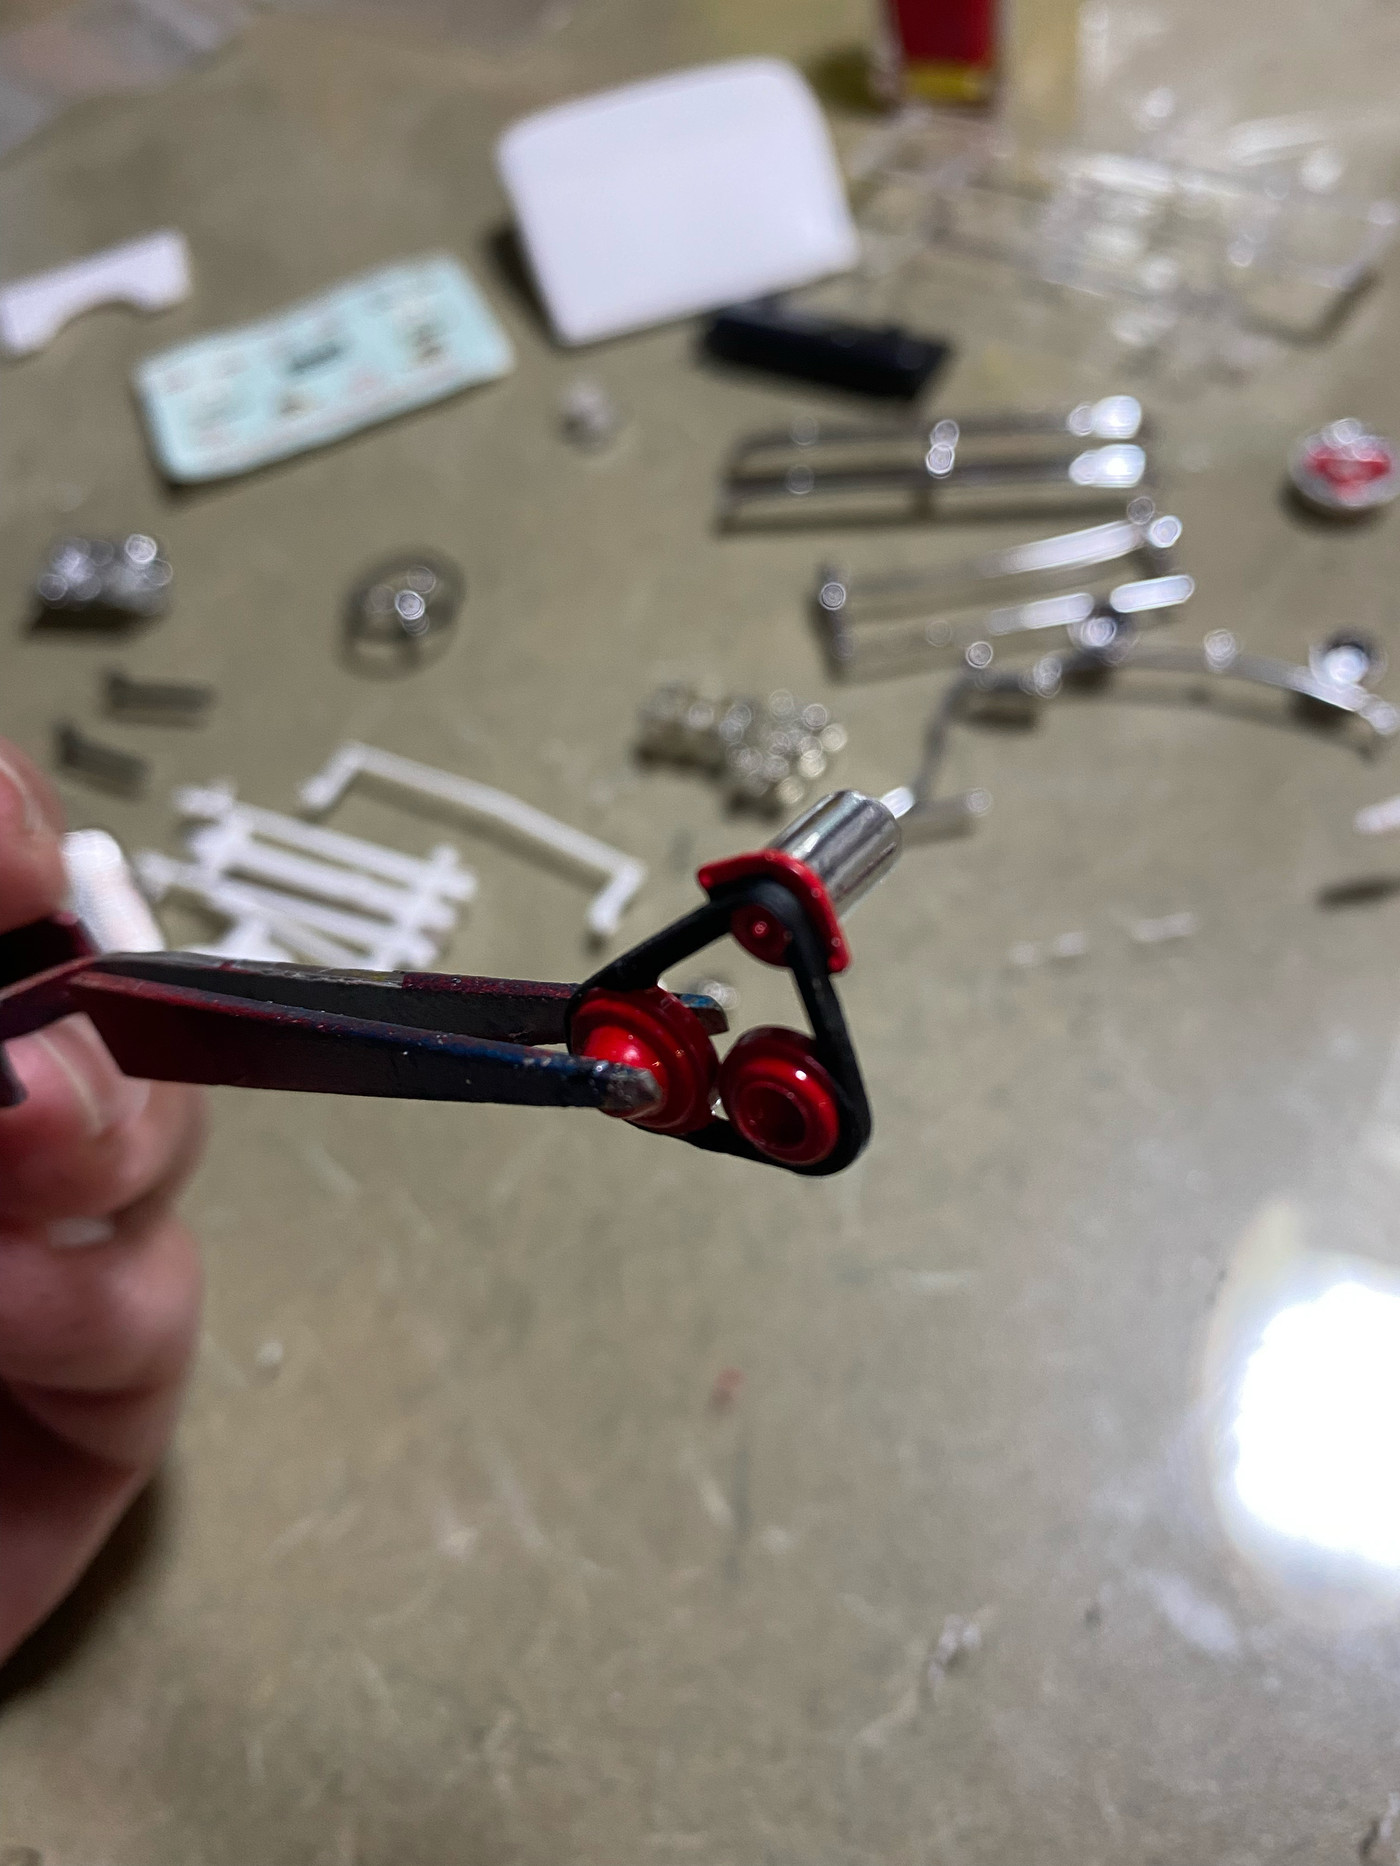 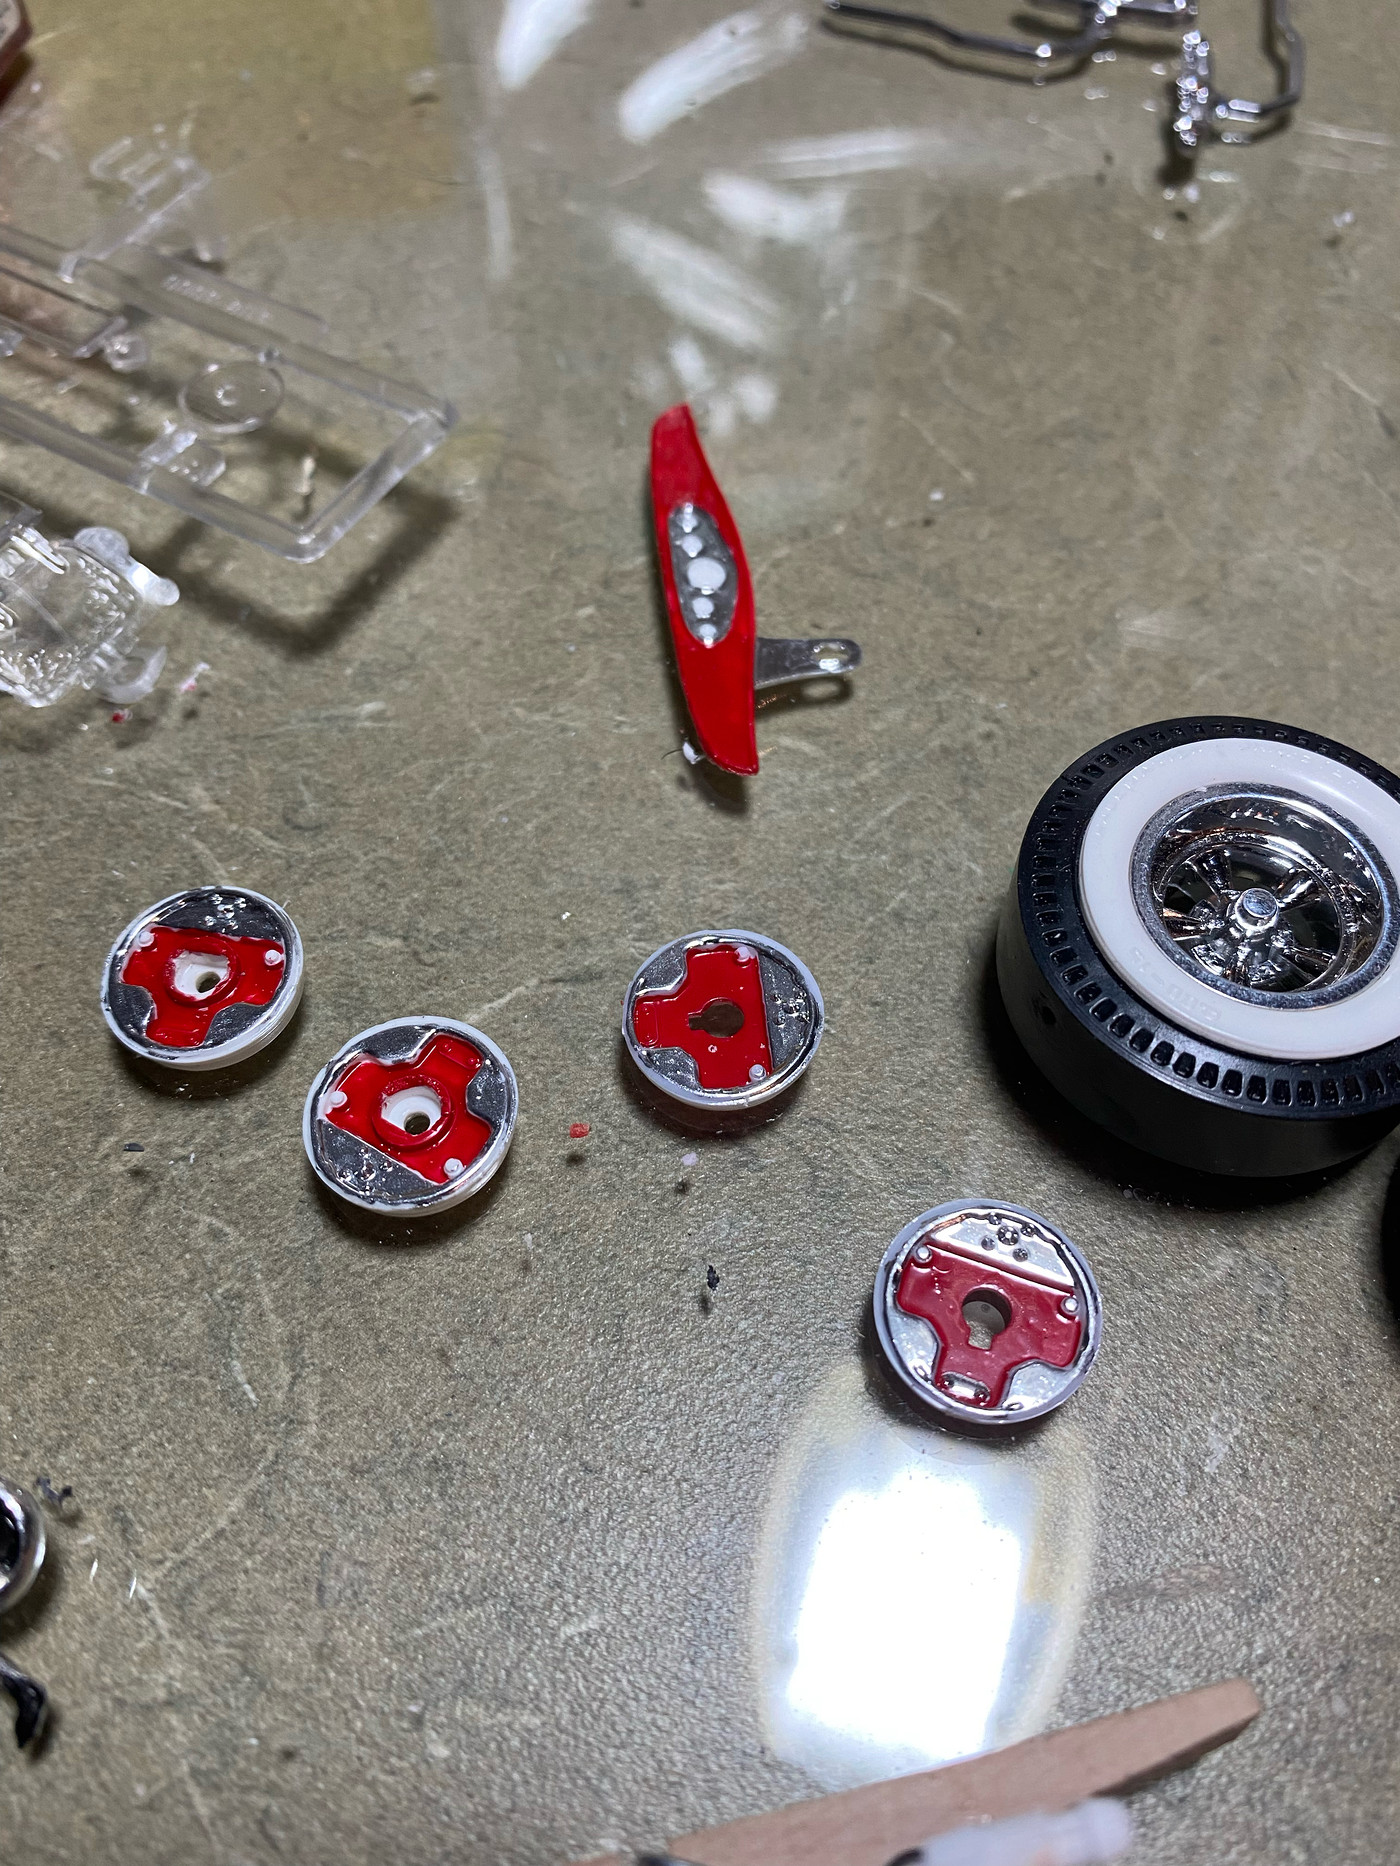 The more I looked at the exhaust as I prepared to chrome it, the giant gap on the side bothered me. So, I decided to slip a piece of .060x.100 Evergreen in there and smooth it out. Not perfect, and it still needs some finesse sanding, but it's a big improvement in my opinion. However, when I do this again I will probably just replace the muffler with tubing. 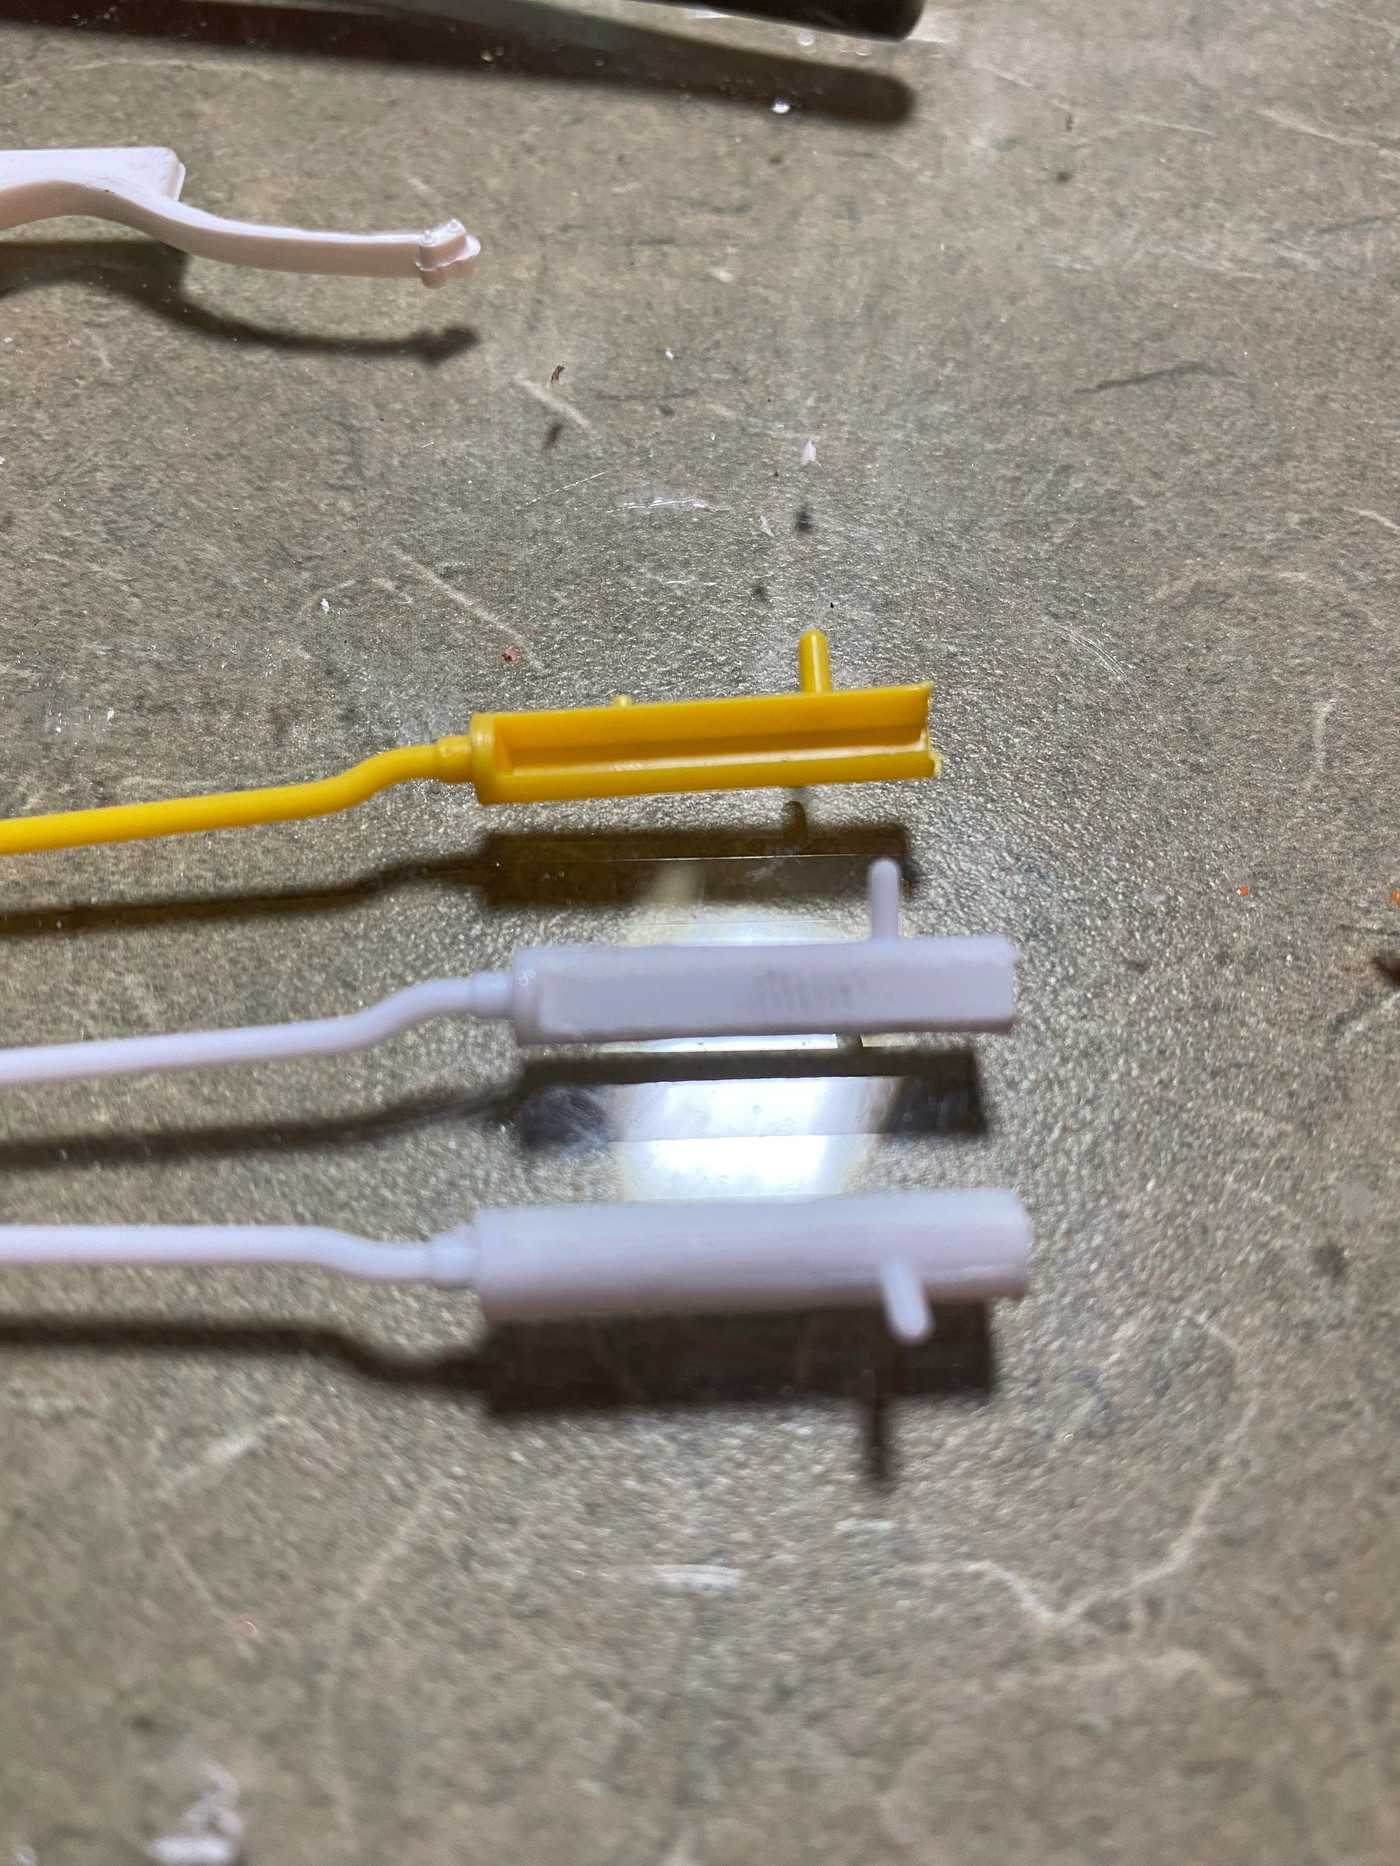 Thanks for stopping by. Just a few things left to detail paint, add piping to the interior (thanks Chris) and then polish the body parts. |
|
|
|
Post by skip on Sept 9, 2021 7:06:23 GMT -5
Craig, Looking better and better with every installment! Like the ideas of chroming and detail painting the brake backing plates and sleeving or replacing the mufflers with tubing. I'm watching with interest at your build up of the Monogram Little Deuce
I have a late Light Blue '32 Roadster on the bench, kinda shoved to the side. I think it's the latest target as soon as I get out of the carpal tunnel brace from recent surgery so I can get back on the bench again. Anyway back to the Late Little Deuce, whitewall tires and wheels are originals from first'ish issue, engine is a Drag City Castings fuel injected 389 clone along with Ed's Little Deuce grill. Paint is red with red on white interior bucket. Pretty much down to the assembly stages with some detail painting left to do. I'll post it when it gets back on the center of the bench in another thread.
Revell-O-Gram really didn't change a ton or stuff when they released all the later versions, I think the Late Blue Deuce might be a little closer than some of the others - Wheels, Tires, Engine and Grill Insert are the big differences. Although the small block Chev engine in the latest version is pretty nice. I was tempted to do it as a Flat Head Hottie until I got the engines from Ed which I got both carb'd and fuel injected intakes and decided to be just a little different and go with the fuel injection. Simple and fun kit to work with brings back a lot of memories!
|
|
|
|
Post by Mr. Metallic on Sept 9, 2021 11:28:33 GMT -5
Revell-O-Gram really didn't change a ton or stuff when they released all the later versions, I think the Late Blue Deuce might be a little closer than some of the others - Wheels, Tires, Engine and Grill Insert are the big differences. Although the small block Chev engine in the latest version is pretty nice. Your deuce project sounds pretty cool. Looking forward to seeing it. A "Little" kit history for those that don't know. So, after the first two issues of this kit, both properly titled Little Deuce (same parts, just slightly different boxart) came the Son Of Ford. That's when the whitewalls, wheels, bumper brackets and custom grille insert all disappeared, and they swapped out the 6 carb setup for the fuel injection. New wheels and tires came in, a stock grill insert, "moon" tank, and roll bar were added. Next issue was the Early Iron series issue, which added yet another new set of wheels and tires, and the return of the molded in bumper brackets. They also positioned the holes for the headlights a little further back on the fenders for a more stock appearance. Then came the last major overhaul, which deleted the last of the remaining LD specific design elements (with the exception of the interior, which has been unchanged since the beginning) Gone were the rectangle taillights and Pontiac engine. In came the SBC and a set of wire wheels. It remained mostly in this configuration until today, with the addition of steel wheels and FORD caps at some point Of course, this leaves out the kit-that-won't-be-named Beach Boys 3 Window version. The body monogram tooled up for this version is just wrong, the greenhouse being the main culprit. They did add a decent Corvette style IRS which I plan to swap into an 80's style build of this kit someday. Thankfully the excellent Ford brakes and buggy sprung suspensions have lasted through every issue of this kit. I snag them whenever I see them cheap enough because those parts alone are worth it. |
|
|
|
Post by Mr. Metallic on Sept 10, 2021 6:28:41 GMT -5
This morning before I left for work I sat at my bench for a few minutes. I had been thinking of Chris' idea of adding piping to the interior. but the more that I looked at it, it was going to be tricky because it was a bucket style interior. Trying to cleanly run wire around the pleated sections was looking to be a risky task. So I decided to try a trick that i had used before, using a marker. I took 5 minutes and did this. very happy with how it came out. 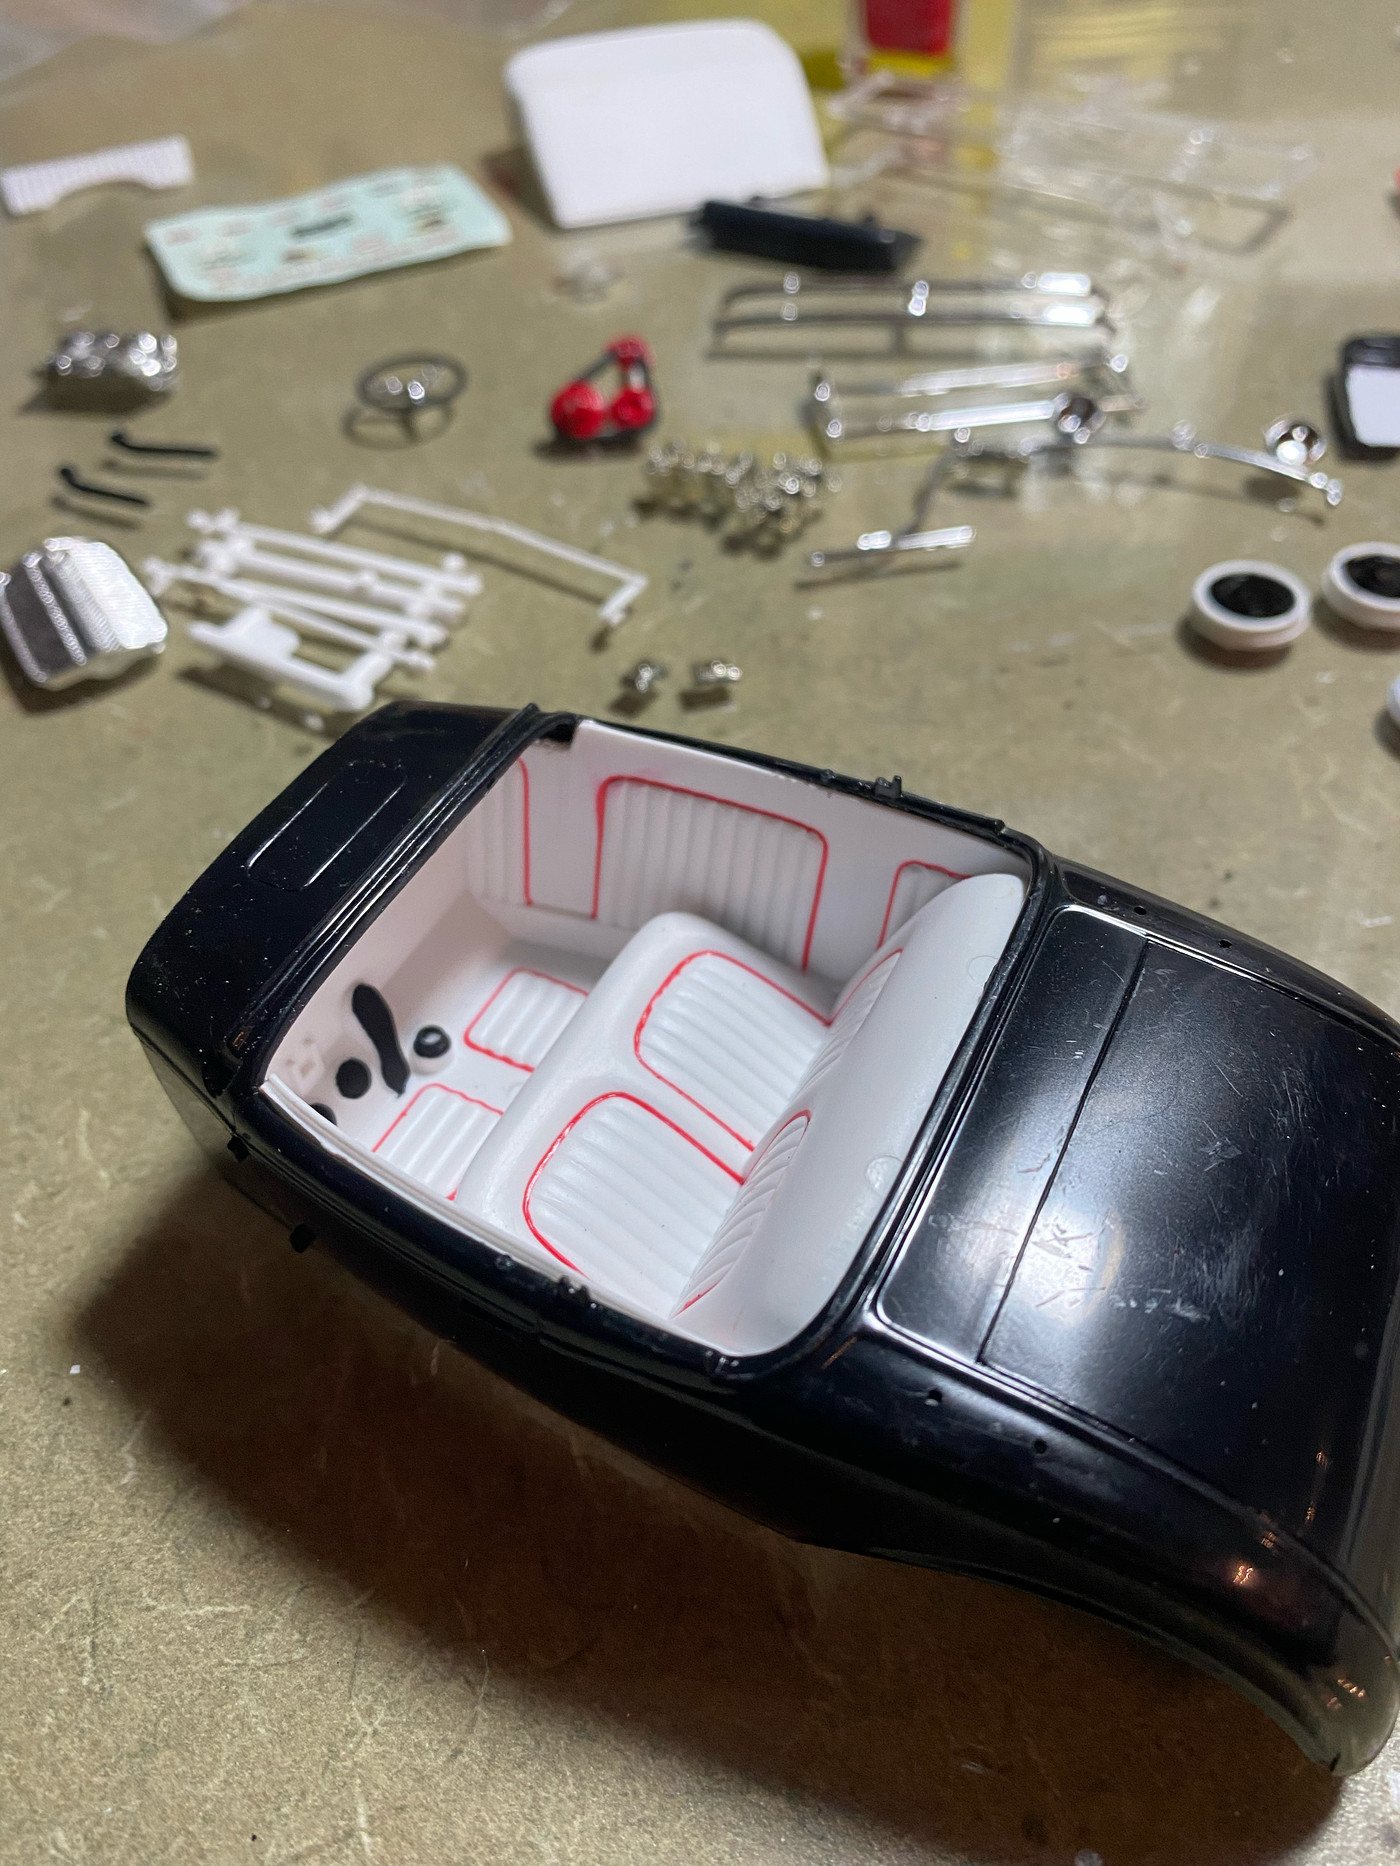 |
|
|
|
Post by cturner on Sept 10, 2021 6:50:02 GMT -5
VERY cool! Now...get the two sink marks off the top of the seat! LOL (Please?)
|
|
|
|
Post by Mr. Metallic on Sept 10, 2021 7:00:36 GMT -5
VERY cool! Now...get the two sink marks off the top of the seat! LOL (Please?) Fingers crossed they sand out ok |
|
|
|
Post by skip on Sept 10, 2021 7:06:10 GMT -5
VERY cool! Now...get the two sink marks off the top of the seat! LOL (Please?) Fingers crossed they sand out ok Phew, just checked my interior bucket. Either no sink marks or I already sanded them out. Were those "Sink Marks" a "Leftover" from the Son of Ford's Rollbar? |
|
|
|
Post by Mr. Metallic on Sept 13, 2021 7:39:33 GMT -5
I finished this one last night. Hopefully I can do a little photo shoot when i get home from work today.
|
|
|
|
Post by Mr. Metallic on Sept 13, 2021 7:51:04 GMT -5
Fingers crossed they sand out ok Phew, just checked my interior bucket. Either no sink marks or I already sanded them out. Were those "Sink Marks" a "Leftover" from the Son of Ford's Rollbar? I looked at my original issue interiors and those marks are present as well. They are ejector pins marks, used to pop the parts out of the mold cavity during the manufacturing process. They are easy to identify because they are perfectly round. They will have varying degrees of severity depending on tool maintenance and how hot the plastic was when it was pushed out of the mold. If the pin is retracted slightly the plastic fills the cavity leaving plastic above the surface. If the plastic is too soft the pin leaves an indentation on the part when it pushes. Sink marks are generally caused by plastic that is still to warm being removed from the mold. If you look on the underside of a sink mark there is nearly always a feature in the underside of the body (either an ejector pin of molded feature like a dome light, etc). This extra weight of that little bit of plastic underneath can cause the upper plastic surface to "cave in", leaving the sink mark. |
|


