Post by Mr. Metallic on Mar 29, 2022 8:29:31 GMT -5
I'm honestly surprised I haven't seen anyone else do this yet since the kit has been widely available for about a month now. I purchased the curbside version of the wagon kit as soon as it came out, but couldn't decide how to build it. Then when Tim Boyds build preview of the Moebius 65 gasser came out I knew I had to try combining the two. I've been busy the last few weeks since i got the Moebius kit, so I didn't get a chance to sit down and determine my course of action, and figured for sure someone would beat me to it so I could follow their lead. Well, it appears I'm first (at least I haven't seen anyone else do it yet, but I could be wrong), so now you all get the benefit of learning from my trial and error. These kits actually kitbash very well together in certain aspects. It all depends on how much effort you want to put into it to get to the level you're comfortable with. You also may see something I did that you feel you could improve upon, if you do please make sure you share it with the rest of us when you do your own conversion.
To begin with, I want to thank my good friend Randy Meyer (Randfink) for inspiring me to not cut the corners with regards to finishing the cargo area, but we'll get into that in a bit. Since we are having an impromptu build off, I knew I needed to elevate my level to even come within sniffing distance of his attention to detail. Now, let's get started.
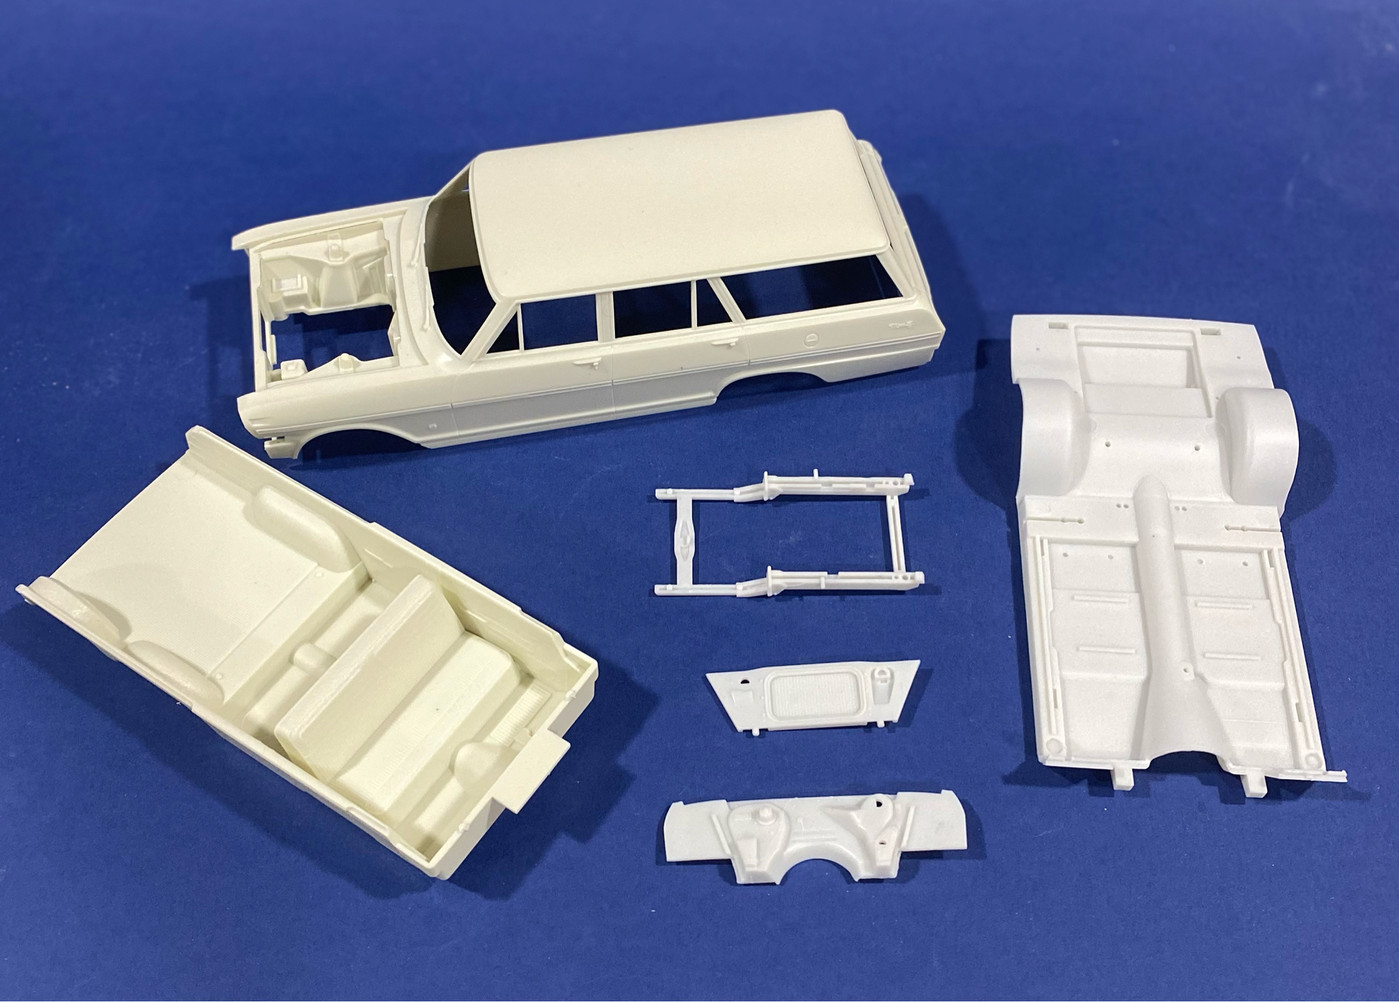
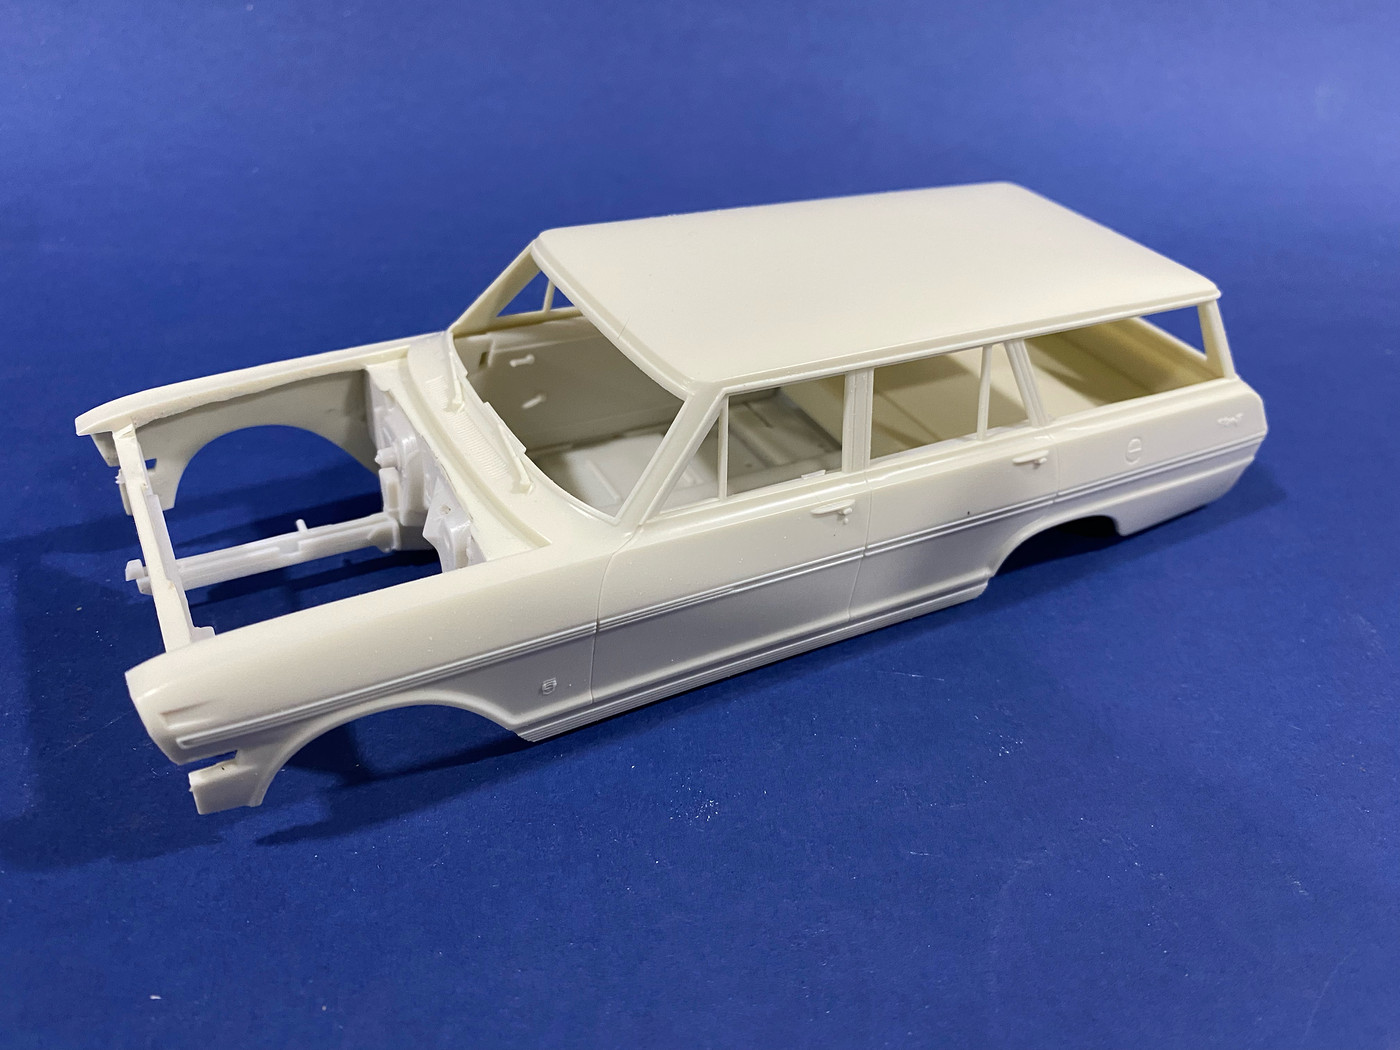
Here are the main components you need to gather to get the fitting process started. The AMT wagon body and interior bucket, the Moebius floor pan, front subframe, radiator, firewall and interior panels (not pictured).
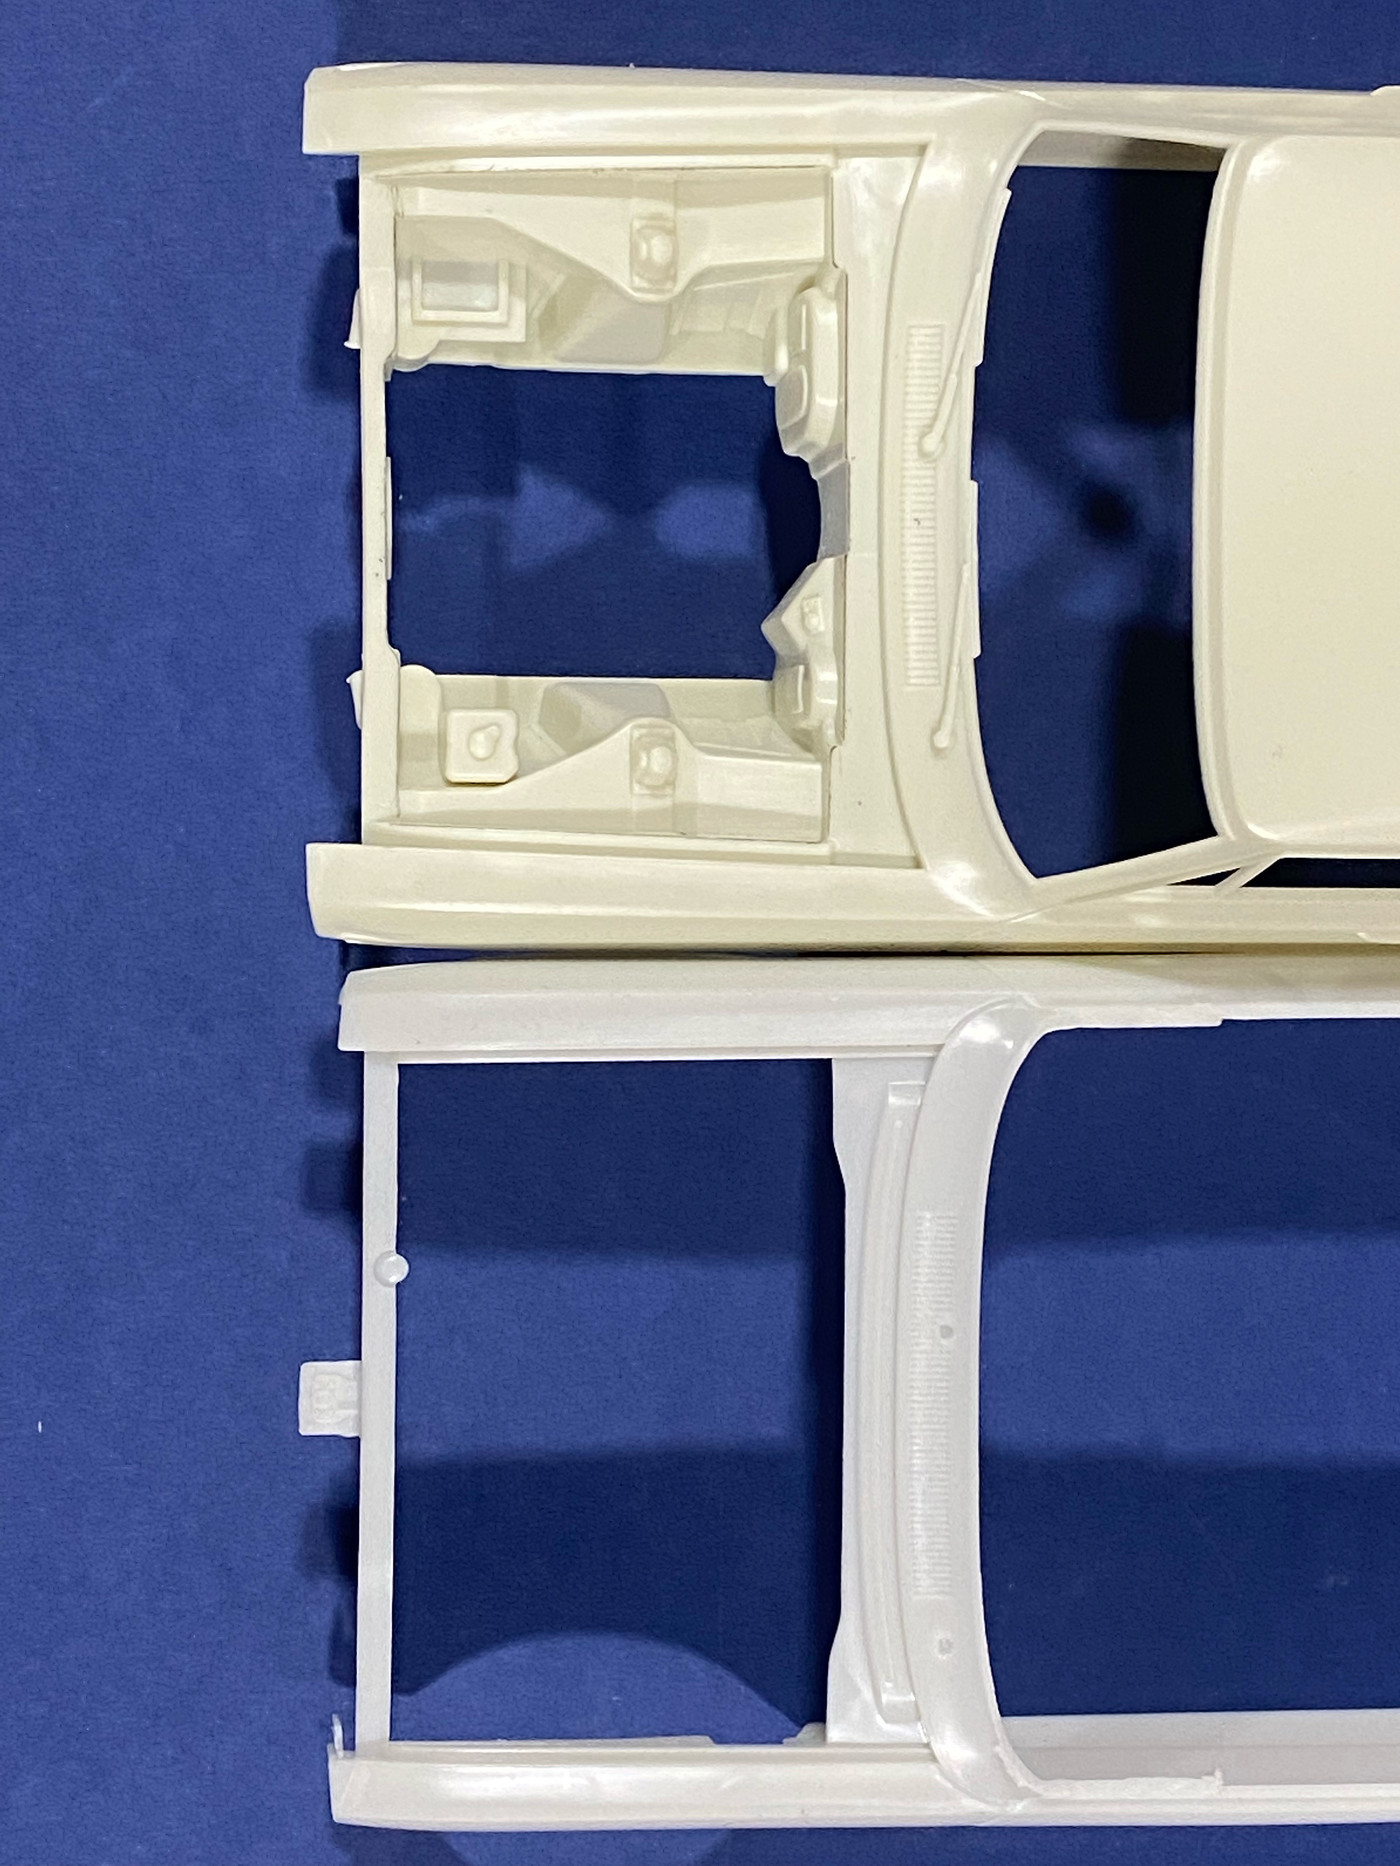
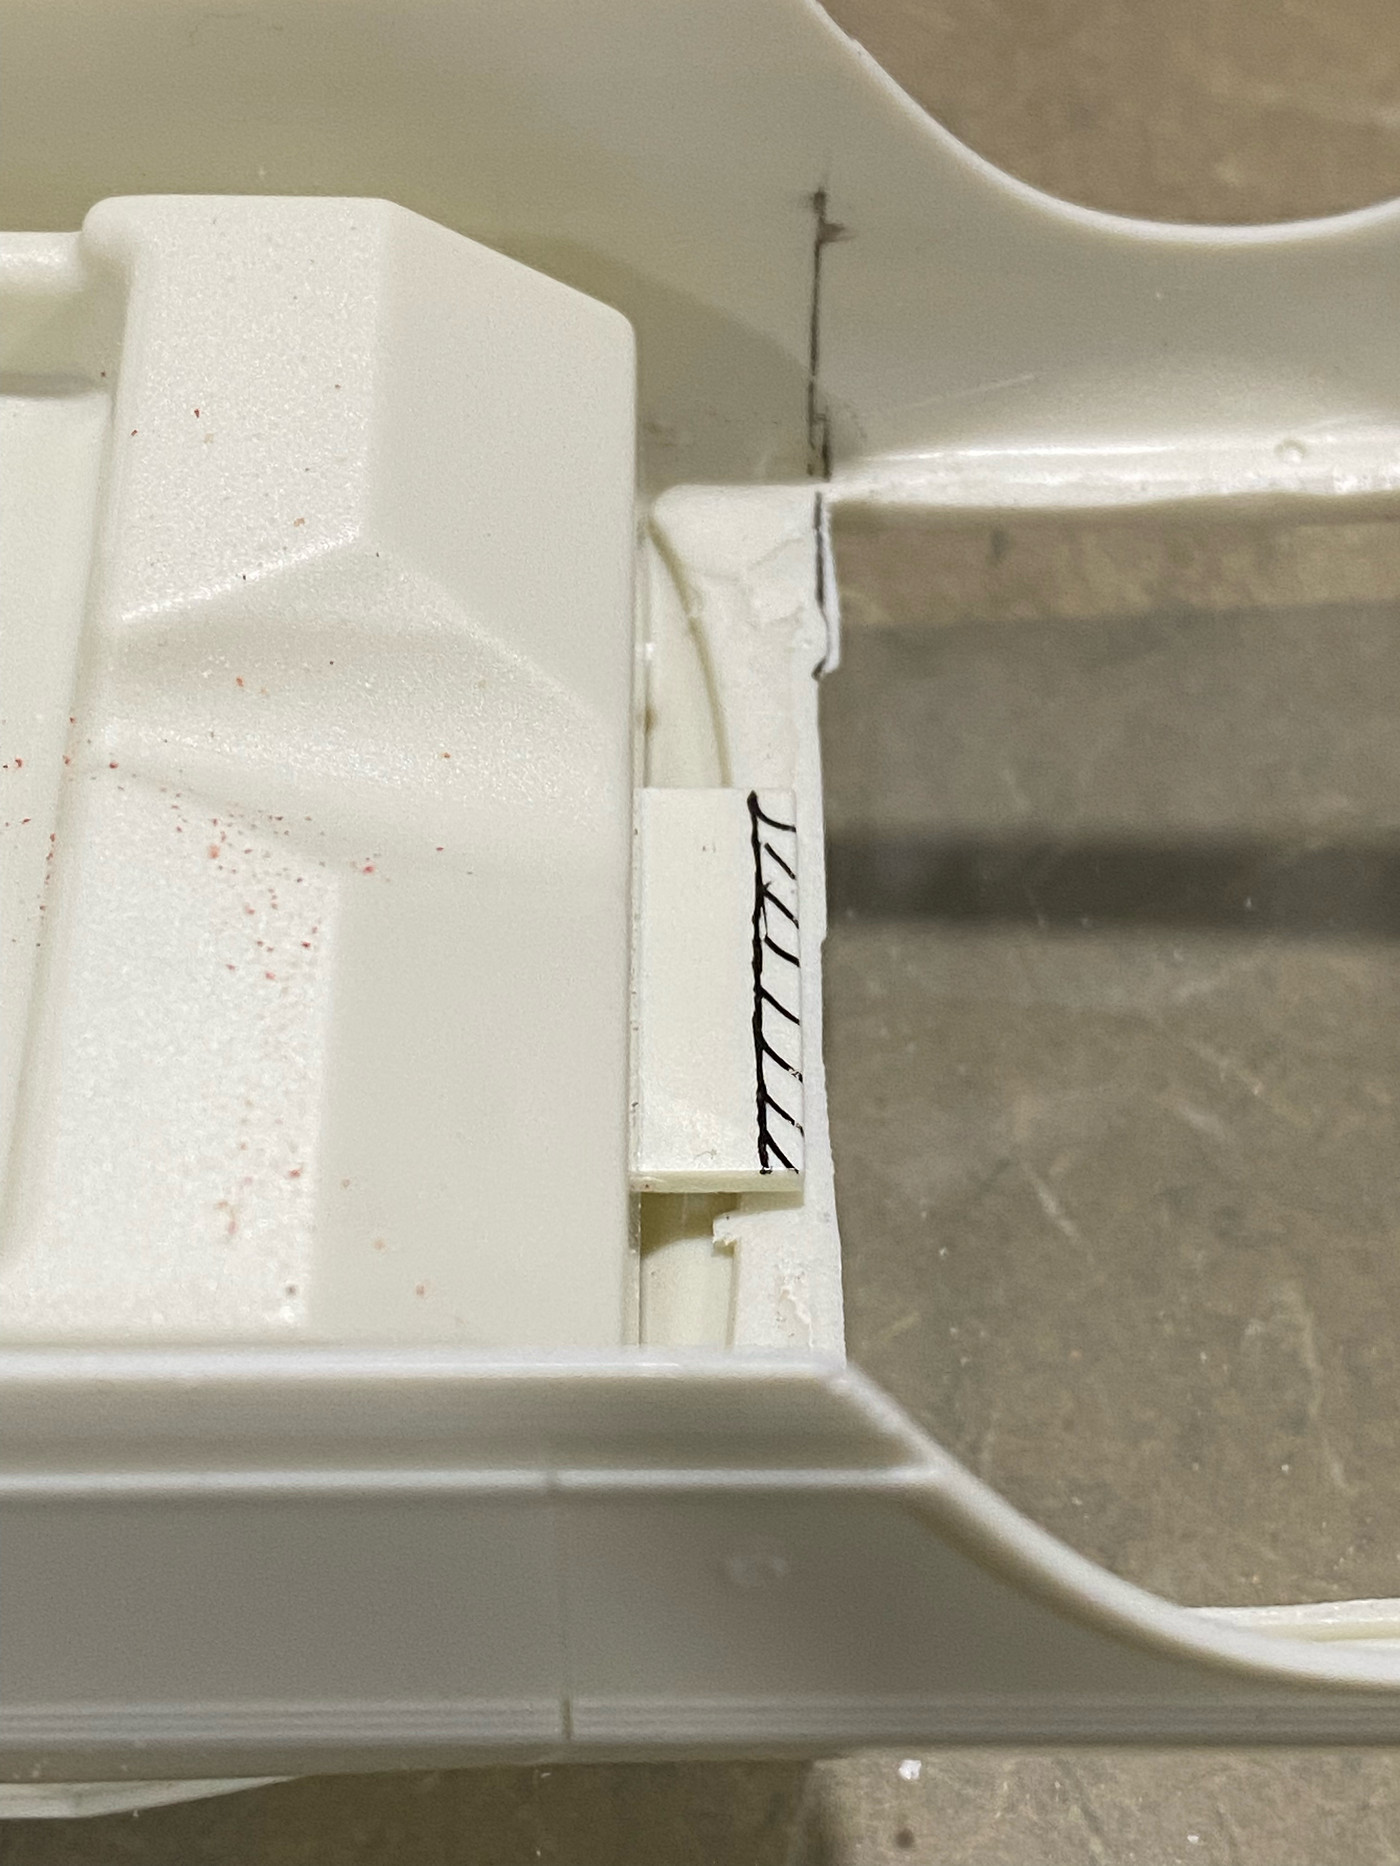
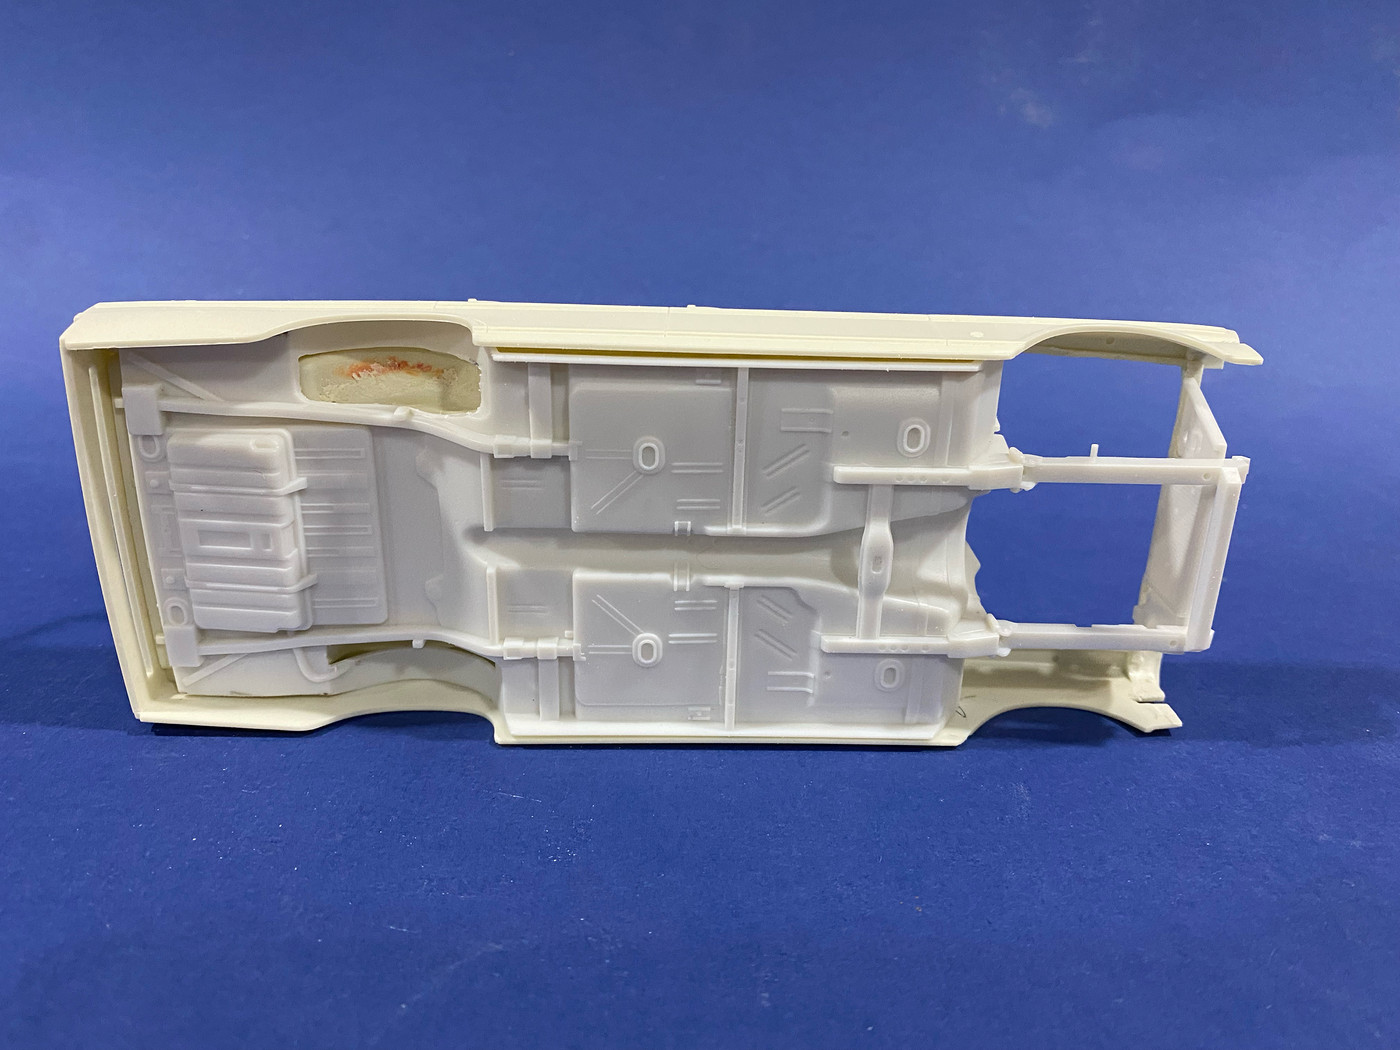
I did a side by side comparison of the two engine compartments and determined they were close enough that this should work without even putting a caliper on them. As I would find out, my assessment was right on the money, almost as if Moebius engineered their kit to mesh together with the AMT kit (I know they didn't, but it's fun to pretend, right?) I think overall the Moebius compartment may be 1 scale inch longer than the AMT as later you will see the moebius firewall ends up slightly farther back than where the AMT one was molded in, but the difference is hardly noticeable unless pointed out. You can see in this picture where I highlighted the upper edge of the compartment sheetmetal so i knew to remove everything on the underside up to that point.
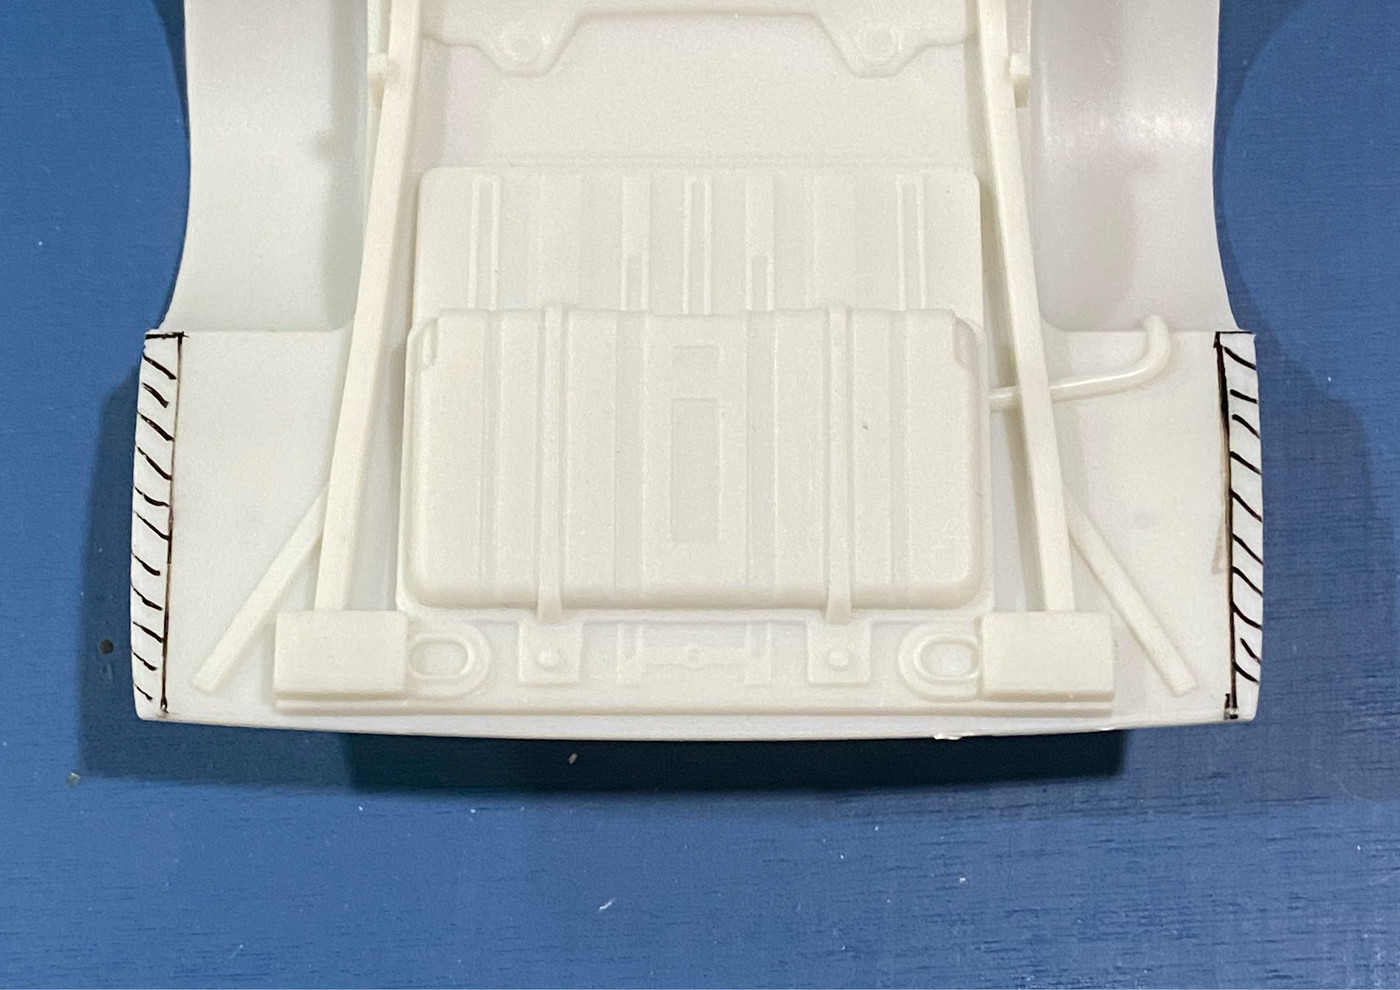
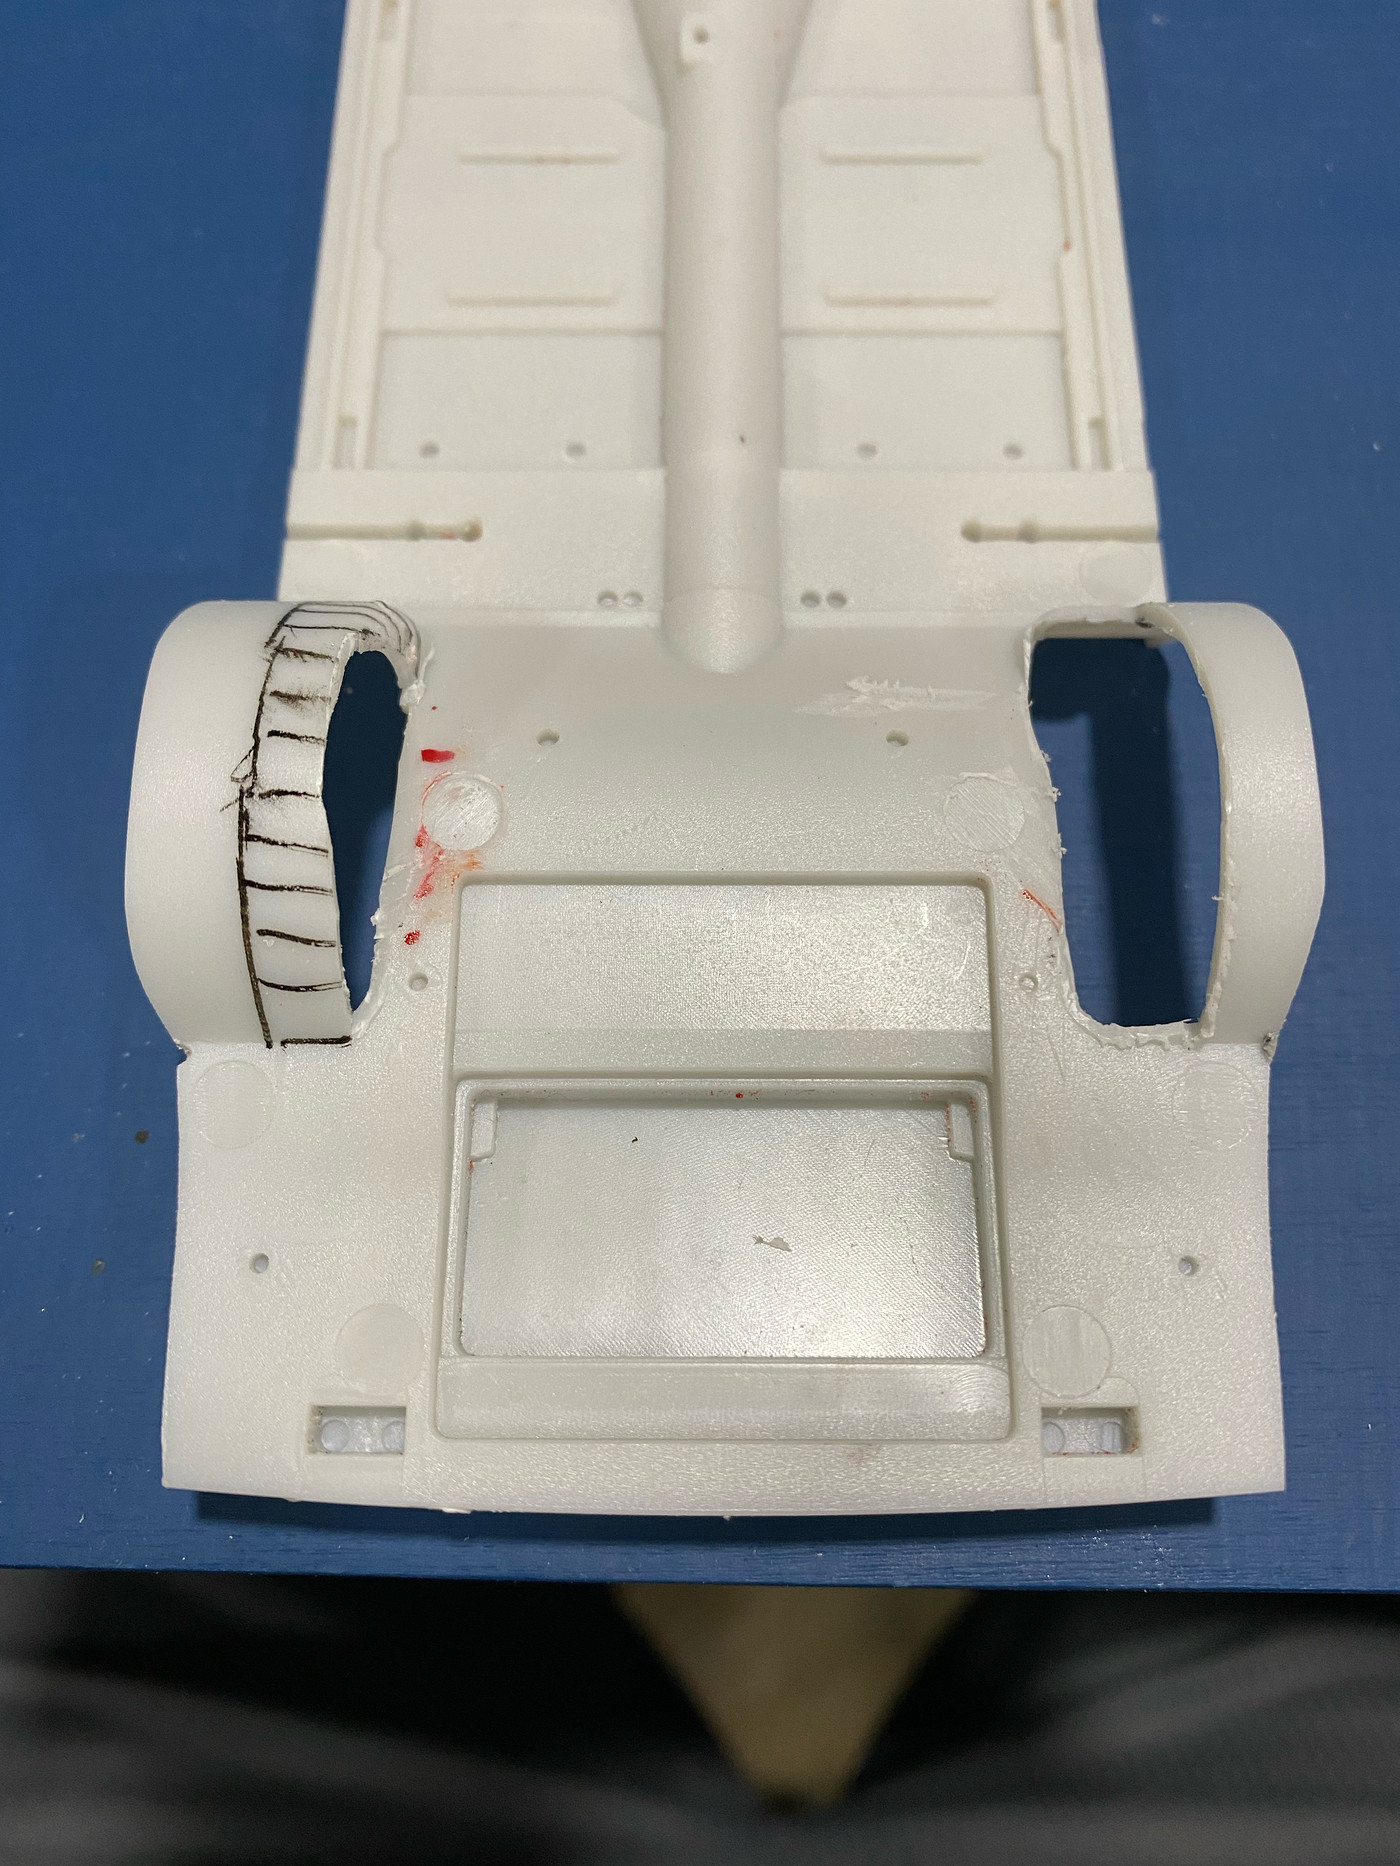
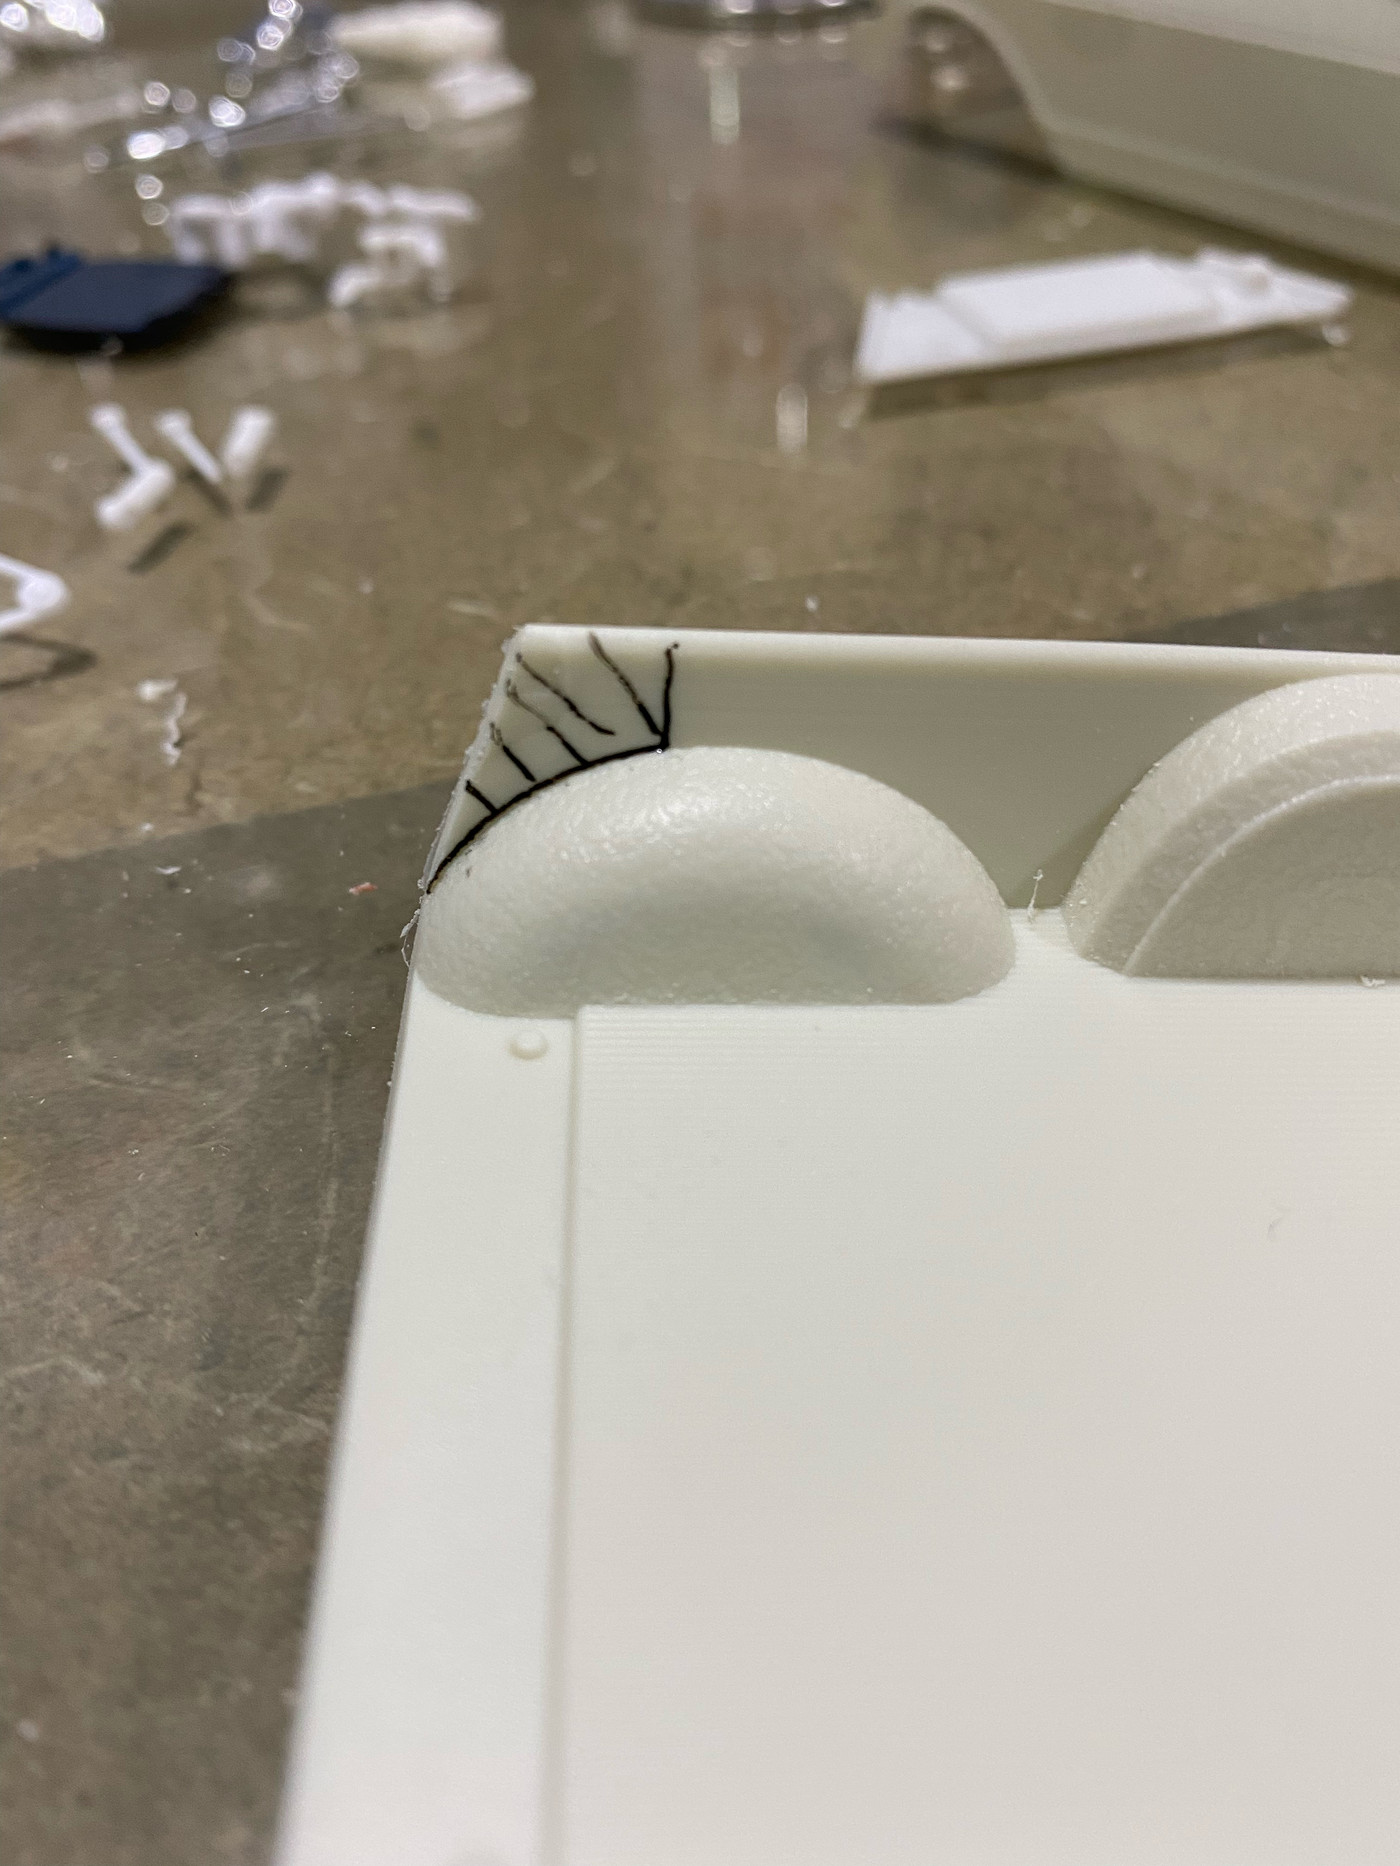
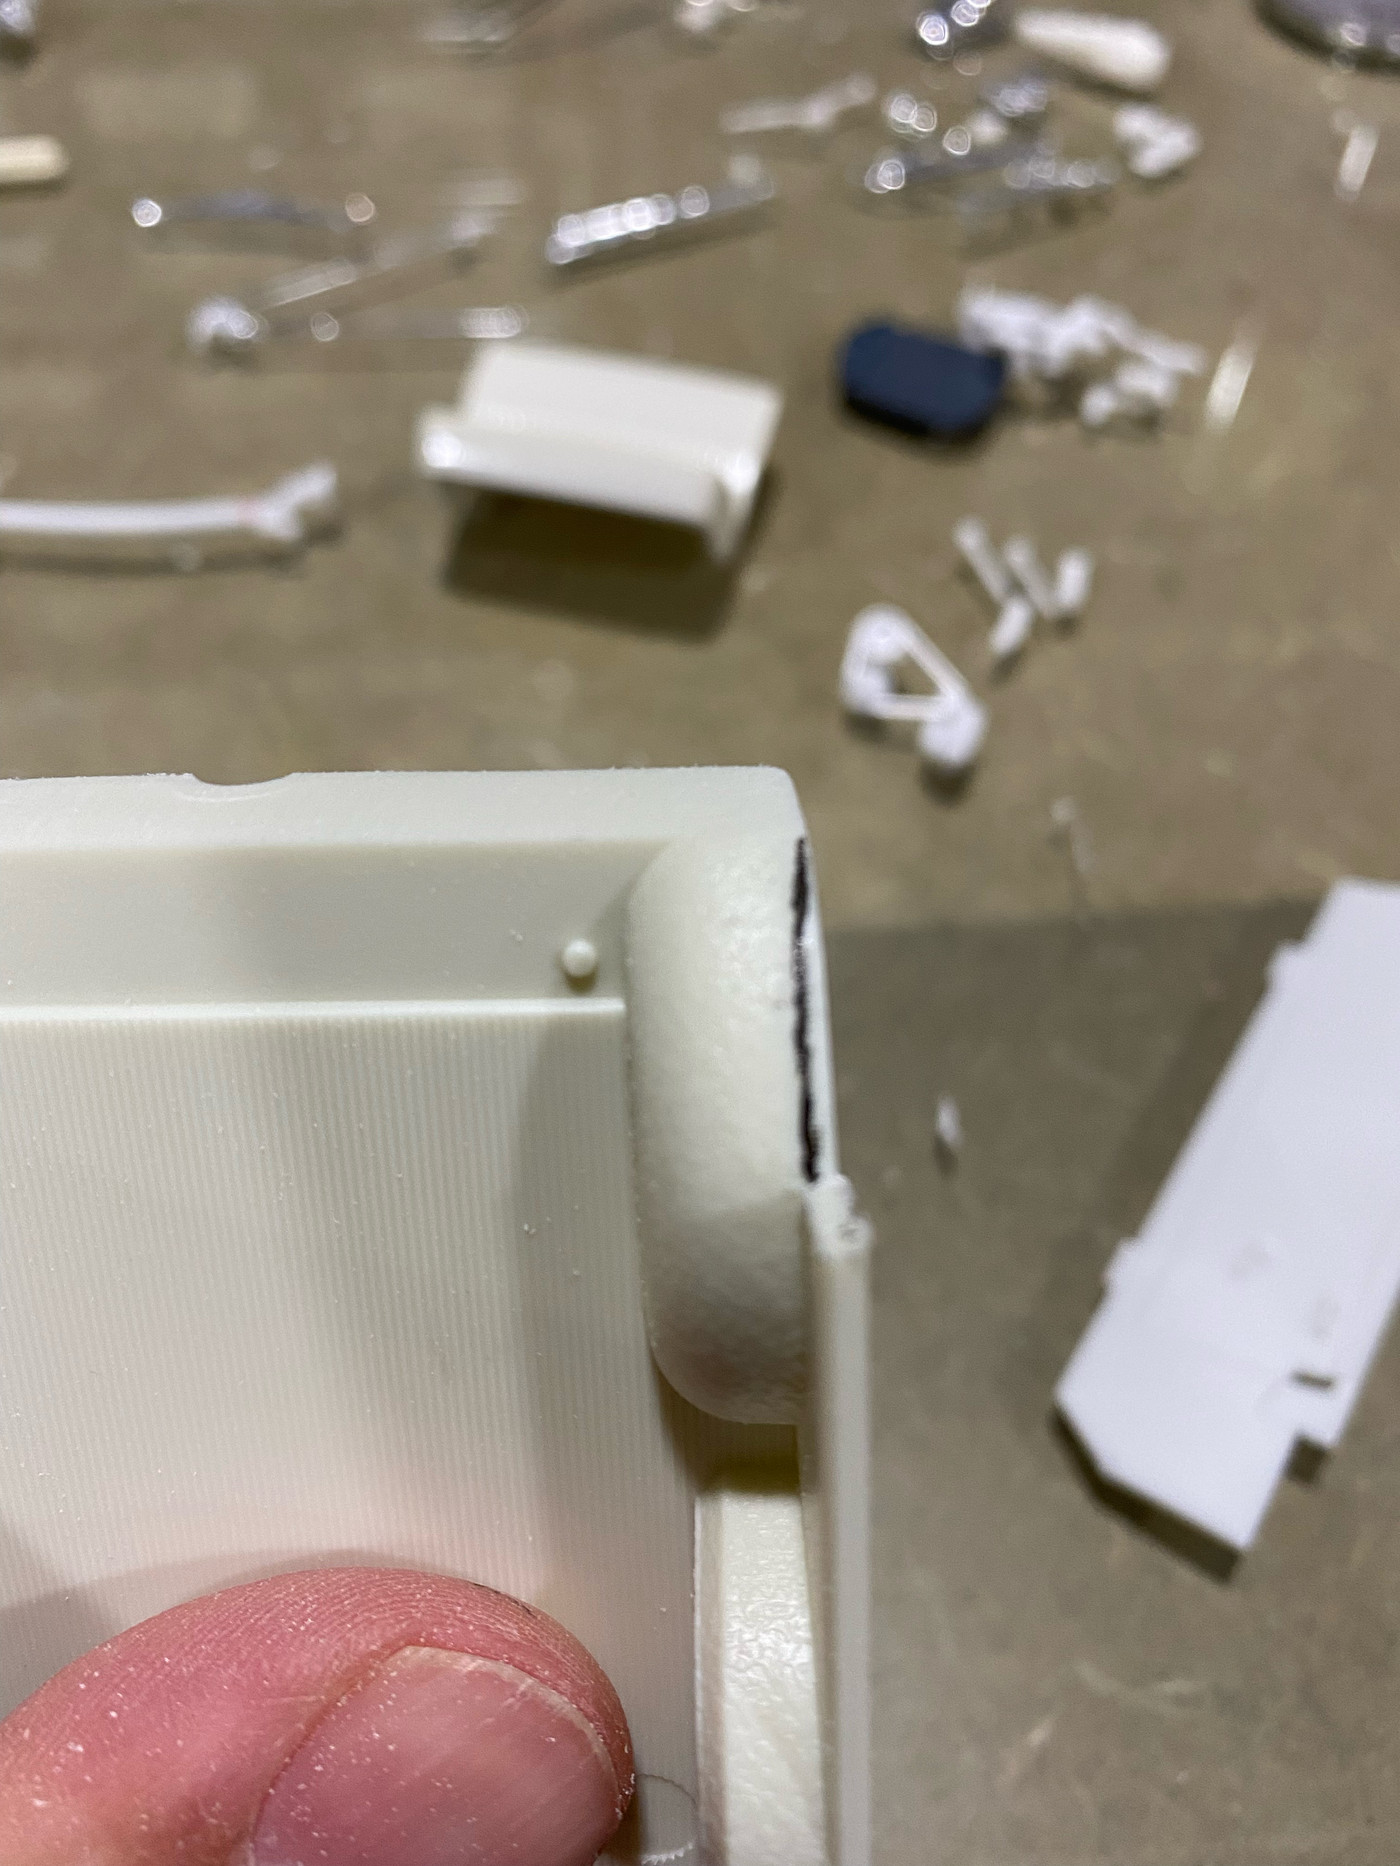
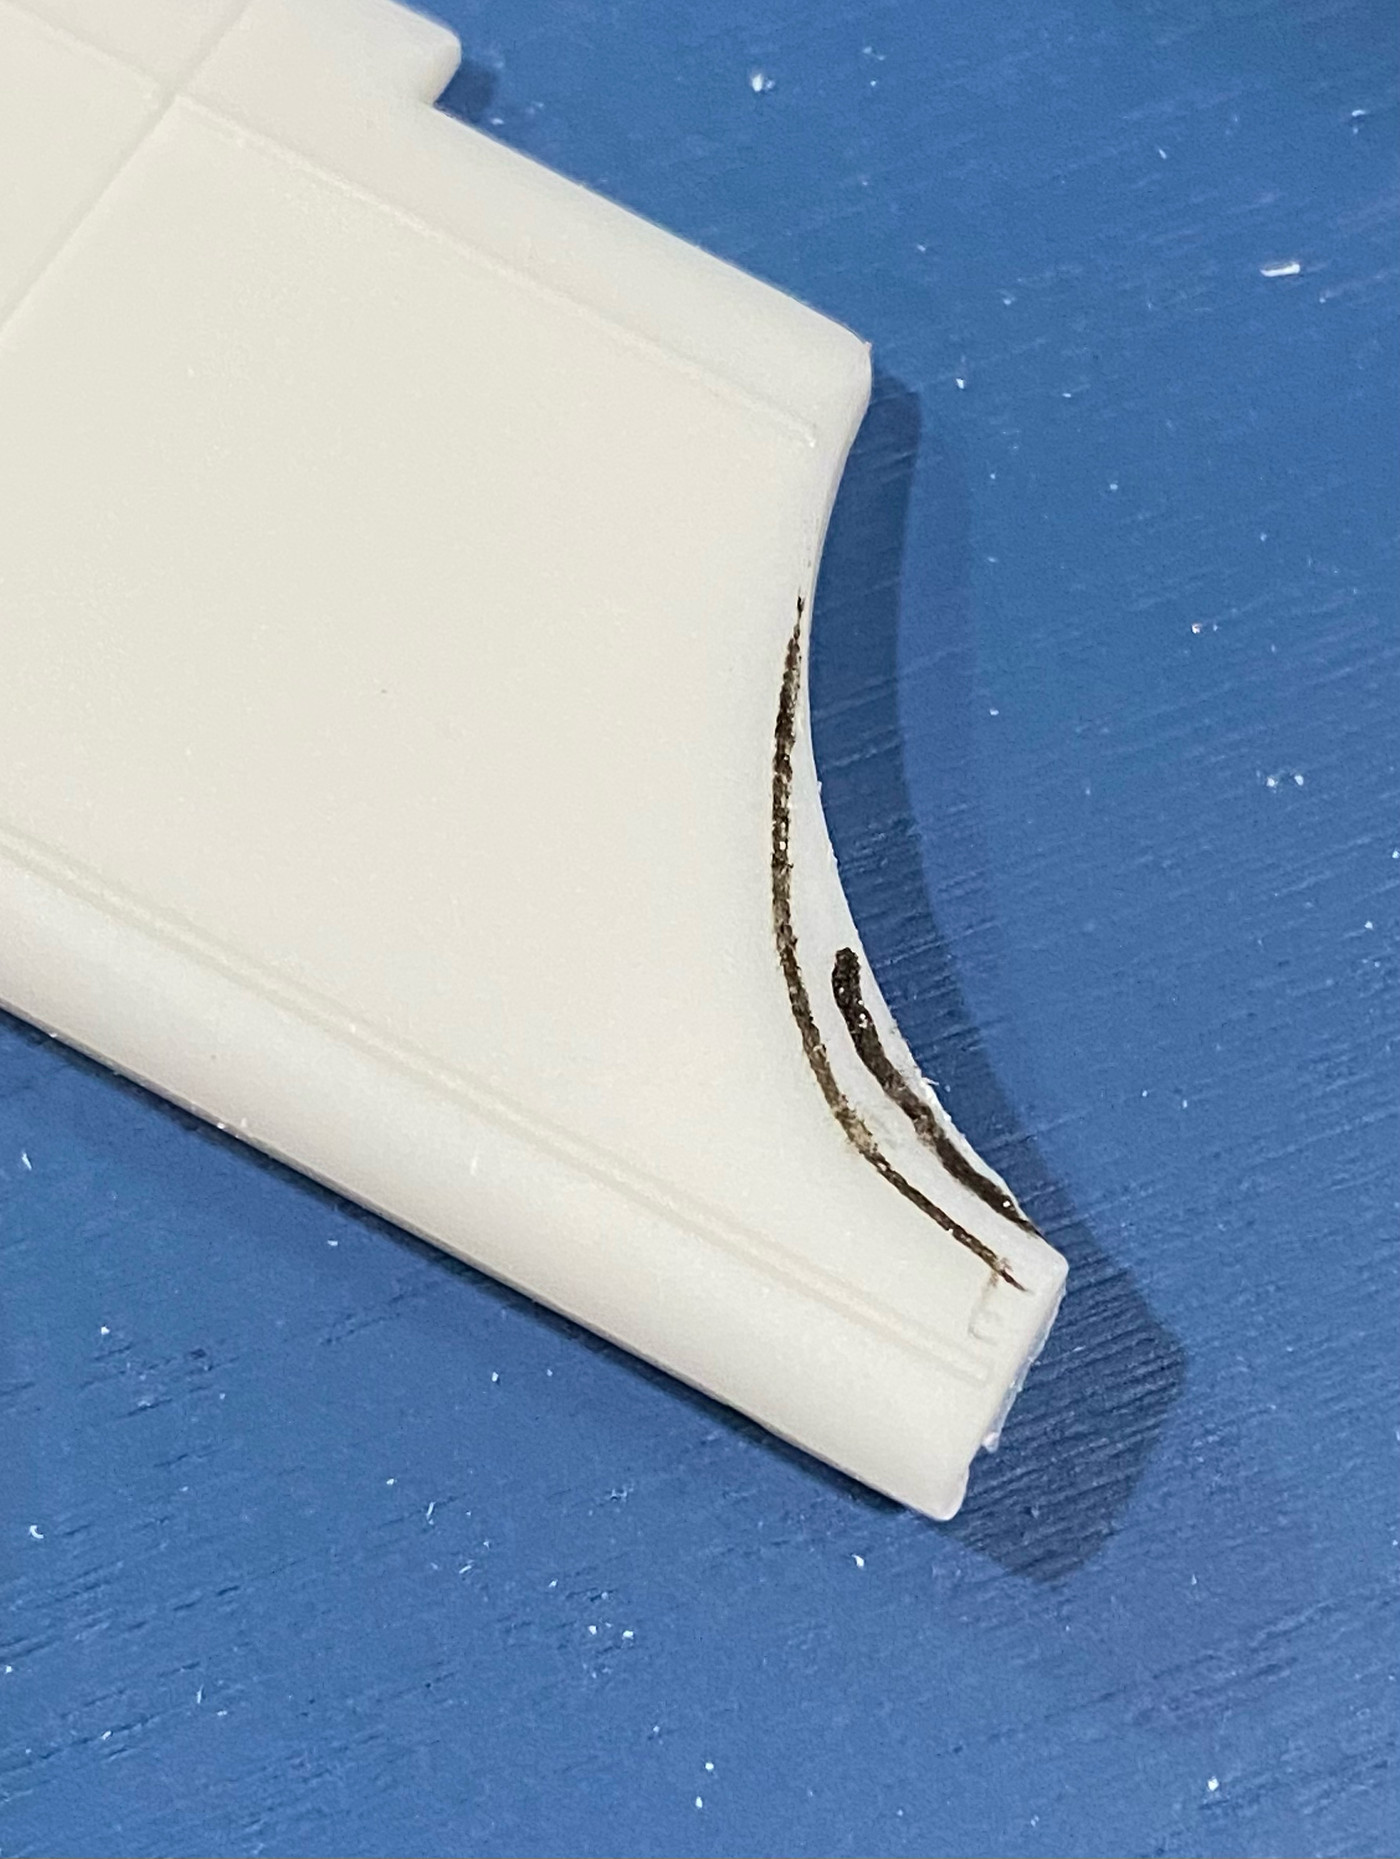
I set about with removing all the compartment stuff with my Dremel cut off wheel, sanding drum and then my razor saw and sanding sticks. Before I could test the fit I had to slightly narrow the rear area of the floor pan to fit into the wagon body. I cut out the areas highlighted in black with a straight cut where it transitions to the fender well and then finessed the area with a sanding stick to tightly fit the wagon body. Eventually the rear of this area will need to be extended a bit. I also assume the gas tank configuration is incorrect for a wagon, but haven't researched that yet, or even decided if I will tackle that feature at all.
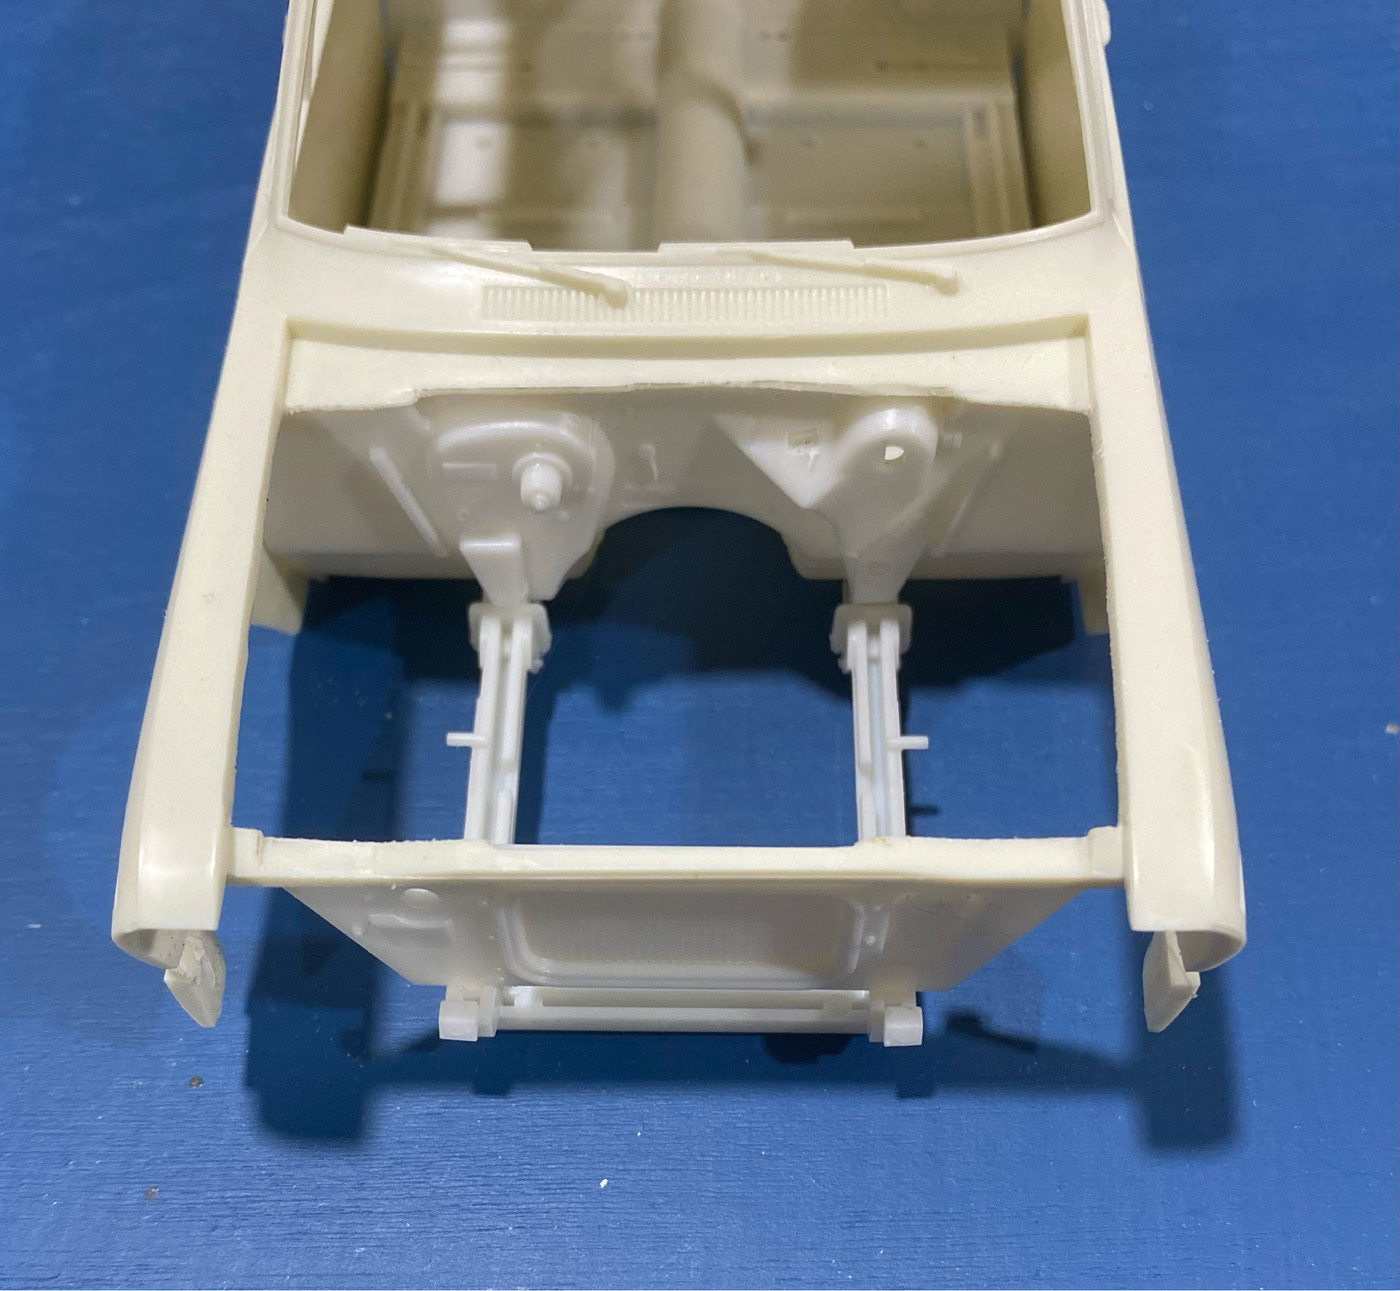
Now it's time to do the first test fit. Use the radiator as your reference point for the positioning of the floor inside the body. It lands perfectly under the cross brace, and the firewall ends up perfectly nestled under the cowl. You may notice the sheetmetal that ran down the sides of the compartment are gone, that is due to me being over aggressive with my Dremel. If you're careful you can retain them. I haven't decided if I will replace them or not.
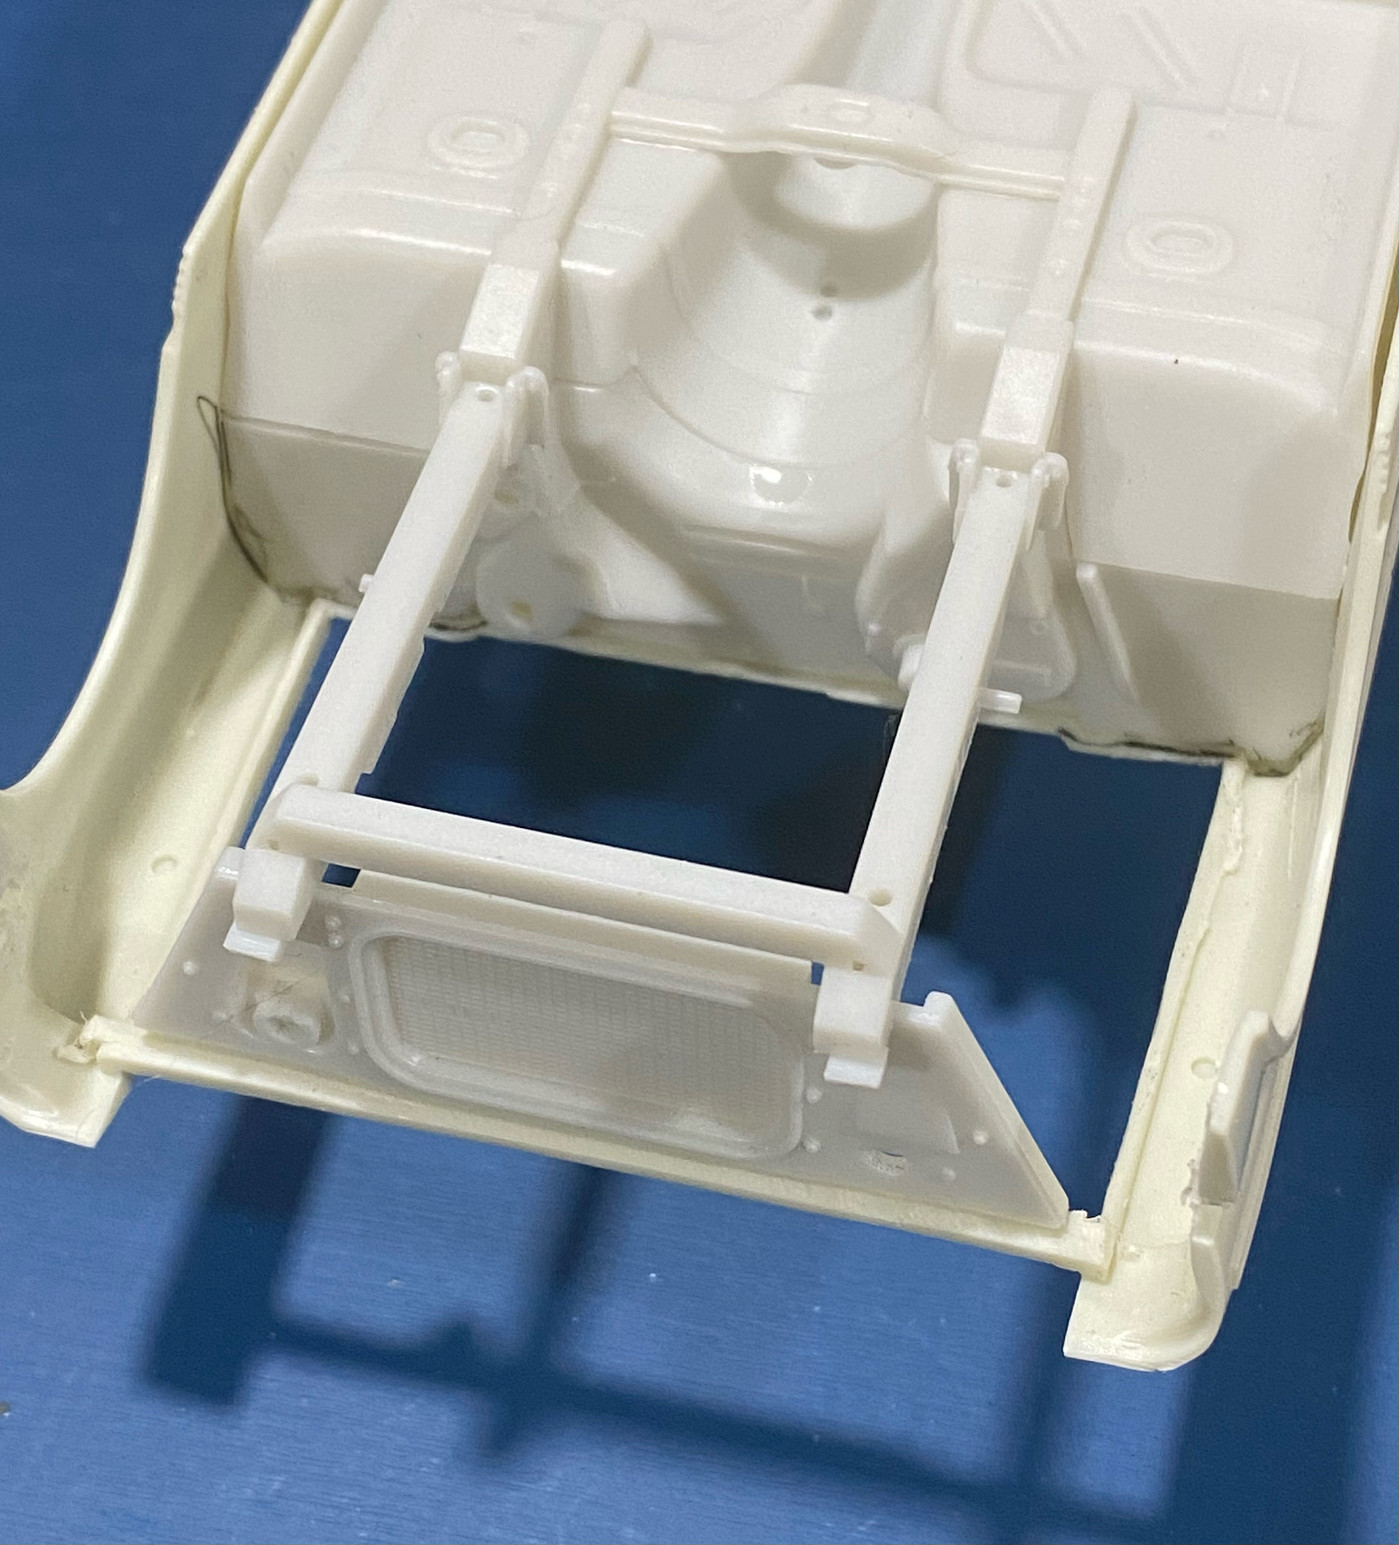
Here you can see what I was talking about when I fantasized that they were engineered to work together. Note how the notches in the top of the Moebius firewall mesh perfectly with the underside of the AMT fenders/cowl. It's a snap fit. The black highlights are a reference line for future mockups to show where the firewall belongs so I don't have to use the radiator every time. No sanding has been done to the Moebius firewall or radiator to fit this tight.
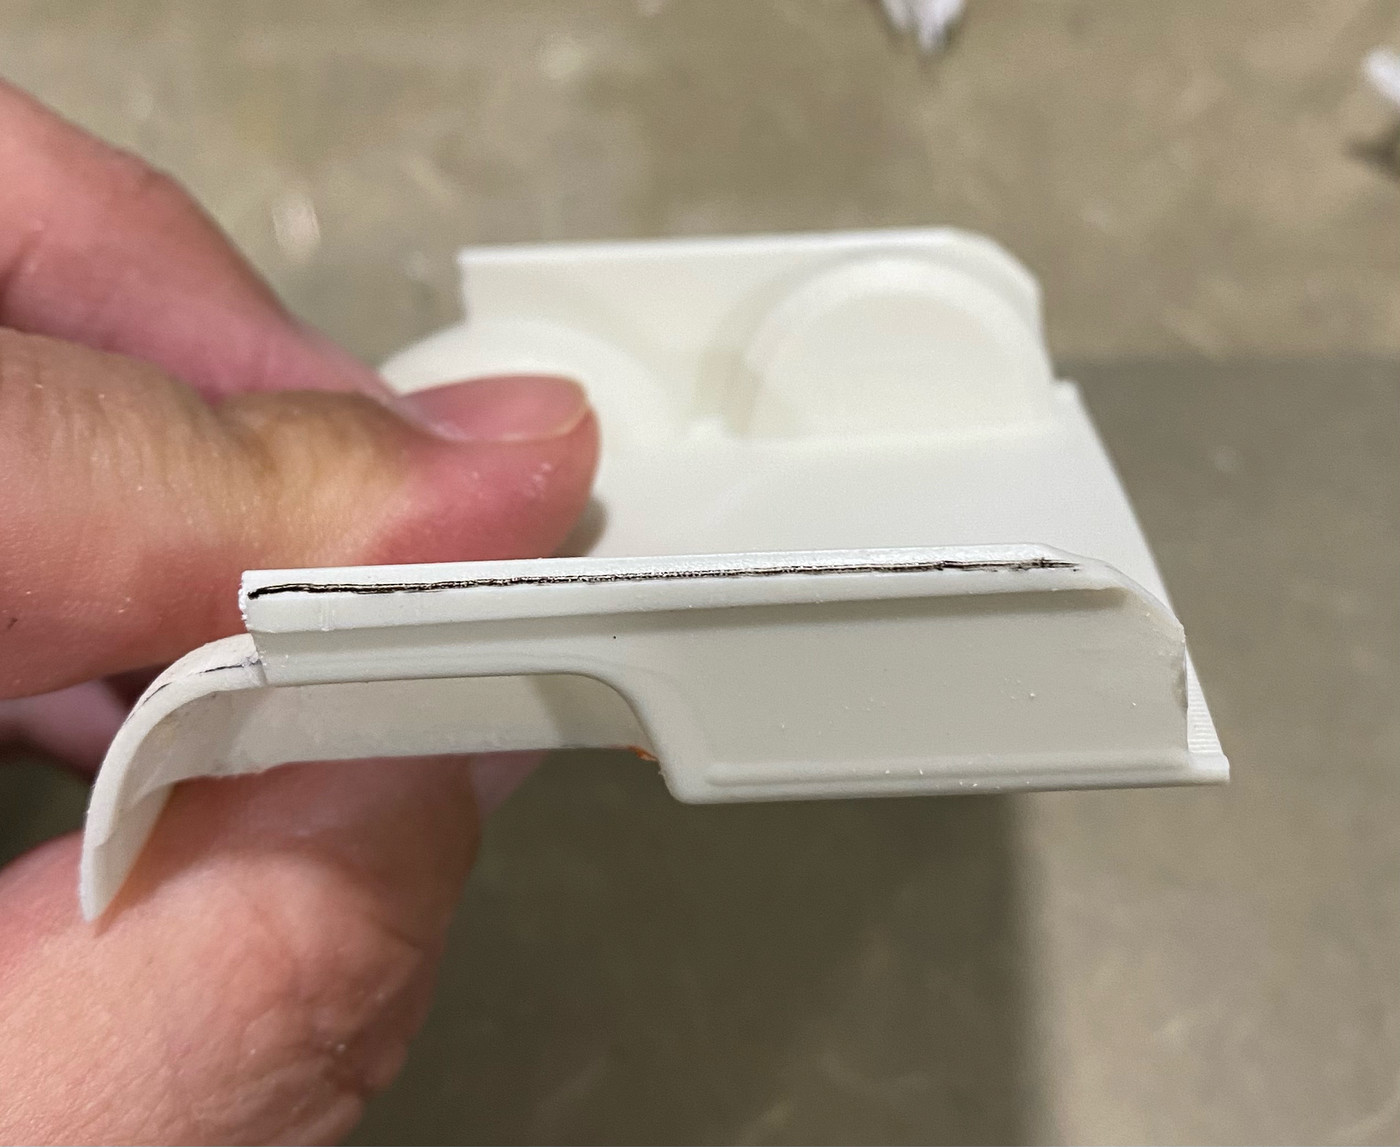
Now to begin the fitment of the interior. You need to shorten this tab on the front of the AMT bucket about 2mm. Don't go too far because you want that tab to hold the tub at the correct height in relation to the body.
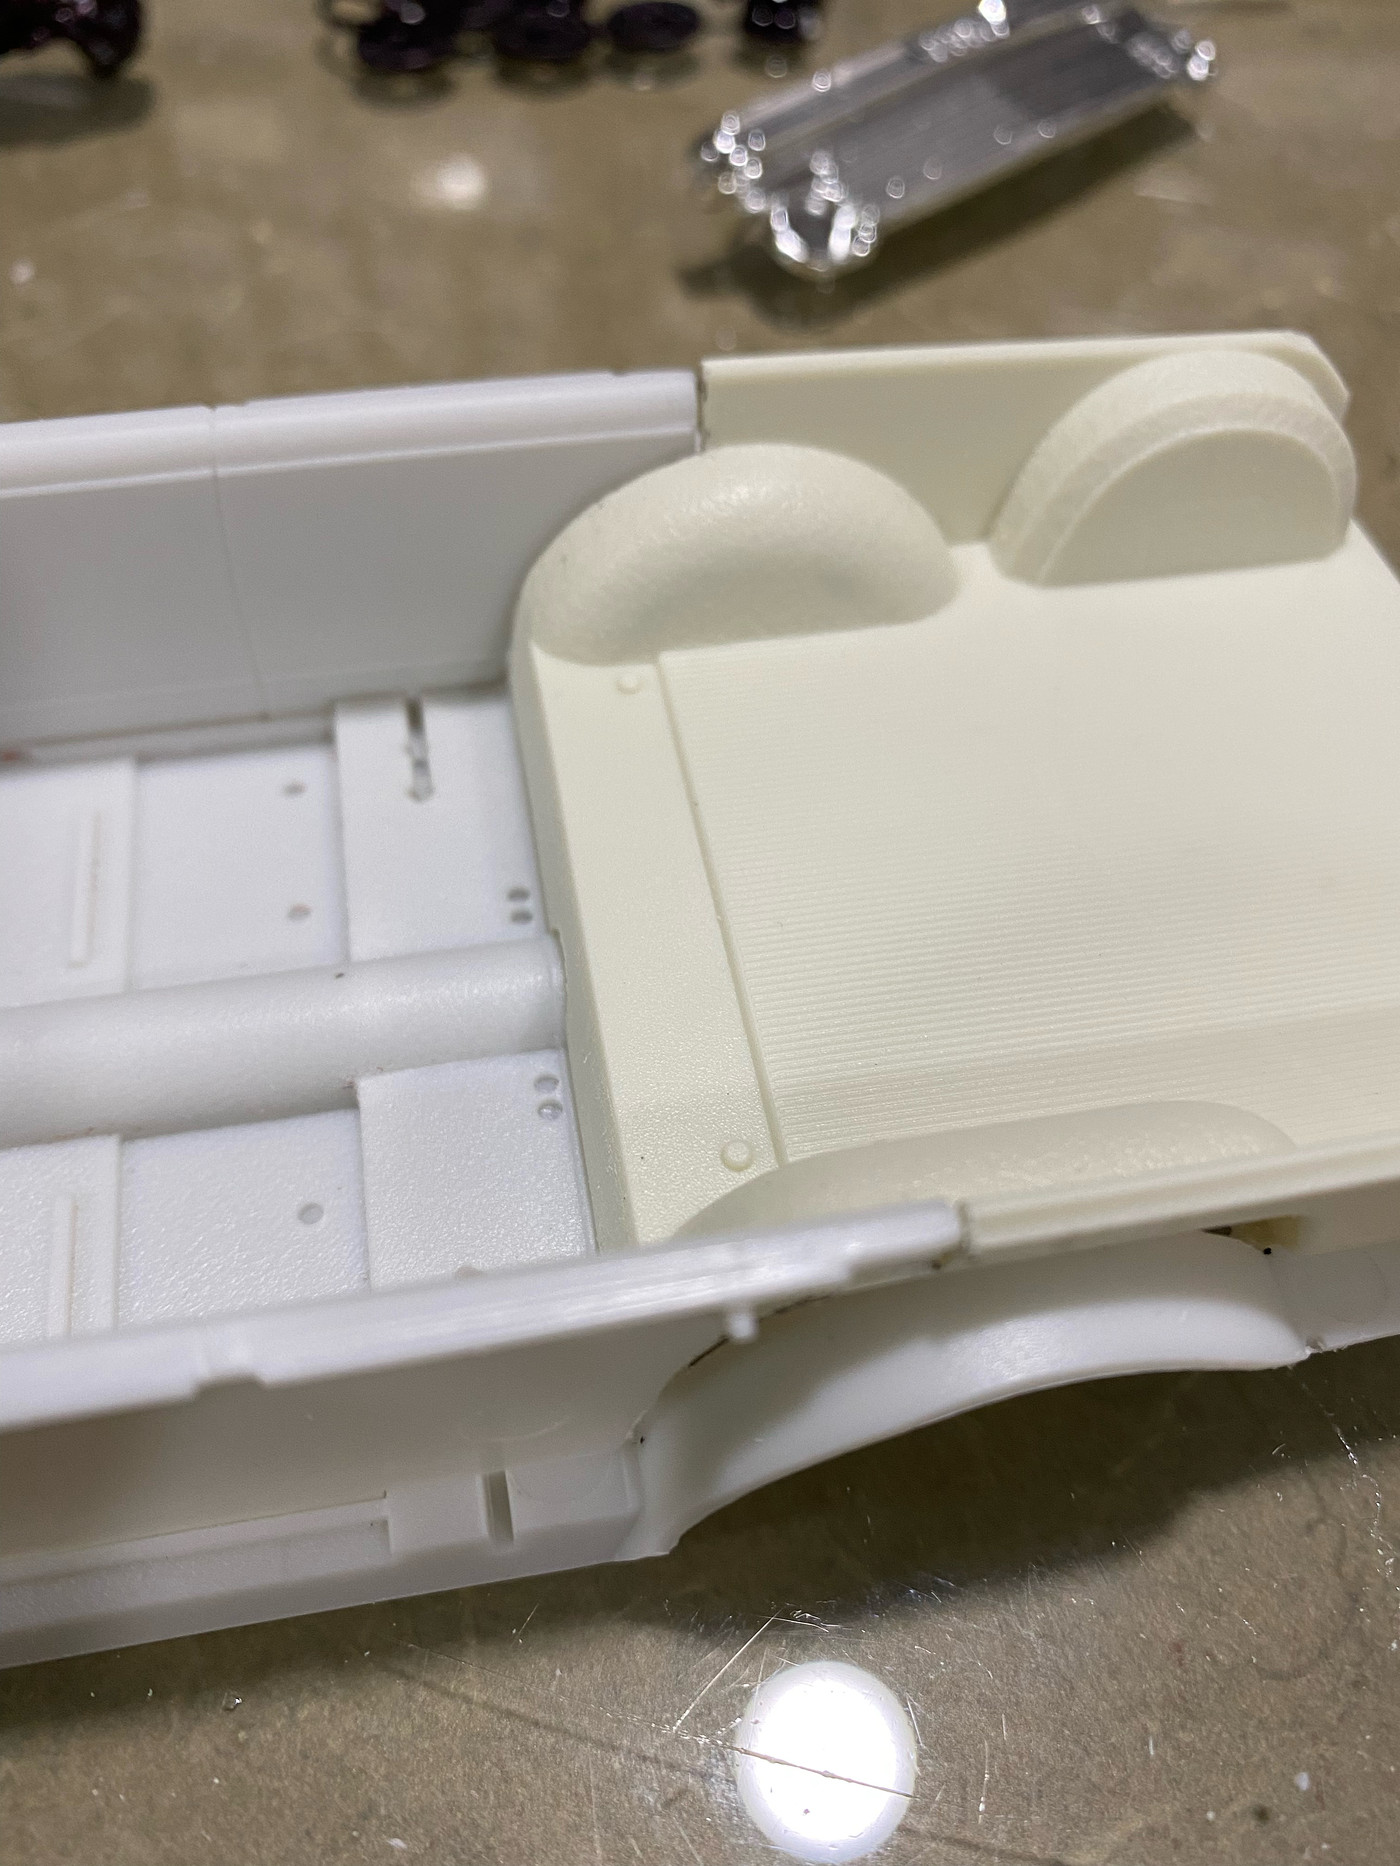
Now the tricky part, where you can decide how far you want to go. I was going to just use the Moebius side panels and throw a tonneau cover over the cargo area and call it done. perfectly acceptable for a drag car or custom. However, knowing that Randy would not cut corners on his 65 wagon conversion, I decided to push through this hard part. At first I was going to do what I could to retain the Moebius fenderwells by simply removing material from the inside of the Moebius part and the outside of the AMT fenderwells. However, there didn't end up being enough thickness to the plastic to accomplish this, so I completely cut away the inner "half" of the Moebius fenderwells. Note here on the left the evidence of a partial removal, which still wasn't enough. So I set the AMT bucket on top of the Moebius floor and marked where I needed to cut. On the underside you can cut right up to the frame rail if you like.
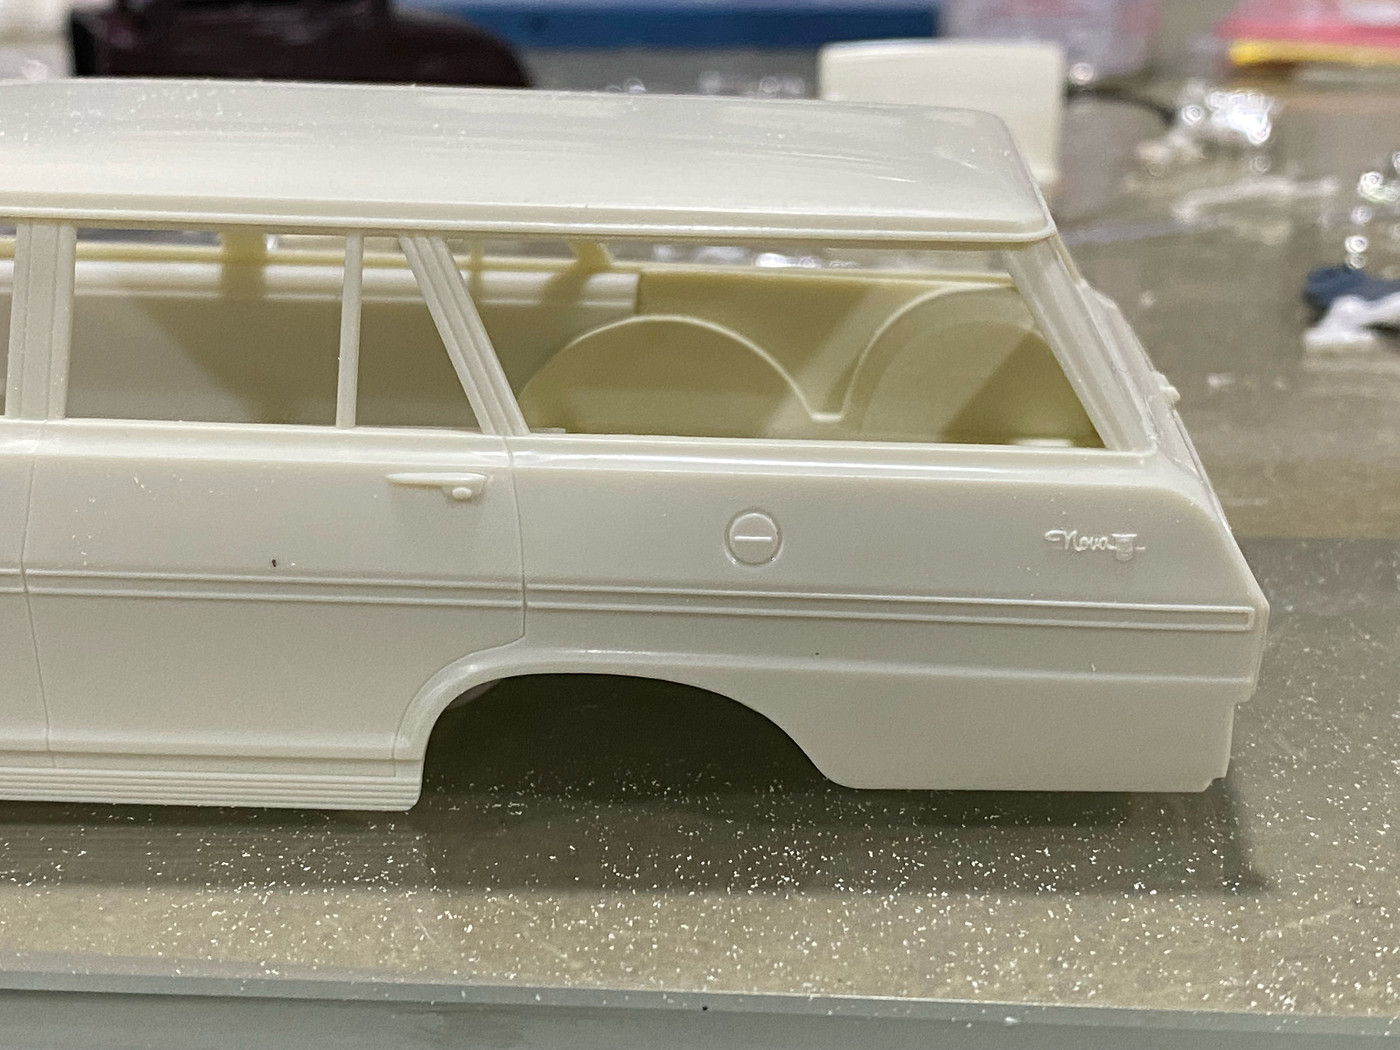
I cut the AMT cargo area away directly in front of the fenderwells and preserved the downward sloping sheetmetal to meet the Moebius floor. After removing the locating tab on the Moebius side panel where it meets the fenderwell I then used the panels as a pattern to show where I needed to cut away the side of the AMT bucket. Fortunately this is exactly where the inner door panel line on the four door wagon would be, so a gap here is prototypical to 1:1. Remove the shaded area and do some finesse sanding to get a good fit. Then repeat the process for the drivers side.
You will also need to remove this small sliver of plastic from the AMT bucket to allow the Moebius panel to fit properly and still allow everything to fit inside the body. It is the width of the vertical plastic that used to occupy this space.
The drivers side rear fender well is a slightly more rectangualr shape at its leading edge than the passenger side, so it requires a little more material be removed from the Moebius side to fit. Use the AMT fenderwell as your template, and remove material slowly.
Now you can see where all your hard work is getting you. You will need to slightly enlarge the arch where the cargo area fits over the driveshaft tunnel. Now everything is ready to test fit in the body.
After you fit the interior into the body you will probably note that the cargo area now sits a little high compared to the window opening. There is a molded in parting line on the upper surface that serves as a great reference point for the removal of material. Run a fine line marker or pencil down that line and then gently sand the top surface until that line disappears. Now everything should line up.
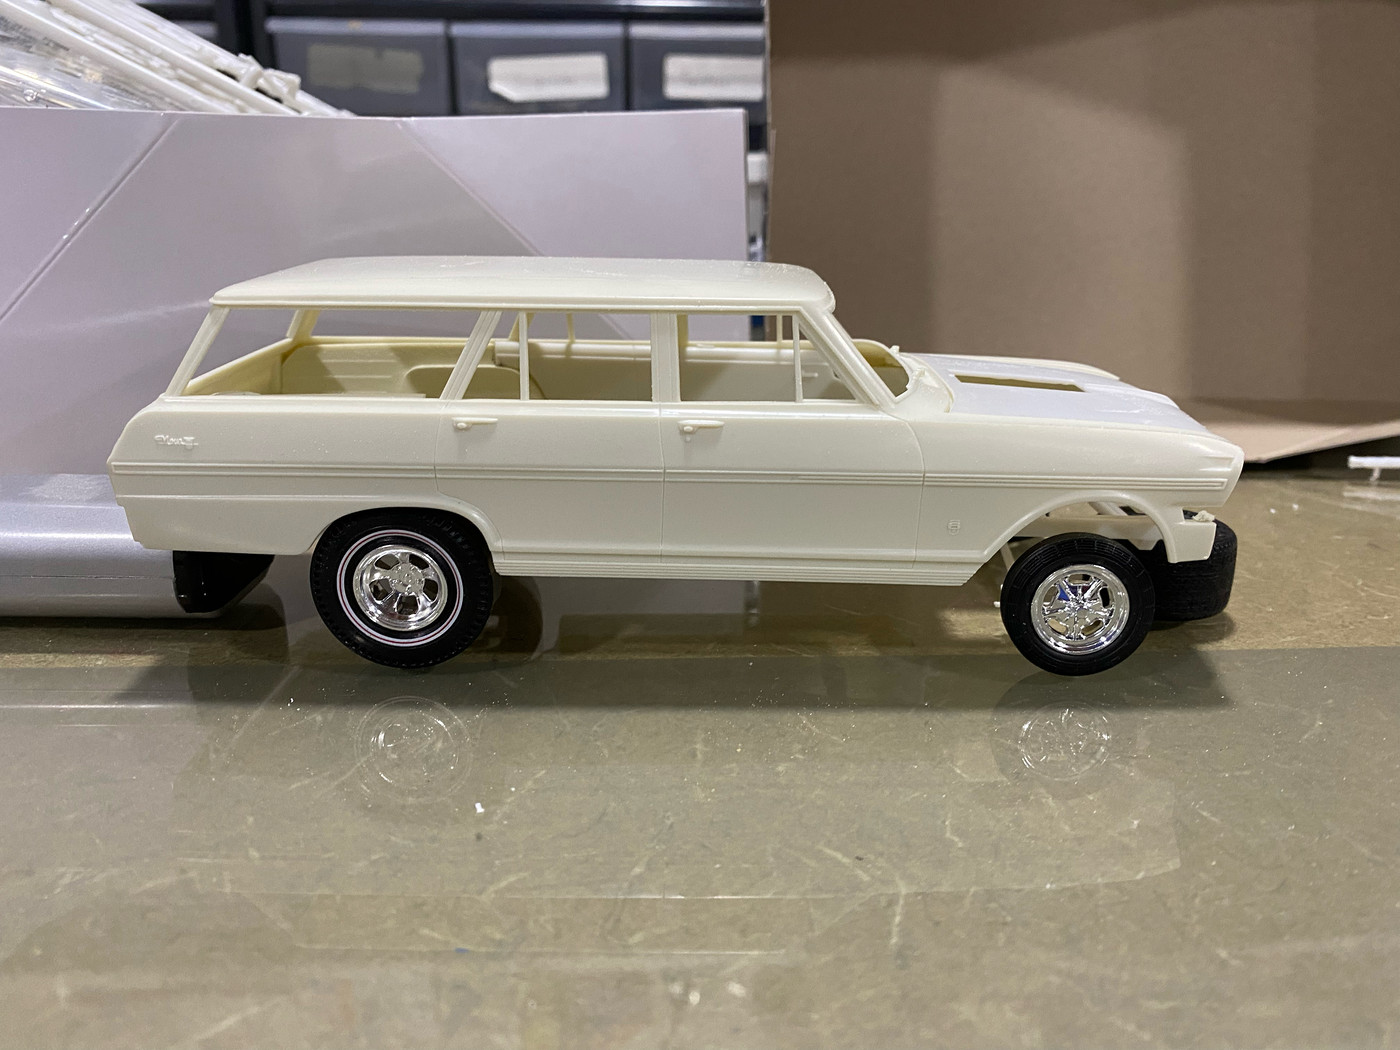
Now we're talking!!!
And, the glamour shots...
Now, I'll be stepping away from this build as I'm done painting the parts for my Simple 30 Ford coupe. Once that is done I will come back to this, as Randy and I have a deadline of June 1st to get out wagons done. Thanks for following along, and I hope someone out there finds this helpful.
To begin with, I want to thank my good friend Randy Meyer (Randfink) for inspiring me to not cut the corners with regards to finishing the cargo area, but we'll get into that in a bit. Since we are having an impromptu build off, I knew I needed to elevate my level to even come within sniffing distance of his attention to detail. Now, let's get started.
Here are the main components you need to gather to get the fitting process started. The AMT wagon body and interior bucket, the Moebius floor pan, front subframe, radiator, firewall and interior panels (not pictured).
I did a side by side comparison of the two engine compartments and determined they were close enough that this should work without even putting a caliper on them. As I would find out, my assessment was right on the money, almost as if Moebius engineered their kit to mesh together with the AMT kit (I know they didn't, but it's fun to pretend, right?) I think overall the Moebius compartment may be 1 scale inch longer than the AMT as later you will see the moebius firewall ends up slightly farther back than where the AMT one was molded in, but the difference is hardly noticeable unless pointed out. You can see in this picture where I highlighted the upper edge of the compartment sheetmetal so i knew to remove everything on the underside up to that point.
I set about with removing all the compartment stuff with my Dremel cut off wheel, sanding drum and then my razor saw and sanding sticks. Before I could test the fit I had to slightly narrow the rear area of the floor pan to fit into the wagon body. I cut out the areas highlighted in black with a straight cut where it transitions to the fender well and then finessed the area with a sanding stick to tightly fit the wagon body. Eventually the rear of this area will need to be extended a bit. I also assume the gas tank configuration is incorrect for a wagon, but haven't researched that yet, or even decided if I will tackle that feature at all.
Now it's time to do the first test fit. Use the radiator as your reference point for the positioning of the floor inside the body. It lands perfectly under the cross brace, and the firewall ends up perfectly nestled under the cowl. You may notice the sheetmetal that ran down the sides of the compartment are gone, that is due to me being over aggressive with my Dremel. If you're careful you can retain them. I haven't decided if I will replace them or not.
Here you can see what I was talking about when I fantasized that they were engineered to work together. Note how the notches in the top of the Moebius firewall mesh perfectly with the underside of the AMT fenders/cowl. It's a snap fit. The black highlights are a reference line for future mockups to show where the firewall belongs so I don't have to use the radiator every time. No sanding has been done to the Moebius firewall or radiator to fit this tight.
Now to begin the fitment of the interior. You need to shorten this tab on the front of the AMT bucket about 2mm. Don't go too far because you want that tab to hold the tub at the correct height in relation to the body.
Now the tricky part, where you can decide how far you want to go. I was going to just use the Moebius side panels and throw a tonneau cover over the cargo area and call it done. perfectly acceptable for a drag car or custom. However, knowing that Randy would not cut corners on his 65 wagon conversion, I decided to push through this hard part. At first I was going to do what I could to retain the Moebius fenderwells by simply removing material from the inside of the Moebius part and the outside of the AMT fenderwells. However, there didn't end up being enough thickness to the plastic to accomplish this, so I completely cut away the inner "half" of the Moebius fenderwells. Note here on the left the evidence of a partial removal, which still wasn't enough. So I set the AMT bucket on top of the Moebius floor and marked where I needed to cut. On the underside you can cut right up to the frame rail if you like.
I cut the AMT cargo area away directly in front of the fenderwells and preserved the downward sloping sheetmetal to meet the Moebius floor. After removing the locating tab on the Moebius side panel where it meets the fenderwell I then used the panels as a pattern to show where I needed to cut away the side of the AMT bucket. Fortunately this is exactly where the inner door panel line on the four door wagon would be, so a gap here is prototypical to 1:1. Remove the shaded area and do some finesse sanding to get a good fit. Then repeat the process for the drivers side.
You will also need to remove this small sliver of plastic from the AMT bucket to allow the Moebius panel to fit properly and still allow everything to fit inside the body. It is the width of the vertical plastic that used to occupy this space.
The drivers side rear fender well is a slightly more rectangualr shape at its leading edge than the passenger side, so it requires a little more material be removed from the Moebius side to fit. Use the AMT fenderwell as your template, and remove material slowly.
Now you can see where all your hard work is getting you. You will need to slightly enlarge the arch where the cargo area fits over the driveshaft tunnel. Now everything is ready to test fit in the body.
After you fit the interior into the body you will probably note that the cargo area now sits a little high compared to the window opening. There is a molded in parting line on the upper surface that serves as a great reference point for the removal of material. Run a fine line marker or pencil down that line and then gently sand the top surface until that line disappears. Now everything should line up.
Now we're talking!!!
And, the glamour shots...
Now, I'll be stepping away from this build as I'm done painting the parts for my Simple 30 Ford coupe. Once that is done I will come back to this, as Randy and I have a deadline of June 1st to get out wagons done. Thanks for following along, and I hope someone out there finds this helpful.