|
|
Post by Mr. Metallic on Nov 14, 2022 9:16:20 GMT -5
For desecrating their beautiful 32 Ford Fordor conversion. Dennis did great work on the master, and as always Ed did a great job casting it. All their great work put me in a great position to attempt a phaeton conversion. Let me explain As many of you know, I'm a huge fan of 32 Fords. There is no conversion to turn the Revell kit into a phaeton, and the AMT and MPC bodies are both lacking in accuracy. I actually did a master of this body style about 5 years ago for a budding resin caster who was a member of our club, but he has yet to get off the ground for various reasons, and I have so far been unable to get my master back. So, I've been entertaining the fact of trying the conversion again, especially after seeing this awesome AMBR contender at the Grand national this year. 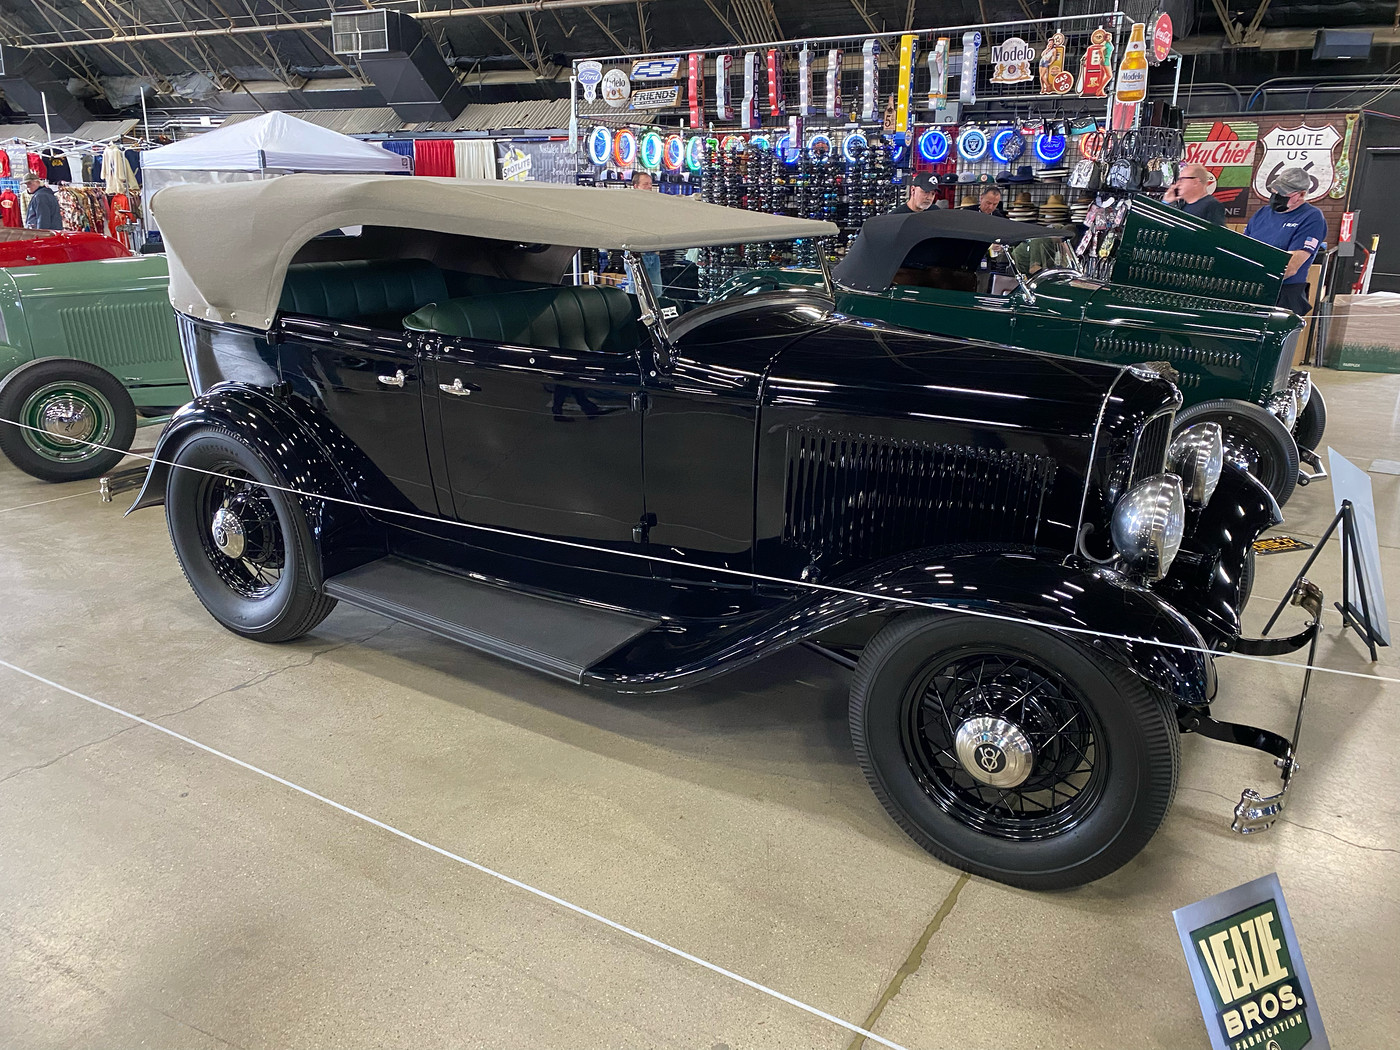 And Paul Gommi's awesome build  I didn't relish the thought of having to cut up another AMT body and asserting the hours and hours of work into fixing the cowl and lower body to be more accurate, I've done that already once. I was looking for an easier way. Awhile back I was doing an inventory of my resin stash and found that I had 3 Drag City Fordors. I usually buy at least 2 of any body style resin 32 body to ensure I can build a fenderless and fendered example once I get around to it. Since I had an "extra" body it was available for cutting. But that's where I stopped pursuing that project. Then while I was working on my current project of backdating the new Revell 32 I found a hacked up Rat Roaster body. Good news it had an intact cowl. That instantly got the wheels turning. 1 Roadster cowl + 1 creatively modified Fordor body = a 32 Phaeton! 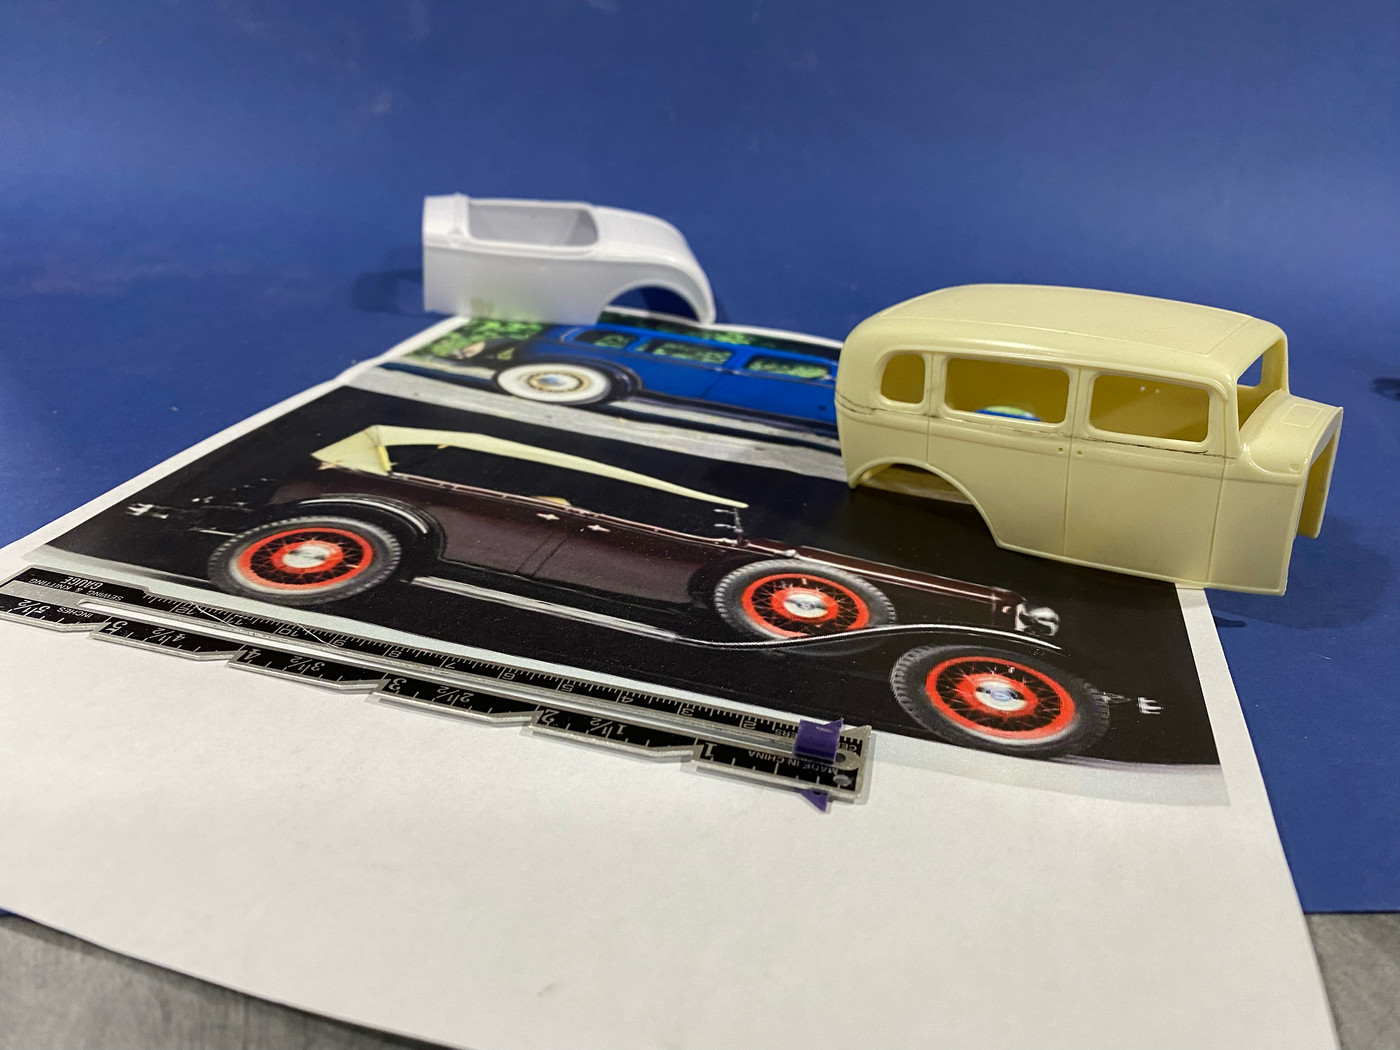 Well, I may have just destroyed a $25 resin body. This is where Ed and Dennis should avert their eyes as I hack up their work.  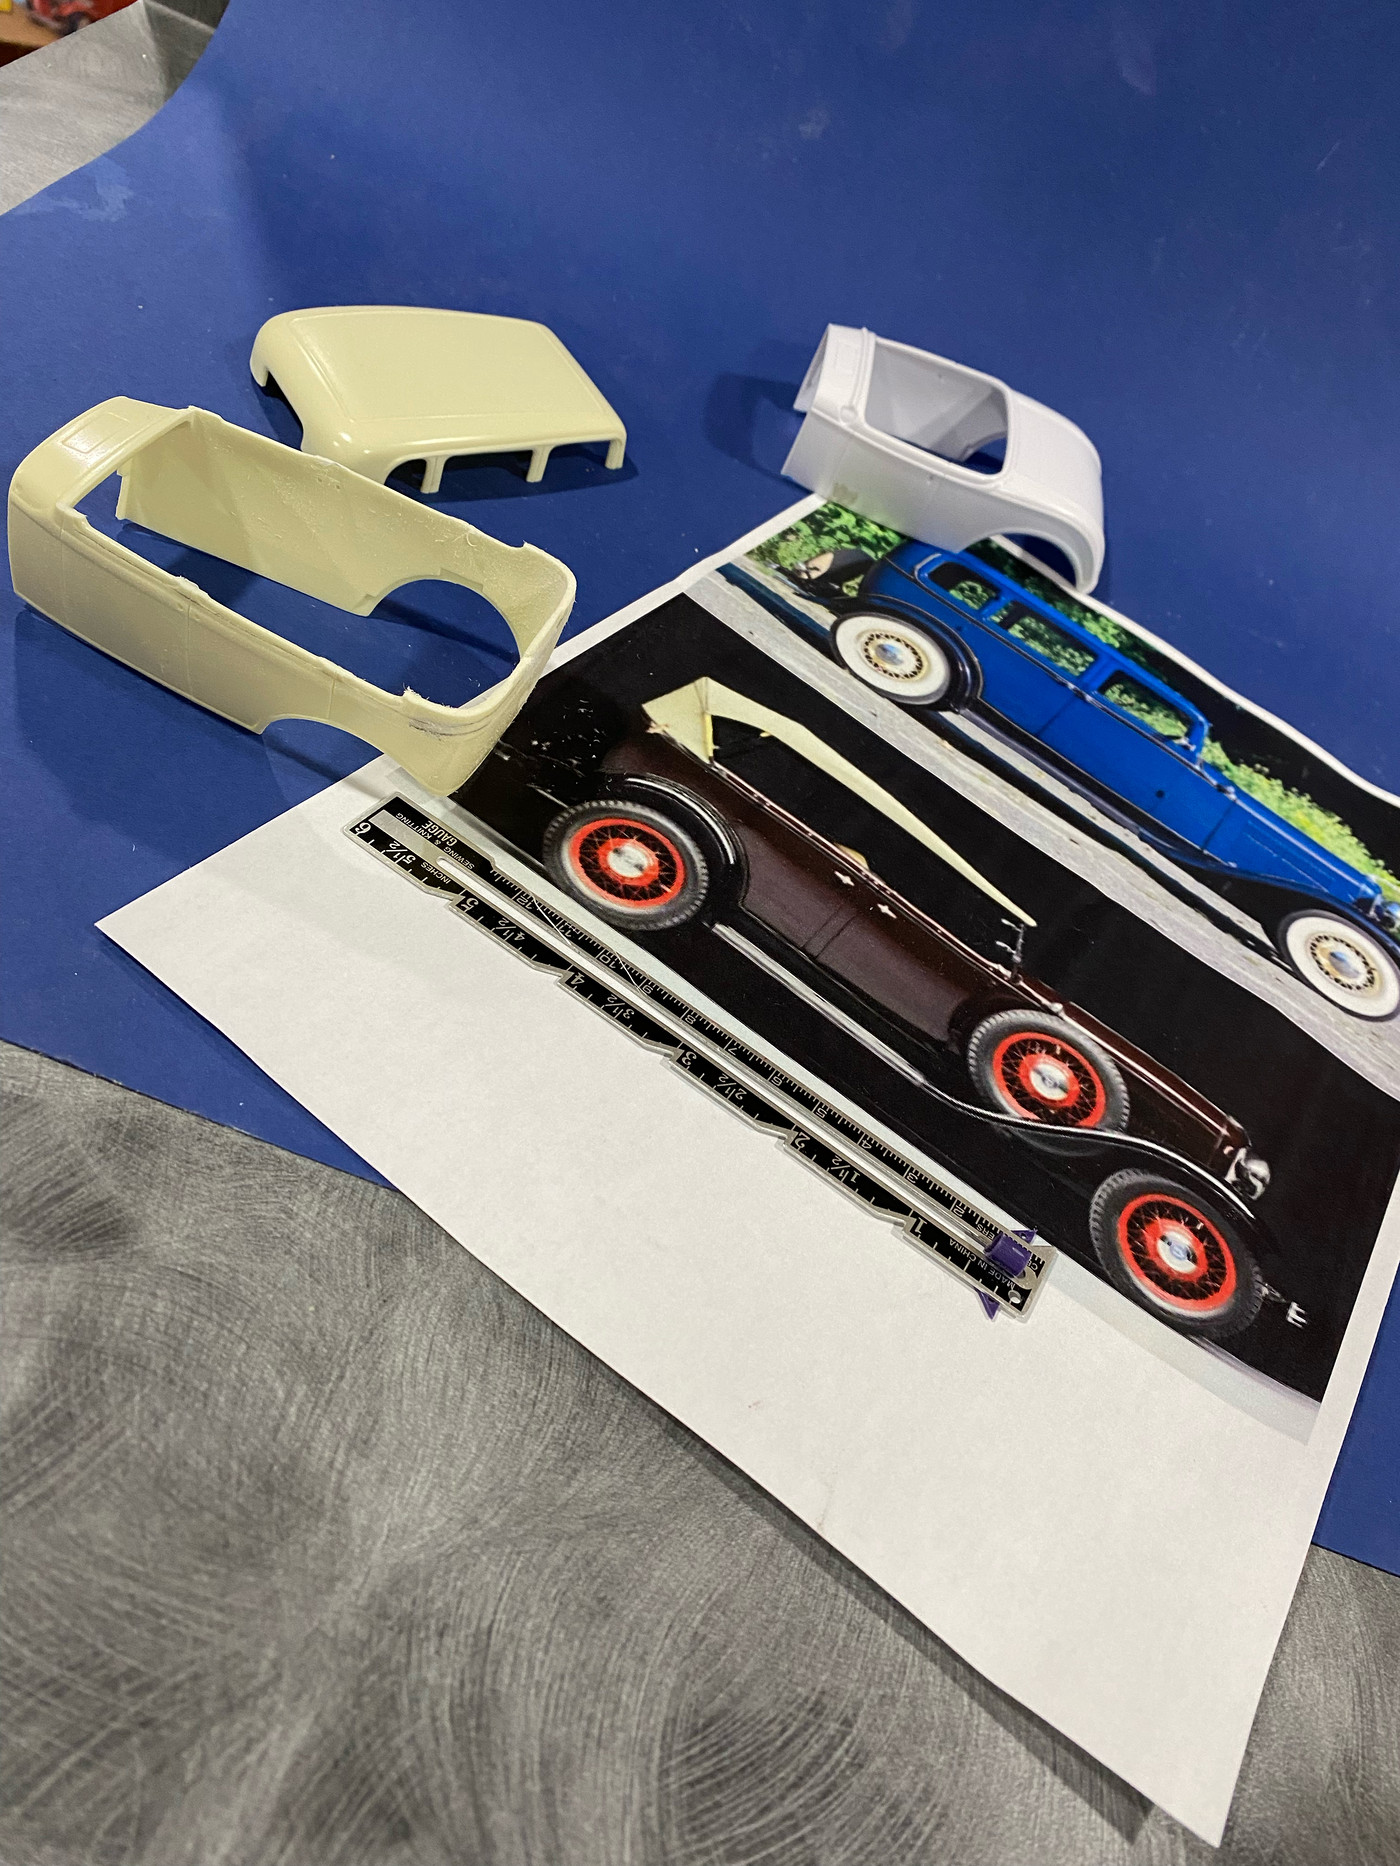 Fast forward a bit and here you can see the roadster cowl grafted onto the former Fordor body. At this point I have roughed in the upper body to the phaeton profile, and added back the thinner body trim which runs from the cowl all the way around the back to the other side. I have also filled in the old door handle holes 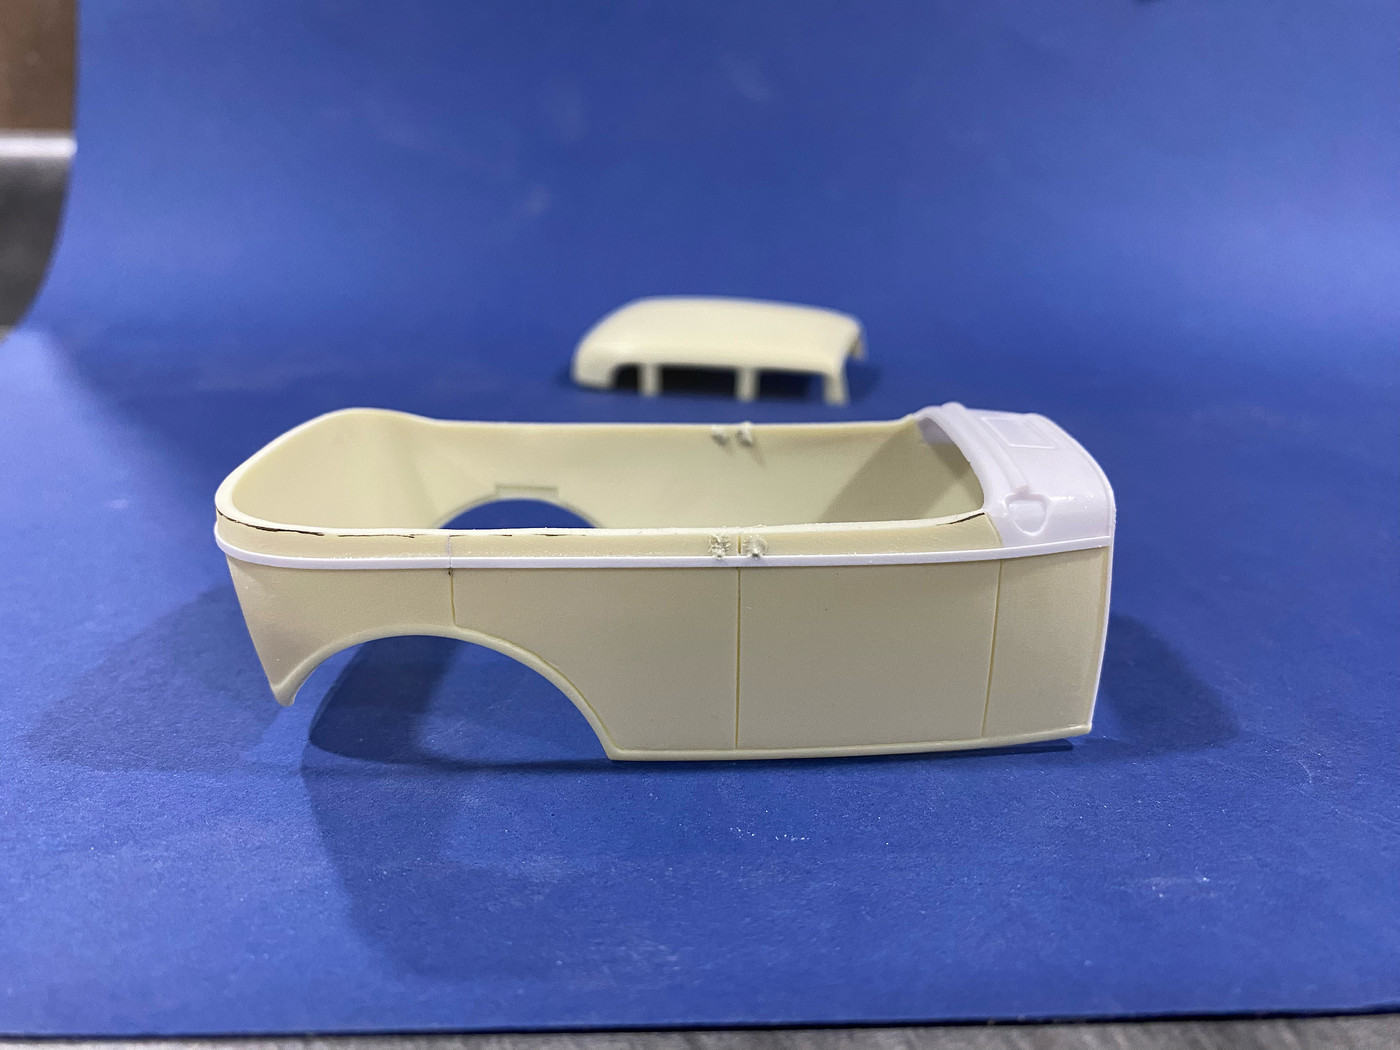 And here it is fitted to the fenders for the first time. 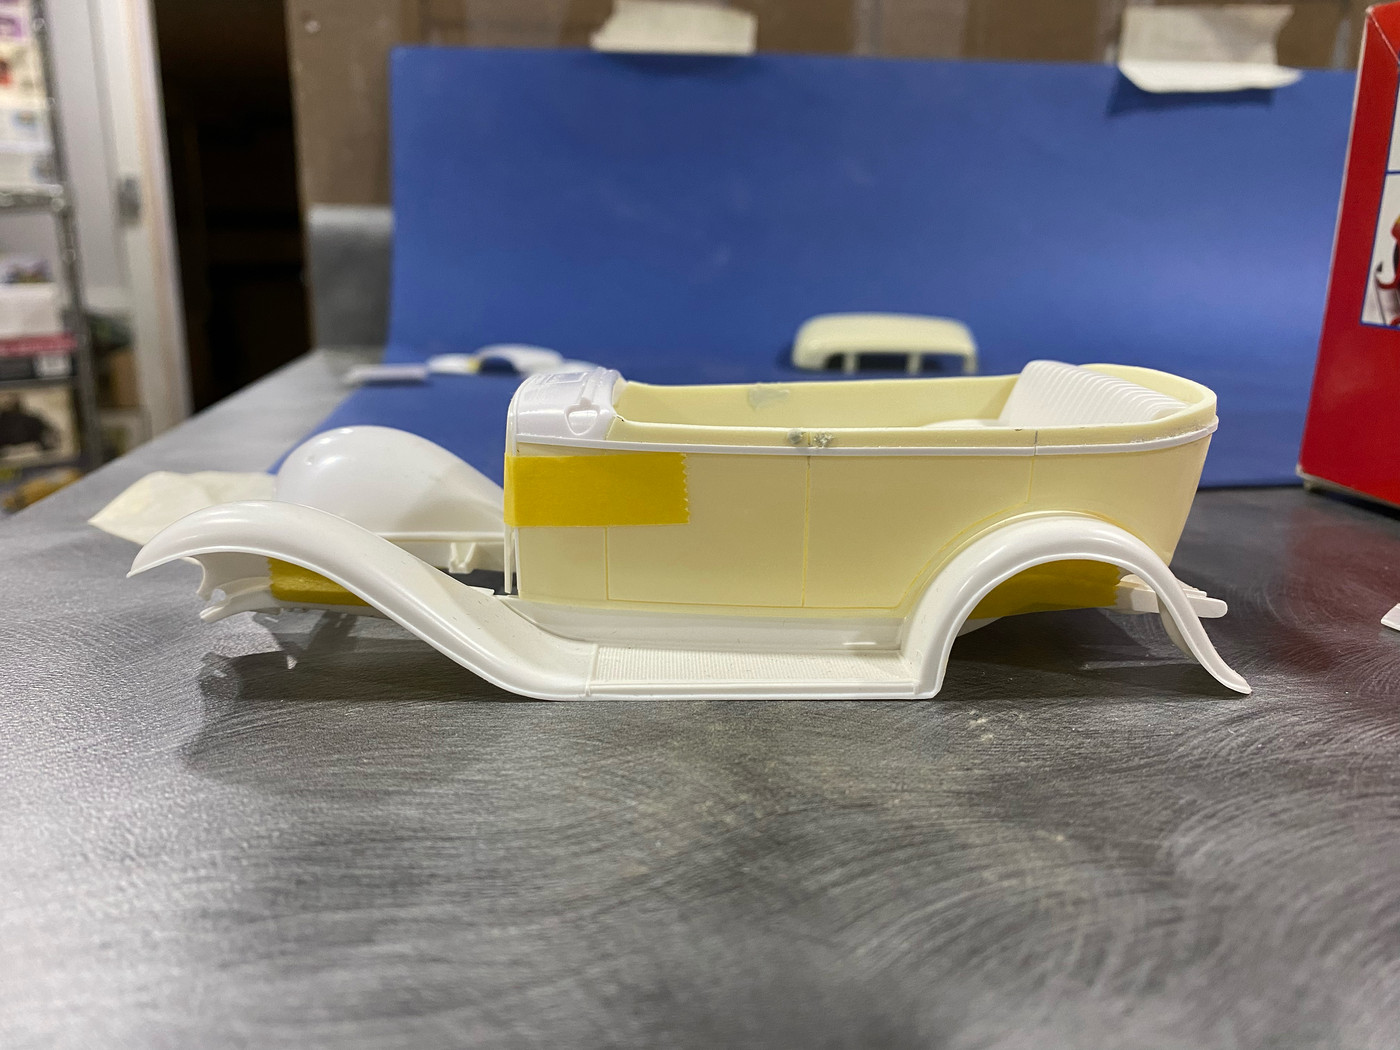 Please forgive my poor primer application. I apparently didn't shake it enough and it didn't like the cold. But I knew this was just the first coat, so I wasn't overly worried about it. I need to refine a couple things and do a final prime. But I am very happy with the results so far. 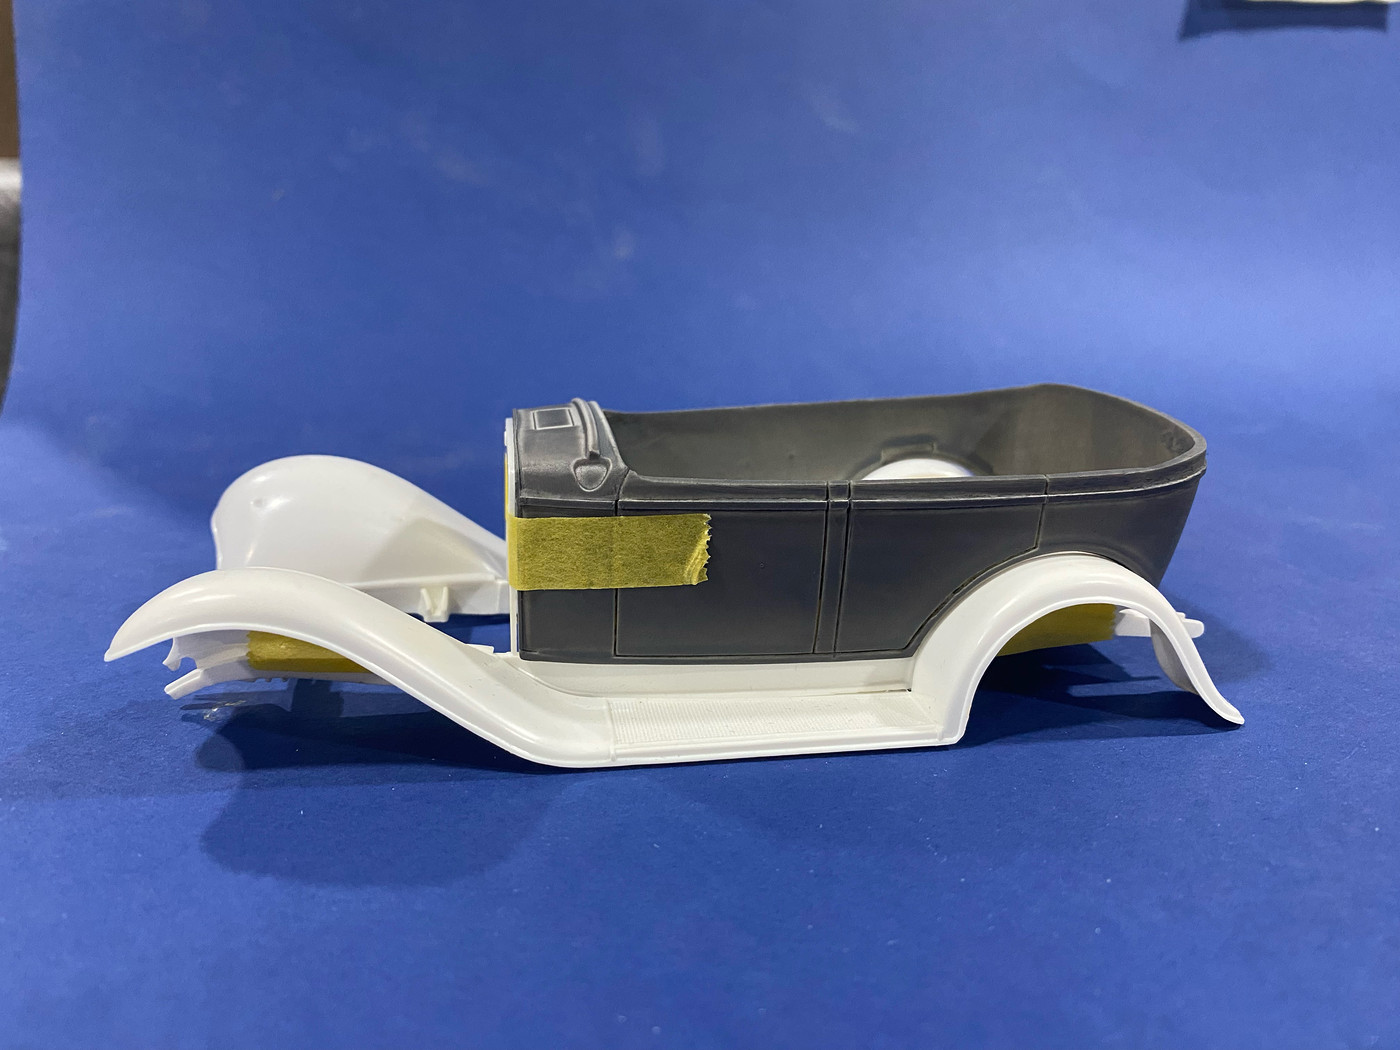 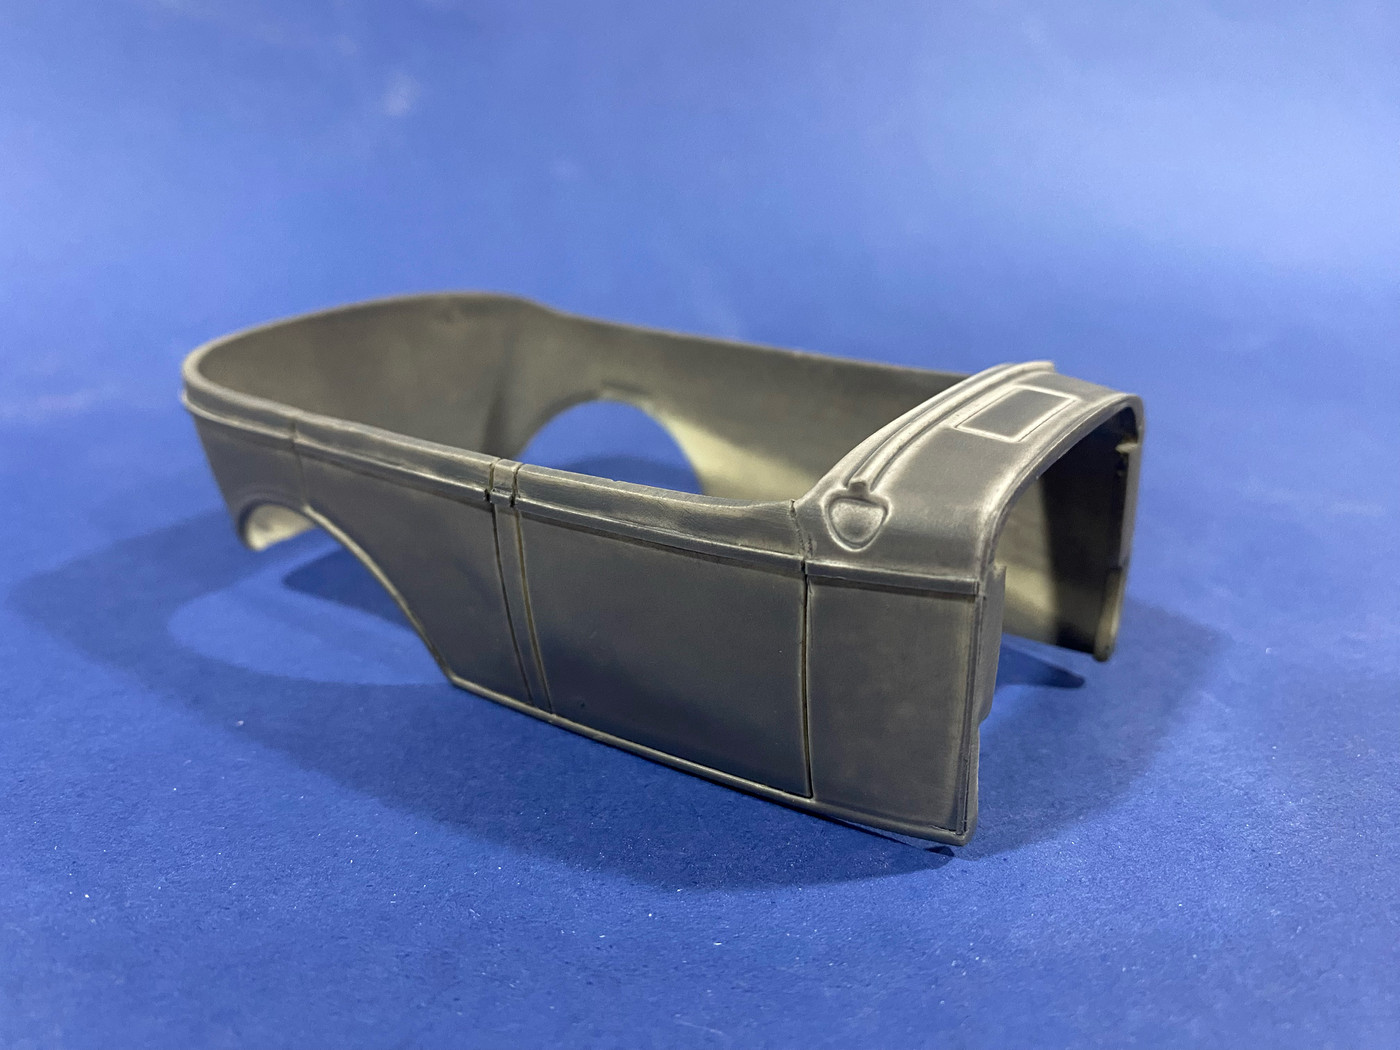  I have lots on the bench now, so it may be awhile before there are updates. But I was feeling pretty great about this so i wanted to share. |
|
|
|
Post by krassandbernie on Nov 14, 2022 10:29:32 GMT -5
I dig it! I replied through messenger with a couple thoughts/concerns I have; but I certainly do not think you ruined anything here! The only room for improvement I see is your choice of primer! LOL! Nothing beats Tamiya's grey sandable primer......when it's warm!
|
|
|
|
Post by Mr. Metallic on Nov 14, 2022 11:39:44 GMT -5
I dig it! I replied through messenger with a couple thoughts/concerns I have; but I certainly do not think you ruined anything here! The only room for improvement I see is your choice of primer! LOL! Nothing beats Tamiya's grey sandable primer......when it's warm! Haha yeah, it's Duplicolor, but I think it's mostly my fault. It's a new can and I definitely didn't shake it long enough. Plus, it was cold. I can't wait until I build my spray booth this winter! And I agree, Tamiya primer is the best. I always use it for the final coat of primer, and I will for sure on this one too. |
|
|
|
Post by krassandbernie on Nov 14, 2022 11:56:11 GMT -5
I dig it! I replied through messenger with a couple thoughts/concerns I have; but I certainly do not think you ruined anything here! The only room for improvement I see is your choice of primer! LOL! Nothing beats Tamiya's grey sandable primer......when it's warm! Haha yeah, it's Duplicolor, but I think it's mostly my fault. It's a new can and I definitely didn't shake it long enough. Plus, it was cold. I can't wait until I build my spray booth this winter! And I agree, Tamiya primer is the best. I always use it for the final coat of primer, and I will for sure on this one too. I quit using Duplicolor primer altogether. It gives you a crappy foundation from the start (texture-wise) and doesn't sand half as good as the Tamiya even if you warmed the can and shook it up thoroughly. That foundation still comes through a bit even if covered with Tamiya afterwards I've found (back when I was mastering tons of new hoods and trying to use up all of my Duplicolor primer). The Tamiya covers smoother with less build-up right from the start, which is what you want for master work (so you don't hide/soften detail); and what you want as a builder so you don't end up laying more paint down overall for the same reasons...."less is more"....from my experience that is. |
|
|
|
Post by Dave from Pleasanton on Nov 15, 2022 19:45:01 GMT -5
Looks good so far Craig. Are you using the AMT interior?
|
|
|
|
Post by Mr. Metallic on Nov 16, 2022 8:04:23 GMT -5
Looks good so far Craig. Are you using the AMT interior? No, the AMT body and interior are quite narrow compared to the revell, especially the back half. I'll be scratching up side panels. Working on the stock height up top right now since the body is mostly complete. |
|
|
|
Post by krassandbernie on Nov 16, 2022 20:28:17 GMT -5
I thought you grafted in the cowl panel from the Revell "Rat Roaster" deuce? The only windshield that fits that is the chopped one that comes in the kit........so isn't that going to pose a slight problem with a stock uptop fitting? Or am I missing something.....which is quite possible! LOL!
|
|
|
|
Post by Dennis on Nov 17, 2022 1:24:36 GMT -5
The title definitely made me laugh. You’re free to do whatever you want with the body, you paid for it! LOL!
In all seriousness, I’m impressed! That’s a great conversion to a Phaeton. I wouldn’t have thought to do it.
That full fender Phaeton from GNRS belongs to my friend Sunny. He’s only 28 years old, believe it or not. He found it as an abandoned restoration project and had our other friends, the Veazies put it together as mild hot rod with a 265” small block. It’s an absolutely bitchin’ car!
|
|
|
|
Post by Mr. Metallic on Nov 17, 2022 7:45:37 GMT -5
The title definitely made me laugh. You’re free to do whatever you want with the body, you paid for it! LOL! In all seriousness, I’m impressed! That’s a great conversion to a Phaeton. I wouldn’t have thought to do it. That full fender Phaeton from GNRS belongs to my friend Sunny. He’s only 28 years old, believe it or not. He found it as an abandoned restoration project and had our other friends, the Veazies put it together as mild hot rod with a 265” small block. It’s an absolutely bitchin’ car! The title is very tongue-in-cheek. I figured you guys would be fine with it. That car is gorgeous. My wife and I drooled over it for about 15 minutes at the GNRS. It was one of my top 3 favorite cars at the show. I have decided that IF I am ever in the position to own a 32, if I want to drive it, it will have to be a phaeton. I'm too tall for chopped cars, and the roadster appears to be too tight for my long legs. But there are plenty of ways to make a phaeton bitchin, as evidenced by the ones picture plus countless other examples. (not that I'll ever have the means to own a 32) |
|
|
|
Post by Mr. Metallic on Nov 21, 2022 9:03:46 GMT -5
Ed's enthusiasm for the project has lit a fire under my rear. So things are cruising right along. I haven't done much to the body, been working away on the stock height top, and the stock windshield. The rear of the Revell body is quite a bit wider than the AMT phaeton, so of course simply using the AMT piece for the uptop wasn't going to work. I cut apart the rounded corner portions after 2 aborted attempts to try to scratch build my own. I cut channels along the bottom edge so it sat on the body protoypically like the 1:1. Then I cut the bottom portion off a Monogram 30 phaeton top and glued that to the corner sections. Then I cut the center section from a parts box uptop and grafted it in to finish the assembly. Then came several rounds of filler/sand/repeat until everything is good. Ha, looks like I didn't take any pics of the uptop. Please stay tuned lol Anyway, for those of you unfamiliar with the new revell roadster body (former Rat Roaster tool) when they did the new tooling they made the body about 1 scale inch wider than the roadster they tooled in 96. Couple that with the bigger base at the bottom of the stanchion and that means you can't simply take the old Revell windshield and swap it onto this cowl for a stock height windshield. That means...surgery First I cut away the bottom of the stanchion from a chopped windshield. Then I cut away the upper stanchion from a stock windshield. Then to gain a little width I cut apart the frame from another stock windshield (good thing I have a bunch of extra parts from these Revell kits over the years) and spliced that in between my new stanchions. Check the fit to the cowl, this makes it all worth it. Just enough tolerance for paint. 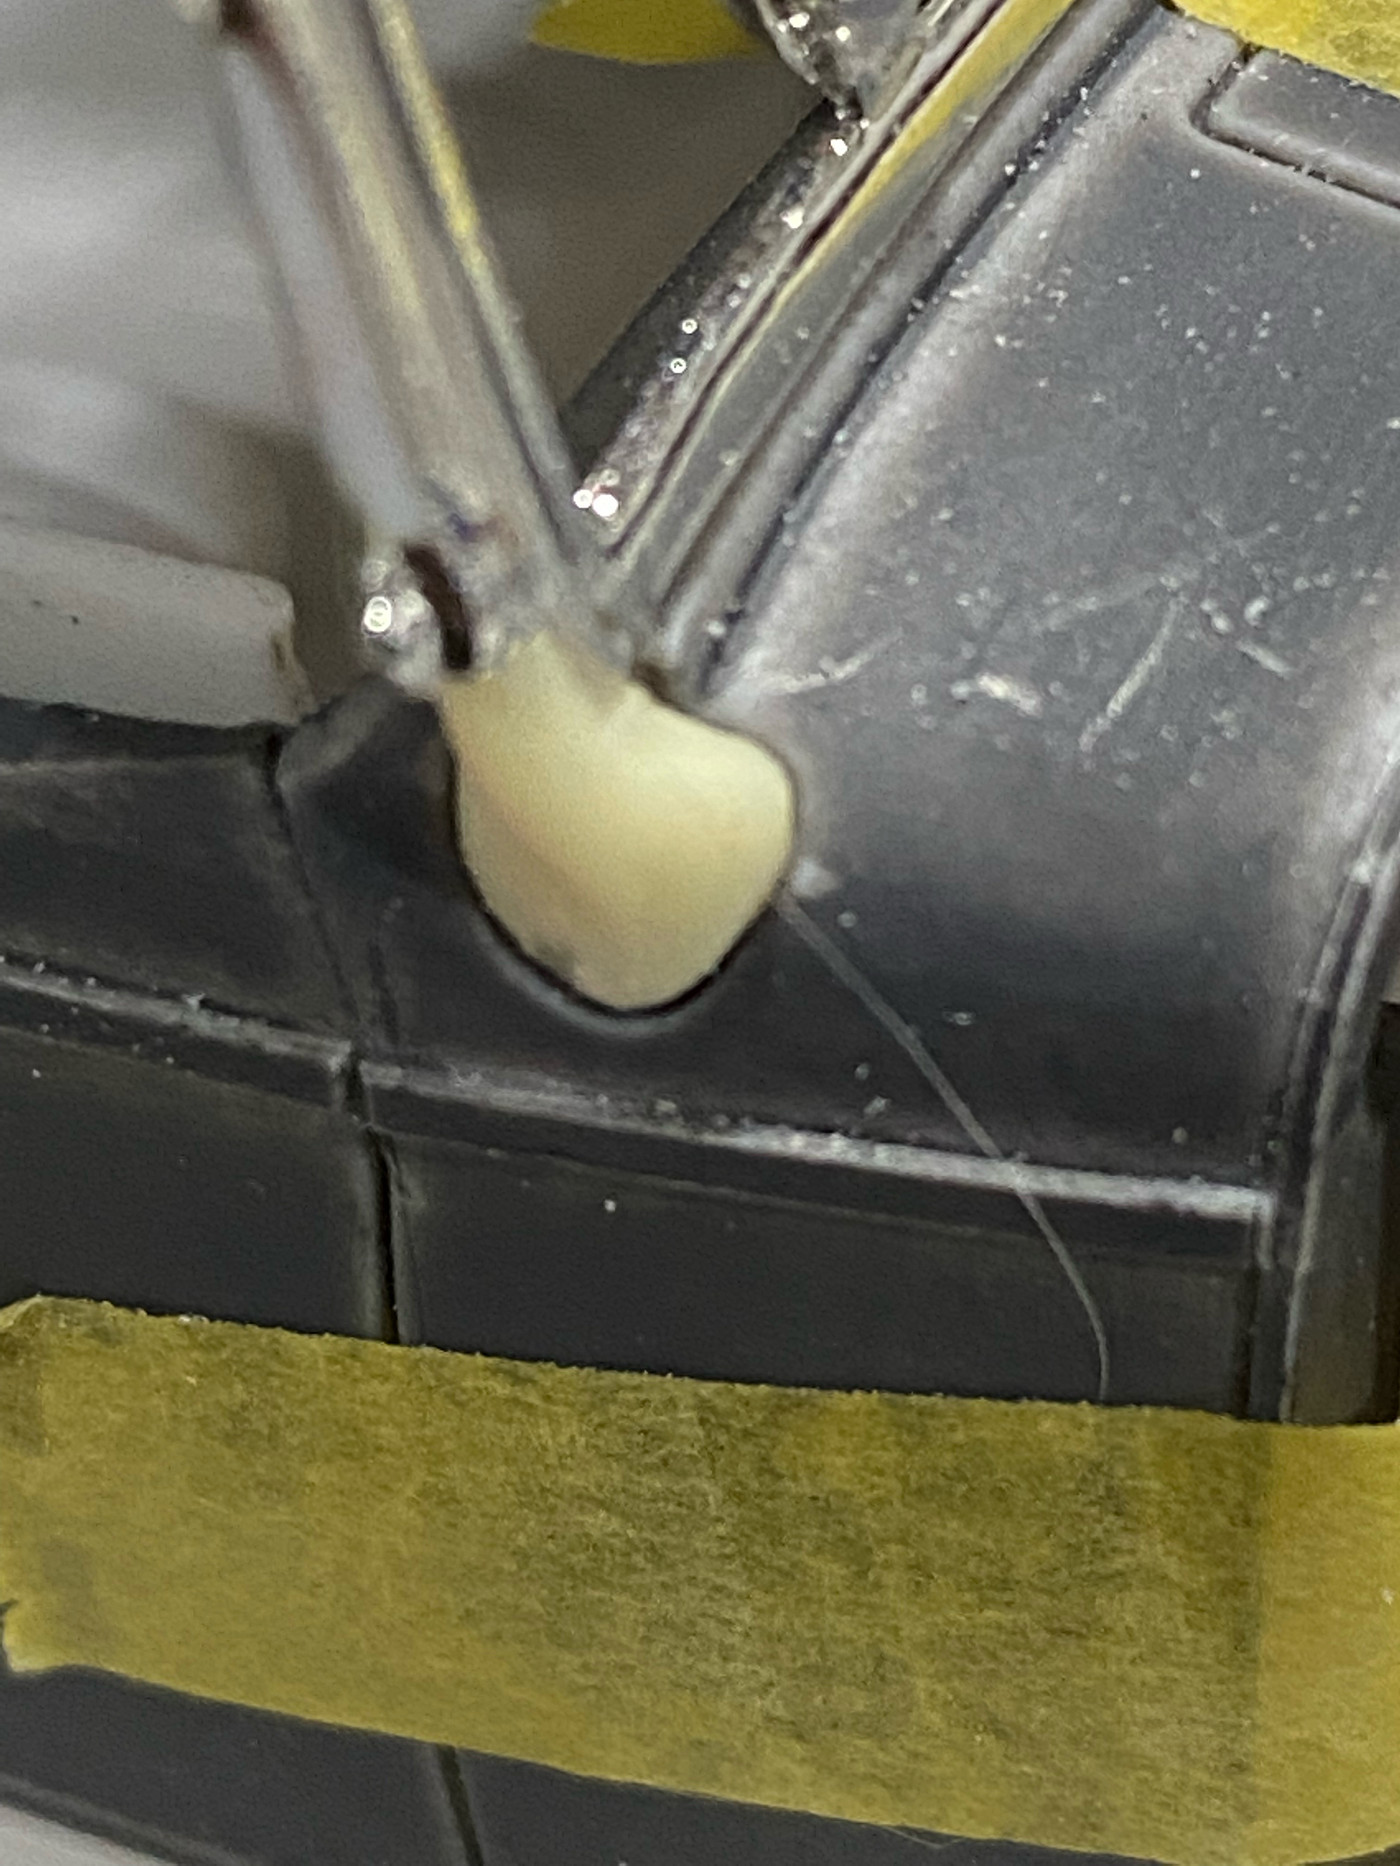 Been messing with the interior too. Got the side panels fitted to the body pretty well. More mods to come. 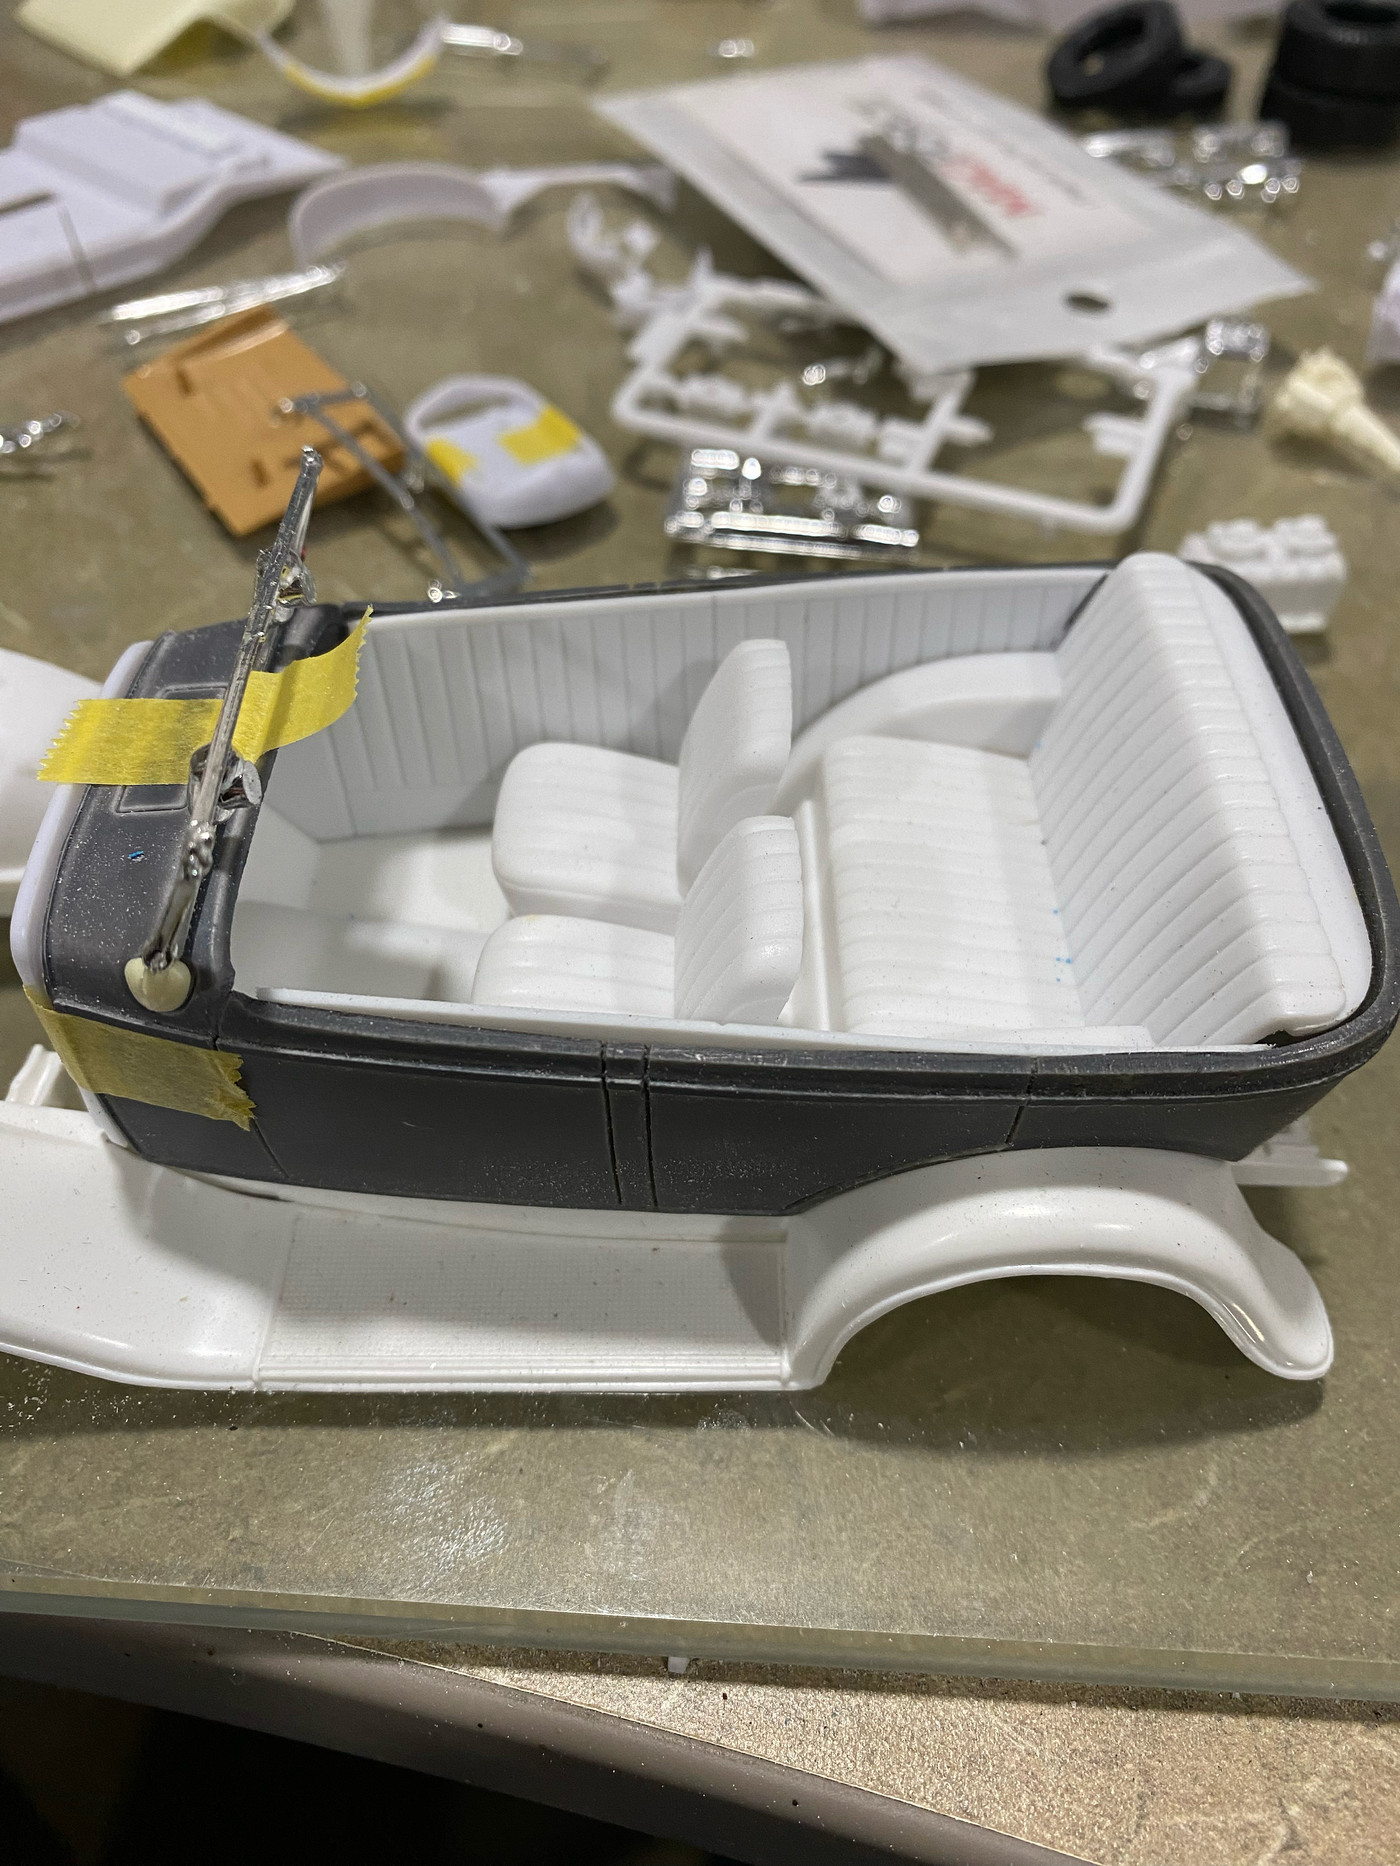 |
|
|
|
Post by Dave from Pleasanton on Nov 24, 2022 20:10:39 GMT -5
Really nice work on the windshield Craig. Interior is looking really good. Is it from the Revell 32 Tudor? IMHO the front seats are too far back unless a gorilla is going to drive it :-)
|
|
|
|
Post by skip on Nov 25, 2022 2:02:45 GMT -5
Really nice work on the windshield Craig. Interior is looking really good. Is it from the Revell 32 Tudor? IMHO the front seats are too far back unless a gorilla is going to drive it :-) I'm in agreement with both of Dave's comments. The top-back of the seat should be at the midpoint of the center post between front and back doors at full extension. On both the phaeton and four-door body styles I've seen, 99% of the seating has the back of the seat back-support no farther back than the middle of the center pillar. Even the top phaeton in the pictures looks like the seat is back farther than the stock position, reason being that the seat back would slightly impede the rear seat occupant's entry into the car. (Just my opinion though.) |
|
|
|
Post by krassandbernie on Nov 27, 2022 11:26:36 GMT -5
Nice job on the windshield! I can't wait to see the uptop now!
|
|
|
|
Post by Mr. Metallic on Nov 28, 2022 7:07:30 GMT -5
Thanks guys, but you need to realize that is where the molded in seat positions for the Revell Tudor interior puts the seats. I realize that the seating position between a Tudor and a Fordor/phaeton in 1:1 are probably different. But in this pic I'm just using the supplied molded in seating position. I'll leave it up to Ed whether he wants me to perform further mods to eliminate the provided seat risers or just leave it up to the end user.
|
|
|
|
Post by krassandbernie on Nov 28, 2022 22:20:58 GMT -5
Here's a question I did not ask you earlier.......if you were to move the front seats forward to where they should be is there enough room to do so or does the trans tunnel interfere or the interior get too narrow to move them far enough ahead?
Perhaps we should come back to the notion of offering a front bench seat with the rest of the interior parts.......it would remedy all of the possible issues I mentioned above...i.e. hide the seat risers and fit over the trans tunnel without dealing with the interference issues the bucket seats contend with. Plus, it's almost cooler looking........and expected to be there to begin with I think.
|
|