|
|
Post by ckourouklis on Jan 17, 2023 14:00:43 GMT -5
Ah, Revell decals... 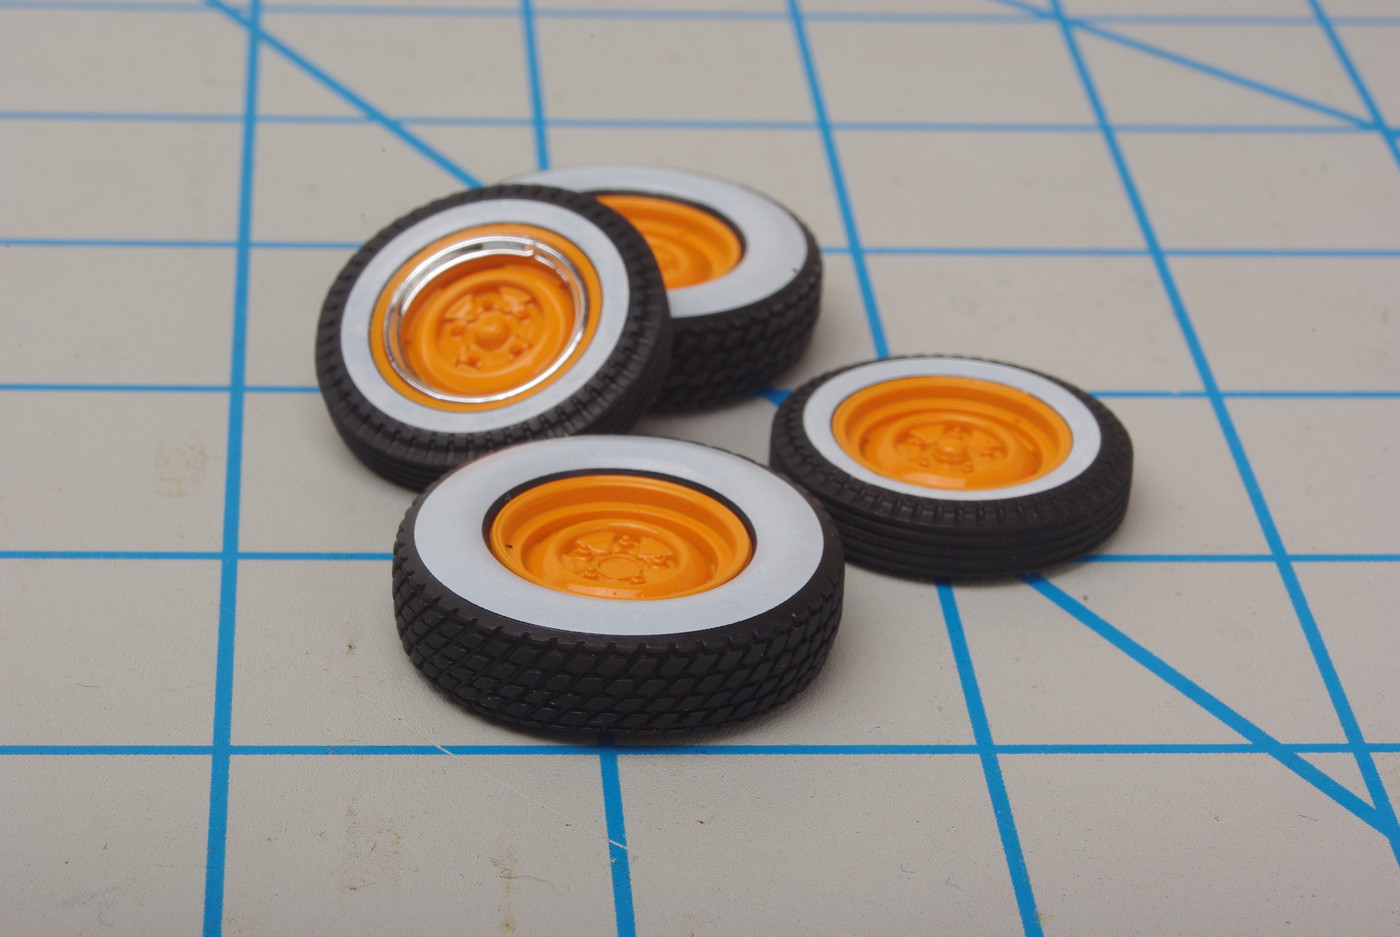 Love 'em, love 'em LOVE. THEM. How good are they?
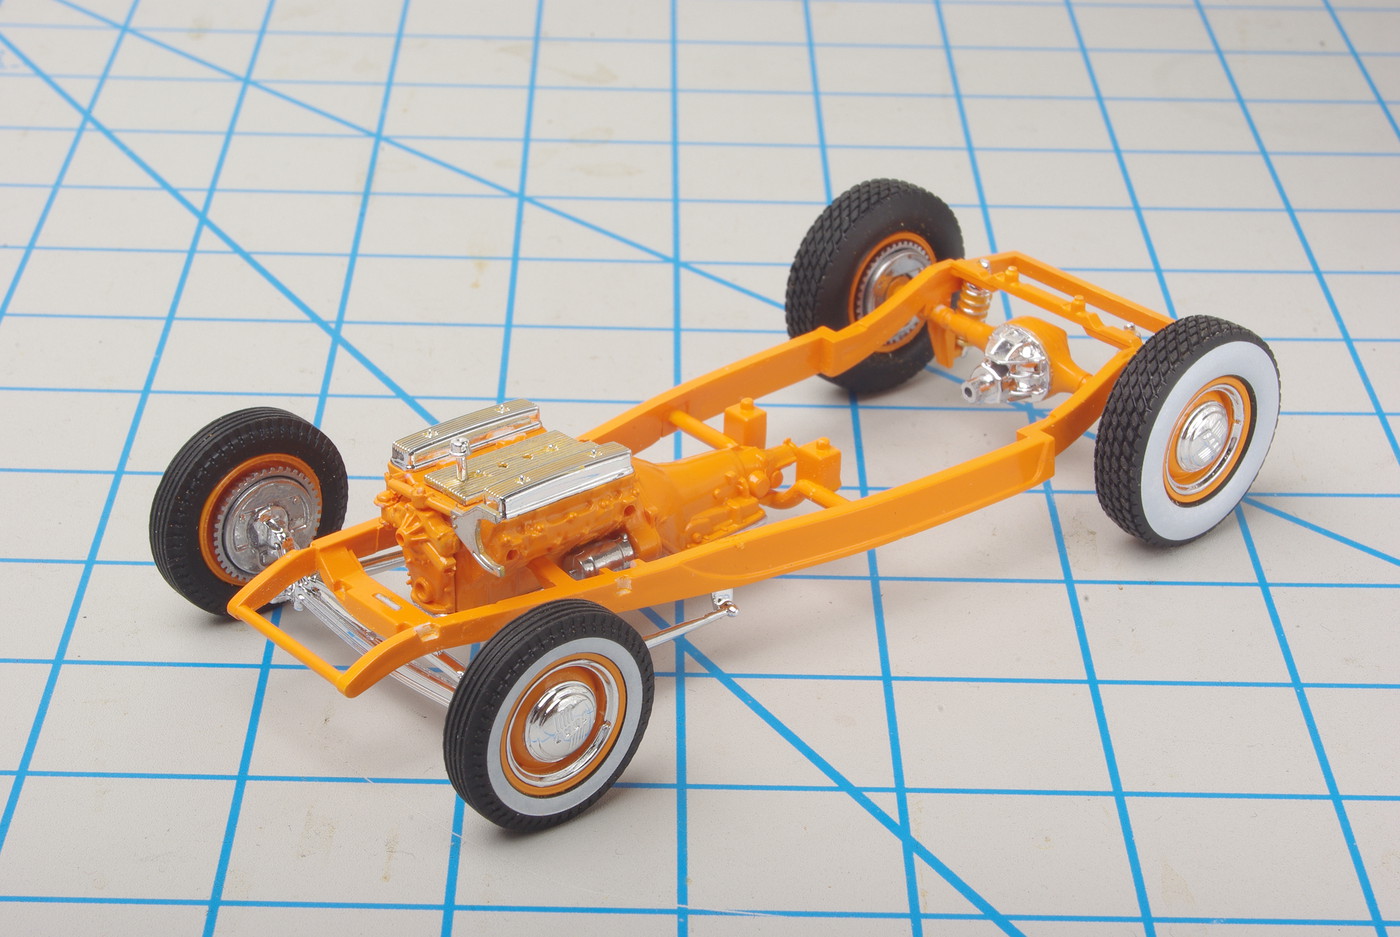
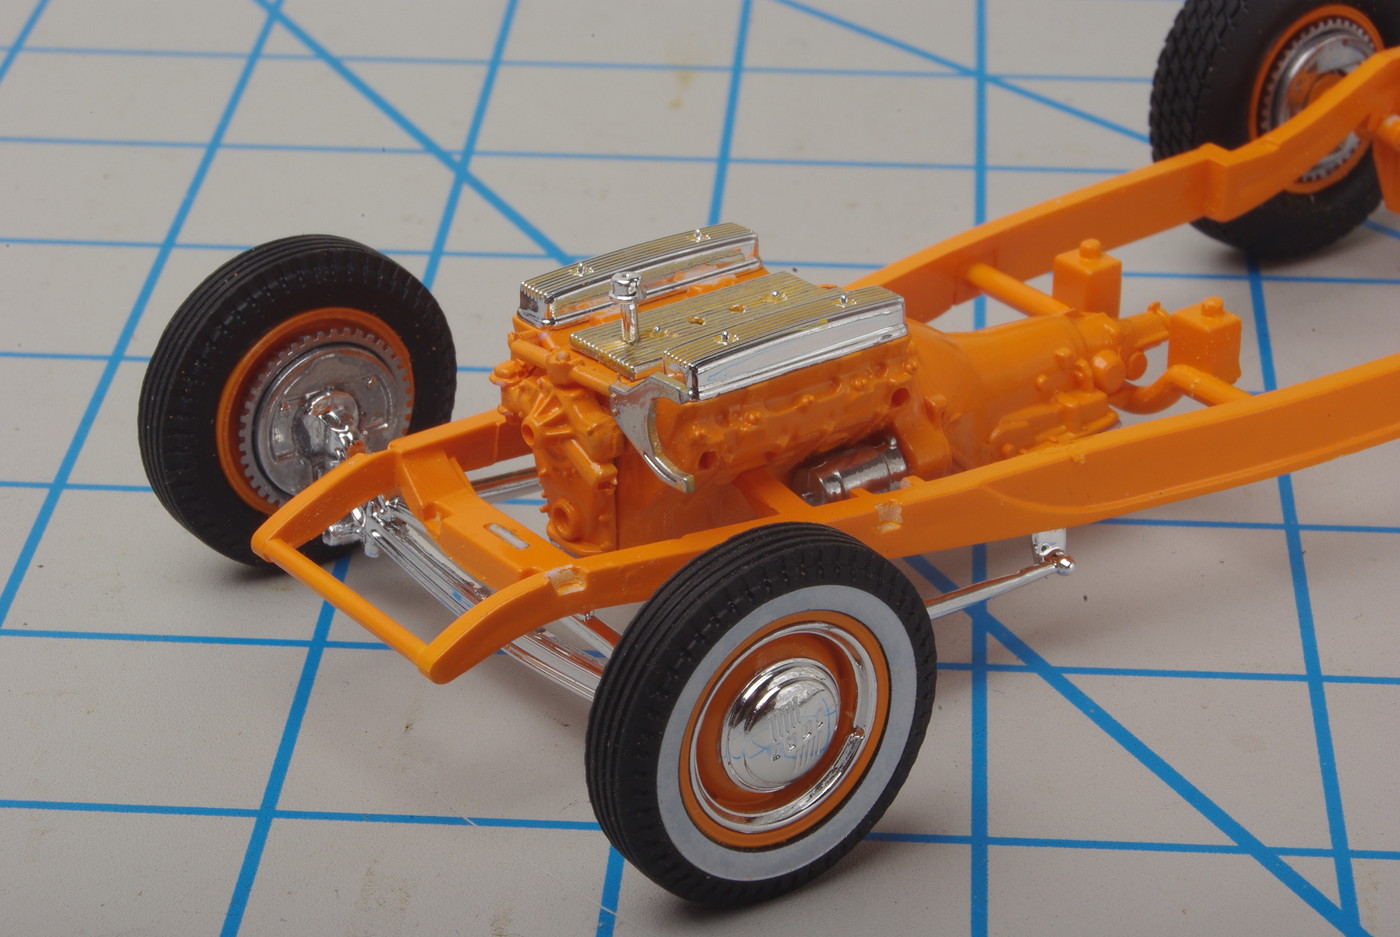
Consider the wheel directly in front. Ever since Revell/Monogram ditched that obnoxious worse-than-cellophane carrier some 22 years ago, R/M decals have been utterly transformed. Even so, I've been unsure how they'd conform to the complex curvatures of a tire sidewall, so normally I just use a compass-cut card stock mask and some airbrushed white interior dye. But this project was supposed to help break a year-long slump on another one, so I soaked and slapped these whitewalls on, starting with one of the rears - that very wheel directly in front of this shot.
Not too promising at the git-go, so I slopped some Tamiya Mark Fit on it and started centering the decal. Did this on assembled wheels, you see, 'cause I didn't want to risk stretching and mangling a decaled tire over a one-piece rim, and just as I was starting to stretch and center the decal...
I realized it was on the wrong side of the wheel.
That sucker came back off the tire in the water cup, and then, about as mightily as you'd expect, fought the tweezing of it back out of the water - till it occurred to me to get the backing paper back under it for the transfer. And so, not even sure if I had it sticky-side down and with solvent already working on it, I slid it onto the correct side and teased it into place. Switched to Micro-Sol and just brushed and waited, brushed and waited, brushed and waited, till all wrinkles and seams disappeared, now indistinguishable from tampo or paint. Micro-Sol did the job on its own for the other three.
'Member that Scale Auto Revell Deuce article (mighta been Doug Whyte?) showing you the relief cuts you had to make in a fender flame decal with that nasty old Monogram carrier? Right around Y2K, decals went from the worst aspect of a Monogram kit to the best of a Revell/Monogram kit, as they are in this one. But let's back up a bit... |
|
|
|
Post by ckourouklis on Jan 17, 2023 14:10:25 GMT -5
After all these years, do I FINALLY have something TRaKable?
Aim to find out, and if this doesn't quite cut it, I'll delete it or have no hard feelings if it's done for me. Revell seems to have forked over appropriate stuff in one box - key question might be in how I finish it.
'Round about the end of 2022, Revell released that more tastefully rendered version of the Rat Roaster, sparking some discussion of it in another forum. "Can ANYONE tell us what it's like to build?" comes the inevitable query. Tim Boyd tossed up his recent review build and a brief note or two, and just for grins I put up my review Roaster to offer a contrast, and some commentary on how trouble-free it was to build. By this time, I've been stalled on another project for a year. And I suddenly had a hankering to do a hot rod. Love to do that new '32, but none of my pushers have brought it in. But what did I have on hand? Why, one of these '30 Ford retools. Hmm. I tend to move faster through rods, 'cause you can gang-paint a lot more parts body-color than you do factory stock and on top of that, there's less surface area on these more compact body shells to collect airborne schmutz. I understand it's an entirely different proposition when you're wrangling parts that were never meant to get along with one another, but if it's all getting handed to you under one box lid, that might be just the ticket to grease the assembly line. Had a holiday week coming up. How much of one of these could I get done?
SO,
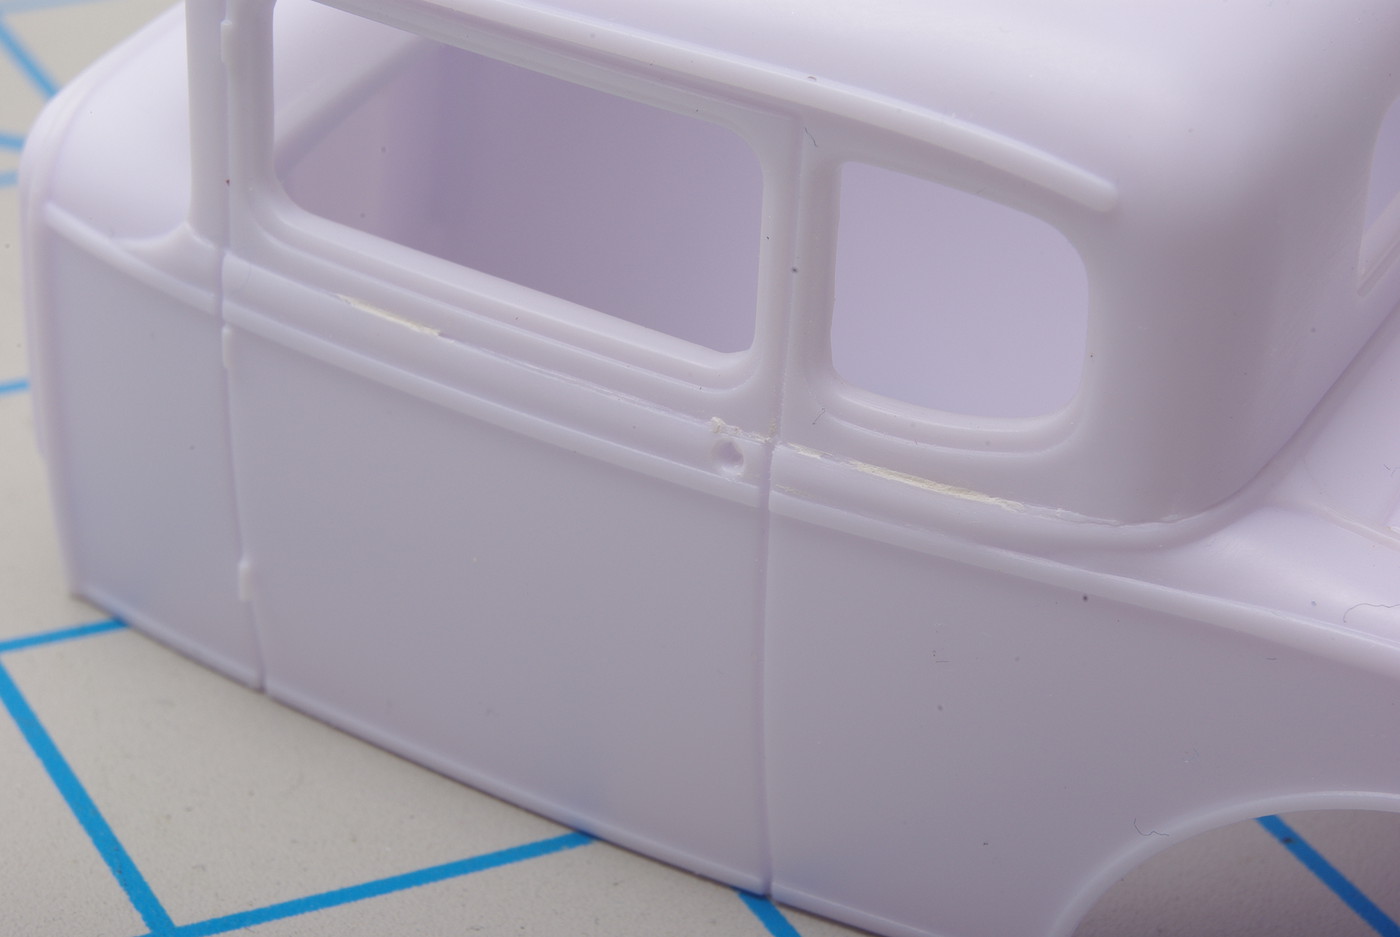
the roof and the body need to come together first, for sure. The fit is generally good, but the alignment tabs and the voids for them inside can open up the seam a bit, particularly on the driver's side. A smearing, sanding, and re-smearing of a little Vallejo putty from the bottle for that -
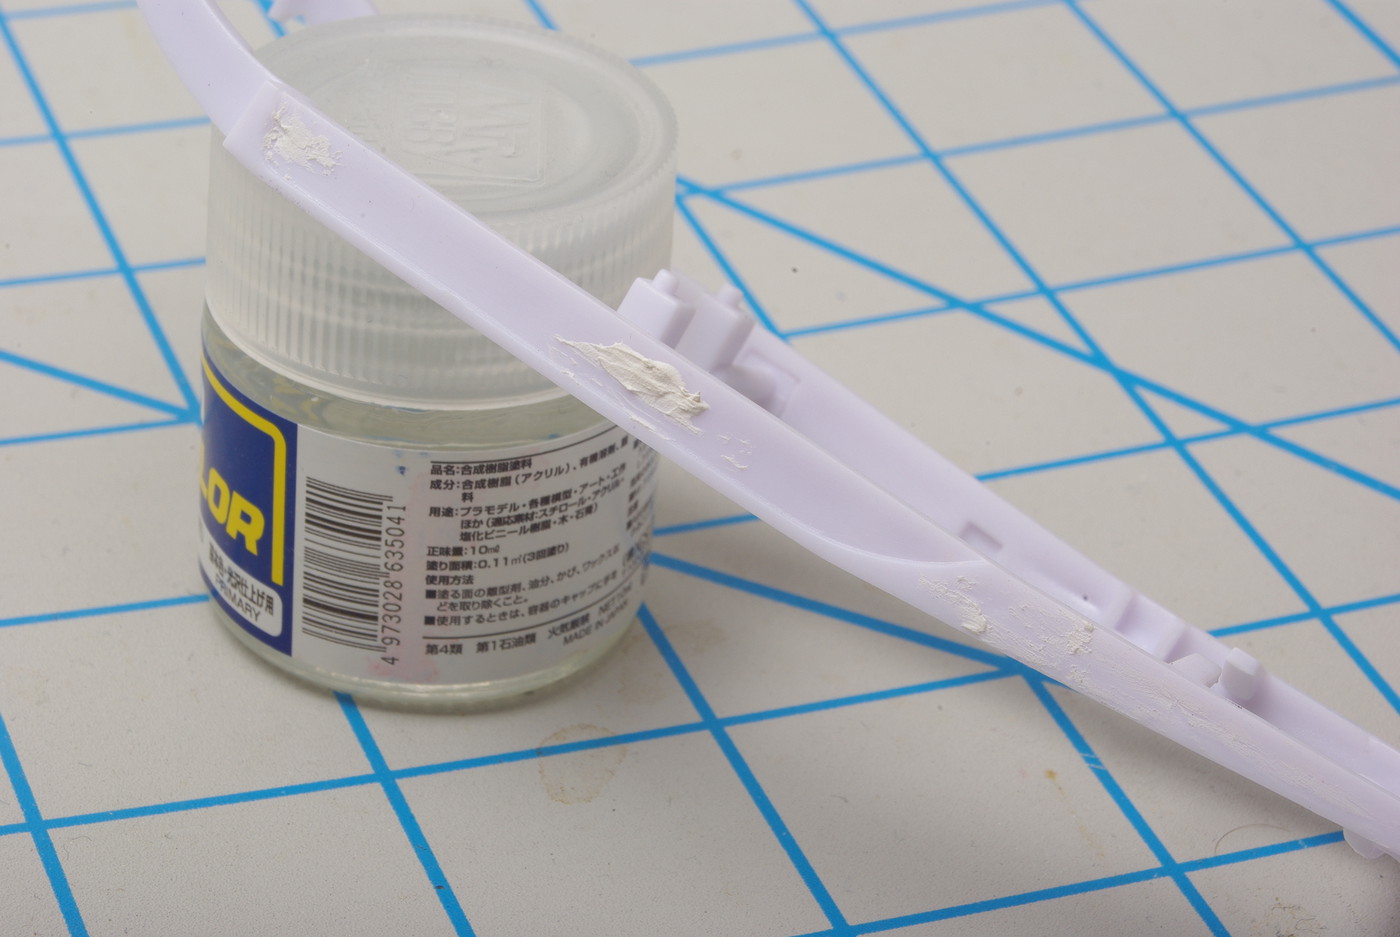
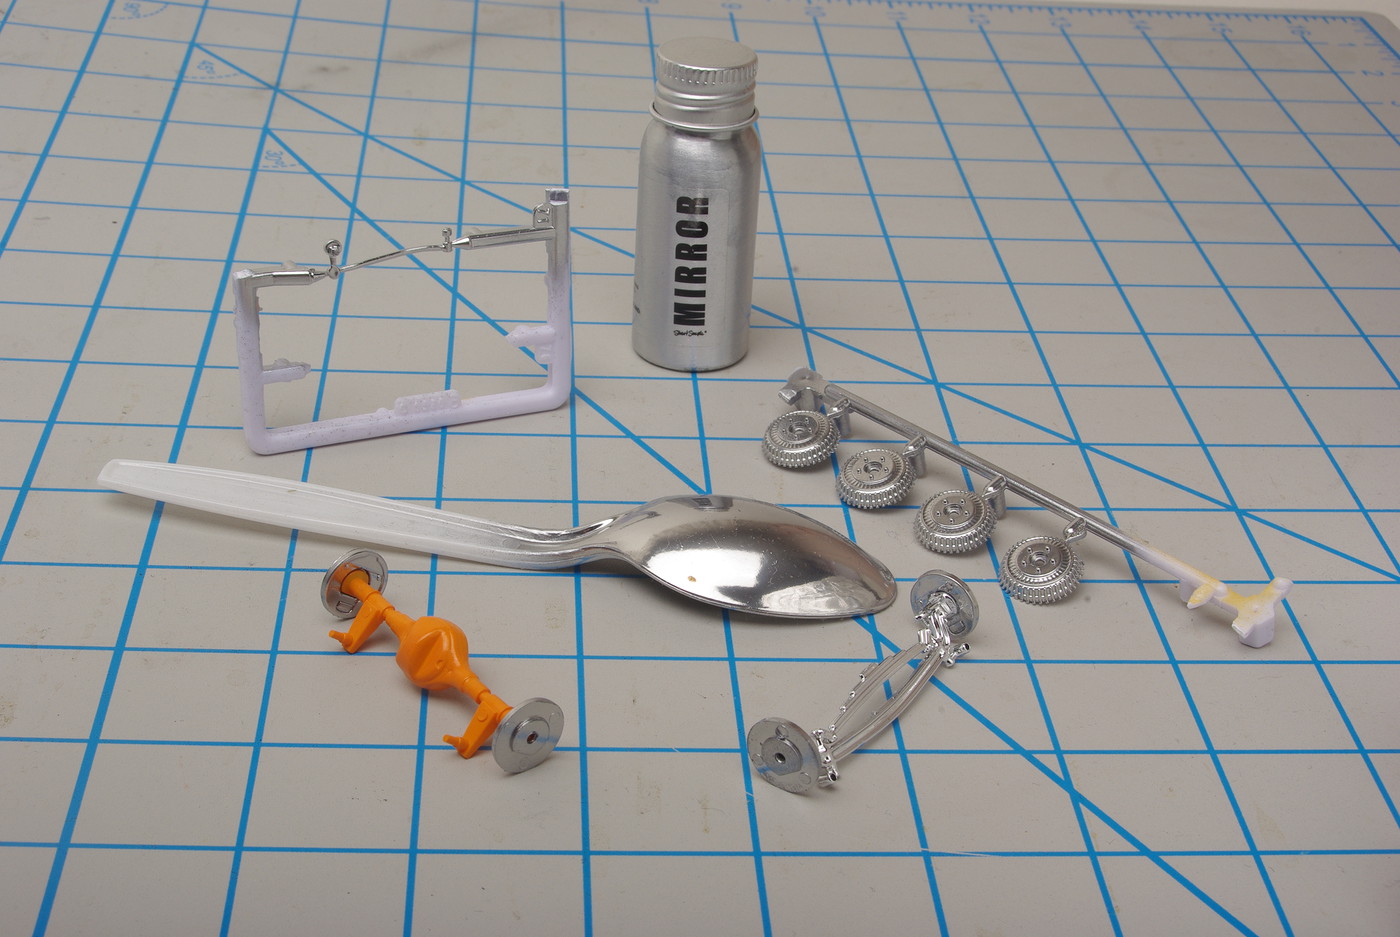
and maybe some more aggressive globbing for some of the sink marks on the outside of the frame, knocked down, re-globbed and knocked down again, then a little Mr Surfacer white to smooth it all out. One other thing: Witness these, shiny and chrome.
Being a little underwhelmed by Stuart Semple's Mirror paint at first, I decided to come back around for another little try.
We've all been waiting for a near-as-dammit chrome paint that can tolerate some handling, and well... we're still waiting.
Although if you want something that doesn't blow off its black substrate in a sneeze like Alclad chrome, or something that hazes over with ANY sort of handling as does Molotow ink, the Semple paint is just a bit more robust, behaving like your classic oil-based enamel that refuses to cure. It even takes a drop-wise addition of lacquer thinner to airbrush a little more smoothly. So for my money, it's the closest so far. Not that Revell doesn't rain chrome parts all over you like a plating plant explosion, but this kit has prodded in me a little extra greed for shiny objects.
More to come, forum willing. EDIT: and yeah, only now that I have it up does the problem finally hit me: I'm doing this mostly oob - including that Ford nine and the coils instead of a buggy spring and a quick-change. Does that break the deal? If so, I'll dust this and know exactly what to do with that '32.
|
|
|
|
Post by Mr. Metallic on Jan 18, 2023 7:21:47 GMT -5
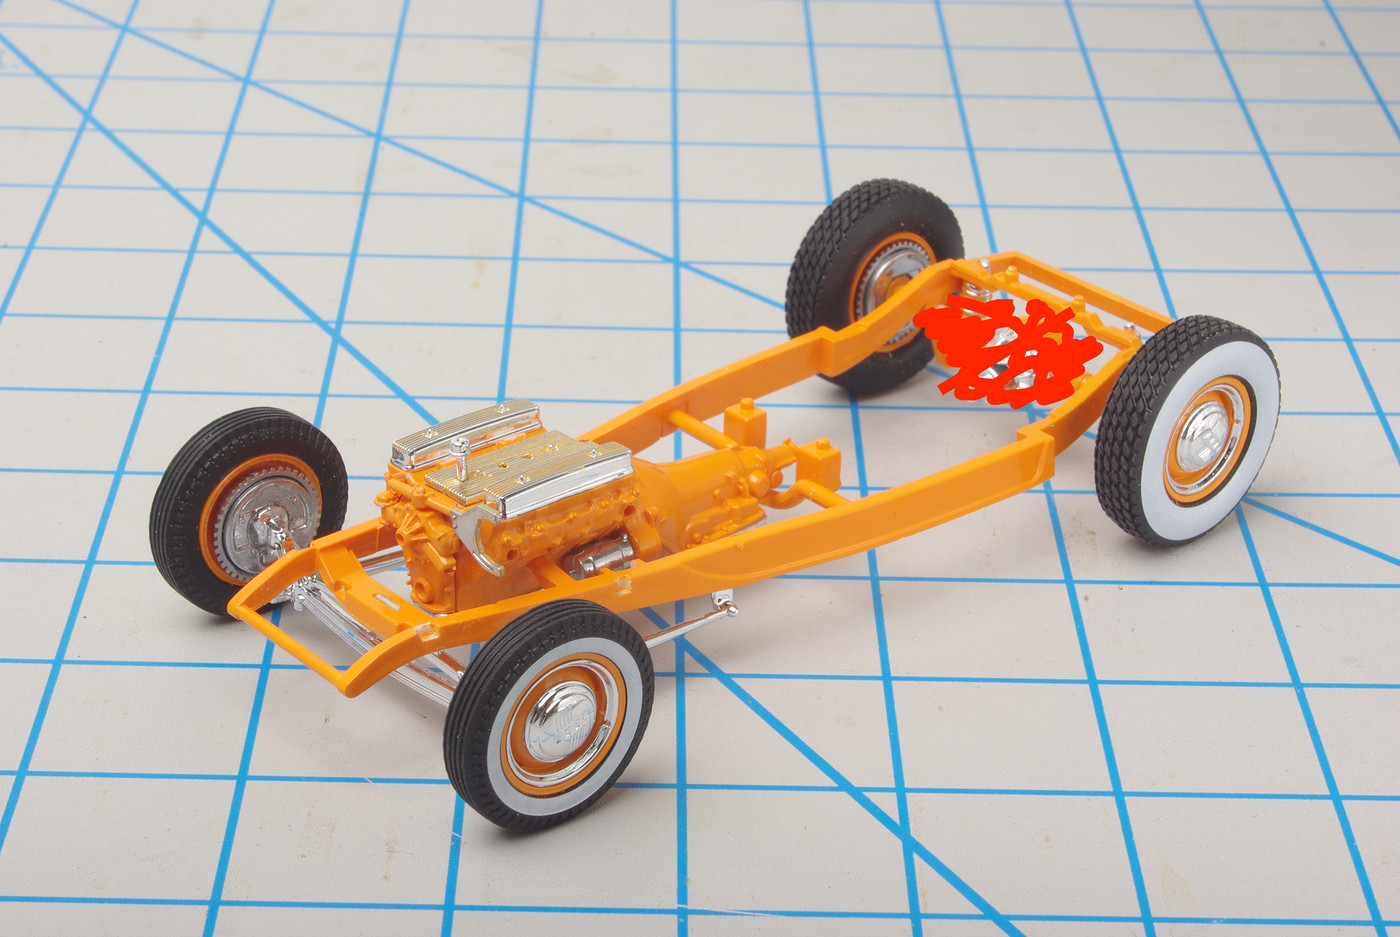
Great to see you here Chuck. You are ok with the kit supplied rear suspension, just don't post any pics of it.  Call it willful ignorance? We all know that's what the kit comes with, but we can pretend it's not there if you don't post pics of it. Looking forward to following along on your build. Your gold 32 5 window from awhile ago in MCM is one of my favorite magazine based hot rod builds. |
|
|
|
Post by Bernard Kron on Jan 18, 2023 14:30:25 GMT -5
Great to see you here Chuck. You are ok with the kit supplied rear suspension, just don't post any pics of it.  Call it willful ignorance... This long-standing convention has its origins in the Revell Deuce rear suspension, and is shared by many other details in various kits, which, if we couldn't employ this workaround, would condemn us all to endless backdating and discussions about how "significant" a particular detail is to being TRaKable. I mean, ask yourself this: how many of us are in the habit of backdating the transmission attached to the "classic" motor (viz. Nailhead, Early Olds, etc.) to be "period correct"? Welcome Chuck! Nice stuff so far, and your comments on the decals are interesting. Something I had not generally considered. Although the backing paper trick has saved my bacon more than once, LOL! |
|
|
|
Post by ckourouklis on Jan 18, 2023 17:07:33 GMT -5
Always nice to hear from you, Bernard, and thank you both very much. Alright, I'll just lope along here unless the tomatoes start flyin'...
Craig, I don't think that gold 5-window was mine - I've been strictly Kalmbach for published stuff, and the closest finished thing I've got is that rude little AMT rat in my profile pic.
Funny you should mention it, though, 'cause Street Rodder has documented a channeled '30 5-window called "Champagne Taste", and it so happens I picked up one of the last cans of Testors Inca Gold lacquer. It nearly nudged the 50/50 bar here, and it may follow.
|
|
|
|
Post by Mr. Metallic on Jan 19, 2023 15:01:57 GMT -5
Craig, I don't think that gold 5-window was mine - I've been strictly Kalmbach for published stuff, and the closest finished thing I've got is that rude little AMT rat in my profile pic. My apologies. After some research I discovered the 32 5 window I was talking about was by Drew Hierwarter (sp) back in the December 2009 issue of Model Cars (and on the cover) Still, glad to see you here, please keep sharing! |
|
|
|
Post by ckourouklis on Jan 20, 2023 14:46:12 GMT -5
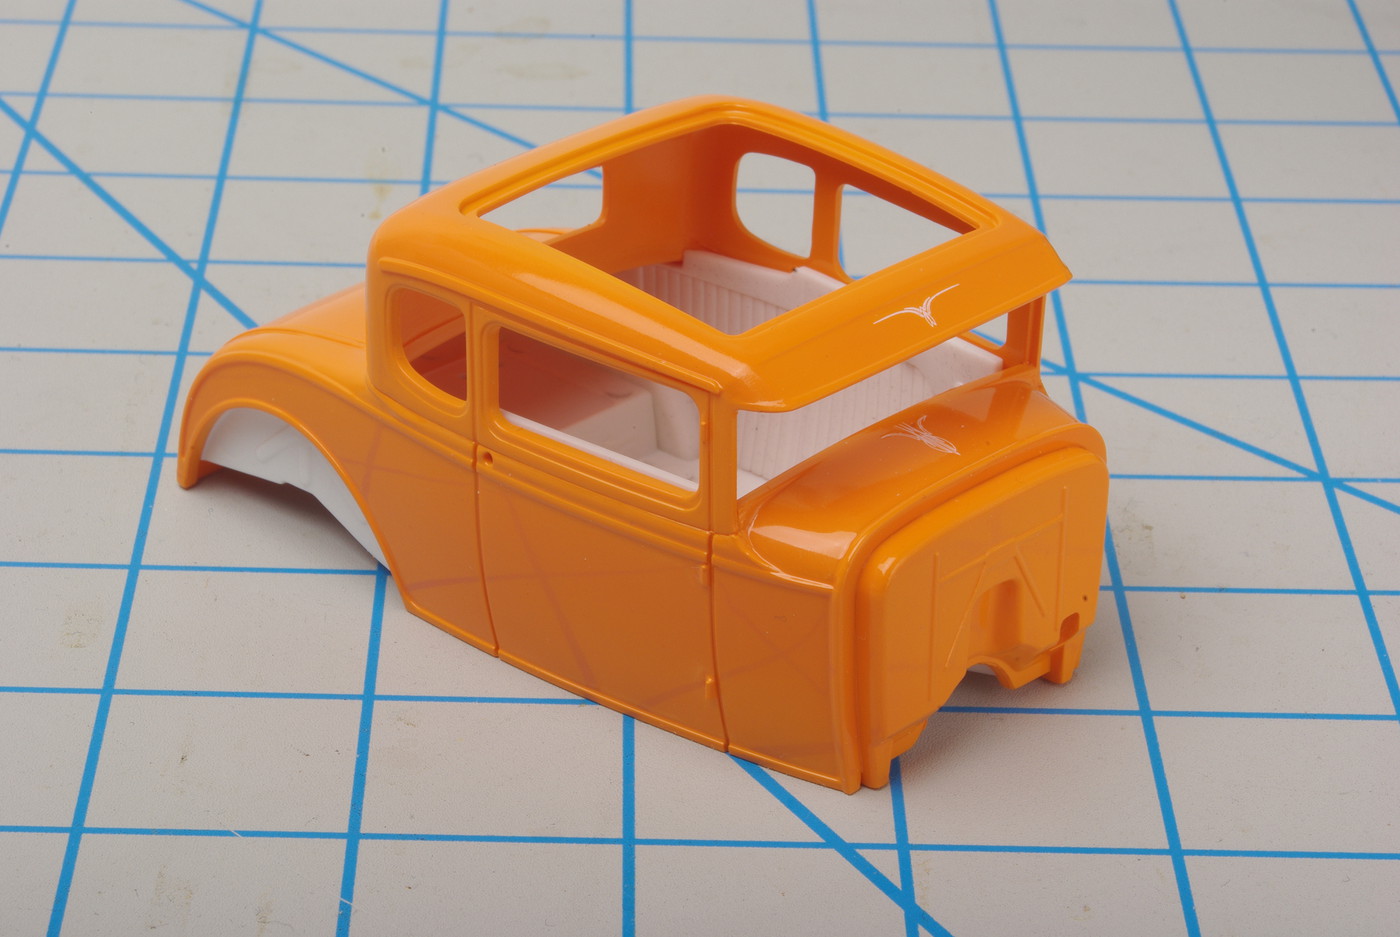
Thankya Sir! And might I say I admire the little deuces and the work you have up at Fotki.  One of the other advantages with more compact surfaces is that you don't get so much wave in the surface that primer and guide coats are mandatory - certainly not in the newer tooling, anyway. And yay, this tooling is clean enough in the body shell that I can apply color directly to the plastic, once some parting lines are gone. Today’s object lesson (with only the profoundest respect and apologies to Maya Angelou): when a can of Tamiya TS tells you what it is, believe it the first time. So there I was on a little post-Christmas modeling recon at Big Al Gerace’s Hobbies Unlimited (highly recommended whenever you’re in the greater Hayward/San Leandro area!), with a can of TS-56 in one australopithecene mitt and a can of TS-34 in the other, carefully pondering the cap colors. From the look of things, my ideal envisioned color would be a sorta ambery split between these two. I mean, I am going to decant the paint for airbrushing – which just reminded me of one of the most unbelievable discussions I’ve ever seen on any forum, btw, a choice thread about the best way to decant a spray can! Would you BELIEVE there are adherents of using a pipe tap to pierce the can? Instead of just, y’know, using a drinking straw in front of the nozzle into a jar? Actually, let’s review this for a minute. Pipe tap: - You weaponize the pressure in the can - You must empty all contents of the can at once - Assuming they aren’t already all over your walls, ceiling, shag carpet, cat, and pretty little face (OH, doing it in the garage? Alright, all over your bench, vice, lawn mower, garden hose, band saw, tool chest and pretty little face, then) Drinking straw: - You use the can’s pressure as designed and intended - You only empty the amount you need at the moment - You can repeat the procedure all you want till the can is empty - Drinking straws are silly-cheaper than pipe taps - You DON’T VIOLATE the safety warning printed on EVERY AEROSOL CAN I mean, you can get all deluxe and spend about 90 seconds molding some poster tack around your straw to seal it, or you can cut a small arc across the straw so it fits the nozzle curvature better and just hold it at the nozzle over your collecting jar. But if you’re seriously gonna punch a hole in a pressurized can, why don’cha just toss it in the nearest dumpster fire first, run for your life, and save yourself a little grief? ANYWAY TS-56 and TS-34, right. I suppose, since I’m already planning to airbrush it, I could just decant and mix the two. But then what if you run out, and you don’t match the ratio exactly on the next batch? Nah, the whole point is to move this thing along, and if the CAP is any indication, TS-56 looks closer than a hand grenade fer sure. But there’s more than the cap color, isn’t there? There’s also the label. Which nakedly and explicitly declared it was “brilliant orange”… 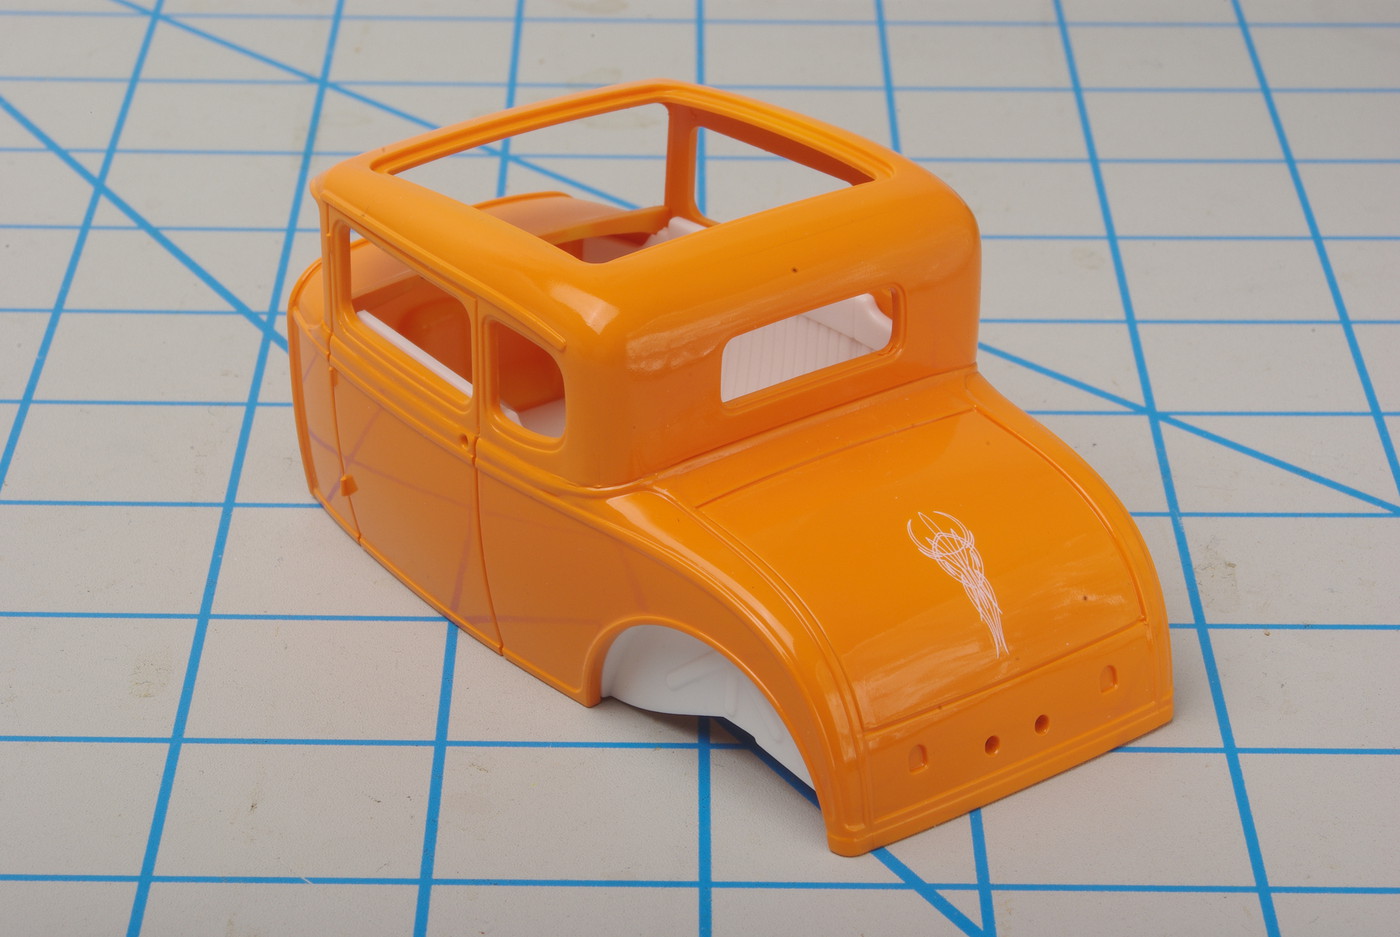 …and that’s how I ended up with this orange creamsicle.
Decanted and shot thru the color-dedicated gravity feed pistol-grip Grex thru a .3mm fan tip, then GS46 clear cut around 30-40% with Mr Color retarding thinner thru an identical Grex reserved for clearcoats (gift for an artist ex-girlfriend given back to me, long story).
Guess I shoulda just gone with the Camel Yellow. I was thinking to give it a beige finish on the upholstery, but you know what? We got wide whites, we got white pinstripe decals, and a Dutch-style white tramp stamp on the decklid. Hell with it, might as well lean into the 50/50 Bar look with pearl white seats and pleats, then. |
|
|
|
Post by Dave from Pleasanton on Jan 20, 2023 15:41:07 GMT -5
Love the color Chuck. White pearl interior sounds perfect. So often the pinstripe decals overpower the body, but yours are perfect.
|
|
|
|
Post by ckourouklis on Jan 20, 2023 17:13:14 GMT -5
Thanks much, Dave! I've had to warm a bit to it, and I appreciate y'all's kind input helping out with that.
|
|
|
|
Post by lo51merc on Jan 20, 2023 22:25:11 GMT -5
Now, THAT is beautiful!
Gary
|
|
|
|
Post by ckourouklis on Jan 21, 2023 1:09:25 GMT -5
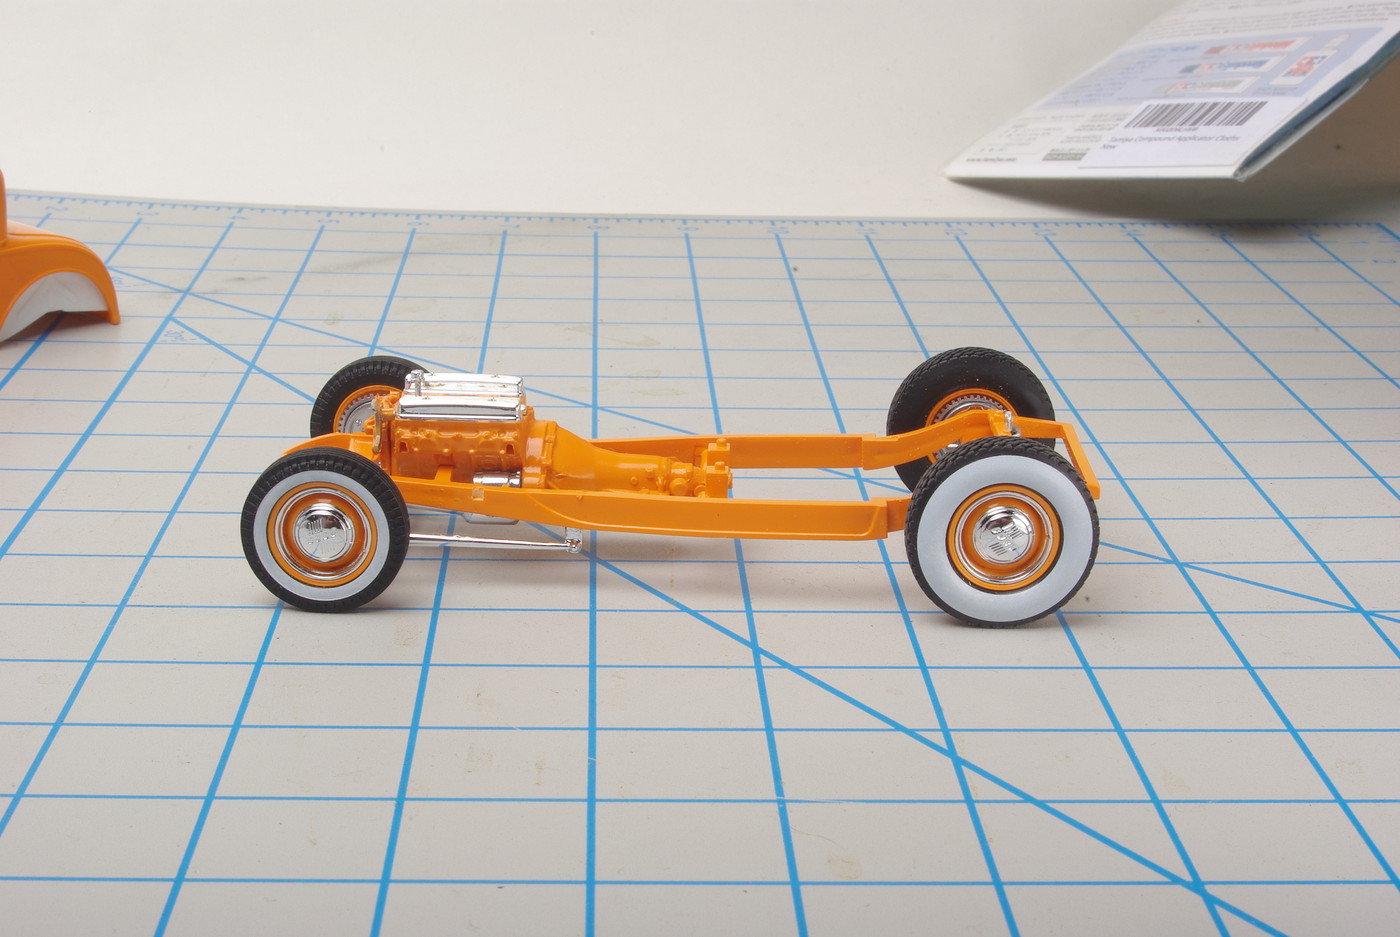
Thanks, Gary! So the frame and suspension have been moving pretty wwOOOOOOAAAAH SH-
um... NAILHEAD! Bit o' cleanup on aisles 1-3 there for the chrome wash, but please PAY NO MIND to any big beefy pumpkin theoretically hiding beyond the margin... oh, here's a good angle: I'm leaving the stance entirely box-stock 'cause I wanna see how Revell has it sit. I figured that since there are two hard axle mounts for the rear, I'd let it dictate how the frame settles on the central mount of the front leaf spring to assure all four wheels touch down.
|
|
|
|
Post by chepp on Jan 21, 2023 8:44:48 GMT -5
Now THIS is a thread! The car, the color, the whitewall decal story with a happy ending, the proposed interior color, the rear suspension cover-up! AND, your entertaining writing style. This is what I enjoy reading...and what I aspire to in model building. Thanks!
|
|
|
|
Post by RodBurNeR on Jan 21, 2023 14:49:49 GMT -5
mighty fine sir!
|
|
|
|
Post by sharp on Jan 21, 2023 16:52:18 GMT -5
Very nicely done! Love the color!
|
|
|
|
Post by Dave from Pleasanton on Jan 22, 2023 14:30:09 GMT -5
Love it Chuck.
This question is for the long-time Trakers. I certainly remember rods in the 60's with XKE independent rear suspension and coil-over shocks. Did nobody do 4 link suspension? Not stirring trouble just curious.
|
|



 Call it willful ignorance? We all know that's what the kit comes with, but we can pretend it's not there if you don't post pics of it.


