|
|
Post by patrol52 on Oct 12, 2007 20:43:50 GMT -5
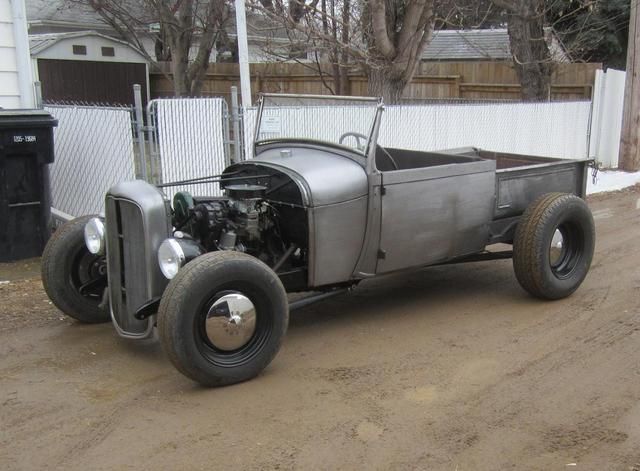
Well, it's getting done a little at a time. Hopefully I'll get it finished for the community build.   I'm trying to build it like the 1:1 will be built some day. I can't decide though, on 409 v-8 or 235 I-6 for the model. The real one will have the six, but I have the 409 and it would be real cool. Thoughts? |
|
|
|
Post by gmckid on Oct 12, 2007 20:52:14 GMT -5
If the surgery lines all over the body are any indication of where this one is going I like it.
As far as the motor, run the 6. Straight 6's rule!
|
|
|
|
Post by geezerman on Oct 13, 2007 5:32:14 GMT -5
Y. That'll look sweet!
V-8 for power - OHV 6 for economy
A souped up 6 will have more appeal, and sound kooler!
|
|
|
|
Post by Smokin Models on Oct 13, 2007 10:05:16 GMT -5
looks bitchin with the new bed
|
|
|
|
Post by Duane on Oct 13, 2007 10:59:46 GMT -5
Patrol i like what you're doin with this Chubby. think i'd go with the souped up 6 cyl with a split manifold. did you build the bed that you have on this truck? it is really slick. hhmm i'm thinkin i'll have to pick one up sometime. i've just gotta follow this build and see where you're takin it, and yes, i DO think it's coool.
|
|
|
|
Post by patrol52 on Oct 13, 2007 11:28:25 GMT -5
I've got a tiple side-draft Webber setup for the 6. I may also build a header for it if there is time. Right now I'm concentrating on the bed and chassis, so engine will come a little later.
I used the stock bed and added some end pieces for contour, and then glued a skin to the edge. I'm going for the Studebaker bed look. Next I need to figure out how to do the headlights, since I don't have any Buick ones, I'll have to make something that will work. I think it has a little too much contour, but hindsight is always 20/20. I can post some more pictures on how I made the bed if anybody wants.
|
|
|
|
Post by Duane on Oct 13, 2007 14:50:22 GMT -5
Patrol go to the how'd ya do it section and at the very top of the page, you'll see where Bob put some links up. go to Replicas in Miature of Maryland. they have '53 Buick headlights. check em out, they're cool lookin. YES, please show how you did the bed. i think that is so cool lookin so, i'd like to try it myself if it's ok with you.
|
|
|
|
Post by patrol52 on Oct 13, 2007 17:46:32 GMT -5
So I started here. I made these two pieces so that they fit up under the bed rail, but left enough recess at the bed rail, so that the skin would be just sort of flush with the bed rail when I put it on. My reason for doing this is so that when the skin is on, it will have a reveal line down the top edge to retain some of the stock look.  The rear panel tapers off much more than the front to match the rear of the fender. The front hangs down much lower and has a very sharp radius so it comes down to the running board, taking the place of that half-round filler panel that was attached to the fenders.  After the sides were securely attached, I glued a piece of plastic sheet, cut just over the length of the bed and a little wider than needed to wrap around the radius, to the bed rail (again, so it was not completely flush with the surface.) I let that get good and hard, before beginning to wrap the sheet along the radius. For this I used crazy glue as it bonds pretty quick and that is necessary here. Once I got the majority of it attached, I let it dry awhile and then began the tight wrap at the bottom by bending it around and then holding it in place with masking tape (wrapped around whole thing several times to hold better), as the glue must be completely dry to hold that tight of a radius with the material thickness I used.  Finally, I eyeballed where the fender goes, and held it parallel to the inside (flat surface) of the bed. I then traced around it with a pencil, being careful to try and get the projection of it, and not the pencil width or other distortion. After that, you just have to cut out the opening, and get the fender to fit, which is the most time consuming thing about it, other than waiting for glue to dry. A secondary benefit to this procedure is that it allows you to move the fenders out and therefore tuck wider tires than the stock kit. The tires I have under this are equivalent to 10" tread width and would not fit the stock fenders. |
|
|
|
Post by Duane on Oct 14, 2007 16:15:16 GMT -5
thank you Patrol. although i coulds only see red x's, i understand how you built the box. you explained it expertly.
|
|
|
|
Post by patrol52 on Oct 14, 2007 17:28:25 GMT -5
Any body else not get the pictures? I can see them, but I posted them.
|
|
|
|
Post by gmckid on Oct 14, 2007 17:45:09 GMT -5
I can see the pictures. Thanks for posting the how to.
|
|
|
|
Post by Duane on Oct 14, 2007 19:45:33 GMT -5
i'm seein the pictures now. would you mind if i saved your instructions to my computer for future use?
|
|
|
|
Post by patrol52 on Oct 14, 2007 21:00:32 GMT -5
No, go right ahead and get it. Always glad to help others and learn from them too. The one thing I would suggest if you do build your own, is that the sides don't need as much curve as I gave them. I think they should have been more straight, at least for this truck.
|
|
|
|
Post by patrol52 on Oct 17, 2007 15:53:18 GMT -5
OK, so I'm thinking about channeling this truck to get the bed line even with the line around the cab. Here is a photoshop of what it would look like. The only drawback I see is that I would have to make the grill back to original. What so you guys think: like it is (top) or what it could be (bottom)?  |
|
|
|
Post by RodBurNeR on Oct 17, 2007 16:09:04 GMT -5
to be perfectly honest, i don't want to say i like the bottom pic more just to see you work your ass off LOL.... i personally like it the way it is on the first pic, but maybe a chop would be nice and channel it.  |
|