|
|
Post by kababa55 on Oct 21, 2007 16:53:40 GMT -5
Here is the start of a $1 garage sale model.  Complete unassembled kit with approximately 1 full bottle of Testors gloss black applied with a toothbrush or possibly just poured on. 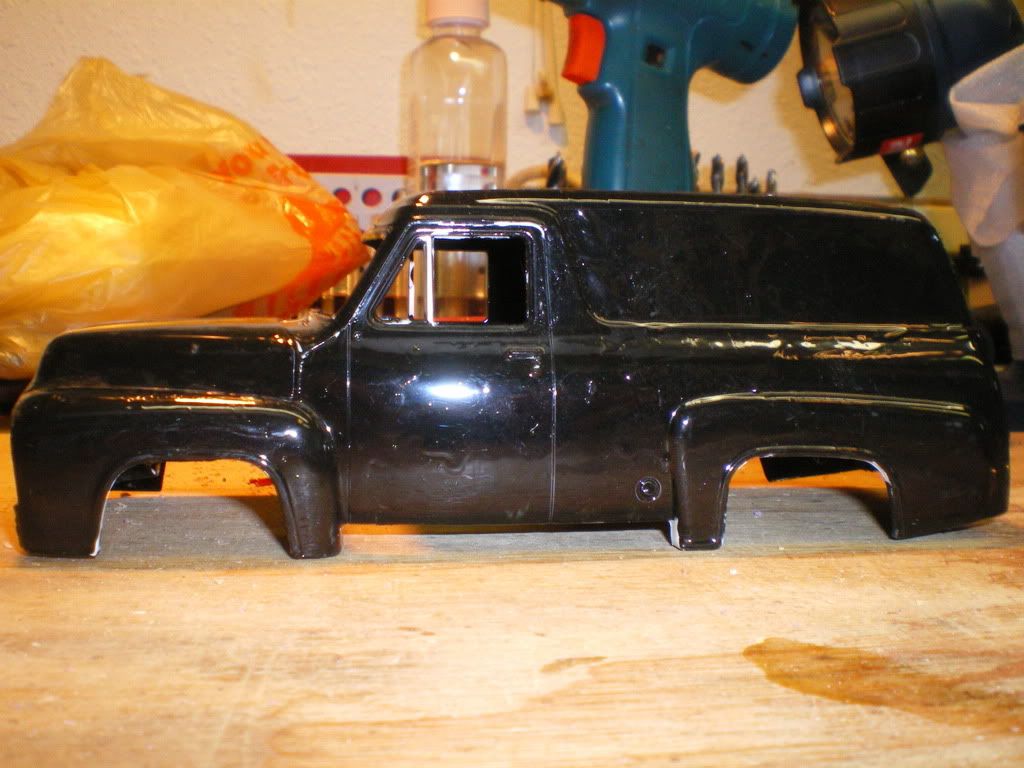 After 1 day at the Brake Fluid spa 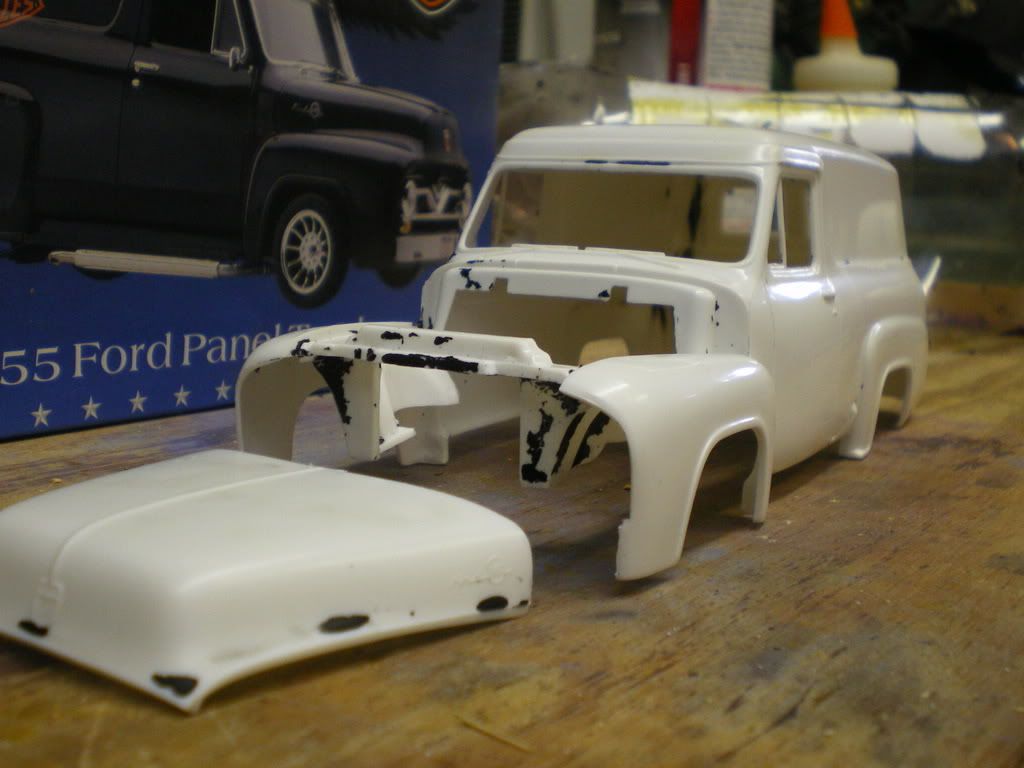 Have chopped and sectioned and will post those updates soon. |
|
|
|
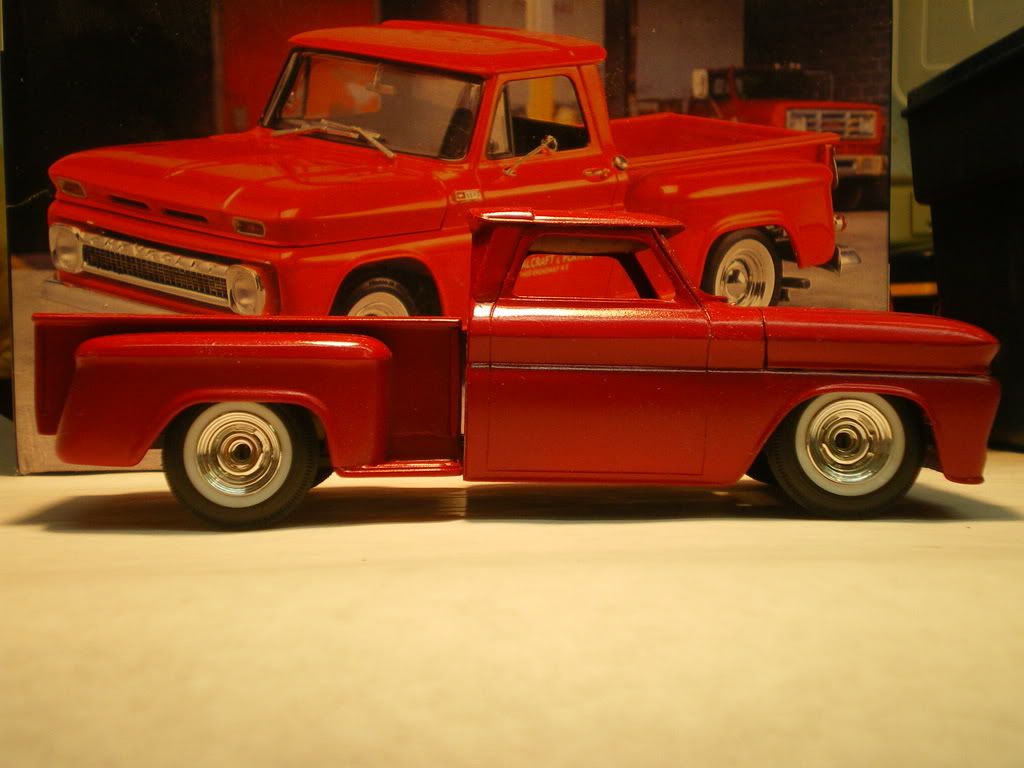
Post by kababa55 on Oct 21, 2007 21:54:57 GMT -5
After chop and section. Still much bodywork to do. 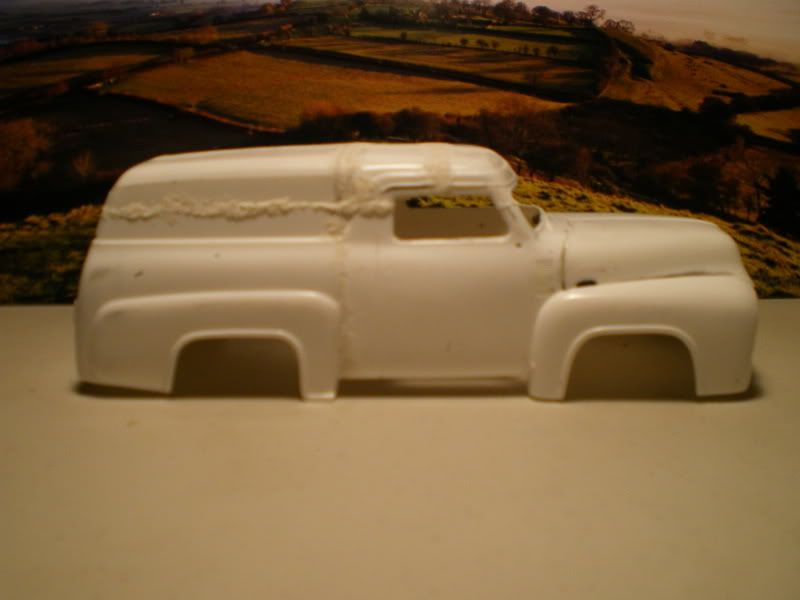 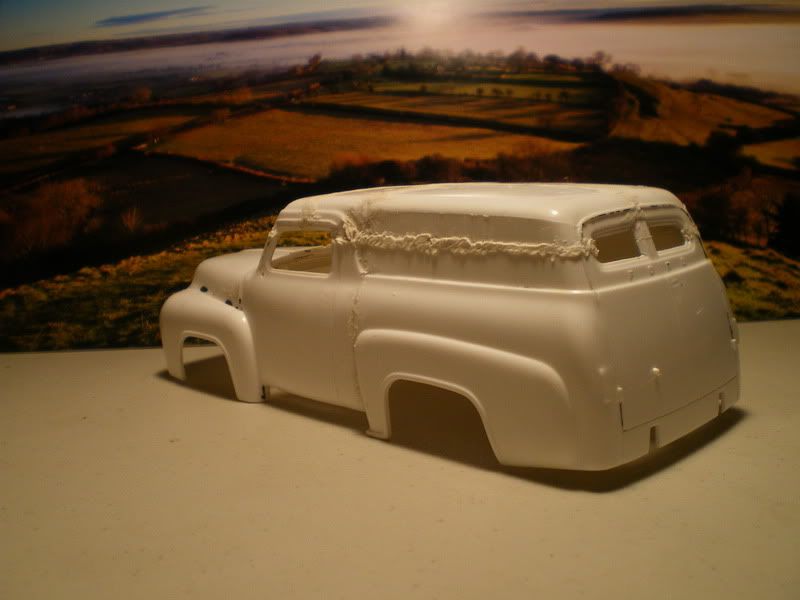 |
|
|
|
Post by RodBurNeR on Oct 21, 2007 22:05:07 GMT -5
holy carp!  |
|
|
|
Post by geezerman on Oct 22, 2007 5:43:22 GMT -5
Looks like he went over to Geezer's Garage and had Igor weld it. ) I use a Dremel for initial cuts also, but I leave some for neater trimming. This chop may be a little more after trimming? Kababa, did you shorten this to fit a certain chassis, or just figure it would look better shortened? |
|
|
|
Post by thefidgiter on Oct 22, 2007 7:18:34 GMT -5
Looks like you're using that crappy testors putty. Don't paint it for a couple years, the putty is going to take that long to shrink.
I like the concept though, proportions are right on.
|
|
|
|
Post by Duane on Oct 22, 2007 8:11:49 GMT -5
Kababa,
a nice filler to use is evercoat, it's a two part filler that you can get at parts stores, tell them it must be compatible with styrene though. it goes on smooth and there's less sanding because of this. did you notice what geezer does? when he chops like you have here, he glues little pieces of styrene together(depending on the width left open from the chop) and places it in the gap, thens fills over that. common sense tells me that doing this would also add more strength to the area that has been chopped.
|
|
|
|
Post by kababa55 on Oct 22, 2007 9:13:07 GMT -5
Laughing....I kinda thought you all would get a kick outta this.
No Outlaw, I didn't melt the plastic, but I can definitely see how you would come that conclusion. I did chop a '53 Chubby Panel with a hot x-acto blade on the end of a soldering iron once many years ago.
Eric was right about the crappy testors putty. I have since sanded all of those lumps down and in the process of spot puttying with good ole Bondo glazing putty. I wish I would have taken pics during the cut and glue, then you all would see that my lines aren't nearly as bad as this nasty putty makes them seem.
I did not have another chassis in mind Clay, I was basically wanting to shorten it up to how I pictured it in my warped mind. Flying by the seat of my pants (with torch in hand!!).
Yes I have been admiring the chopping and techniques I have seen on these boards and I wish I took pics of the glue up. I actually have learned something and I used the left over styrene to bridge gaps in the chop and section. Thanks for the tip on Evercoat Duane, I will check into that.
Thanks for the encouragement and tips fellas!
|
|
|
|
Post by matttrotta on Oct 22, 2007 9:31:31 GMT -5
I like the proportions on this. Clean up your putty situation, and you'll be all set.
|
|
|
|
Post by jondutch46 on Oct 22, 2007 10:13:20 GMT -5
Use Evercoat's Metal Glaze. It has a very fine texture, bonds well and feathers really well.
|
|
|
|
Post by Duane on Oct 22, 2007 11:02:17 GMT -5
Kababa, i had a sneakin feelin that it was just the testors putty. i tried it yesterday when i was a teen(lol)and hated it. it actually was one of the reasons i quit modelling. unlike you, i couldn't get it to look worth a damn.
|
|


 Complete unassembled kit with approximately 1 full bottle of Testors gloss black applied with a toothbrush or possibly just poured on.