|
|
Post by RodBurNeR on Nov 13, 2007 2:46:50 GMT -5
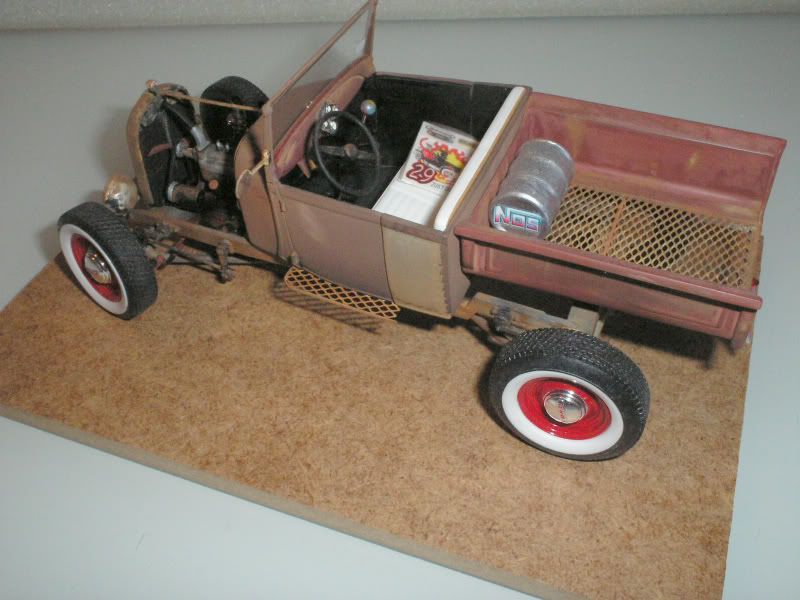
I didn't go to any great lengths on taking pictures, but while i was working on a how to, i snapped some. I posted it right when the forum was born , but the pics disappeard and would not come back no matter what i did... enjoy! low detail....built from the Switchers kit so if you had built one, you can see how much lowering, channeling and sectioning i did. that kit sat pretty high. built about a year ago in a challenge that we agreed "not to wire or plumb" there are a couple steering parts missing, i think i lost and found but now i can't remember where they are? *notice the shifter, i see someone else did this lol* 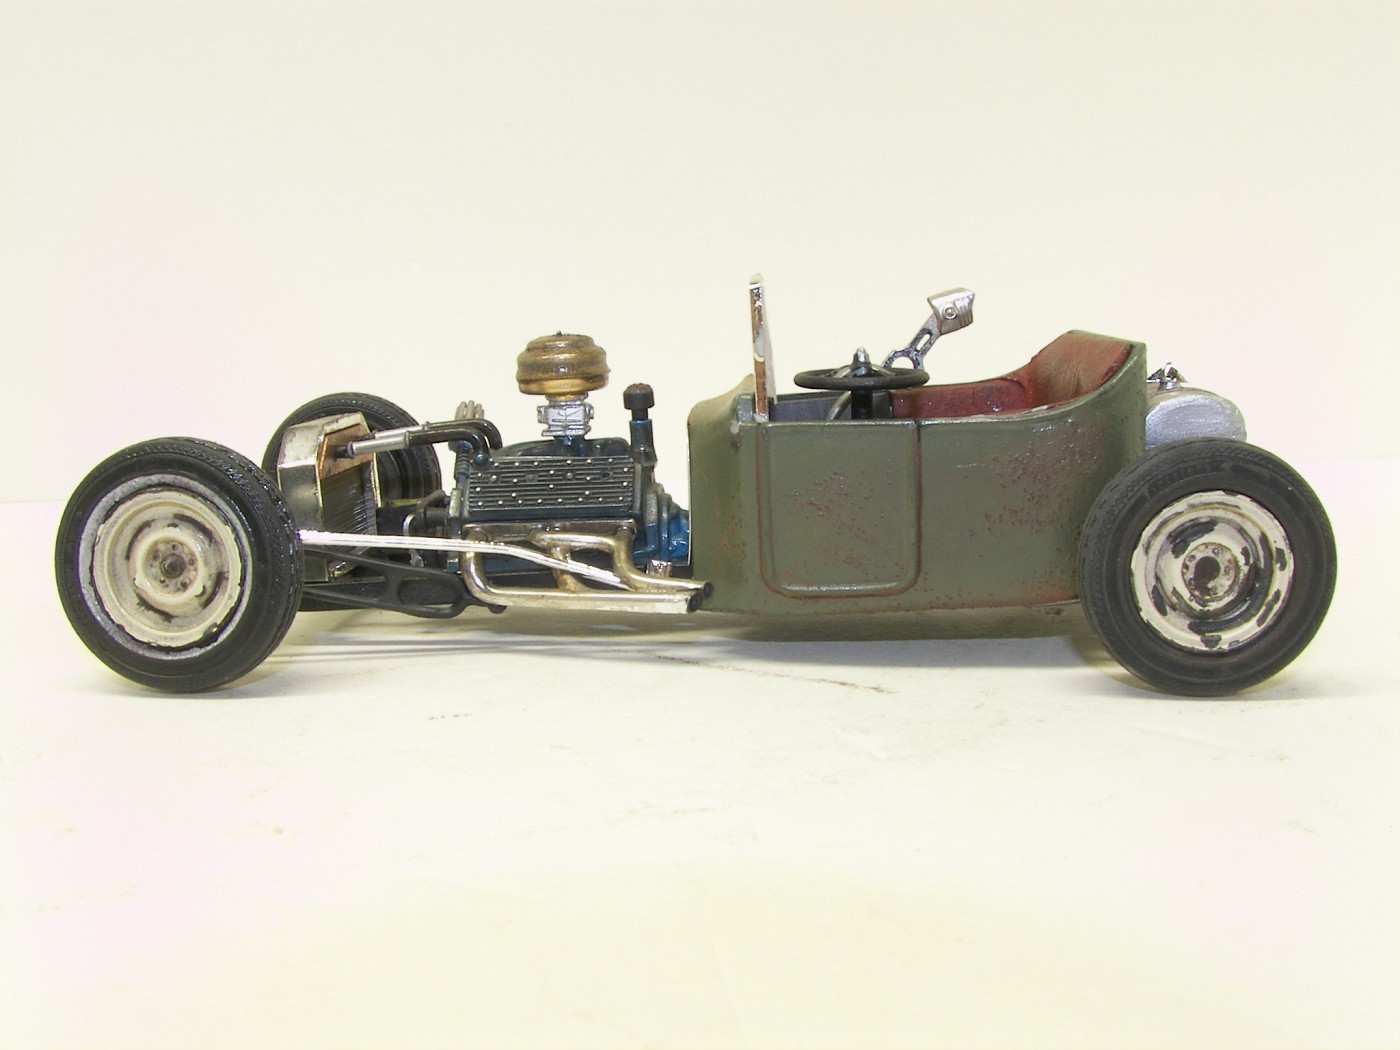 Hosted on Fotki Hosted on Fotki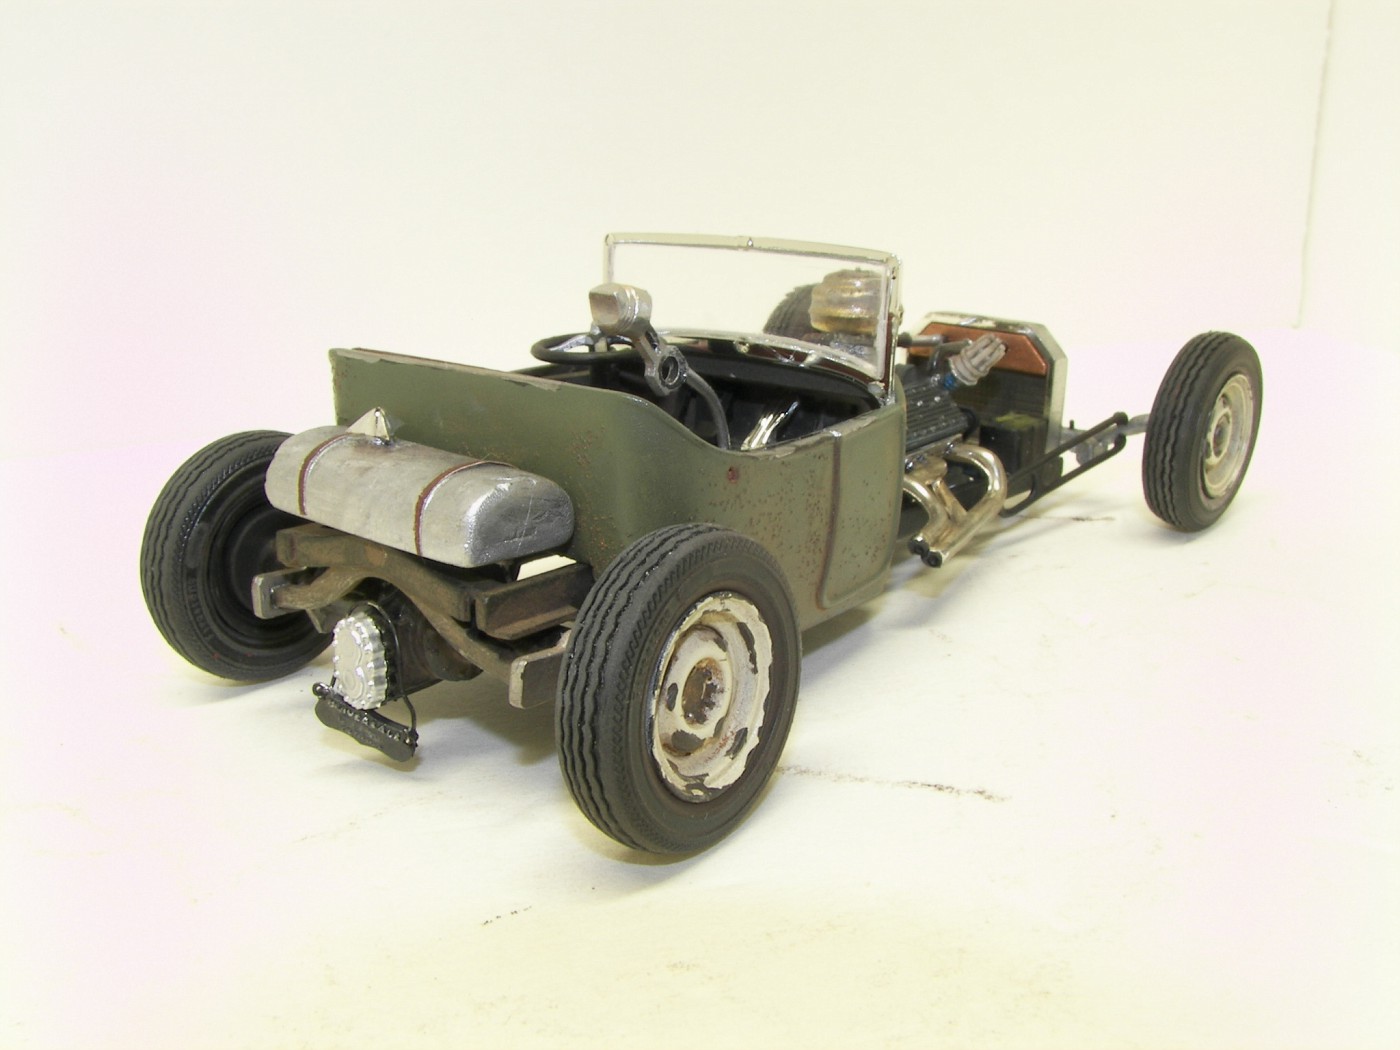 Hosted on Fotki Hosted on Fotki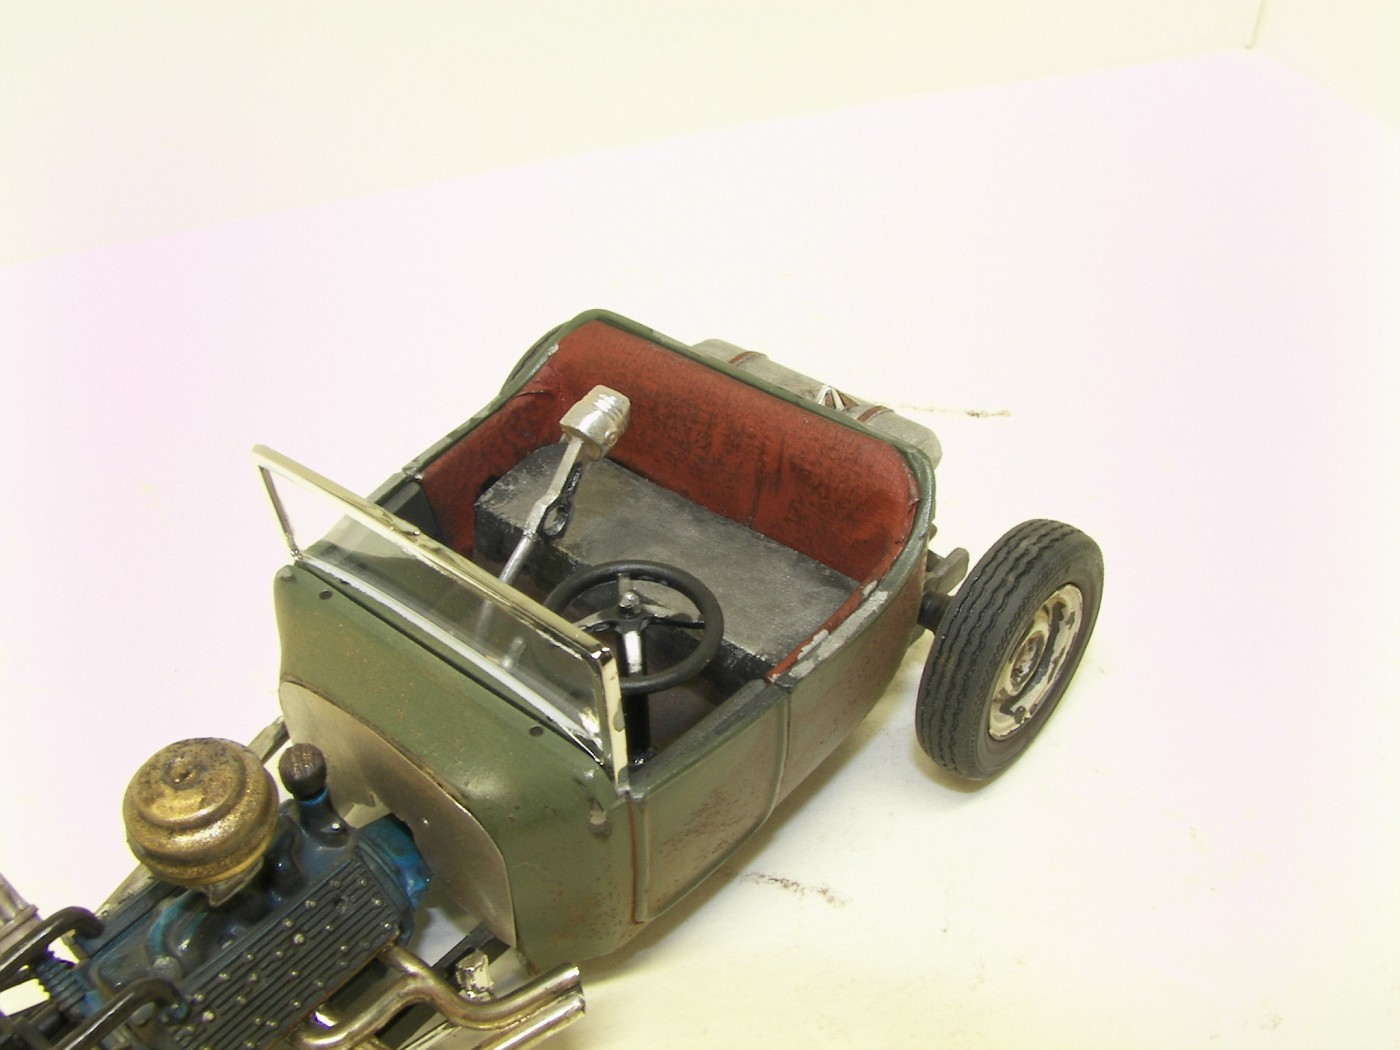 Hosted on Fotki Hosted on Fotki Hosted on Fotki Hosted on Fotki |
|
|
|
Post by flathead51 on Nov 13, 2007 18:01:02 GMT -5
YEAH!!!  That looks awesome! Its funny, My second option for the shifter (If I couldn't find the piston )was the hammer on the floor of your last pic. Great job on the weathering! |
|
|
|
Post by gmckid on Nov 13, 2007 18:10:49 GMT -5
cooool!
How did you do the surface rust on the body?
|
|
|
|
Post by kababa55 on Nov 13, 2007 18:14:07 GMT -5
Nice job weathering and a cool lookin car!
|
|
|
|
Post by RodBurNeR on Nov 13, 2007 18:14:18 GMT -5
cooool! How did you do the surface rust on the body? i used a straight , very sharp tool that looks like a dental pic. i must have "tapped" that body 2,000 times! after that i shot the body with flat black and then semi satin green. at that point i hit it with the pastels and pushed it all into the holes best i could. it looks worse in person lol |
|
|
|
Post by RodBurNeR on Nov 13, 2007 18:16:57 GMT -5
thanks guys! |
|
|
|
Post by gmckid on Nov 13, 2007 18:19:16 GMT -5
Thanks for letting me know.
It looks good from here but what do i know haha.
I have heard that painting a basecoat of a rust type colour and then dunking some salt in the paint when its wet, then painting over the coat with the main colour when the base drys and then picking the salt off also works.
|
|
|
|
Post by certribe on Nov 13, 2007 19:22:09 GMT -5
Ya might also try that white sand you can find in the gardening section very fine...another idea for exposing larger areas is using petroleum jelly between the base and the final coat, you then rub away the petroleum jelly to expose the undercoat. For rust 'bubbles' I have looked at using small 'dabs' of either putty or sprue glue to leave the rusting bubbling look, then just exposing part of the raised area showing the 'rust'.
No, no pictures, still no access to the digital camera...maybe Santa will fly by this year.
Charles
|
|
|
|
Post by crazy1 on Nov 13, 2007 22:21:09 GMT -5
The tools on the floor are the perfect final touch. Way cool!
|
|
|
|
Post by RodBurNeR on Nov 13, 2007 22:59:09 GMT -5
yep, using salt grains is a nice thing for either surface rust or chipped paint..... stabbing the plastic a couple thousand times with a needle sharp tool will make it look more realistic though... here are some better pics of weathering the stab wounds lol these pics suck.....like i said it was at least a year ago..maybe longer that this was built.  Hosted on Fotki Hosted on Fotki Hosted on Fotki Hosted on Fotki Hosted on Fotki Hosted on Fotki Hosted on Fotki Hosted on Fotki |
|
|
|
Post by thumper on Nov 17, 2007 10:16:29 GMT -5
Thanks for showing us that trick....never thought of that.
|
|
|
|
Post by RodBurNeR on Nov 17, 2007 13:17:32 GMT -5
Thanks for showing us that trick....never thought of that. no prob! i will share anything i ever do if someone wants to know , or half the time i explain it any ways lol |
|
|
|
Post by ratrod on Nov 17, 2007 18:52:24 GMT -5
Really cool Hot Rod, I like rusty cars.
|
|
|
|
Post by RodBurNeR on Nov 17, 2007 19:46:53 GMT -5
Really cool Hot Rod, I like rusty cars. thanks ;D |
|


 That looks awesome! Its funny, My second option for the shifter (If I couldn't find the piston )was the hammer on the floor of your last pic.