|
|
Post by spex84 on Sept 7, 2014 23:37:07 GMT -5
That '49 is looking mighty slick, Glenn! I love the profile on that chop.
|
|
|
|
Post by Gluhead on Sept 10, 2014 1:31:21 GMT -5
Yep, good start. My humble 2cents? I'd redefine the panel lines and really dial in the soft curves of the roof. Seeing what's next is often a lot easier when you're not fighting your eyes over areas like the slightly flat areas over the side windows, etc. Then you can see where those lines are really flowing.
|
|
|
|
Post by 351w24t on Sept 10, 2014 2:21:45 GMT -5
I agree Christopher. I put a guide coat on it yesterday. I need to work the roof just a little more. The problem with sectioning is you end up with several coats of primer softening your lines. I cut them in once a couple of primer coats ago. They will need to be done again. I am thinking 53 Ford head light rings and the custom grill.
|
|
|
|
Post by Gluhead on Sept 14, 2014 0:49:09 GMT -5
Yep. Most of it comes back off but it builds up in the details. After doing the same thing for 20 years or so I eventually had a lightbulb go off -- "Hey, why don't I skip the priming until I'm about done with the work?". I grew up in a body shop so that went totally against the grain, but I'll be damned if it doesn't help do a nicer job in the end. And when I do finally spray some, it's something super-thin like Tamiya or figure primer. I'll often put a quick soft mask on the area to keep it to just the working area too. The little things add up, especially when you are prone to being a little heavy-handed at final paint like me.
I can't think what the custom grill is in that kit. I'll give a thumbs up for the '53 rings, though. Should look good.
|
|
|
|
Post by kandylove on Oct 26, 2014 10:59:27 GMT -5
|
|
|
|
Post by Canada Jeff on Nov 6, 2014 22:52:27 GMT -5
AMT Merc undergoing some surgical augmentation. Still a ways to go but soon I should be ready to add drip rails and stainless. 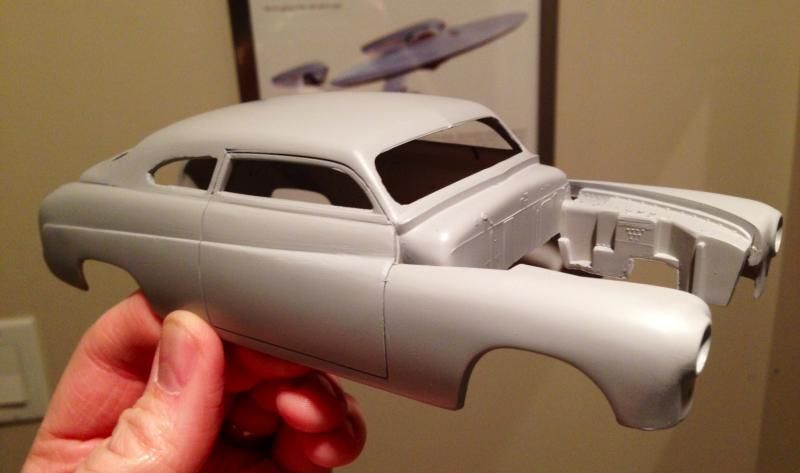 |
|
|
|
Post by krassandbernie on Nov 6, 2014 23:55:42 GMT -5
Looks much better than Revell's attempt Jeff!
|
|
|
|
Post by Canada Jeff on Nov 10, 2014 11:01:10 GMT -5
Thanks Ed. I hate to be one of those negative guys, but doing better than the Revell chop isn't that hard!
Any opinions on the drip rails? I was going to put them back on, but a couple buddies in my club said I should really leave them off after all that work. Any thoughts?
|
|
|
|
Post by 53suburban on Nov 10, 2014 11:14:56 GMT -5
Thanks Ed. I hate to be one of those negative guys, but doing better than the Revell chop isn't that hard! Any opinions on the drip rails? I was going to put them back on, but a couple buddies in my club said I should really leave them off after all that work. Any thoughts? I'd put them back. Not that hard to do with Evergreen strip styrene. |
|
|
|
Post by krassandbernie on Nov 10, 2014 12:43:21 GMT -5
If you are confident enough in yourself to put the drip rails back I would do it. Here are two ways that I have done in the past that are easier/more secure than simply gluing Evergreen strips to the body.........carefully drill a series of very small holes along your pencil lines for the drip rail moldings; and then slowly scribe through the pencil lines with your X-Acto knife until you have a 'slot' to slide a strip of Evergreen flat stock through. Take Pro Weld (or any other liquid cement) and run it in from behind to fill in any gaps.......although, if you take your time there shouldn't be much of a gap anywhere. Now file the sheet stock to shape on the outside, and then trim off any excess on the inside of the body. The second way is similar without drilling a 'slot' right through the body......instead, taking a file and scribing a 'v' channel where you are going to place the Evergreen stock for the drip rail molding........glue in down into the groove you made and go from there.
|
|
|
|
Post by Gluhead on Nov 10, 2014 21:35:56 GMT -5
+1 for drip rails on old cars. For the life of me I've never been able to figure out why people choose to shave them. On most cars, they're necessary to restore visual flow where the quarter windows lack any other kind of framing line like that formed by the door opening around the door window.
Unless it's a hard top...or a really dark colored car where the door lines don't really show, it's gotta have drip rails in my book. They aren't difficult to make, either...just takes a little patience, liquid cement, and the right size strip.
|
|
|
|
Post by zenrat on Dec 19, 2014 3:40:27 GMT -5
Trophy Series '53 F100. I've done a bit of work to it and there is more to come. First thing is to move a chassis cross member as I didn't realise the tub sat that high until I blutacked this all together. Top of the box should be level with the swage line round the cab.  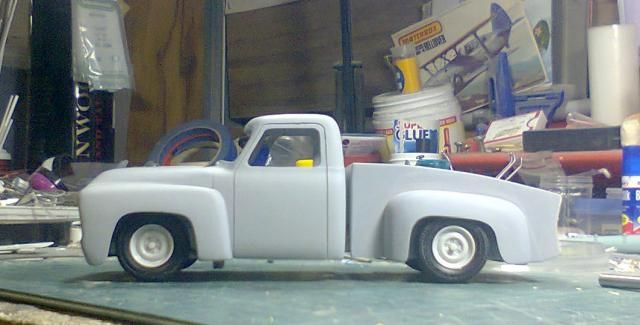 |
|
|
|
Post by cycolacfan on Feb 20, 2015 19:06:16 GMT -5
Great to see on this thread how many of the primer builds are now on the shelf. Was in two minds whether to post this one since it keeps giving me a low rider vibe that will only disappear with Watson paint or a swap of wheels, but it's the only thing on the bench that's in primer so here it is... 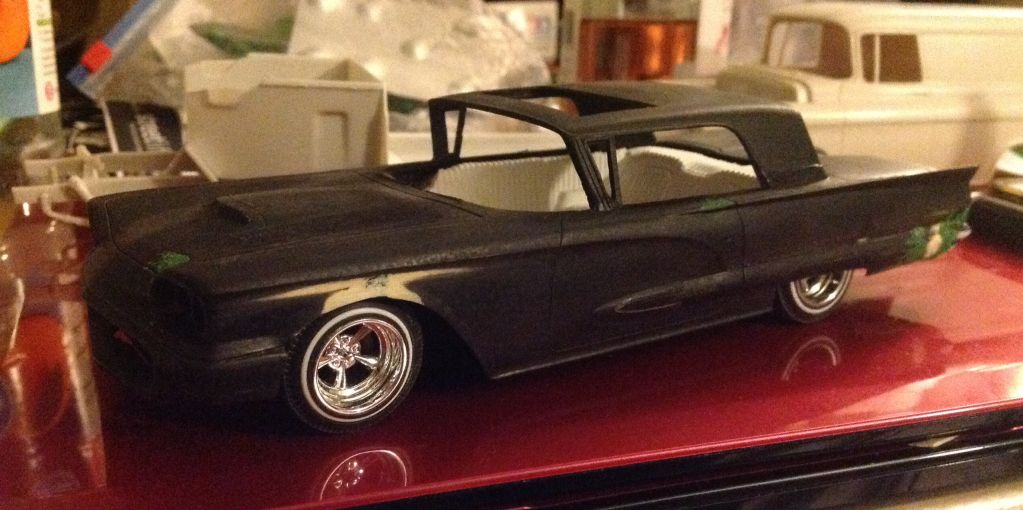 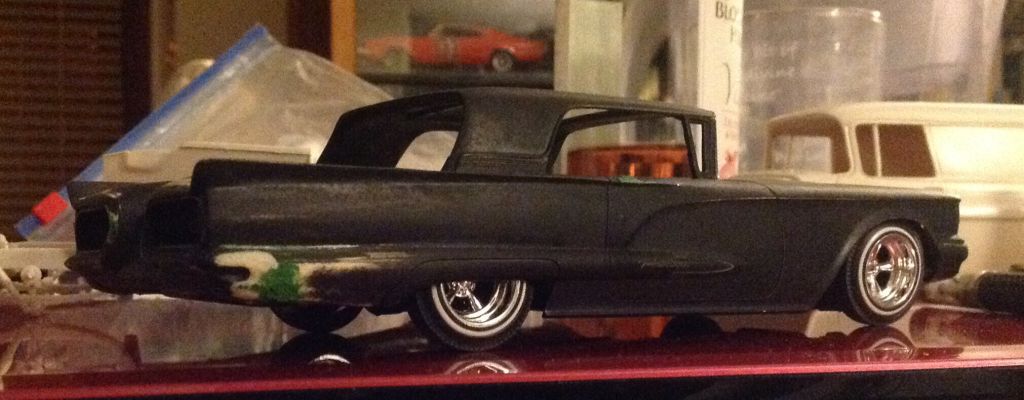 As usual with my builds it started out as a simple clean up on a glue bomb '59, nosed and decked, shaved handles... Next thing I'm adding roll pans and full tuck'n'roll - this is why I never get anything finished... Try to decide between blue, green or gold for the body. |
|
|
|
Post by dino246gt on Feb 22, 2015 11:58:45 GMT -5
Here's a primer picture! My work table!  |
|
|
|
Post by dino246gt on Feb 22, 2015 12:30:04 GMT -5
Here's my '41 conversion on Revell's chopped '48 and using AMTs Woody front, of course.  |
|