Deleted
Deleted Member
Posts: 0
|
Post by Deleted on Jan 17, 2016 17:32:35 GMT -5
Nice tip. My MMD Green and White Putty's are getting hard to even squeeze out of the tube. Those one part green & white putties like that are merely just thickened lacquer primer & dry through evaporation, meaning that they shrink as they dry, so months & years after using them for custom work can show sink marks. They are totally useless except for filling shallow scratches & certainly aren't suitable for major bodywork. Two part putties like Steve recommends cure through a chemical reaction, which doesn'r shrink. The Evercoat Glaze Coat Steve uses is great stuff, but having worked in the auto body trades for many years in the past, (& having a diploma in auto body repair & paint), I can say that they are very expensive for use only on models, & usually dry up/go bad long before an entire container can be used up for such things. For modelers however, there is a less wasteful & cheaper alternative, that works just as well. Here it is: It's the Bondo Professional Glazing & Spot Putty, as seen on the big tube, & rubs about $7/$8 & come with a tube of putty & a tube of hardener. Mix the two & go. The package it comes in also has "Professional" on it. The regular Bondo one part spot/glazing putty doesn't have "Professional" on it & like all one part putties will shrink over time. 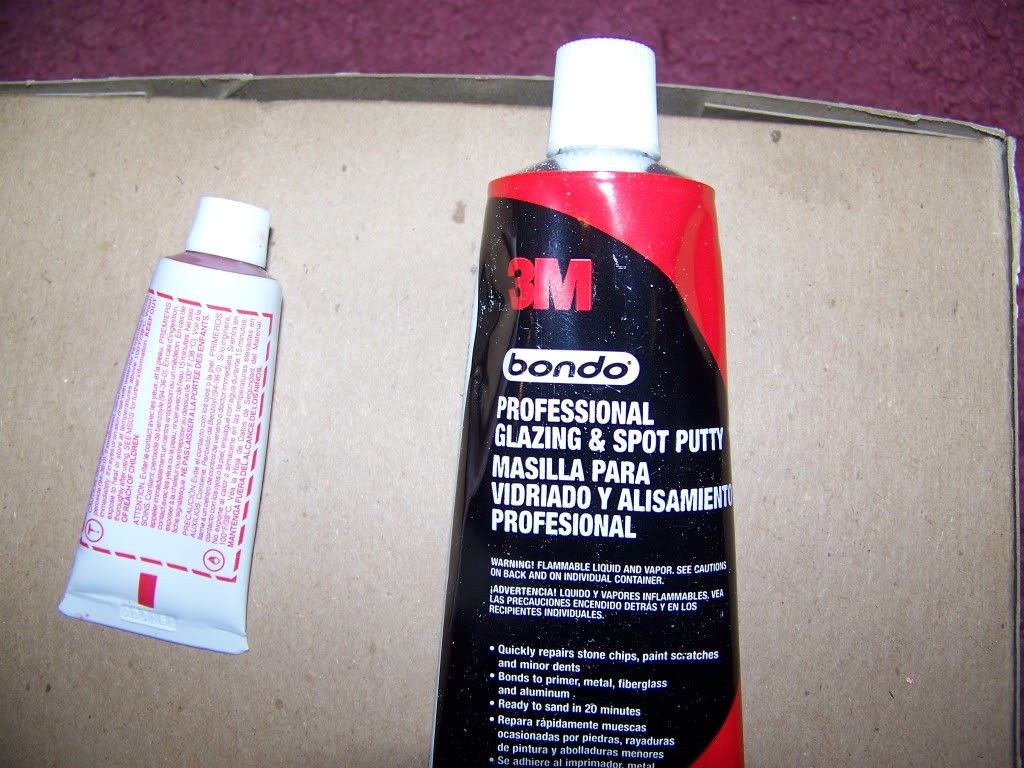 Now, there is nothing wrong with Evercoat, they make great products & when i worked both as a body man/painter for Freightliner & in body shops, that was what they all used. But for the cost & limited shelf life for us modelers, the Bondo I recommend is just as good. It sands well, feathers nicely & works just as well as the Evercoat does. It's recommended that it be used mainly on primed surfaces, but I've found it adheres to bare plastic as well as it does primed surfaces. |
|
Deleted
Deleted Member
Posts: 0
|
Post by Deleted on Jan 17, 2016 19:18:51 GMT -5
Thanks Mark! Headed down to NAPA tomorrow.
|
|
|
|
Post by dakotajohn on Jan 17, 2016 21:43:44 GMT -5
the NAPA part number is 801, line code MMM I think I will order some for me tomorrow!! I work at a NAPA Jobber.
|
|
|
|
Post by steveb on Apr 30, 2020 16:26:08 GMT -5
After a 3-1/2 year break on the 36 Ford, I got back to it in early 2019. The 2 things that killed it for me were the lackluster interior & upside-down bumpers in the Revell kit (more on that later). The first thing that I tackled was the interior. I bit the bullet & decided to try making a late 30’s Lincoln dash. After looking for many photos of 37-39 Lincoln dashboards, I chose the 37 model. Using the ’36 Ford kit dash as a guide for the width, I started gluing various pieces of styrene together. 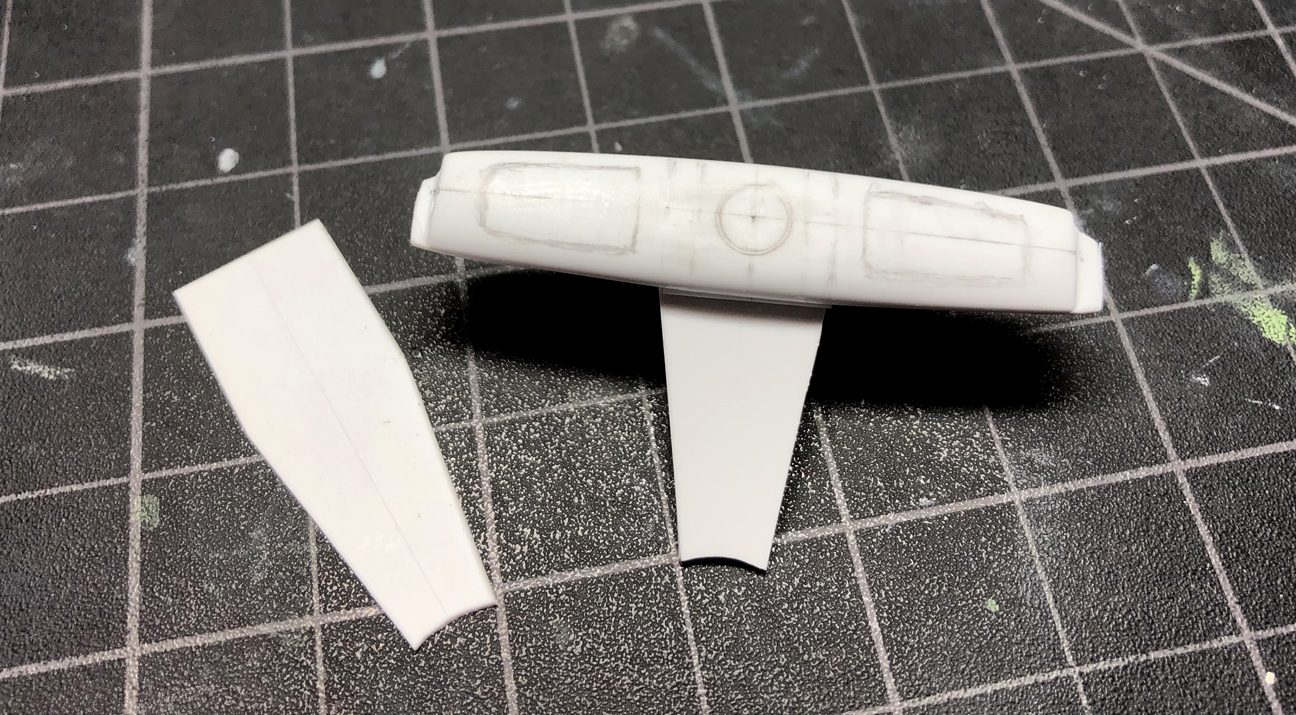 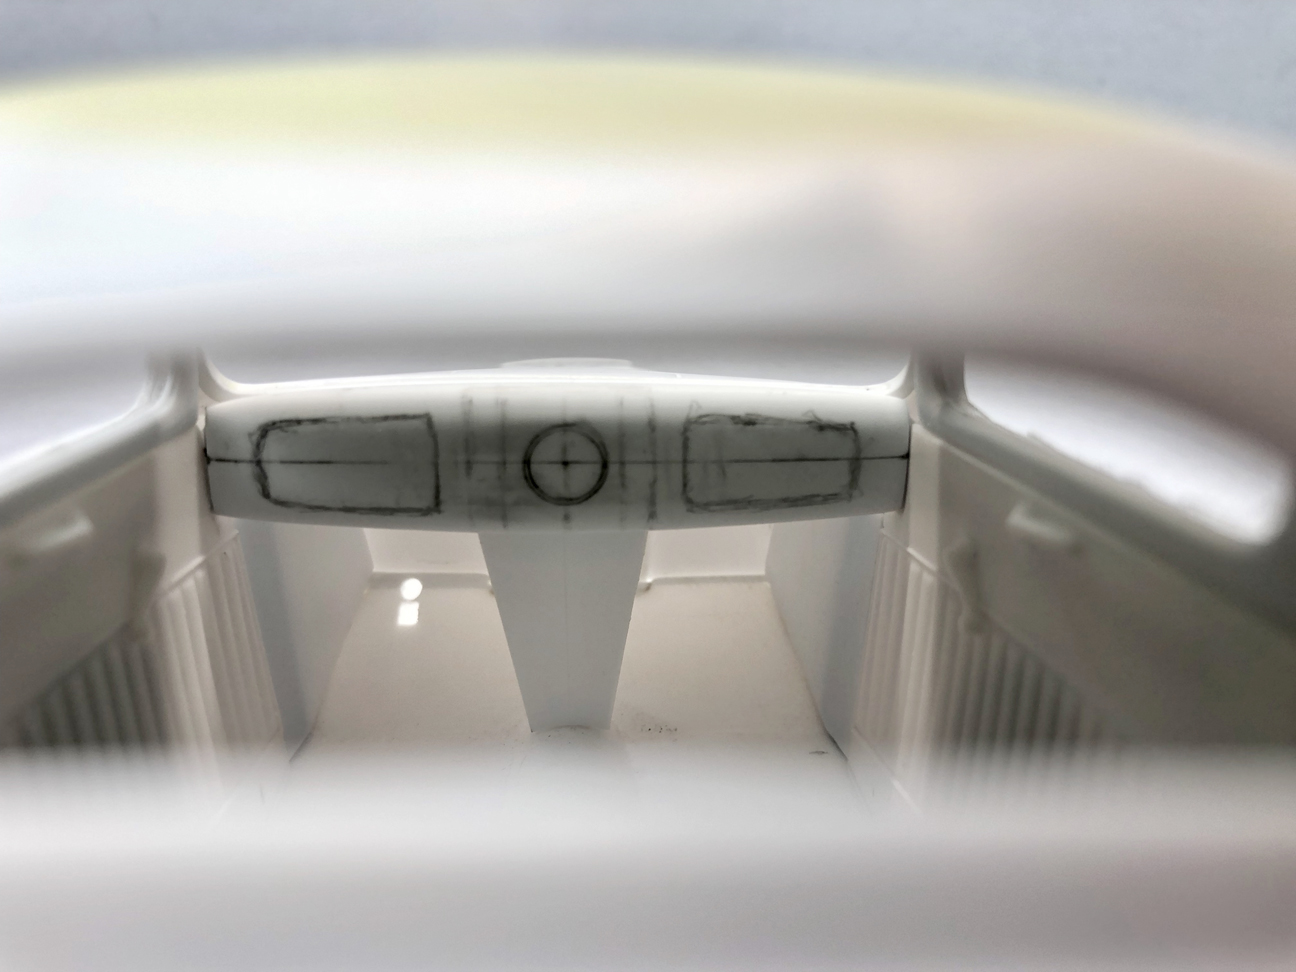 More layers of styrene were added to the front & sides. 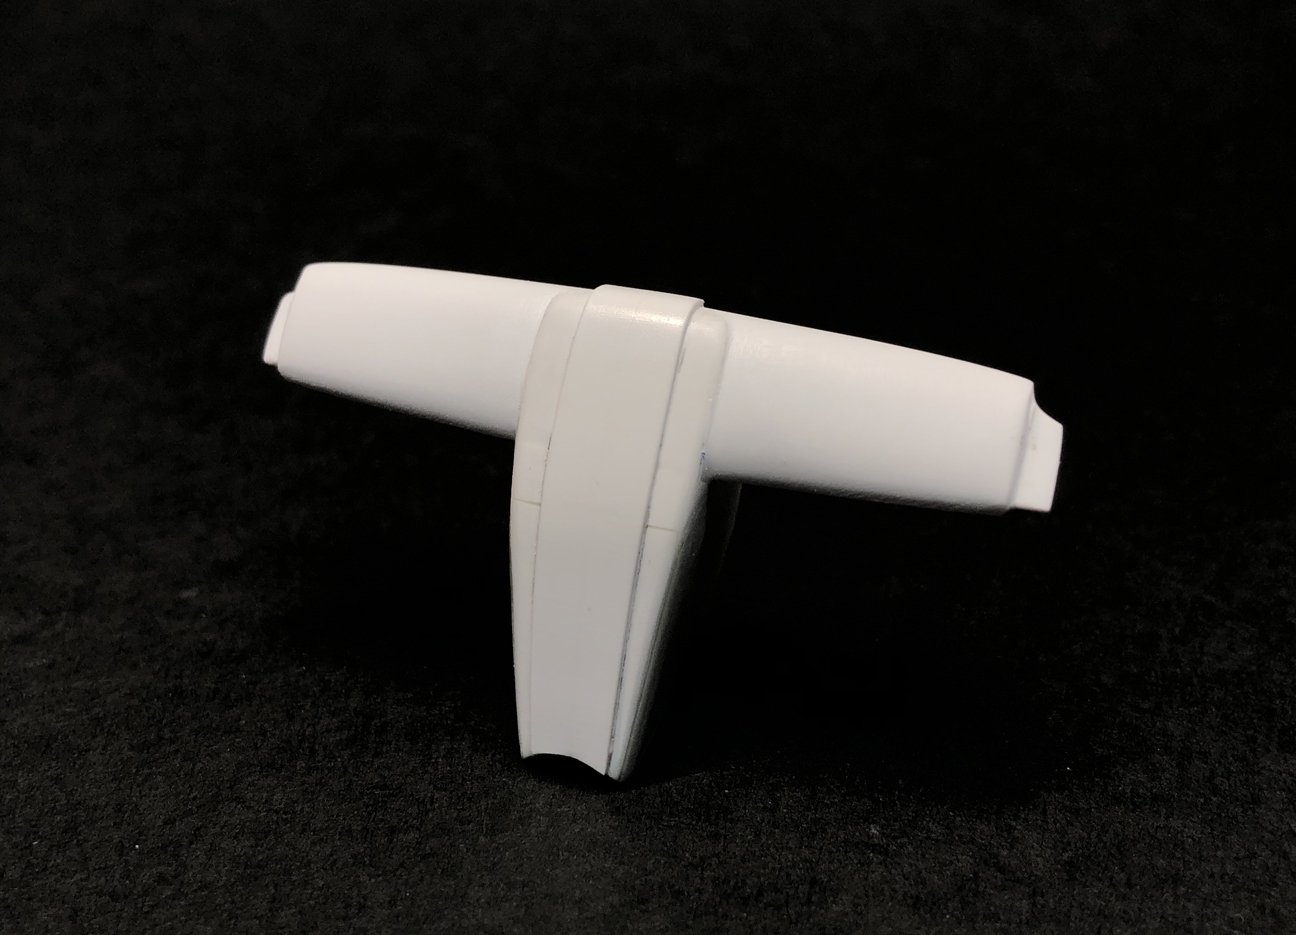 I cut out the section where the vertical grille will go. 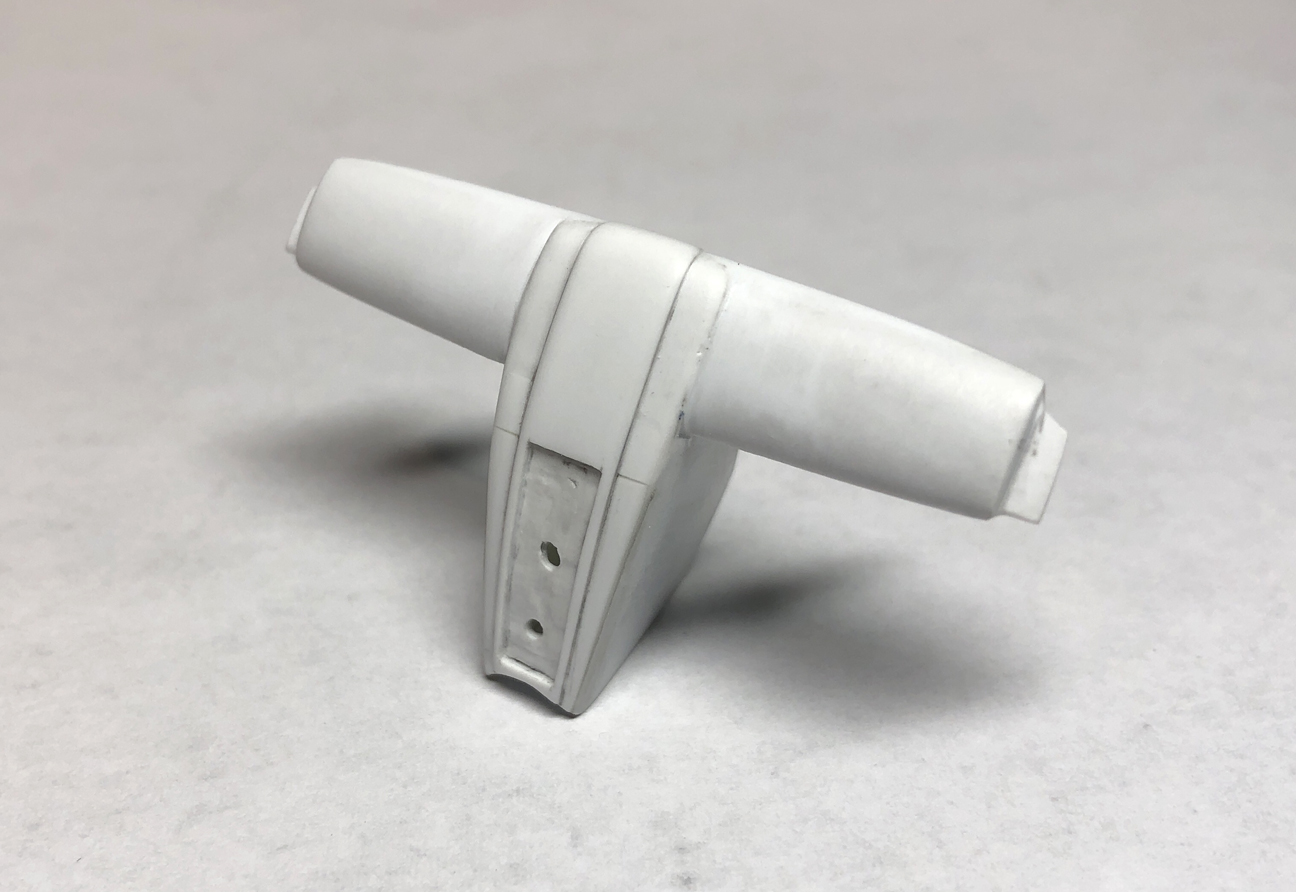 I added a piece of grooved styrene for the grille section & painted it with black craft paint to be able visualize the overall look. 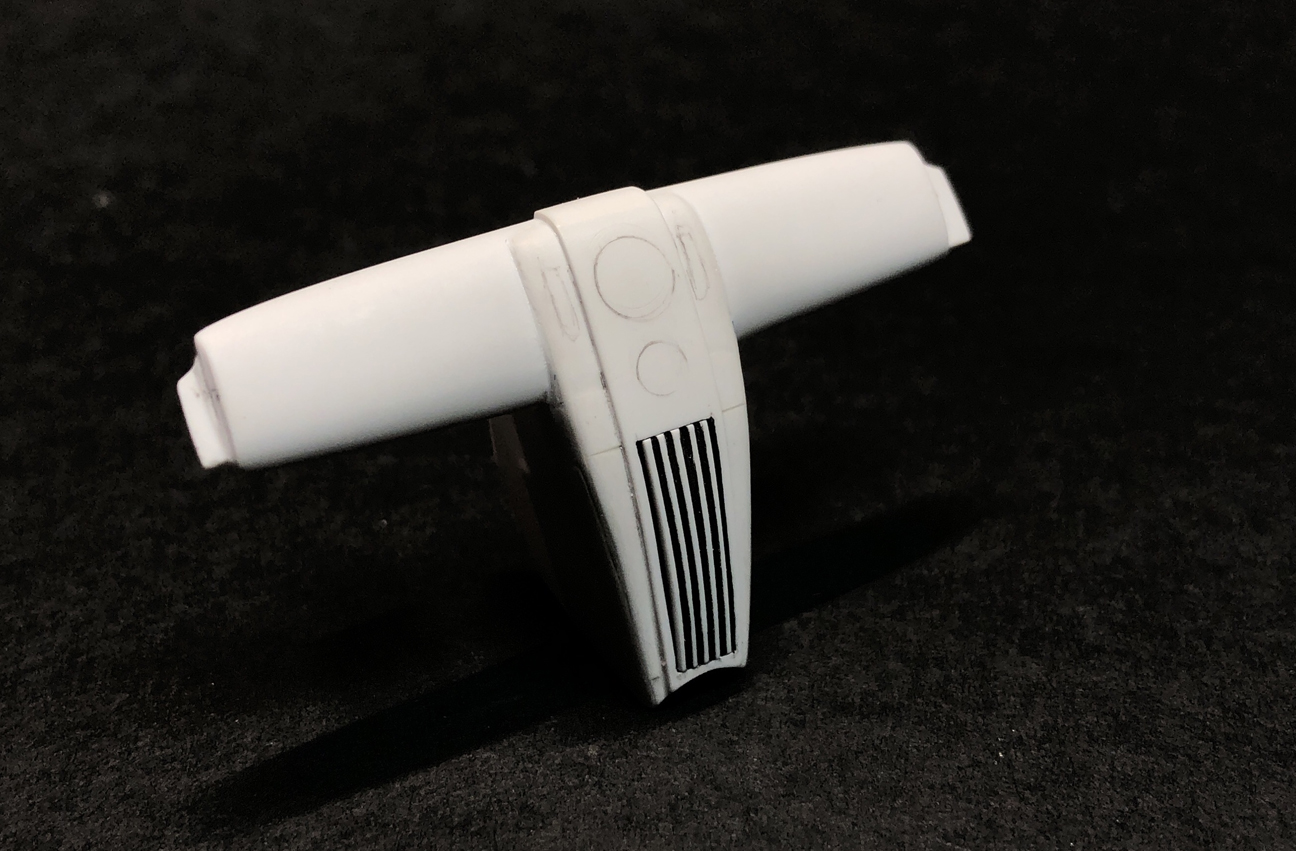 I made gauge rings out of aluminum tubing, & printed photos of gauge faces for test fitting. 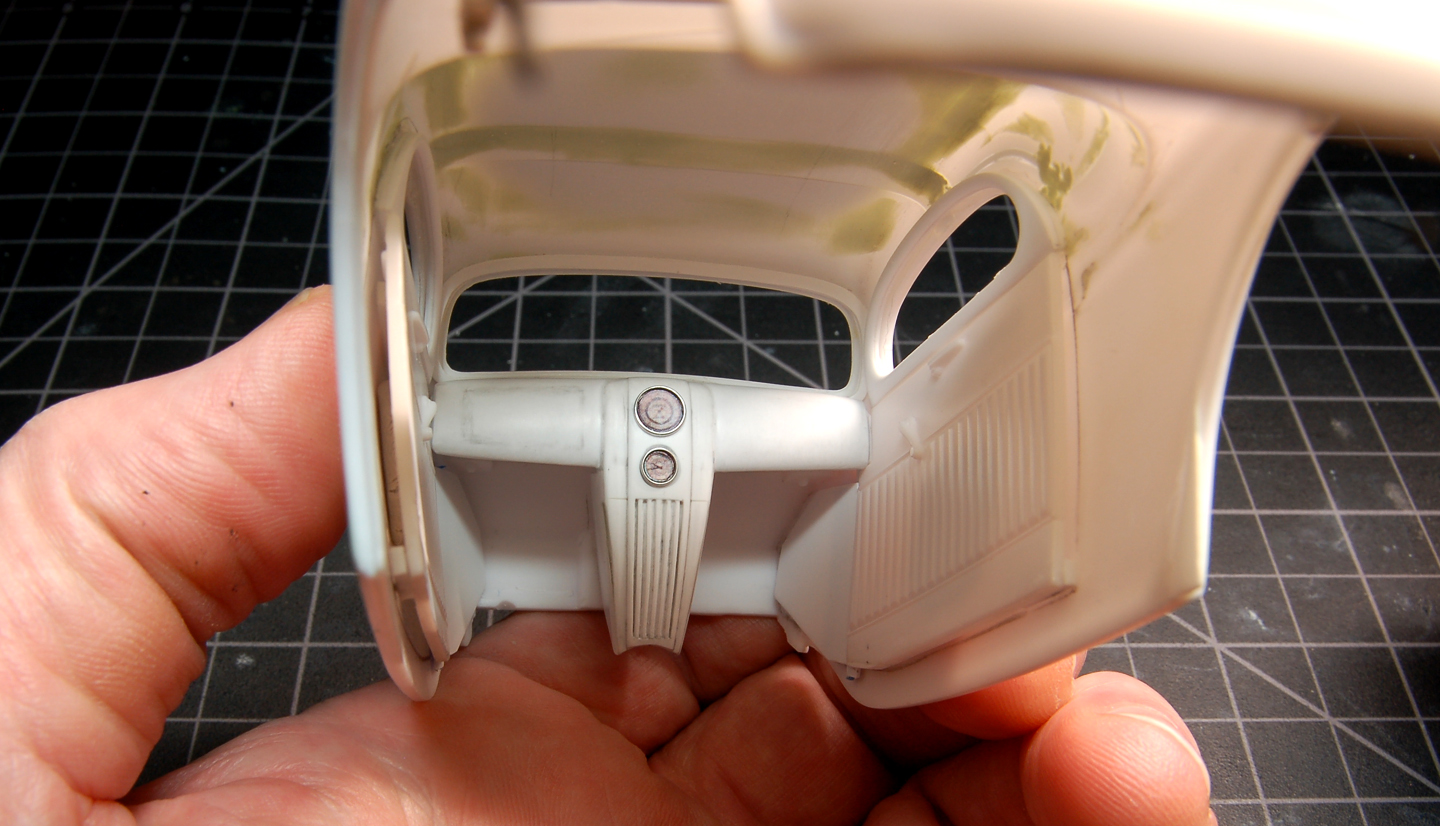 I didn’t have quite enough room for the smaller inner panels on the stock Zephyr dash, so I opted to only have the 2 larger ones on each side. I saw a photo of a 1:1 dash that they did this to & felt better about my decision. Scribing the panel lines with a needle chucked in a pin vice. 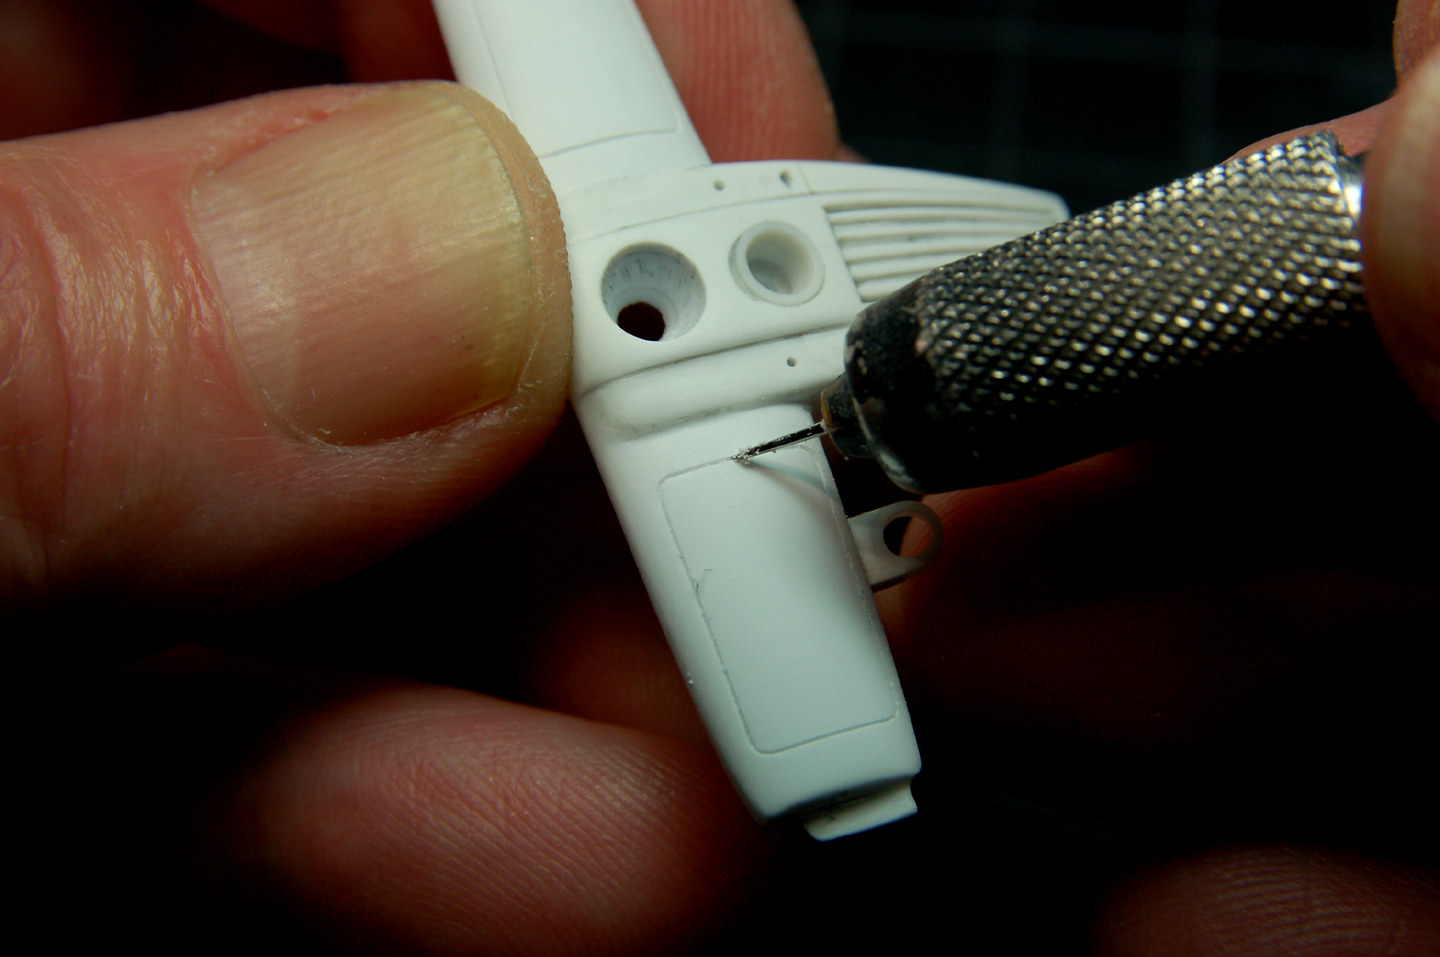 Holes drilled for the 4 dash knobs. 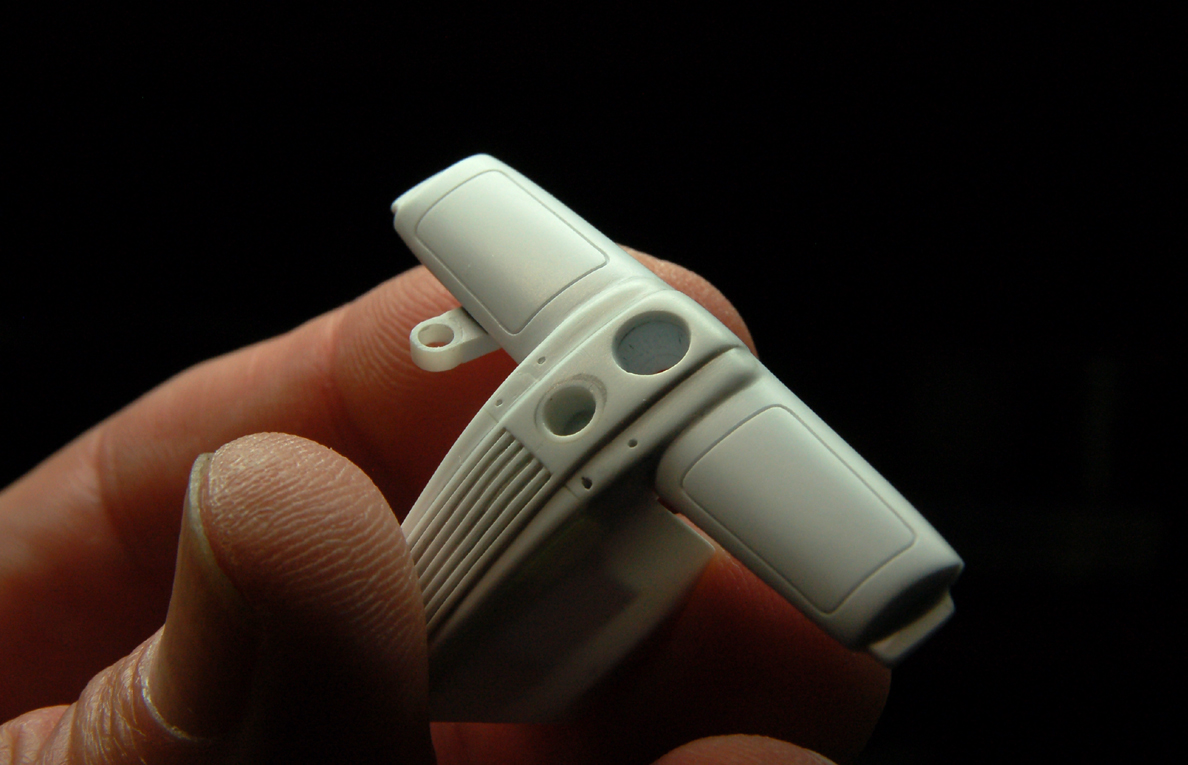 The dash & glove box knobs were made by chucking a piece of styrene rod in my Dremmel & “machining” them with hobby knives & needles. Each knob is mounted on a piece of 28 ga. bead wire. 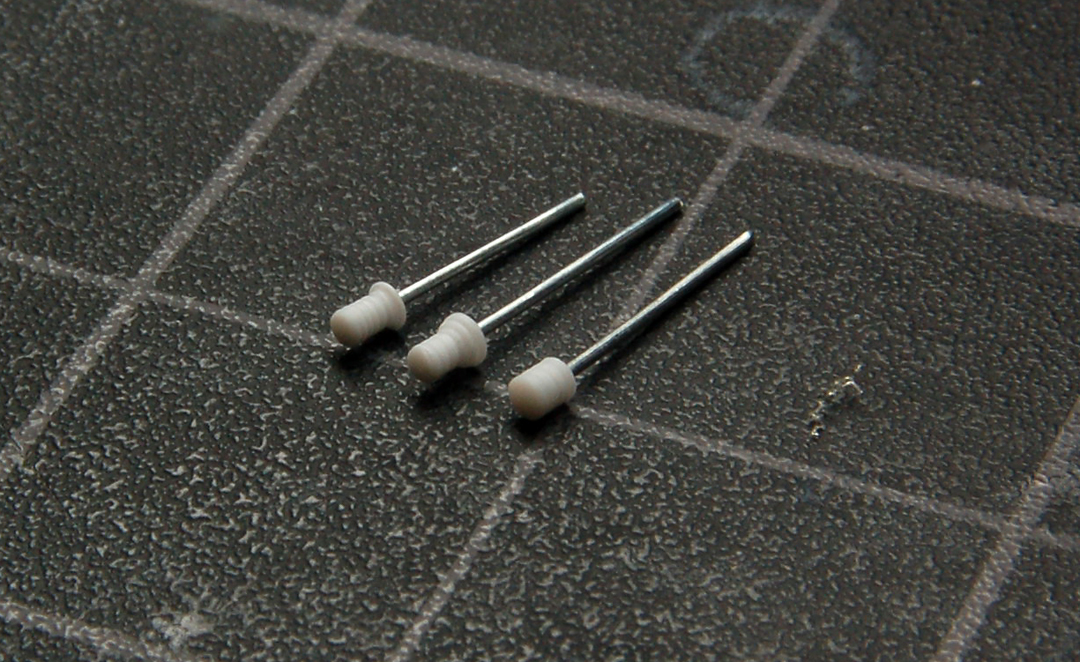 After holes were drilled in the glove boxes, I test fit each of the knobs. The thick steering column support would later be thinned out & refined. 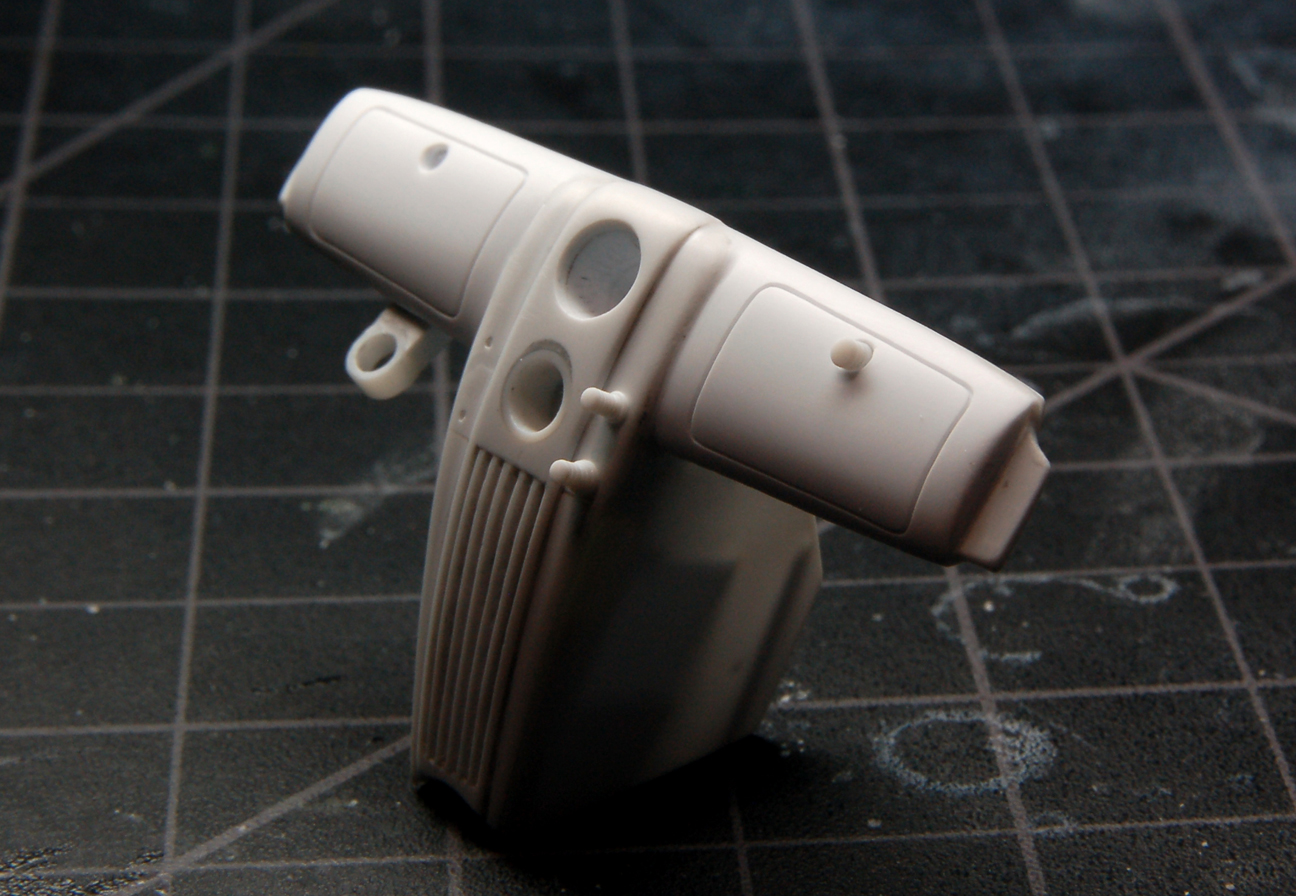 I made a mold of the knobs & gauges, & cast them in resin. Here is the dash & all the parts. 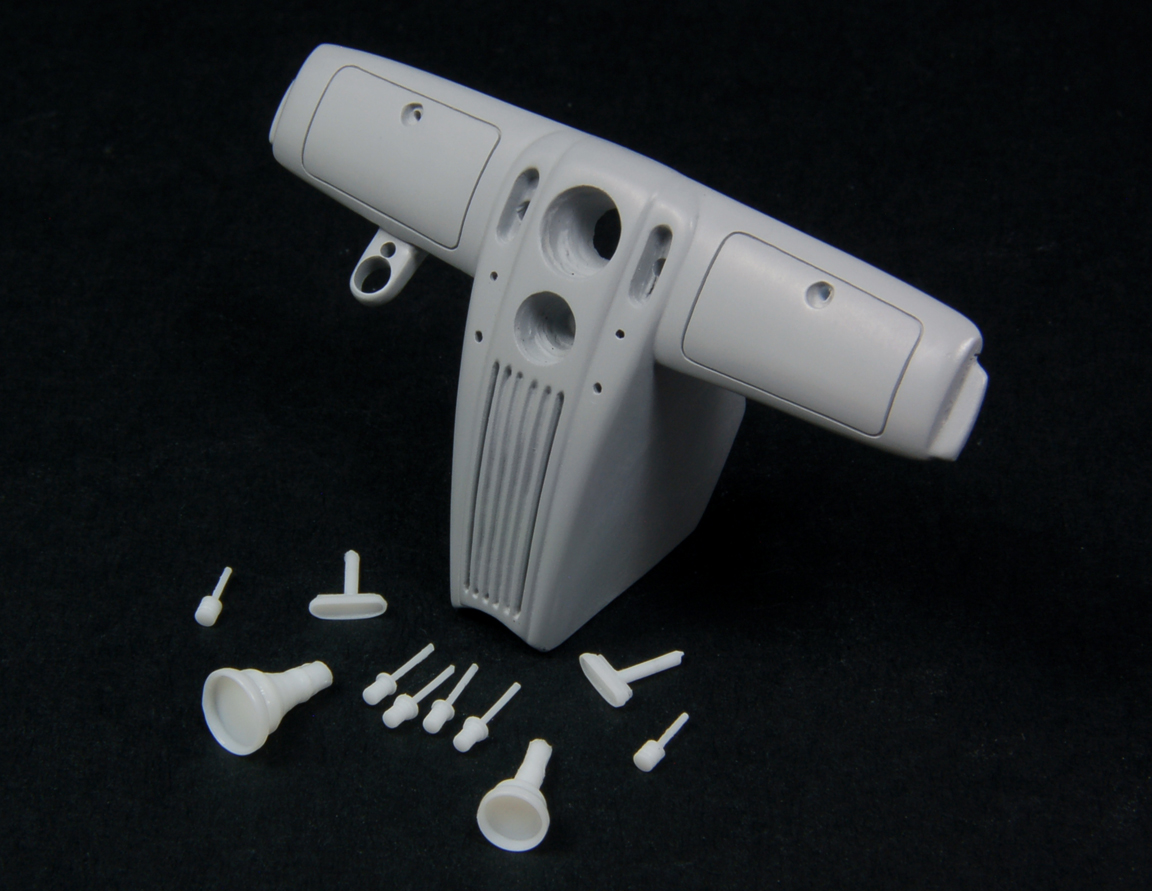 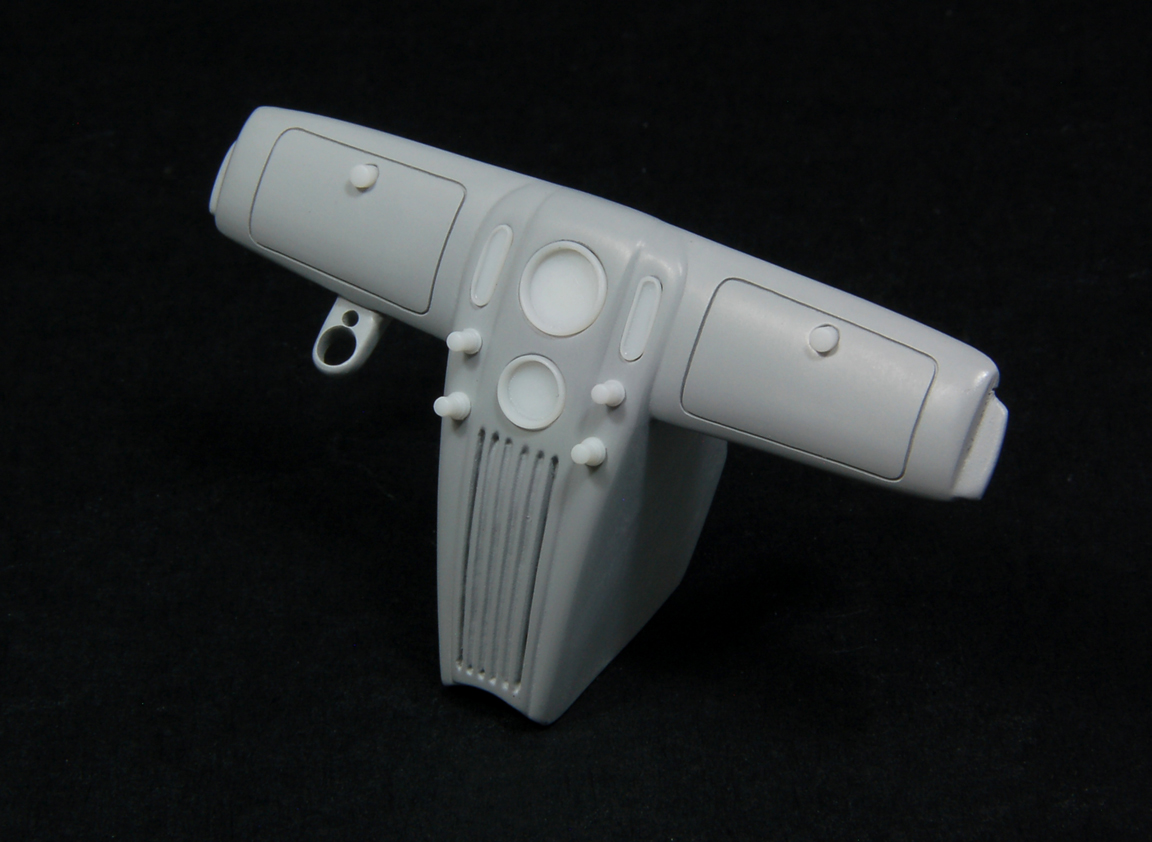 Seat The 36 Ford kit seat is a bit wide at the top, so I decided to use a seat from the Revell 32 Ford kit. I filled the seat upright with epoxy, & also added a layer on the inside of the bottom. I planned on digging a recess in the seats for tuck & roll inserts. 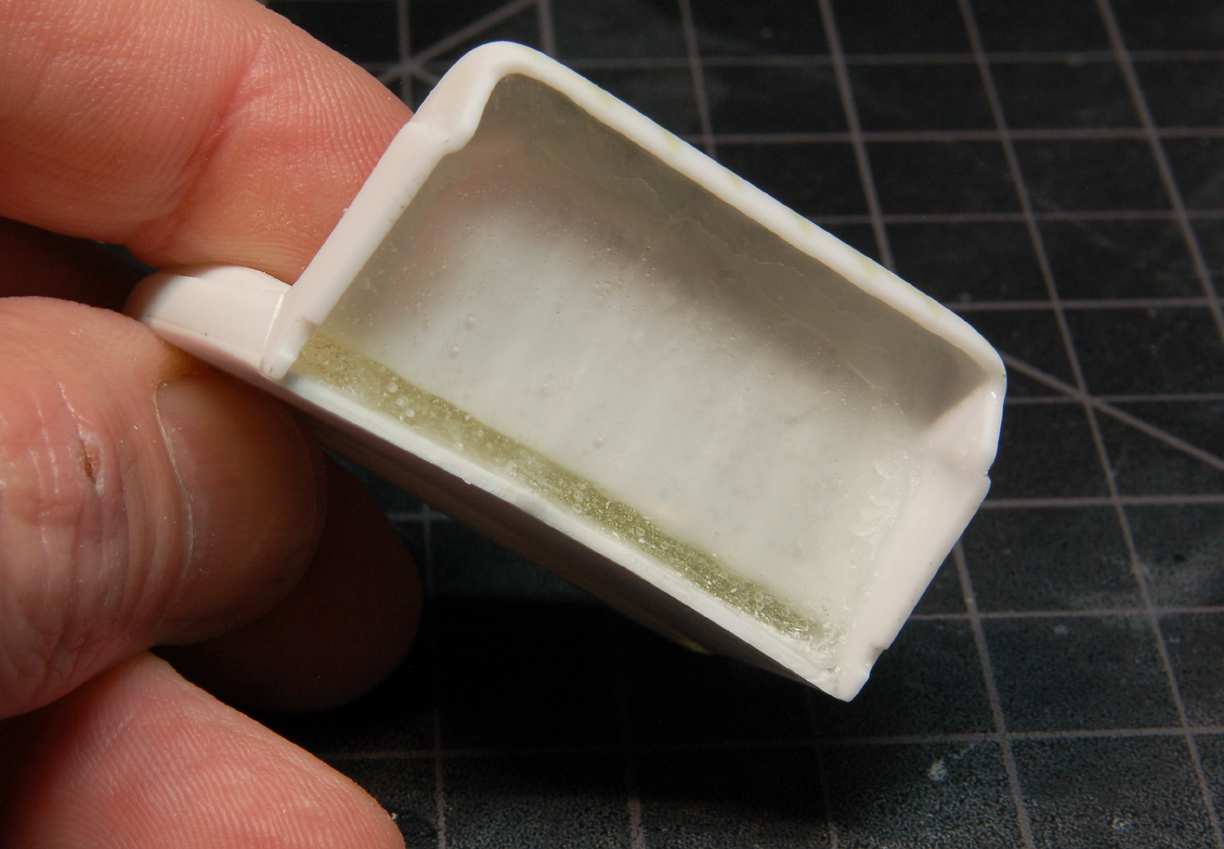 I ground out the recesses & filled in the large pleats with filler. The translucent areas show how thin the plastic is & why I needed to add in the epoxy. 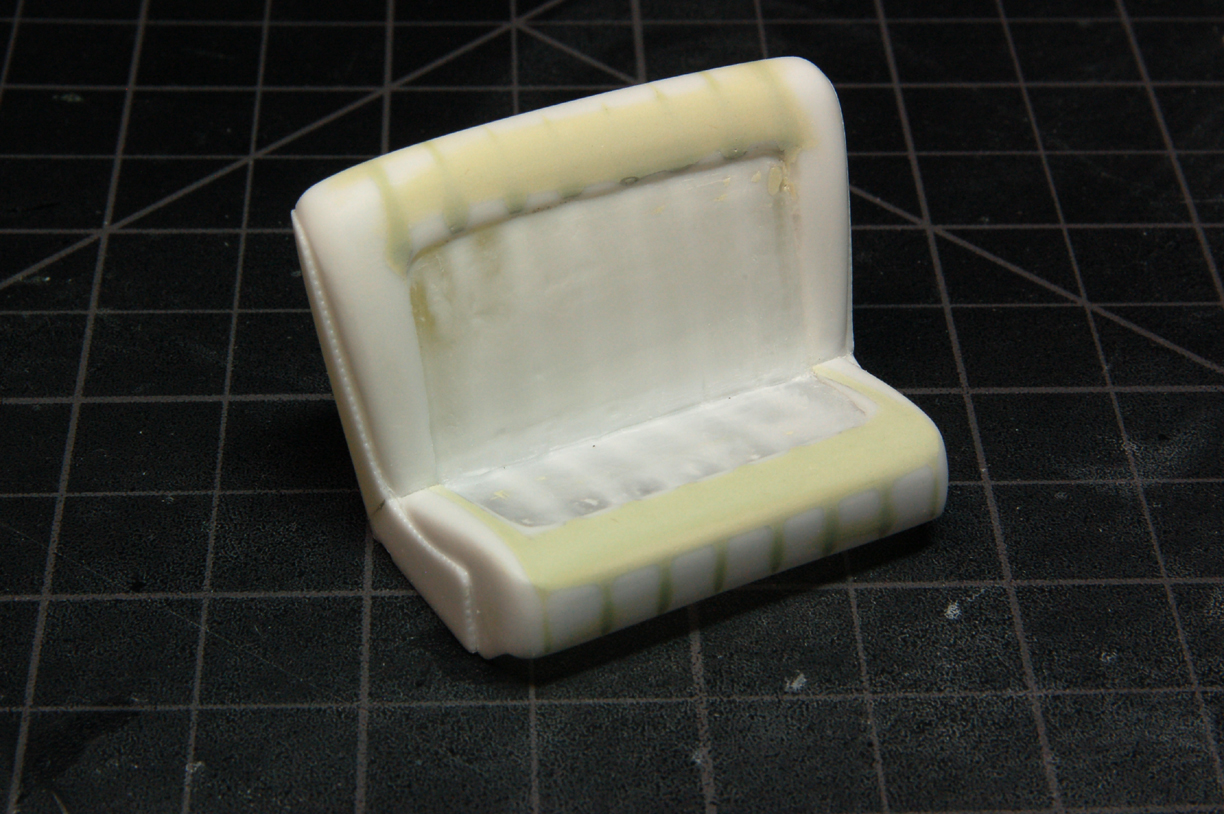 Here’s the seat after a few coats of primer. 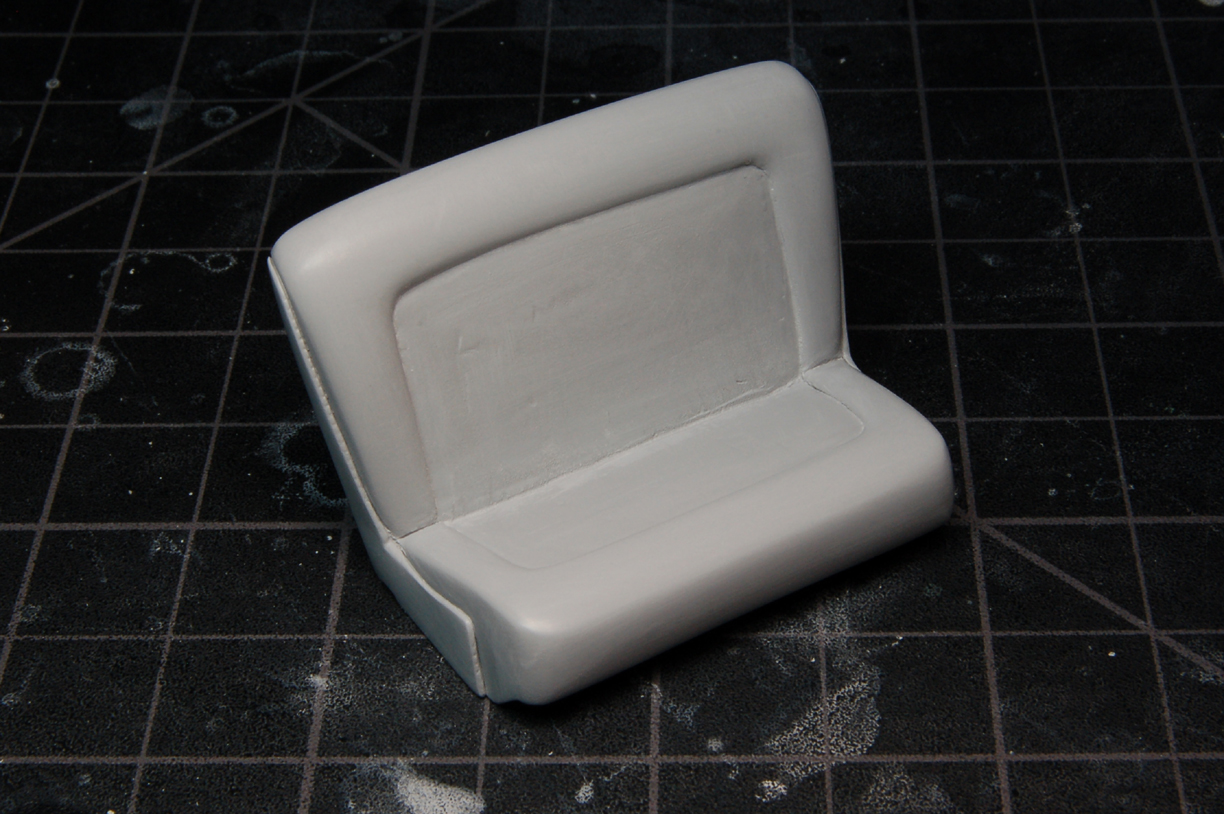 Headliner & interior I made the window garnishes out of layers of plastic & had a crazy idea to create a headliner. I mounted the garnish pieces to the body with double sided tape & added lots of filler to the inside of the cab. 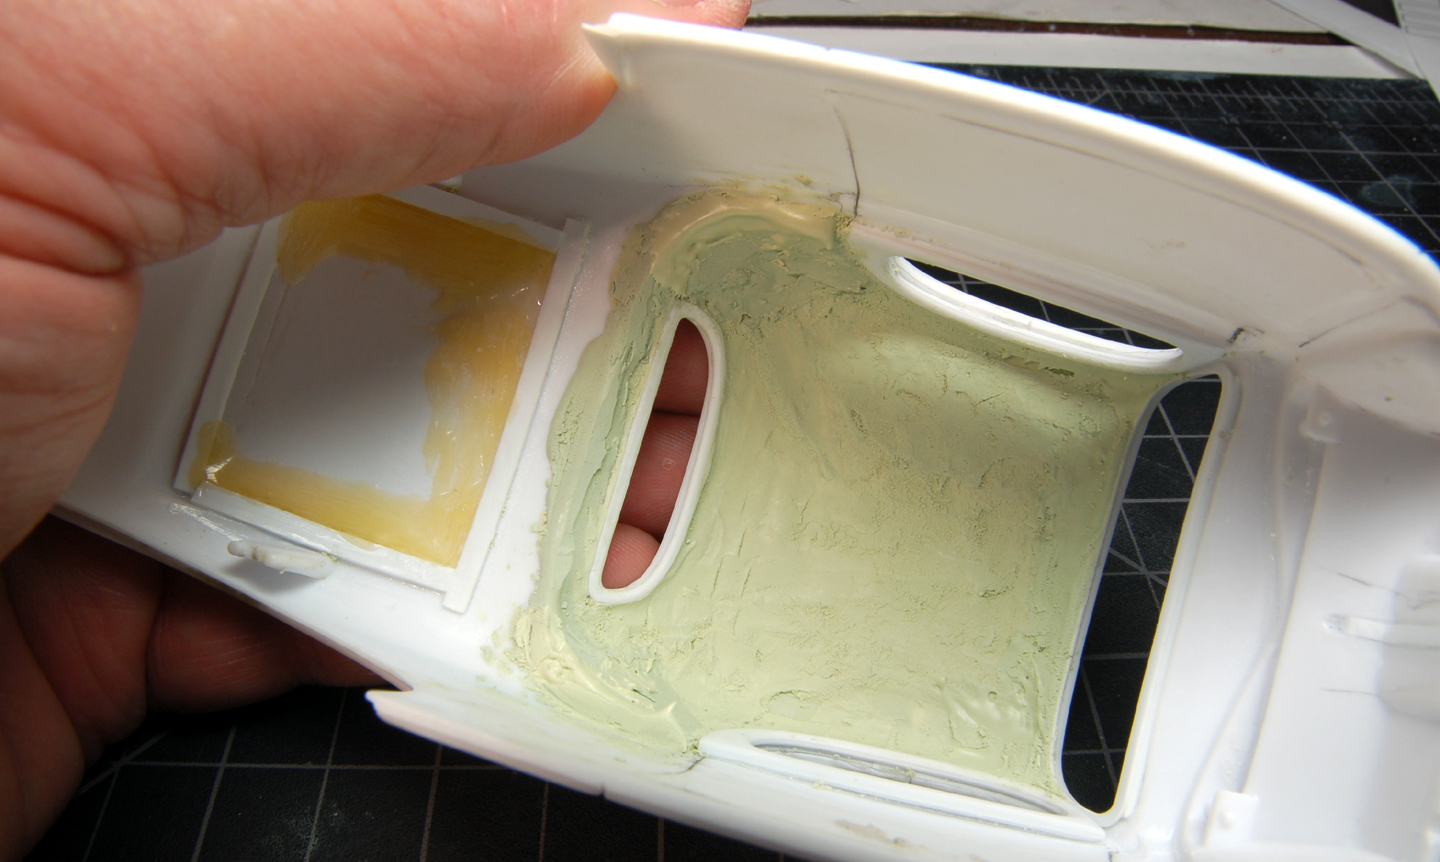 I removed the garnish pieces before the filler set up fully. I sanded, added more filler, sanded, & kept repeating until the headliner was smooth. More filler was added after this photo to fill pinholes & other slight imperfections. 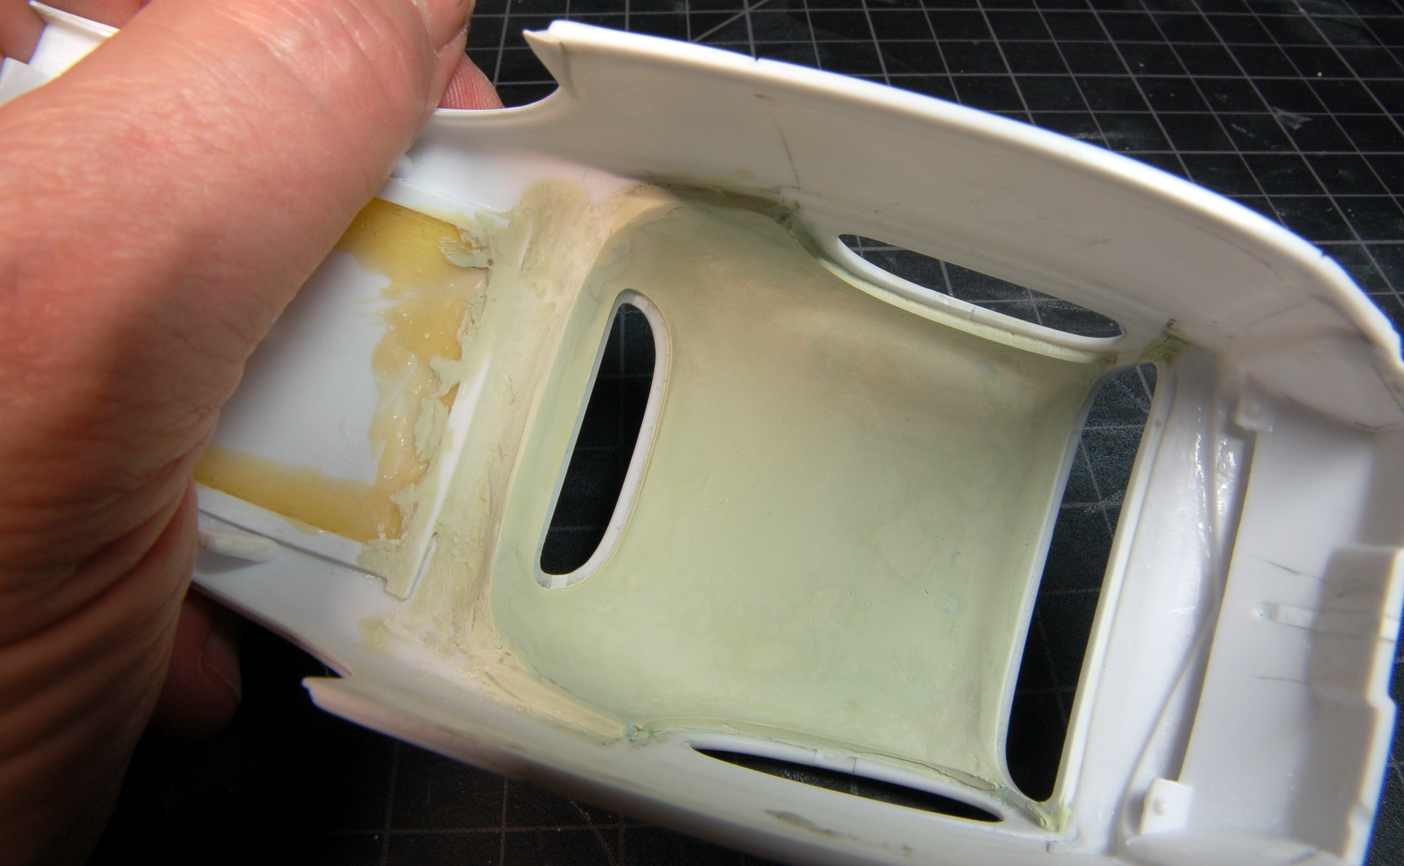 More coming later... |
|
|
|
Post by krassandbernie on Apr 30, 2020 16:55:05 GMT -5
Well, that's one way to make a headliner! LOL! It's crossed my mind to basically do the same; but with plastic sheet stock cut into strips to bend more easily to the roof contour. That's a bit more difficult to accomplish with the contour of the roof on a '36 Ford coupe however. Your dash (and associated parts) is a piece of art in and of itself......but we'd expect nothing less from your work bench Steve! Great work as usual!
|
|
|
|
Post by cturner on Apr 30, 2020 18:51:51 GMT -5
What Ed said...
|
|
|
|
Post by mack2856 on Apr 30, 2020 21:40:06 GMT -5
That dash is sick. Sometimes it's so much fun building these you want to slow down and enjoy what you done, or maybe it's just me.
|
|
|
|
Post by dodgefever on May 1, 2020 3:46:38 GMT -5
That dash is incredible. I don't even want to think about trying to sand the headliner.
|
|
|
|
Post by randfink on May 1, 2020 10:20:21 GMT -5
Wow. I'm totally in awe of that dash. Just wow.
|
|
|
|
Post by spex84 on May 1, 2020 13:00:50 GMT -5
Holy smokes. Glad to see this build return!!
That dashboard is a work of art. I also really like the seat bolsters/padding.
|
|
|
|
Post by lo51merc on May 1, 2020 13:27:50 GMT -5
Master work. Wow!
|
|
|
|
Post by steveb on May 2, 2020 8:37:47 GMT -5
Thanks, guys! Yeah, that headliner, lol. I've used filler for most of my headliners, but never with garnish impressions. Also, I never did such a small cab as this. I used a Dremmel with a conical stone to get the curvature in the tight spaces, then moved on to sanding & more filler. Continuing on: Fender Skirts I thought the kit skirts were too short, so I added layers of plastic sheet & superglue to increase the overall length. 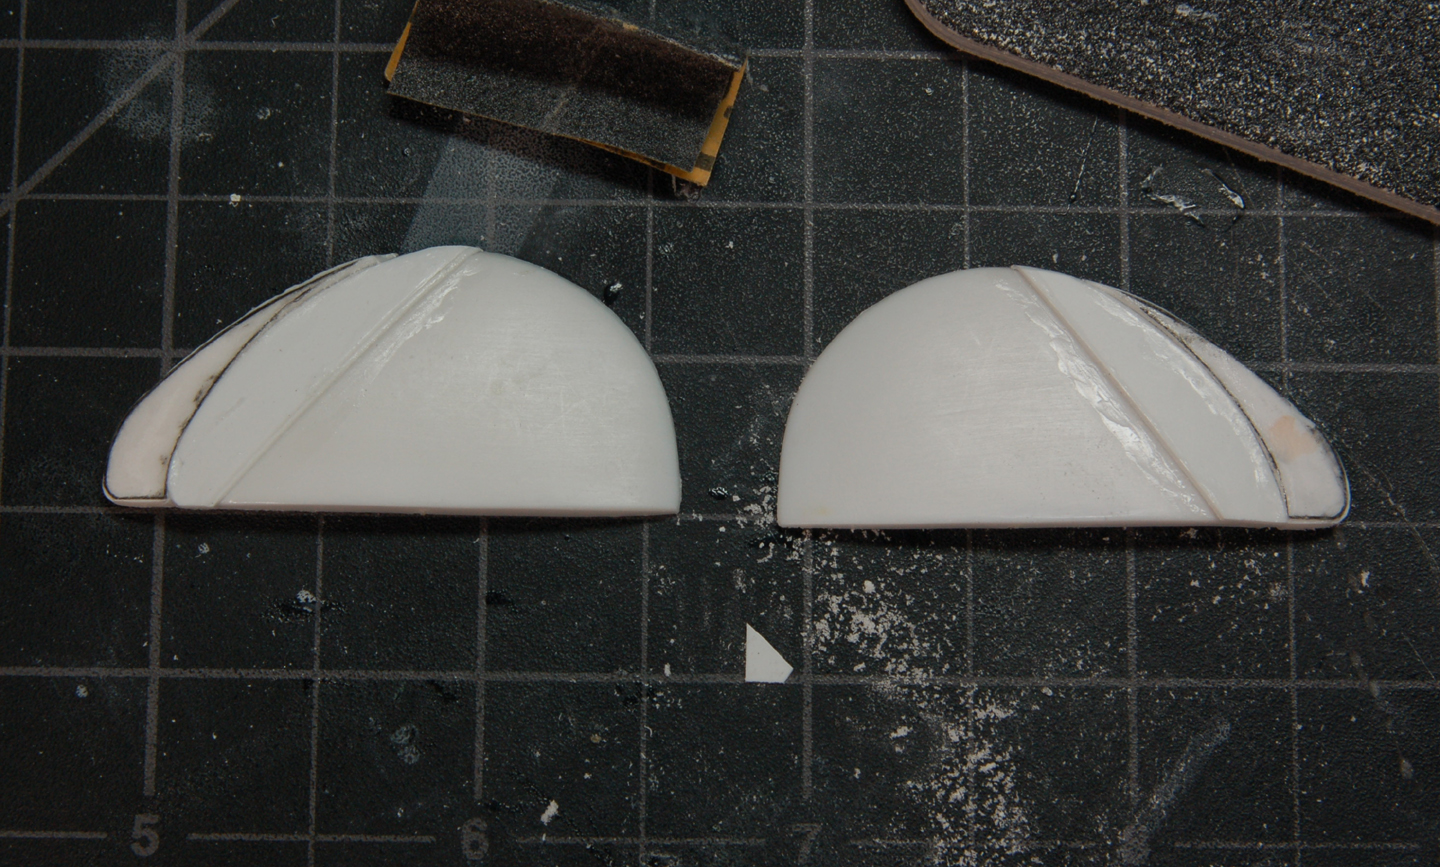 After lots of sanding & more superglue they were taking shape. 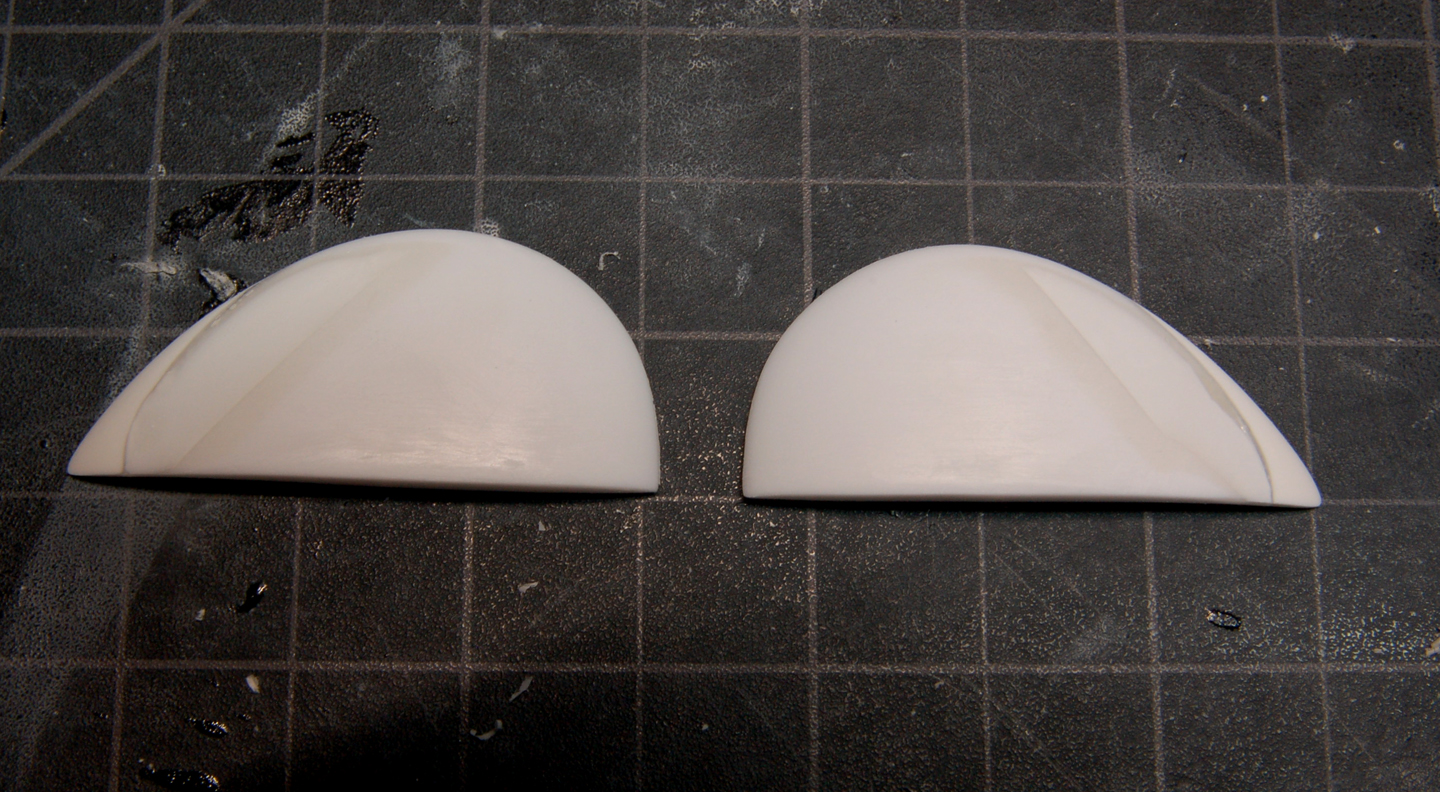 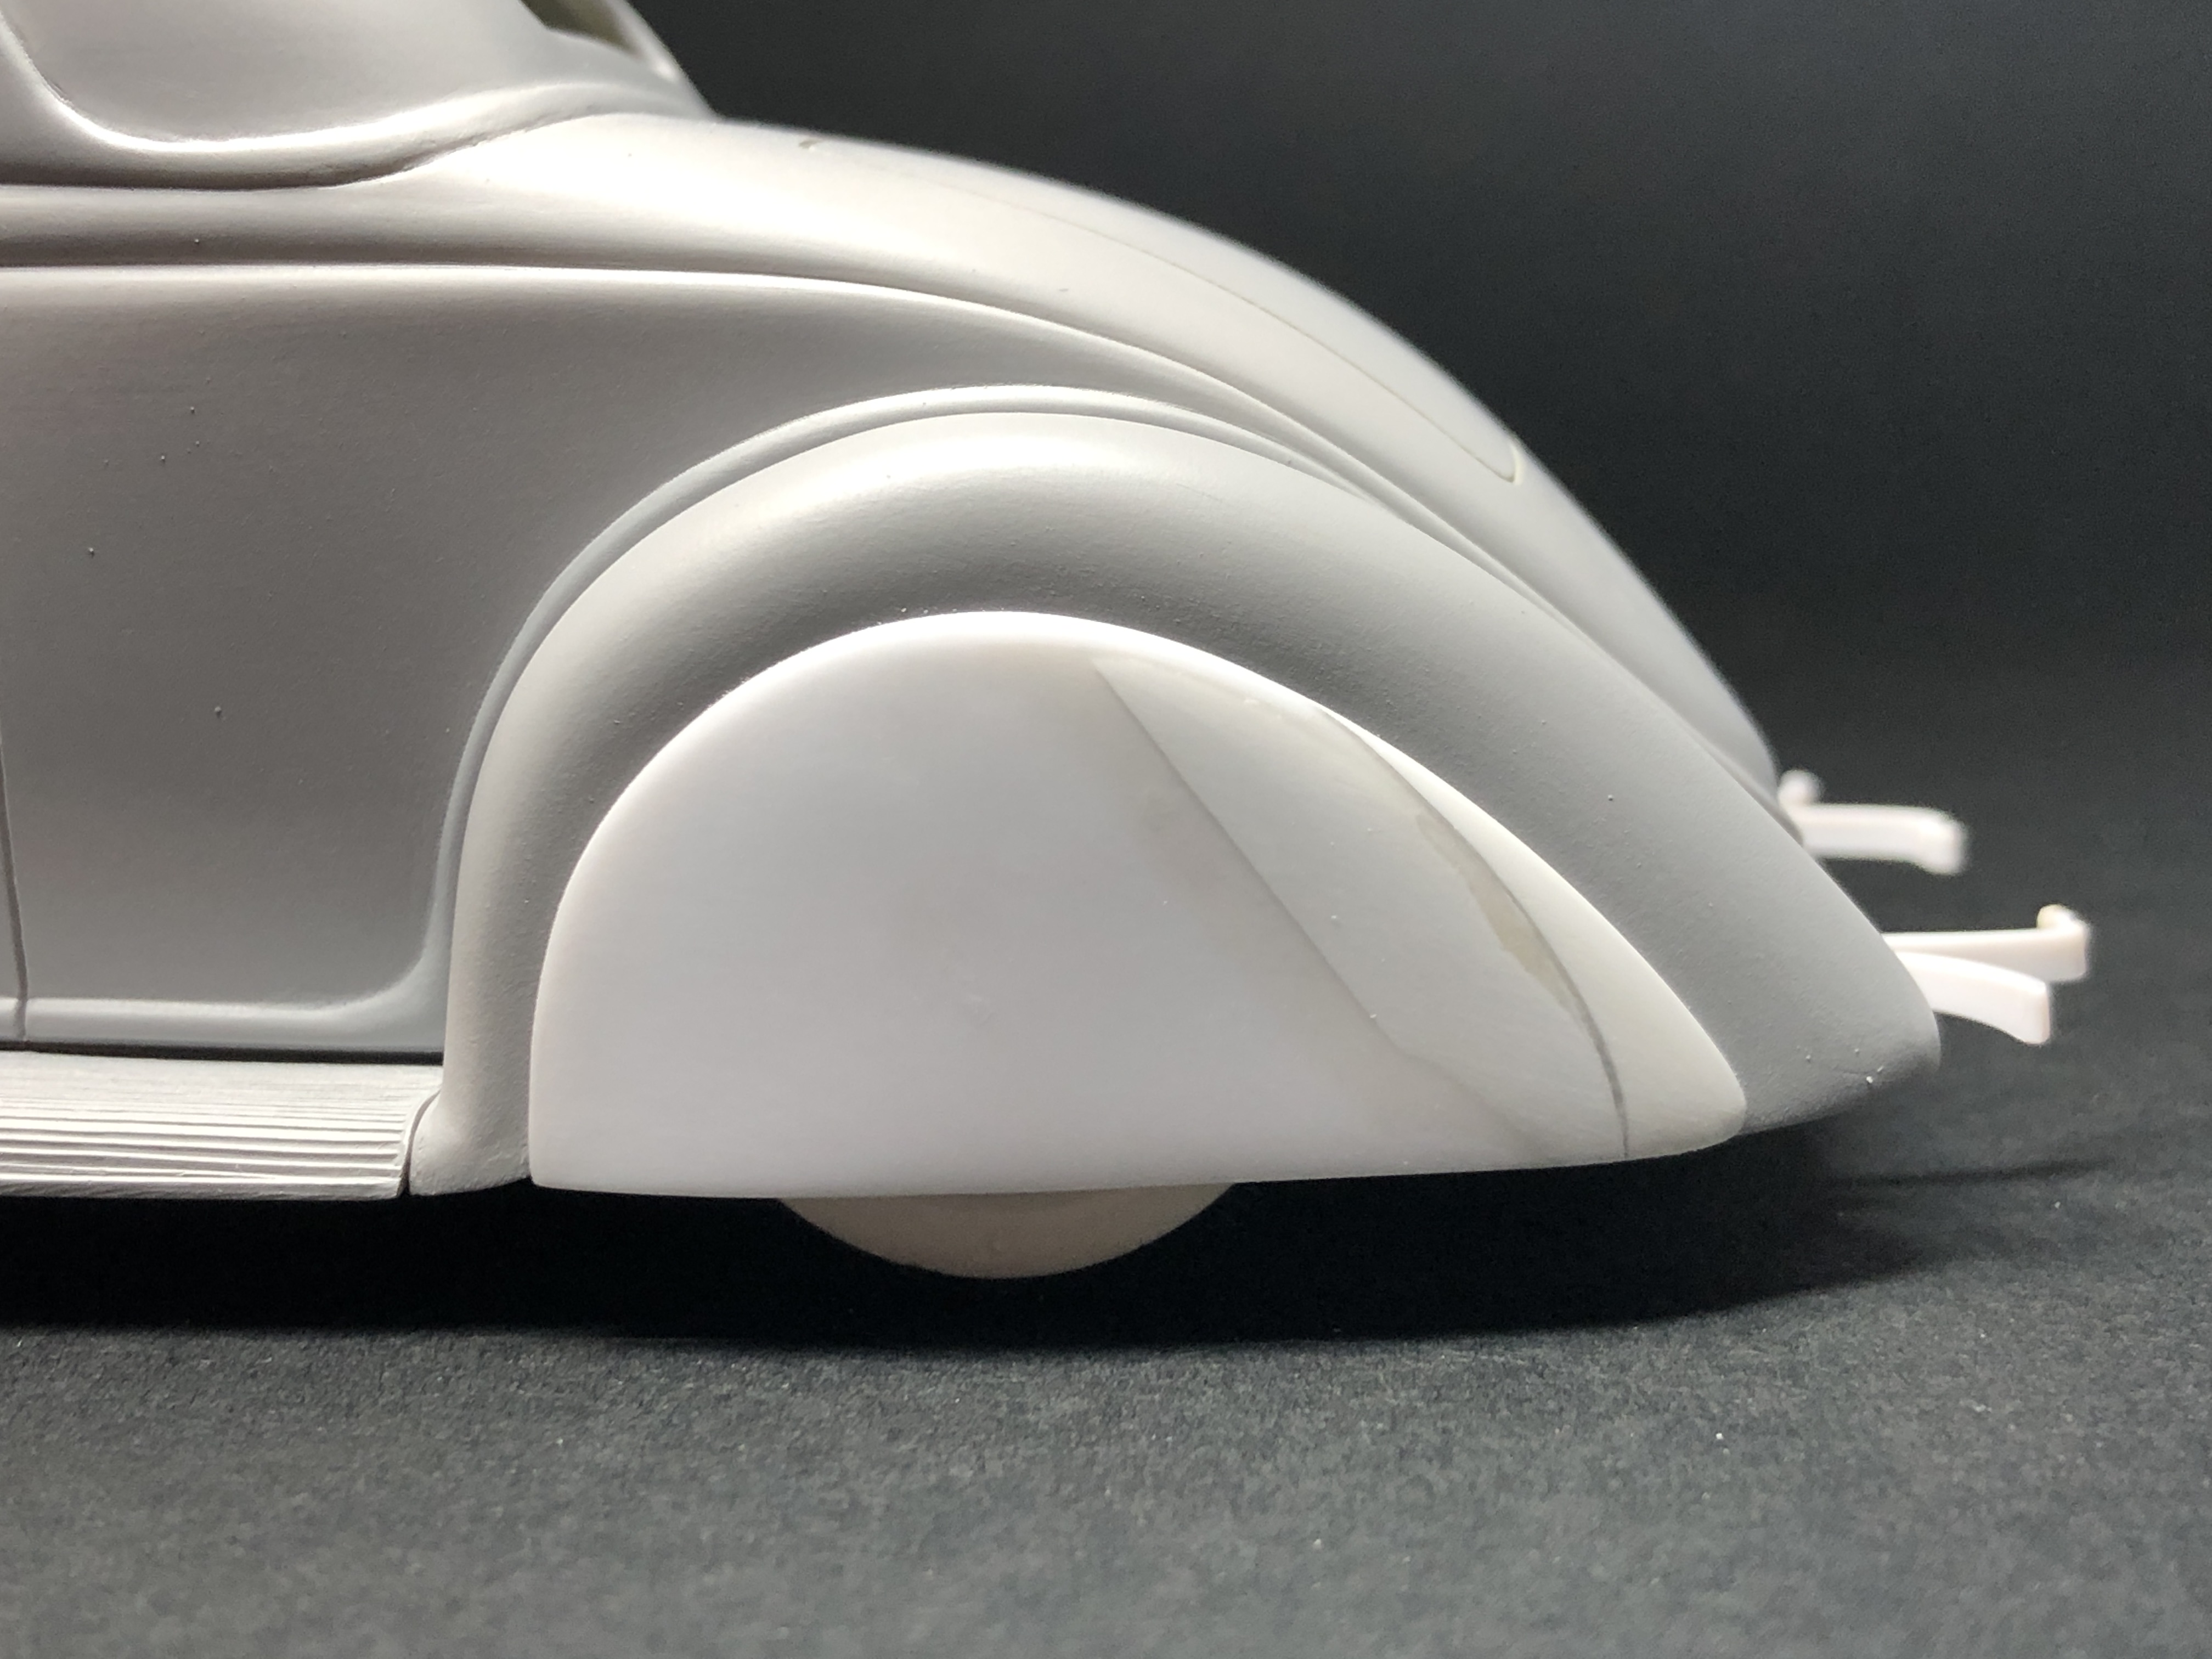 Getting the inside contours to fit without gaps took a while, but I was finally able to glue them on. 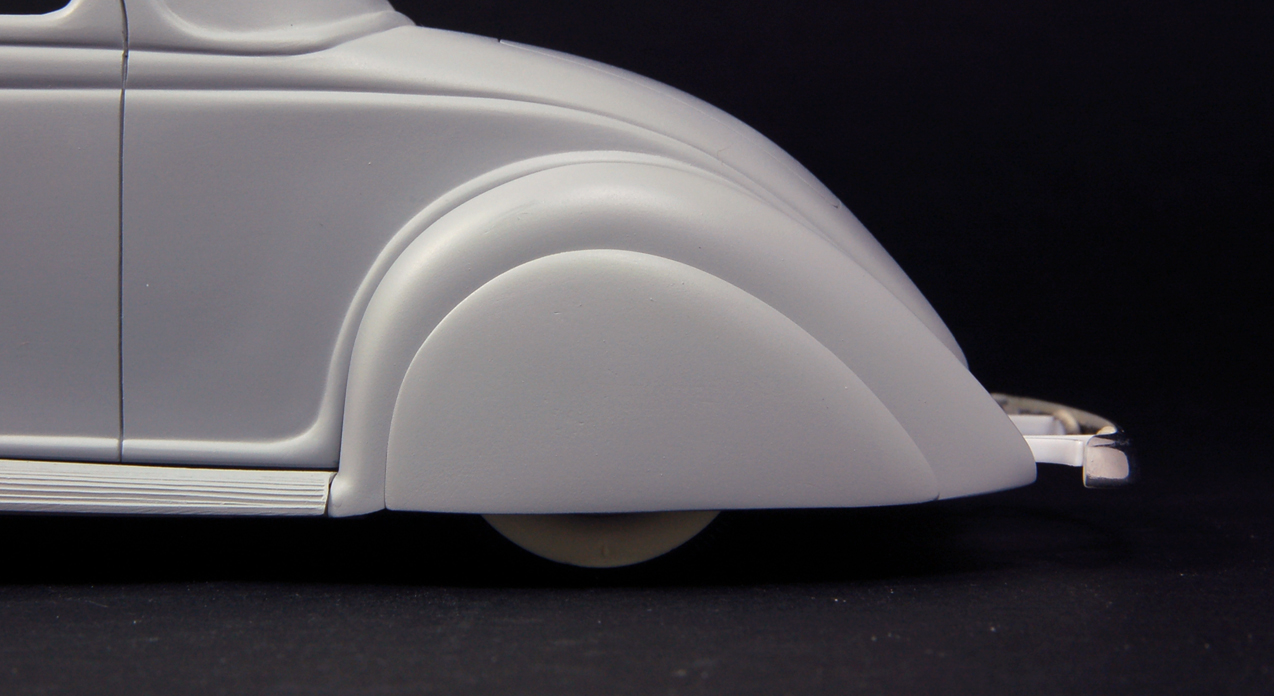 46 Ford bumpers added on, but the rear bumper brackets need to be modified to pull the bumper closer to the body. 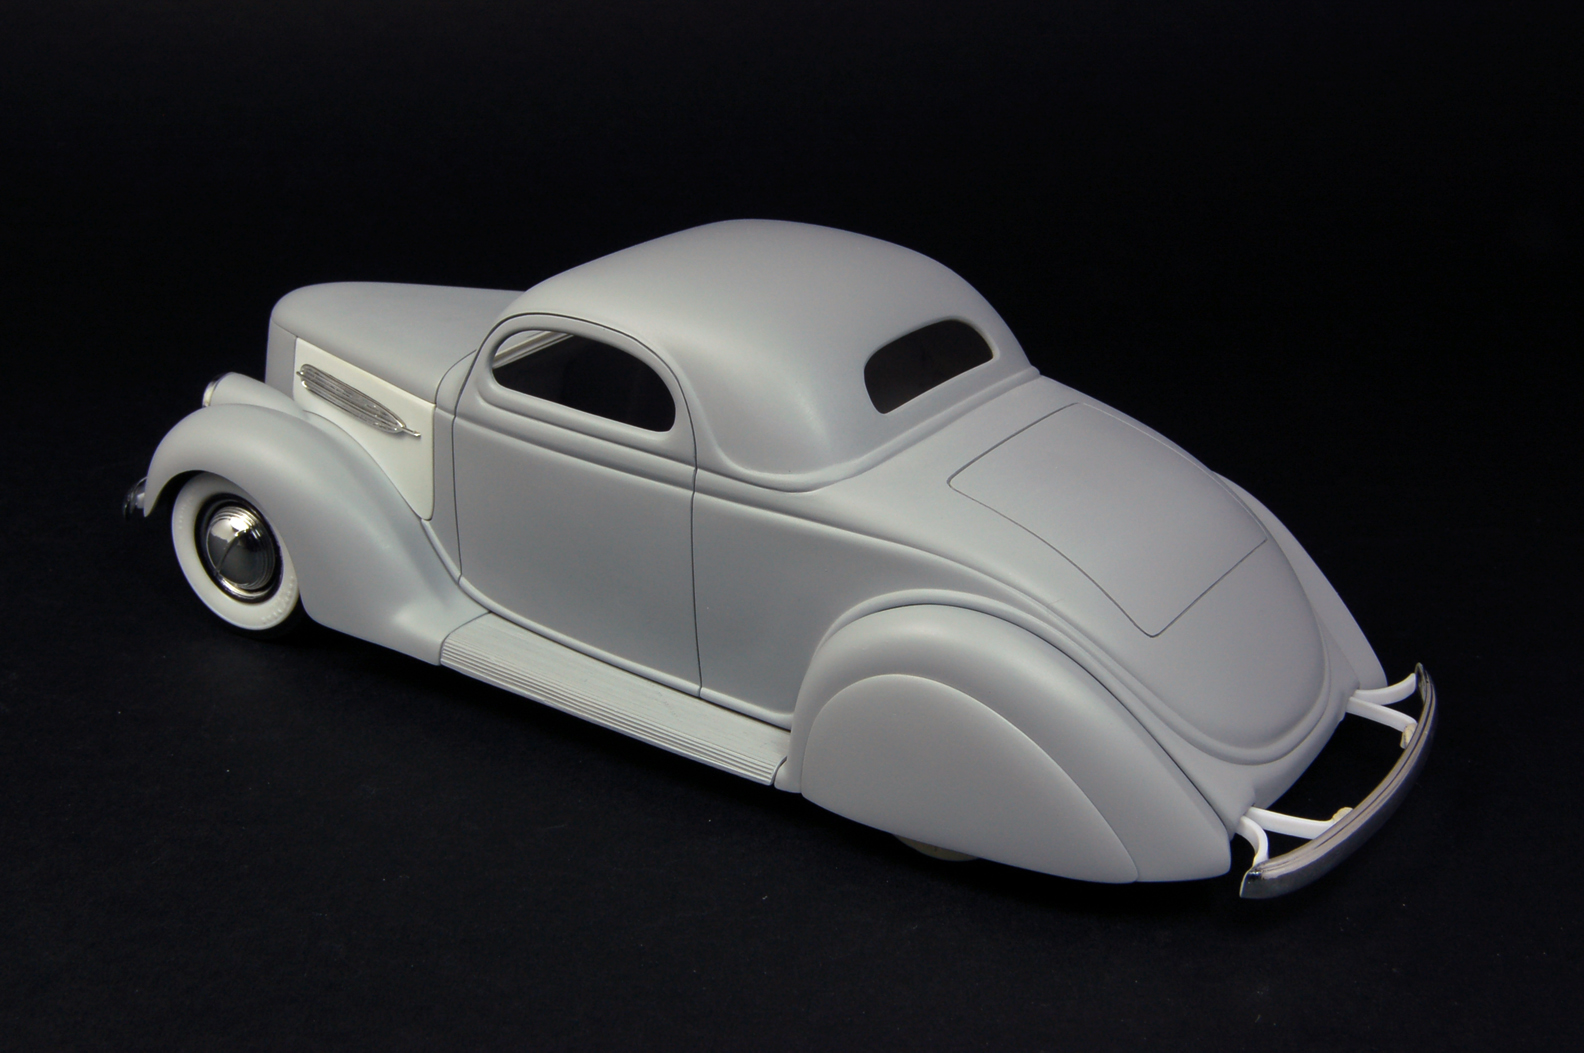 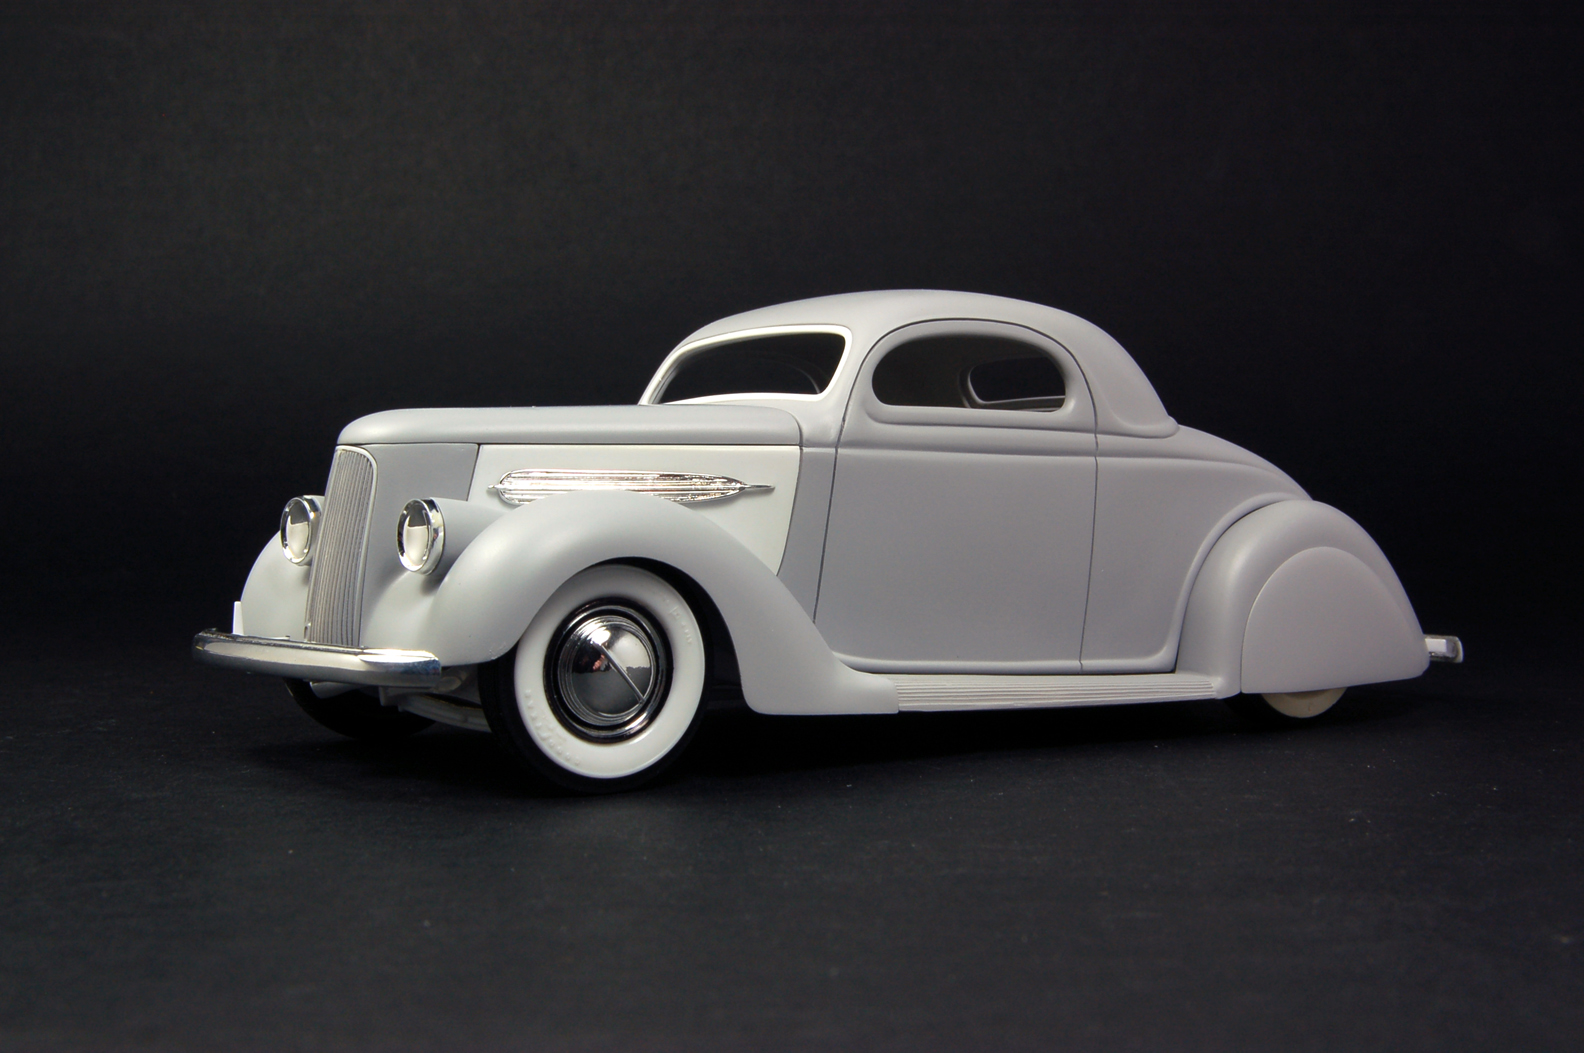 Hood I didn’t like the gap between the hood & the cowl, so I added plastic & superglue to the hood. 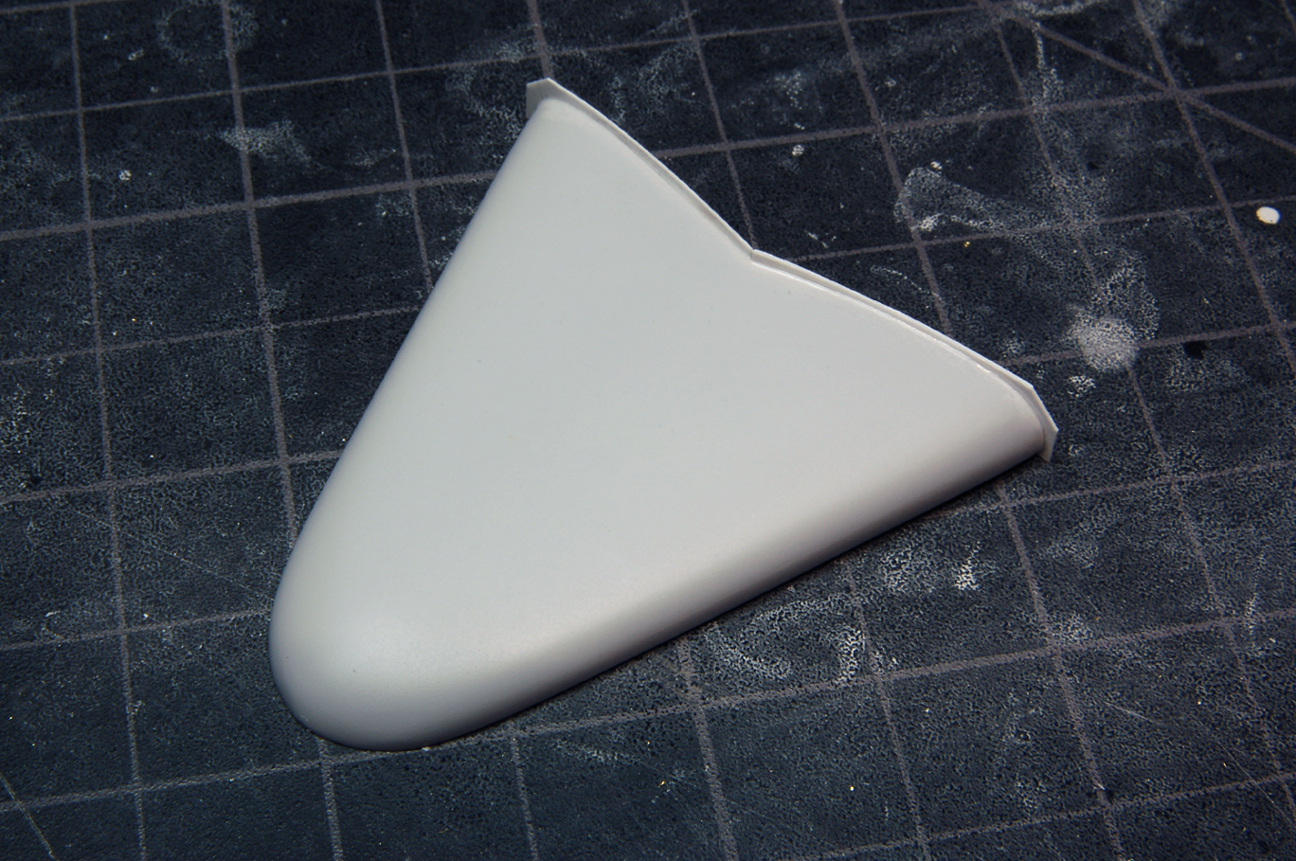 After the glue setup, I trimmed off the excess & filed it level. 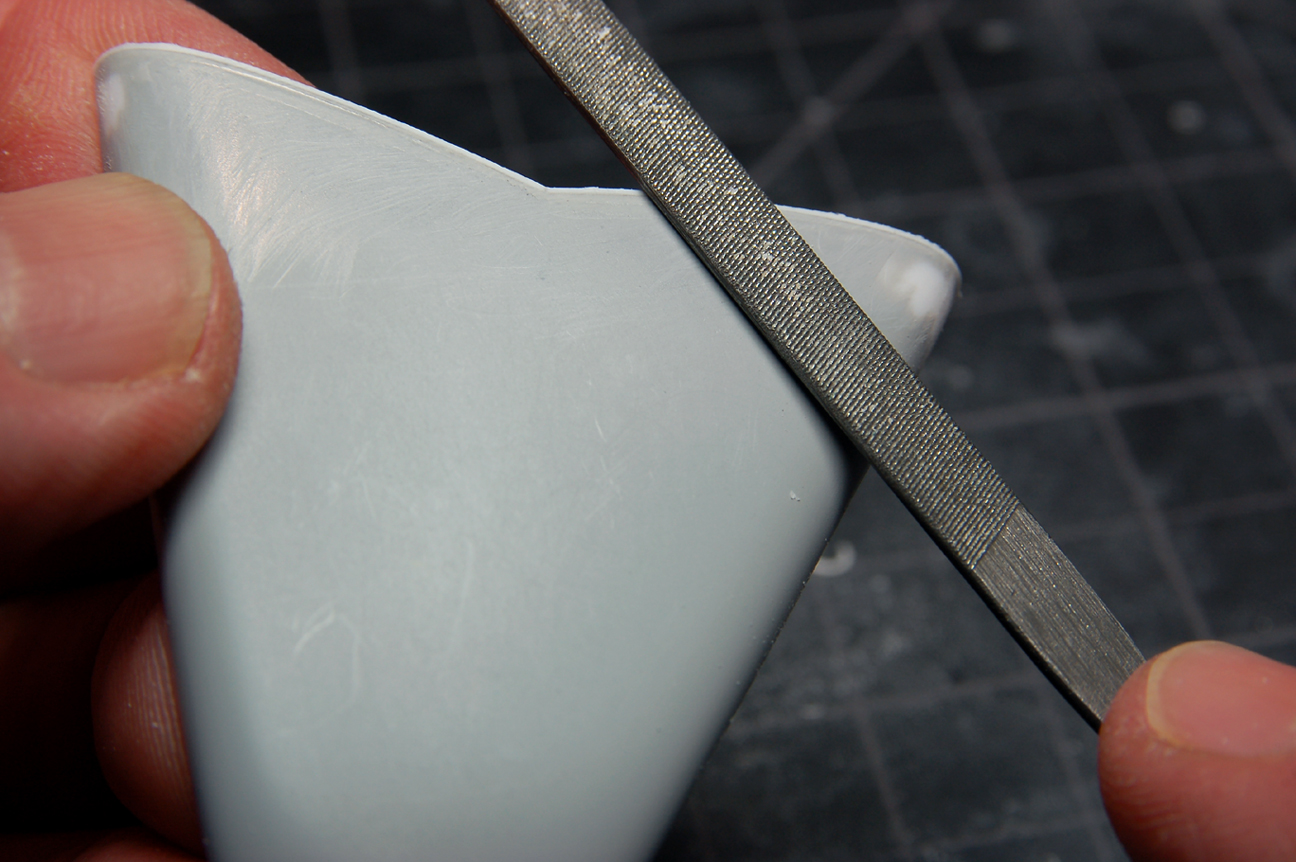 The fit is better now. I later added a strip down the center to represent the hood hinge spine. 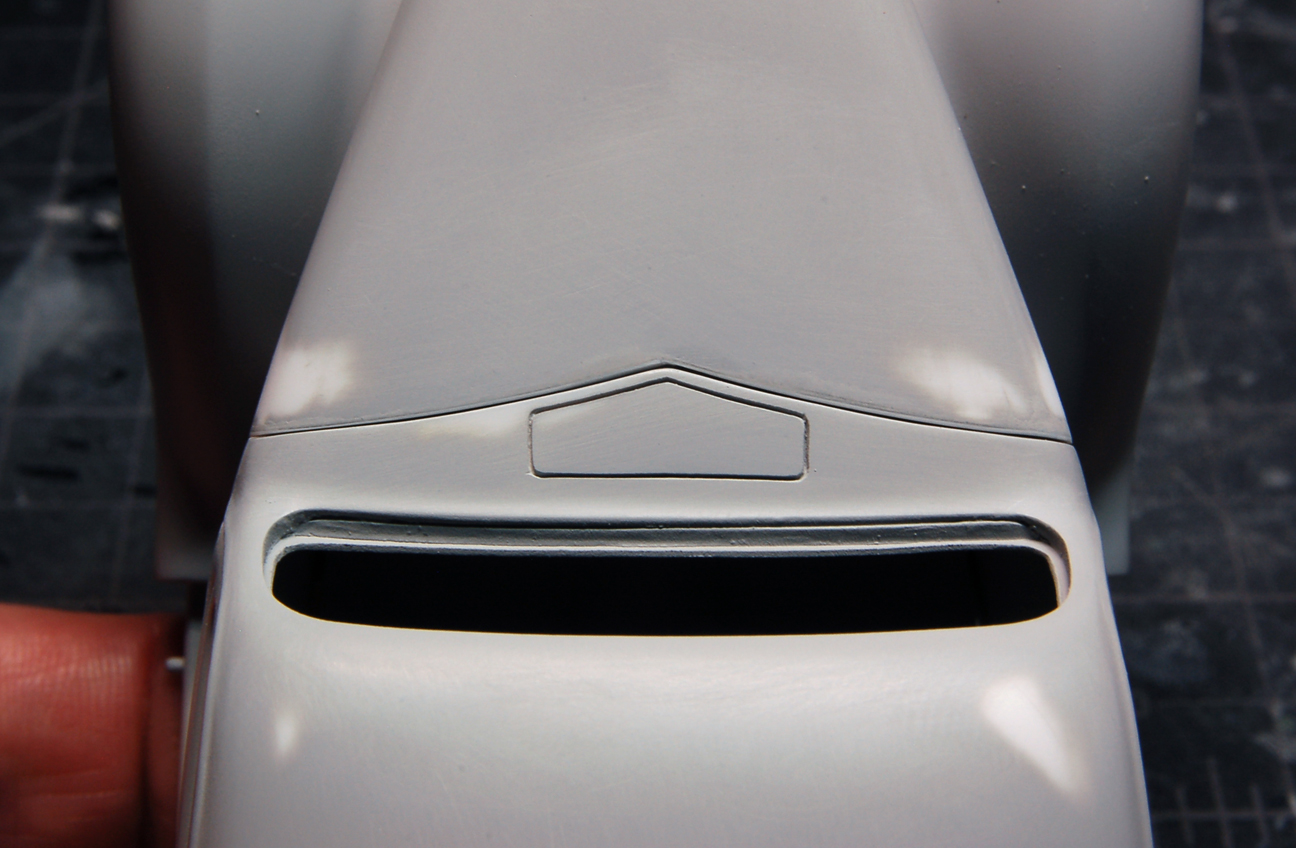 Hinges Since I had sanded off the hinge blobs on the body, I now thought about adding some better-looking hinges. Rik Hoving suggested making them separate, & add them in after painting & polishing. He had done something similar for 32 Ford hinges that are available from Replicas & Miniatures. After one failed attempt of hinges that were too large, my second go round came out better. 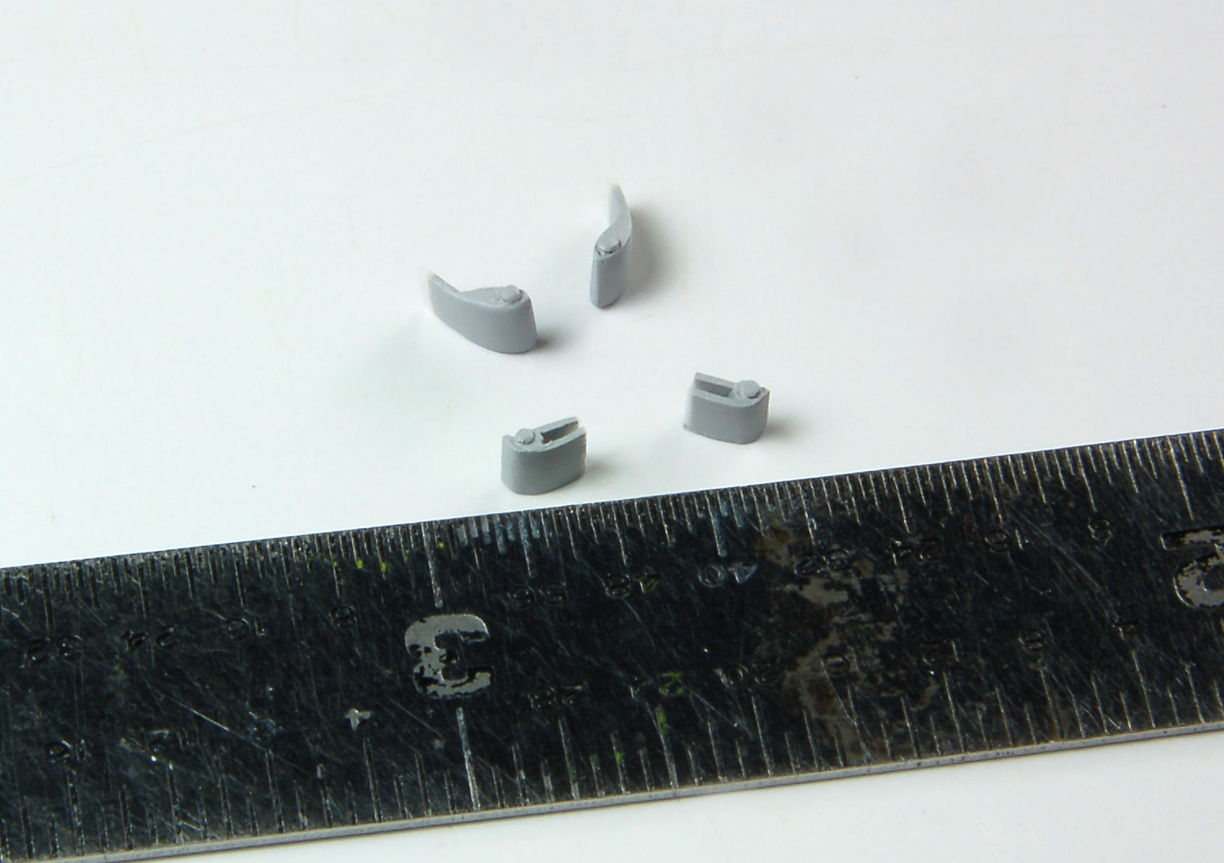 The hard part was digging those small rectangles in the body for the hinges to fit in, but I finally got it looking okay. 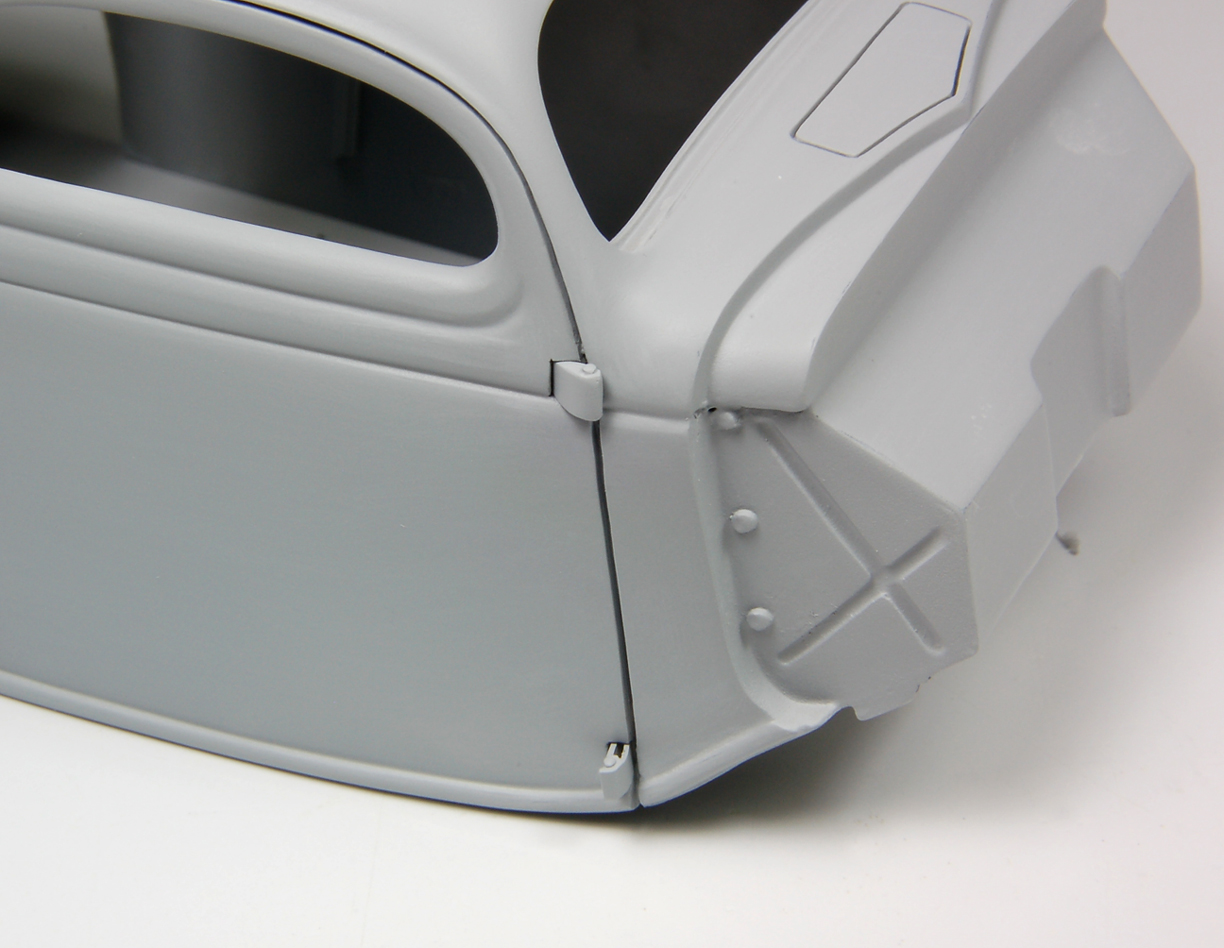 I also added a small lip transition on the bottom of the hood sides (another Rik idea) 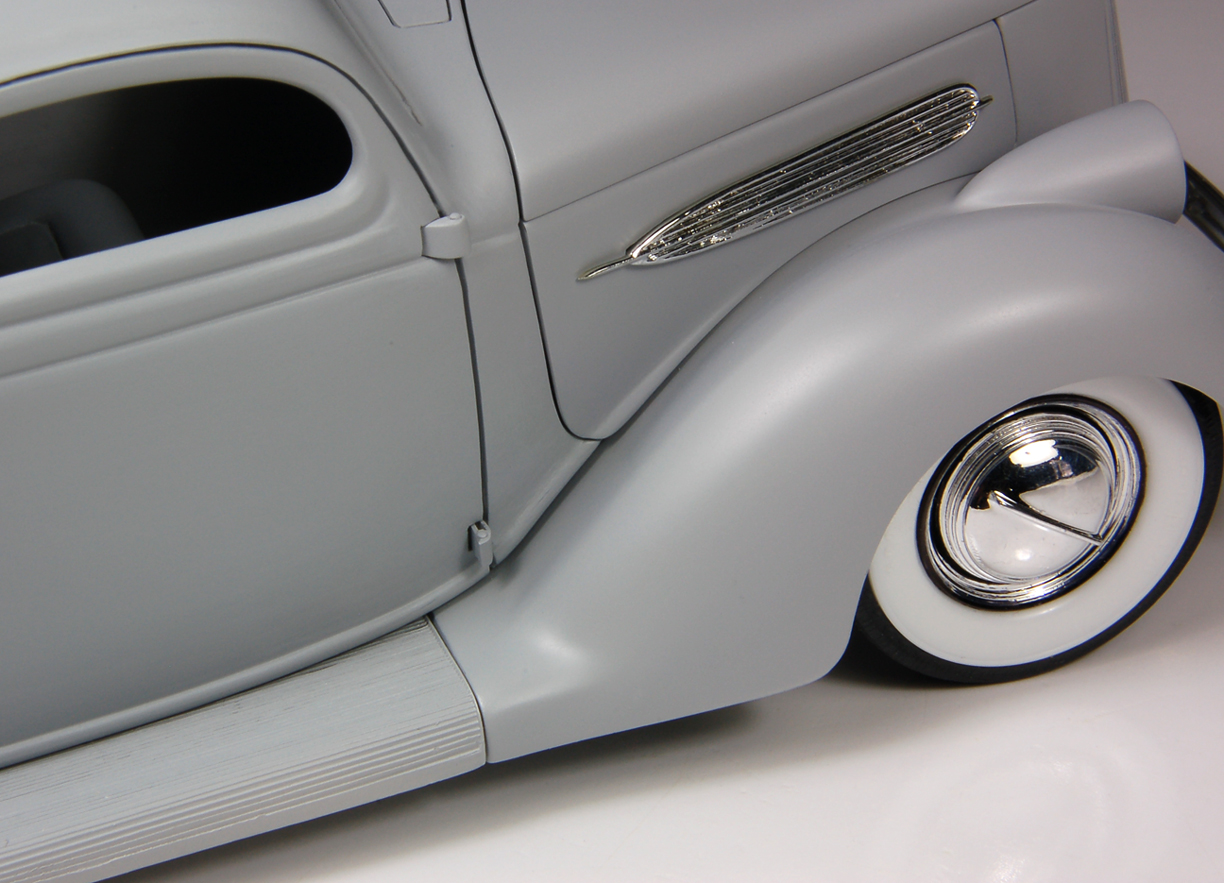 Bumper brackets I knew that the rear bumper brackets needed to be modified to pull the bumper closer to the body. I saw a few examples of gravel shields on early customs, so that would be a good way to hide those thick bumper brackets. The front brackets would be totally exposed, so I had to come up with something better than the thick kit pieces. I drew out a template & bent 4 pieces of brass bar to shape. The 2 pieces for each side were soldered together 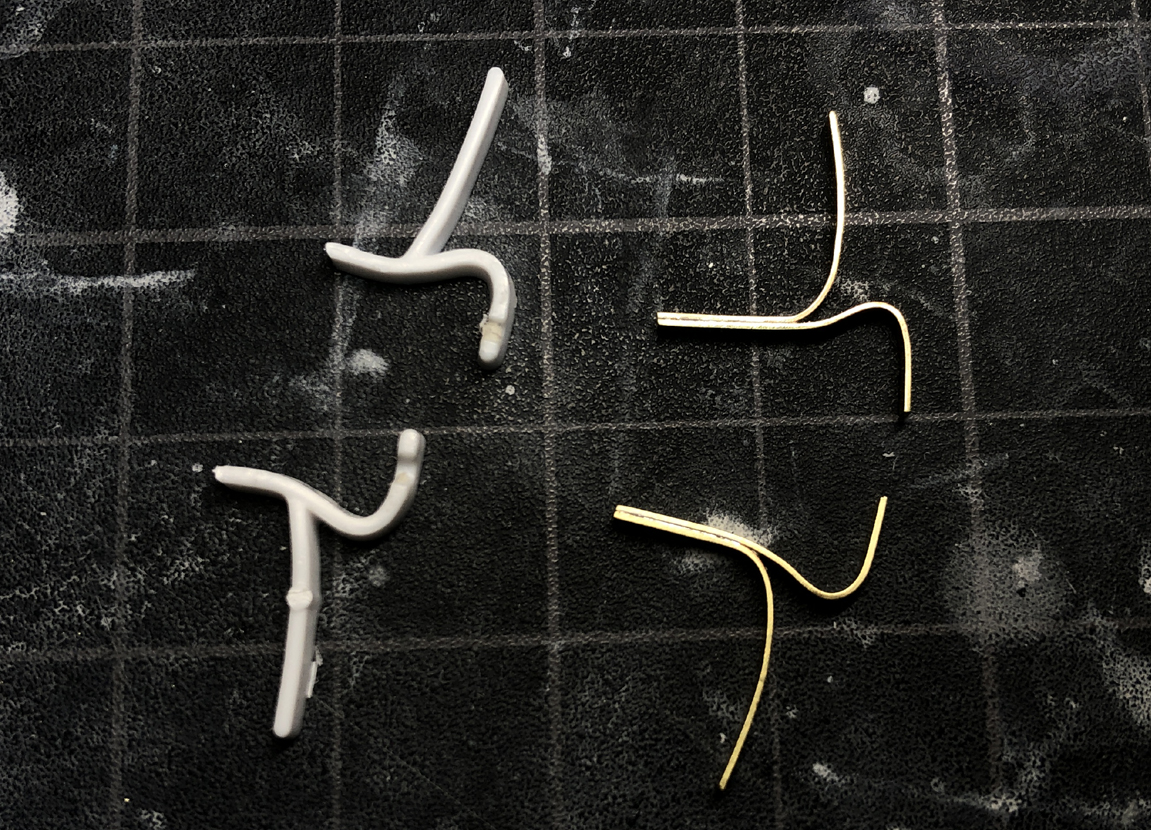 Afterwards, I superglued the brackets to the frame. 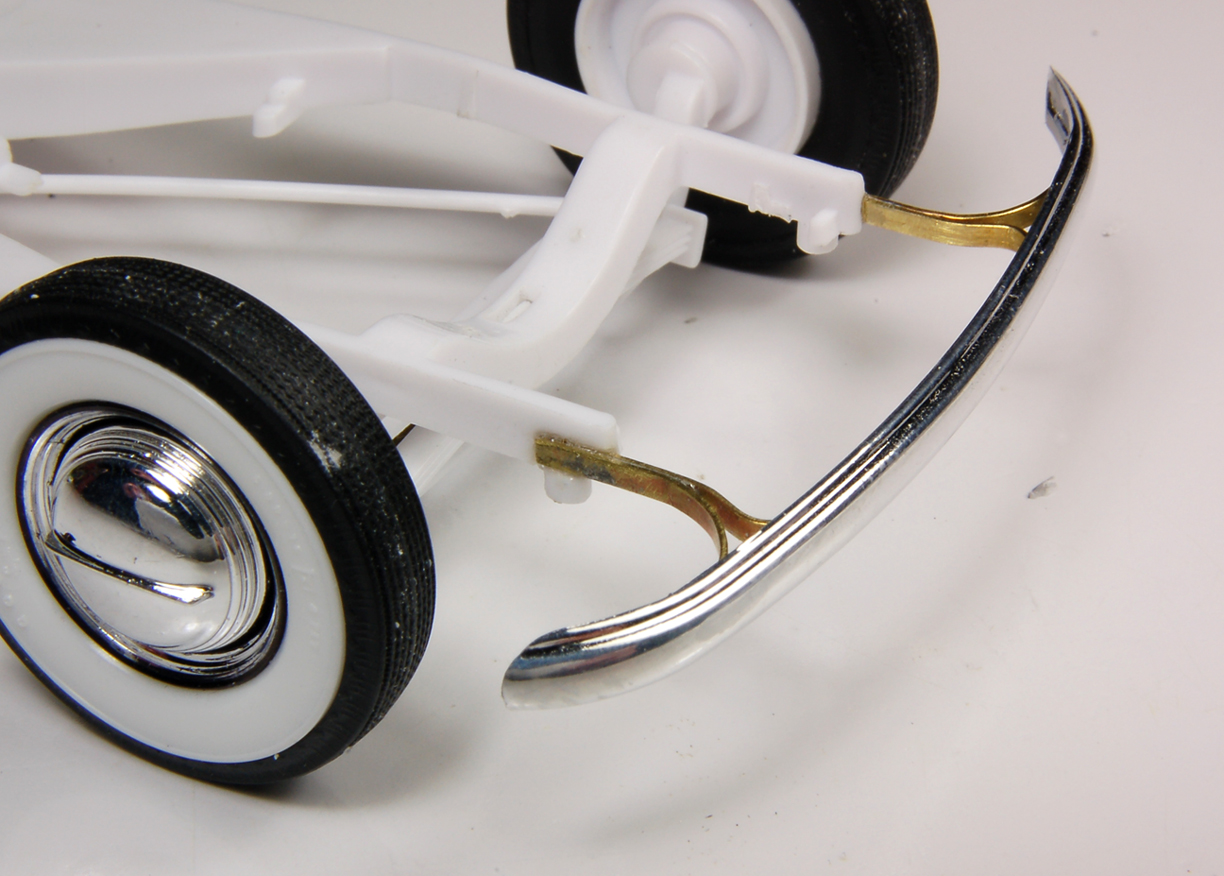 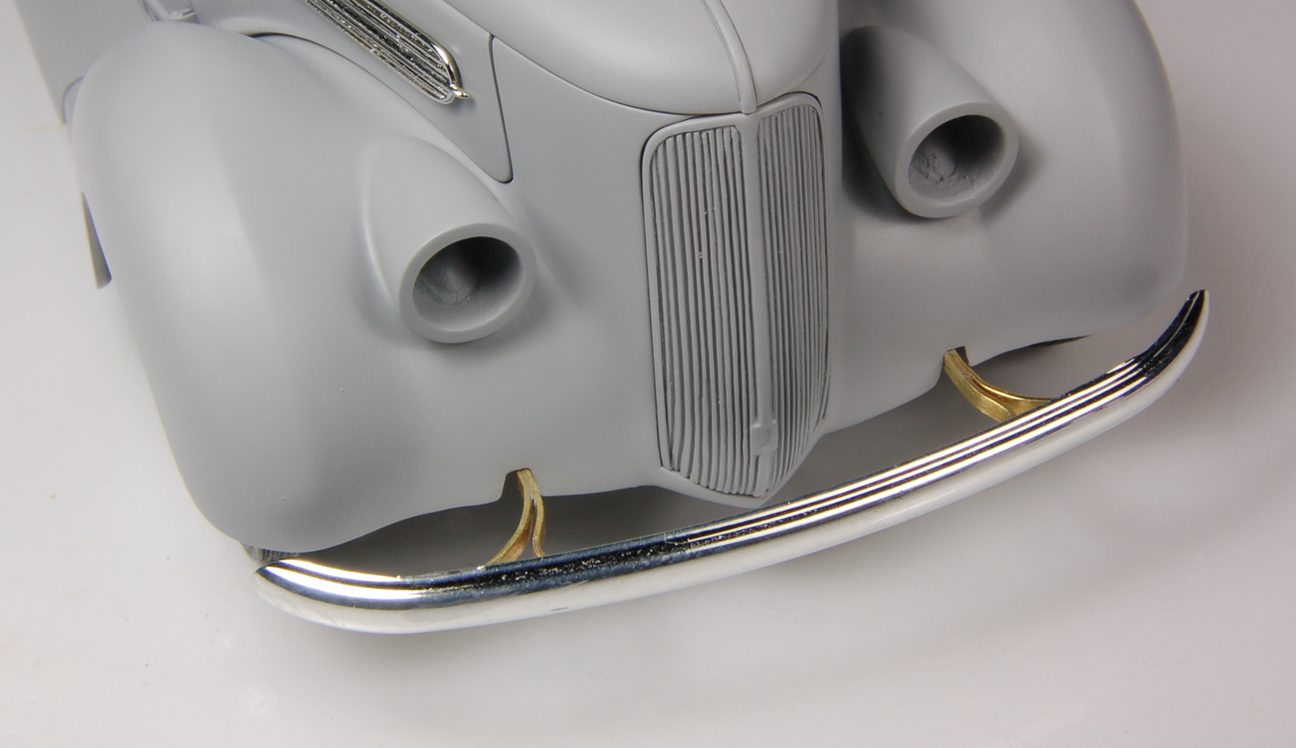 I made a removeable rear gravel shield out of thin plastic. 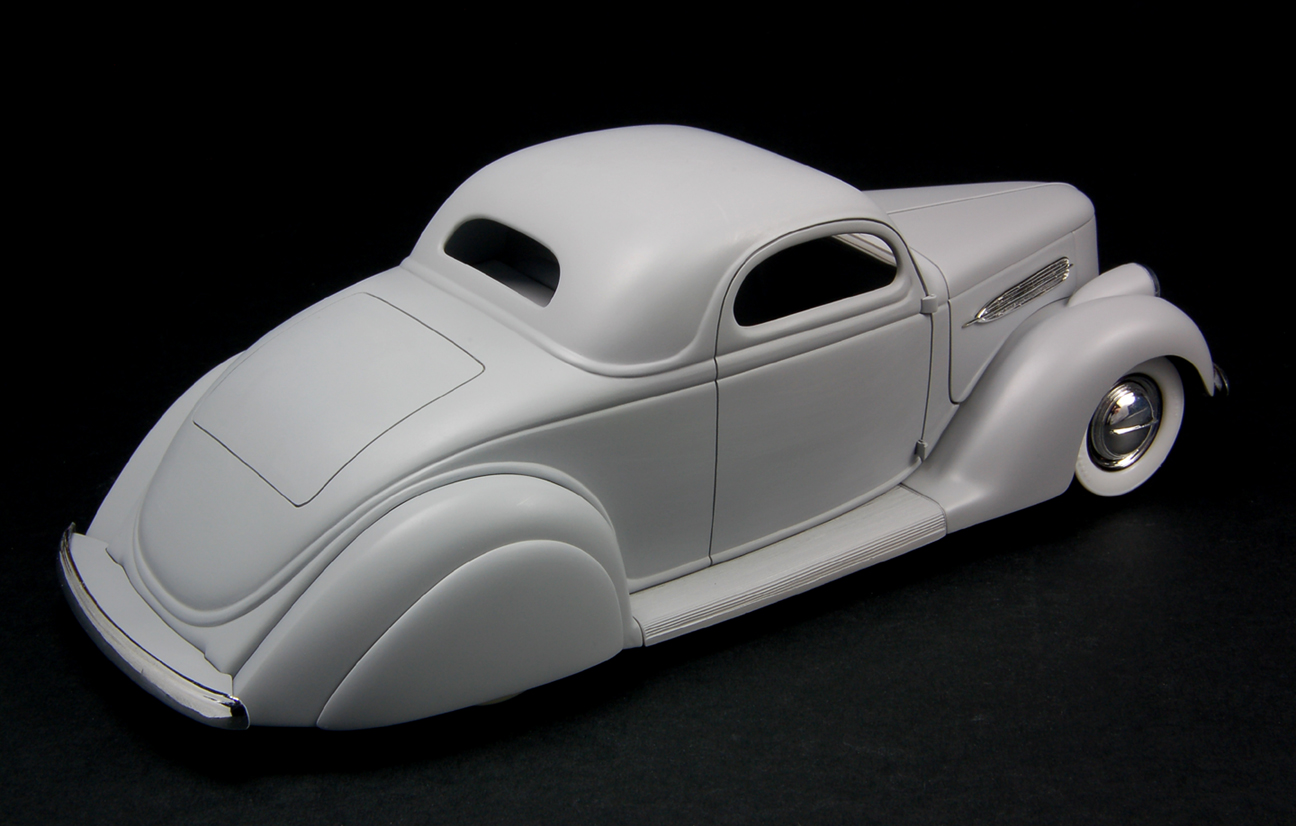 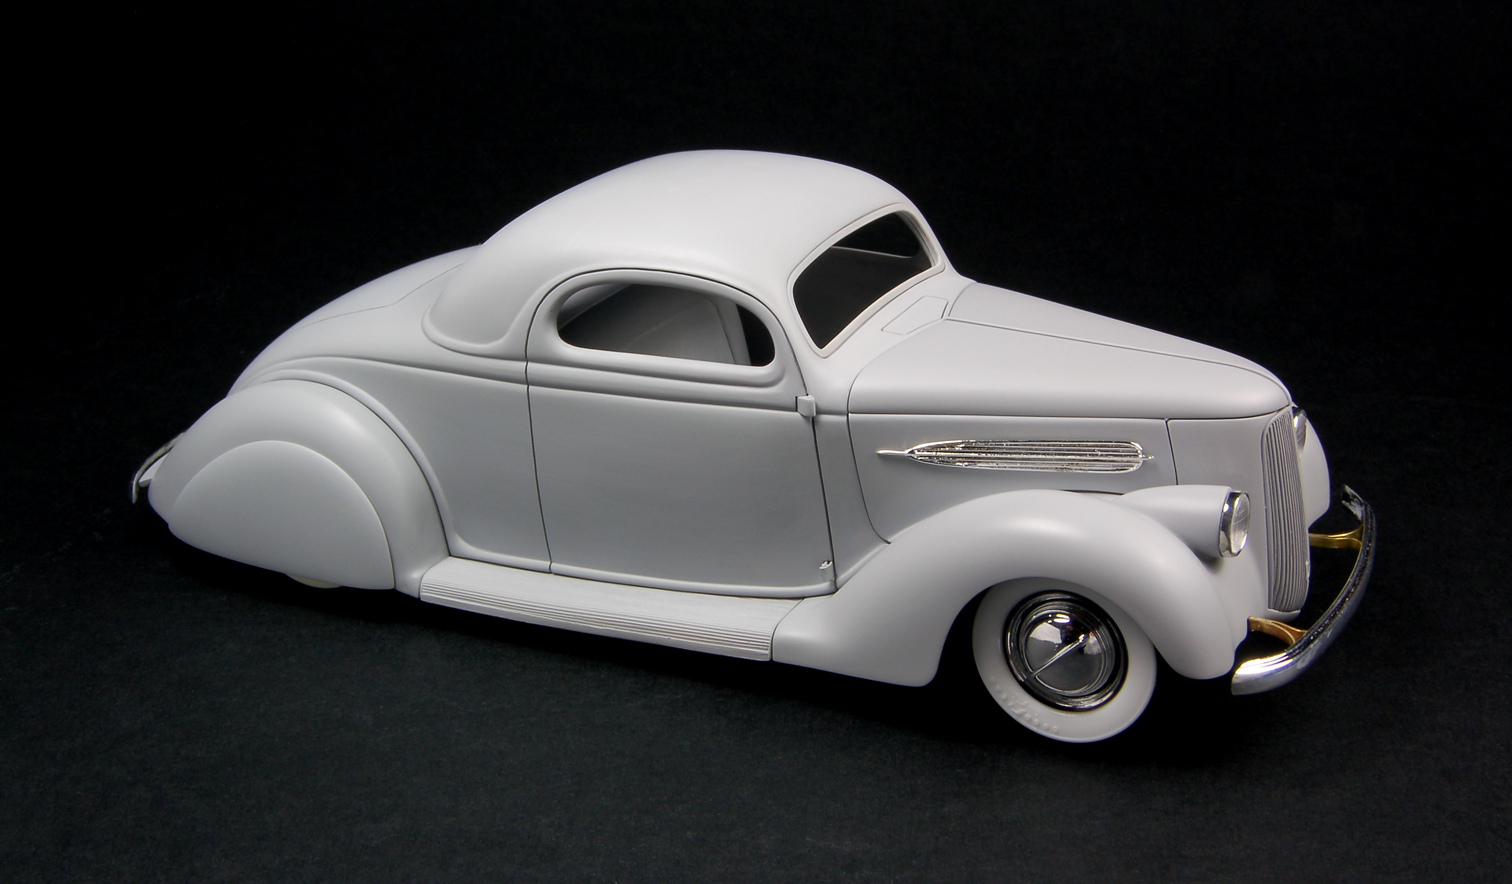 Recessed license plate I wanted to have a recessed license plate, but I couldn’t just cut a hole in the rear deck & expect it to look good. Remember I added all that filler to build up the contour earlier. I drew the outline of the opening on a piece of sheet plastic. I cut out the opening & trimmed the outer edges of the plastic to be about 0.1” larger than the opening. I positioned the plastic sheet on the deck, marked out & scribed where the opening would go. 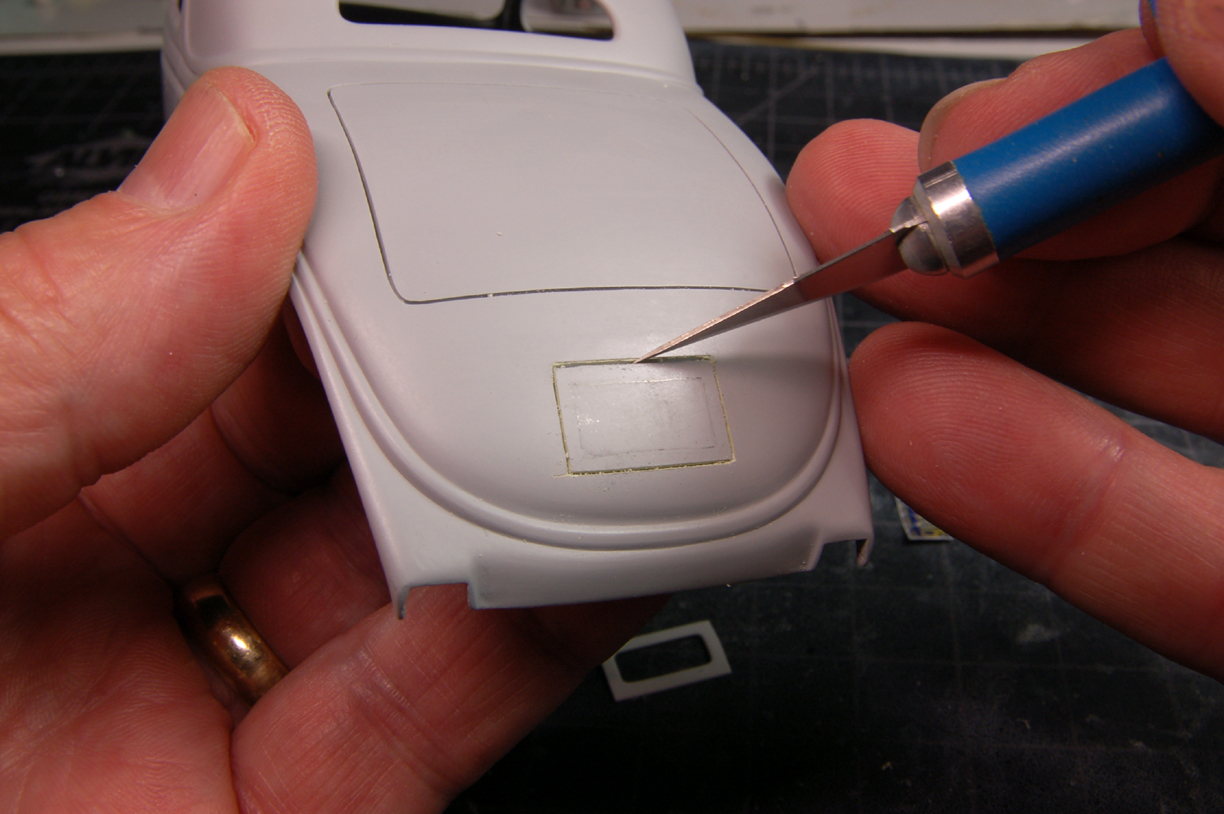 Once I cut through in a few places, I moved on to a MCG saw blade to finish the cuts. 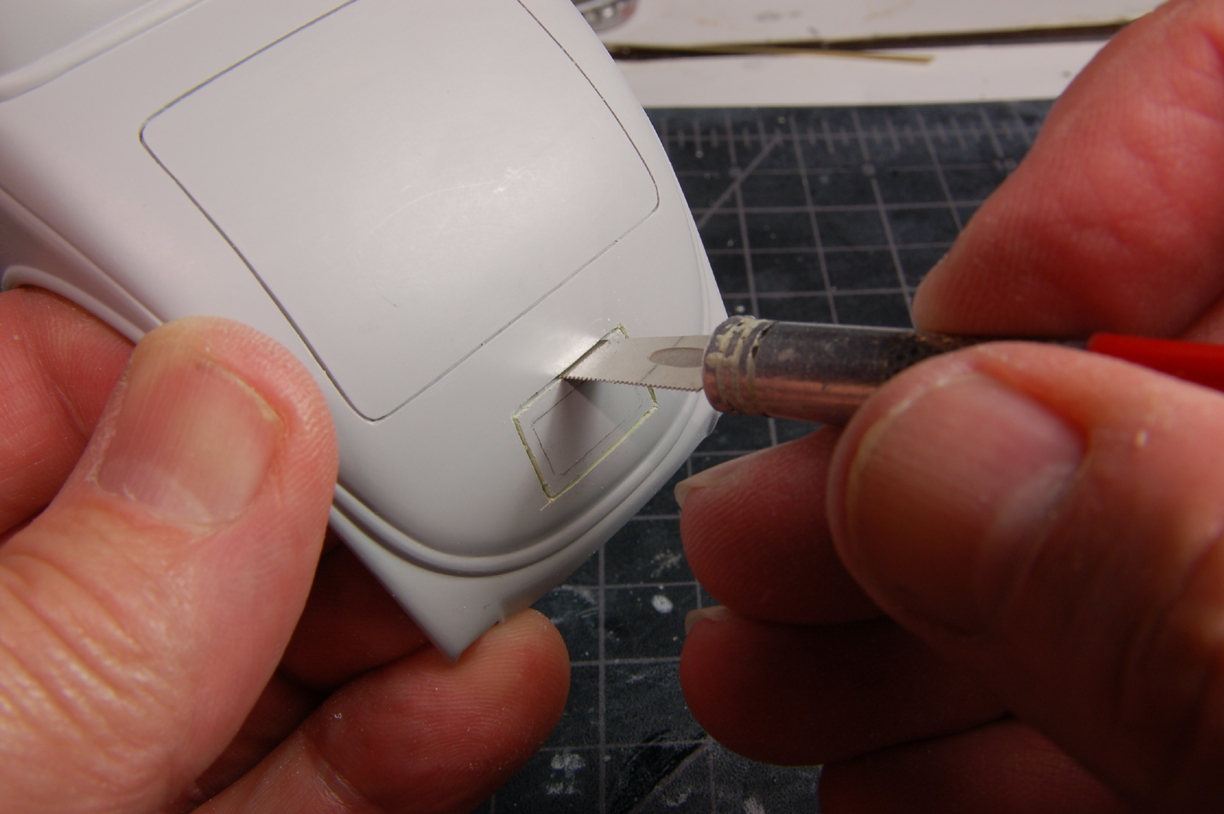 Piece removed. 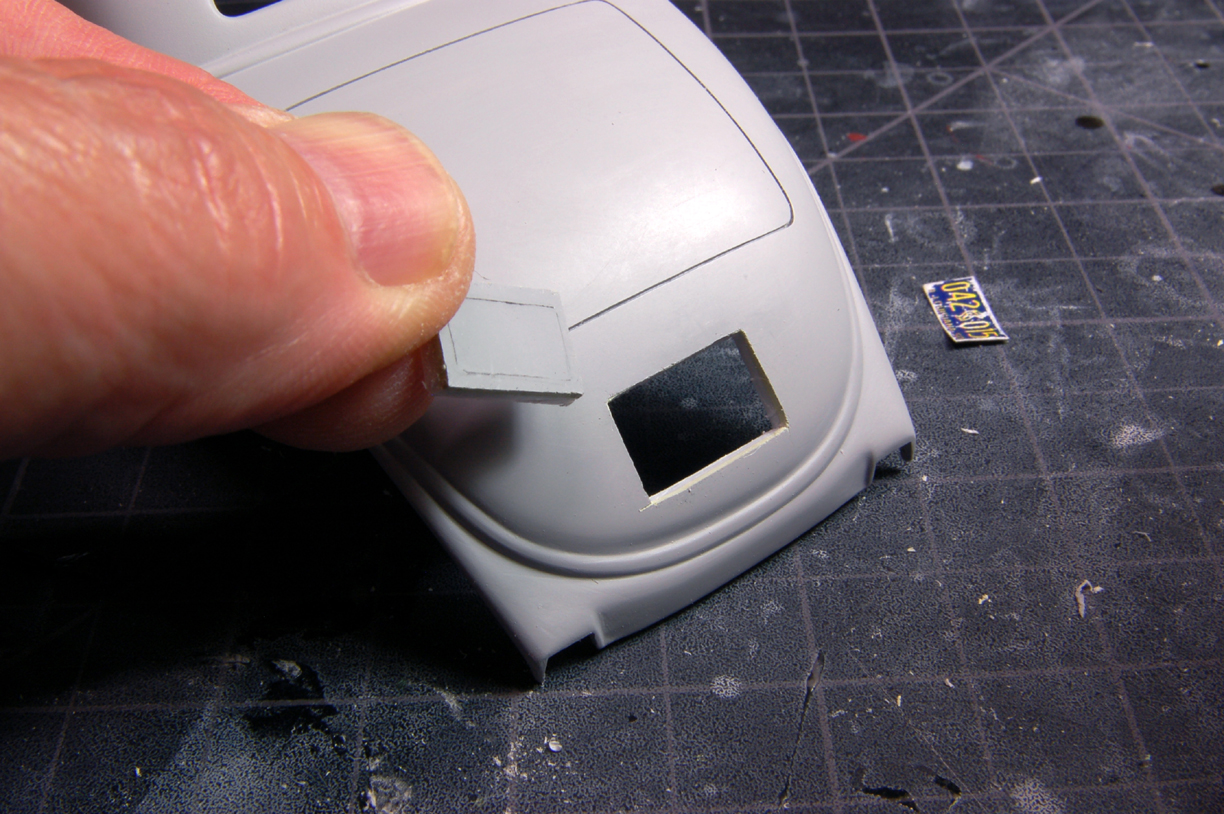 I was a little sloppy on my cutting & I would need to add plastic around the opening to fill the gaps. 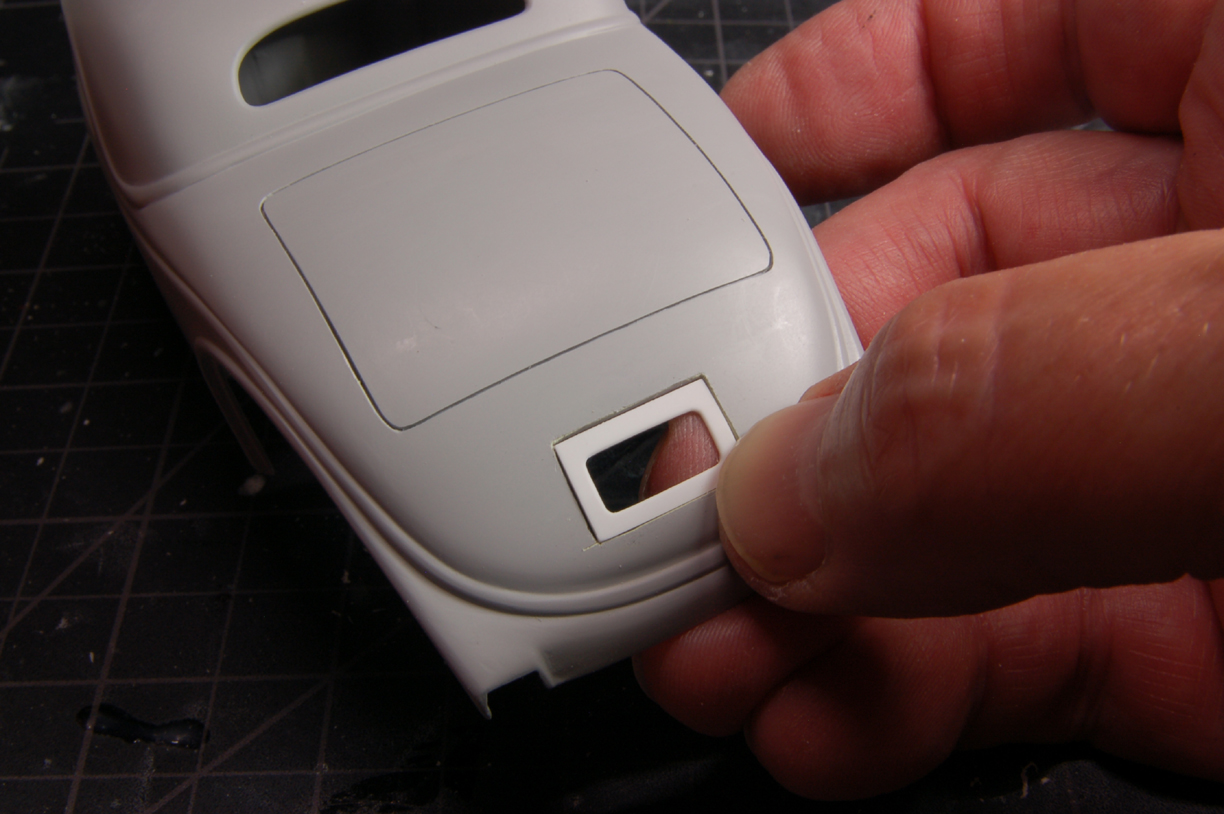 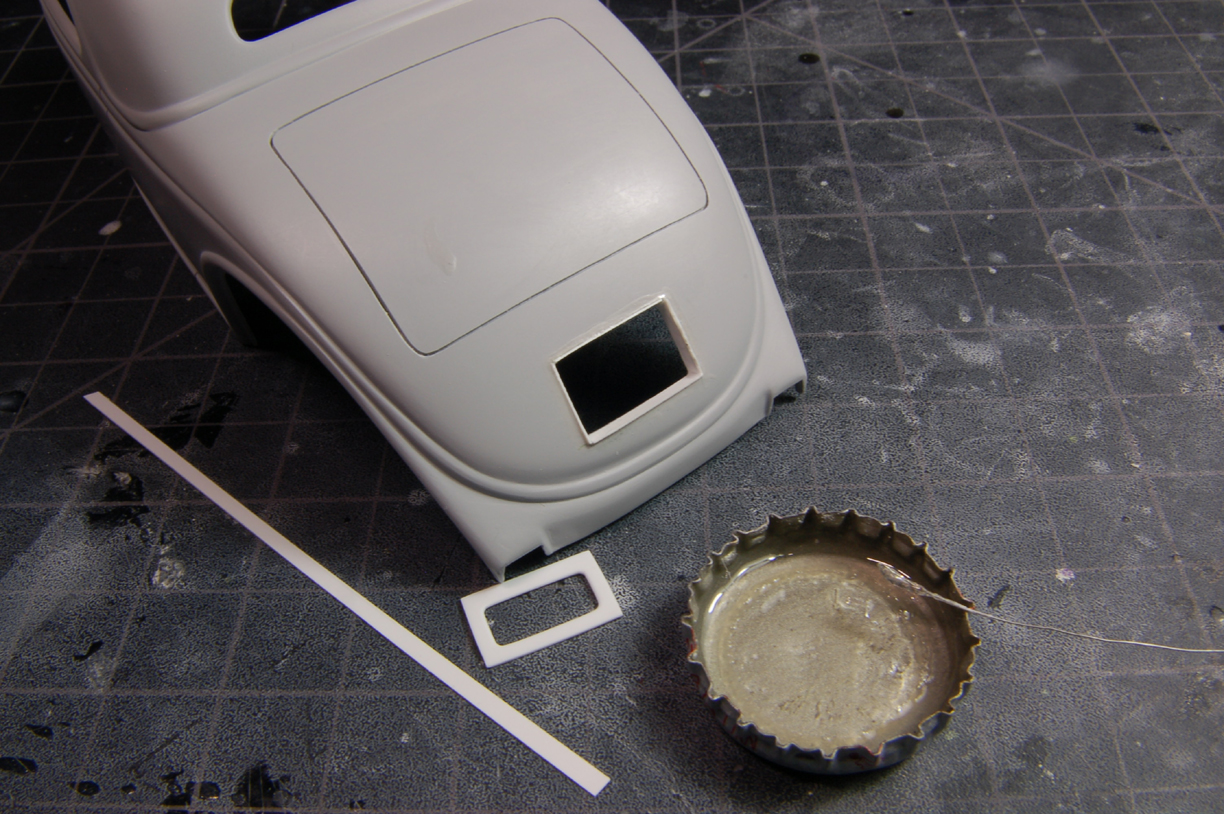 After superglue & sanding. 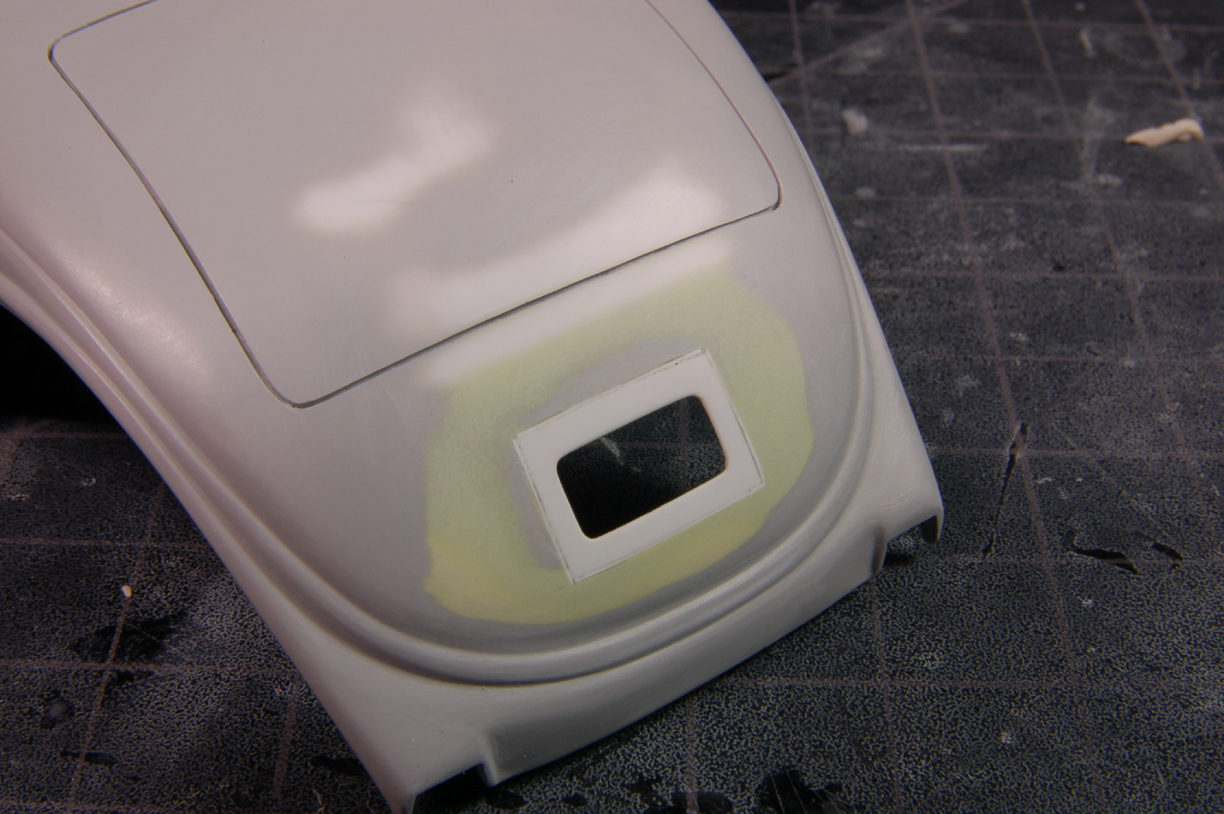 From the inside. 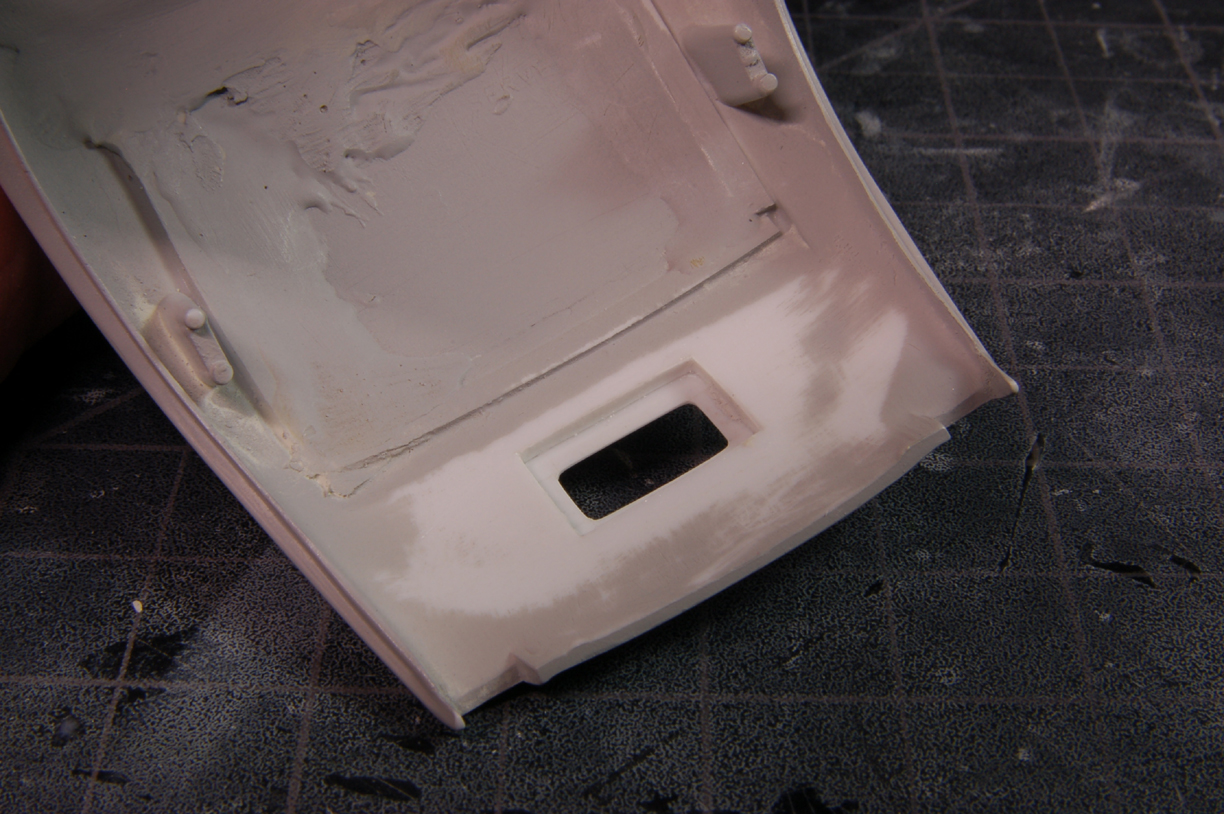 License plate test fit. 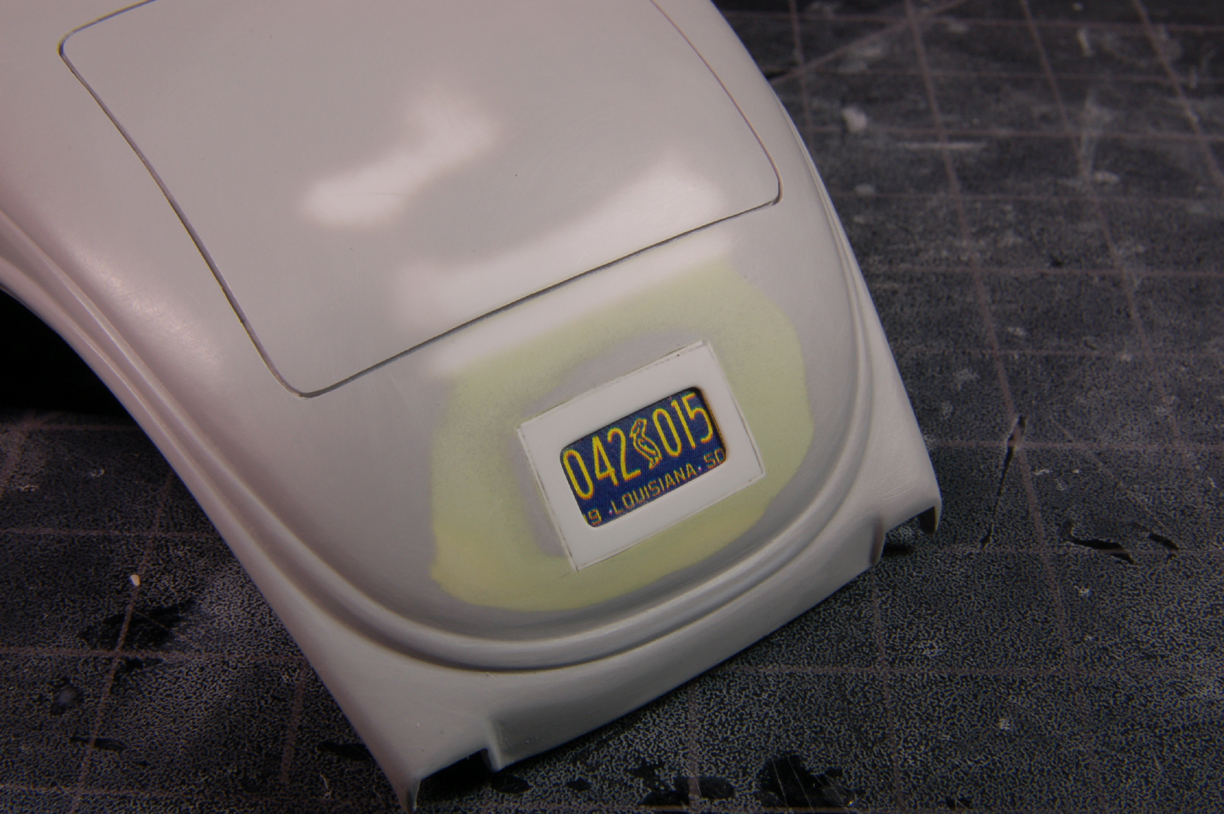 More to come later. |
|
|
|
Post by constructionbob on May 2, 2020 9:01:54 GMT -5
Tnx for share detail solutions, dash and knobs is ingenious. Marvelous craftmanship!
|
|
|
|
Post by chepp on May 2, 2020 10:08:45 GMT -5
This keeps getting cooler and cooler. Thanks for the how-to tips.
|
|
|
|
Post by cturner on May 2, 2020 10:09:17 GMT -5
soooooo...when I open my 36 Ford box from Revell Monogram...this is NOT what is inside?  I feel cheated now if that is the case... |
|







 I feel cheated now if that is the case...