|
|
Post by spex84 on May 2, 2020 12:46:01 GMT -5
I have a '36 set aside for a future taildragger build, but of course I'm ruined forever after seeing these photos. I won't accept anything less than Steve B quality. Might have to lower my expectations a little  Love that recessed license plate! I'm noticing that you use a lot of superglue, Steve. So does Dennis Lacy on this forum...whenever I try to use superglue, I find it dries harder than the surrounding plastic, making sanding just about impossible. Is there a specific brand, or some kind of trick that you're using to avoid this problem? |
|
|
|
Post by steveb on May 2, 2020 21:37:27 GMT -5
I have a '36 set aside for a future taildragger build, but of course I'm ruined forever after seeing these photos. I won't accept anything less than Steve B quality. Might have to lower my expectations a little  Love that recessed license plate! I'm noticing that you use a lot of superglue, Steve. So does Dennis Lacy on this forum...whenever I try to use superglue, I find it dries harder than the surrounding plastic, making sanding just about impossible. Is there a specific brand, or some kind of trick that you're using to avoid this problem? Ha! Thanks! I like super thin, usually what Hobby Town USA had (when we had one here) or whatever Hobby Lobby has. You are so right about it drying harder than the surrounding plastic. I apply layers a little at a time, then level the areas with files, not sanding sticks or sandpaper. There also seems to be a time window where the superglue is hard enough to not clog up a file, but not rock hard. Once I think it's level, I sometimes use sandpaper to even out the sheen or finish of the surfaces. Steve |
|
|
|
Post by skip on May 2, 2020 22:12:54 GMT -5
If I hadn’t seen the in progress pix of your dashboard, I think I would have been convinced that it was 3D printed! It’s that good! Then the other details like the Bubble Skirts and the Frenched License Plate recess... (Fitting that hood is another well done project in itself. I’ve had a ‘36 in line of personal projects that I’ve been trying to figure out just how to fix the hood alone. Thanks for the great mini-tutorial, I appreciate it.).
Your whole ‘36 takes me back to seeing a series of articles in R&C then Hot Rod finished them of a ‘36 done by Spence Murray where he used a brand new AMC V8 under the hood, had the same classic looks as yours does. You one upped it by a mile with that Zephyr Dash! This will be absolutely stunning when it’s finished!
|
|
|
|
Post by Dennis on May 2, 2020 22:24:08 GMT -5
Phenomenal craftsmanship! The dash is to die for and all of the exterior customization is awesome.
When building to such tight tolerance (like the hood top fit) do you not worry about leaving room for paint thickness? I find that to be an issue with my models at final assembly.
|
|
|
|
Post by steveb on May 3, 2020 11:48:18 GMT -5
Phenomenal craftsmanship! The dash is to die for and all of the exterior customization is awesome. When building to such tight tolerance (like the hood top fit) do you not worry about leaving room for paint thickness? I find that to be an issue with my models at final assembly. Thanks! Yes, I always try to keep in mind the added paint thickness. With this hood, it wasn't as much of an issue as a more modern car like a 49 Ford, where 3 of the hood sides have to fit inside the engine bay opening. I'm still using lacquer, so the paint layers are very thin. Since this is a solid color, there are no clear coats, just polish out the solid color. Steve |
|
|
|
Post by Duane on May 3, 2020 22:11:52 GMT -5
Steve; you've taken a '36 that needed major surgery, and performed it,
while adding some new goodies on the side !you've shown us, how a '36
can grow a brass pair; well done; excellent !
|
|
|
|
Post by steveb on May 5, 2020 16:53:01 GMT -5
Thanks again! Continuing on.... Back to the interior. Steering wheel Another crazy idea I had was to try & replicate a 1947 Lincoln steering wheel. I started with a resin copy of a Ford Crestliner steering wheel I made a few years ago. I cut off 2 of the spokes & started building up the center with plastic & superglue. 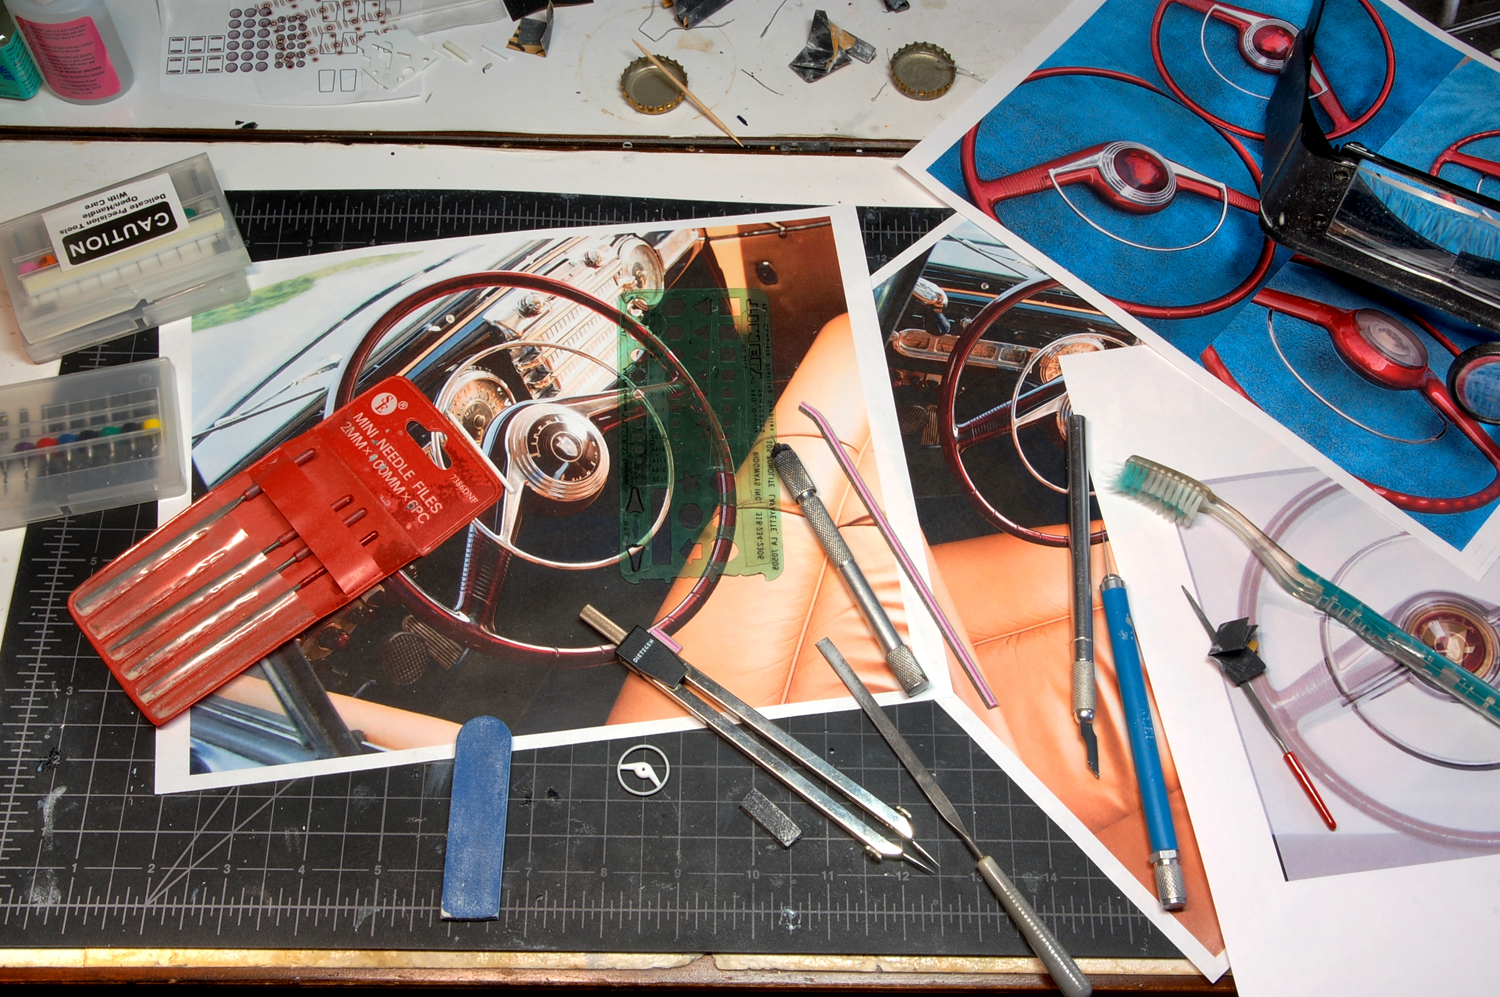 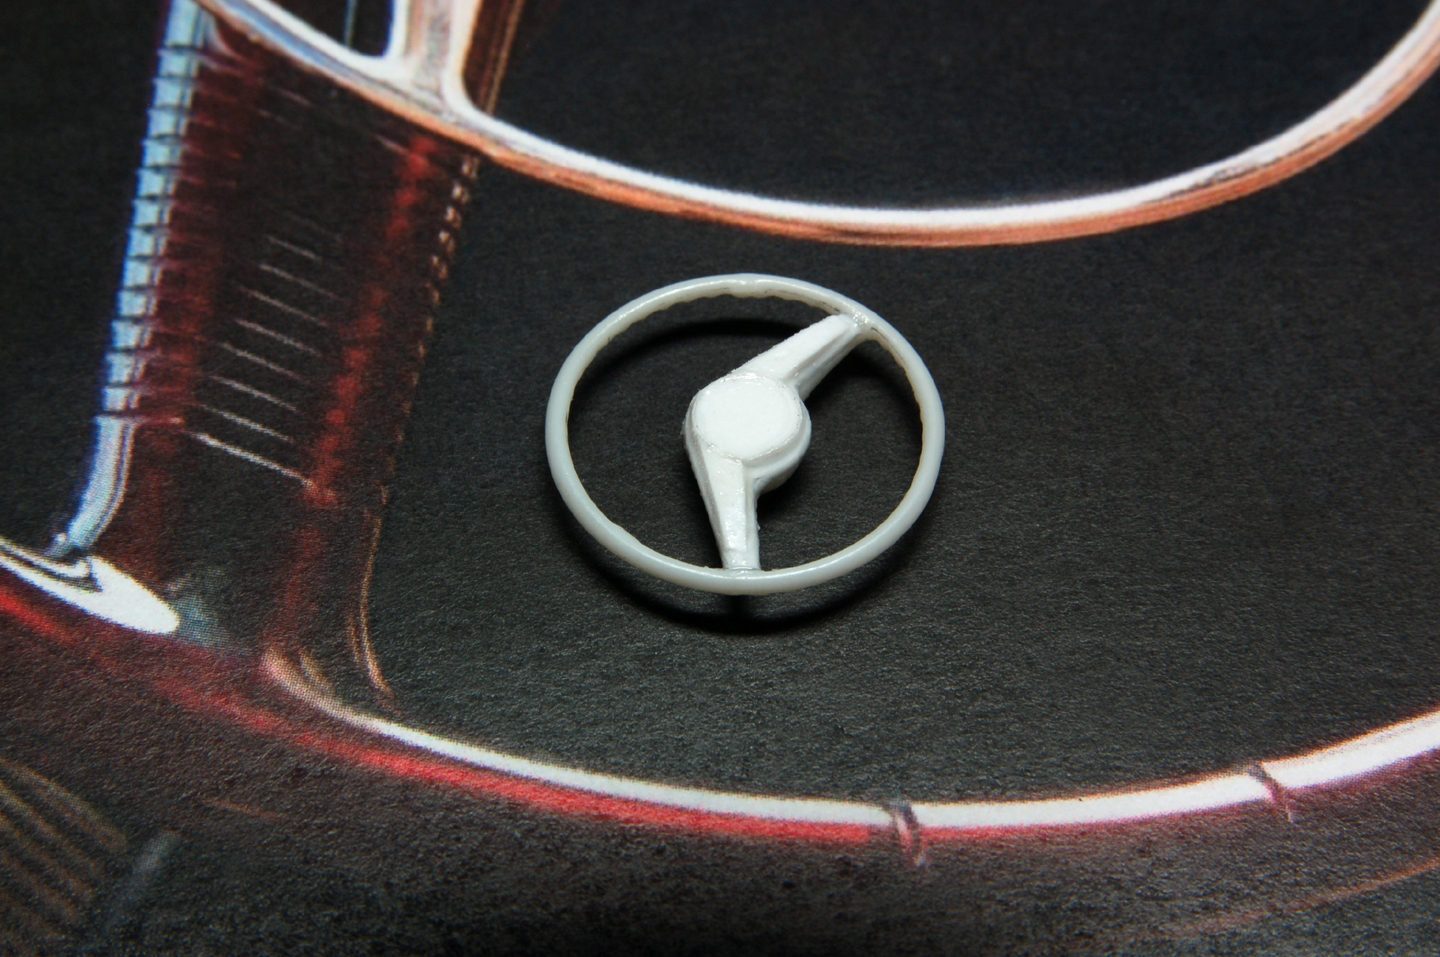 After lots of sanding & superglue. 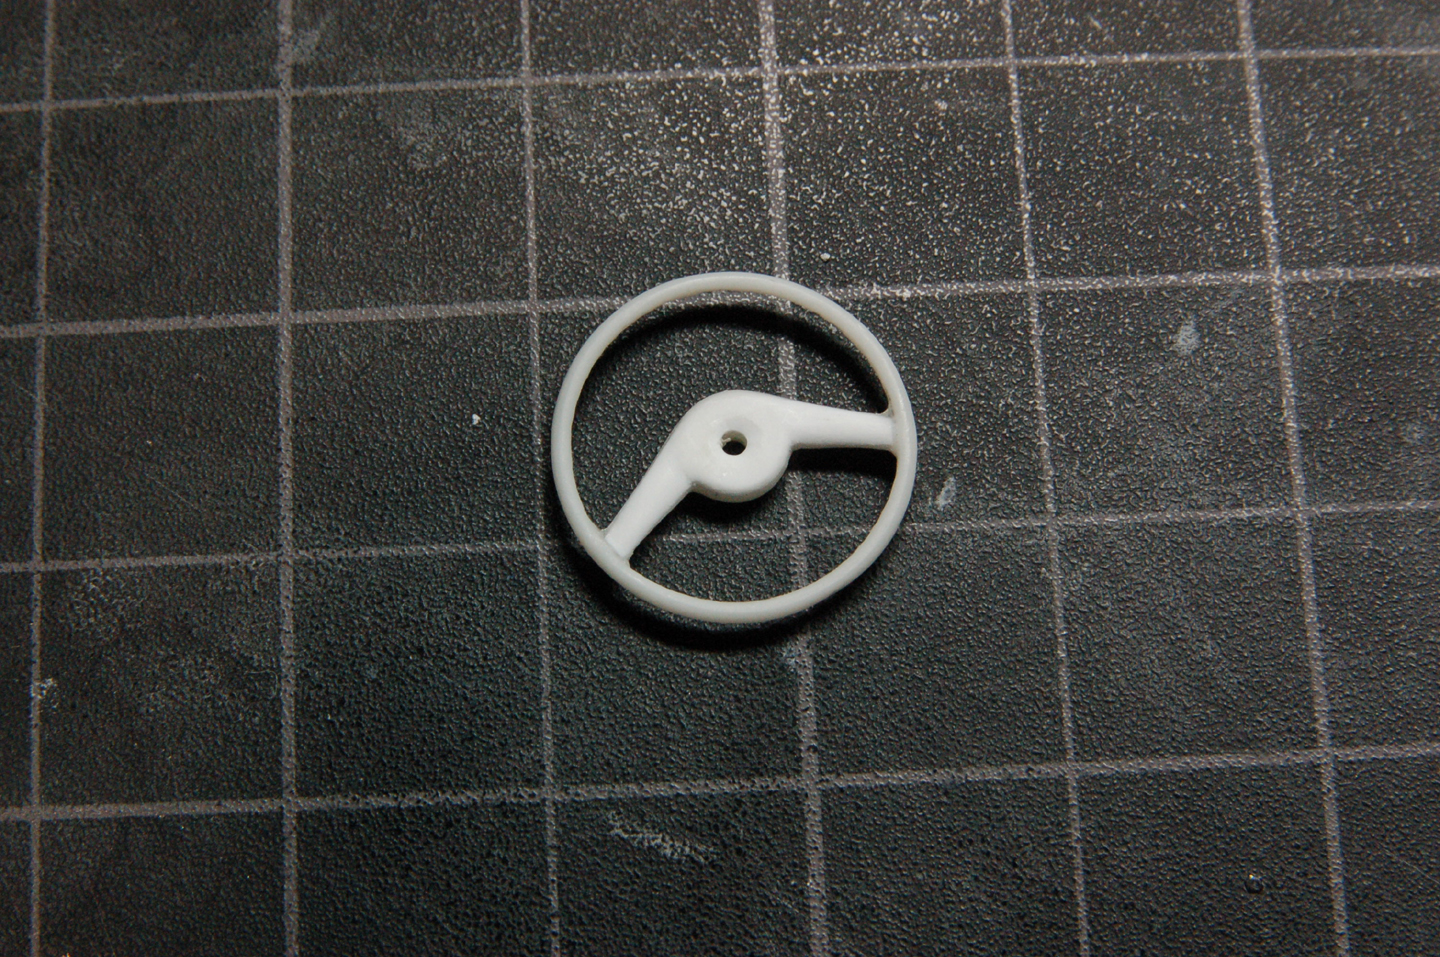 I glued a circular piece of plastic sheet to a plastic rod & chucked it in my Dremmel. I machined the shape of the horn center using hobby knives & other stuff. 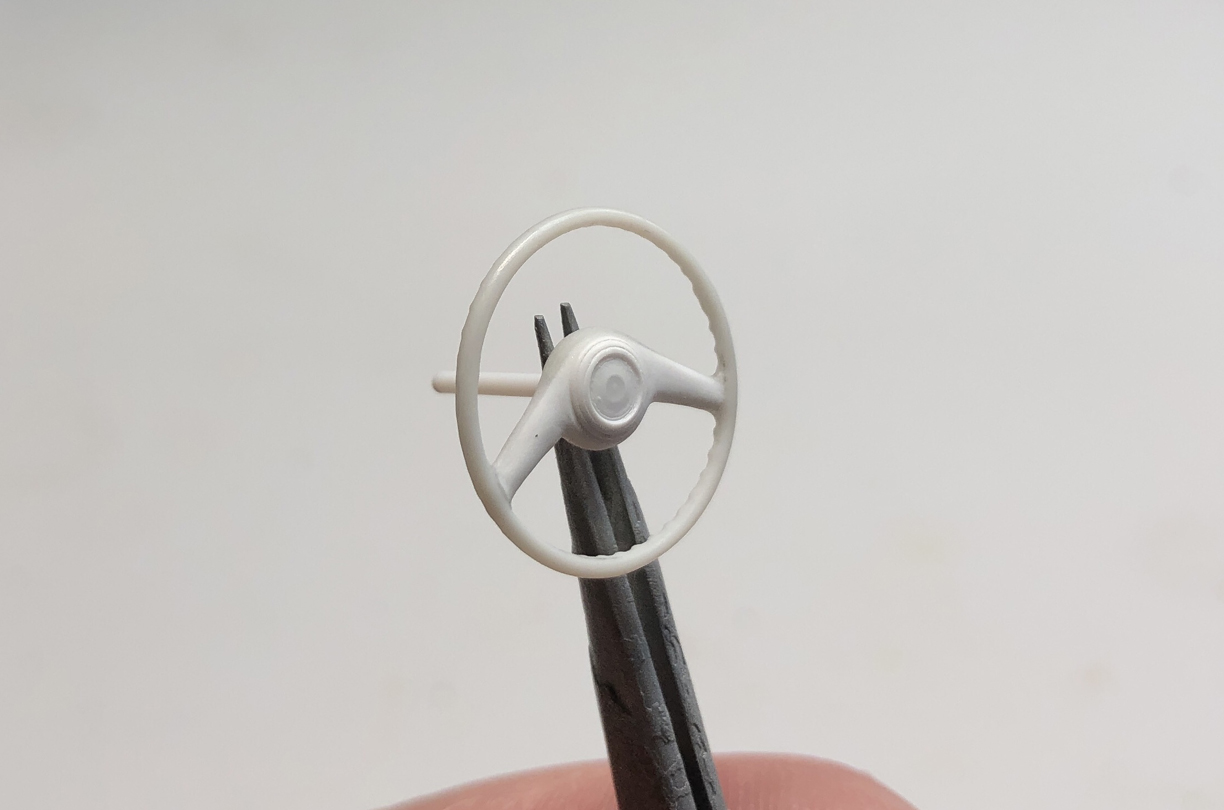 Later on, I added the horn ring arms to the center. 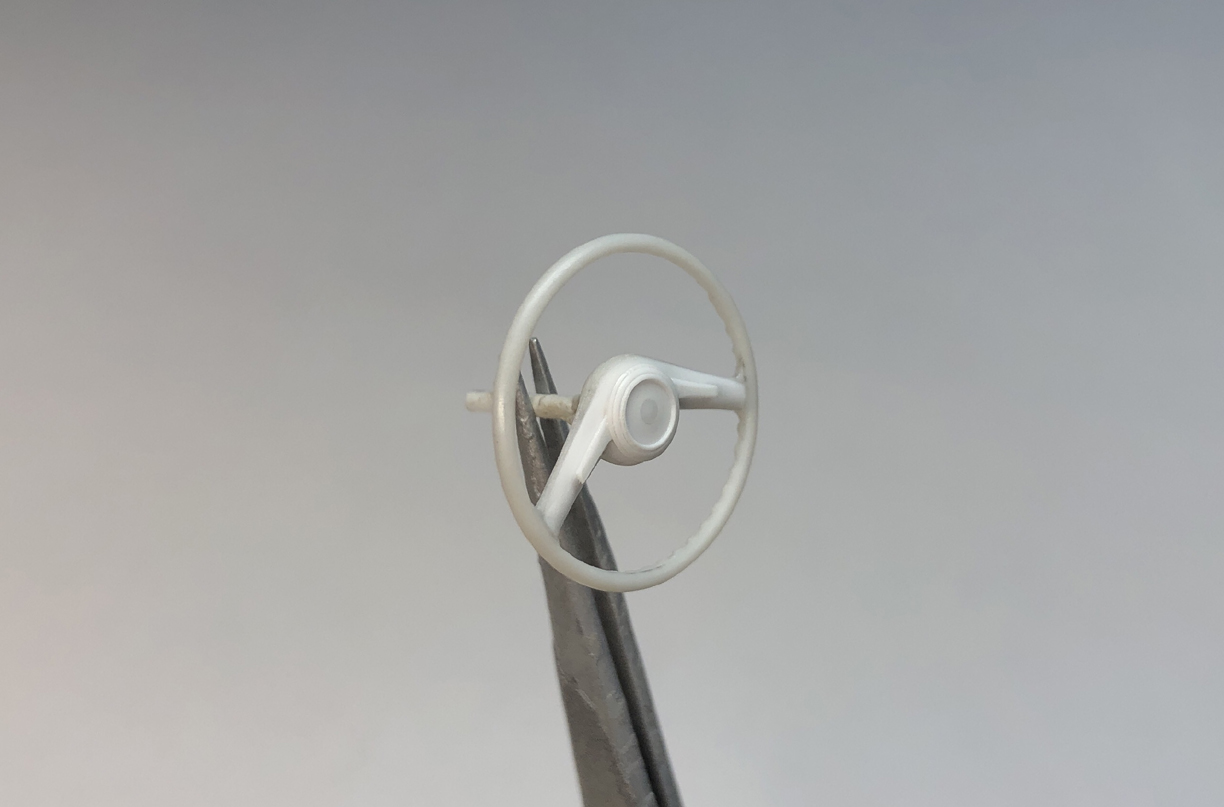 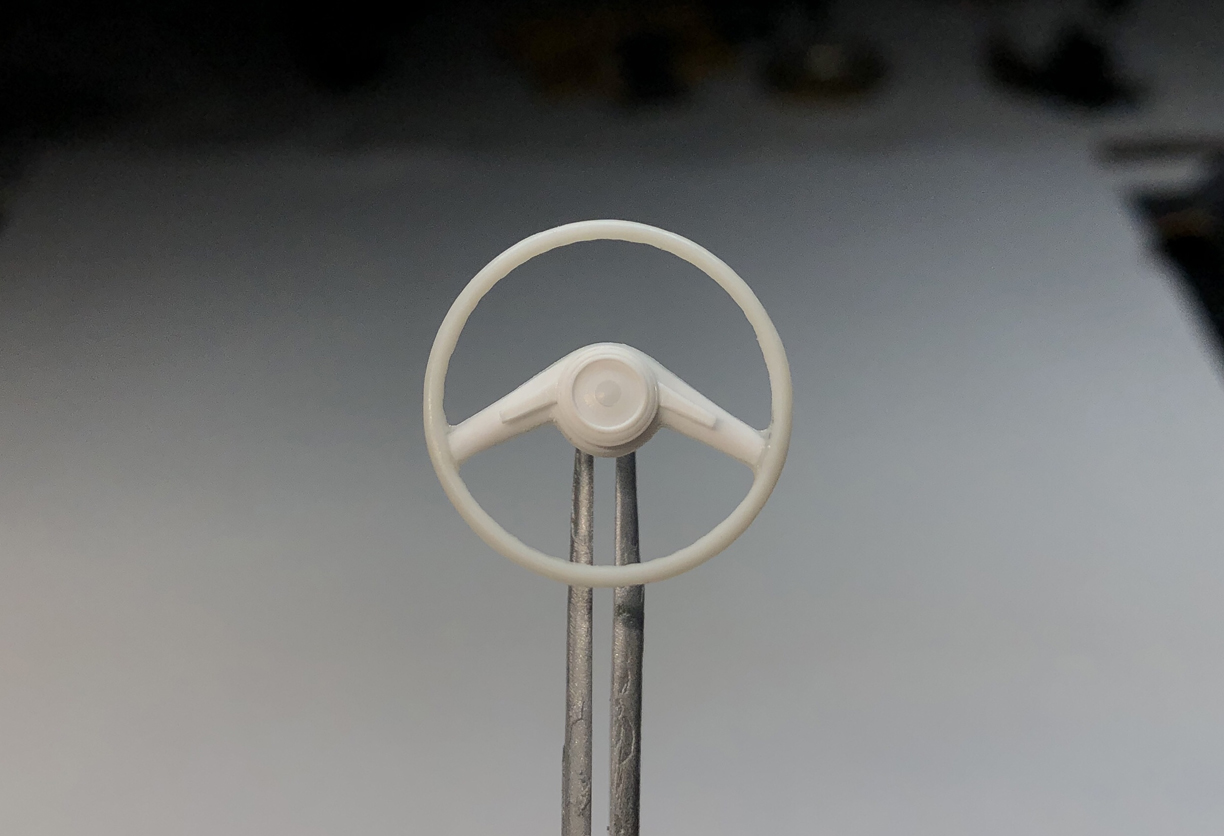 I made a horn ring out of bead wire & glued it with white glue to see if things looked okay. 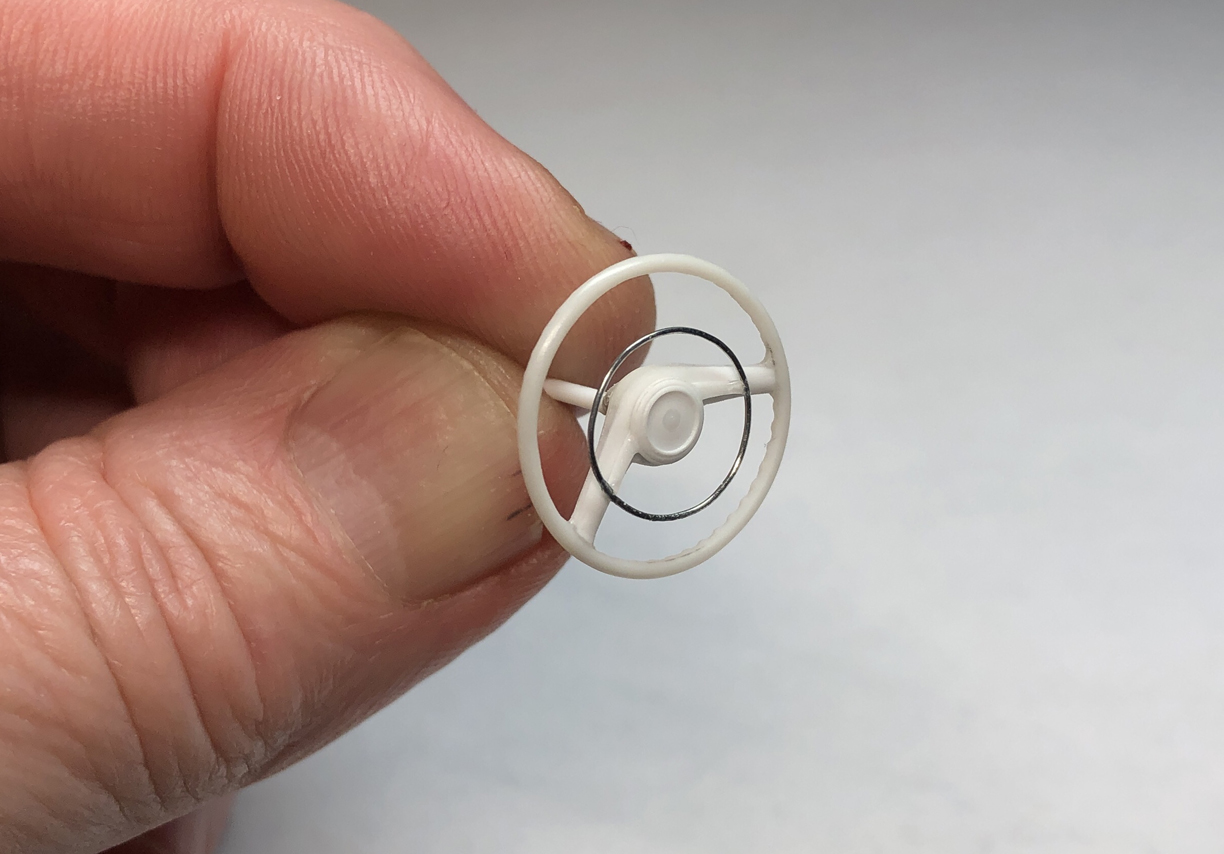 I wanted the steering wheel to be the same transparent red or burgundy as the 1:1. I made a mold of the steering wheel & did a test pour with regular resin. That came out okay, so I tried clear Alumilite tinted with red dye. It came out nice but was not rigid. I let it sit for over 2 weeks & it was still the same. I tried several times, also using other steering wheel molds & always got mixed results. Some eventually became more rigid, other times, not. I read all sorts of things about heating the molds, improper mix ratios, mixtures that were too small, humidity, you name it. None of my results were ever consistent. Maybe because of the small size of the rim. I tried slow curing 2-part epoxy, & that seemed to give the most consistent results, although because of the viscosity, more tiny air bubbles were present. Even with casting under pressure, some bubbles remain. This is one of the better ones made from epoxy. 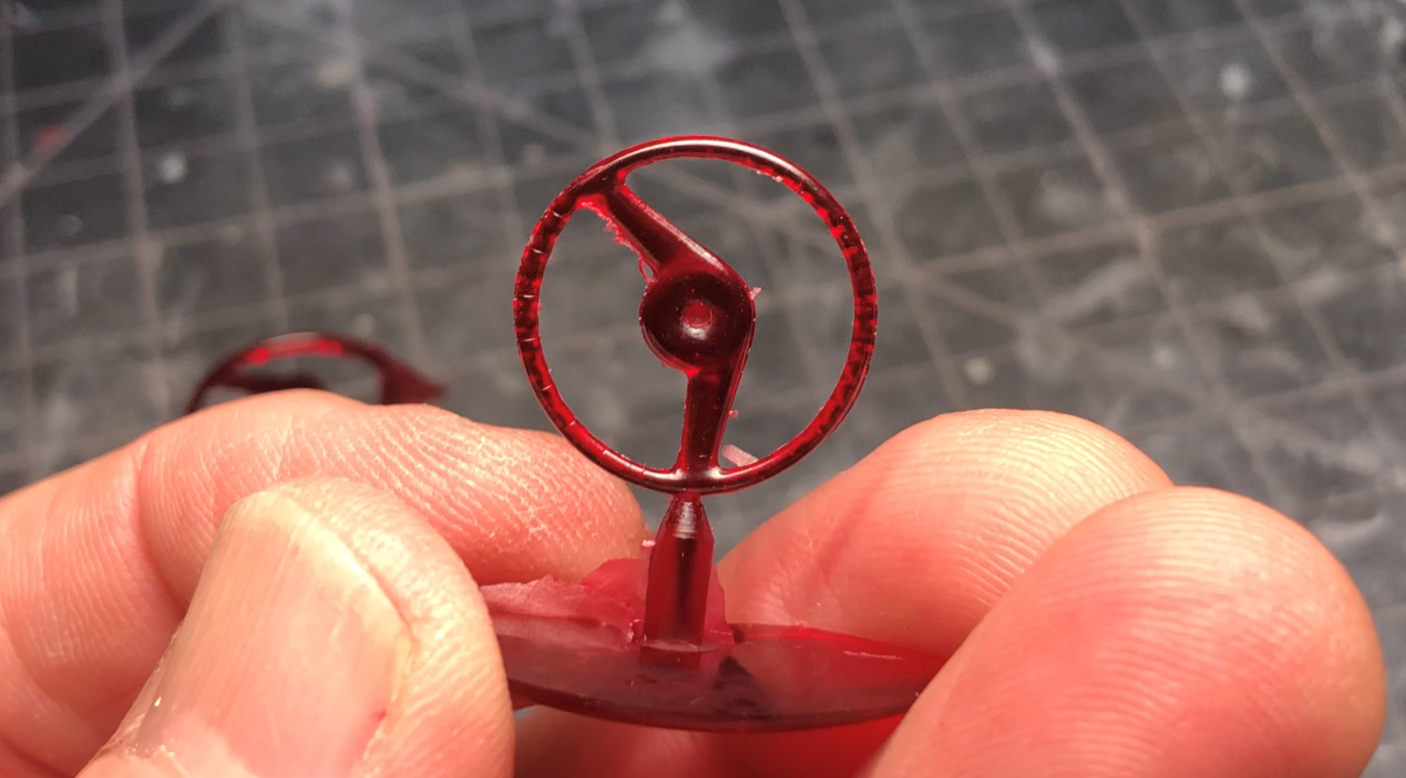 Seats & door panels The exterior color is a dark purple, & I wanted a reddish color for the interior. I bought a few different colors of craft paint & made the seat inserts. The door panels already have tuck & roll, so I didn’t need to mess with them.  I painted the garnish moldings the purple color described below & Testors Acryl British Crimson. The seats & door panels are also British Crimson. I added ignition wire for the piping & sprayed a few coats of Testors Acryl semi-gloss clear over everything. The window cranks & door handles are resin copies of some that I made a long time ago, painted with Alclad chrome. 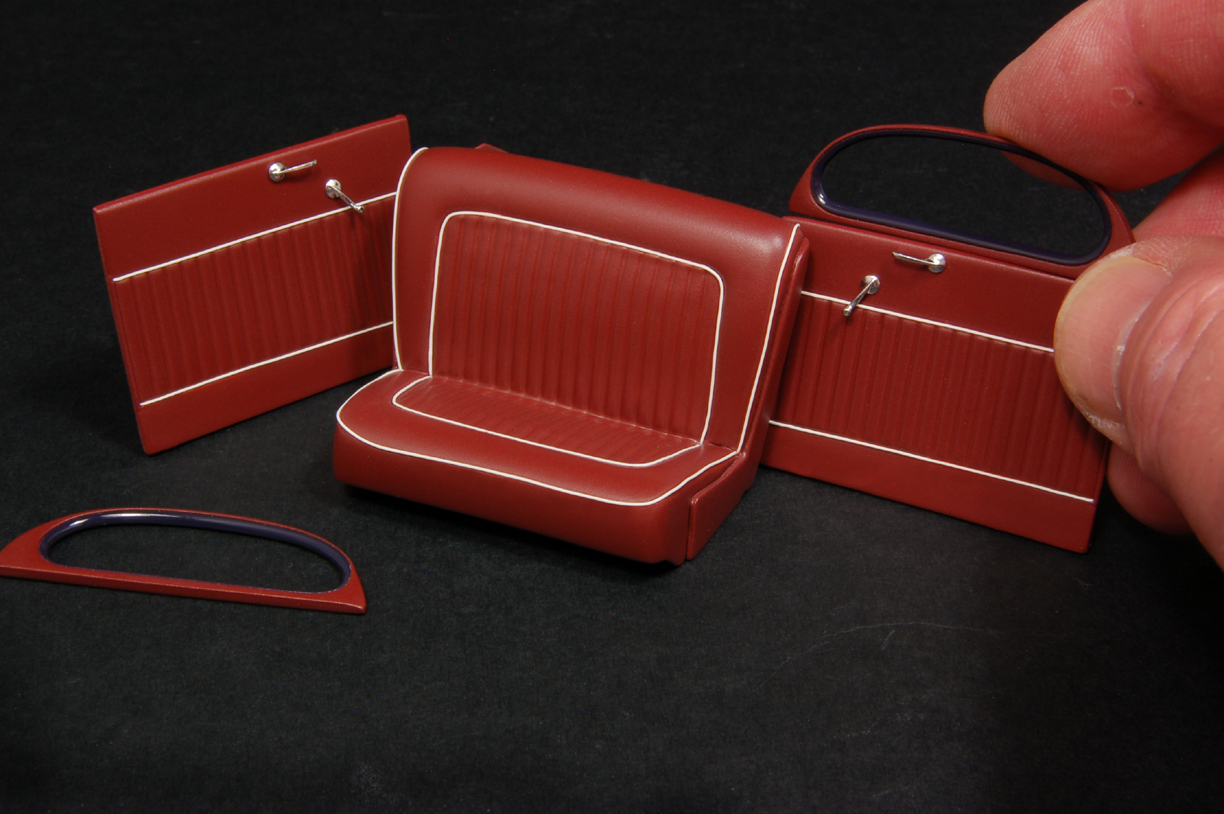 Dash finalization The body part colors are a mixture of HOK black, white & candy purple. The gauge clusters are Alclad chrome. I used Molotow chrome for some of the dash knob bezels. I drew up the artwork for the gauges, & Bedlam Creations printed them for me. www.bedlamcreations.com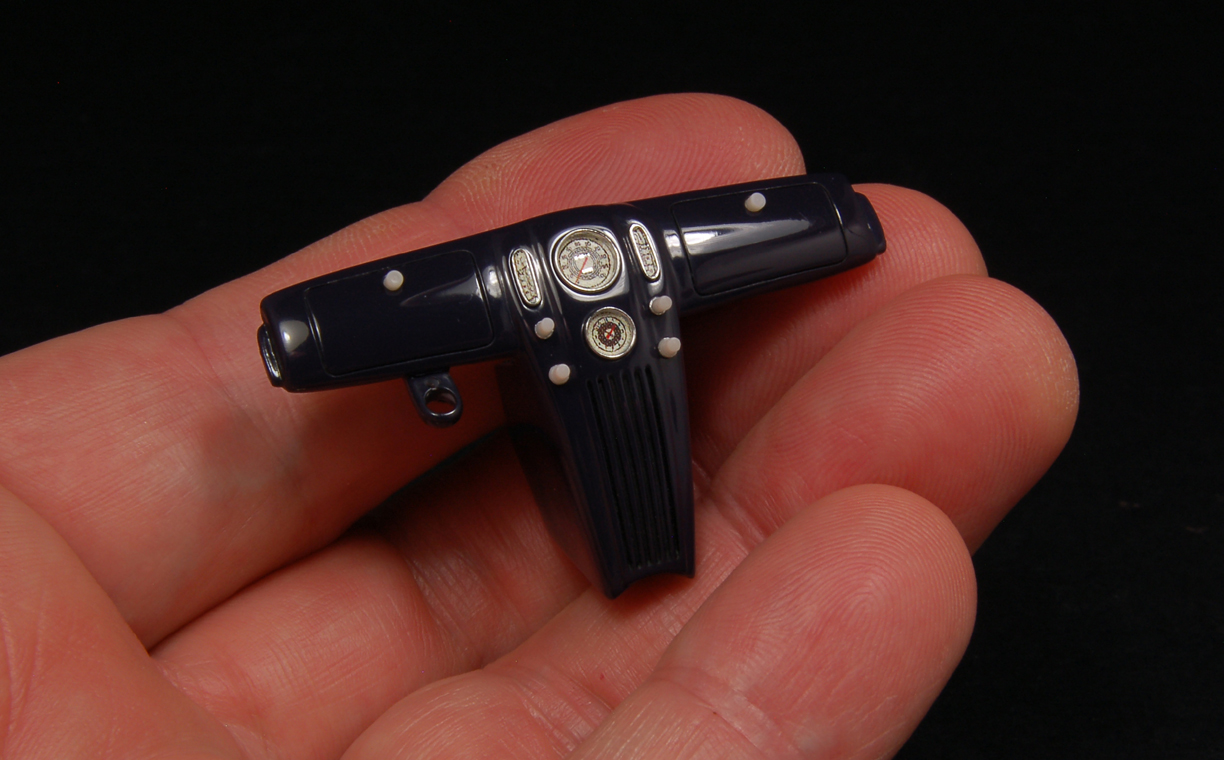 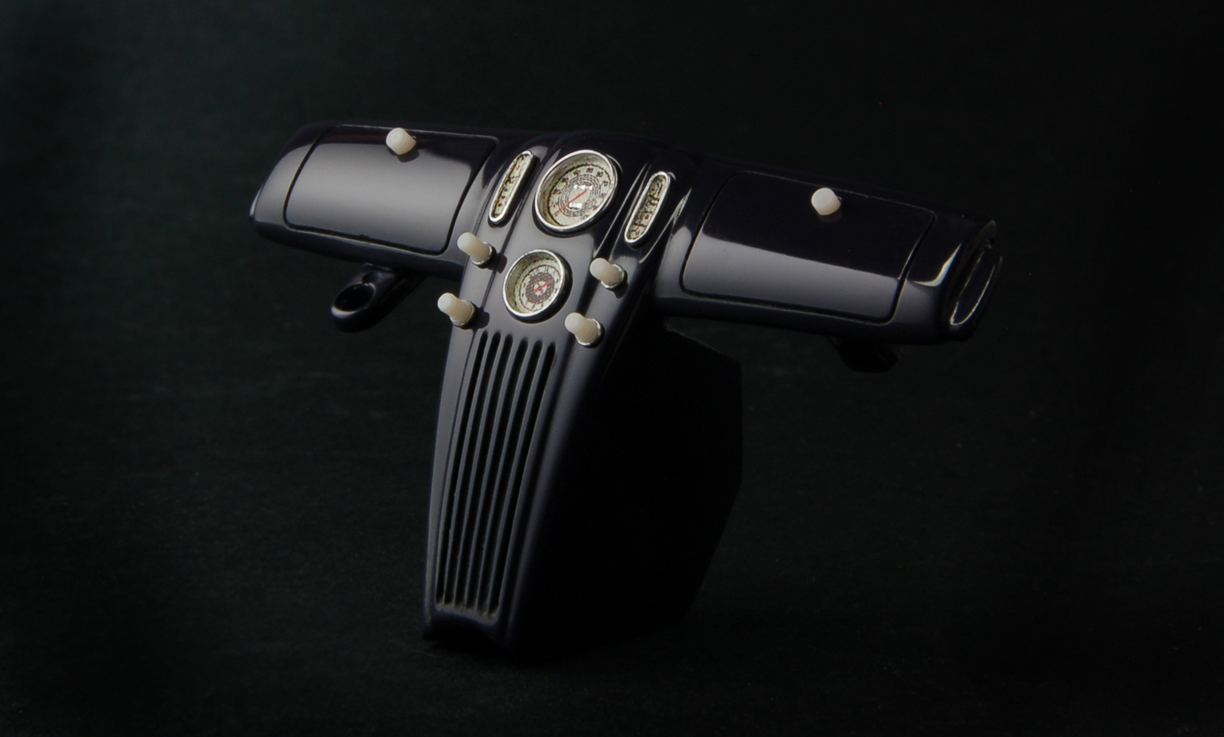 The pedals are MCG PE pieces with plastic added. 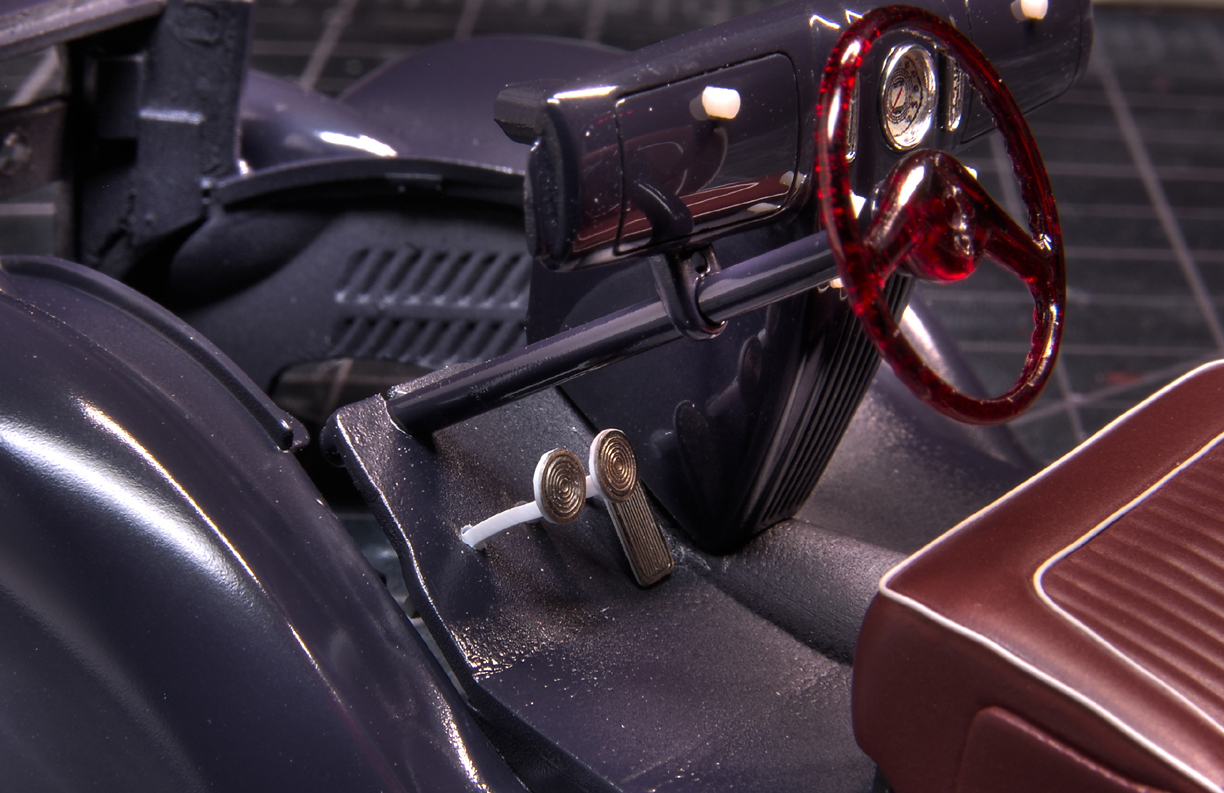 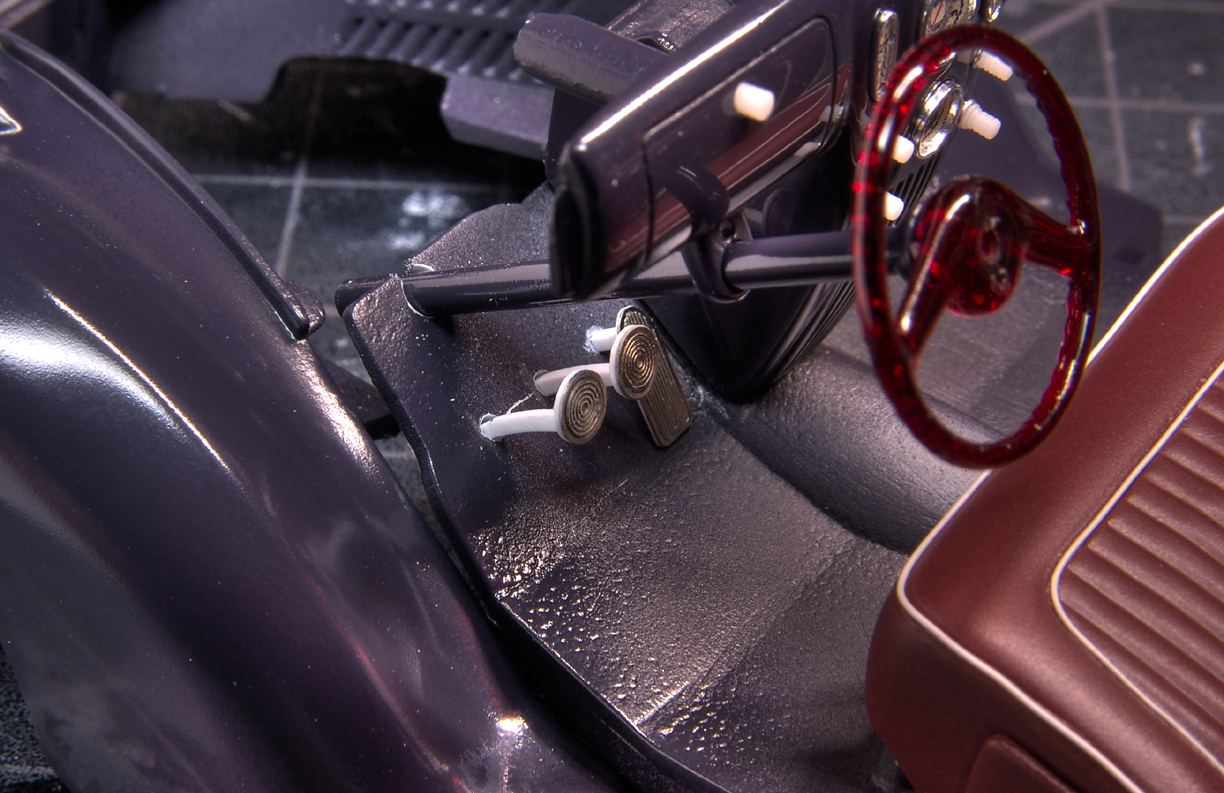 Steering wheel finalization I painted the horn center with Alclad chrome & added the horn ring made from bead wire. I used Molotow chrome on top of the superglue joints. I printed a scaled down version of the Lincoln horn emblem, glued it to the horn center & covered it with several coats of Testors clear parts cement. This didn’t come out as hard as I thought it would, but it still served the purpose for a part that would never be handled once the model was complete. The shift lever is bead wire & the knob is cast from the same red tinted epoxy. The steering wheel & shift knob received a couple of dips in Future, or whatever it's called these days, for added gloss. The steering column was made from plastic rod & filler, & the shifter column was also made from plastic rod. 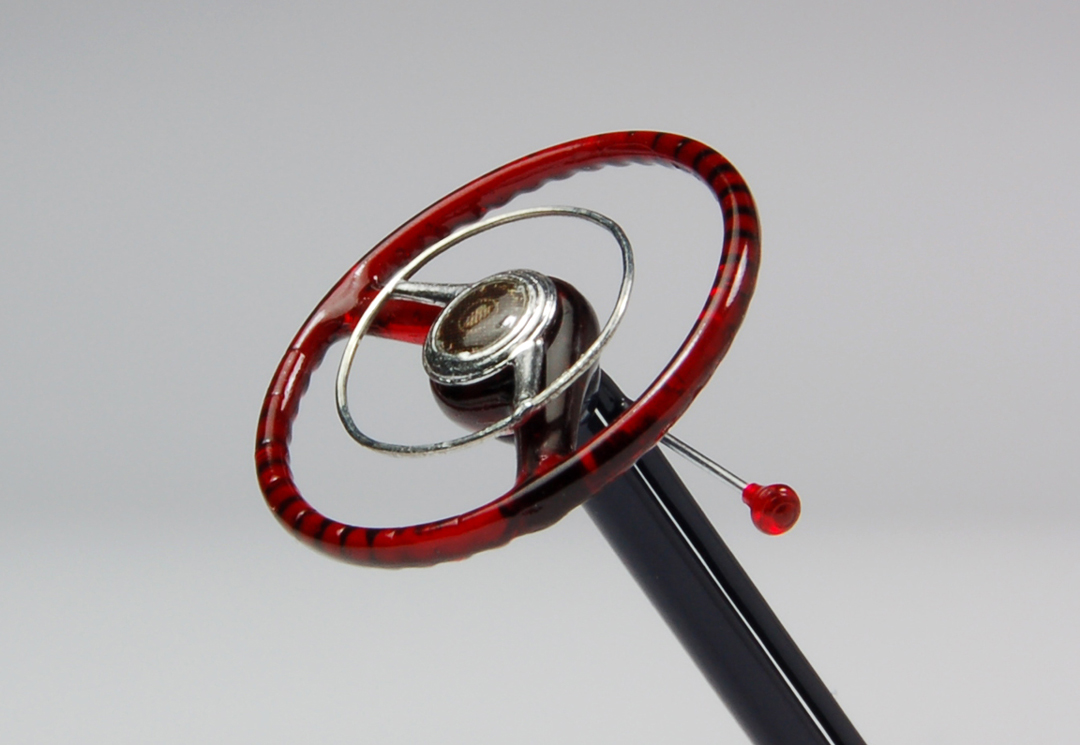 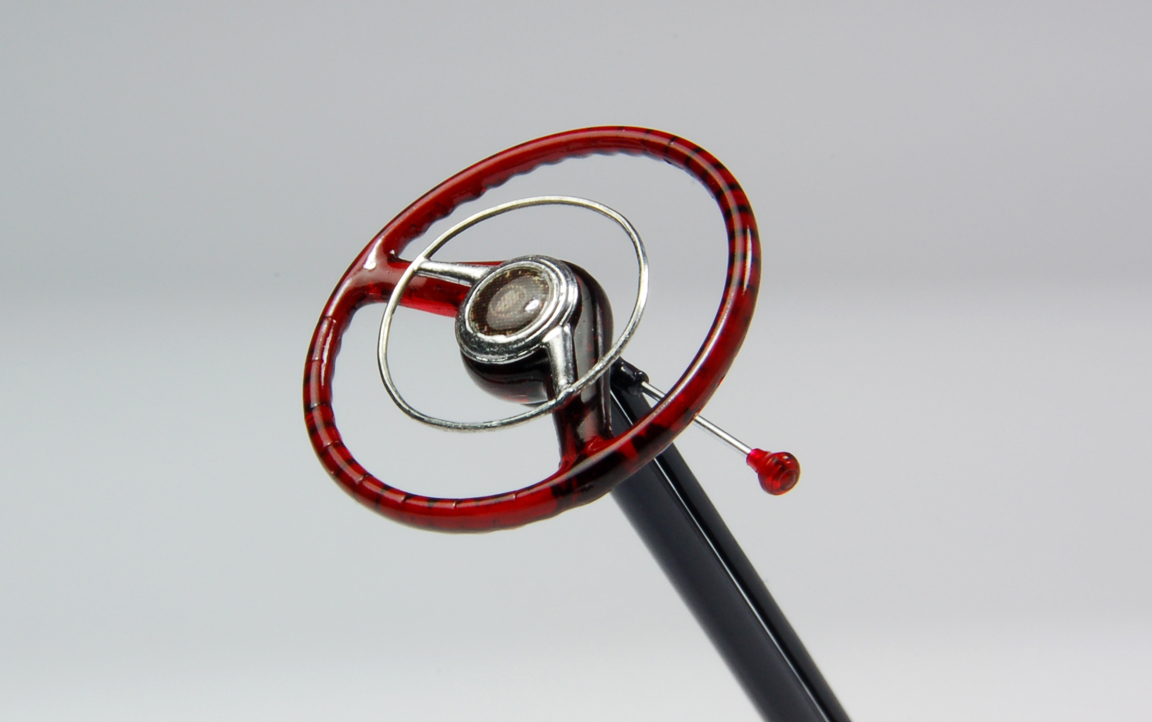 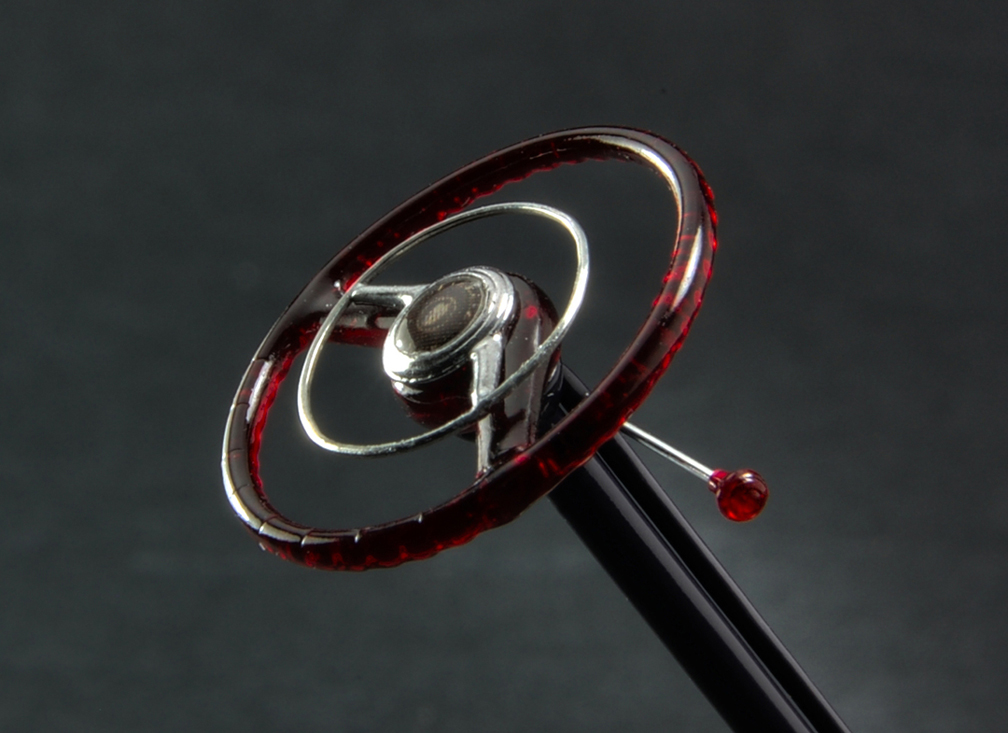 I painted the floor interior British Crimson, shooting a few coats at low pressure to create a textured surface. I drew the floor mats in CAD & printed them on paper. It took me quite a few attempts to get the color right. I cut them out & did a test fit with seat & dash in place. The pedals have also been painted but not yet permanently glued in. Same thing with the gauge clusters & dash knobs. For final assembly, the dash & steering assembly will be mounted to the body, not the floor. Only the seat will be mounted to the floor, then, the body & other interior parts will be placed on top of that. The fenders & other exterior body parts still need to be polished out at this point. 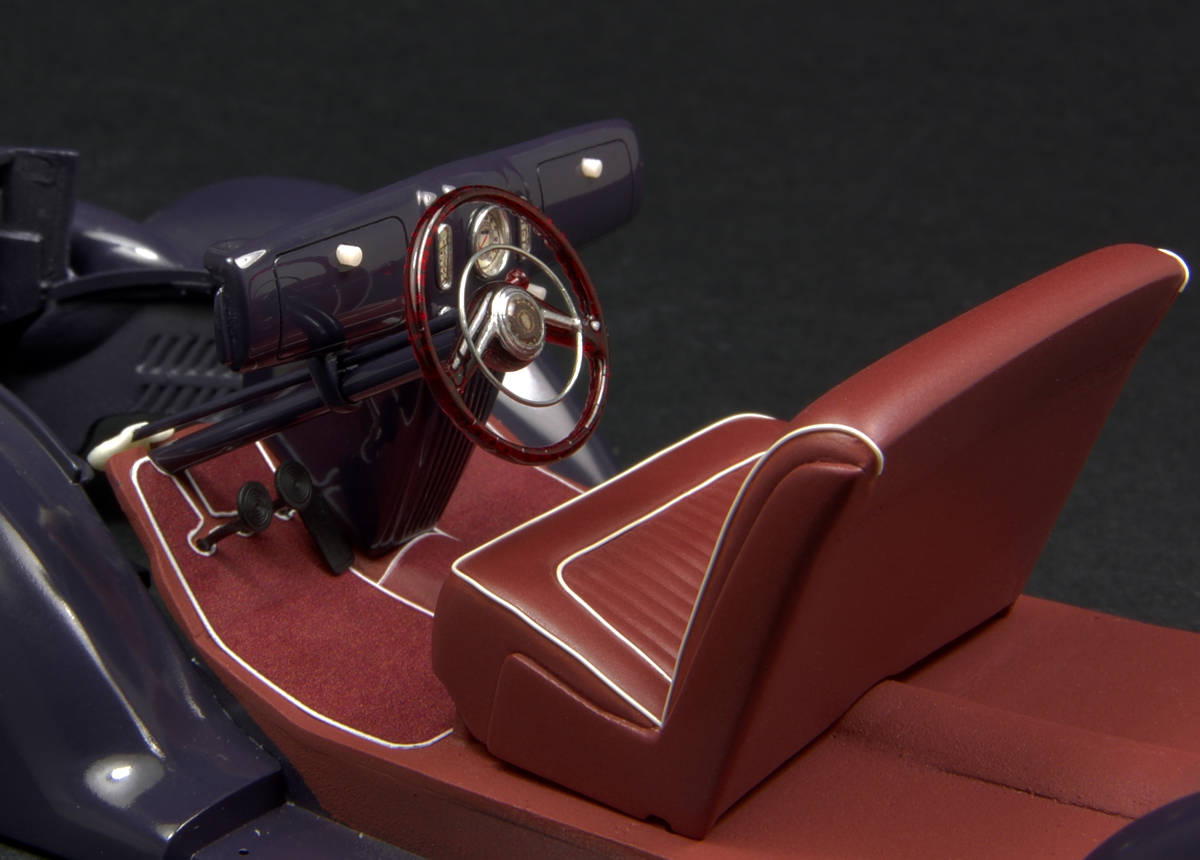 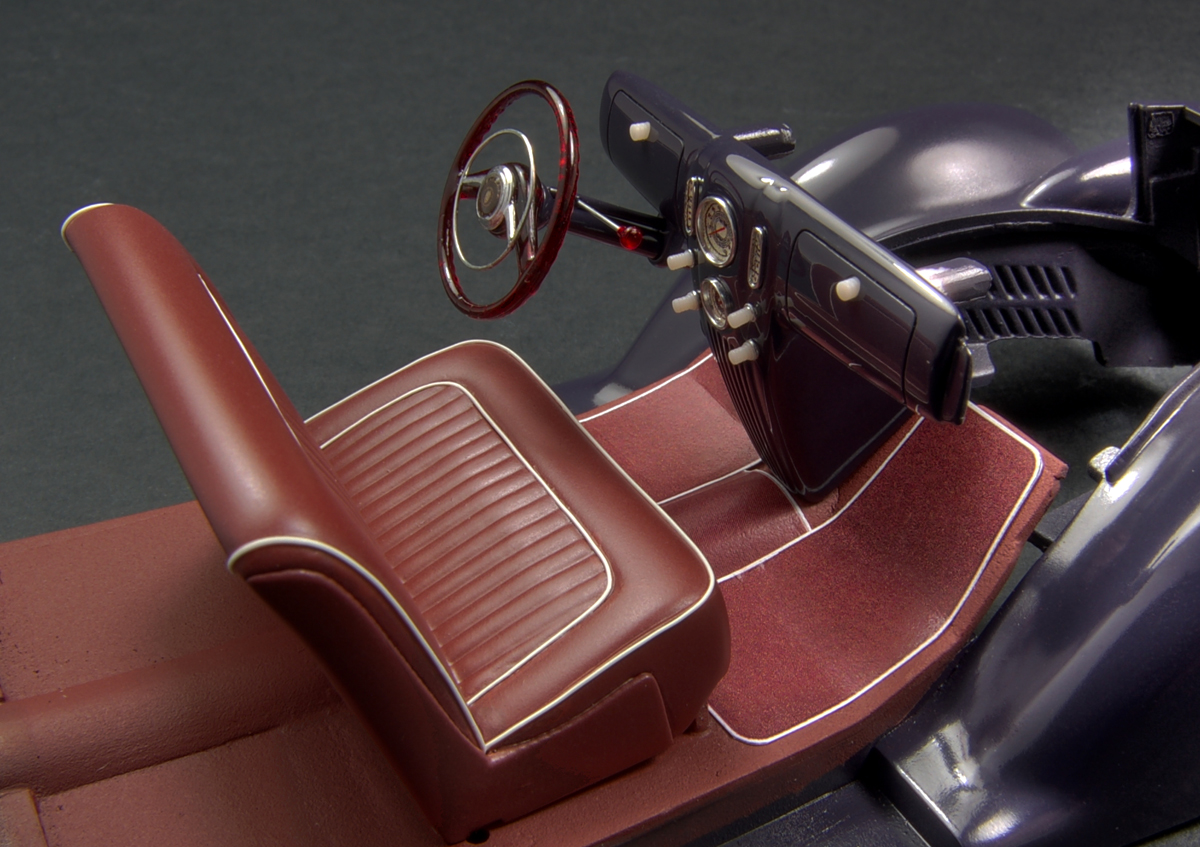 Here is another test fit; the door panels, side window garnishes & dash held in place with handy tack. 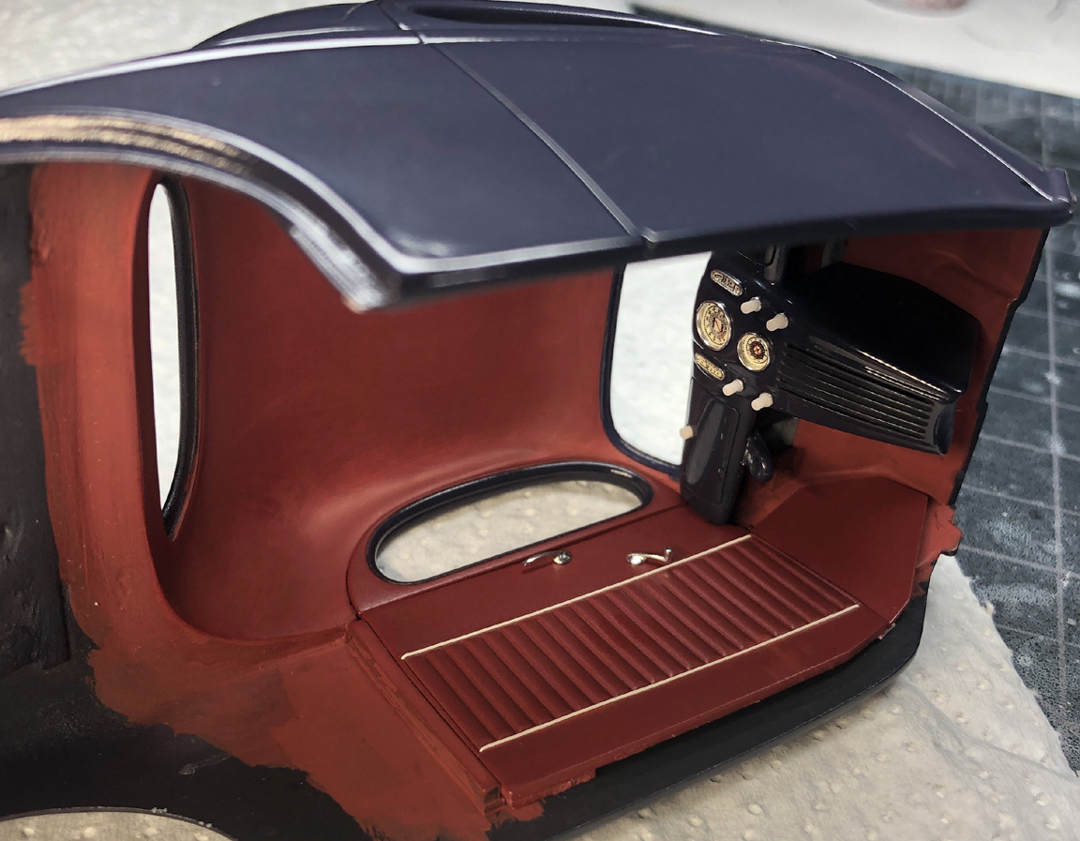 It's getting close to the end, but a bit more to come. Steve |
|
|
|
Post by Bernard Kron on May 5, 2020 17:36:15 GMT -5
Beautiful work and choice of colors. Very classic looking. The steering wheel is a perfect complement to the dash and upholstery. It doesn't get mentioned, but the detail closeup photography is as spectacular as the workmanship and design. What do you use? It looks like you're set up to photograph directly from your workbench.
And thanks for the link to Bedlam Creations. Their prices are quite reasonable and they offer a complete range of decal services. The fact that they also sell sheets of generic numbers, letters, checkers, and other stuff in your choice of solids and metallics is just frosting on the cake. I recently lost my Alps printer guy and have been looking for someone. Digging down into their web site I found their excellent custom order page and was pleasantly surprised to find that they even accept uploaded bitmap files, including Photoshop .psd files. Quite a few custom houses will only print art work they have finalized and frequently charge for redrawing to vector graphic format. I'll have to work up something to get a quote from them, but it certainly looks promising.
|
|
|
|
Post by Duane on May 5, 2020 21:31:58 GMT -5
Steve; you've done some hard, and tedious work on
your '36 and with each photo it shows; beautiful work !
|
|
|
|
Post by lo51merc on May 5, 2020 22:02:29 GMT -5
I sit here shaking my head in awe of your talent and skill Steve. You truly do amazing work.
|
|
|
|
Post by skip on May 6, 2020 8:06:33 GMT -5
Absolutely Exquisite, I'm at a loss for any better adjective! I'm in absolute awe at your work on the 1947 Lincoln Steering Wheel, the work that went into that piece alone. Then there is the pedals, the aforementioned Dash. That seat is another one of those details that are often overlooked yet you've proven with just a 'bit' more work it looks realistic enough to want to sit down for the rest of the ride!
Question - I notice the dash knobs haven't received any color yet. Are you working on casting those in color like you did the steering wheel in red or a semi-translucent Tan would give it that 40's or 50's flair.
|
|
|
|
Post by spex84 on May 6, 2020 10:55:06 GMT -5
Unbelievable.
That steering wheel is a fabulous work of art in its own right. You went the extra mile on that one!
I like the leather-like appearance of the headliner...it has a vaguely terra-cotta look that is very enjoyable. Shame it'll barely be seen in the finished car!
The textured floor mats are trick, too.
Thanks for describing the techniques you're using to achieve these beautiful results!
|
|
|
|
Post by steveb on May 7, 2020 16:45:04 GMT -5
It doesn't get mentioned, but the detail closeup photography is as spectacular as the workmanship and design. What do you use? It looks like you're set up to photograph directly from your workbench. Thanks, Bernard! Yes, set up on the bench. Sometimes, the background is the cutting mat, other times, I put a piece of white or black poster board for the background. Some are iPhone photos, & some are with an old Nikon D50. The one of the steering wheel n the sprue is actually a screen capture from an iPhone video.  I have a small fluorescent desk lamp as well as a small LED desk lamp. That's what I use to build, but I still could use a bit more light. Sometimes, I'll set up 2 clamp lights with 100w compact fluorescent bulbs in them. The D50 is on a tripod, & I use a remote because of the slow shutter speed & high f-stop. |
|
|
|
Post by steveb on May 7, 2020 16:46:28 GMT -5
Thanks, guys, I really appreciate that you appreciate my sickness.  |
|
|
|
Post by skip on May 8, 2020 9:38:11 GMT -5
I have a '36 set aside for a future taildragger build, but of course I'm ruined forever after seeing these photos. I won't accept anything less than Steve B quality. Might have to lower my expectations a little  Love that recessed license plate! I'm noticing that you use a lot of superglue, Steve. So does Dennis Lacy on this forum...whenever I try to use superglue, I find it dries harder than the surrounding plastic, making sanding just about impossible. Is there a specific brand, or some kind of trick that you're using to avoid this problem? Ha! Thanks! I like super thin, usually what Hobby Town USA had (when we had one here) or whatever Hobby Lobby has. You are so right about it drying harder than the surrounding plastic. I apply layers a little at a time, then level the areas with files, not sanding sticks or sandpaper. There also seems to be a time window where the superglue is hard enough to not clog up a file, but not rock hard. Once I think it's level, I sometimes use sandpaper to even out the sheen or finish of the surfaces. Steve I've used CA Superglue both thin and the thick gap-filling types for a long time. It's been my go to filler for closing unsightly seams on the Roth and Weird Oh's, works better than other fillers. Used it on a ton of cars as well. I've had people on another forum tell me that CA glues are not good for filling. Or that they will eventually crack or whatever. Yet I've had models with CA glue filler going back more than 20 years and have yet to see any cracking develop. I also like to use baking soda with the super glue, especially the thin stuff, it finishes out well. One trick I learned when using the baking soda and super glue is to tint the baking soda with food coloring, helps to "locate" the filler on the surface. Same finishing techniques Steve outlined apply. |
|