|
|
Post by thirdgearspeedshop on Sept 18, 2017 7:47:14 GMT -5
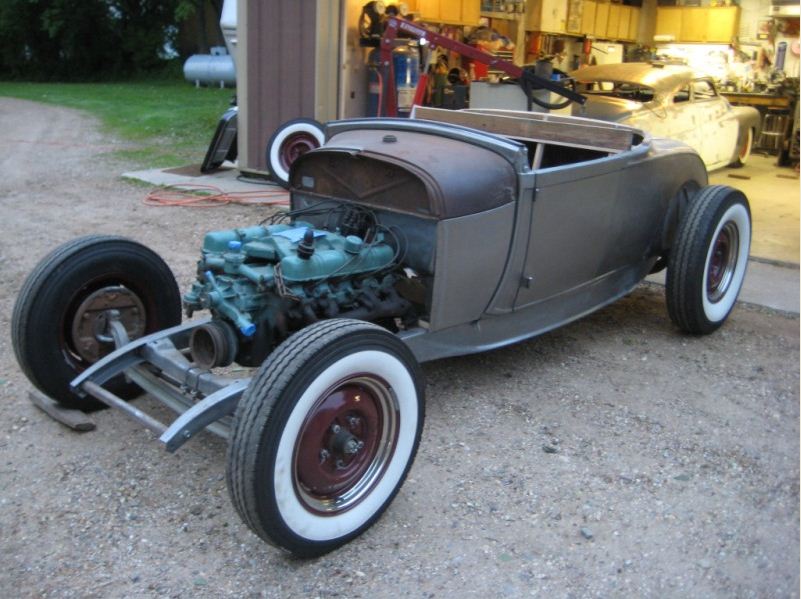
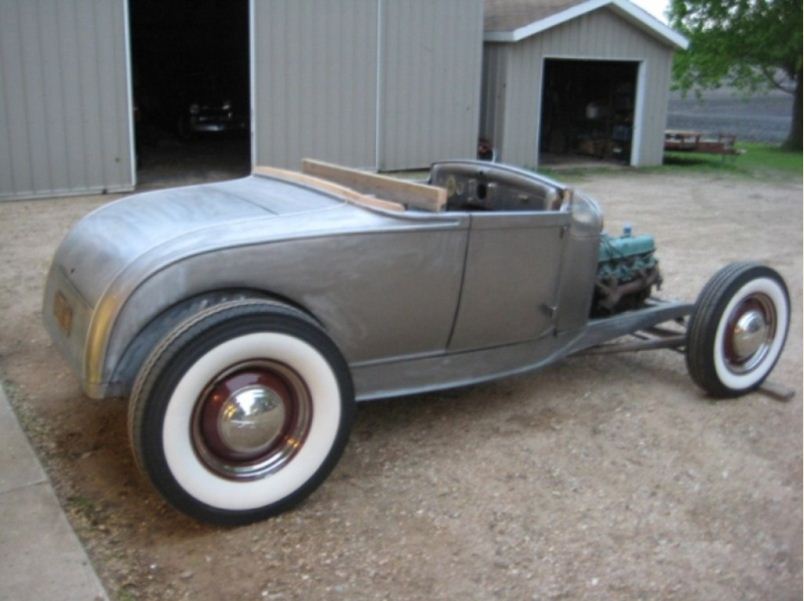
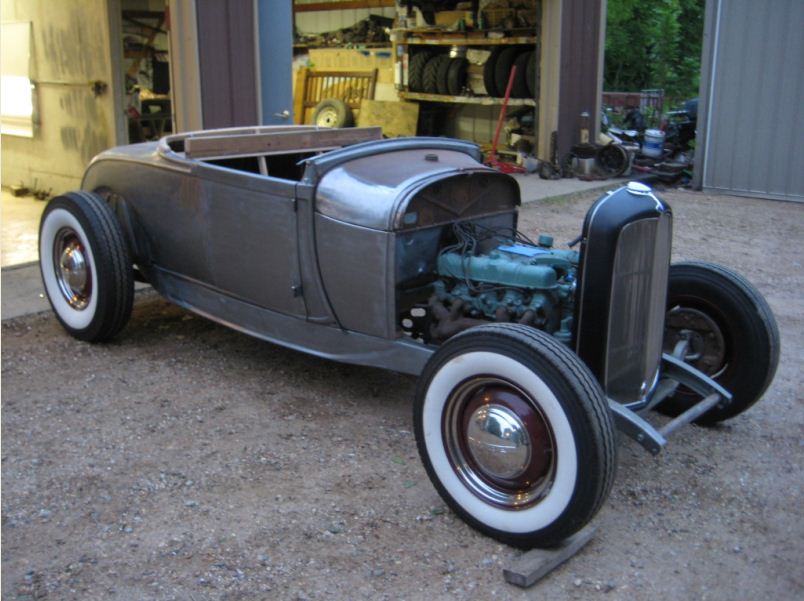
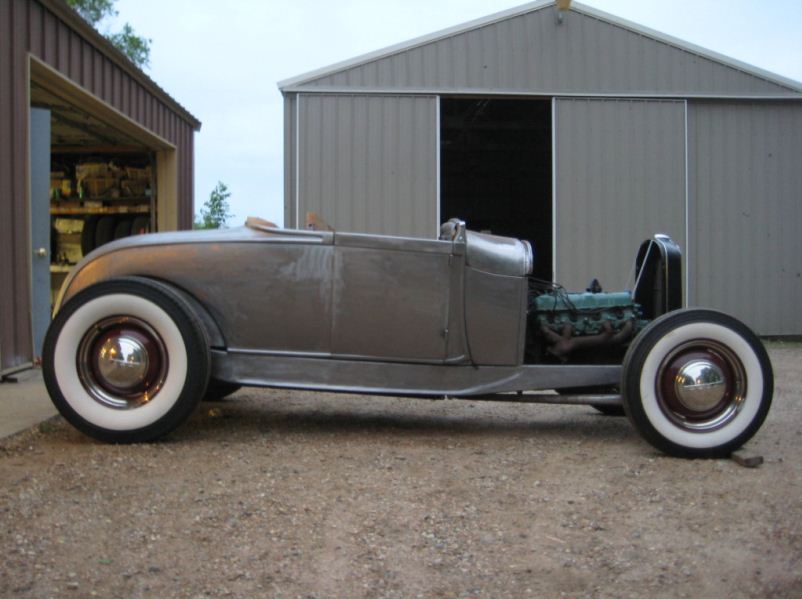
Hey guys, I thought I would move the conversation from a previous thread and create an official build thread. I have mocked up my next project using the inspiration photo pictured below. The plan is to build a clean roadster in a traditional style circa early 40s. I will be using the AMT body on the Revell 29 pickup frame. To achieve the rake in the photo I'm going to attempt to lower the front by removing leaves from the front spring rather than using the kit supplied dropped axle. I have mocked up a 32 grill shell but I'm not married to it. Interior details have not been worked out yet, but the new Revell 29 interior may find it's way into the build. Power will come from the flathead 4 with a scratch built Miller/Cragar OHV head. About the wheels and tires: This is always tough on a traditional build because kit supplied options just barely miss the mark IMO. For a traditional build I really think it should have wire rims. The AMT 34 wires have better detail, but finding tires that fit them is tough with my available stash. I have mocked up the AMT Kelsey Hayes style wires on firestone wheels, not ideal but better than the other options I have played with thus far. I've researched old photos and referenced The American Hot Rod by Dean Batchelor and it seems that the big and little combos came into the picture in the later 40s. I'm sure this will spark some thoughts and opinions, and they are all welcome. I welcome any critique, discussion, and tips you guys may have. I respect the builders in this forum and the experience they bring to the hobby. This will be a slow moving project but I will keep it updated with pics along the way.  |
|
|
|
Post by dakotajohn on Sept 18, 2017 10:37:48 GMT -5
I'm liking this !! I have a couple or so of the AMT Kit, I may have to try one of these....
|
|
|
|
Post by Dennis on Sept 19, 2017 9:31:15 GMT -5
I'll be following! Do you have any issues of Lindberg's '34 Pickup? The stock tires in all of those are Armstrong brand and are ever-so-slightly shorter and the tread is narrower compared to the AMT Firestone's you have above. You could put the Armstrong's on the front to give it a mildly staggered tire set... Here's that combo on a '25 T I threw together 10 years ago. 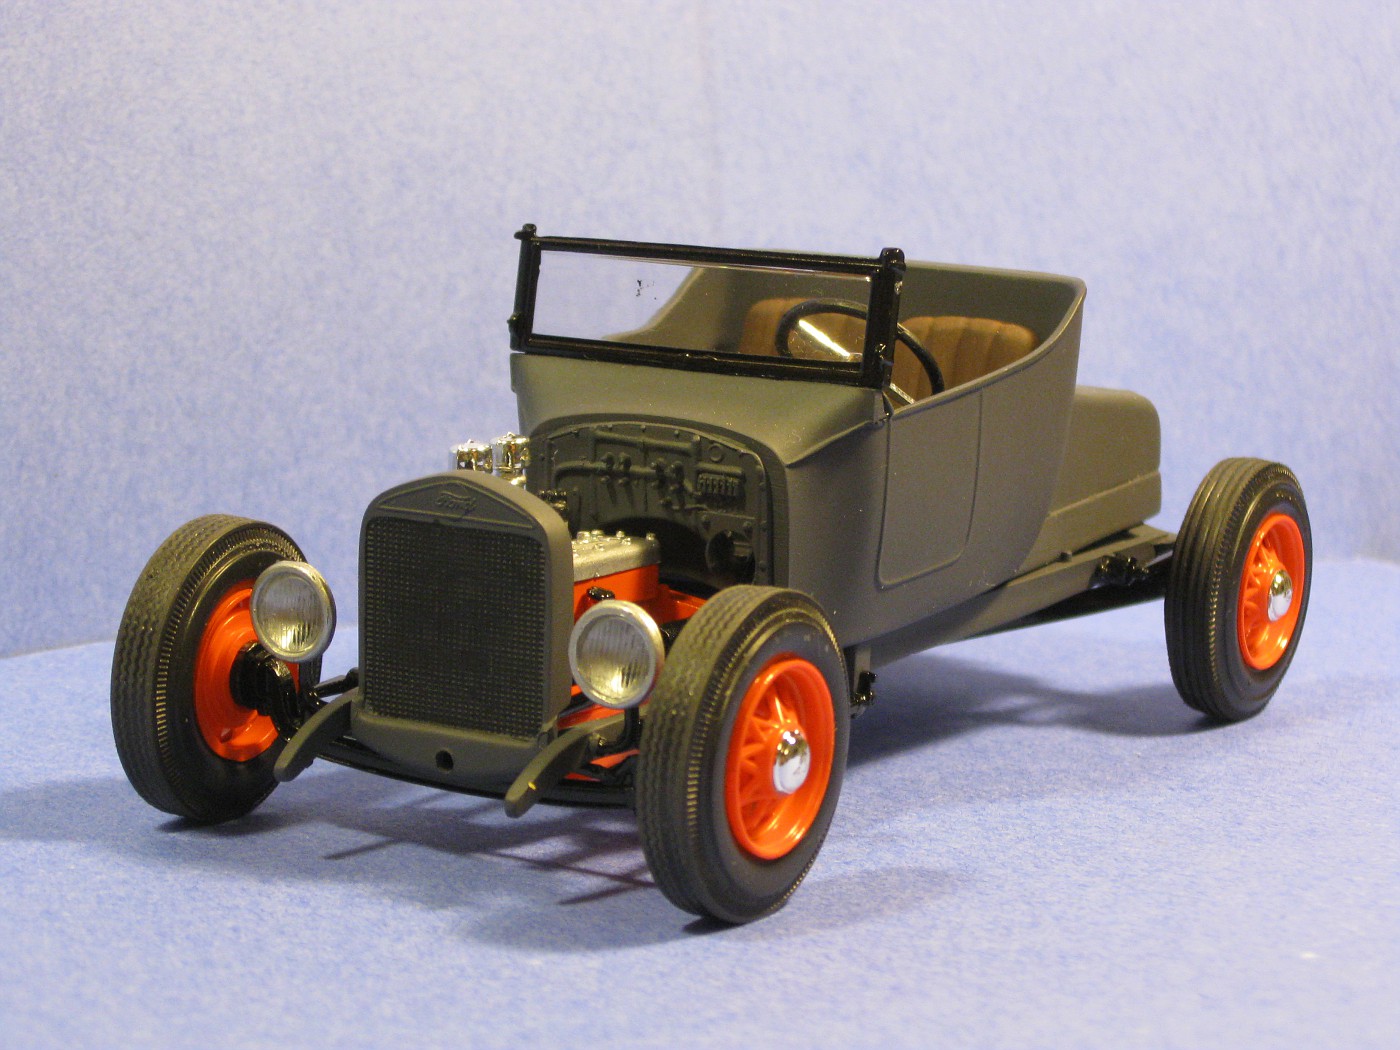 Hosted on Fotki Hosted on Fotki  |
|
|
|
Post by thirdgearspeedshop on Sept 19, 2017 11:26:14 GMT -5
Nice little T Dennis!
I only have the cab from the Linberg 34. Thanks for the tip, Another kit to keep my eyes open for. I have some tires coming that will work better I think. The goal is to use the AMT 34 wires because they look more in scale than the ones I've mocked up. I'm going to move forward with frame mods and keep my options open. Updates will follow.
|
|
|
|
Post by mod3llover on Sept 19, 2017 23:03:36 GMT -5
I really like those Armstrong tires, but you never
seem to get a good set of those anymore!
Always they are molded badly, I found 2 tires to use
out of 3 '34 kits that I dug through!
Ok, . . . I'm better now!! And yes that is a nice
little T you have there Dennis!!
And Travis, I think that roadster is going to look
great. And if you have certain tires you do decide to
use on this, but don't have, post it in wanted!
I look there all the time to try and help out!!
David S.
|
|
|
|
Post by EchoBravoSierra on Sept 20, 2017 13:48:41 GMT -5
I've got a thread for a similar project going on 5 years here... It'll wait until I'm feeling more ambitious- I've had limited building time lately, so I've been leaning toward projects that are closer to box stock so I can make progress with the time I have. trakinscale.proboards.com/thread/15628/pre-war-29-ford-roadsterI used the Armstrong front tires that have been mentioned, and kept the wires you have in your mockup. I'll be watching yours with interest, and maybe it'll inspire me to dig mine out again. |
|
|
|
Post by thirdgearspeedshop on Sept 20, 2017 15:01:25 GMT -5
Thanks Eric.
I looked through your build thread and it looks fantastic! I would encourage you to dig it out and finish it. It looks very similar to what I have on the bench and the scratch building you have done is superb. I am interested in seeing how you do the mechanical brakes. I would also be interested in seeing your carb set up if you have a pic of that.
|
|
|
|
Post by EchoBravoSierra on Sept 20, 2017 16:04:07 GMT -5
Thanks!
I'll dig it out and play with it again soon. I'll take some more pictures- some in that thread might be messed up now, or my server at work is blocking them.
Thanks to Dennis, I need to fix the inner fender area at the rear with some half-round, and repaint. ;-)
I am also interested in seeing how I'll do the mechanical brakes... lol
|
|
|
|
Post by thirdgearspeedshop on Sept 25, 2017 7:58:57 GMT -5
Build update: I "unboxed" 29 the frame using thin styrene cut into strips aprox .125" wide. I started at the back of the frame rails just forward of the rear cross member and wrapped the rails leaving the same overhang on the top and bottom. Tamiya plastic cement worked great fusing the thin plastic as it wrapped around the frame horns. I then sanded the outside of the rails smooth leaving the channel inside both rails.  After unboxing the rails I moved on to the body mods. There has been much discussion regarding the shortcomings of the Revell 29 body, how to correct it and the advantages of using the AMT offering. I was all set to use the AMT body but on closer inspection the tooling of the Revell body looked much better if you overlook the rear wheel openings ( we will get to that later). I especially like how the Revell body has the seam just under the gas tank recessed vs. the AMT one that is raised, appearing to be a mold line. The details in the raised strips on either side of the trunk also look much better on the Revell body.  On to the rear wheel openings. I decided the pros of the Revell body outweighed the cons so I set out to correct the infamous rear wheel opening problem. My solution was to cut the wheel well from the interior panel, move it down and mark the arch with a pencil. I then cut the wheel well piece and sanded until it fit into the body. I also had to add material to the bottom to straighten out the step in the kit's lower wheel opening.  ![]()  Still lots of sanding and filling but at least with the Revell body the body work is located, for the most part, in 2 areas (both wheel wells). In conclusion, both AMT and Revell strike out in regards to a stock body, but IMO, the Revell body is much cleaner and most of the details much sharper than the AMT body. I will still use the AMT body for a build, perhaps a beater or weathered hot rod. Something that hides the shortcomings of the mold. |
|
|
|
Post by Dennis on Sept 25, 2017 10:13:39 GMT -5
Great work fixing the wheel wells. I really wish I had done that on the '29 I recently finished.
I have seen a couple of guys cut out the wells from the AMT body and graft them into the Revell body but this is the first I've seen using all-Revell parts. I think the results are really nice!
|
|
|
|
Post by krassandbernie on Sept 25, 2017 10:22:24 GMT -5
Thanks for sharing your fixes to the Revell body! I still think the cowl sucks big time on the Revell body; and plan on correcting mine with the cowl from the Revell '29 rpu perhaps. The sweep of the body line from the top of the cowl down towards the bottom is just plain wrong (no where near curved enough) on the new Revell '29. I can't unsee this now! LOL! I haven't spent a ton of time looking it all over; but that was the direction I was thinking I needed to go the last time I had it in my hands.
|
|
|
|
Post by thirdgearspeedshop on Sept 25, 2017 11:10:43 GMT -5
Thanks Dennis.
Ed, I also noticed the difference between the Revell PU and roadster cowls. I assumed it was because the pickup had a slightly different body style, but you are totally right. I'm picking my battles and moving forward. Maybe for kicks I will graft the cowl from the PU onto my spare AMT body that has already been corrected in the rear. You know, as an experimental project. lol
|
|
|
|
Post by spex84 on Sept 25, 2017 11:33:12 GMT -5
Hey, nice fix! I somehow had forgotten about the raised wheel arch on the Revell roadster body, but seems like you've taken care of it.
The un-boxed frame is a cool touch, something that didn't occur to me at all when I was building my last '29!
IMHO the Revell body needs a couple things in order to be equal to the AMT body: the beltline is super thick, and could stand being sanded down a bit, and that curved cowl reveal line is, as Ed observed, way off...but I bet it wouldn't be too difficult to use the AMT body as a pattern, shave the reveal off the Revell body, and re-build it to the correct shape with some styrene strip. Maybe that's too extreme and picky for this project, though? Haha.
|
|
|
|
Post by thirdgearspeedshop on Sept 25, 2017 12:32:33 GMT -5
To my eyes, the cowl area on the Revell body looks damn close to the reference pic (which is a 28), but I'm probably missing something LOL.
|
|
|
|
Post by krassandbernie on Sept 25, 2017 13:04:12 GMT -5
|
|


