|
|
Post by Mr409 on Jan 13, 2019 16:23:54 GMT -5
Thanks Ron! Added some black washing to the engine and it definitely looks better now. Though I'm not completely sure if I'm exactly happy about the outcome or not, but at least it's better than what it was before. I also added fuel lines from the fuel block that I made from aluminum to the injectors. Fuel line fittings are made from hex plastic rod and painted with Humbrol's clear orange on top of Revell's silver. The fuel lines are spark plug wire material from Scale Productions. 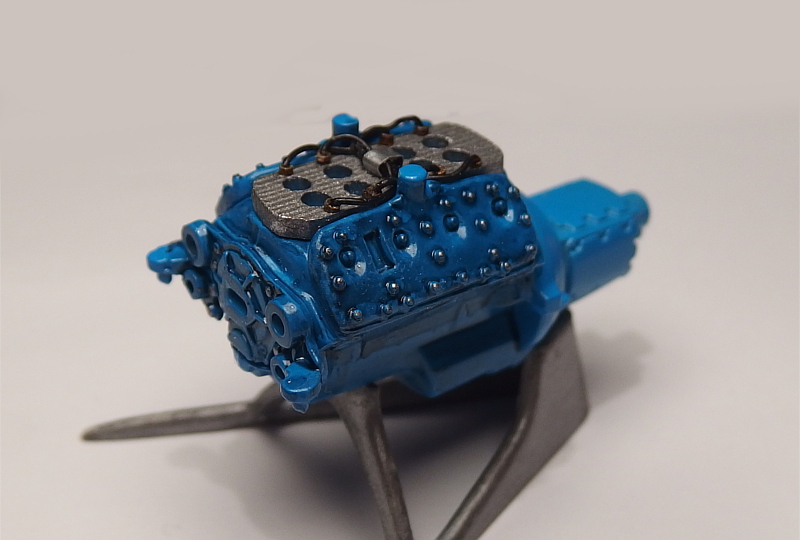 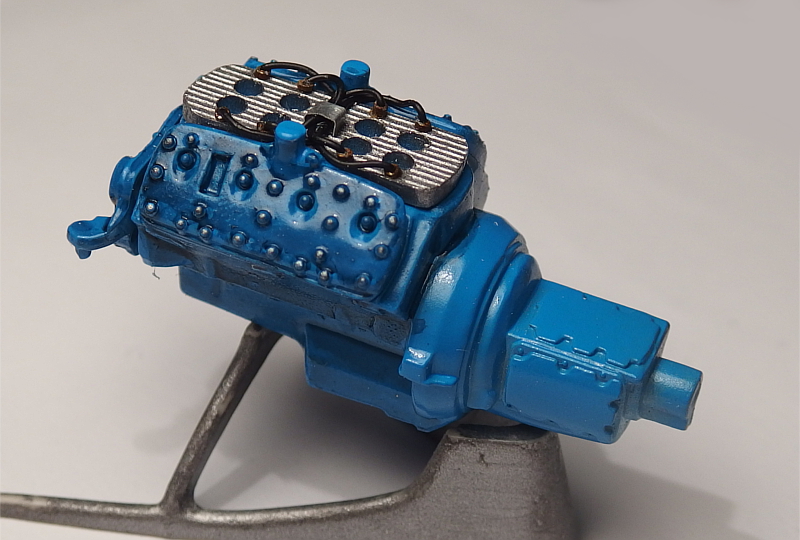 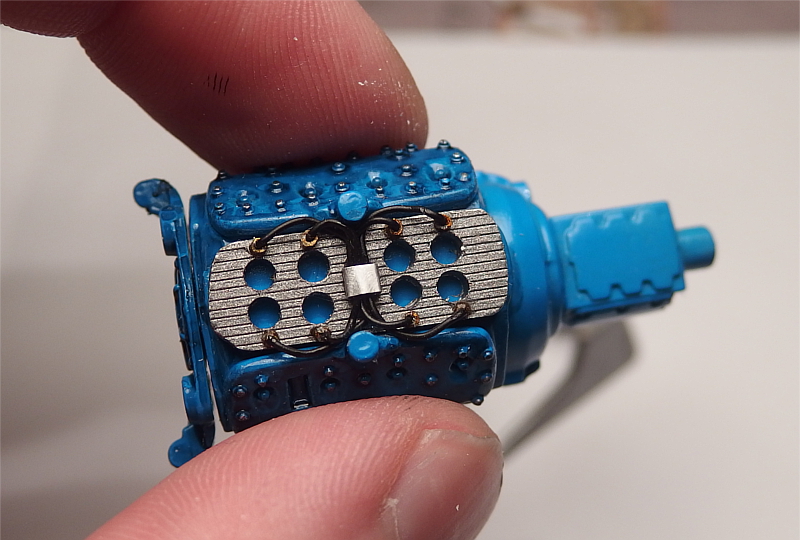 |
|
hardrock
Rebel
  Retired Military
Posts: 59
|
Post by hardrock on Jan 14, 2019 9:33:09 GMT -5
Beautiful
|
|
|
|
Post by froghawk on Jan 14, 2019 14:46:06 GMT -5
Terrific work! Great concept and execution.
|
|
|
|
Post by FordRodnKustom on Jan 14, 2019 16:40:54 GMT -5
Excellent! The wash looks great.
|
|
|
|
Post by Ranchwagon on Jan 14, 2019 17:33:55 GMT -5
Niiice! The fuel lines, nuts, and distribution block are just right, and I’m gonna steal that intake manifold idea!
|
|
|
|
Post by Mr409 on Jan 15, 2019 14:54:15 GMT -5
|
|
|
|
Post by constructionbob on Jan 15, 2019 15:24:50 GMT -5
Nice Engine detailing. Have U cut the passenger door open?
|
|
|
|
Post by Mr409 on Jan 15, 2019 15:41:58 GMT -5
Thanks! No, the doors are not opened up, I probably would not get them lined up properly anymore after the surgery.  The door gaps in this kit are pretty large so it indeed looks like they might be cut open. |
|
|
|
Post by Mr409 on Jan 18, 2019 15:56:04 GMT -5
Today I did some test fitting with the engine to get it mounted properly in the engine bay. First I did a mock up with the stock Flathead six to see where it would mount, and for my surprise it sat pretty far back when using the stock mounts. I did a Google search and that seems to be the case with the real car as well. Of course that's good for my use. The Flathead V8 fit on place pretty well, but it was sitting way too low, so it looked tiny in the engine bay. So I decided to lift it up a little and that helped a lot. So I fabricated a new crossmember for the frame so that the oil pan fits on top of that. I used the stock engine mounts as a basis for that. It's not the most accurate way, but that way the engine can be glued exactly to the right position and it will sit there just like it should. The crossmember needs still some work, and I will also have to fabricate the actual engine mounts between the stock Flathead engine mounts and the new crossmember that I built. Trans crossmember was also modified a little by adding a bit of material so that the trans will sit a bit higher too. 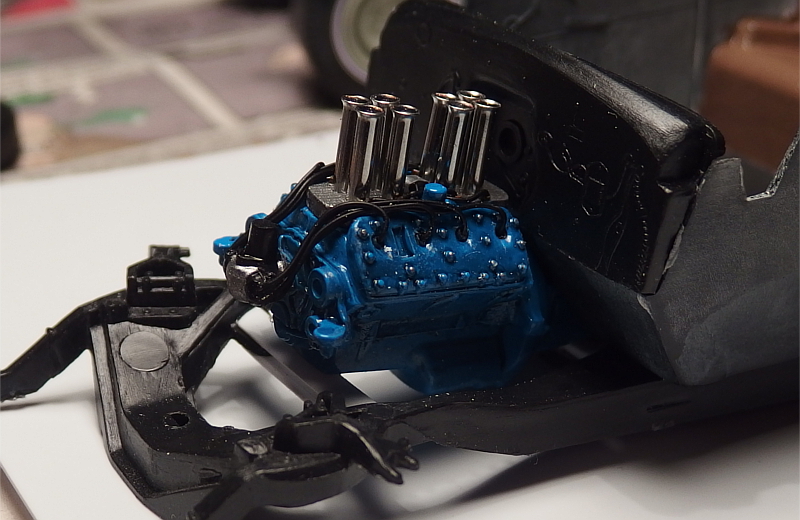 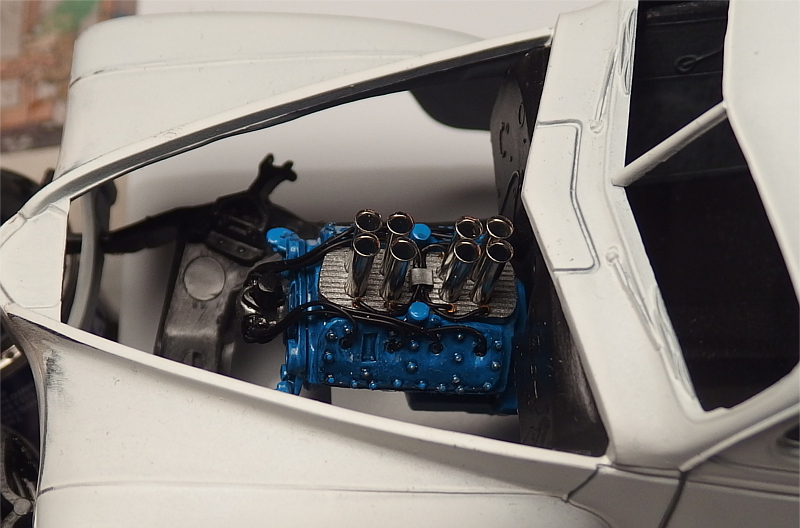 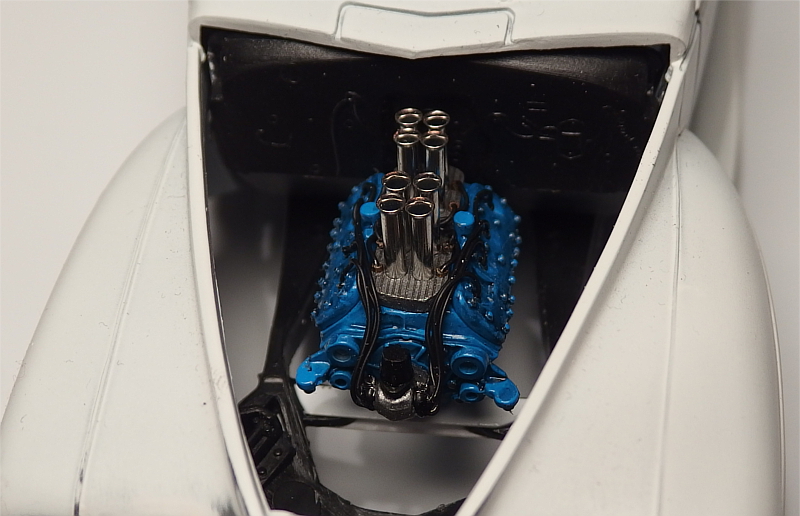 |
|
|
|
Post by mod3llover on Jan 18, 2019 21:07:16 GMT -5
That looks soooo kool in that Plymouth!! And those doors
do kinda look like they have been cut open!?!
I really love that injection set up on that Flattie too!!!
Awesome work here Niko! I just love it so far!!
David S.
|
|
|
|
Post by dodgefever on Jan 19, 2019 8:41:51 GMT -5
Neat job. What make is that ribbed sheet? I could do with some fine ribbing like that.
|
|
|
|
Post by Mr409 on Jan 19, 2019 12:08:57 GMT -5
Thanks for the kind words David and Stu!
The styrene is by Evergreen. That sheet is .020" thickness and the grooves have .025" spacing. I believe thicker sheets have also wider spacing between the grooves but I could be wrong. Of course this guess is just based on those sheets that my local Hobby Shop has on their shelf.
|
|
|
|
Post by dodgefever on Jan 19, 2019 17:14:42 GMT -5
Thanks, I'll check Ebay. I miss the old days when there were model shops around here. :/
|
|
|
|
Post by Mr409 on Jan 20, 2019 5:04:13 GMT -5
Luckily around here I have two Hobby Shops pretty close. Another one of them has lots of model cars, mainly American. The other one is mostly model railroad stuff, but they have a big selection of tools and supplies for scratchbuilding.
|
|
|
|
Post by Mr409 on Jan 22, 2019 14:03:42 GMT -5
Did some work with the engine details today. Started off with throttle linkage. That was kinda tricky, and because of that my linkage is not completely accurate but I think it will do. It's made from some metal wire that I had laying around and Detail Master's Photo Etch parts. Then I glued the belt driven fuel pump on place. Obviously, the belt and pulleys is still in progress. The fuel pump itself is taken from the AMT Boss Nova kit that has the same Hemi engine than AMT Double Dragster. After some prepping I sprayed it with chrome silver, painted the fuel line fittings and added a bit of black washing with Tamiya's Panel Line Accent Color. Fuel line from fuel pump to the fuel block was very tricky to get on place, but finally I did it. 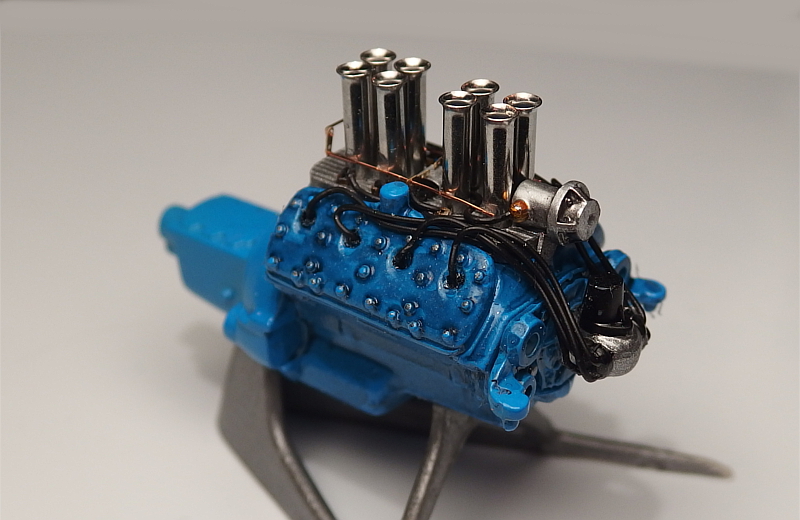 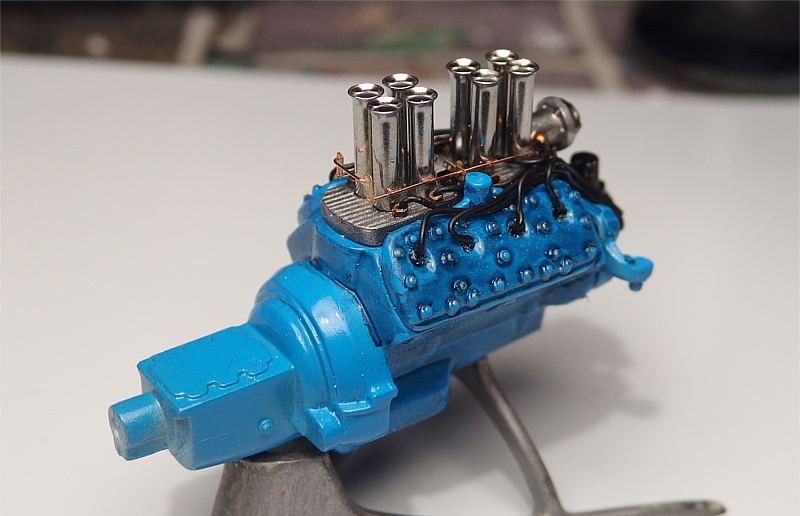 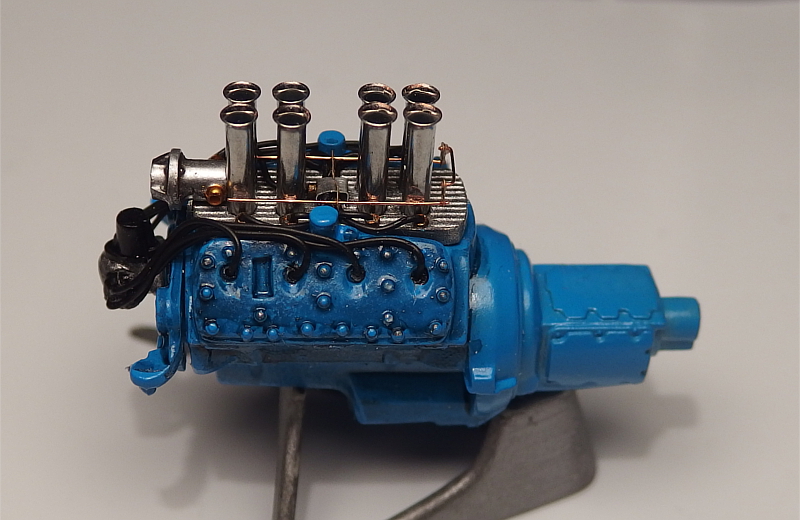 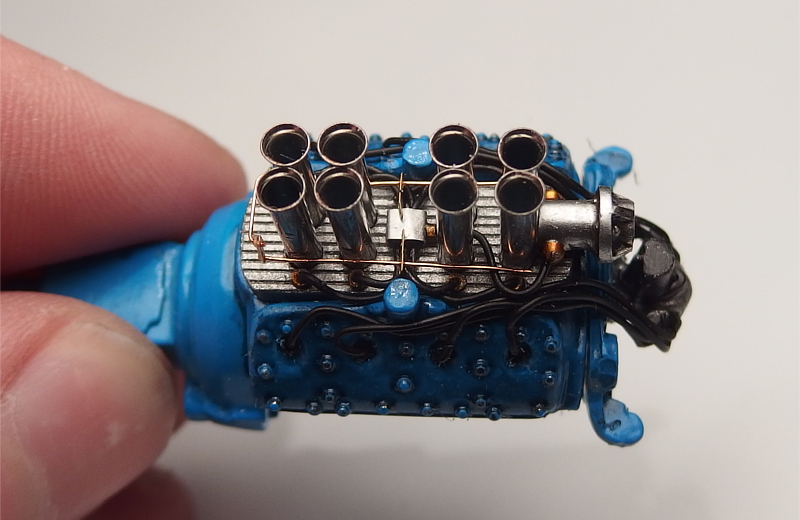 Next step will be scratchbuilding the headers and messing with the belt pulleys and belt for the fuel pump. Then a couple of smaller parts (starter, oil filter etc) and the engine is pretty much done. |
|