|
|
Post by lo51merc on Jun 4, 2020 8:59:57 GMT -5
For the door tops and the front of the vent windows I did this. I guesstimated the thicknesses and using the appropriate sizes of strip styrene I cut them down to fit in their respective locations. The door tops are 2 layers and the vent windows are three. It was tedious work but necessary. I hope this answered your question.
Gary
|
|
|
|
Post by jeff on Jun 4, 2020 9:30:42 GMT -5
It does, thanks. I thought you were a sanding god, but this makes sense too. I need to think in layers for body work more often I guess, thanks for sharing that.
|
|
|
|
Post by lo51merc on Jun 4, 2020 10:28:06 GMT -5
Jeff, you're quite welcome. Glad to help.
Gary
|
|
|
|
Post by lo51merc on Jun 9, 2020 9:49:19 GMT -5
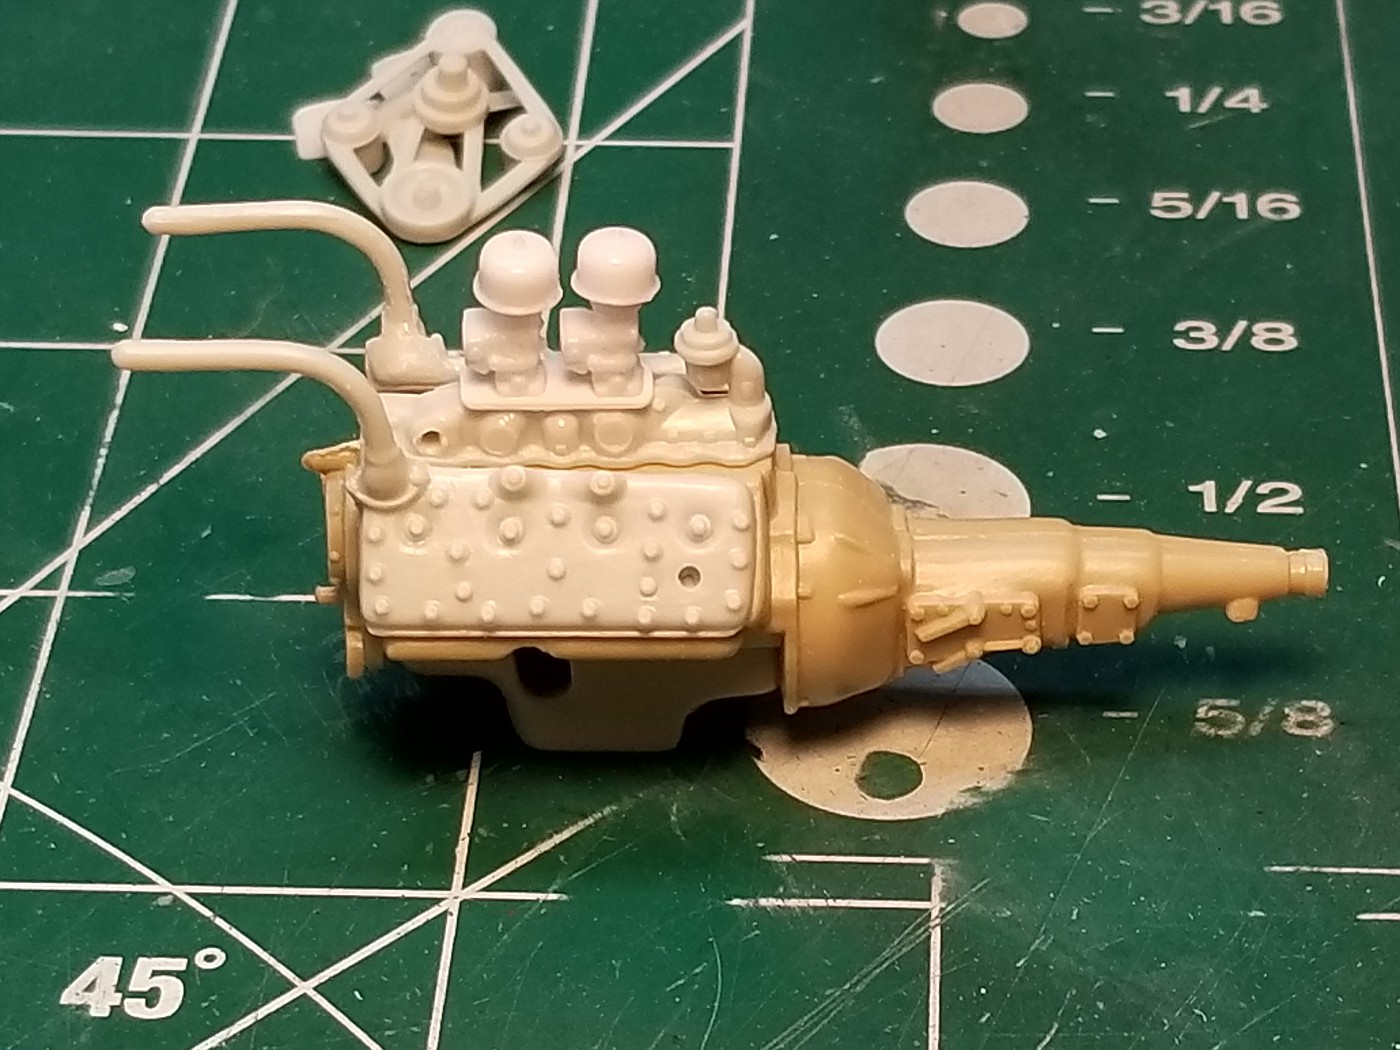
OK, which intake orientation is correct, this way or 180 degrees opposite? I'm hoping I can get it under the hood with Norm's Strombergs with bell shaped aircleaners. 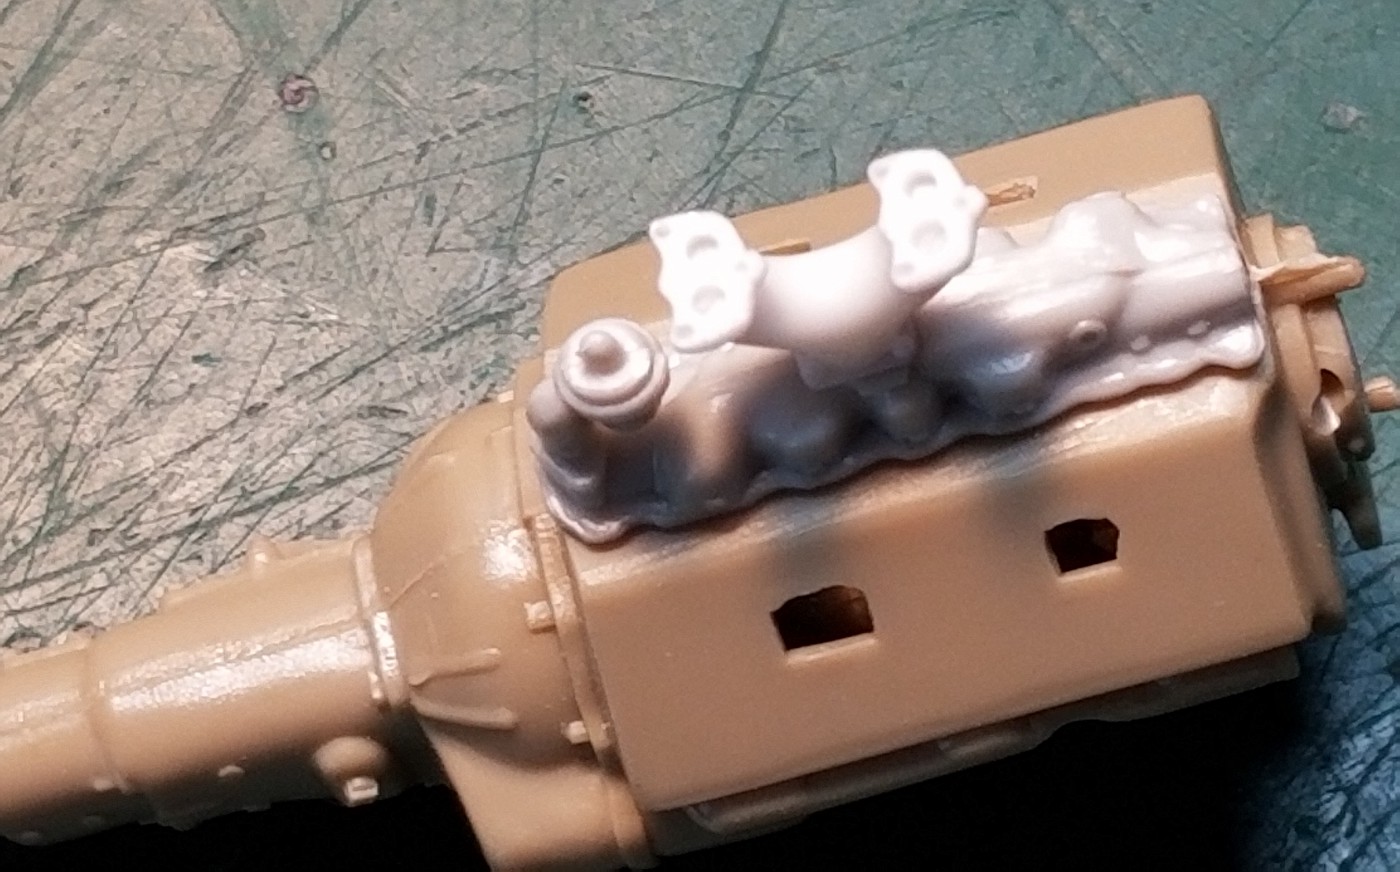 Hosted on Fotki Hosted on FotkiThanks, Gary |
|
|
|
Post by cturner on Jun 9, 2020 10:16:11 GMT -5
The way you have it IS correct...but...it's a model! LOL
IF you can't get it under...go to an intake with 2 carbs and don't "elevate" them!
|
|
|
|
Post by Dennis on Jun 9, 2020 13:40:36 GMT -5
OK, which intake orientation is correct, this way or 180 degrees opposite? I'm hoping I can get it under the hood with Norm's Strombergs with bell shaped aircleaners. Hosted on FotkiThanks, Gary The intake manifold is correct. The slingshot adapter needs to be flipped 180 degrees. When the carburetors are installed the fuel bowls should point forward. |
|
|
|
Post by lo51merc on Jun 9, 2020 16:06:12 GMT -5
Thank you Craig and Dennis. I've had that slingshot for a long time and hadn't found a use for it. Sadly that arrangement wouldn't fit under the hood. So I made an adapter for the 2 carbs and glued it all in place on the stock manifold, so no slingshot. I have a picture of it in my phone and will put it in here this evening. Always good to hear from you guys. This is quite the good group we have here.
Gary
|
|
|
|
Post by lo51merc on Jun 10, 2020 12:03:54 GMT -5
|
|
|
|
Post by lo51merc on Jun 19, 2020 10:31:42 GMT -5
Work progresses on this most every day with only a couple of setbacks. The same one actually. The rear bumper has cracked then subsequently broken where one of the bumper guards used to be. A re gluing then 1/32" wire super glued inside and I think I have solved the problem. I'll try to be more careful when handling it now as well. You can easily figure out why I made that last comment. 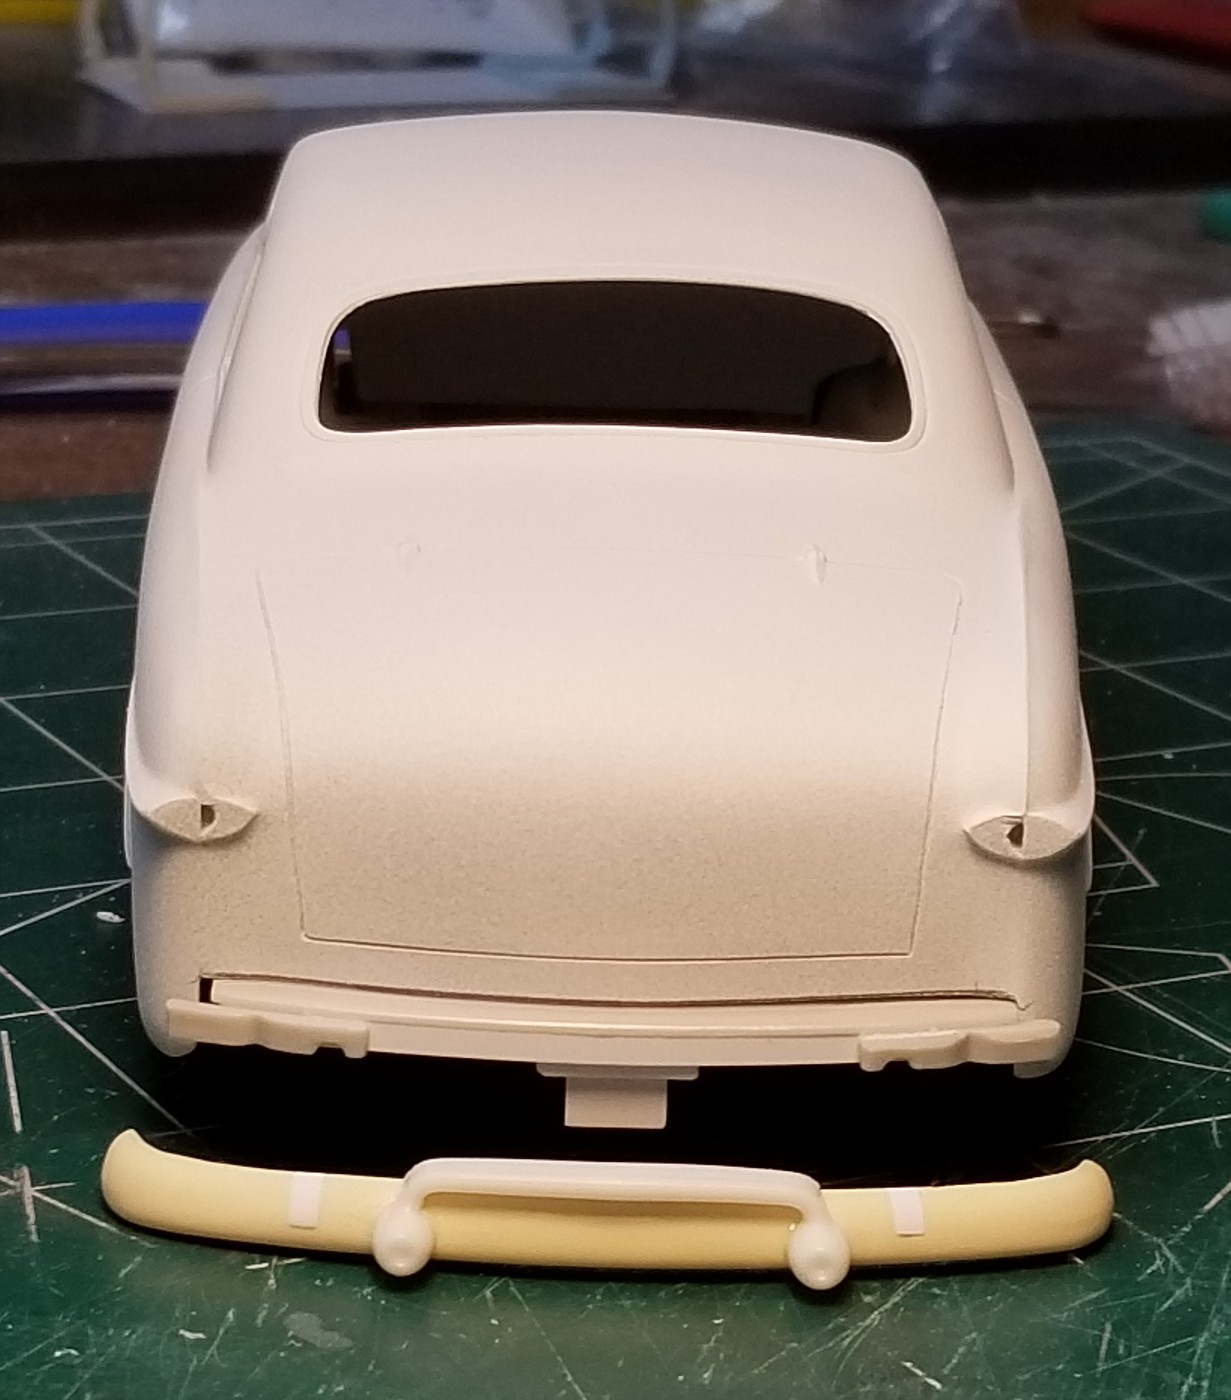 Hosted on Fotki Hosted on Fotki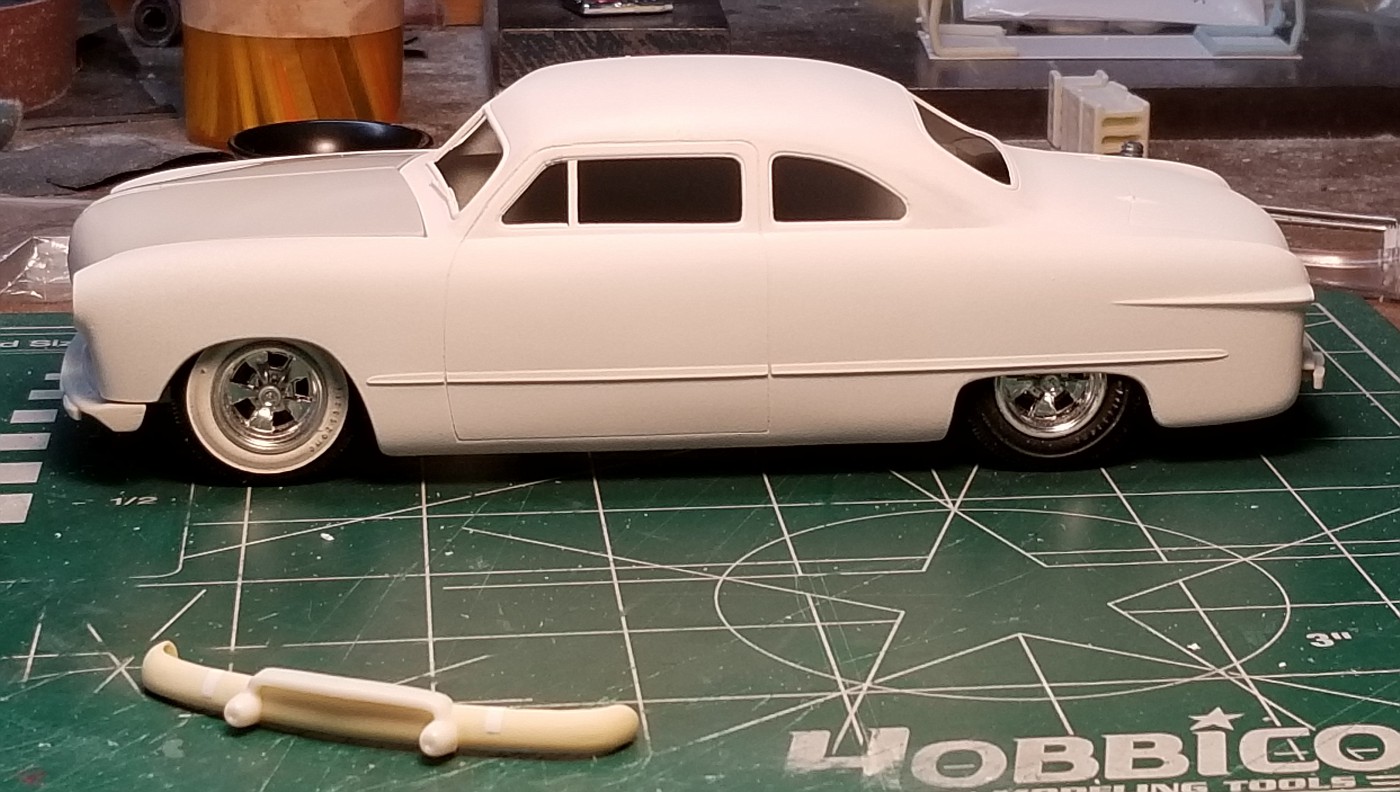 Hosted on Fotki Hosted on FotkiMy plans are to paint it black. I must get the top as smooth as I can here for sure. I'm using stock hub caps and trim rings on black wheels. Also, I thinned a pair of kit skirts as much as I could for it. That's all I can think of right now. Thanks for the comments. Gary |
|
|
|
Post by spex84 on Jun 19, 2020 10:49:31 GMT -5
The back bumper looks great! And the chop, of course  Looking forward to seeing some paint on it! |
|
|
|
Post by lo51merc on Jun 19, 2020 11:01:55 GMT -5
Meet too!
|
|
|
|
Post by steveb on Jun 19, 2020 13:01:09 GMT -5
Nice work on the side windows, trim & rounded door line! I know the frustration of cracking bumpers, it's happened to me many times. Where did the Kaiser over rider come from? I can't remember which kit included it.
|
|
|
|
Post by lo51merc on Jun 19, 2020 16:54:27 GMT -5
The overrider is a part from this kit. There's another being used on here on the rechopped Revell Merc.
Gary
|
|
|
|
Post by froghawk on Jul 1, 2020 20:31:46 GMT -5
Great work, Gary! In addition to that nice chop you've achieved a cool stance. How did you lower this chassis?
|
|
|
|
Post by Duane on Jul 1, 2020 23:57:28 GMT -5
love it !
|
|