|
|
Post by Mr409 on Oct 30, 2023 17:31:24 GMT -5
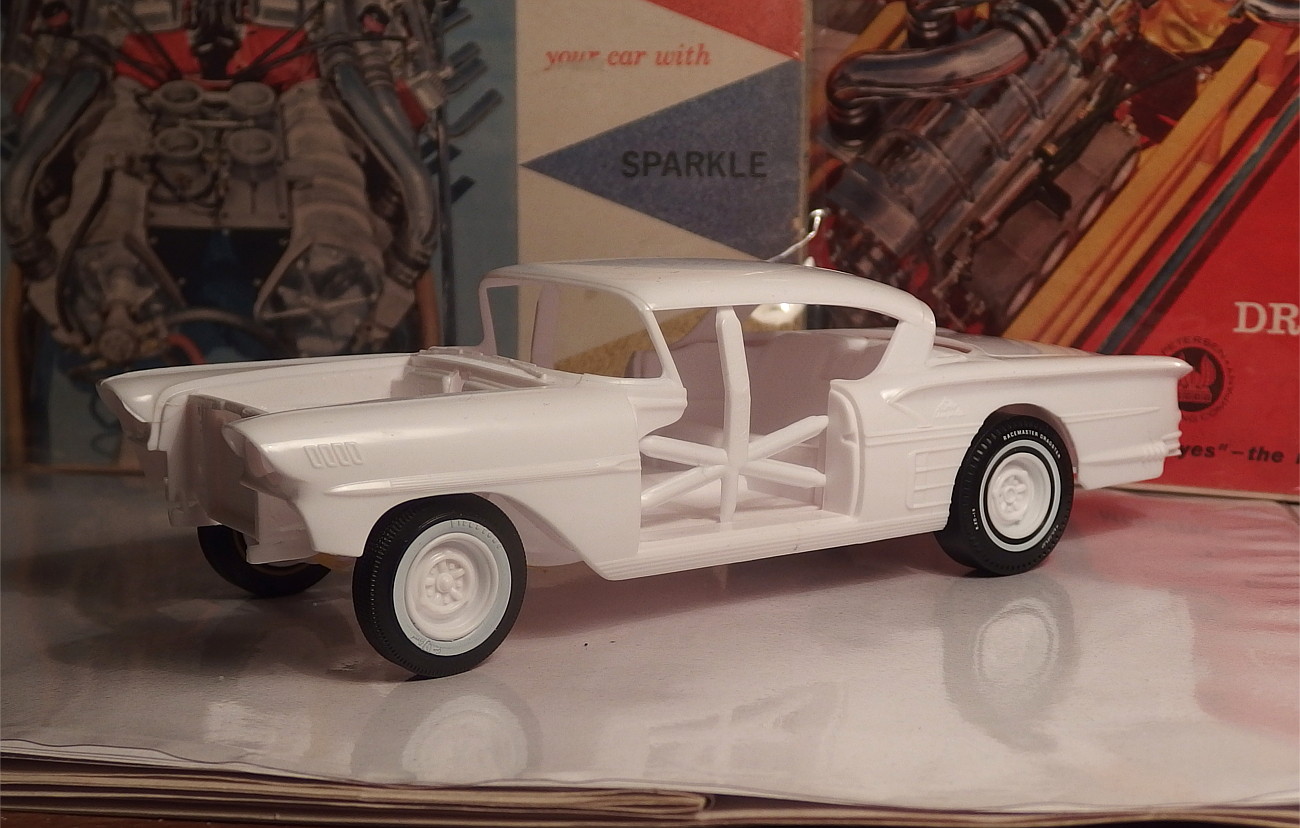
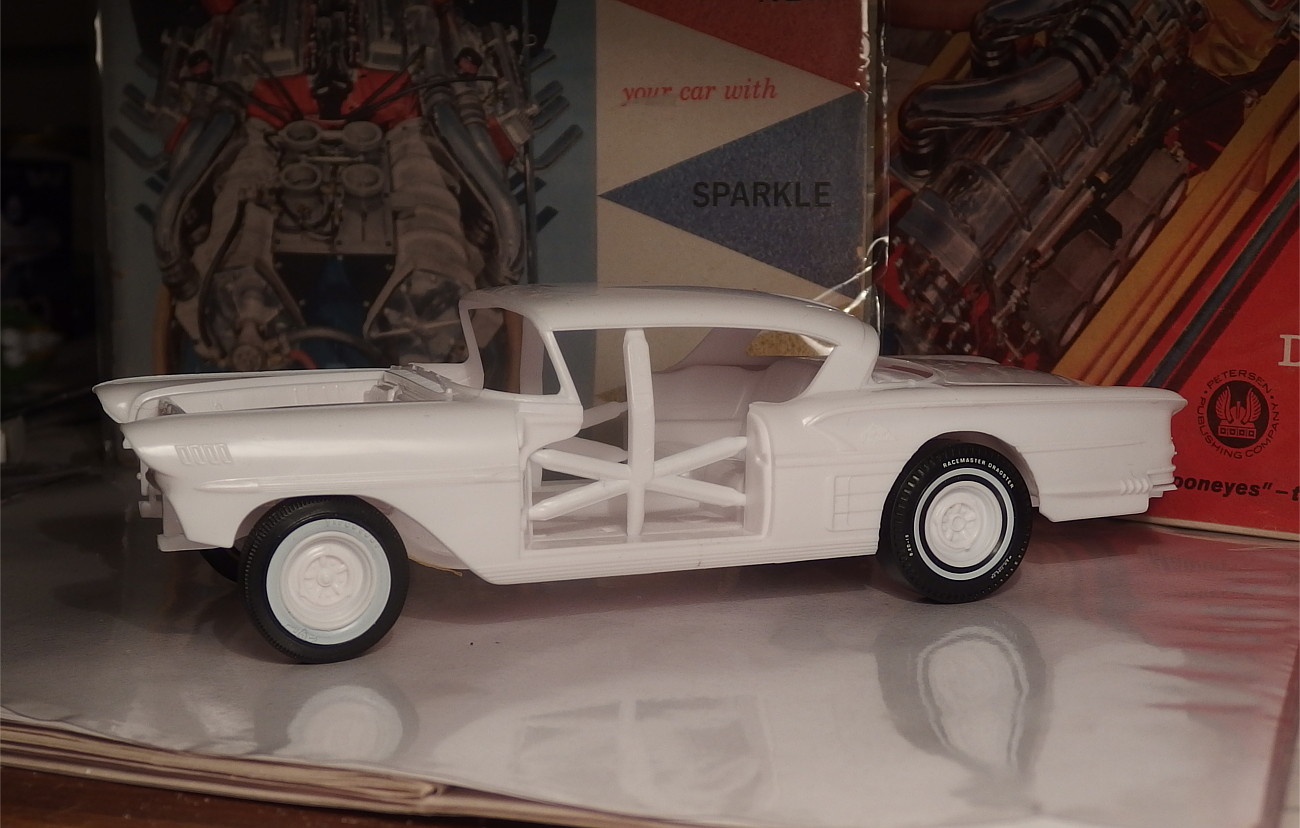
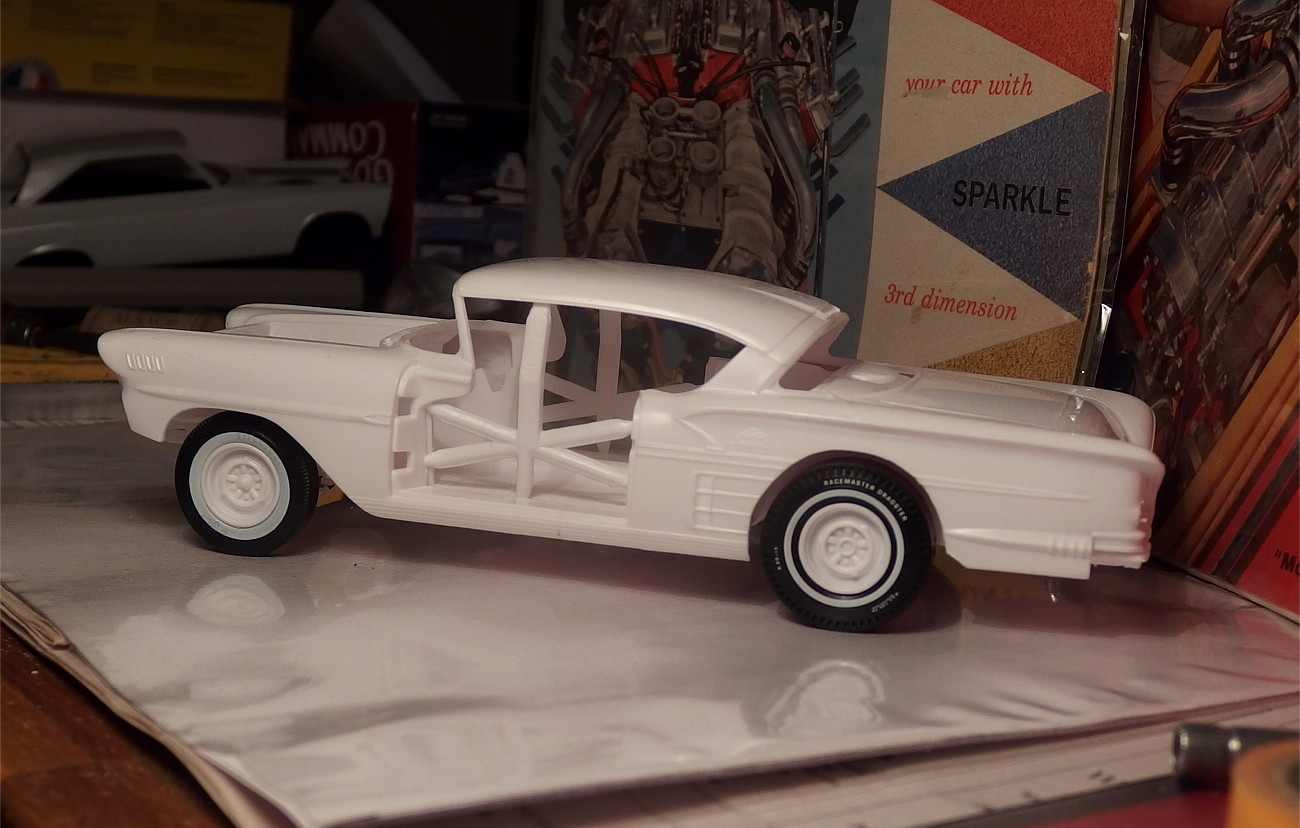
Found this AMT reissue while visiting Pegasus Hobbies in California a week or two ago and had to start building it right away. The box art is so cool that I knew I had to build this one as a Gasser, even though '58 Chevrolet wasn't the most common starting point for a Gasser back in the day, but hey, someone could have built a car like this for the Gasser class anyway.  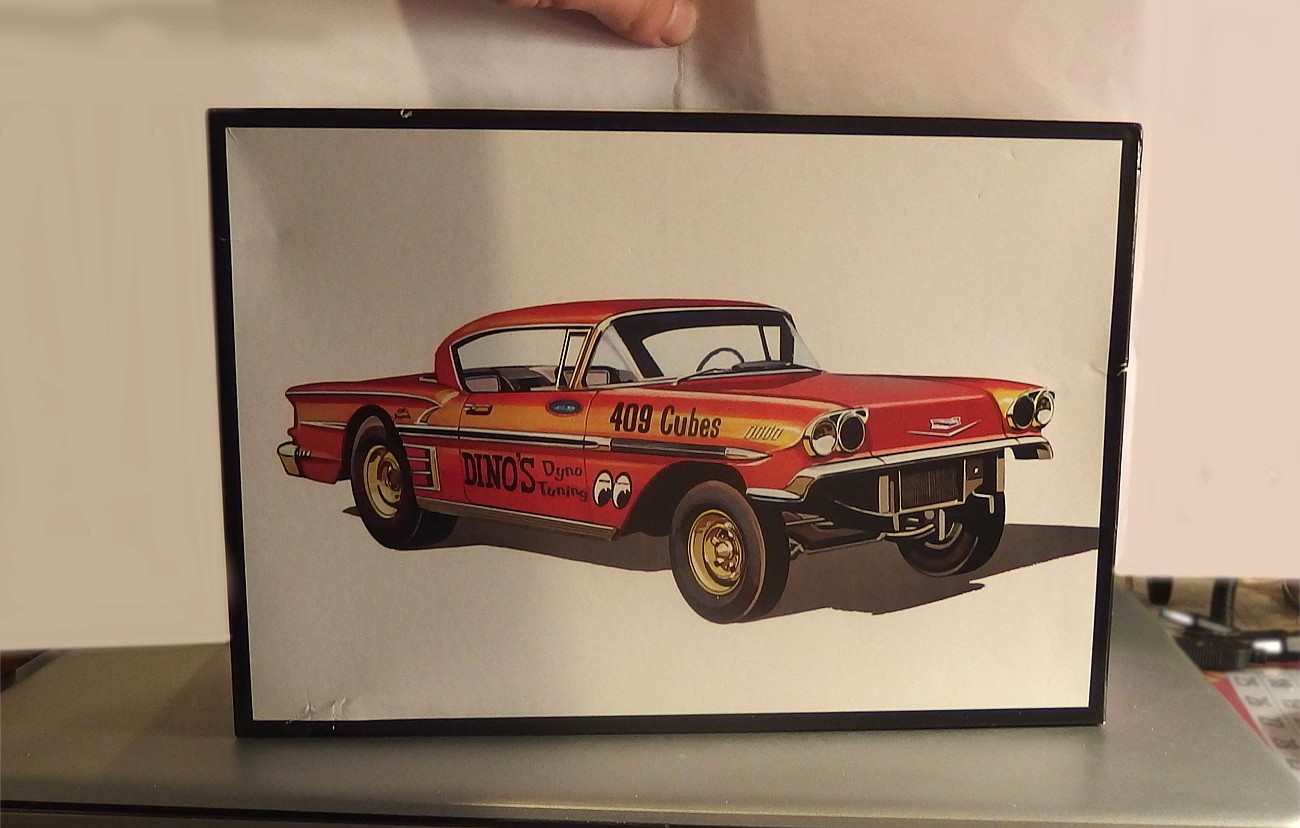 As I was going through the old NHRA Rulebooks for the Gas Coupes & Sedans class rules, I decided to go with 1961 rulebook. That's mainly because in 1960 you were not allowed to cut the rear fenders in order to fit slicks on the back, but for 1961 season that rule changed and one was able to make more room for the slicks by cutting the rear wheel openings bigger. And that is one of the things I really liked on the box art, so I wanted to go the same thing on my model. It's not going to be box art replica however, because for example, the rules require that cars need to have a grill on front while the box art hasn't and overall mine will have some slight differences in appearance when it's done. I'll be using the 348 engine that came with the kit, the plan is to install an Offenhauser 3x2 intake manifold on it together with some other speed equipment. That engine will put this in B/G class. The first thing to do was to mock up the stance as I wanted to see if I need to do some modifications to get the stance that I'm looking for. The rear axle was glued together from two separate halves, and the top half of the axle was warped pretty bad. I glued the metal axle to the bottom half of the rear axle to make that stronger and then clamped the top half of the axle on place with some small C-clamps and glued it on place. I also needed to drill a bit bigger hole for the rear inner wheels to make the metal axle fit properly. Then I enlarged the wheel openings, but that was easy because on the inside of the body, there was already a template where to cut if one wanted to build the racing version. Then I did a mock up to see how it looks. Rear tires are not the ones that came with the kit as I wanted old Pie Crust slicks on this one. Those were found in AMT's reissued '49 Ford kit. 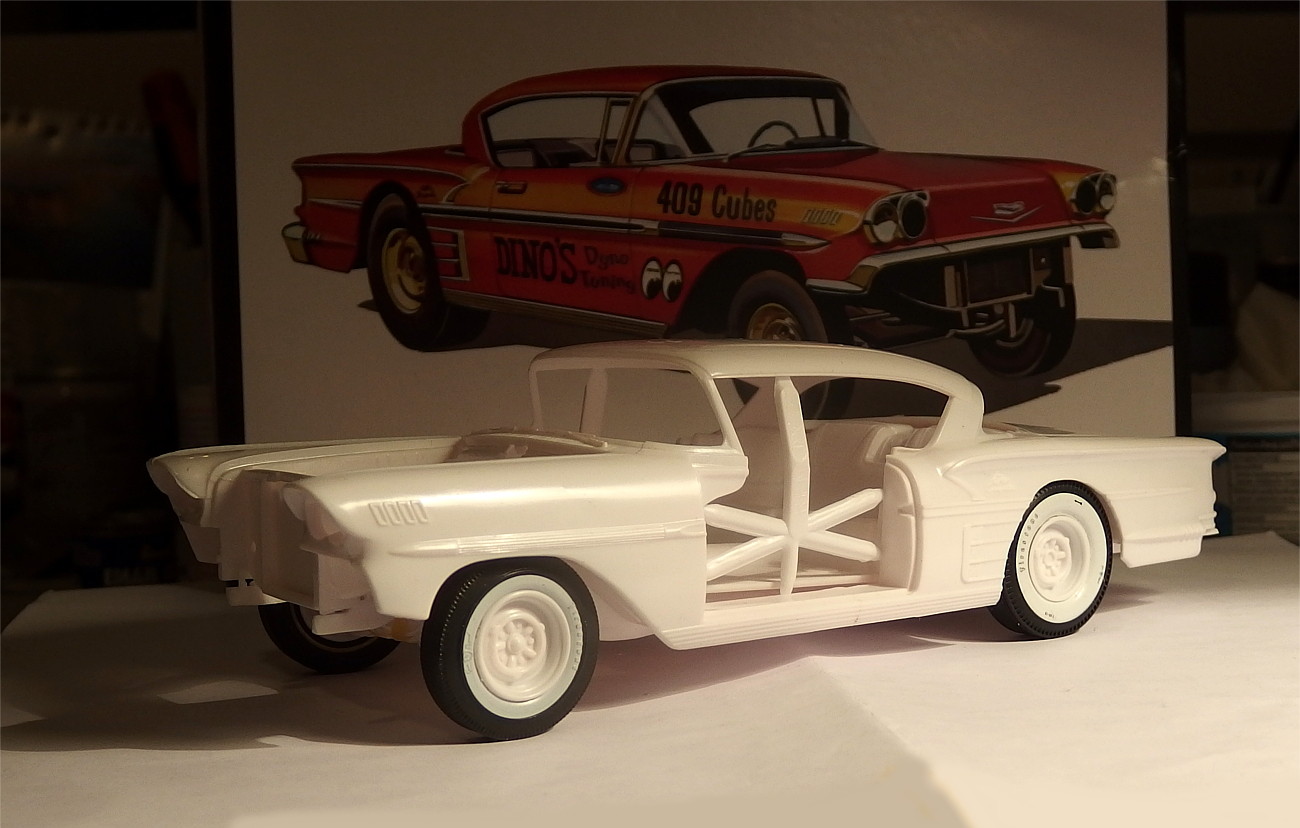 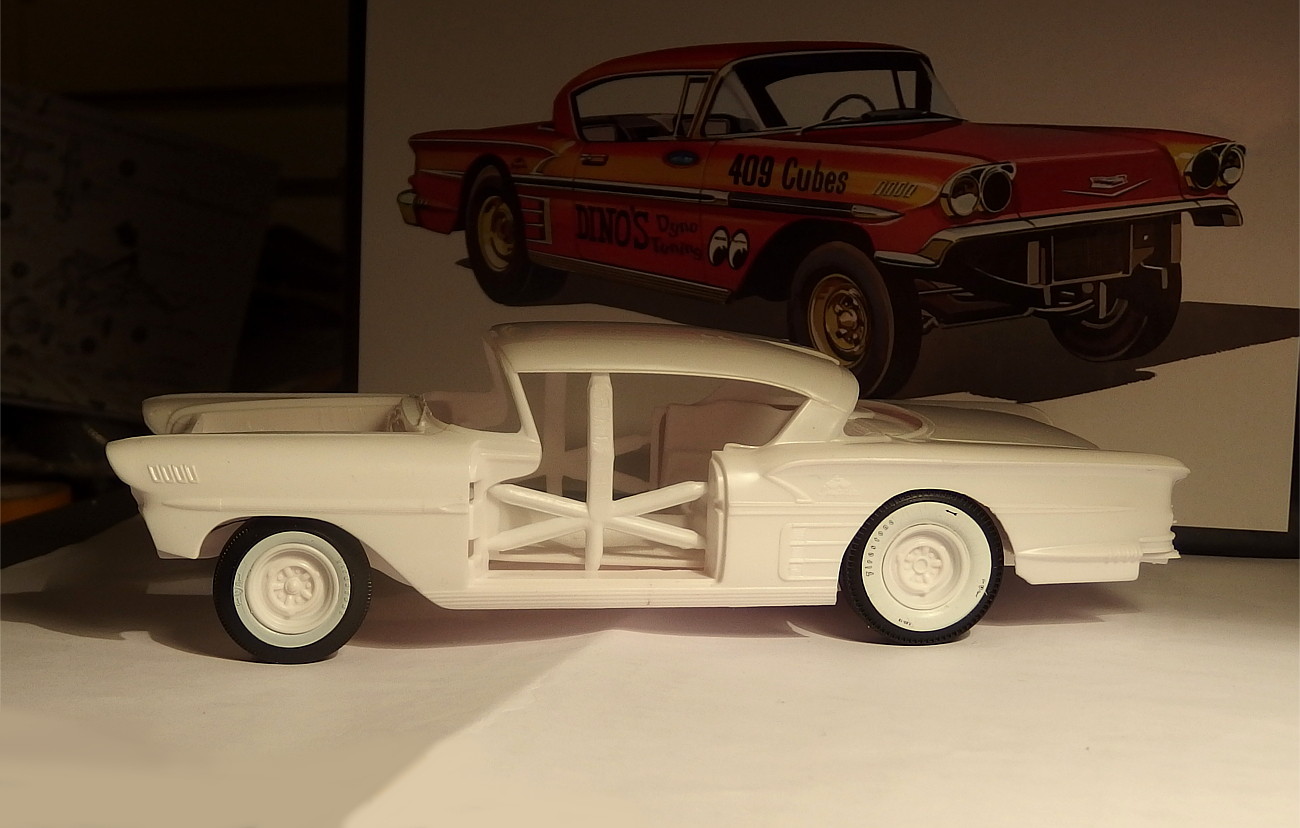 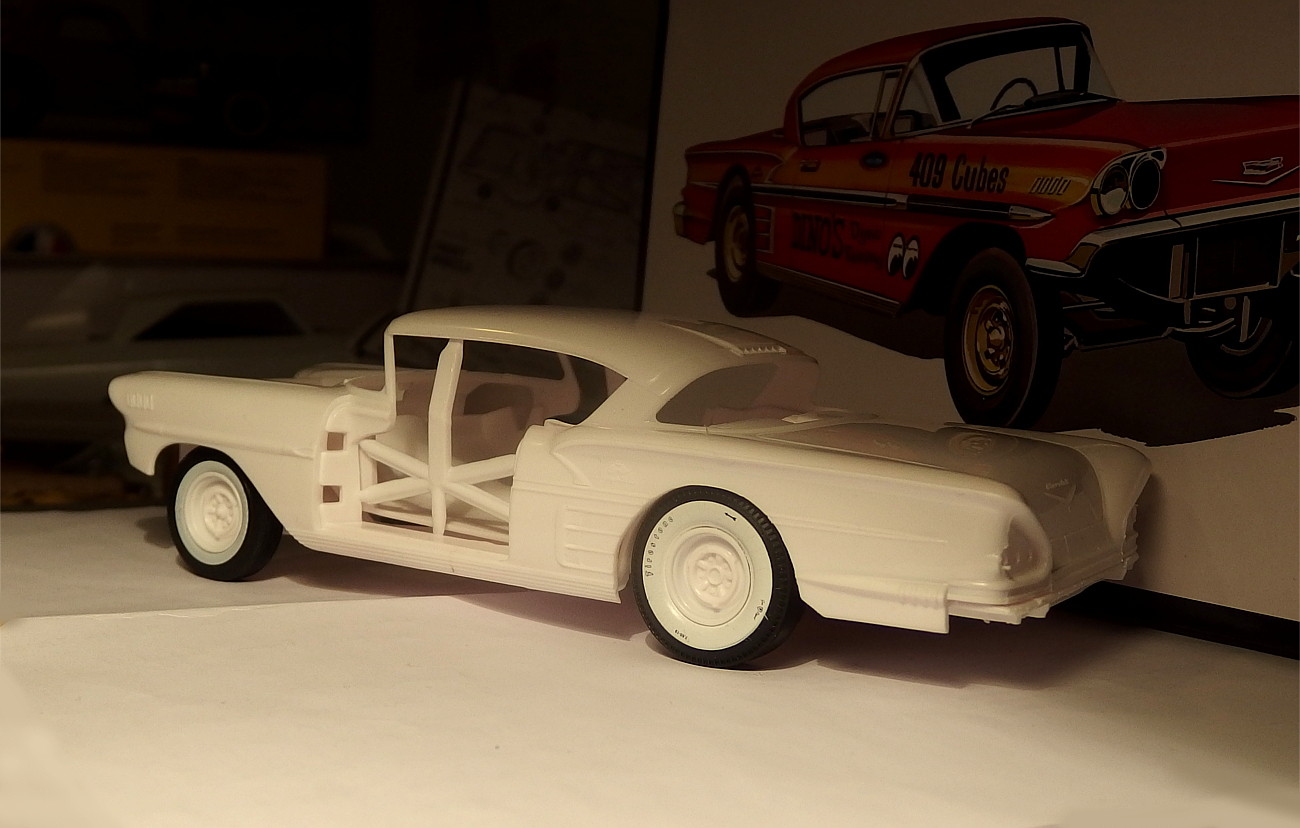 It doesn't look too bad, but needs a couple of small adjustments. The ride height in rear is good, but I think the rear tires are a bit too far inside the fenders, so I need to widen the track width a little. Front end is slightly lower than in the box art picture, I'm thinking if I should raise it just a little or leave it as is. |
|
|
|
Post by skip on Oct 31, 2023 10:41:31 GMT -5
Niko, Ride height looks great as is. The NHRA rules of the day stated 24 inches
from the ground to the center of the crankshaft (bolt). So, some of the high-
altitude "gassers we see being built wouldn't have flown by a tech inspector.
The first thought that I had on those radiused rear wheel wells were "Some
purist is singing the blues over all that cut up chrome." LoL!! The Box Art on
these kits was the best! A reflection of what was happening on the streets and
strips when the kits came out, can't ask for better than that! Love it!
|
|
|
|
Post by Mr409 on Oct 31, 2023 15:42:54 GMT -5
Niko, Ride height looks great as is. The NHRA rules of the day stated 24 inches from the ground to the center of the crankshaft (bolt). So, some of the high- altitude "gassers we see being built wouldn't have flown by a tech inspector. The first thought that I had on those radiused rear wheel wells were "Some purist is singing the blues over all that cut up chrome." LoL!! The Box Art on these kits was the best! A reflection of what was happening on the streets and strips when the kits came out, can't ask for better than that! Love it! Thanks Skip! You are right that the rulebook has some limitations regarding the ride height. And that's good because some of the "Gassers" built nowadays look more like offroad vehicles, and I don't like that look at all.  If I end up raising the front end, it's going to be very minimal, but I haven't decided on that yet. Many of these old box arts are so cool that I'm tempted to buy the kit even though I'm not sure what to do with the model inside. |
|
rickyc
Soc
 Addicted to plastic since mid last century
Posts: 46
|
Post by rickyc on Oct 31, 2023 21:25:38 GMT -5
|
|
|
|
Post by Mr409 on Nov 4, 2023 16:03:13 GMT -5
|
|
|
|
Post by mack2856 on Nov 4, 2023 16:38:58 GMT -5
I’m digging the mock up👍
|
|
|
|
Post by Mr409 on Nov 12, 2023 15:28:39 GMT -5
Thanks Glen! Not much progress as haven't had a whole lot of bench time, only a few minutes here and there... Anyway, I prepped the chassis for primer. There was quite a lot of mold flash that had to be cleaned and I also had to get rid of the copyright textes that were next to the frame rail behind the driver's side rear tire. Then the chassis was shot with a coat of primer. 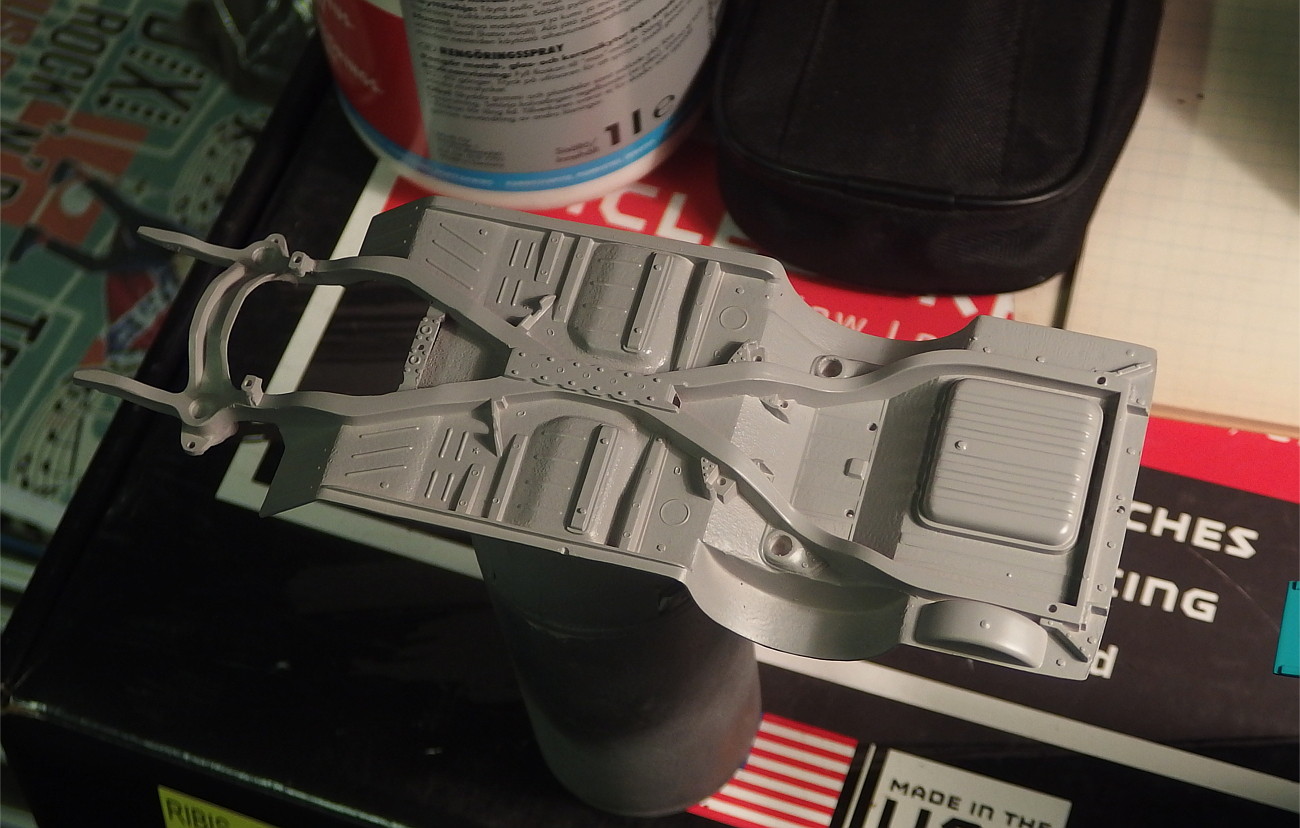 The chassis was painted flat black and when that was dry I brush painted the frame and gas tank with gloss black to give it a bit of contrast. 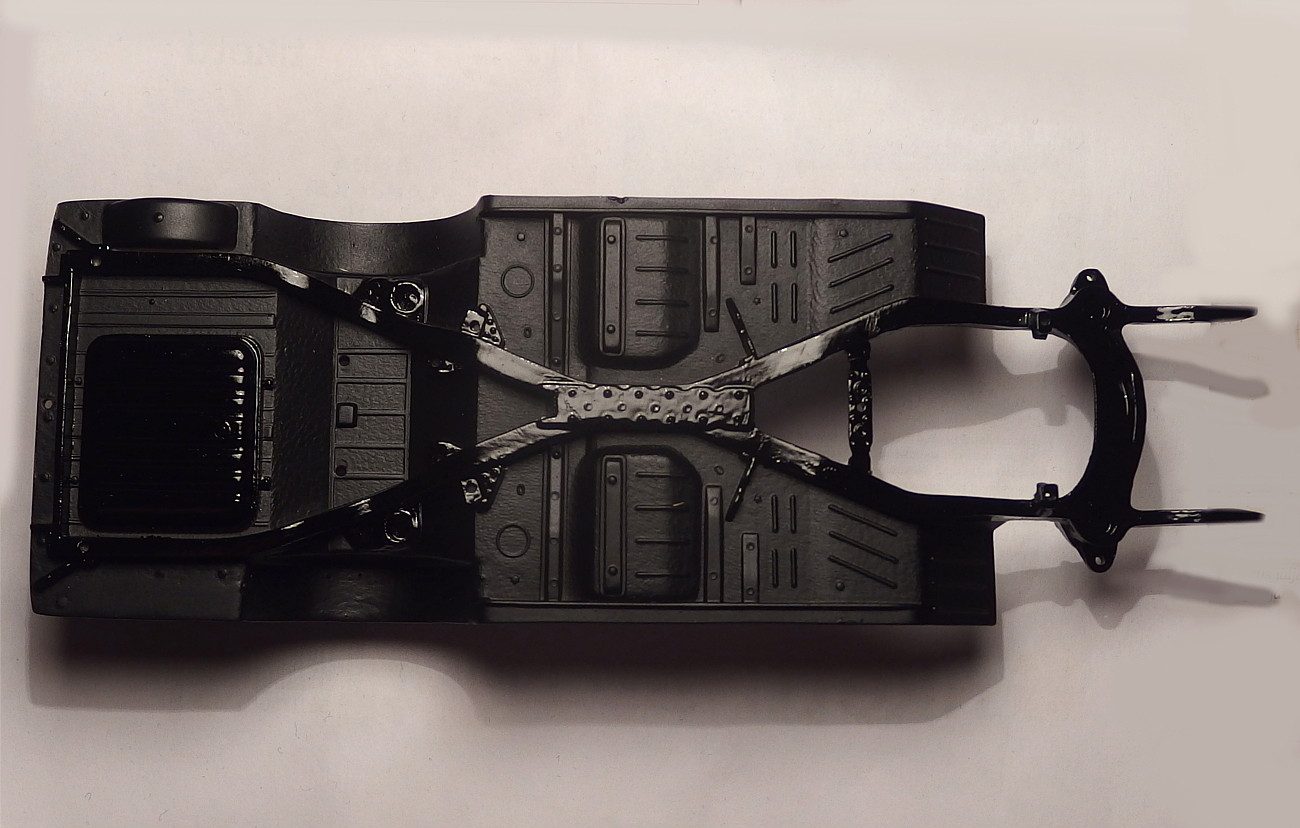 The rear axle required quite a bit of work to smooth out the seam between the axle halves. After a few times of sanding and applying Tamiya's Liquid Glue to the seam, it was pretty much disappeared and there was only small need for putty. 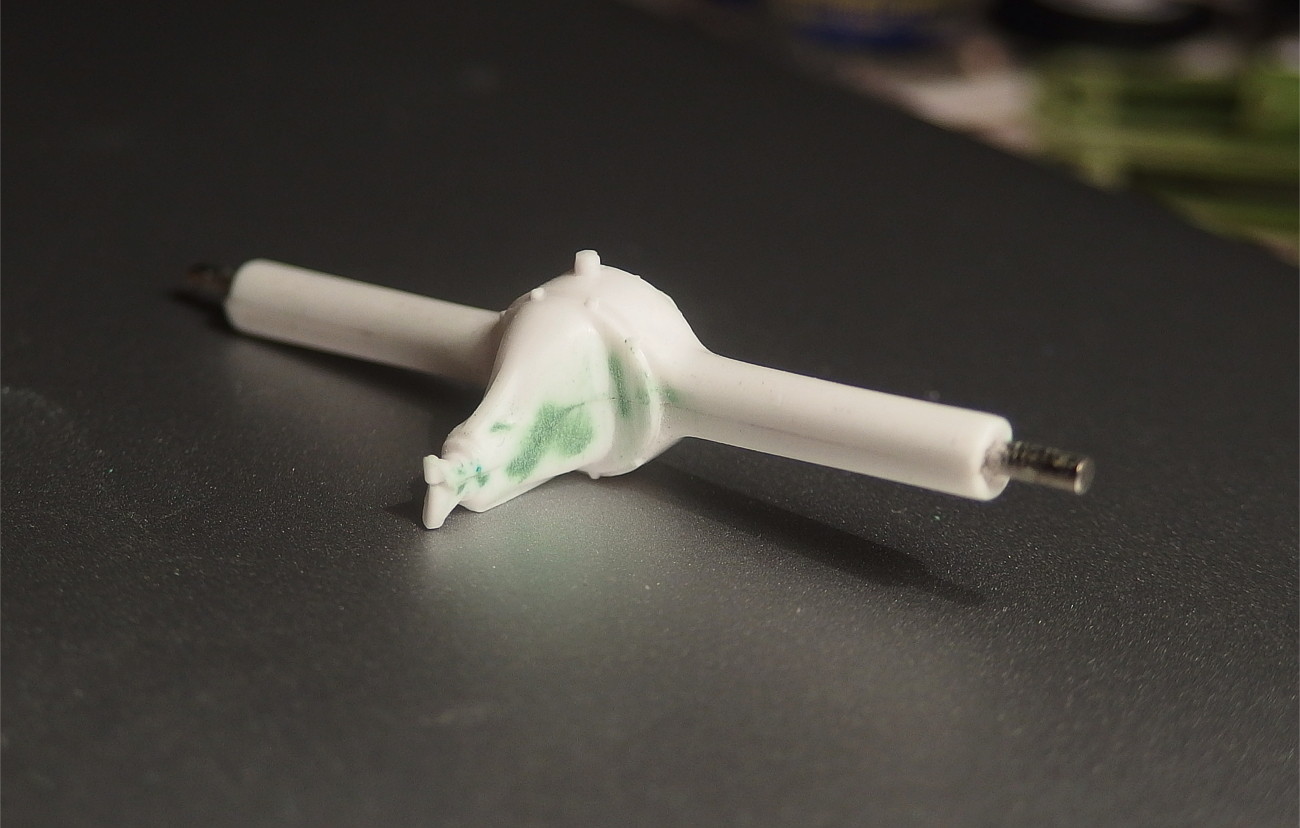 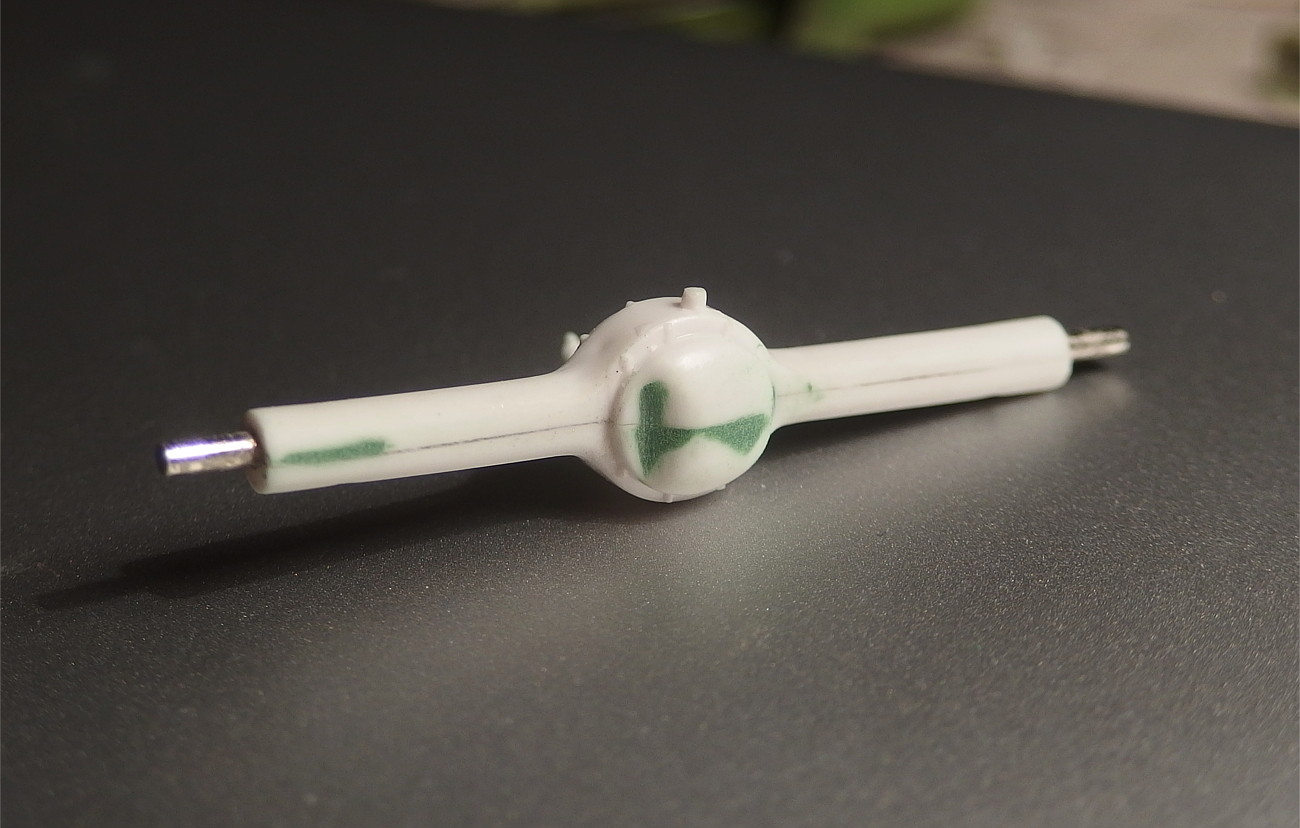 Then the axle was painted gloss black and the center section with Humbrol's Metallic 53. I wish the center section would be a bit more detailed, but that's what the kit offers so I'm sticking with it. 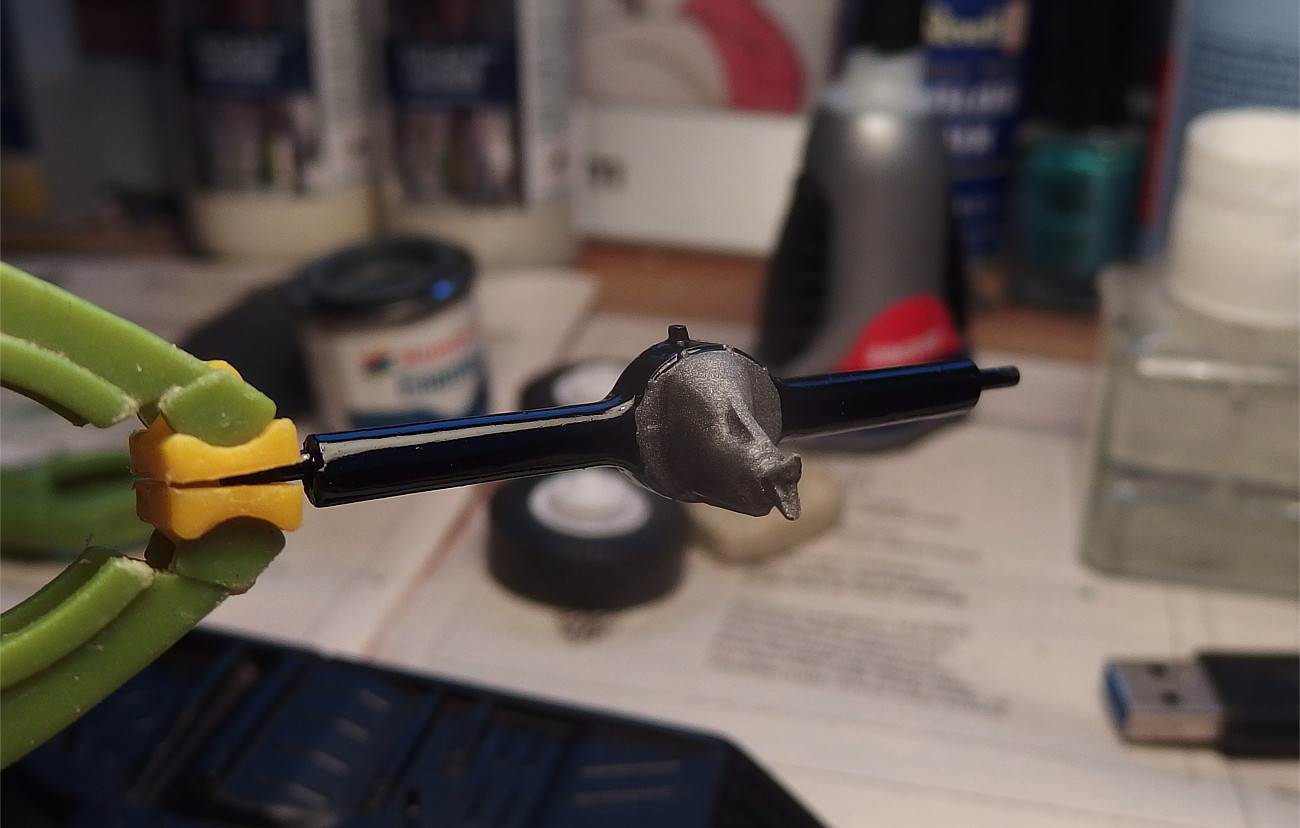 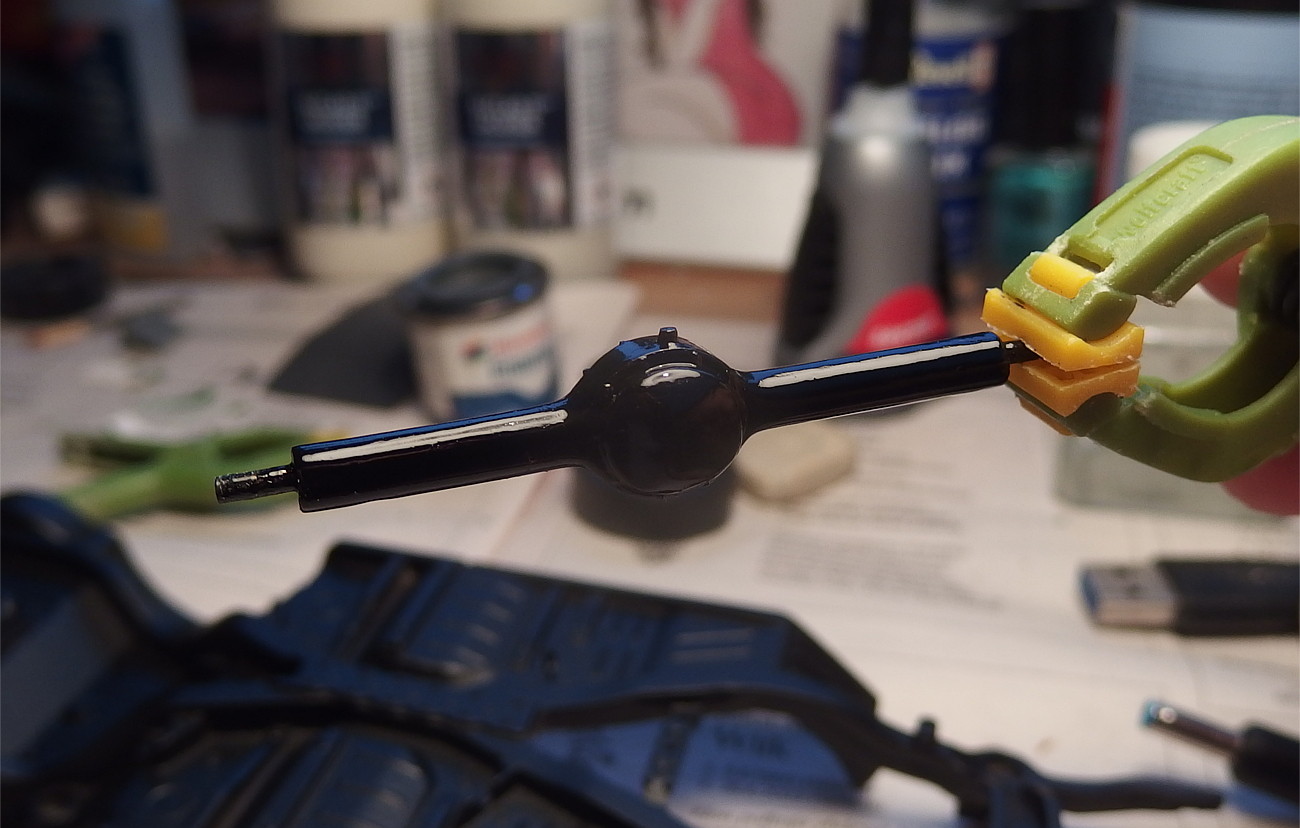 After a bit of sanding the engine parts were also ready for primer and paint. I decided to go with an original paint color on the block, heads, timing chain cover and oil pan. The 3x2 intake manifold was painted silver. Once the clear coat dries, I can start assembling the engine. 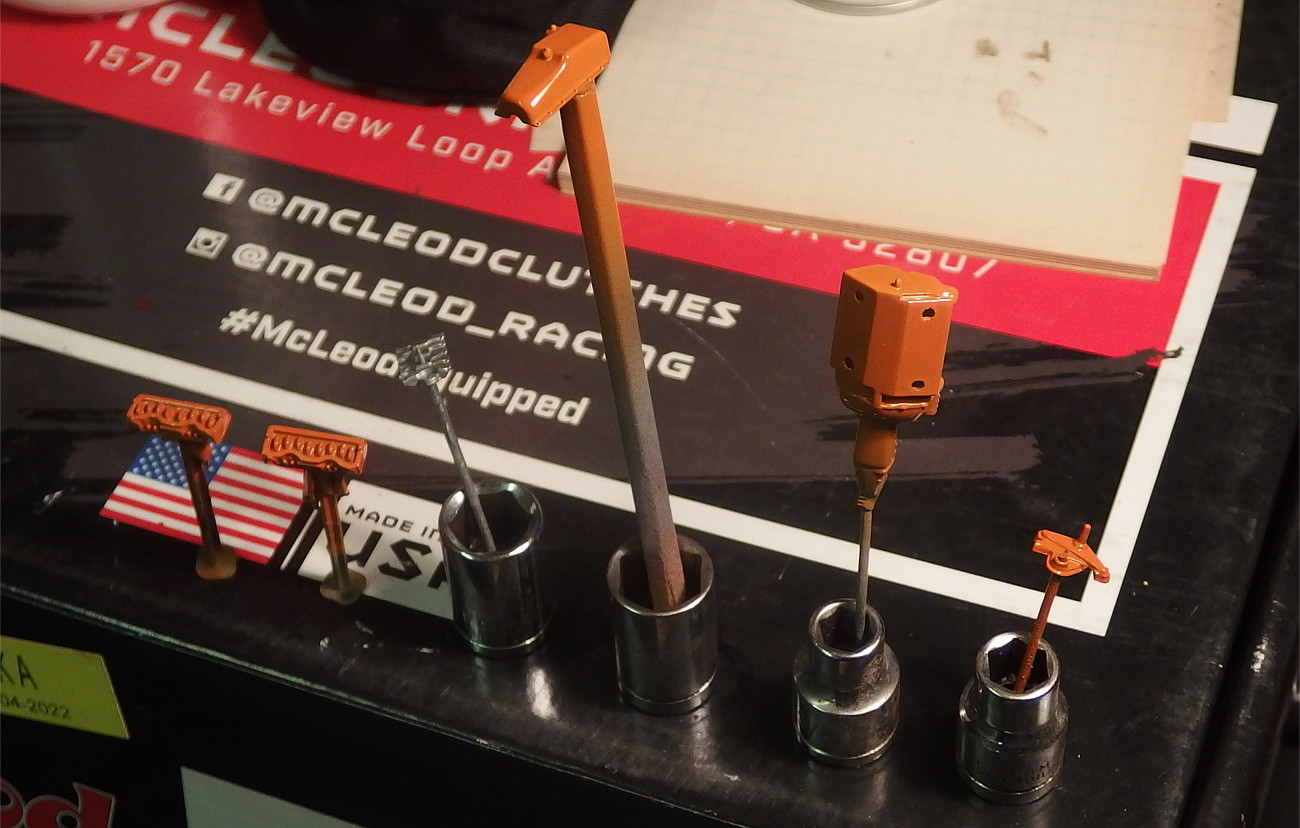 For the engines I bought these cool Cal Custom style scoops from Maple Leaf Modelworks. I haven't been working much with these 3D printed items, but these look really good. I might be ordering some more 3D printed parts for future projects as well. 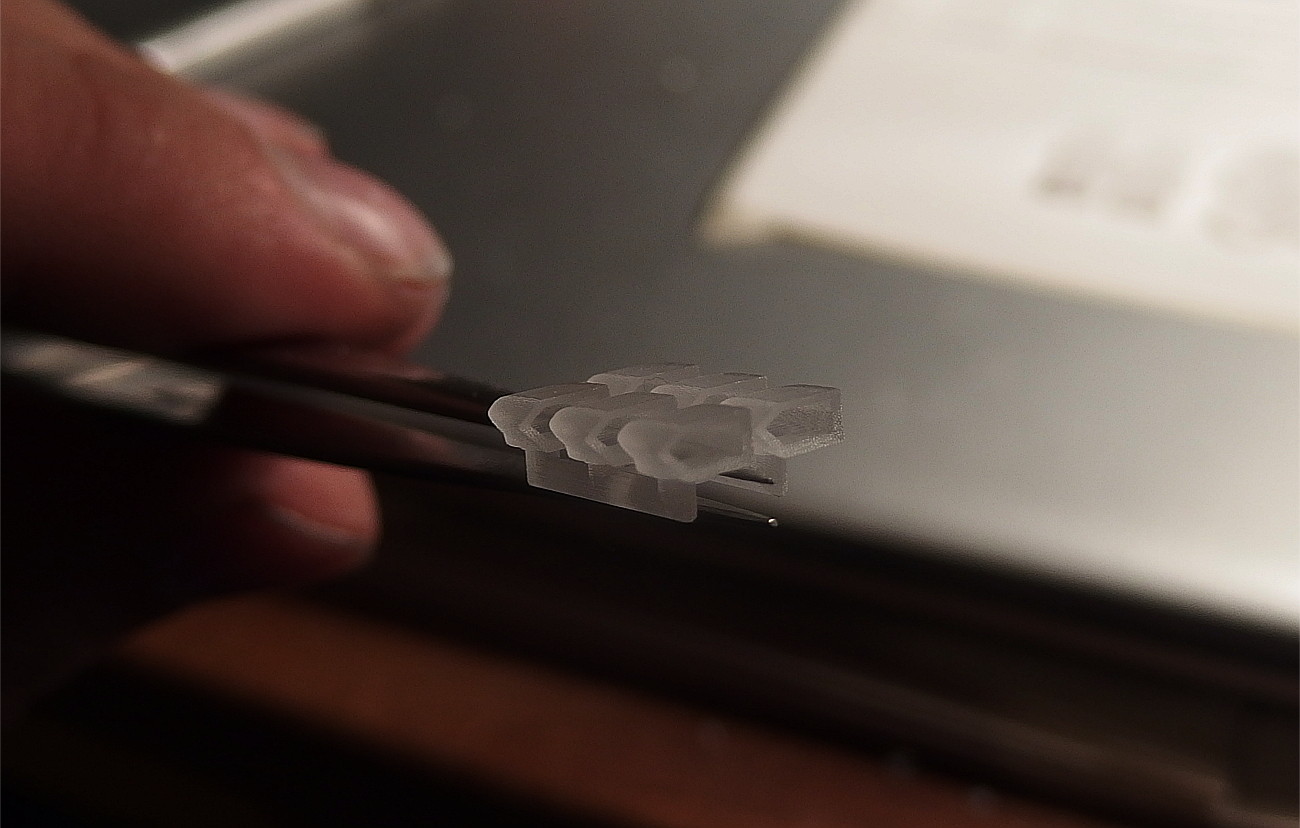 |
|
|
|
Post by Mr409 on Dec 4, 2023 13:33:26 GMT -5
After the clear coat on the engine parts had dried, I glued the crankshaft, oil pan, timing chain cover/water pump and heads to the engine block. I had a bit of struggle to make the crank and oil pan fit correctly, but after a bit of sanding I was able to make everything fit. The biggest issue was the fitment of the intake manifold as there was a huge gap between the engine block and intake bottom. Of course I should have mocked it up before painting, but they are all kit parts so I assumed they would fit... 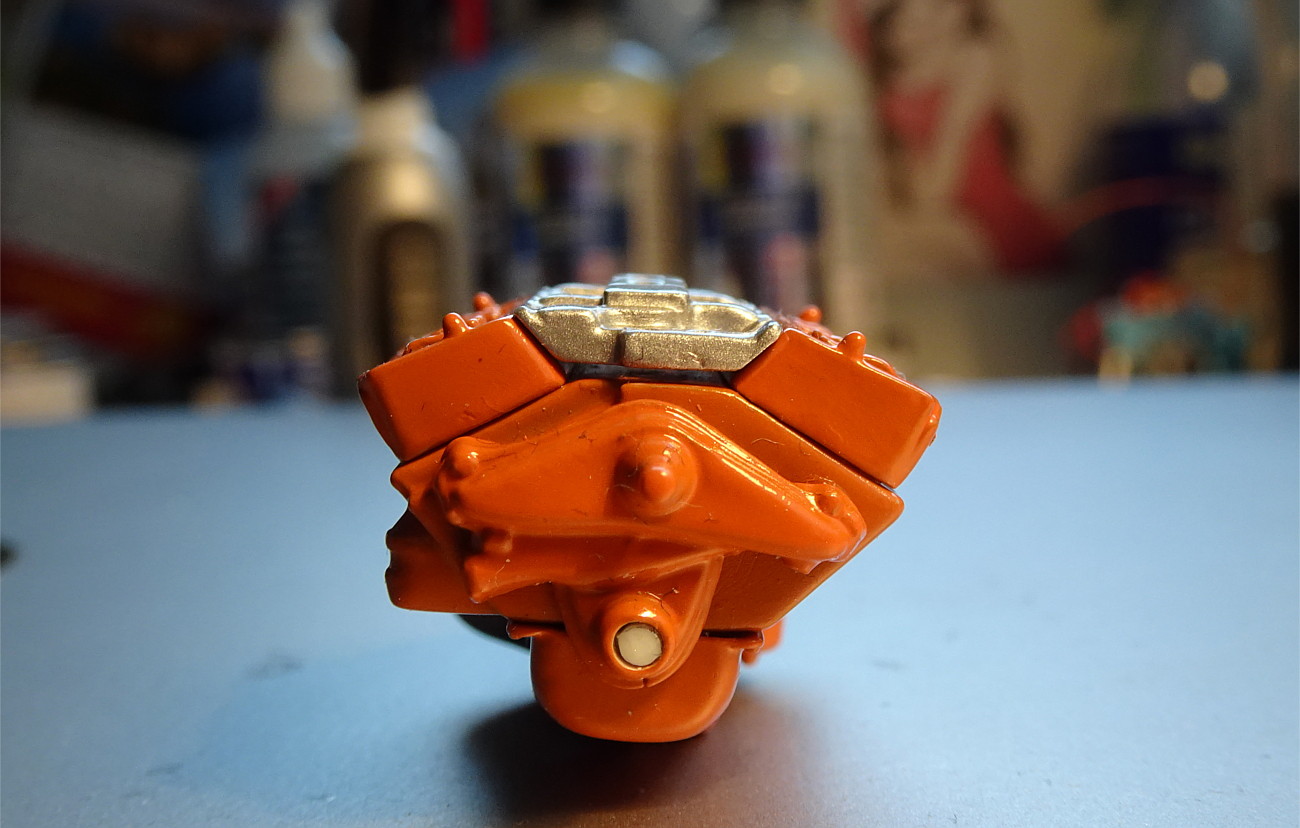 Well, some sheet styrene to the rescue, I cut a piece of styrene to the size and shape of the intake manifold and glued it on... 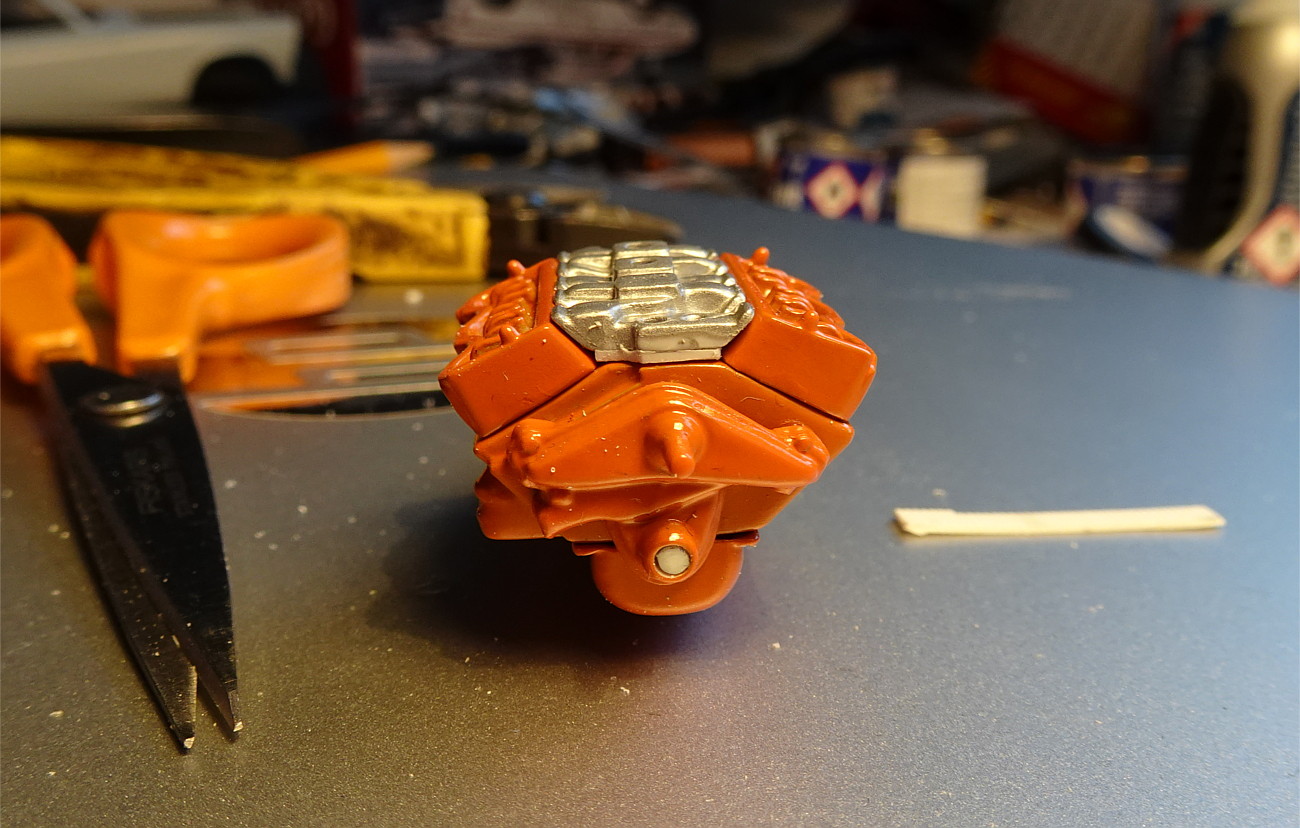 ...A bit of putty to smooth out the glue seams and then some touch up with silver. 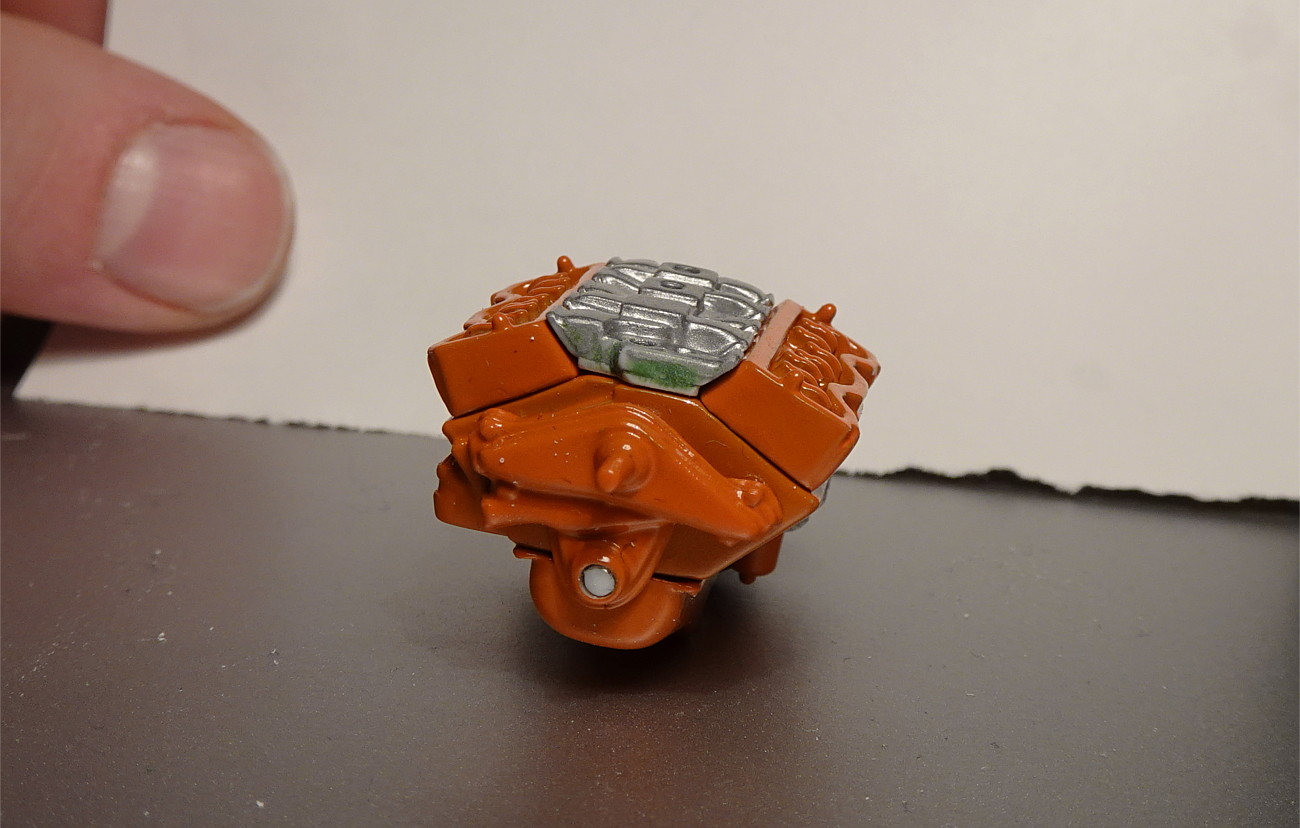 After that the intake fit nicely on place. Valve covers are also from the kit, but I removed the chrome plating and painted them with "Chrome Silver" out of some automotive spray can. 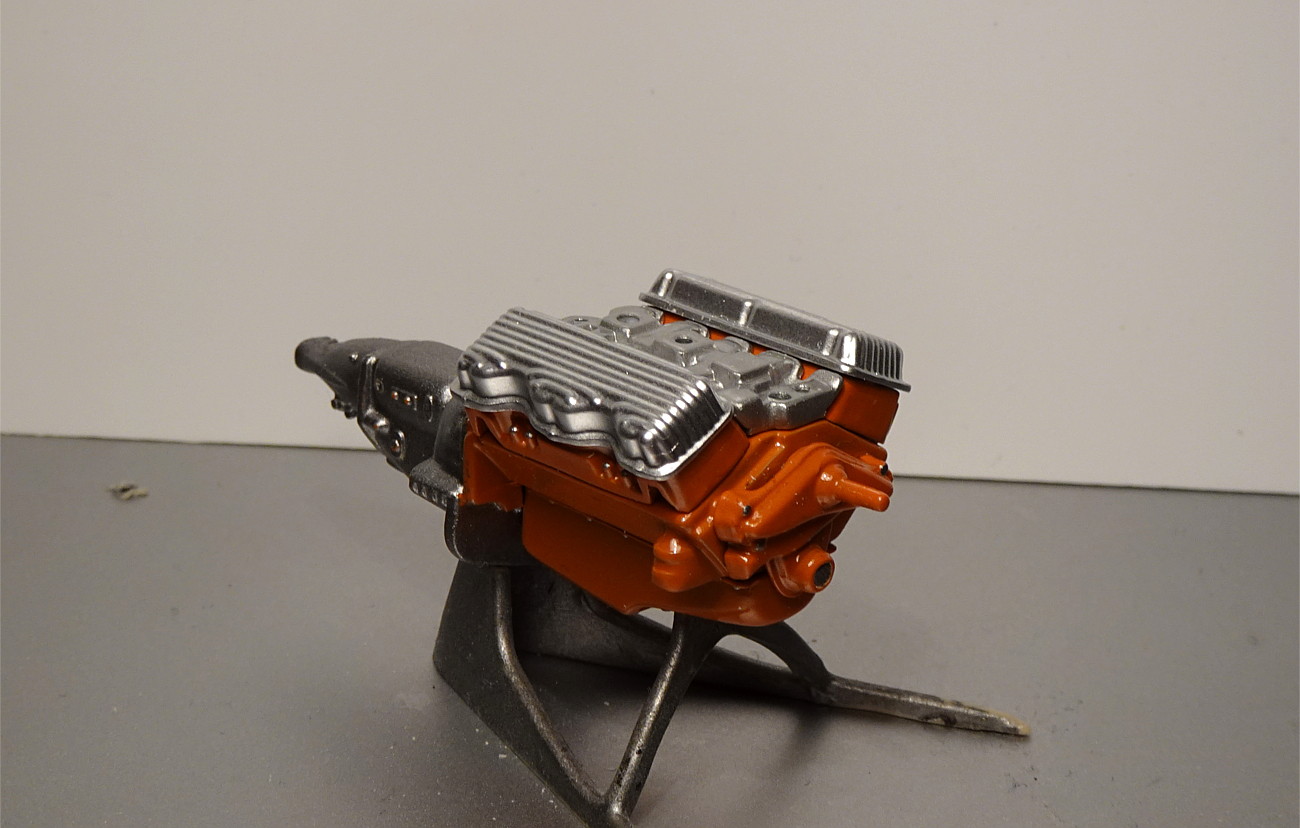 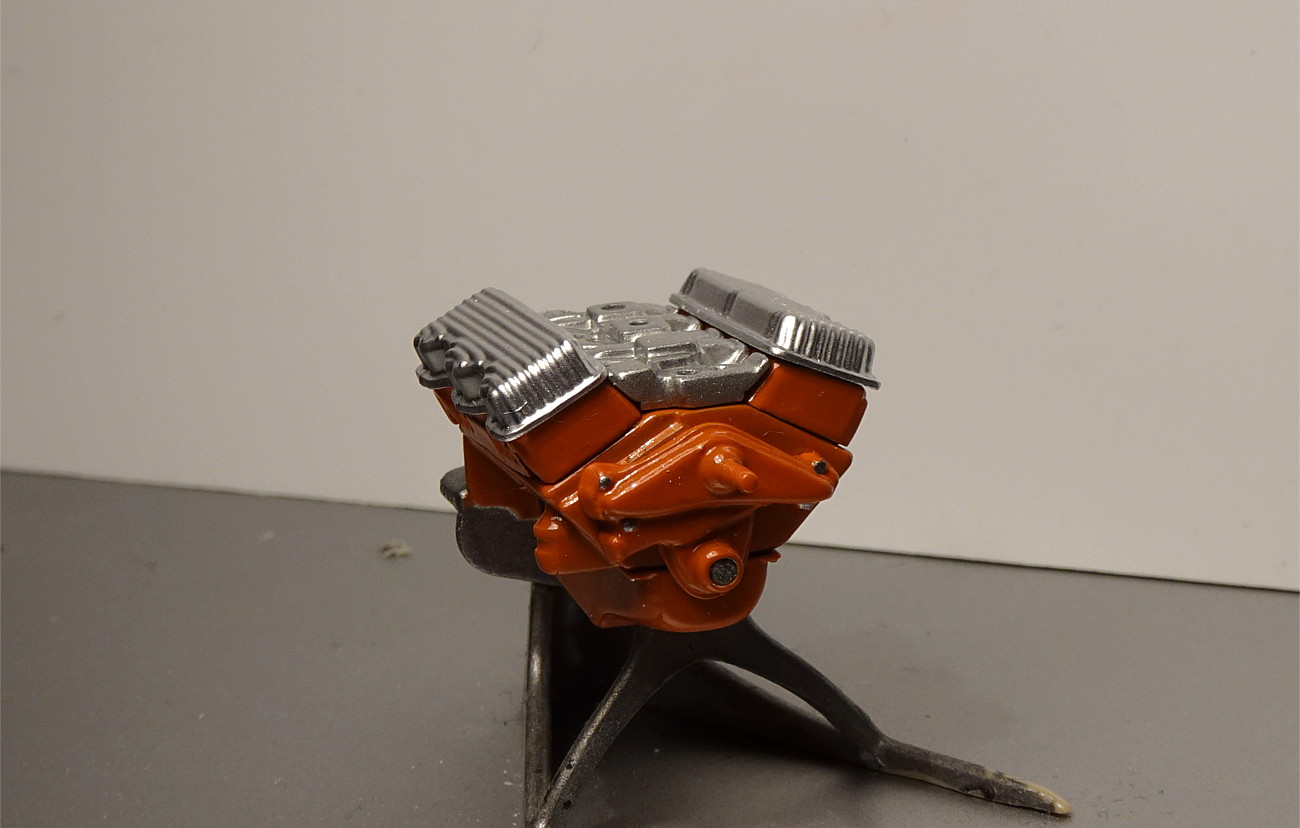 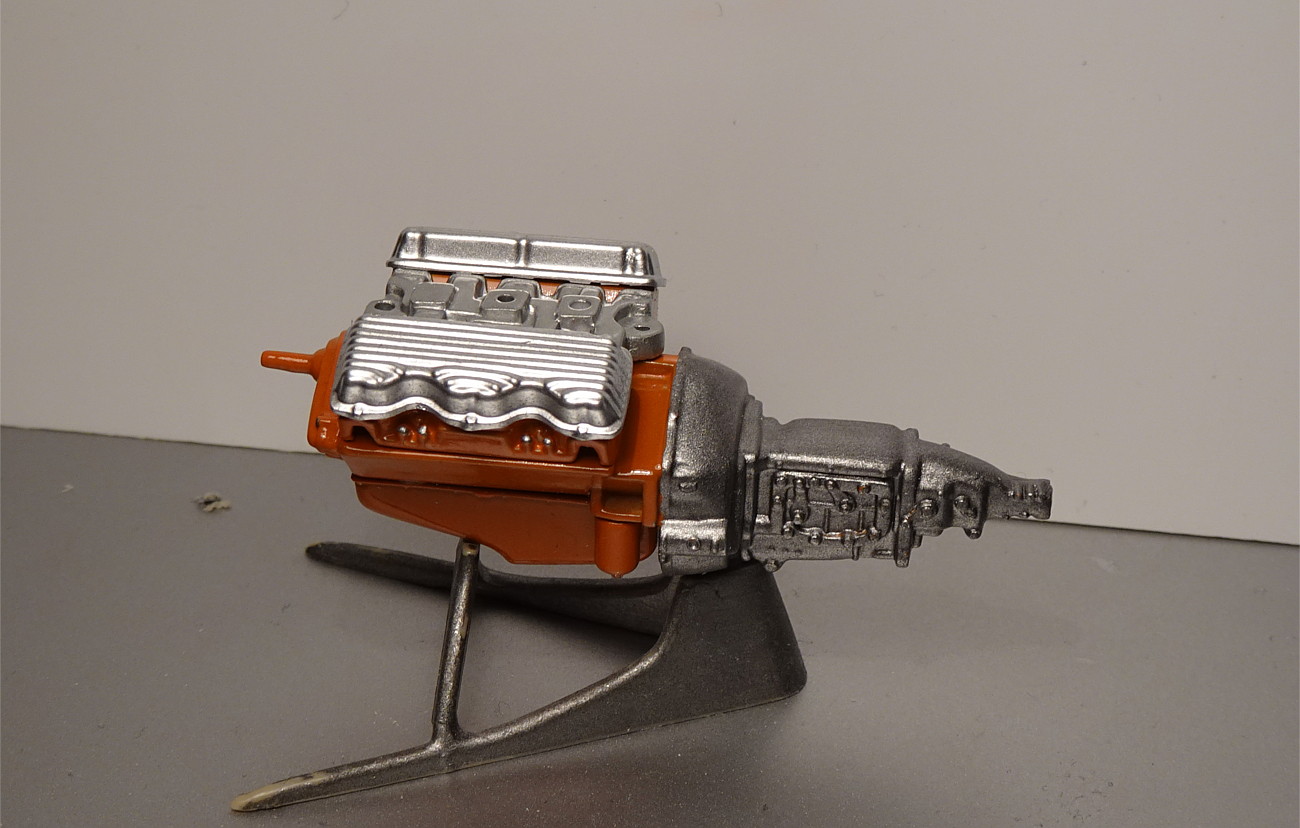 I had a small issue with the kit carburetors. I stripped the chrome plating from them as well, because I was going to paint them, and the paint doesn't stick very well on top of the kit chrome. When I took them out from the paint stripper, the carbs flew off from my tweezers and despite spending quite a bit of time searching everywhere, I never saw them again. Luckily I had a "glue bomb engine" from the same kit, so I took the carburetors from that one. The only problem was that the small stub where the air cleaner is mounted, was missing from the center carburetor. 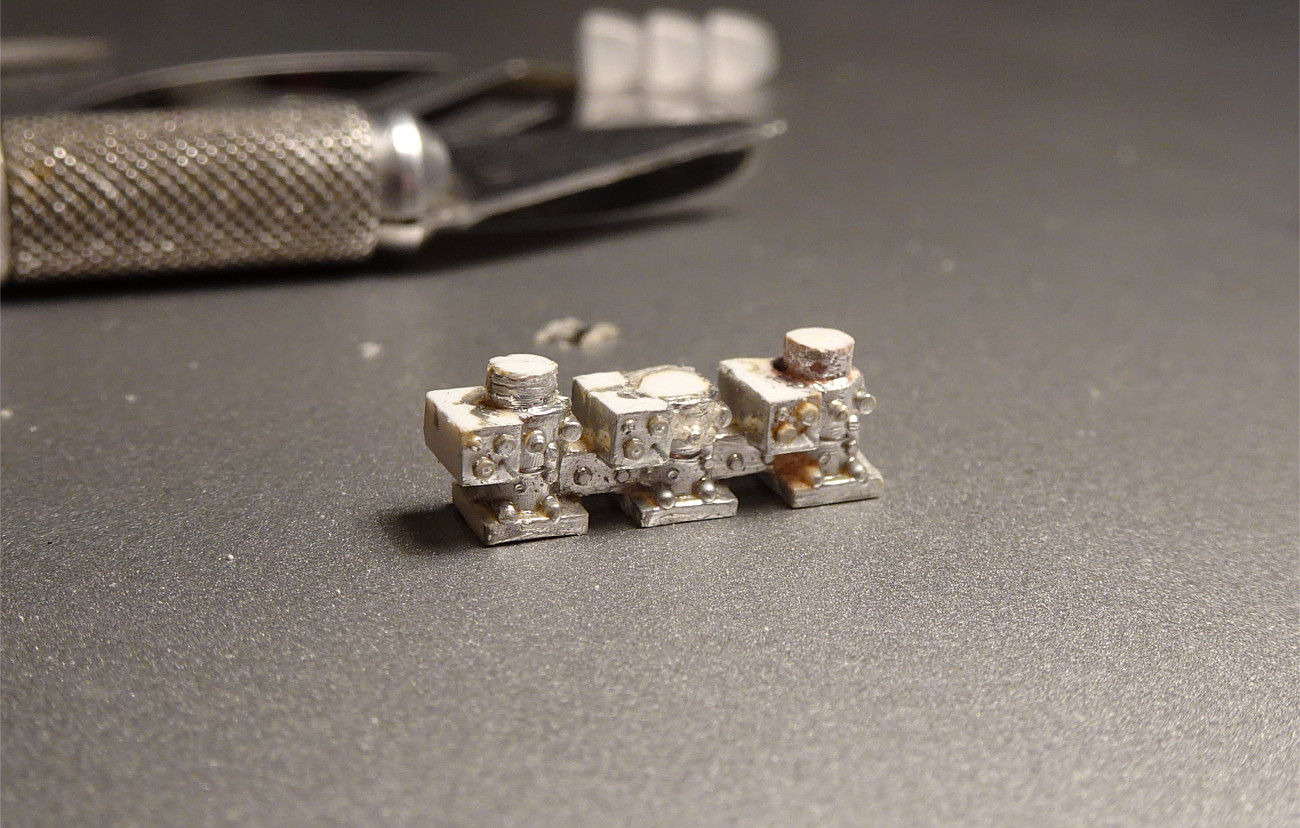 So I took the same size plastic rod and made a new one. 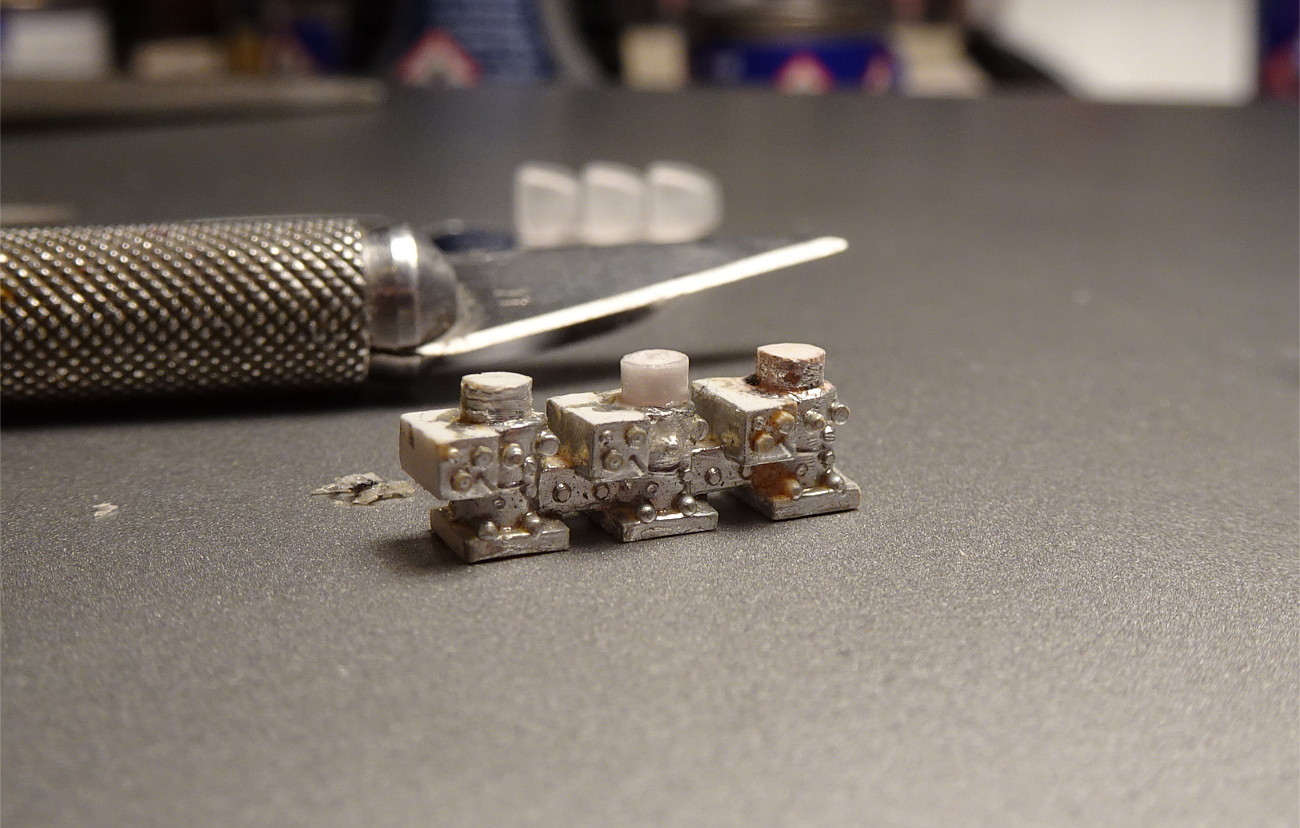 |
|
|
|
Post by 41chevy on Dec 4, 2023 14:47:54 GMT -5
58 chevies make awesome dragcars, the X frame makes impressive launches.
|
|
|
|
Post by EchoBravoSierra on Dec 7, 2023 14:32:13 GMT -5
That intake manifold mod looks great. I would have started sanding on the heads or intake or both to get the intake to sit down in there low enough to close the gap. Your fix takes much less effort with a much greater chance of looking good when done. I'll have to remember that for later.
|
|
|
|
Post by ChrisV on Dec 9, 2023 9:10:14 GMT -5
Great looking project, Niko!
The heavy ‘58 was and still is a rare sight in drag racing, but far more unlikely subjects have been turned into racecars throughout history…
I really like where this is going!
|
|
|
|
Post by Mr409 on Dec 9, 2023 13:23:43 GMT -5
Thanks guys! Paul, yes it does, having one X-Frame Chevy in the garage and knowing how flexible the stock frame is, I'm not surprised at all that these things launch quite interestingly on the Drag Strip.  Eric, that's the way I did it once, but then figured out how much easier it is just to add some material to the bottom of the intake. I've used the same method on several builds when swapping intakes. Chris, the good thing in vintage Drag Racing is that pretty much anything was seen on the Drag Strips one time or another. So that gives a lot of options to choose from when building a scale model. One thing I love about these old kits is that they often come with some cool Vintage speed parts. This kit has two choices for distributor, a stock one or a vintage Spalding Flame Thrower Ignition. I did some research on the Spalding unit, and it's pretty cool. If interested, see more Here on this link. Anyway, I removed all mold lines and flash from the Flame Thrower and drilled holes for plug wires, vacuum hose and for coil wires, because these things had dual ignition coils in them. I think I will install them on firewall when I get that far. 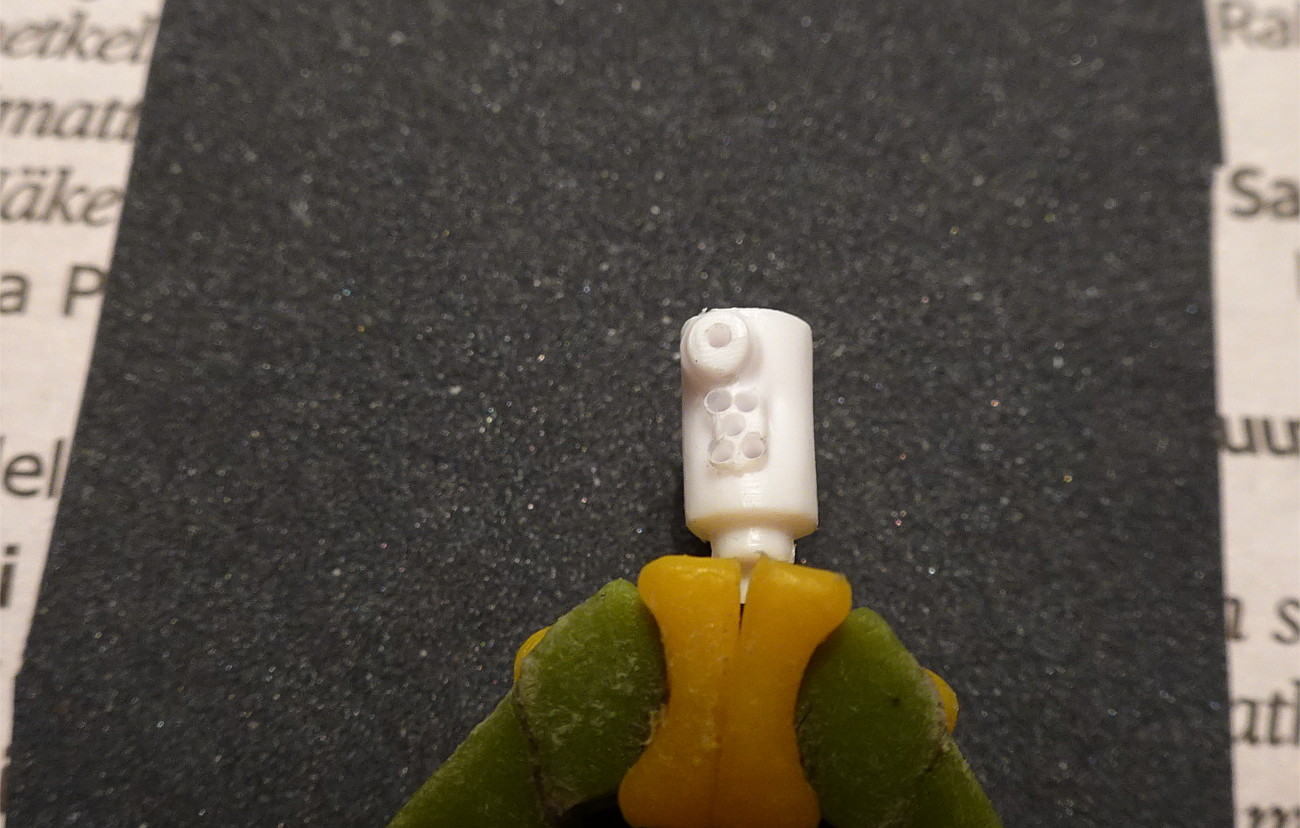 The unit was painted gloss red like the original. The areas where the spark plug wires connect to the Flame Thrower are black and vacuum advance can is of course painted with silver. Then I added spark plug wires and while I was at it, I installed them in the correct firing order too. The wires are made out of Pro Tech spark plug wire. A couple of other misc parts are also installed on the engine, plus the vacuum hose from vacuum advance can to the bottom of the middle carburetor. 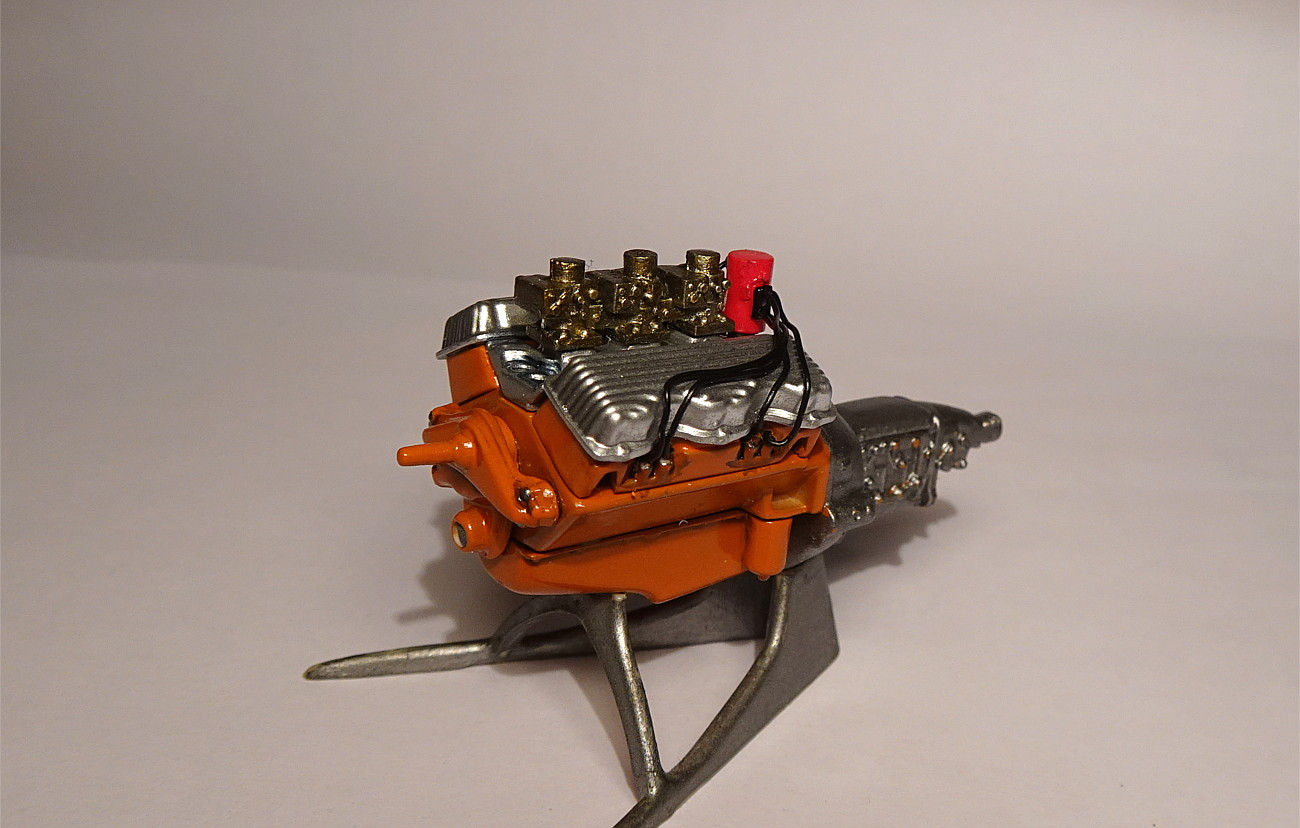 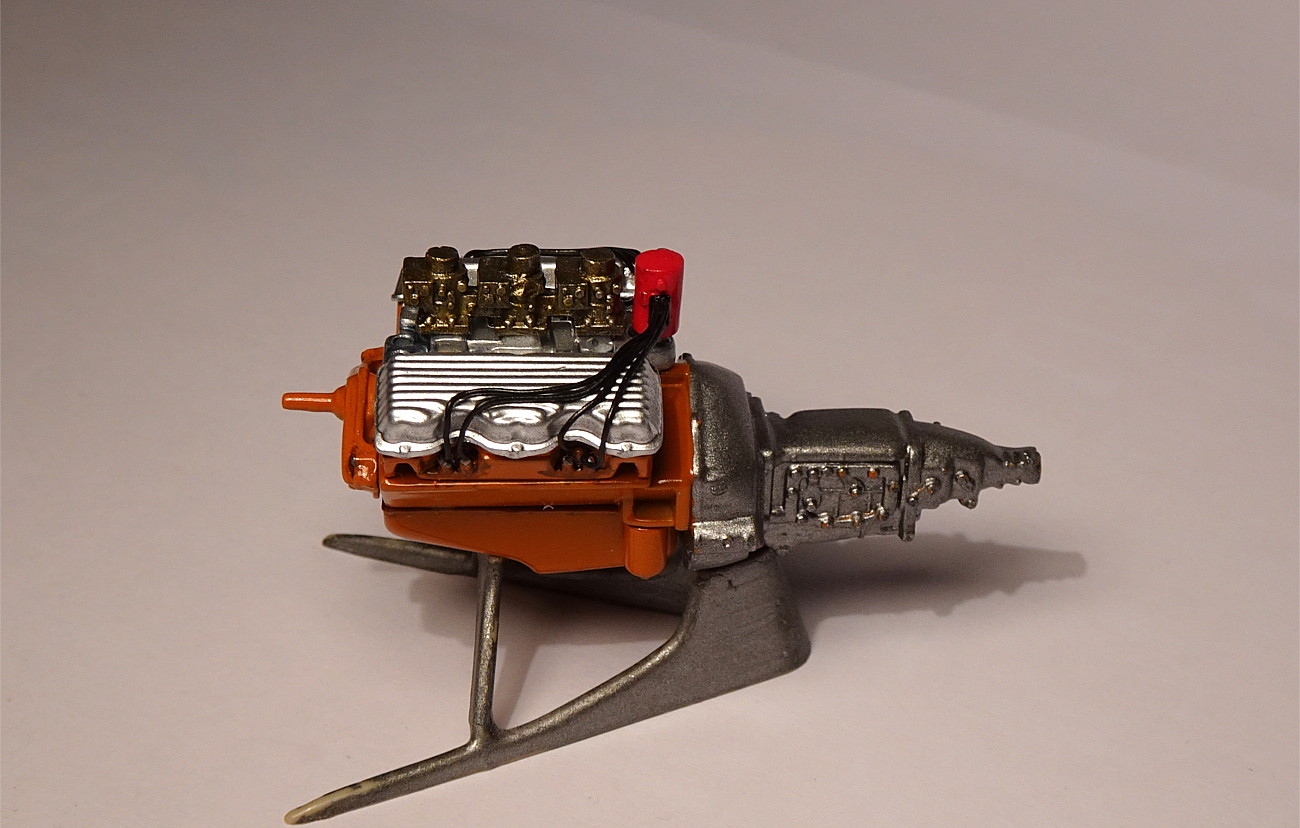 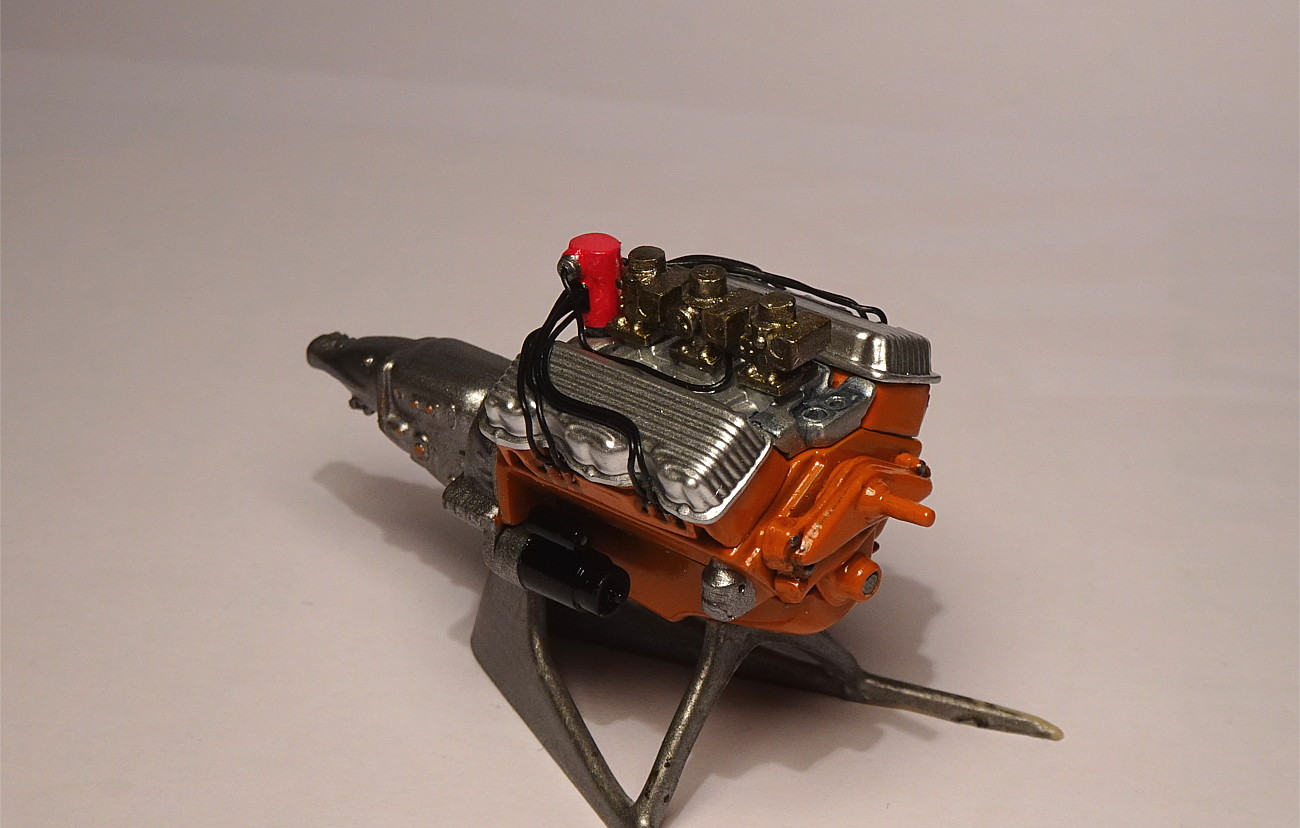 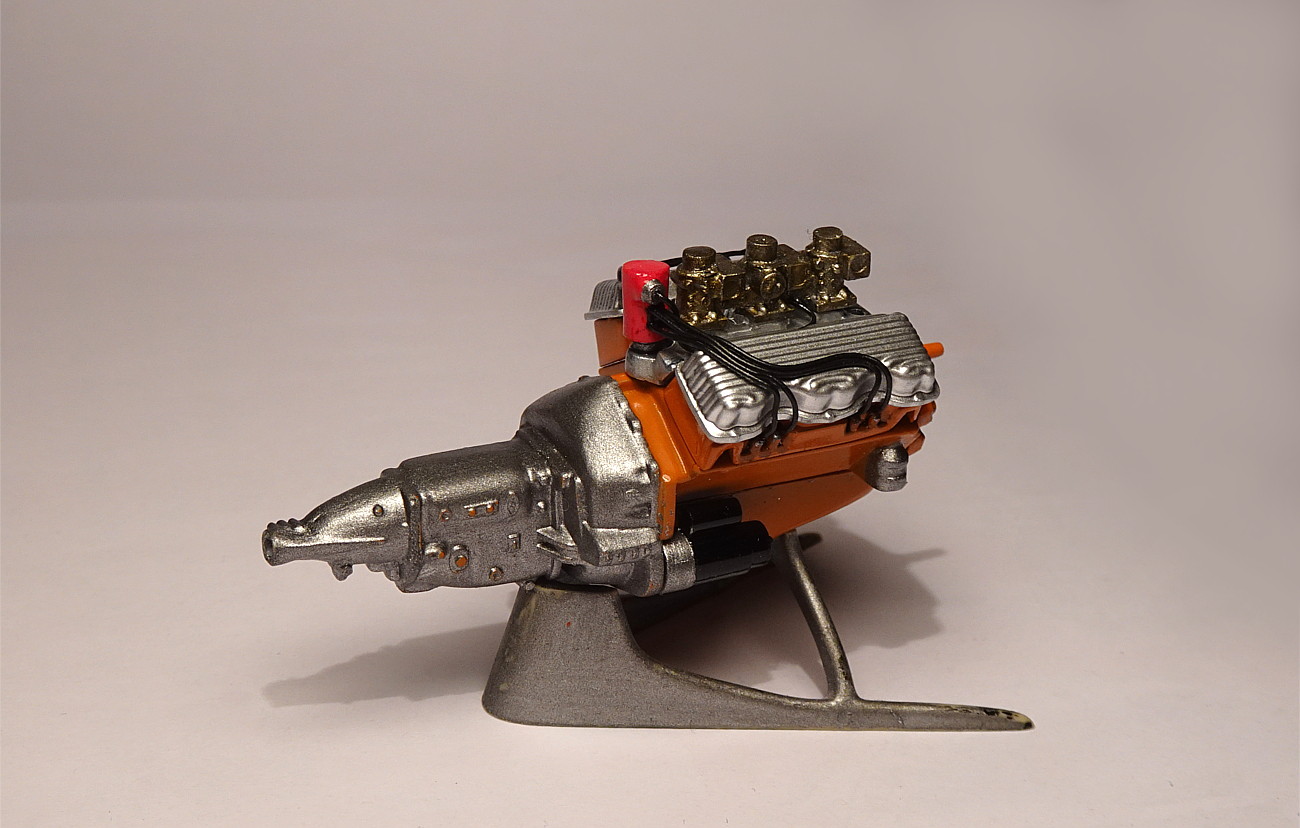 |
|
|
|
Post by Mr409 on Dec 25, 2023 17:33:22 GMT -5
The progress is slow, but at least I'm making some progress.  My plan was to add fuel lines to the engine next. But in order to do that, I had to make the carburetor linkage for the co-driver's side, which is basically just a couple of metal rods that keep the carburetors synchronized with each other. That was quite simple and actually it can't be seen very much from under the fuel lines, either. The fuel lines are metal wire with fittings made out of hex-shaped plastic rod. I drilled a hole to the center and cut the fitting to desired length, then paint it with Revell 91 silver, covered with Humbrol's Clear Orange. It was a bit fiddly to build the fuel lines, especially the three that go from the junction block to the carburetors, but I think it came out decent. Fuel filter is somekind of electric part (not sure what, I don't know much about electric components). I also installed some Cal Custom scoops on top of the carburetors. They are made by Maple Leaf Modelworks and they are very nice. They just required some sanding to get rid of the 3D printed texture, but once that was done I painted them with "Chrome Silver" from spray can. 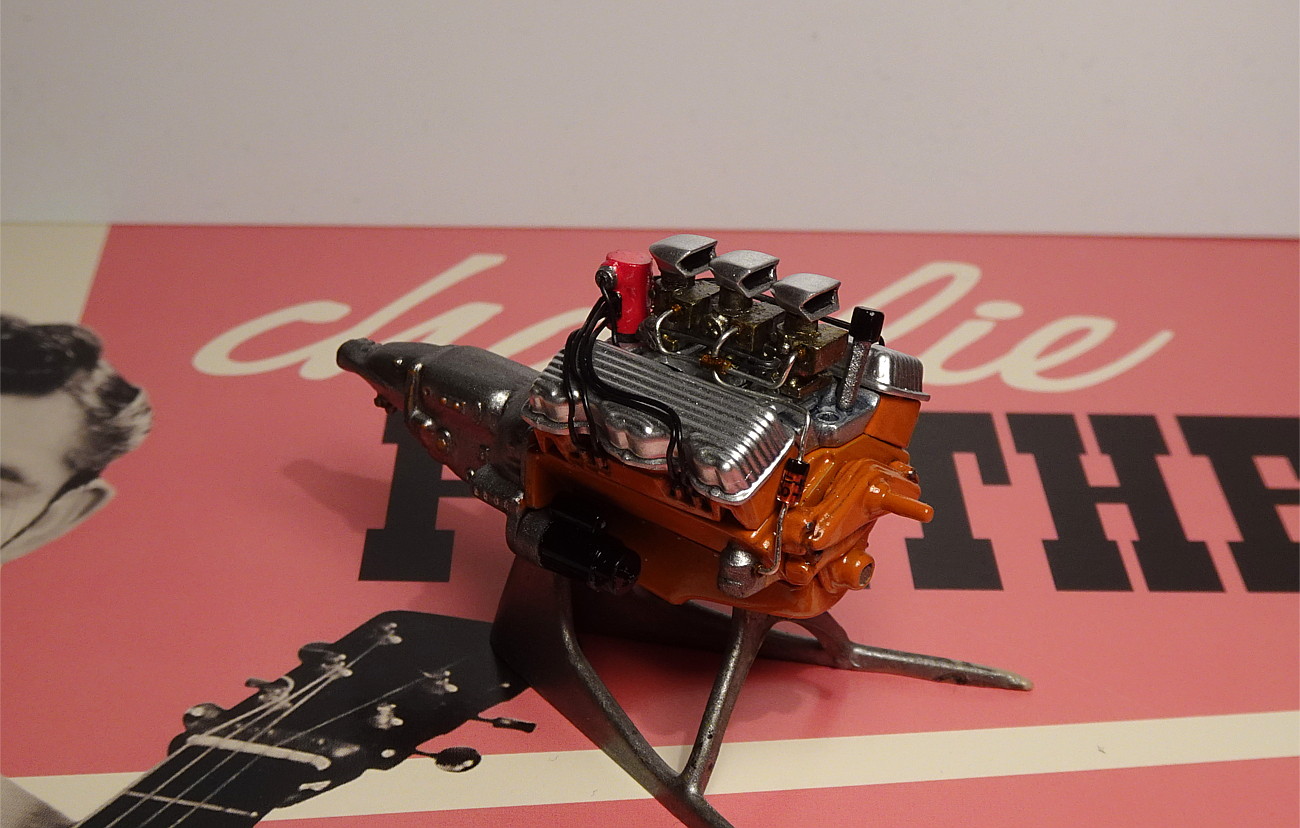 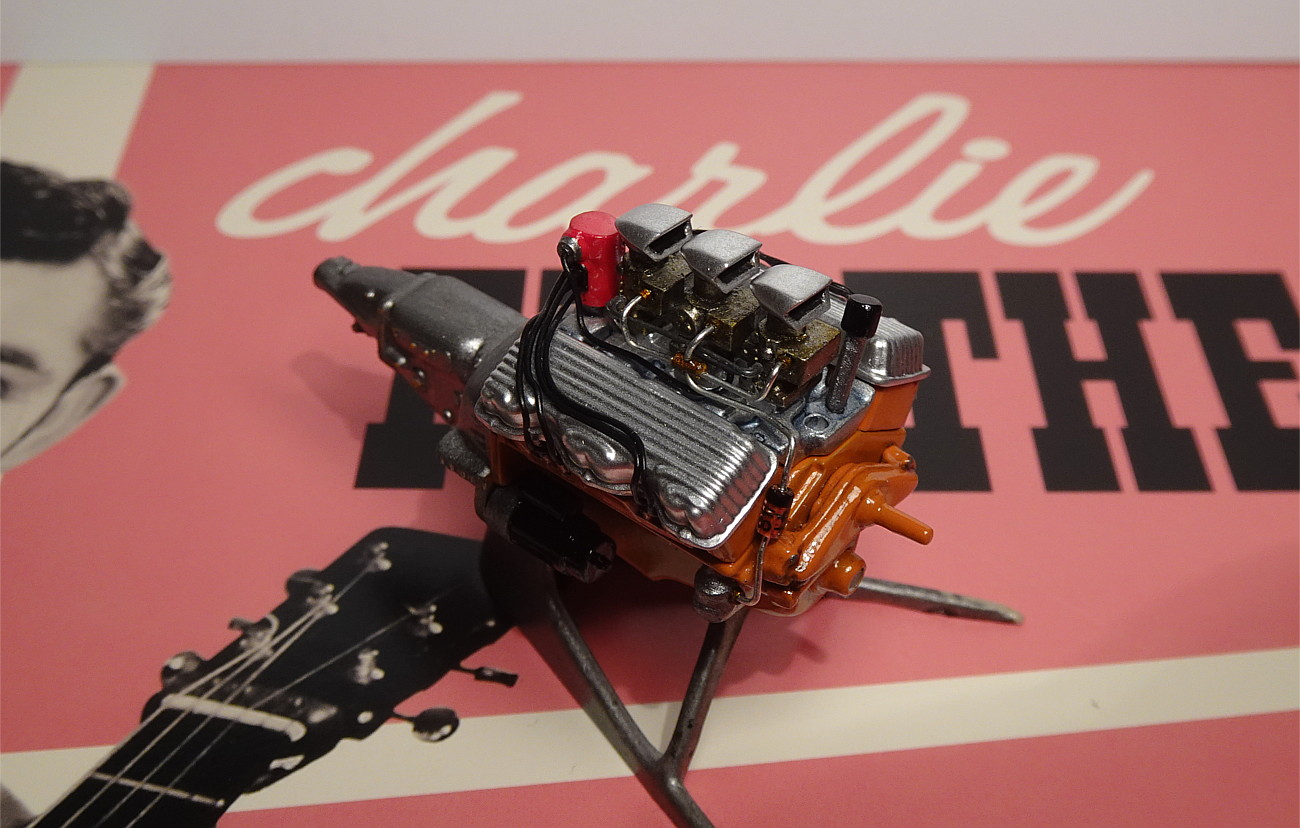 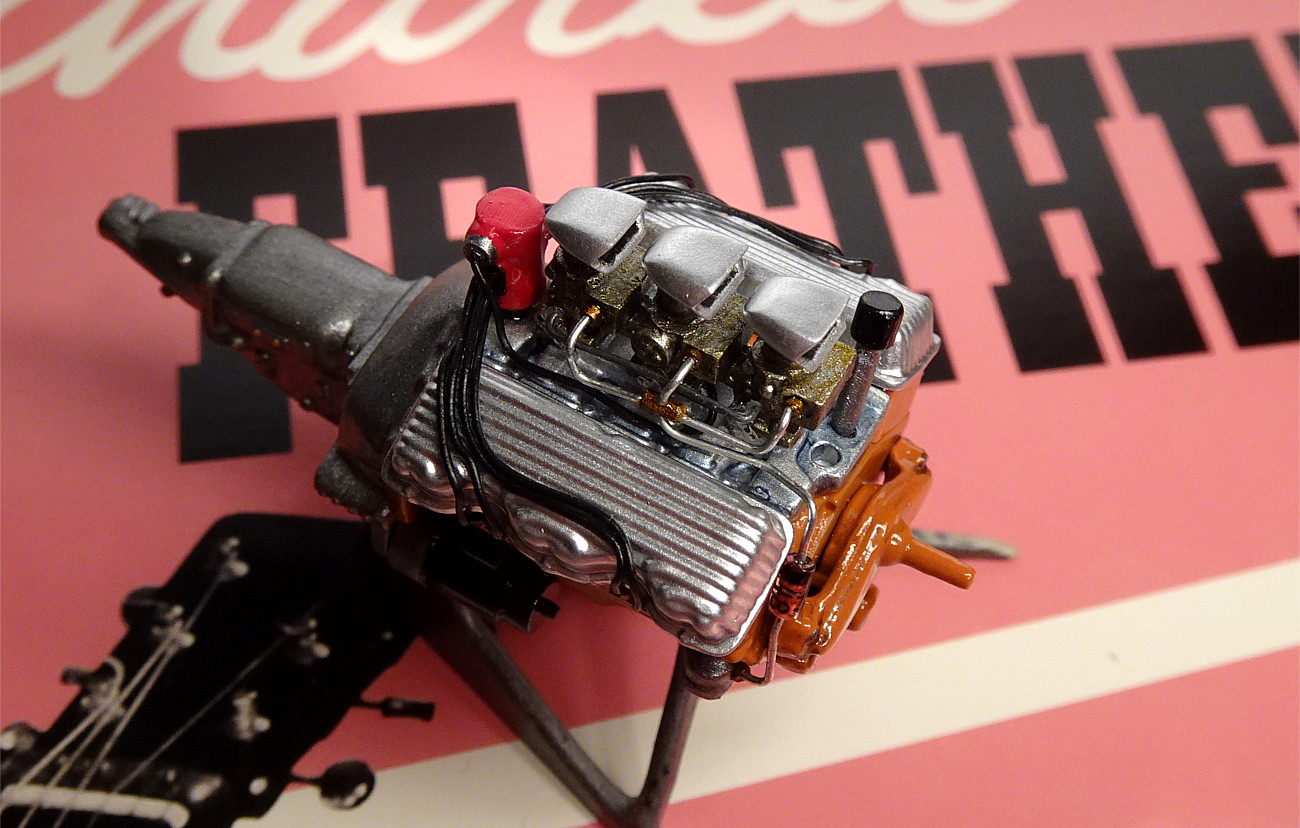 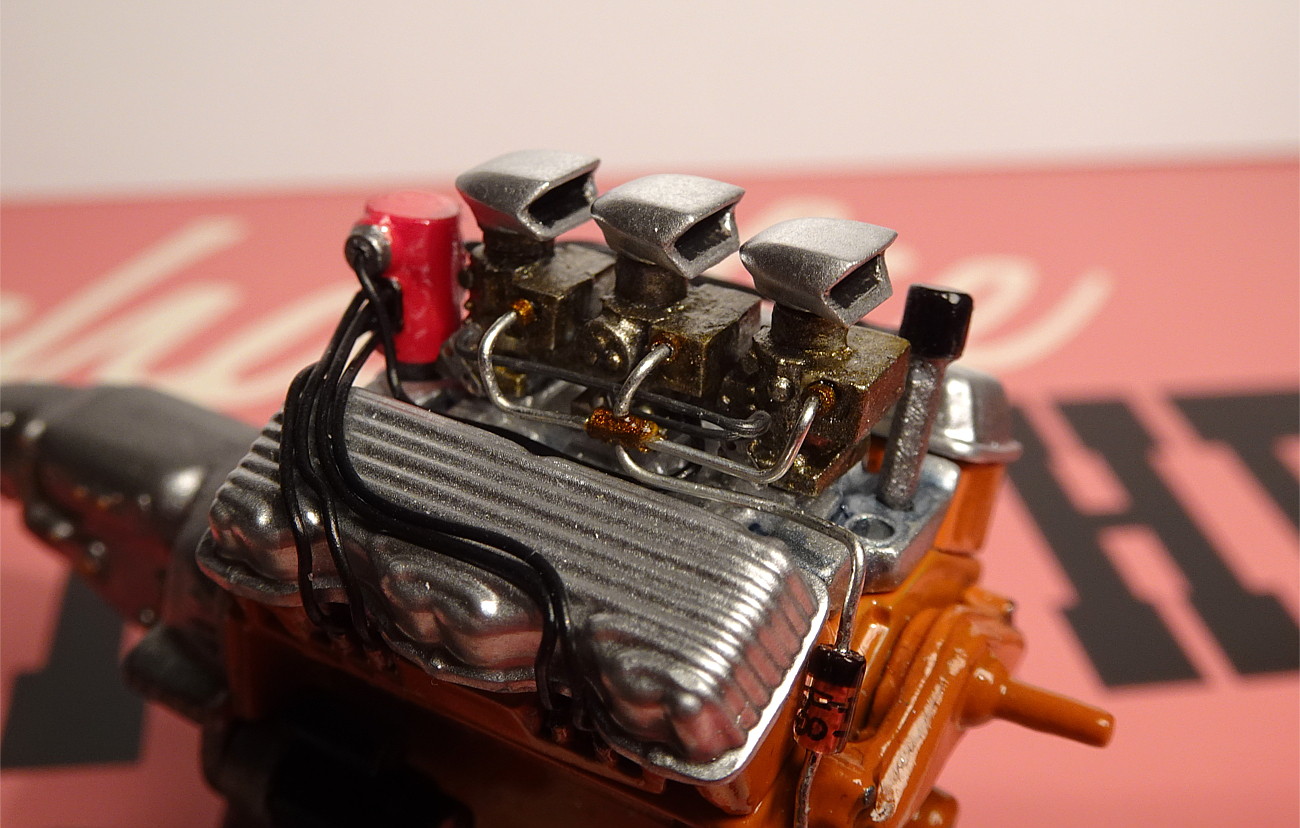 |
|
|
|
Post by skip on Dec 26, 2023 1:20:39 GMT -5
WoW! Niko, that is one of the prettiest 348/409 engines that I've seen in a long time, if not ever!
The fuel lines, ignition wires, and down to the Super-Duper Flame Thrower all play the part, that
of a brutish tire smoking X-Frame Twister! I'm always amazed when you look at something this well
detailed in scale just how much your eyes and brain fill in the rest of the picture and start off
telling big stories. One of those "early Big Block" Chevrolet engines could really motorvate a not
so light weight '58 Impala right down the road lickety-split! Again, I have to say, I really like
what you've got goin' on here, thanks for sharing it!
|
|
|
|
Post by Mr409 on Dec 29, 2023 19:42:11 GMT -5
Thanks Skip, I appreciate the kind words! Building engines and detailing them is probably my favorite part in the whole model building. The details are often quite fiddly to make, but it makes a huge difference when you pull it off.  Speaking of details, I built the throttle linkage on the driver's side as well. All that is left is to connect this linkage to the actuating rod that comes from the gas pedal, through the firewall. I will add this when the engine is mounted in place, but otherwise the throttle linkage is done. 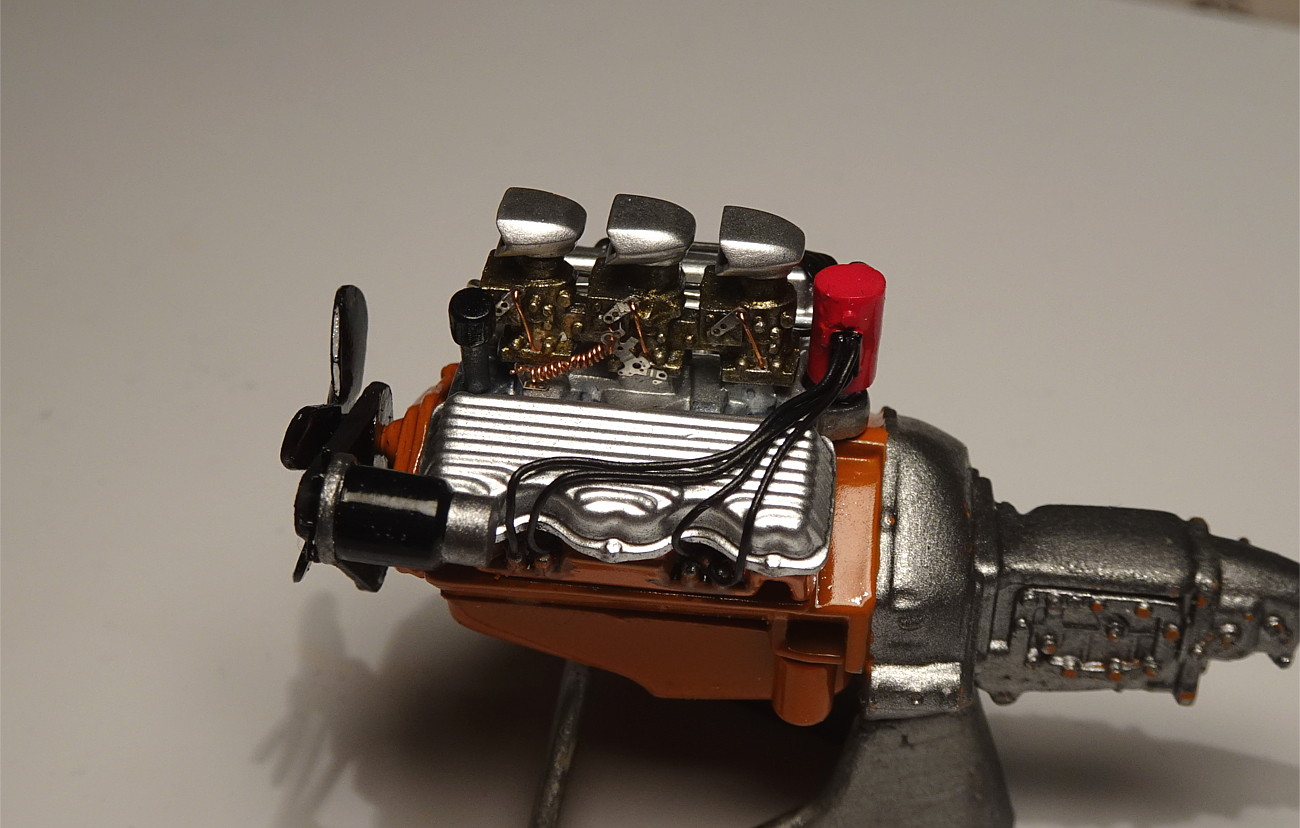 And while I was at it, I added a generator bracket as well. 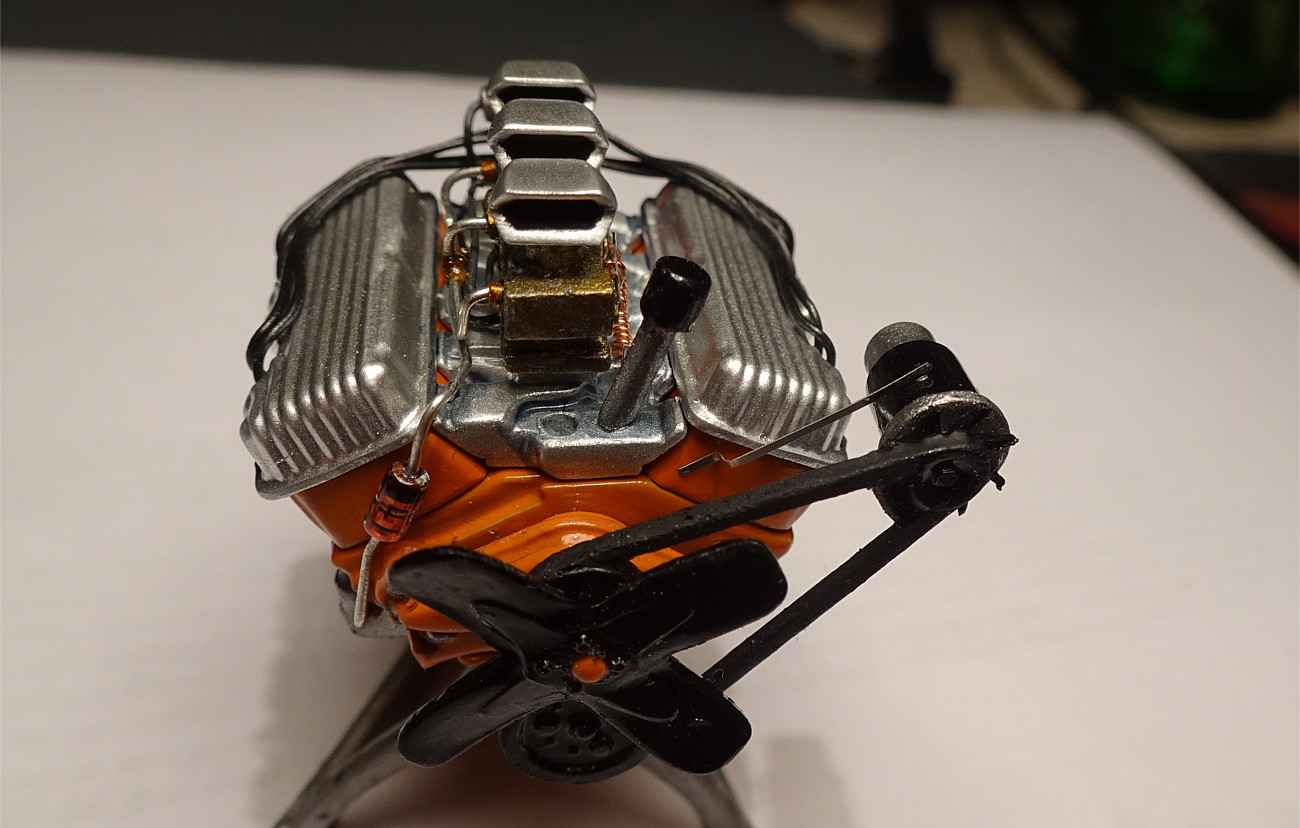 The engine is not that far from finished, once paint dries on the headers, I'm able to install them and add the rest of the detailing. Then I can move on to the chassis. |
|


 If I end up raising the front end, it's going to be very minimal, but I haven't decided on that yet.


