|
|
Post by spex84 on May 8, 2020 10:14:40 GMT -5
Thanks Skip, I'll have to give that a try!
|
|
|
|
Post by Joker on May 9, 2020 11:36:59 GMT -5
Man down !!!
I keep scrolling back and forth on this incredible build.
Question...
Just how many times can you ( Steve ) hold your breath during construction?
I'd be passed out...
( heavy sigh)
Thanks for sharing/posting though.
|
|
|
|
Post by Jared on May 9, 2020 13:52:10 GMT -5
I’ve been watching this build on Facebook. Amazing work. And the best part is that guys like Steve are not afraid to share any info on how it was done. I’m getting sick of the newer guys that don’t want to share info or how to set something up. Thank you Steve for loads of info and pics of your skills!!
|
|
|
|
Post by BigPappaJ on May 10, 2020 14:19:47 GMT -5
Outstanding build, Steve. Of course, I haven't seen a build of yours that wasn't.
What are you using for the tuck and roll? Looks too thin to be Evergreen shapes.
Thanks
Jim
|
|
|
|
Post by steveb on May 12, 2020 15:41:21 GMT -5
Absolutely Exquisite, I'm at a loss for any better adjective! I'm in absolute awe at your work on the 1947 Lincoln Steering Wheel, the work that went into that piece alone. Then there is the pedals, the aforementioned Dash. That seat is another one of those details that are often overlooked yet you've proven with just a 'bit' more work it looks realistic enough to want to sit down for the rest of the ride! Question - I notice the dash knobs haven't received any color yet. Are you working on casting those in color like you did the steering wheel in red or a semi-translucent Tan would give it that 40's or 50's flair. They are cast in white resin with a bit of brown dye to try & replicate the knobs on the 1:1 dash. I probably could have used more dye. 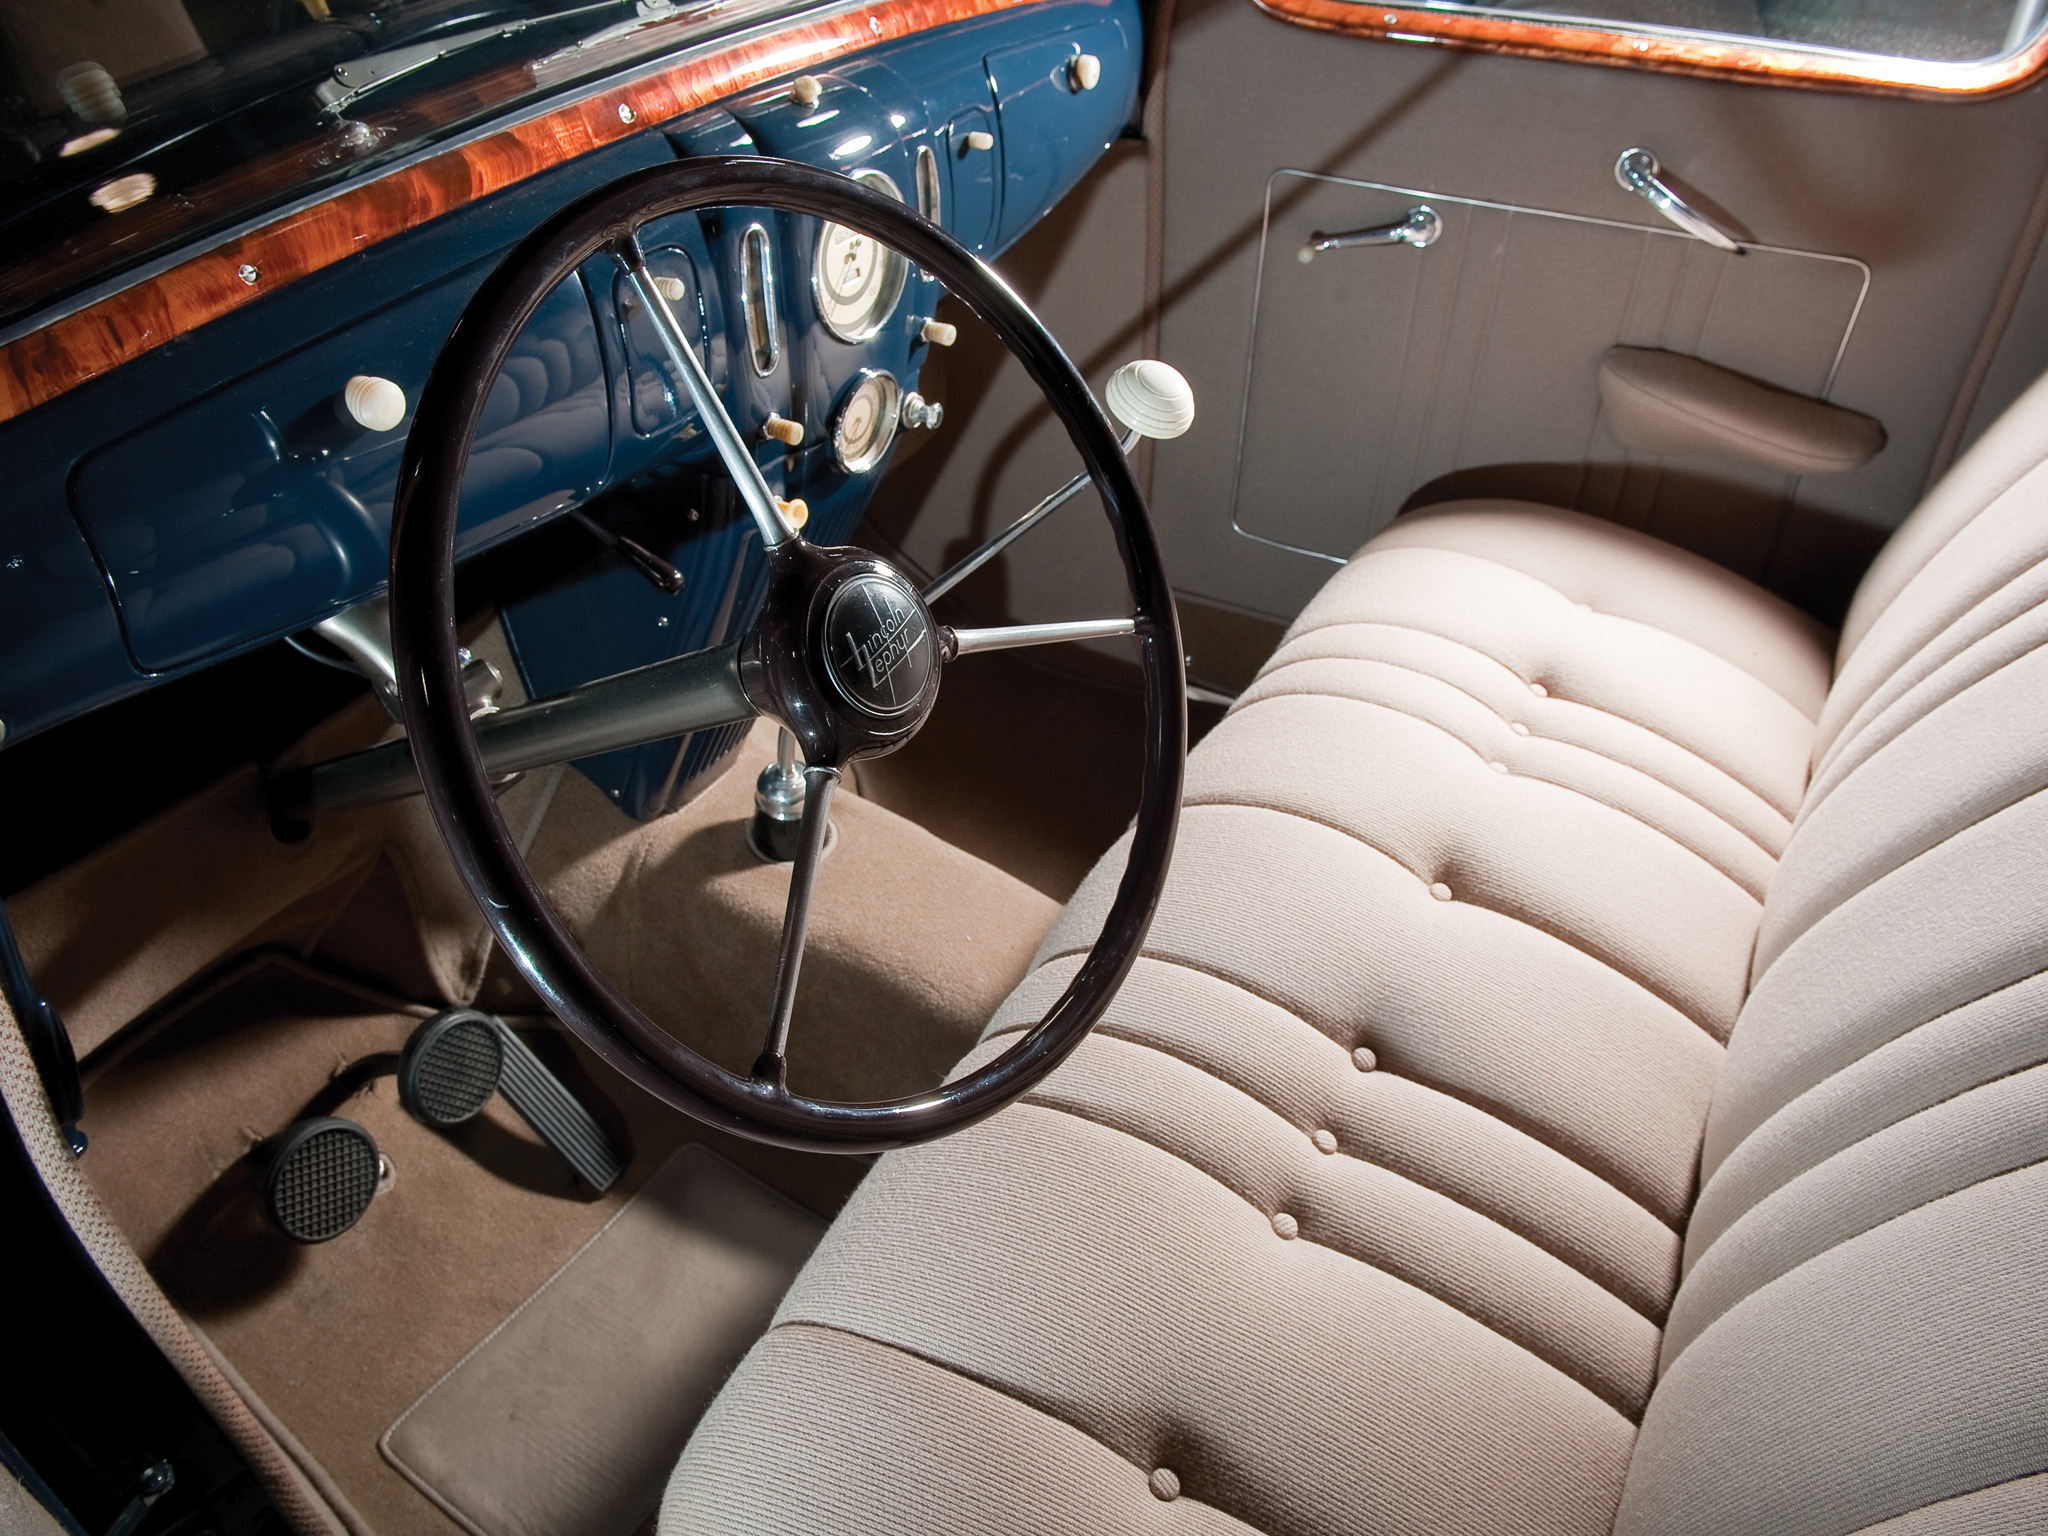 |
|
|
|
Post by steveb on May 12, 2020 15:57:40 GMT -5
Outstanding build, Steve. Of course, I haven't seen a build of yours that wasn't. What are you using for the tuck and roll? Looks too thin to be Evergreen shapes. Thanks Jim Thanks! The tuck & roll is craft paint poured into a mold of a tonneau cover. Then, it is cut to shape. 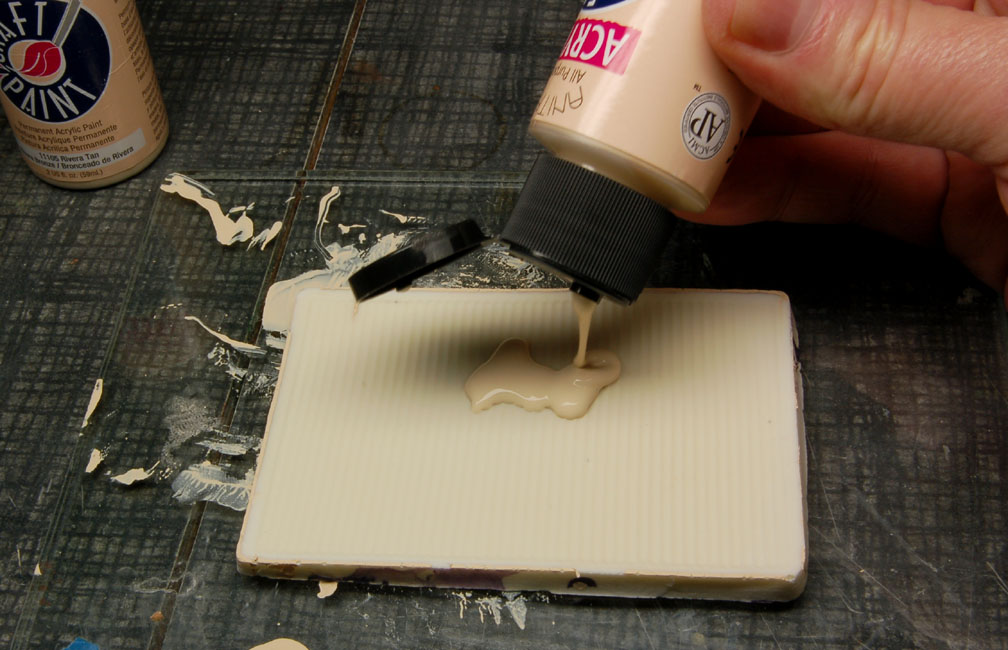 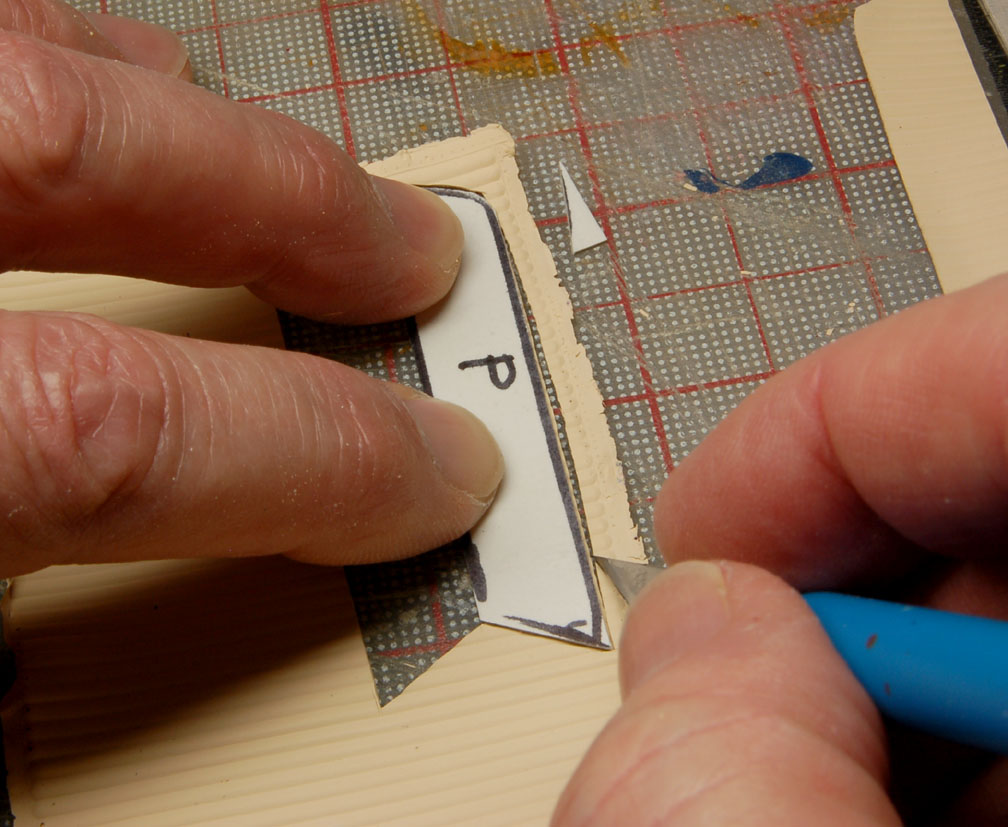 ![]() 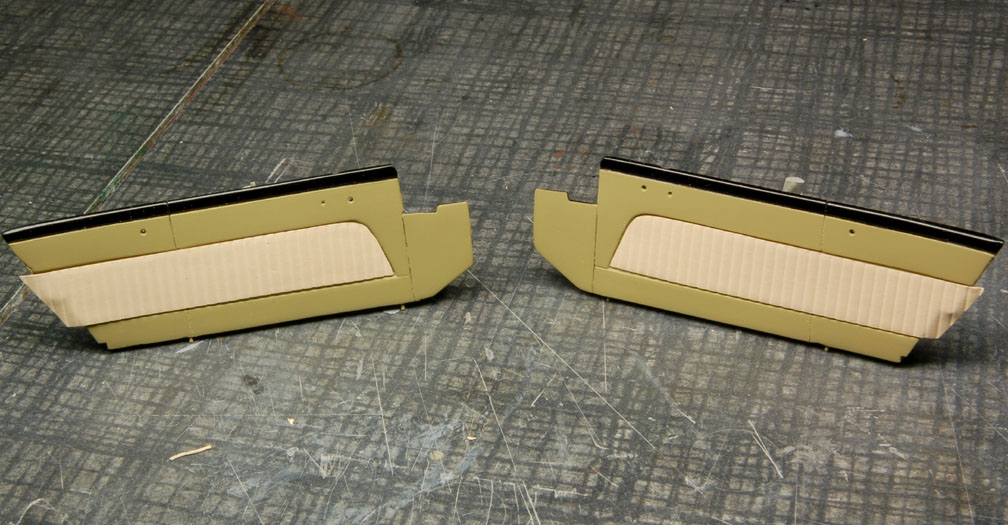 |
|
|
|
Post by BigPappaJ on May 13, 2020 6:44:18 GMT -5
Now that is slick! Thanks, Steve
Jim
|
|
|
|
Post by steveb on May 13, 2020 21:50:20 GMT -5
Getting close. I took the kit rearview mirror & reshaped the edges & back of it. I made a mounting plate out of plastic & added a piece of bead wire to connect the 2 pieces. 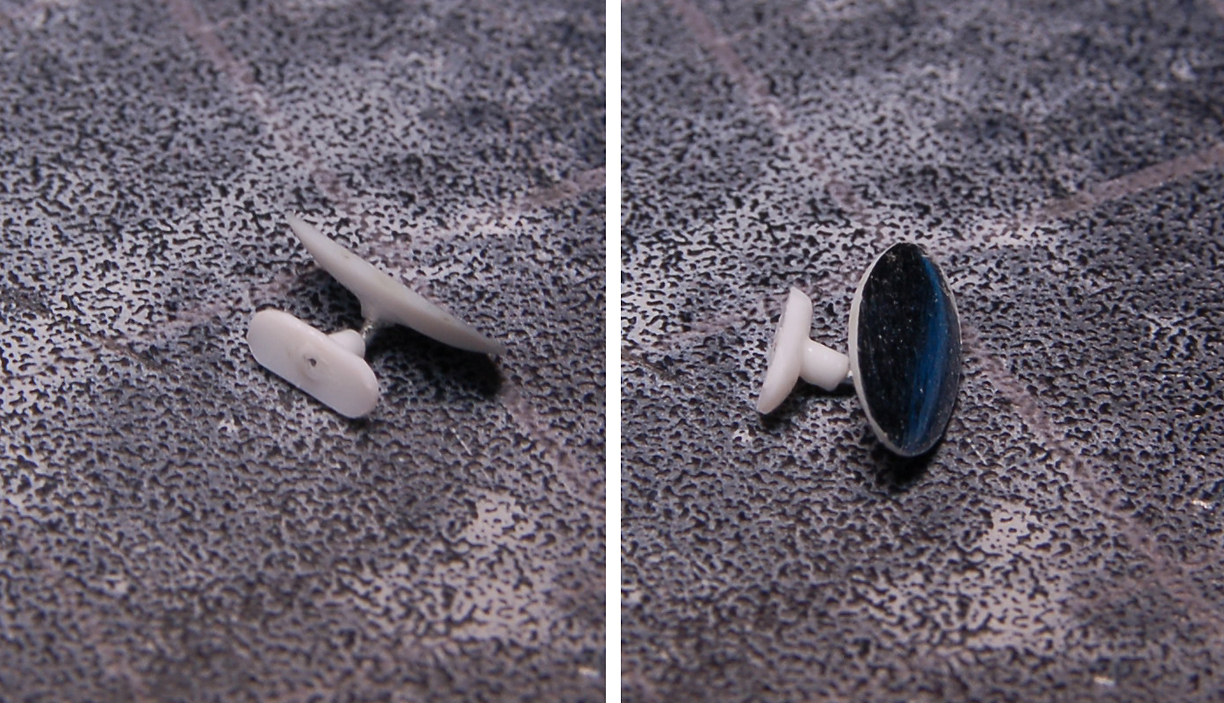 I scratch built the dome light, made a mold & cast it in epoxy, then masked & painted the outside with Molotow chrome. The rearview mirror parts were painted with Alclad chrome. Those were mounted to the body, as well as the garnish moldings windshield frame, “glass” & other parts. 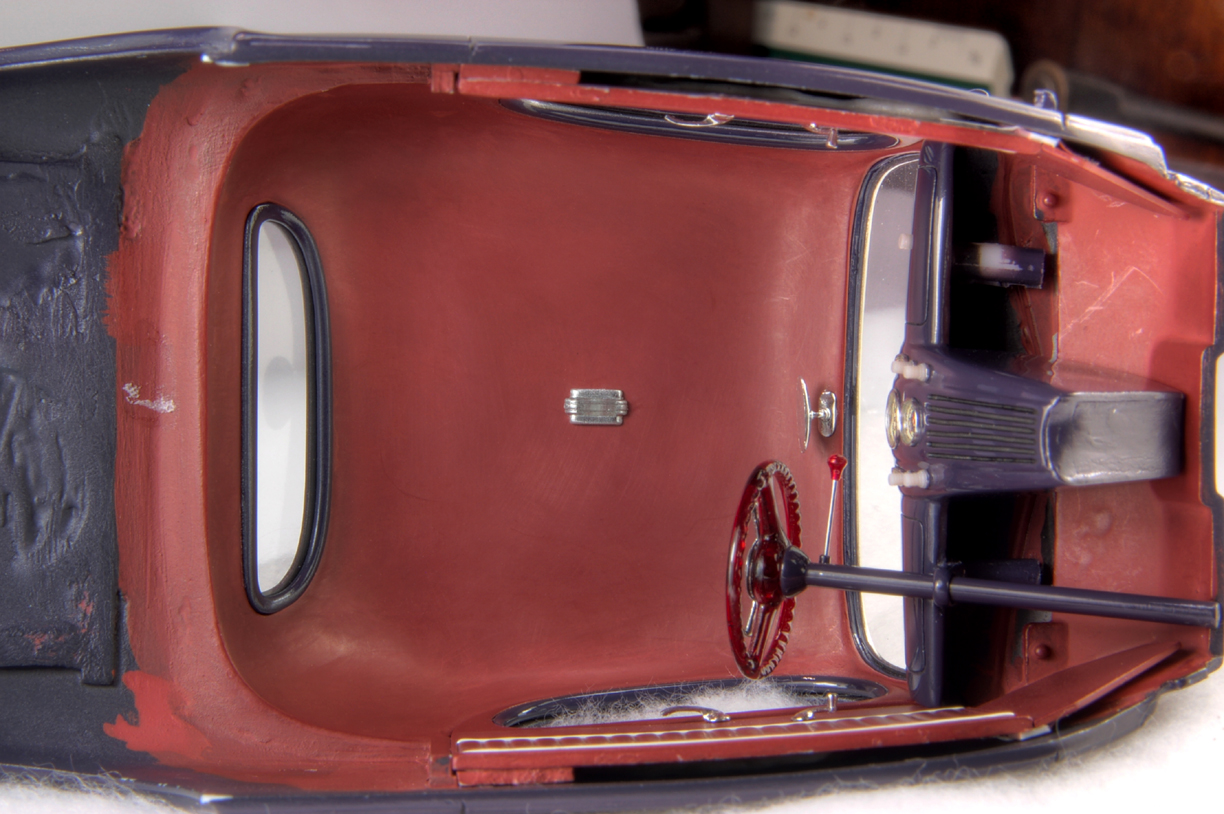 The package tray was also added in at this point. 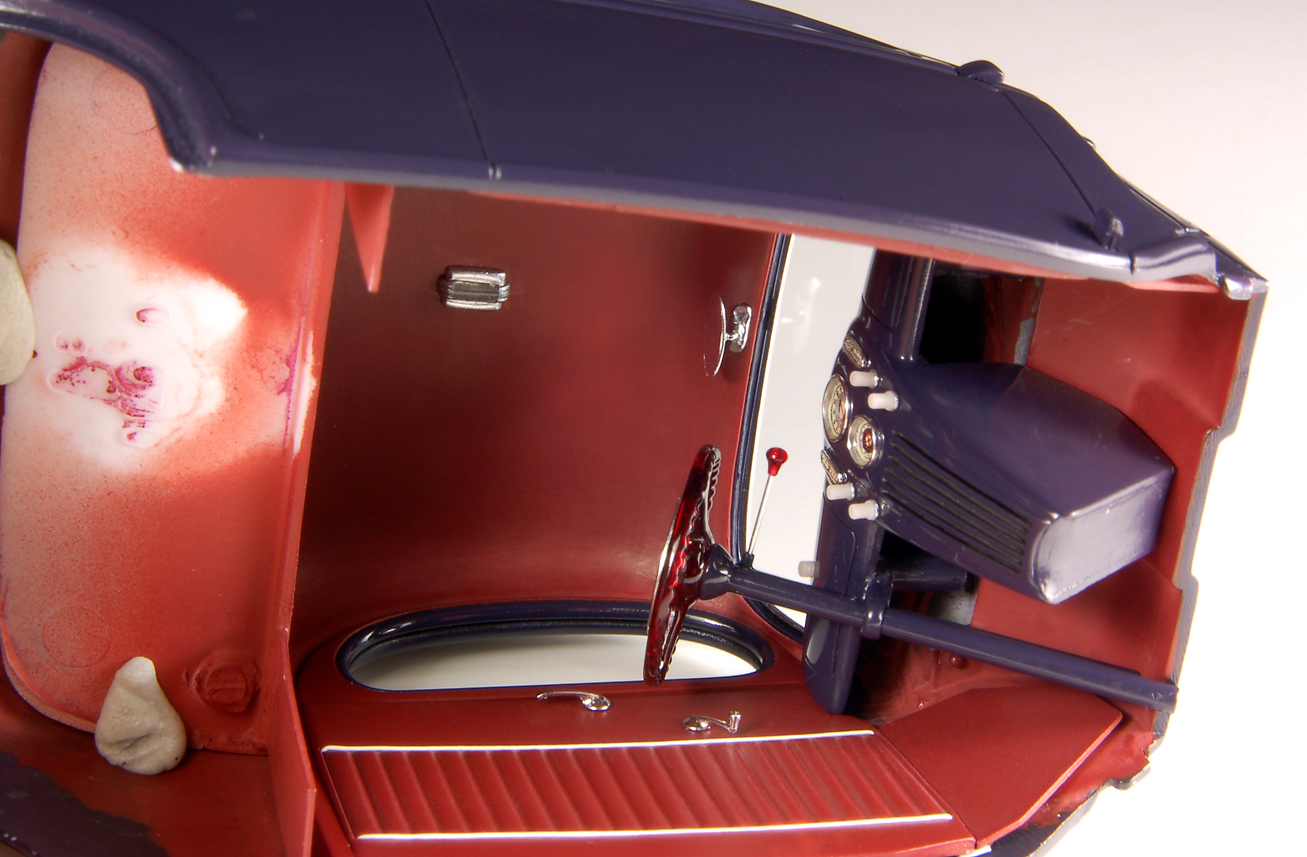 The Hollywood flipper hubcaps that I made were initially flat on the back, so I modified resin copies of a kit wheel from the Monogram ’40 Ford convertible kit. I had an idea for a way to have very thin beauty rings on the wheels, & the first step was to have some of my copies plated. 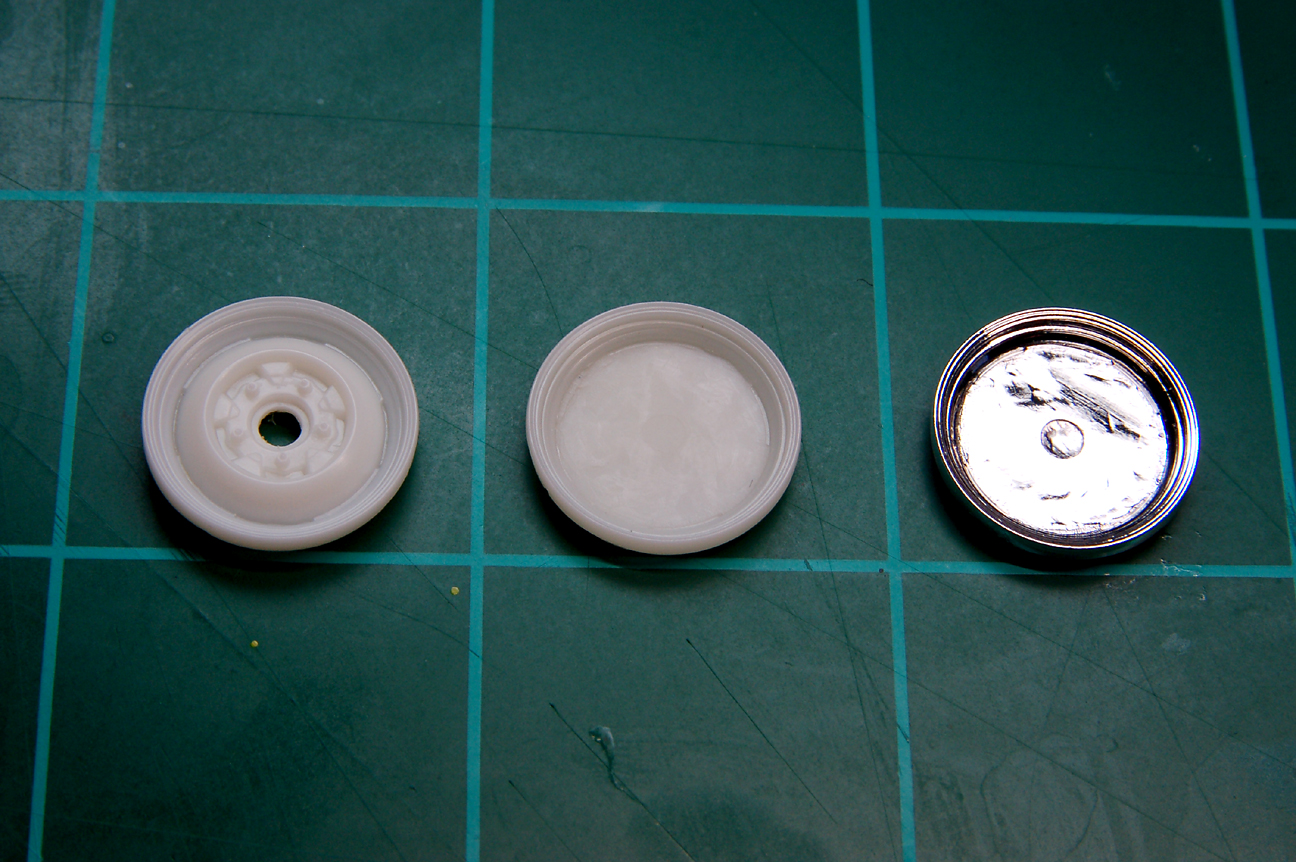 I drilled a hole in the center & mounted it on a Dremmel shaft that is usually used for cutting discs. 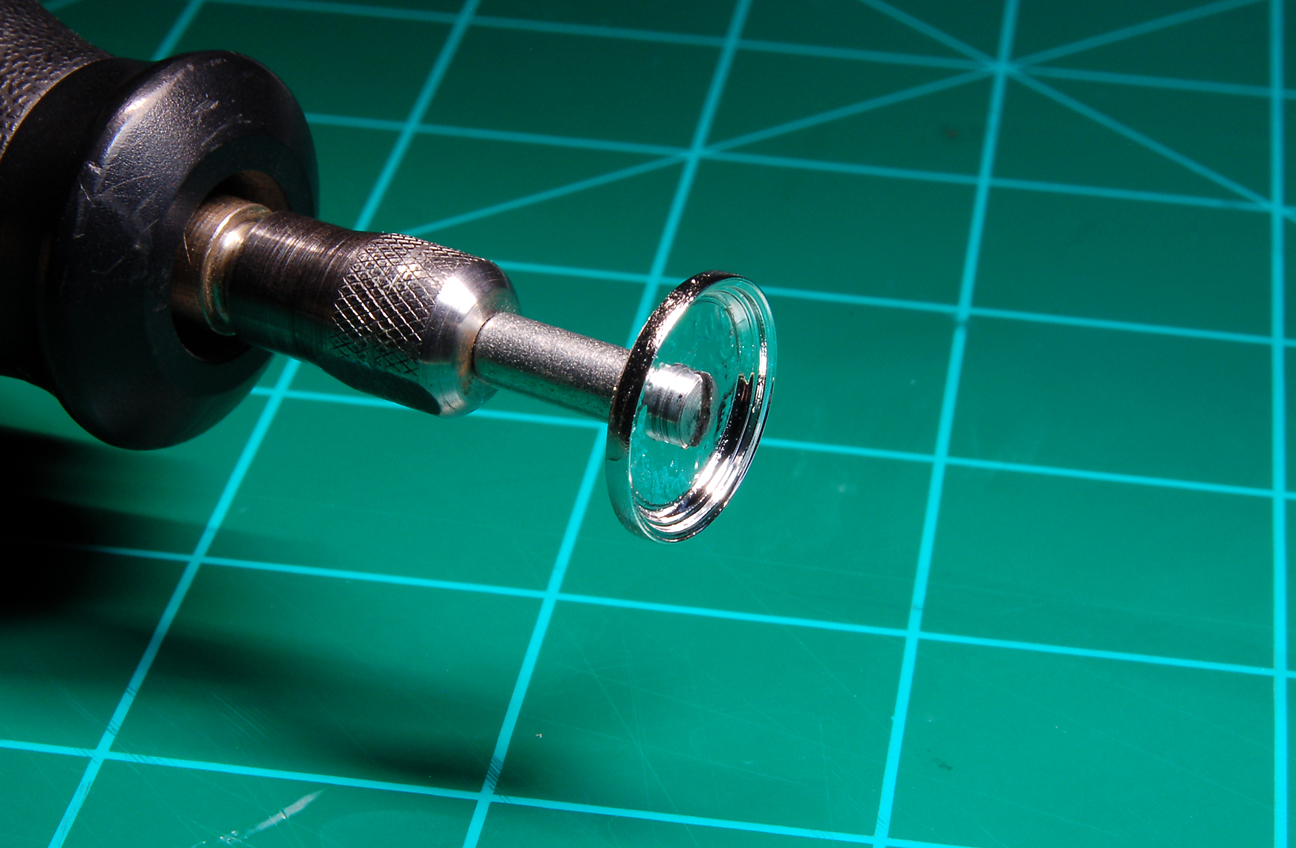 I rotated the shaft slowly with one hand, while applying black enamel paint with the other. I painted the outer rim & parts of the inner rim, leaving a small ring of chrome. Sometimes things went well, but a few had slip ups & needed to be done again. I wiped off the enamel with white spirits & started again. 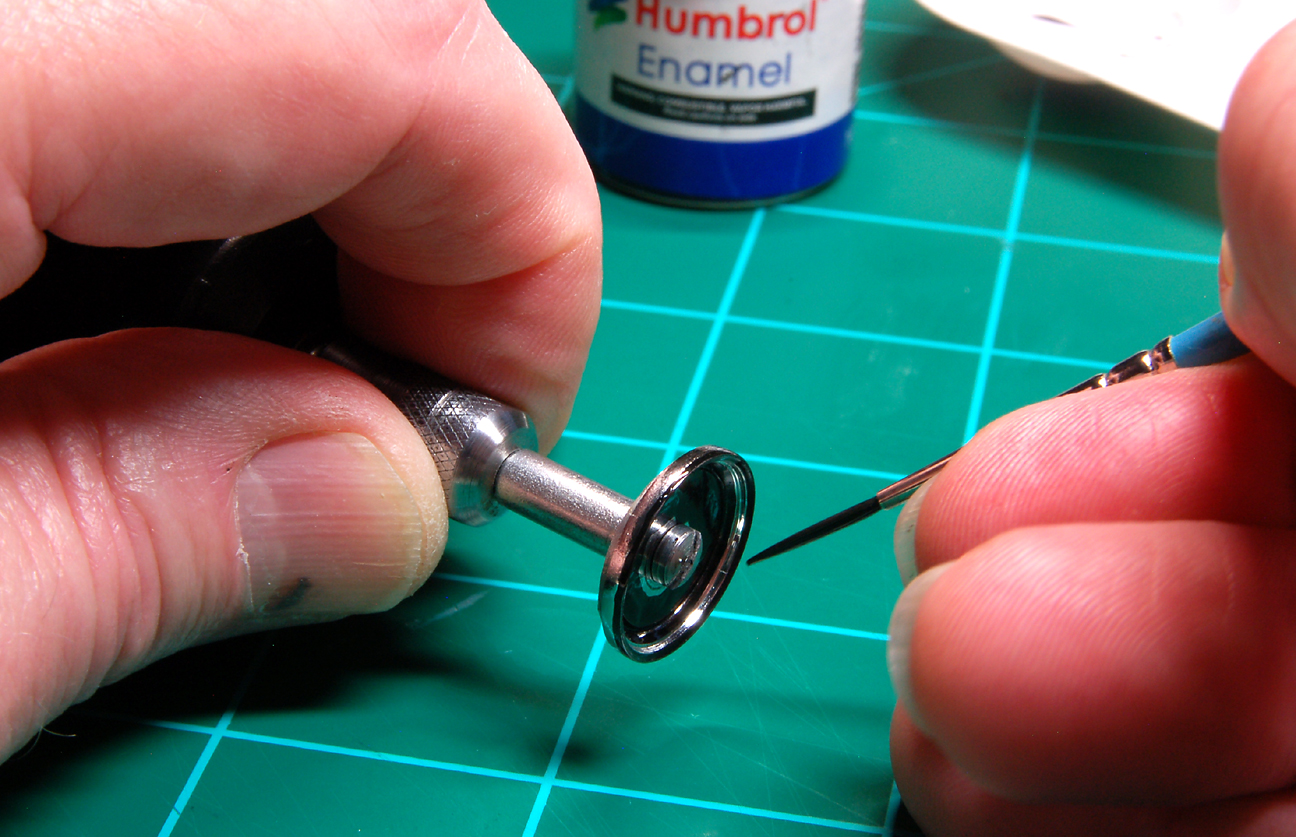 I let the wheels dry for several days then mounted them in a tire from the Monogram 40 Ford convertible. The white walls previously received a coat of off-white Acryl that I mixed. The hubcap was added last. 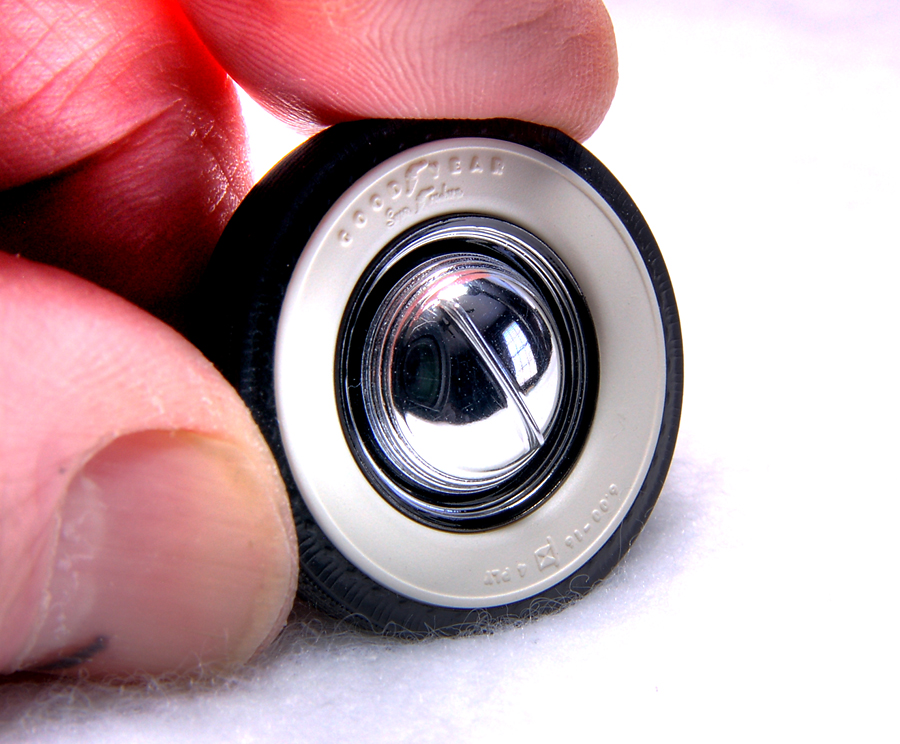 Using ’46 Ford bumper guards from an old IMC kit as a starting point, I made a few modifications. 1. Kit piece straight from the kit 2. Smoothed & leveled resin copy with a reshaped backside to fit the ’46 Ford bumpers from the Revell kit. 3. Resin piece with a portion of it removed. I’m trying to remember exactly how I did this. I know I used a MCG saw blade to cut the top & bottom, then the finish work was done with files & hobby knives. 4. Using another resin copy, I cut away most of the backside, & filed the 3 flat sides to fit in the previously modified guard. 5. Molds of both pieces were made, & each were cast either in resin or red tinted epoxy. 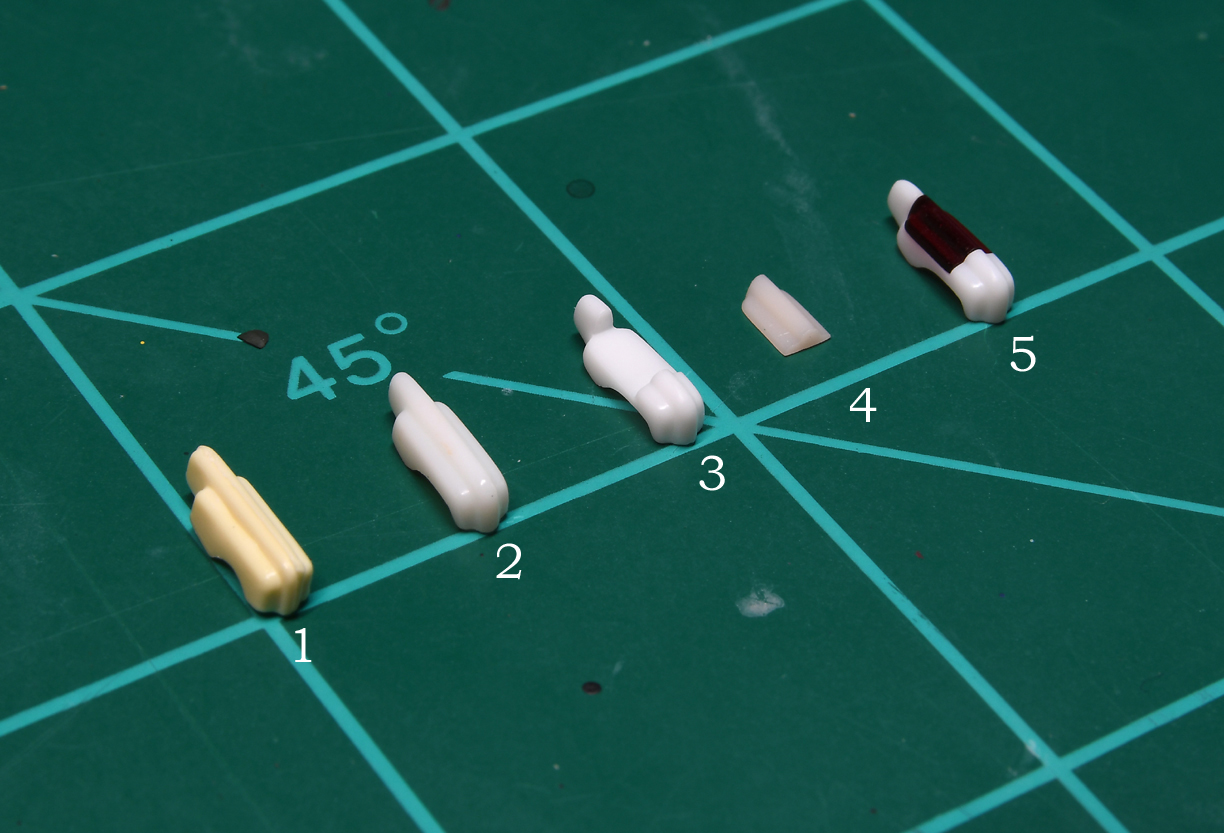 Bumper guards were glued to a resin copy of the bumper, & that was cast as one unit. 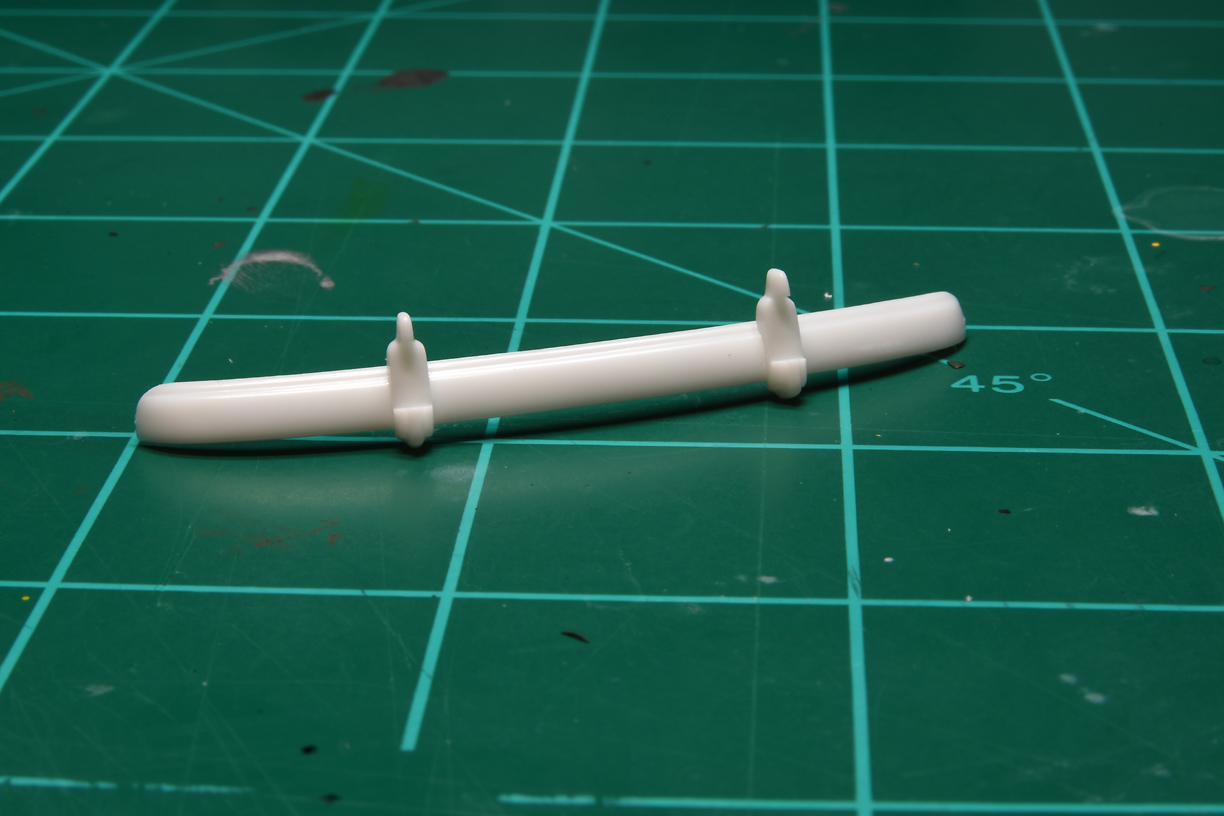 After plating with the taillight in place. 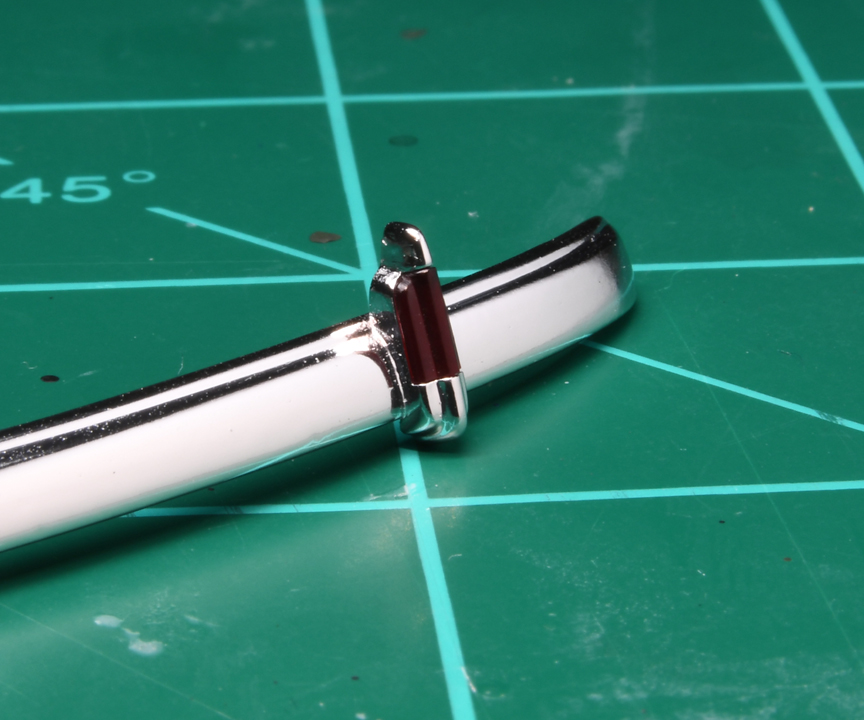 Up front, I scratch built the bumper bracket grommets from plastic & painted them with Tamiya NATO Black. They are separate pieces & were added during final assembly. The bumper brackets were painted with Testors gloss black acrylic. 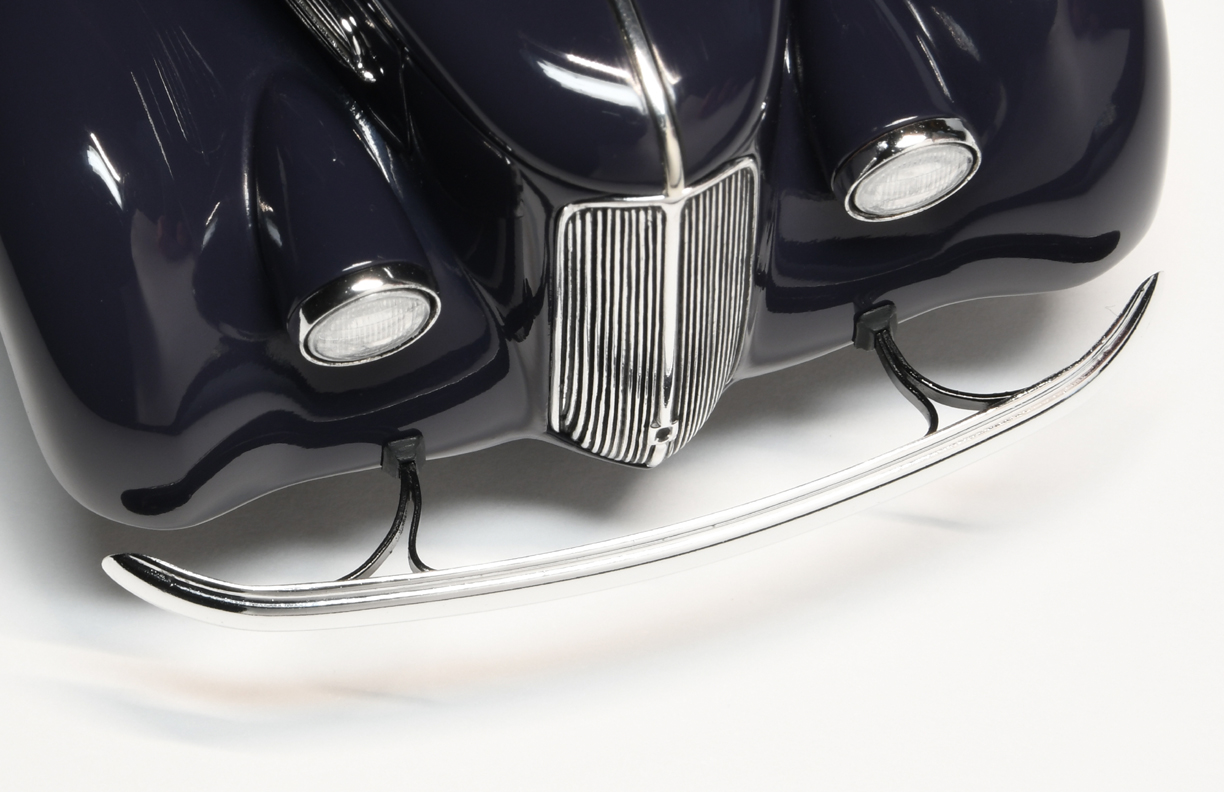 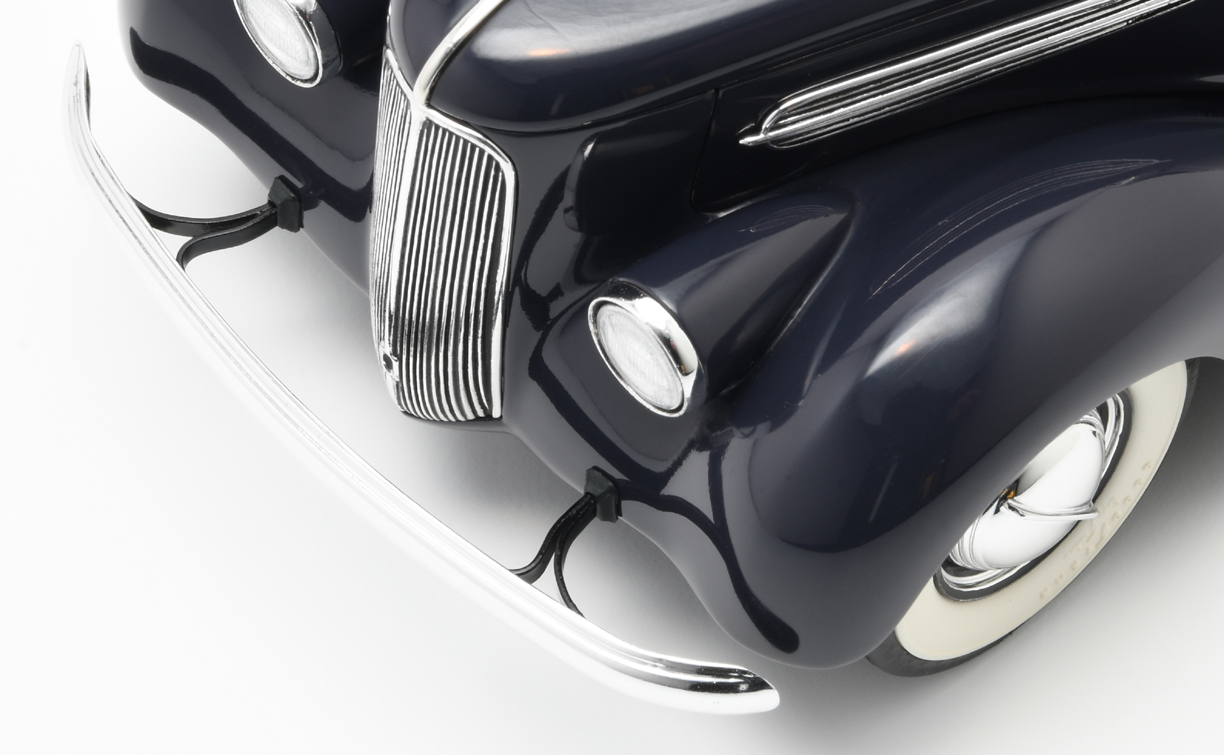 That’s about it for now, & the next post will be On the freakin shelf. |
|
|
|
Post by spex84 on May 14, 2020 1:24:44 GMT -5
Whoa, insane amount of effort in that rear bumper!!
I like the rearview mirror too...it definitely benefited from the modifications, even though it can barely be seen.
And the beauty rings are trick.
|
|
|
|
Post by skip on May 14, 2020 7:53:06 GMT -5
Steve, Thank You for taking the time to do these detailed "How To's". They are almost like seeing Dennis Doty's How to Build books for the first time, where they opened up new worlds of detail and build style for most of us. They are that fresh and exciting seeing what you are doing for "the first time" now with eyes wide open!
Hope you continue to stick around TRAK, challenging the rest of us "Old Hands" to build better models, please keep doing what you're doing! This is a first class presentation from what you're building to the photography, what's not to like!
|
|
|
|
Post by Joker on May 27, 2020 19:10:47 GMT -5
Dude !!!
The bumper guard tail light treatment is smooth.
Thanks for sharing/posting your sorcery.
|
|
|
|
Post by Duane on May 27, 2020 22:51:52 GMT -5
Steve; i'm with Skip, on everything he said, another beauty !
|
|
|
|
Post by krassandbernie on May 30, 2020 10:19:28 GMT -5
I have to say that if it weren't for the grille giving away the fact that we are looking at a model; you'd have everyone fooled! If the bars on the grille were opened up and the headlight lenses a slightly less opaque you might have convinced me! You are a master at what you do! I admire your work greatly! |
|
|
|
Post by froghawk on May 30, 2020 16:56:34 GMT -5
Breathtaking build, Steve! You've taken things to a whole new level with this one!
|
|
|
|
Post by constructionbob on Jun 1, 2020 10:53:45 GMT -5
There is so much to appreciate. Hope U have a good time building it!
|
|