|
|
Post by Mr. Metallic on Oct 24, 2019 6:55:52 GMT -5
Engine! Got both of the 3D printed headers pinned to mount to the Revell 57 Y-block. That allowed me to drop the engine where I wanted in the frame relative to the firewall and body. Because I extended the frame forward of the firewall, the only fit issue was making sure there was clearance between the headers and the body. I made up engine mounts from brass and Evergreen, and a tranny crossmember from more brass. Now the engine is locked in place, so I can finalize other items. Hey Chris, note the clipped corners on the spring leaves. Thanks for bringing that up. 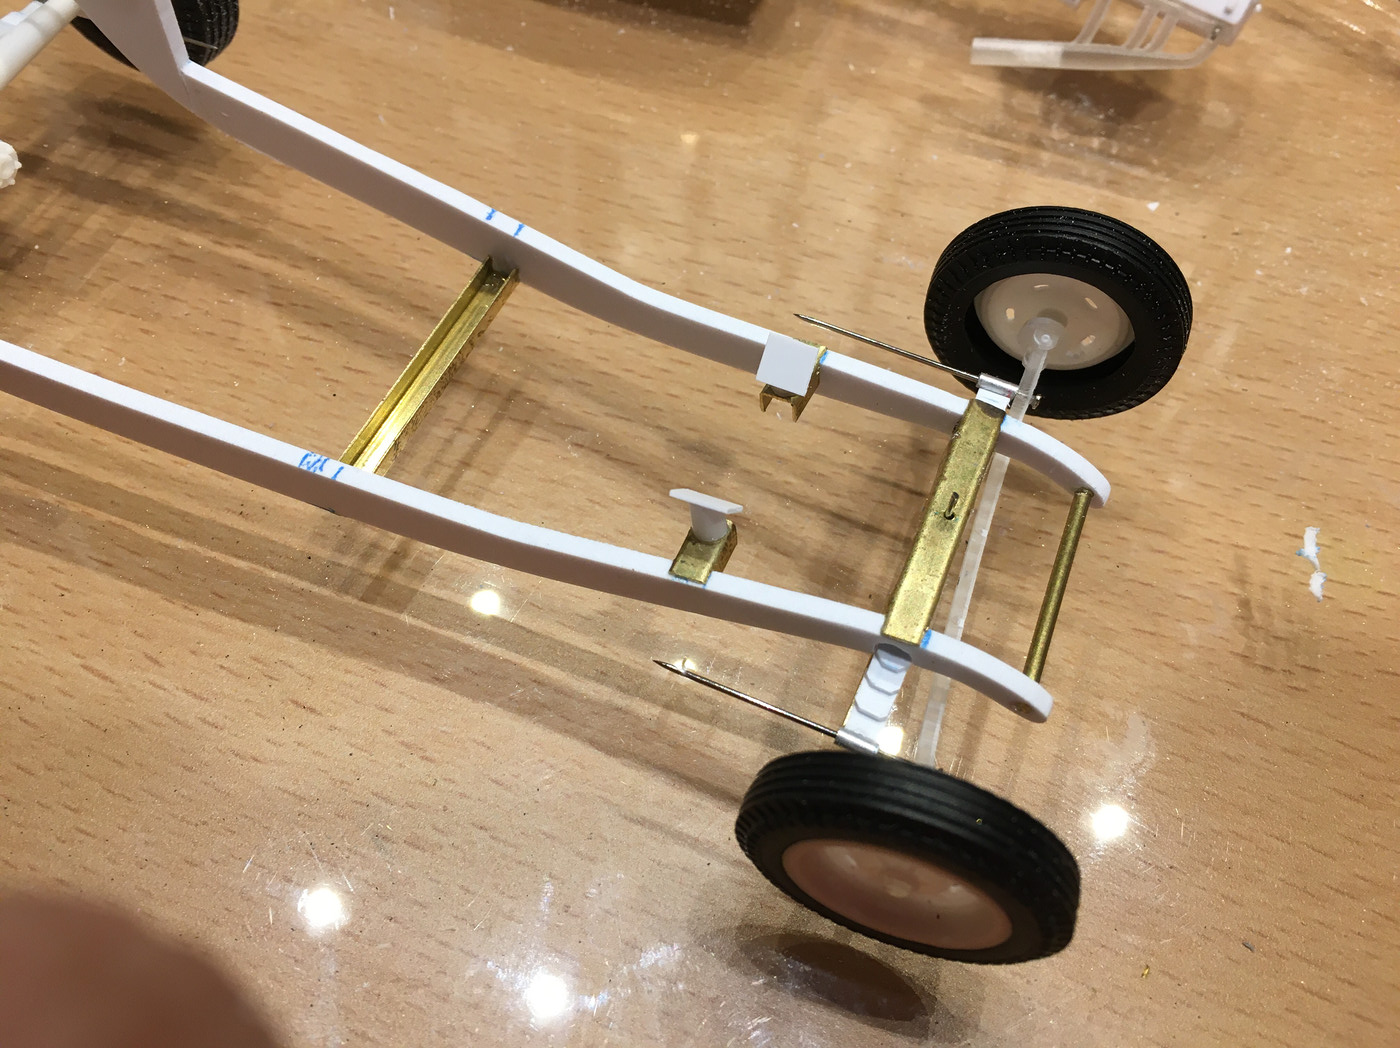 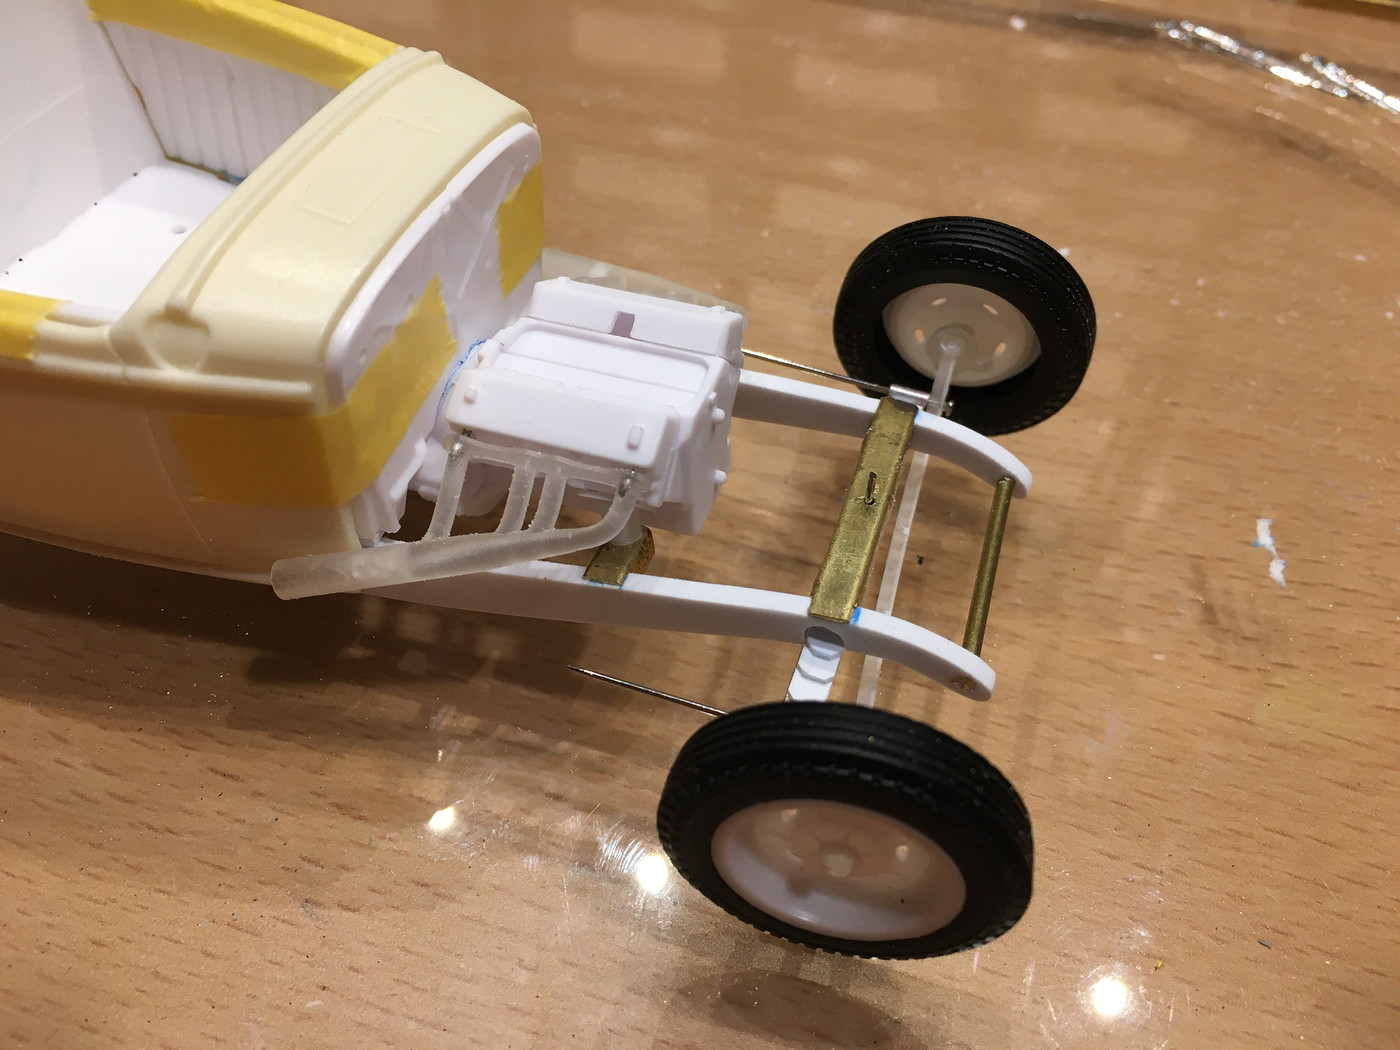 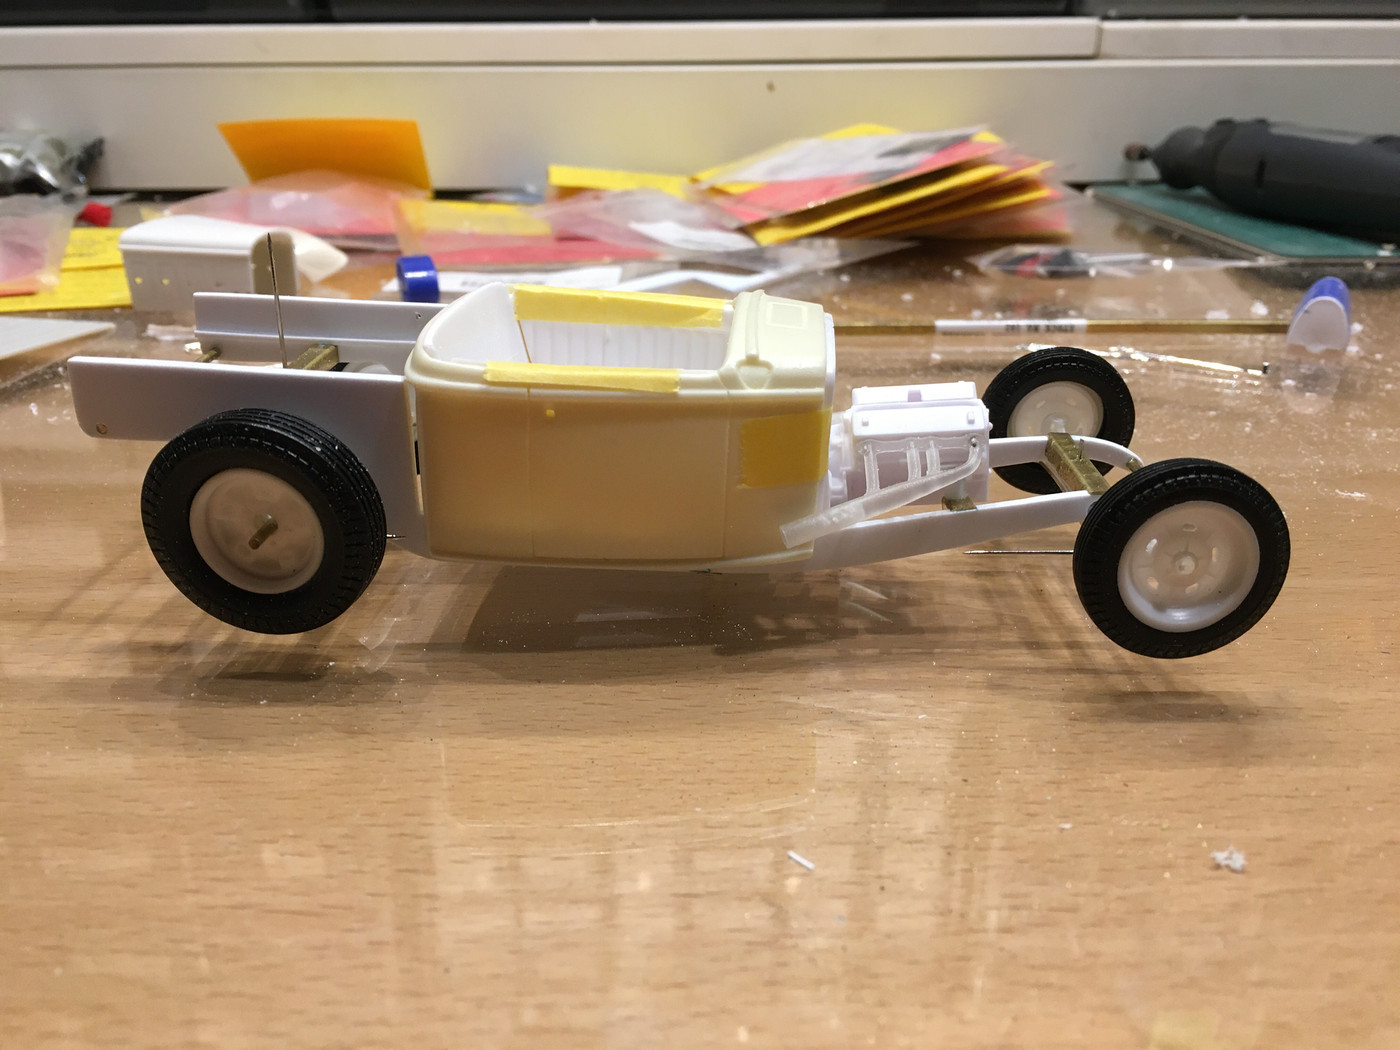 I need to start thinking seriously about what to do with the area behind the cab. When I made the frame I left it the stock length behind the axle, and incorporated extra height to mimic the look of a pickup box. But I also like the look of a lake modified with the fully exposed gas tank and rear suspension. So here's quick and dirty pics for comparison. I know which one I'm leaning towards, but curious on your opinions. pickup bed 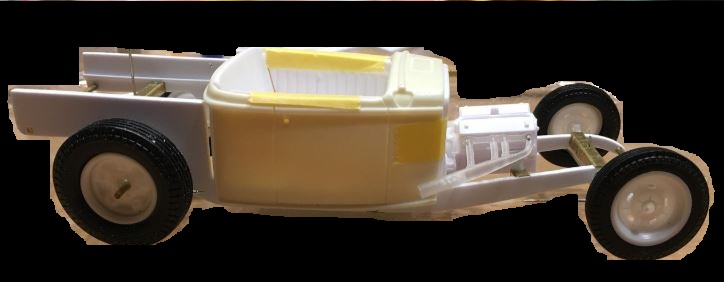 shorty bed 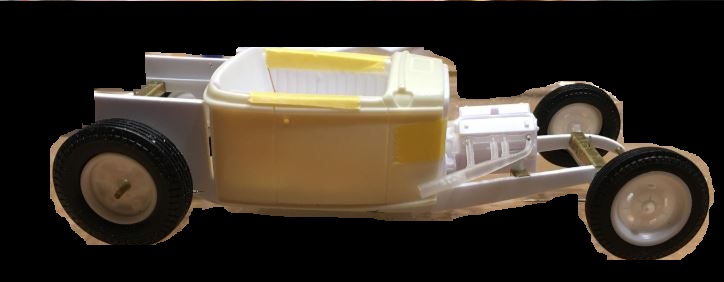 frame rails only 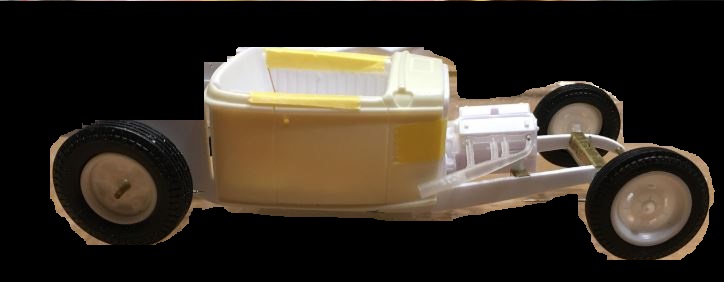 |
|
|
|
Post by Dennis on Oct 24, 2019 9:43:05 GMT -5
Nice progress!
I really like the look of the mimic’d bed. Sand the top edges at an angle, add some bed rails and make a flush fit cover.
|
|
|
|
Post by spex84 on Oct 24, 2019 11:28:03 GMT -5
I like the shorty bed! Gives it those short-deck, long-hood proportions  Nice to see the 3D printed headers in use. Seems like they fit OK, so that's encouraging. I can see that if the body was wider there would be problems...or if you wanted more engine setback. |
|
|
|
Post by Mr. Metallic on Oct 24, 2019 11:33:24 GMT -5
Nice to see the 3D printed headers in use. Seems like they fit OK, so that's encouraging. I can see that if the body was wider there would be problems...or if you wanted more engine setback. I was fortunate that the as-printed headers worked, but you're correct. If the cowl was wider or the engine set back further it would be tight. If you ever consider revising the headers i would possibly add 1-2 mm to the length of all the tubes because it is also tight at the front tube for the drop over the frame |
|
|
|
Post by randfink on Oct 24, 2019 11:44:44 GMT -5
Amazing work! I vote for the shorty bed.
|
|
|
|
Post by chepp on Oct 25, 2019 13:57:51 GMT -5
Thanks for the axle/spring how-to tips. Overall, the rod looks good. Keep us posted.
|
|
|
|
Post by Mr. Metallic on Oct 29, 2019 8:10:10 GMT -5
Suspension! Took front hairpins from the Revell 32 5W and mounted them. I drilled a hole through the front so it locates to the pin and sandwiches the spring between the axle and hairpin (yes, I need to trim the pin). I then pinned the rear of the hairpins to the frame. 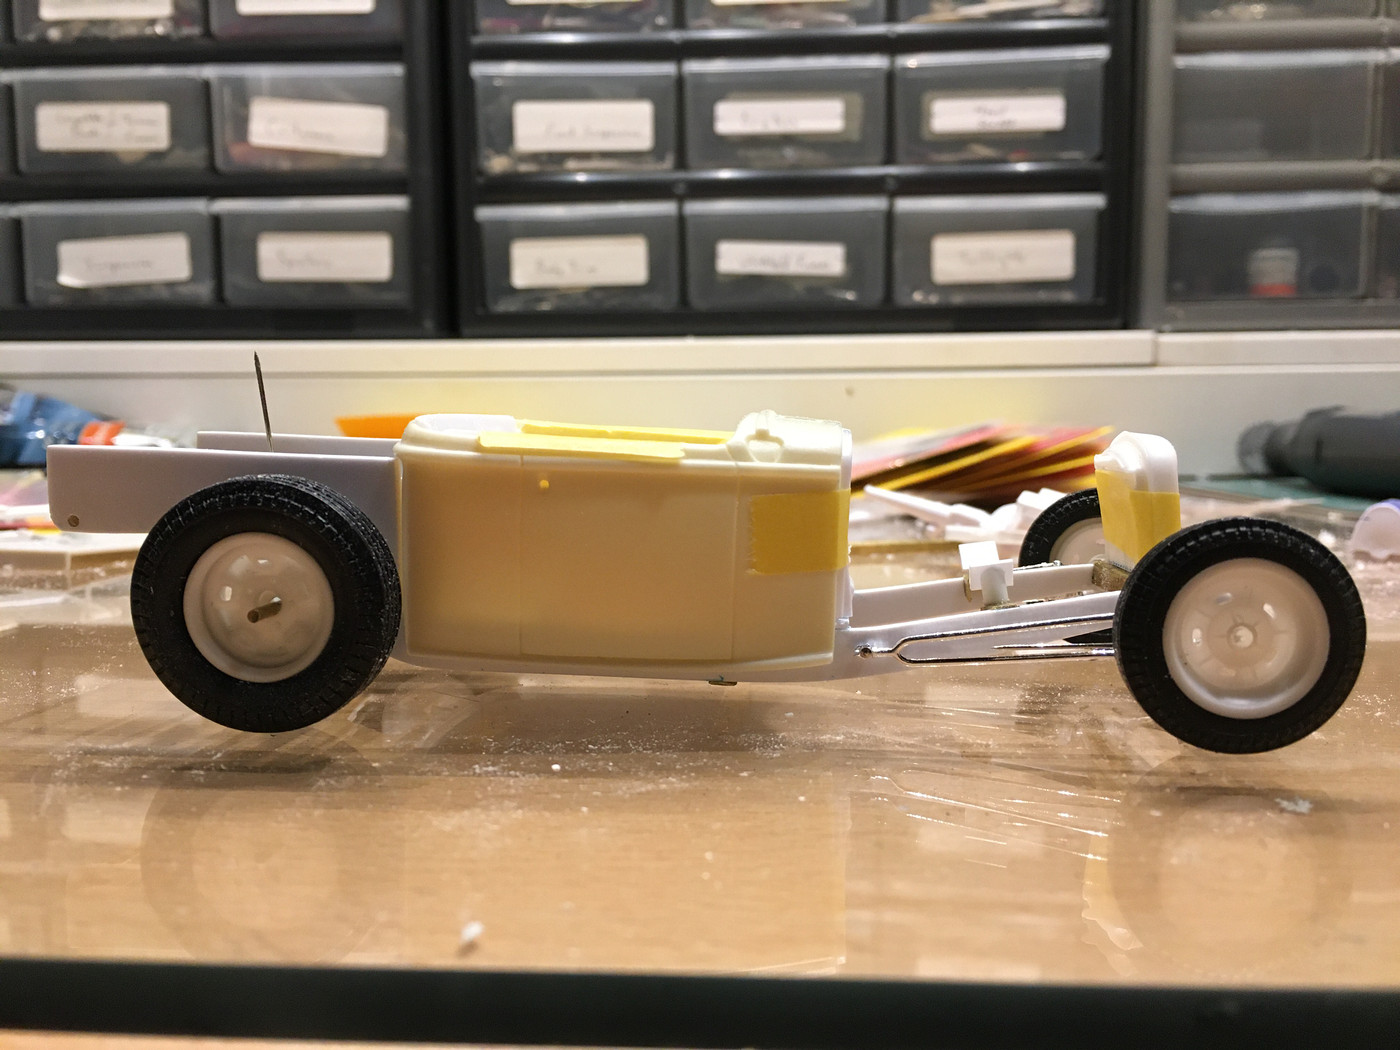 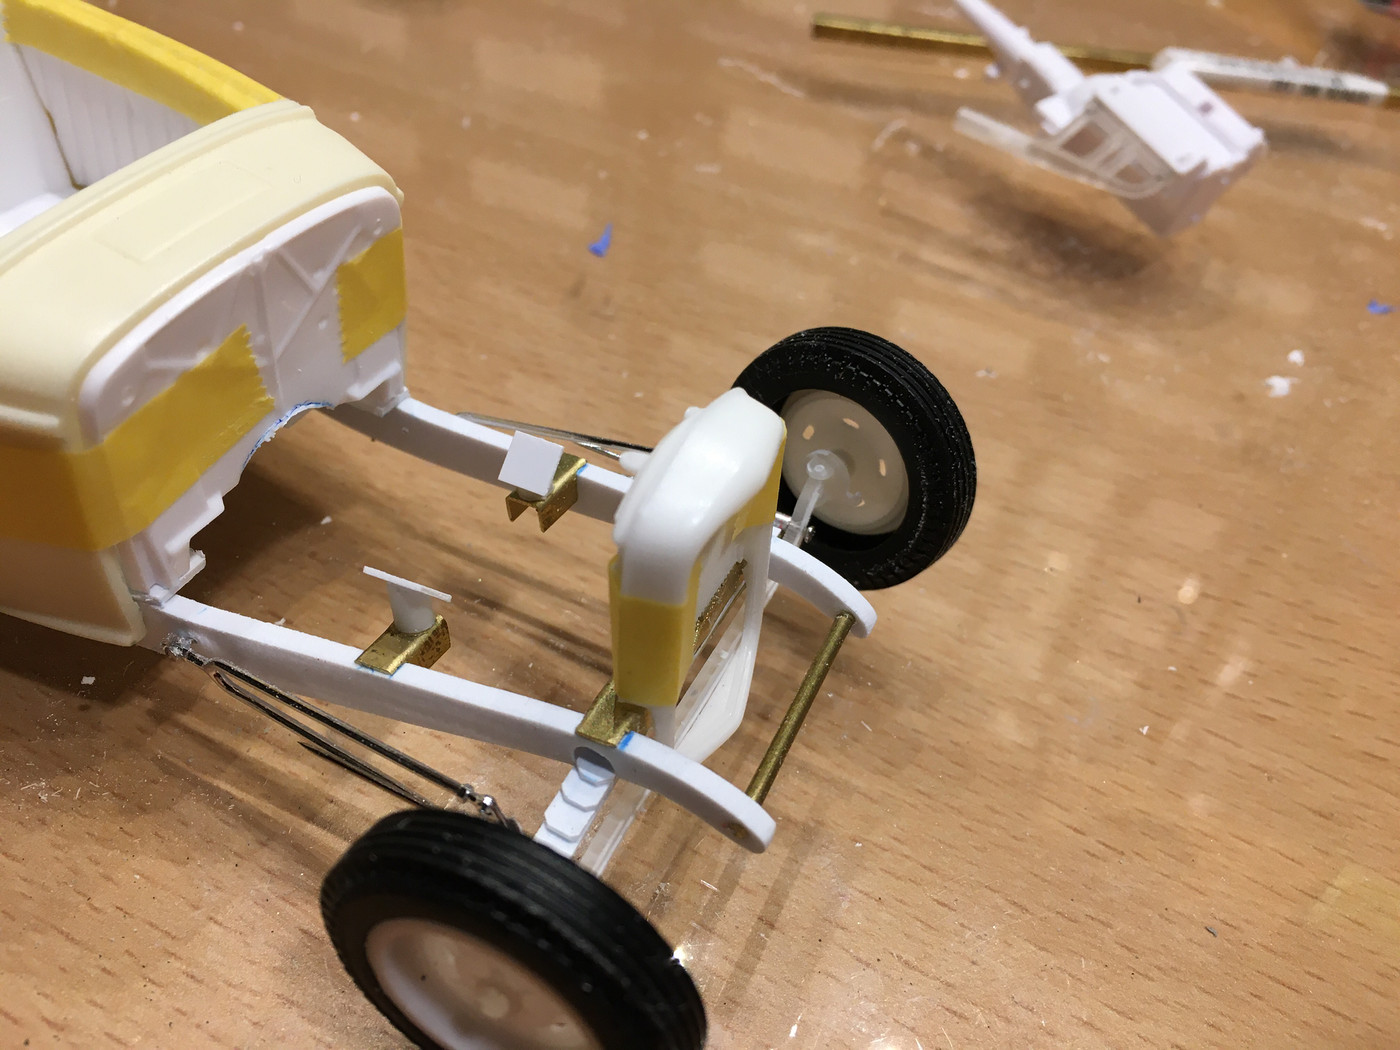 I also chopped down the radiator and shell. It took a few tries but I finally got a pleasing flow from the body to the shell. I used the pin the locates the spring to the frame through the front cross member to also locate the radiator. I will add more reinforcing pins, but this is a good start. Next up is the rear suspension arms, and refining details to frame. |
|
|
|
Post by Mr. Metallic on Oct 30, 2019 6:36:58 GMT -5
Wanna see my rear end? Pulled a couple rear suspension arms out of the parts box and modified them to fit the scratchbuilt braket I already made to mount the spring. Tiny pins positively locate the arms to the bracket and the frame. I also cut a short length of Evergreen tube and slipped it over the brass rod the runs through the entire rearend to strengthen it. This allows the brake and wheel to fit snug and spaces the wheel assembly far enough away from the suspension to not foul it. 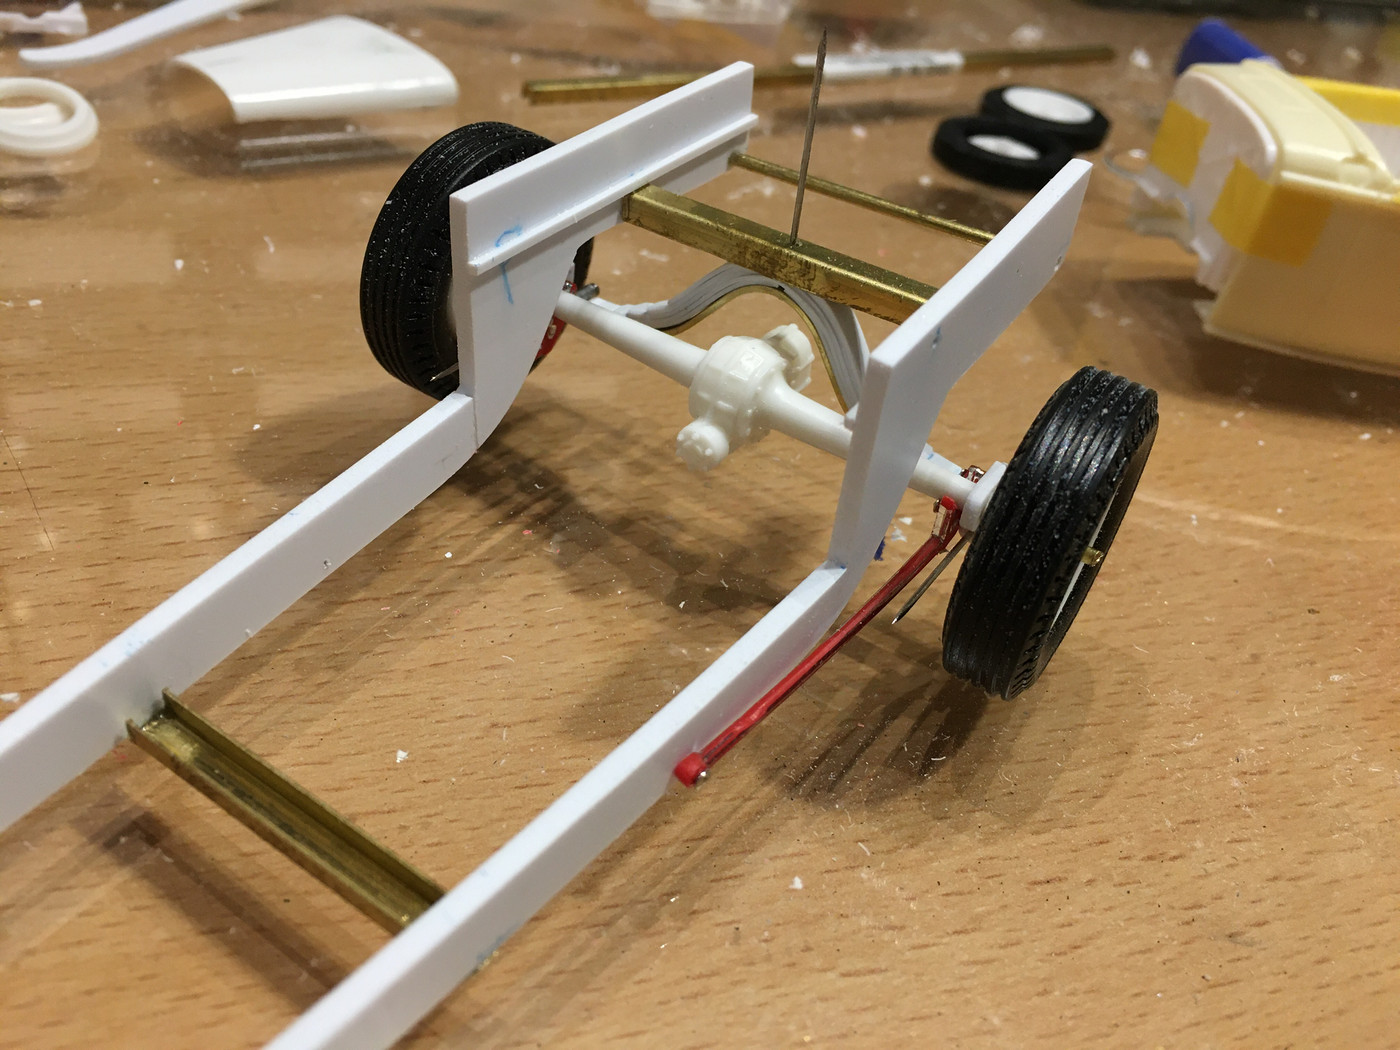 In order for the suspension arms to theoretically function in the real world I had to make the notches in the back of the body bigger to clearance the arms. 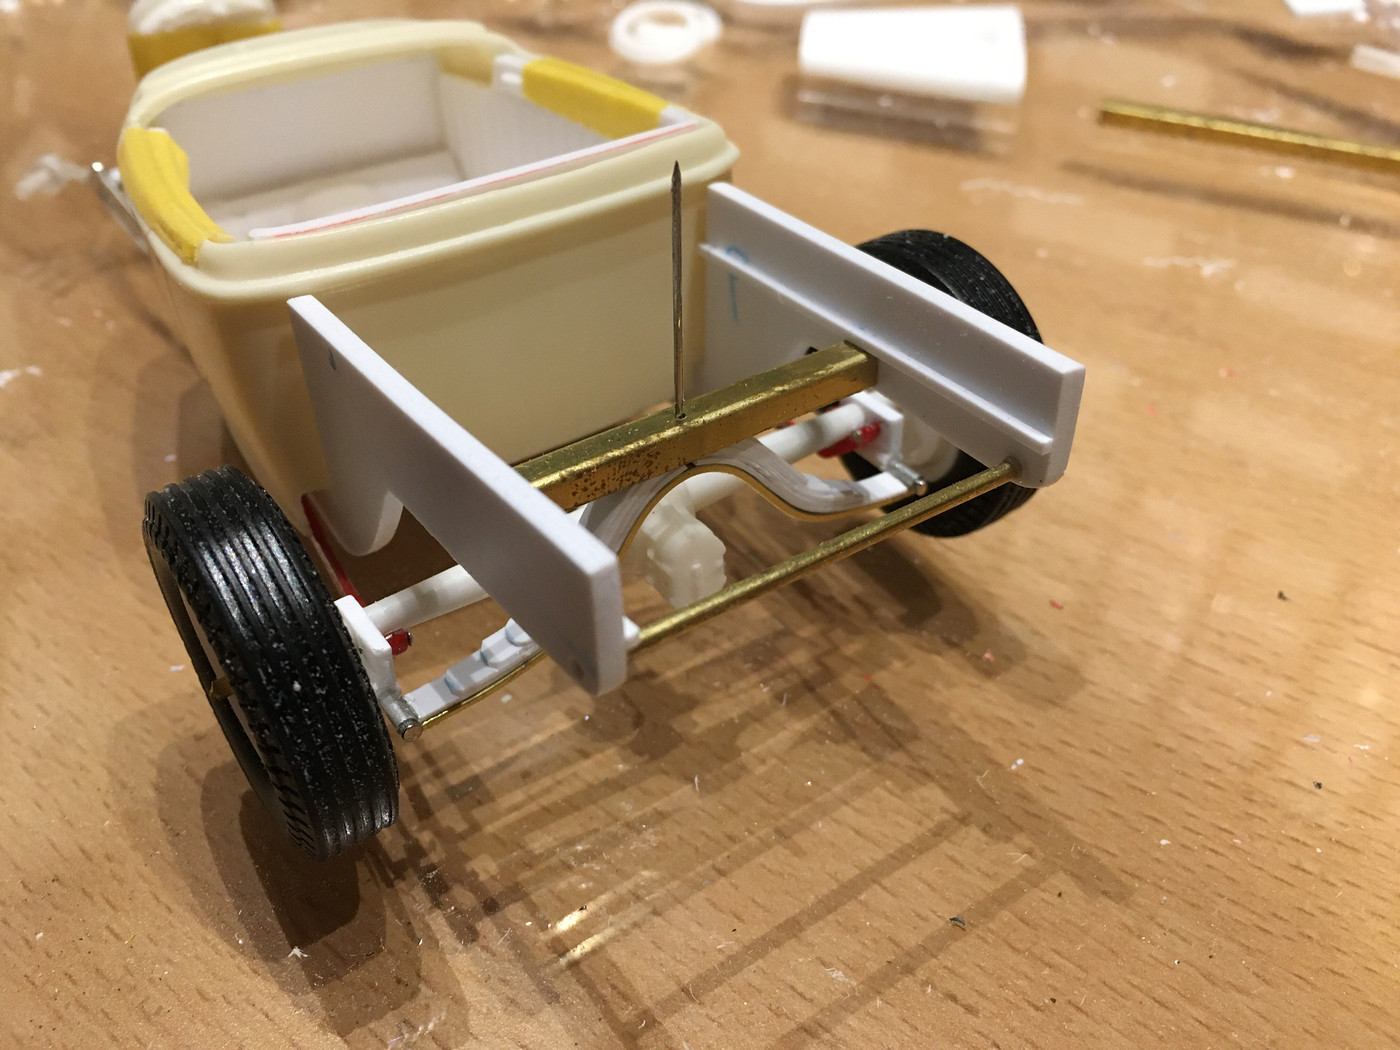 And here's the first solid stance mockup on all fours. As a bit of serendipity I stumbled across an extended hood I made for another project years ago, that fits almost perfectly on this project. It looks like I cut up a couple Revell hoods to make this extended one, and it dropped right into the space on this new project. SCORE! 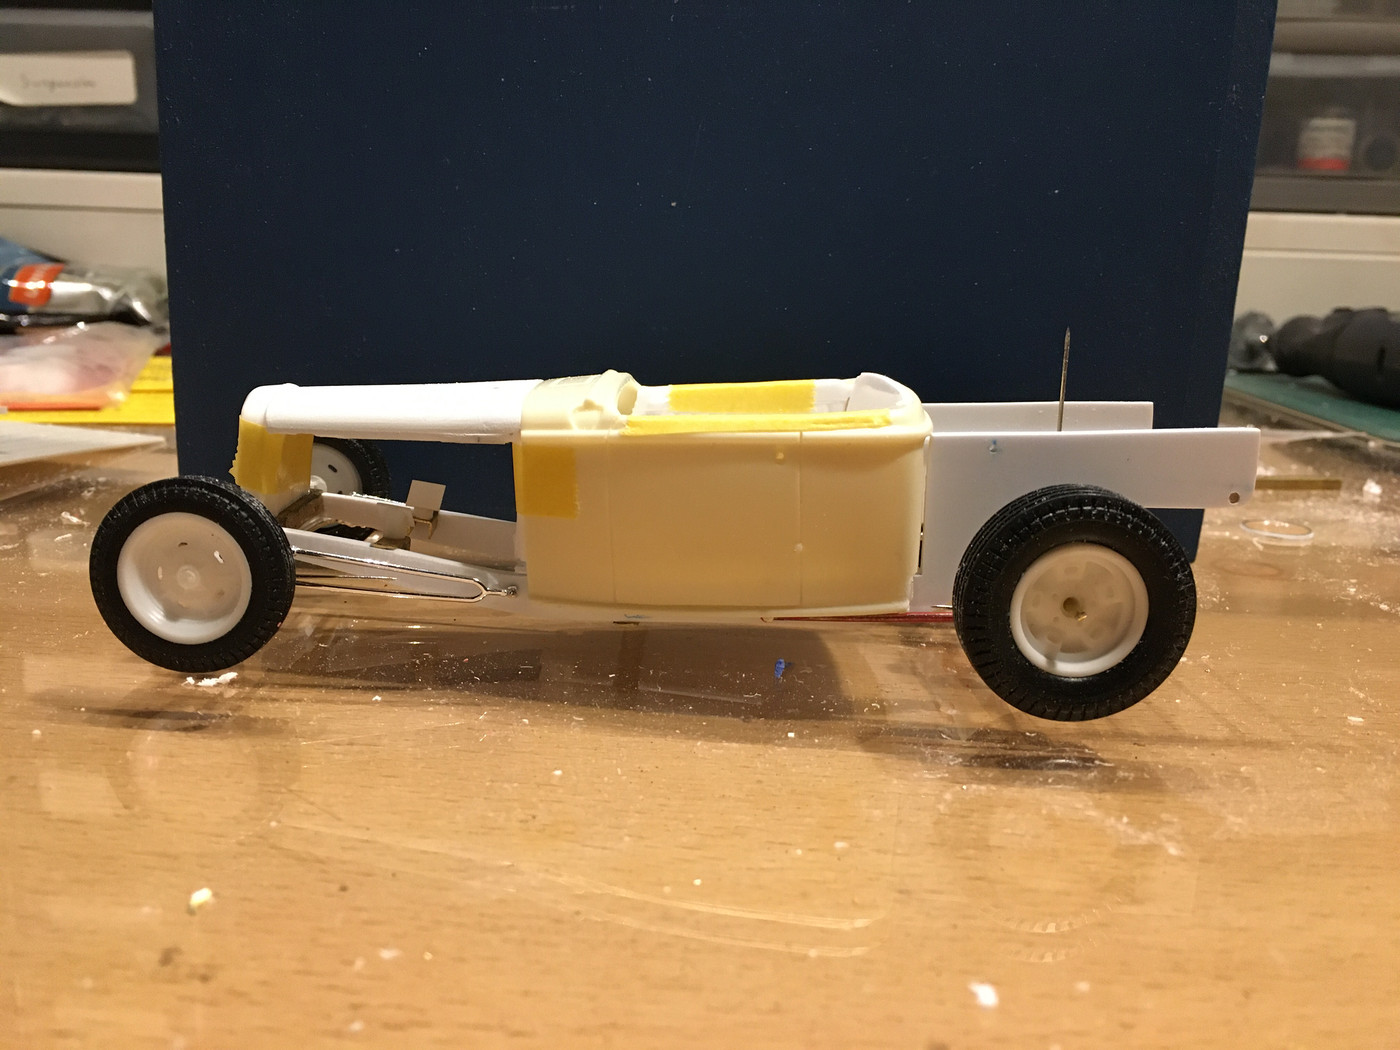 |
|
|
|
Post by spex84 on Oct 30, 2019 12:27:31 GMT -5
I like that slinky stance  |
|
|
|
Post by Mr. Metallic on Oct 31, 2019 8:08:44 GMT -5
Shocking developments... Since I'm on this kick of scratchbuilding I decided to try my hand at some friction shocks. Made of Evergreen rod and strip, with straight pins. Need to add blocks to the axles where they would bolt on in real life. The close up photos of the front may make them appear a little bulky compared to 1:1, but I'm happy with my first attempt. Next time I'll try brass.  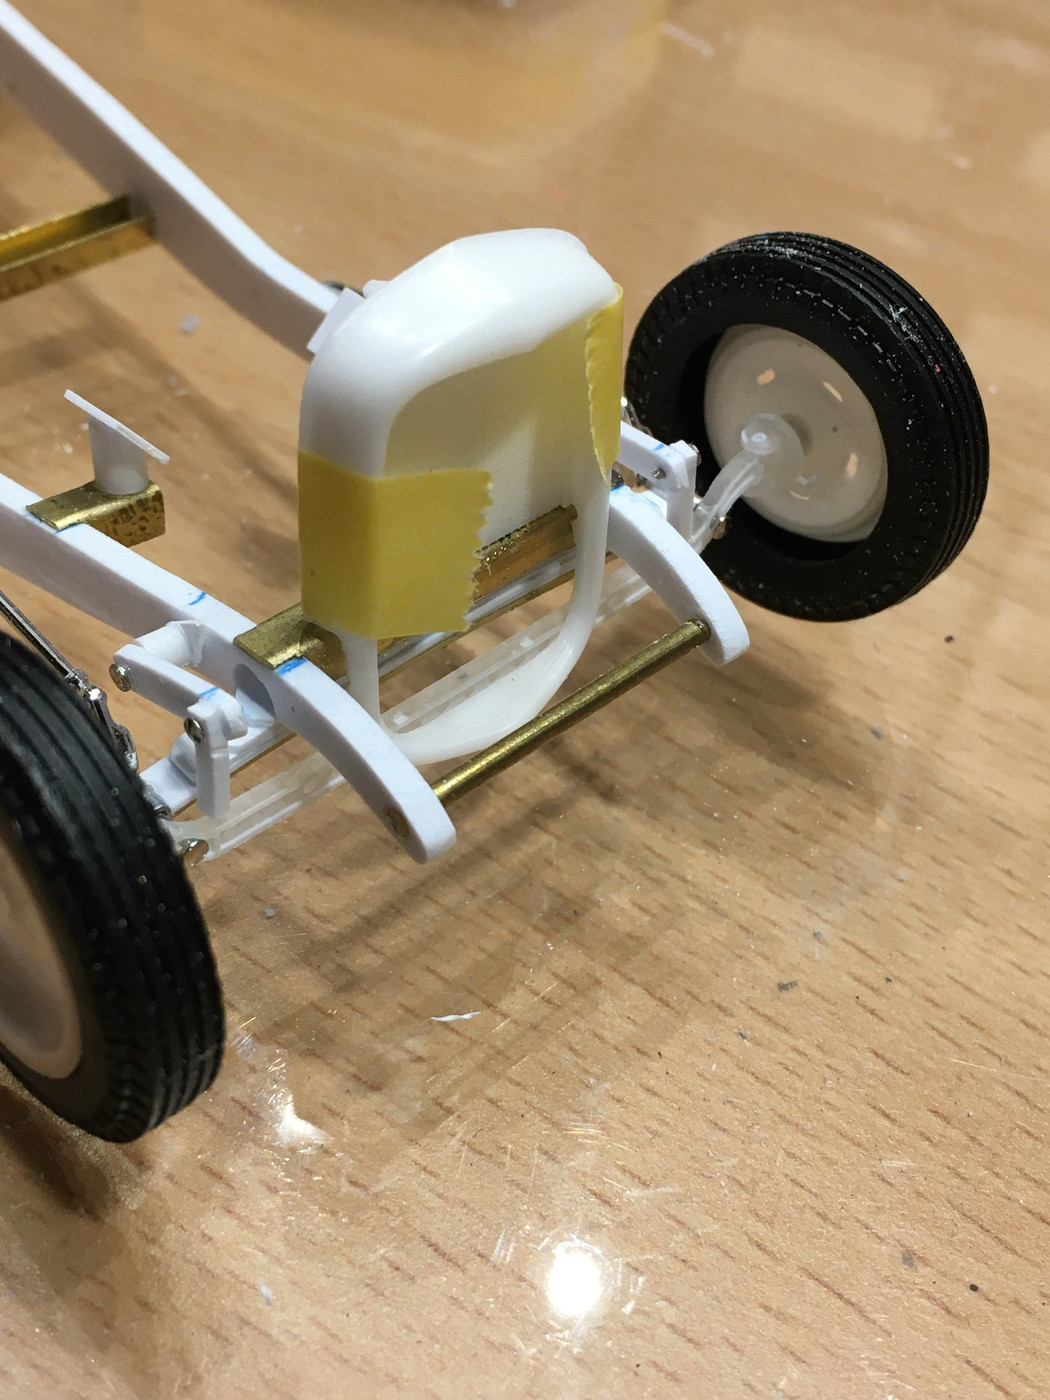 Next up is steering and making a decision on the area behind the body. |
|
|
|
Post by mod3llover on Oct 31, 2019 10:06:06 GMT -5
Nice stuff there Craig!! I love all the little details.
Those headers are kool! Are those the ones from Chris D.?
David S.
|
|
|
|
Post by Mr. Metallic on Oct 31, 2019 10:09:34 GMT -5
Nice stuff there Craig!! I love all the little details. Those headers are kool! Are those the ones from Chris D.? David S. Thank you Yes, those are part of the MapleLeaf Modelworks Y-Block dress up set. I will also be using the FI setup as well. |
|
|
|
Post by Mr. Metallic on Nov 4, 2019 7:56:04 GMT -5
Put it to bed! Well, got the bed figured out anyway. I decided to shorten the bed so it ends up even with the rear of the back tire. Once I got that figured out I went to town scratchbuilding a gas tank and tailgate. First I sanded the top of the rails at an angle and added styrene rod to mimic a pickup bed. Back when I did the frame I installed a piece of .040x.040 Evergreen to locate the axle crossmember. But I always intended to also use it to hang a gas tank from, whatever form it took. I made the tank by cutting up .040 Evergreen sheet, and wrapping it in .020x.250 strip. Then I added L-channel to the side to hang it off the frame. 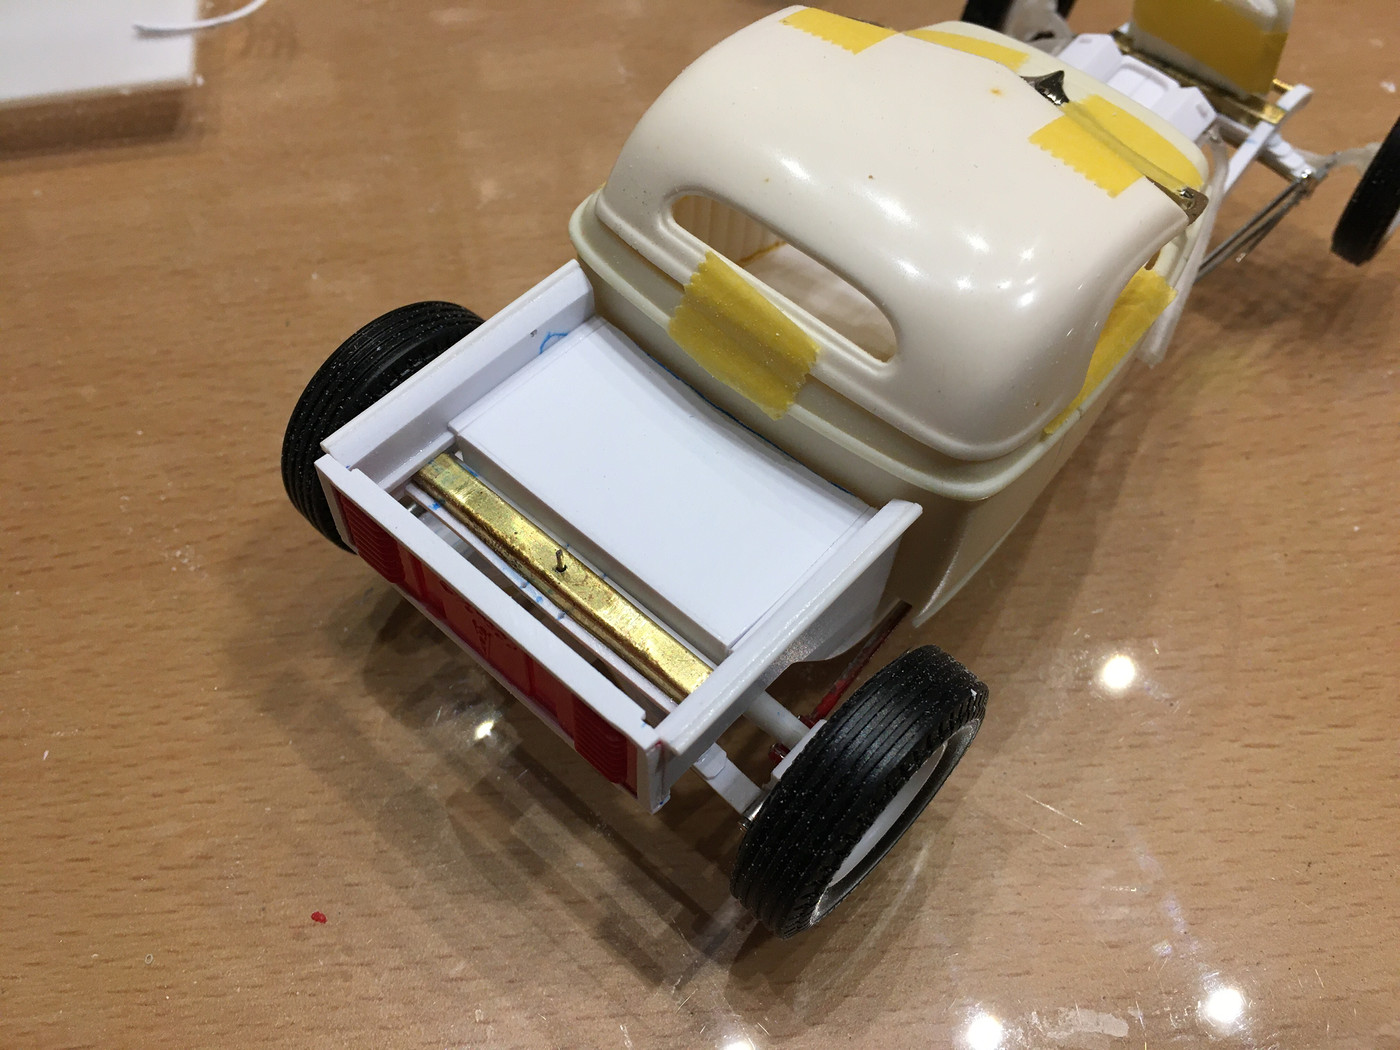 Took the louvered tailgate out of the Monogram 40 Ford pickup and cut it up to fit the bed, and then wrapped it with various Evergreen strip to finish it off. I think I'm going to hang some 37 Ford taillights underneath the bed. 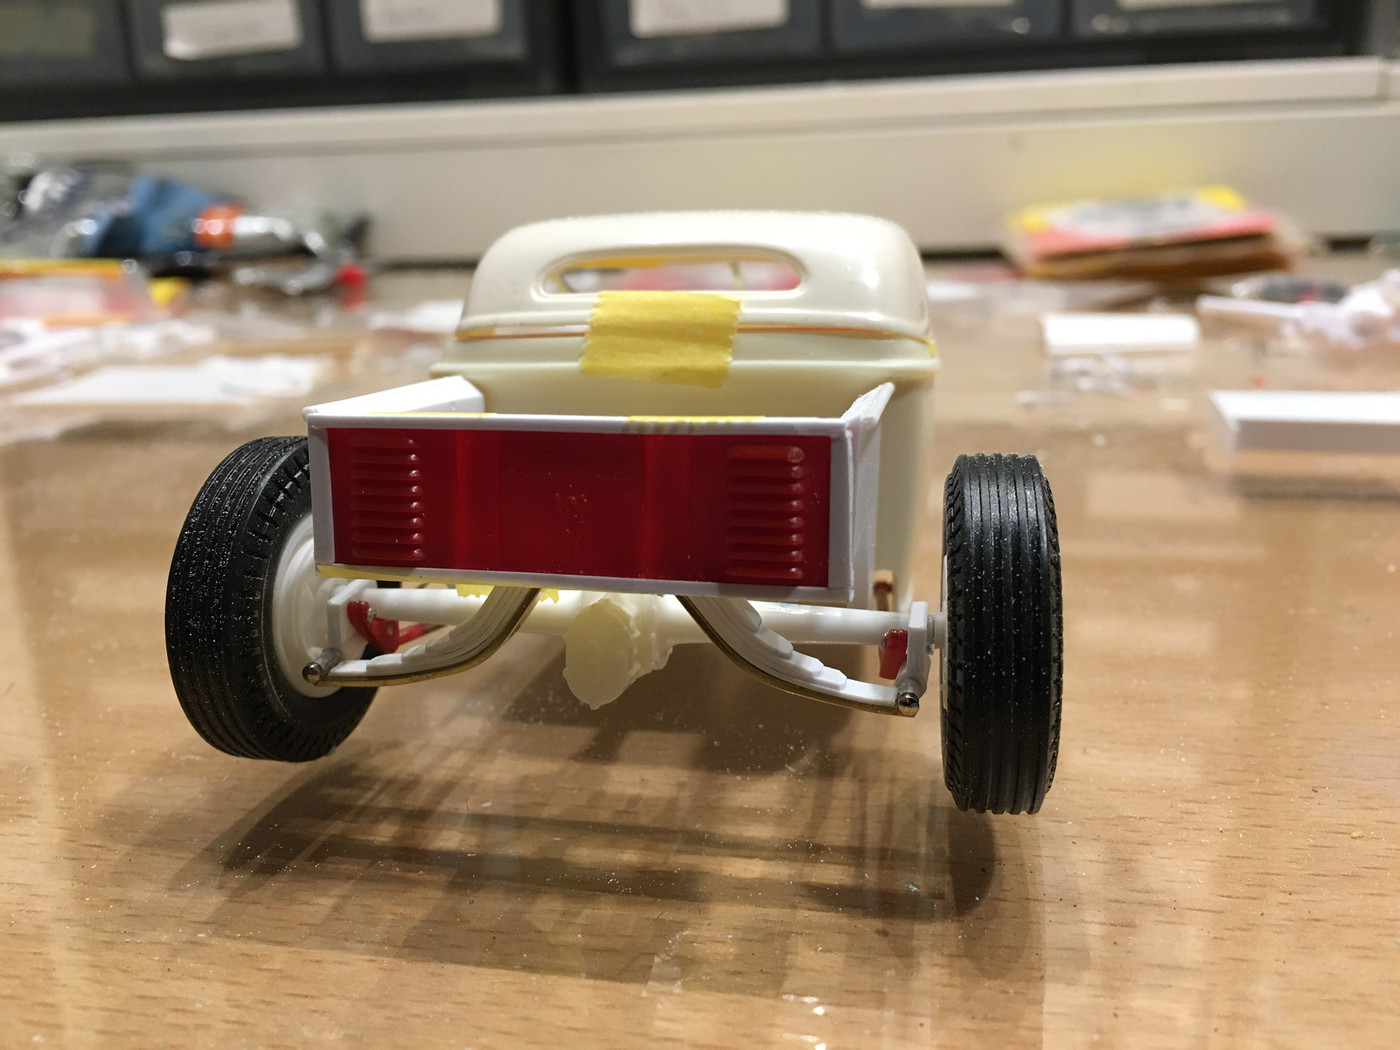 And here's the side profile with the shorty bed. This also shows the first appearance of the Doane Spencer style roof and windshield from Replicas and Miniatures. I need to make the mods to the cowl so it fits properly. But I love the look. 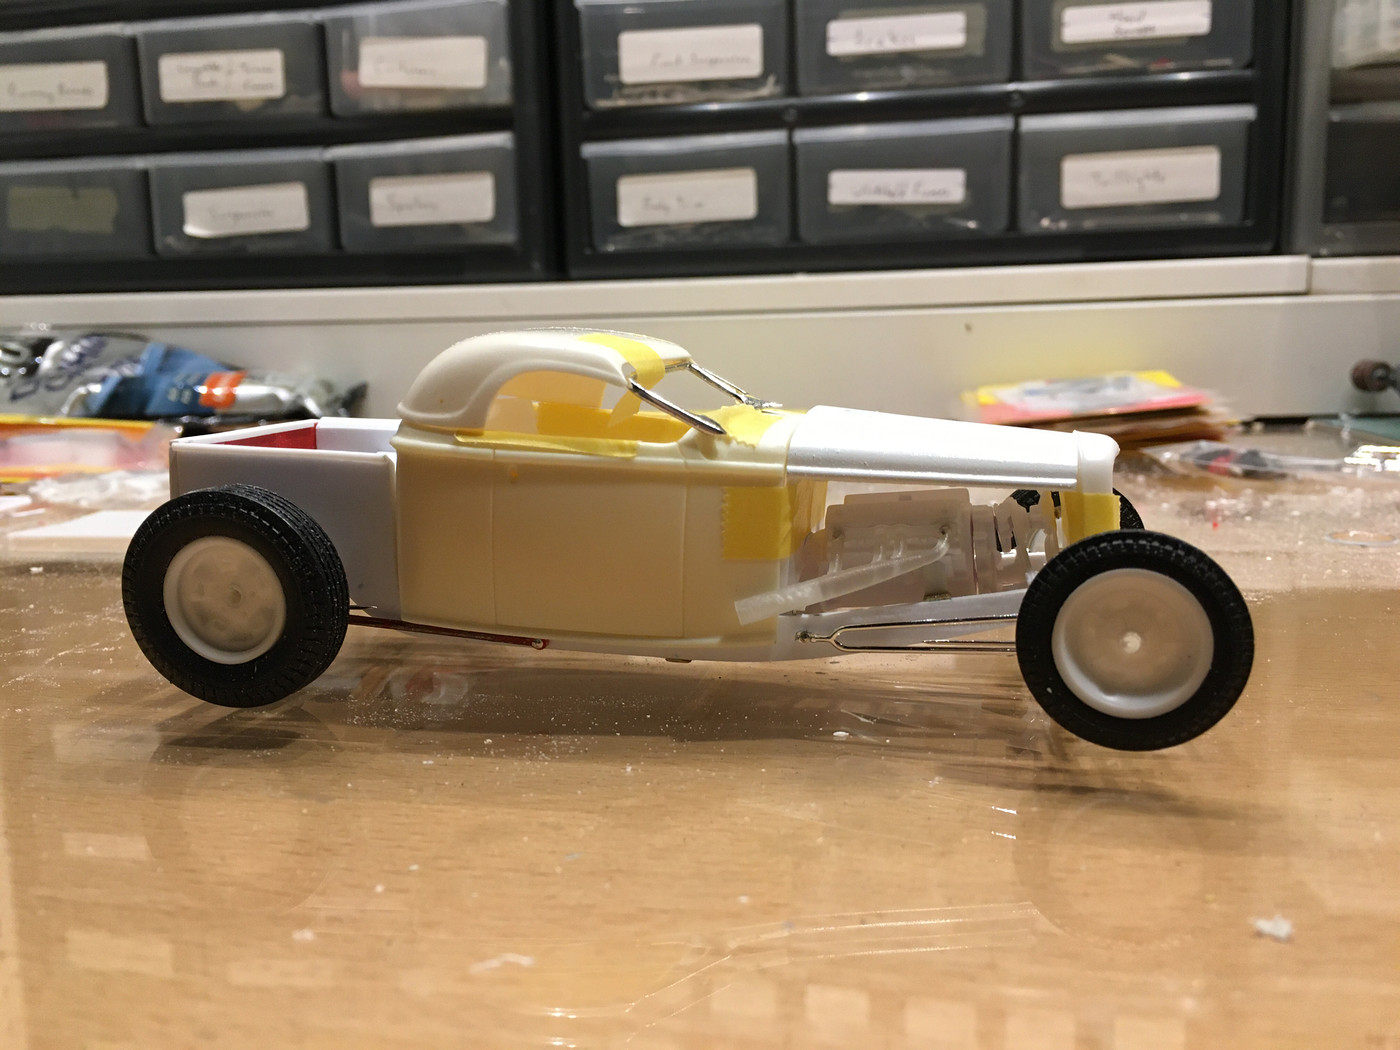 And here you can see why the front end had to be lengthened. The y-block is a little long to begin with, but once you add the front cover, water pump, belt and fan, that space filled up mighty quick. 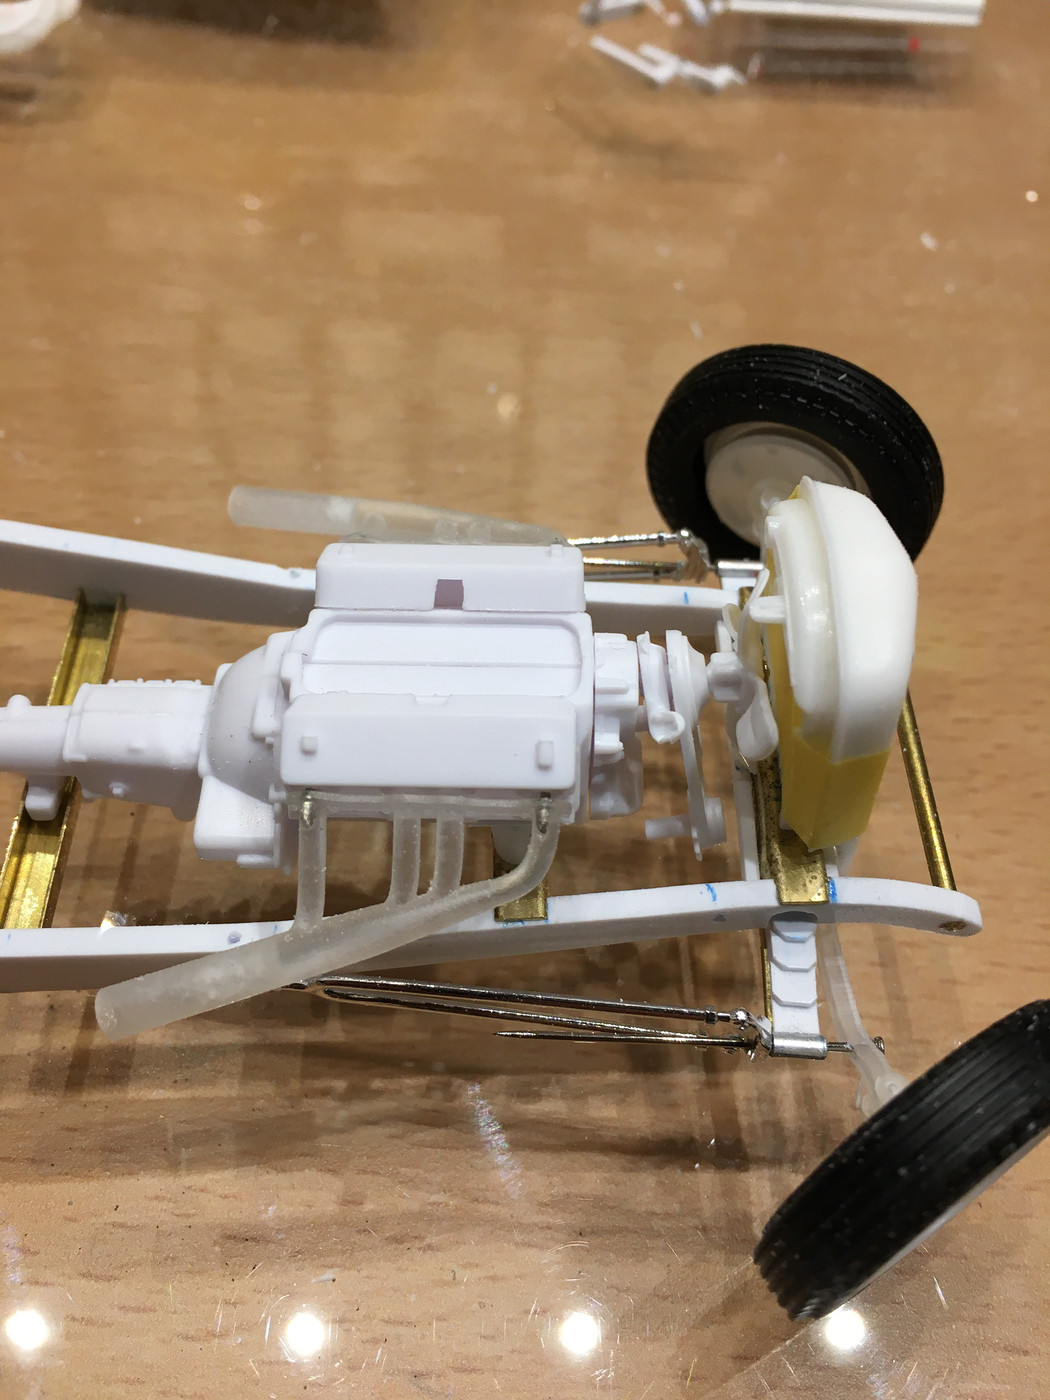 On to the interior and steering |
|
|
|
Post by spex84 on Nov 4, 2019 12:52:12 GMT -5
DUDE!
That looks amazing. Love the RepMinCo roof; I was going to ask if it was a chopped-up '36 Ford piece or something.
The juxtaposition of the rounded roof with the squared-off bed and louvered tailgate is tuff...and then the way the T-spring appears to flow out of those louvers is unexpected and dramatic.
The overall profile is ultra-sleek. I wasn't entirely sure about the long nose, but with that laid-back windshield and rounded hardtop, it all makes sense.
|
|
|
|
Post by Mr. Metallic on Nov 4, 2019 14:01:56 GMT -5
DUDE! That looks amazing. Love the RepMinCo roof; I was going to ask if it was a chopped-up '36 Ford piece or something. The juxtaposition of the rounded roof with the squared-off bed and louvered tailgate is tuff...and then the way the T-spring appears to flow out of those louvers is unexpected and dramatic. The overall profile is ultra-sleek. I wasn't entirely sure about the long nose, but with that laid-back windshield and rounded hardtop, it all makes sense. Thank you very much. Such eloquent praise is highly appreciated. I've been building this car in my minds eye for YEARS. Ever since I saw the first Brookville body like this one. I was very excited when Altered States came out with their RPU, but I could never figure out why I couldn't get that body to work "in the flesh" with that Rep and Min roof/windshield. It took me a long time, but I finally figured it out, and when I did it was one of those smack-yourself-on-the-forehead moments. The Altered States body is stock (and well done), but what I was missing was that portion extended behind the doors. That's when I decided to master this body, and thankfully Ed was interested in casting it. I was pretty confident I wanted to put a y-block in it all along, but when you came up with the correct FI setup that is what sealed the deal. But I also knew that to fit it I was going to have to set it back into the cowl a bit or extend the frame. At times over the last couple weeks I began to wonder if I had made it too long, but I was confident in the measurements I had taken ahead of time that it would prove to be the right amount. And now that I have it fully mocked up I am very happy with it. |
|